SSBU Icon.png

Ridley (SSBU)/Pummel: Difference between revisions

From SmashWiki, the Super Smash Bros. wiki
Jump to navigationJump to search
mNo edit summary
No edit summary
 
(One intermediate revision by one other user not shown)
Line 1: Line 1:
{{ArticleIcons|ssbu=y}}
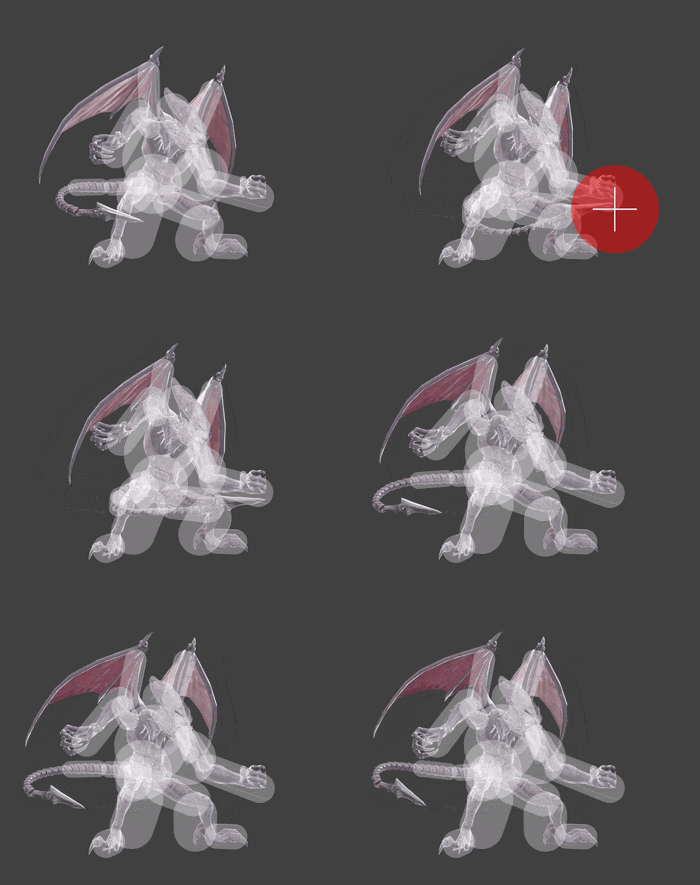
[[File:RidleyPummel.gif|thumb|500px|Hitbox visualization showing Ridley's pummel.]]
[[File:RidleyPummel.gif|thumb|350px|Hitbox visualization showing Ridley's pummel.]]
{{competitive expertise}}
==Overview==
==Overview==
Line 9: Line 9:
|damage=1.6%
|damage=1.6%
|angle=361
|angle=361
|af=3
|bk=0
|bk=0
|ks=100
|ks=100
Line 44: Line 45:


{{FrameIconLegend|lag=y|hitbox=y|interruptible=y}}


{{MvSubNavRidley|g=SSBU}}
[[Category:Ridley (SSBU)]]
[[Category:Ridley (SSBU)]]
[[Category:Pummels (SSBU)]]
[[Category:Pummels (SSBU)]]

Latest revision as of 04:06, January 23, 2022

Hitbox visualization showing Ridley's pummel.
Competitive.png This article or section may require competitive expertise.
You can discuss this issue on the talk page or edit this page to improve it.

Overview[edit]

Hitboxes[edit]

ID Part Rehit rate Damage SD Angle Angle type BK KS FKV Set weight Radius Bone Offset SDI× T% Clang Rebound Effect Type G A Sound Direct Hit bits Hit part Blockable Reflectable Absorbable Flinchless No GFX Heedless
0 0 0 1.6% 0 Sakurai angle Forward 0 100 30 HitboxTableIcon(False).png 5.5 top 0.0 6.5 12.0 2.2× 1.0× 0% HitboxTableIcon(NoClang).png HitboxTableIcon(NoRebound).png EffectIcon(Stab).png TypeIcon(Tail).png HitboxTableIcon(GroundedTrue).png HitboxTableIcon(AerialTrue).png S Slash SpecialsDirect.png All All HitboxTableIcon(Blockable).png HitboxTableIcon(Unreflectable).png HitboxTableIcon(Unabsorbable).png HitboxTableIcon(False).png HitboxTableIcon(False).png HitboxTableIcon(False).png

Timing[edit]

Hitbox 2
Interruptible 8
Animation length 25
FrameIcon(Lag).png FrameIcon(Hitbox).png FrameIcon(Lag).png FrameIcon(Lag).png FrameIcon(Lag).png FrameIcon(Lag).png FrameIcon(Lag).png FrameIcon(Interruptible).png FrameIcon(Interruptible).png FrameIcon(Interruptible).png FrameIcon(Interruptible).png FrameIcon(Interruptible).png FrameIcon(Interruptible).png FrameIcon(Interruptible).png FrameIcon(Interruptible).png FrameIcon(Interruptible).png FrameIcon(Interruptible).png FrameIcon(Interruptible).png FrameIcon(Interruptible).png FrameIcon(Interruptible).png FrameIcon(Interruptible).png FrameIcon(Interruptible).png FrameIcon(Interruptible).png FrameIcon(Interruptible).png FrameIcon(Interruptible).png
Legend (1 square = 1 frame)
FrameIcon(Lag).png
Lag time
FrameIcon(Hitbox).png
Hitbox
FrameIcon(Interruptible).png
Interruptible