Rage: Difference between revisions
mNo edit summary |
mNo edit summary |
||
| Line 11: | Line 11: | ||
This mechanic was originally discovered by the Japanese community at the launch of Smash 3DS there and called the 'Hot Hot Effect'. [[Ayuha]] and {{sm|Chibo}} then worked together to make a tutorial video on it and bring the information to the US scene, where Chibo then named it the 'Rage Effect'. | This mechanic was originally discovered by the Japanese community at the launch of Smash 3DS there and called the 'Hot Hot Effect'. [[Ayuha]] and {{sm|Chibo}} then worked together to make a tutorial video on it and bring the information to the US scene, where Chibo then named it the 'Rage Effect'. | ||
The Rage Formula is (1+(x-35)*0.0013), where x is the damage of the attacker. This is multiplied on the end of the knock back formula denoted as R which stands for all variables such as crouching. | The Rage Formula is (1+(x-35)*0.0013), where x is the damage of the attacker, and is always between 35 and 150. This is multiplied on the end of the knock back formula denoted as R which stands for all variables such as crouching. | ||
[[Category:Game mechanics]] | [[Category:Game mechanics]] | ||
Revision as of 23:07, March 25, 2016
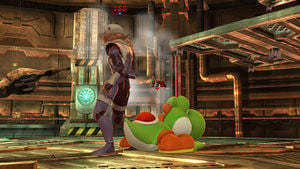
Rage is a new mechanic in Super Smash Bros. 4, where a character's attacks will deal increased knockback as his or her damage rises. The effect is similar to Lucario's aura mechanic, though the damage dealt by attacks does not increase, and the increase in knockback is much less significant. Rage begins to take effect past 35% damage, and maxes out at 150% damage. At maximum rage, attacks will deal 1.1495x the amount of knockback that would normally be dealt. Rage is visually denoted by characters flashing red and smoke rising out of them when they reach 100%, and the effect grows more visually intense as damage rises farther until the aforementioned 150%; this visual effect making characters appear to be enraged is what led to the mechanic being named "rage" by the Smash community.
The obvious application of rage is that it allows players at higher damages to land KOs sooner than they would be able to otherwise, which can help aid a losing player staging a comeback, but it can also be used to assist a player with a stock lead in surviving for longer by keeping the opponent's finishing moves at bay. Rage is not necessarily a comeback-friendly mechanic, not just because of that, but also because the increased knockback can prevent combos from working sooner than they normally would, especially if the combo involves a setup from a high base knockback throw, making it more difficult for a highly-damaged player to rack up damage on a lower-damaged player. But on the other hand, rage can also assist in combos that rely on greater hitstun, such as stage-specific combos that rely on forcing opponents to close in on platforms to reduce defensive options and refresh the attacker's jumps.
Generally, heavyweight characters such as Bowser and Ganondorf benefit the most from rage, as their greater survivability allows them to both experience rage longer and to a greater degree, and the fact that heavyweights rely less on combos allows them to make greater use of the knockback increase, with little concern of it preventing vital combos.
Like stale-move negation, Rage is not present in single player modes such as Training mode. As such, its effects cannot be tested in that mode, requiring the player to do testing in Versus mode instead.
This mechanic was originally discovered by the Japanese community at the launch of Smash 3DS there and called the 'Hot Hot Effect'. Ayuha and Chibo then worked together to make a tutorial video on it and bring the information to the US scene, where Chibo then named it the 'Rage Effect'.
The Rage Formula is (1+(x-35)*0.0013), where x is the damage of the attacker, and is always between 35 and 150. This is multiplied on the end of the knock back formula denoted as R which stands for all variables such as crouching.
