Snake (SSBB)/Forward smash: Difference between revisions
From SmashWiki, the Super Smash Bros. wiki
Jump to navigationJump to search
SacredFire37 (talk | contribs) m (→Hitboxes: Updated hitbox info to show that the larger hitbox hits grounded opponents while the smaller one hits aerial opponents. Displayed the other way around.) Tag: Mobile edit |
No edit summary |
||
| Line 1: | Line 1: | ||
{{ArticleIcons|ssbb=y}} | {{ArticleIcons|ssbb=y}} | ||
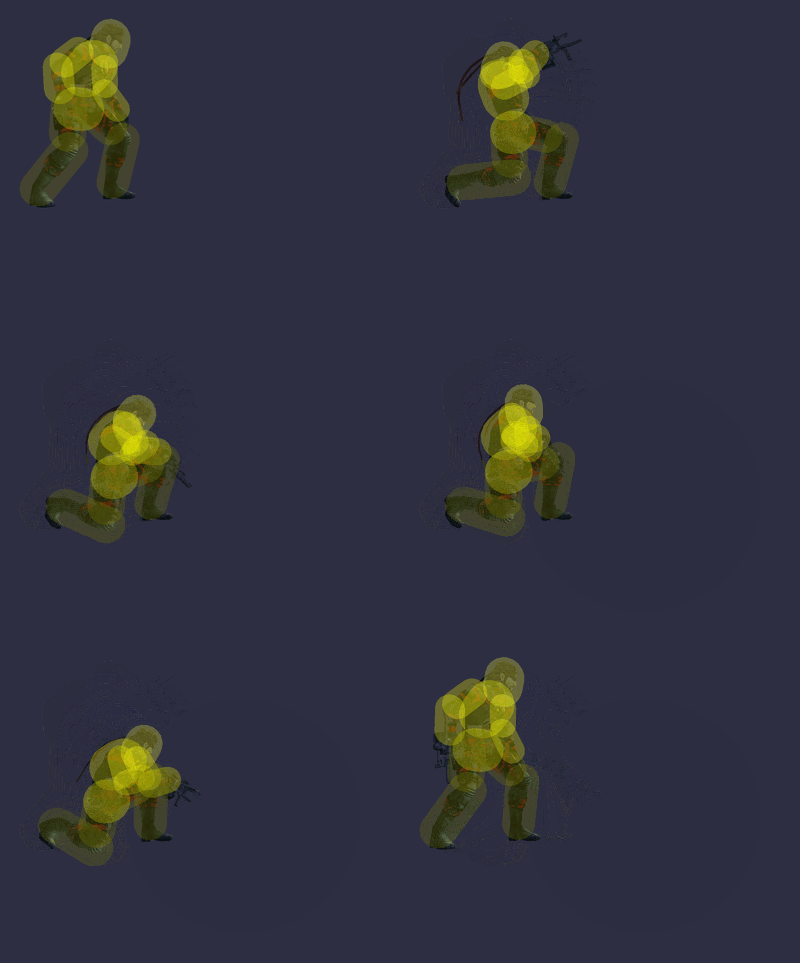
[[File:SnakeFSmashSSBB.gif|thumb|400px|Hitbox visualization showing Snake's forward smash.]] | |||
==Overview== | ==Overview== | ||
Snake aims and fires an {{s|wikipedia|RPG-7}} rocket launcher into the ground in front of himself, causing an explosion. The move sports disjointed range and is the second-slowest forward smash in the game, taking 80 frames to complete. However, it is one of the most powerful smash attacks in ''Brawl'', dealing massive damage and knockback; fully charged, it deals 30.8% damage and is capable of [[OHKO]]ing every character except {{SSBB|Bowser}} if used at one of the edges of {{SSBB|Final Destination}}, provided the opponent does not [[DI]]. | Snake aims and fires an {{s|wikipedia|RPG-7}} rocket launcher into the ground in front of himself, causing an explosion. The move sports disjointed range and is the second-slowest forward smash in the game, taking 80 frames to complete. However, it is one of the most powerful smash attacks in ''Brawl'', dealing massive damage and knockback; fully charged, it deals 30.8% damage and is capable of [[OHKO]]ing every character except {{SSBB|Bowser}} if used at one of the edges of {{SSBB|Final Destination}}, provided the opponent does not [[DI]]. | ||
Latest revision as of 20:02, May 21, 2024
Overview[edit]
Snake aims and fires an RPG-7 rocket launcher into the ground in front of himself, causing an explosion. The move sports disjointed range and is the second-slowest forward smash in the game, taking 80 frames to complete. However, it is one of the most powerful smash attacks in Brawl, dealing massive damage and knockback; fully charged, it deals 30.8% damage and is capable of OHKOing every character except Bowser if used at one of the edges of Final Destination, provided the opponent does not DI.
Because using the move is impractical in most situations and Snake is likely to be attacked or punished for attempting to use it, his forward smash is best suited as a punishing option or used after a hard read.
Hitboxes[edit]
Timing[edit]
| Charges between | 39-40 |
|---|---|
| Hitboxes | 41-43 |
| Interruptible | 80 |
| Animation length | 79 |
Lag time |
Charge interval |
Hitbox |
|
