R.O.B. (SSB4): Difference between revisions
No edit summary |
mNo edit summary |
||
| (282 intermediate revisions by more than 100 users not shown) | |||
| Line 2: | Line 2: | ||
{{Disambig2|R.O.B.'s appearance in ''Super Smash Bros. 4''|the character in other contexts|R.O.B.}} | {{Disambig2|R.O.B.'s appearance in ''Super Smash Bros. 4''|the character in other contexts|R.O.B.}} | ||
{{Infobox Character | {{Infobox Character | ||
|name | |name = R.O.B. | ||
|image | |image = {{tabber|title1=Famicom|content1=[[File:R.O.B. SSB4.png|x250px]]|title2=NES|content2=[[File:North_American_ROB.png|x250px]]}} | ||
|game | |game = SSB4 | ||
|ssbgame1 | |ssbgame1 = SSBB | ||
|ssbgame2 = SSBU | |||
|availability = [[Unlockable character|Unlockable]] | |availability = [[Unlockable character|Unlockable]] | ||
|tier = D | |tier = D | ||
|ranking = | |ranking = 35 | ||
}} | }} | ||
'''R.O.B.''' ({{ja|ロボット|Robotto}}, ''Robot'') is a playable character in ''[[Super Smash Bros. 4]]''. | '''R.O.B.''' ({{ja|ロボット|Robotto}}, ''Robot'') is a playable character in ''[[Super Smash Bros. 4]]''. After initially being [[leak]]ed on August 19th, 2014 as part of the [[ESRB leak]], his reappearance to the series was officially announced on [[Super Smash Bros. 4 Official Site|''SSB4''{{'}}s official website]] on October 9th, 2014, during which {{SSB4|Ganondorf}} was also announced.<ref>[http://www.escapistmagazine.com/news/view/138070-Secret-Super-Smash-Bros-Characters-Revealed-by-Nintendo#&gid=gallery_3377&pid=1 More "Secret" ''Super Smash Bros.'' Characters Officially Revealed]</ref> | ||
R.O.B. | R.O.B.'s realistic "beeping" robotic sounds from ''[[Super Smash Bros. Brawl]]'' are repurposed in ''Smash 4''. | ||
R.O.B. is ranked 35th out of 54 on the [[tier list]], placing him in the D tier. This is a moderate drop from his placement in ''Brawl'', where he was ranked 18th out of 38, and is his worst placement in the series to date. R.O.B. boasts his reowned strong zoning game and recovery: [[Robo Beam]] and [[Gyro]] are [[charge]]able, long-ranged projectiles, while [[Robo Burner]] is versatile; covers impressive overall distance; and is complimented by his much faster [[air speed]]. | |||
R.O.B. also possesses a strong air game, thanks to all excluding [[forward aerial|one]] of his aerials possessing disjointed [[hitbox]]es, alongside a capable [[grab]] game due to the useful applications of his throws. Despite being a [[Weight|heavyweight]], R.O.B.'s overall mobility is also respectable. Notably, R.O.B.'s once poor KO potential has been significantly improved, thanks to receiving a number of strong KOing options. | |||
However, R.O.B.'s grounded game lacks range compared to his air game. This is most obvious with his arm-based attacks, especially in regard to his overall grab, which is now the shortest-ranged in the game. While still remaining strong, R.O.B.'s zoning game has also been somewhat toned down; Robo Beam is slower and Gyro deals significantly less damage. R.O.B. is also susceptible to combos because of his heavy weight and large hurtbox. Lastly, his newfound KOing options are hindered by noticeable amounts of start-up lag and overall unsafety. | |||
Overall, R.O.B. is a more powerful character compared to the previous game, thanks to him retaining all of his strengths and possessing noticeably improved KO potential; yet, the larger competition present and several of the tools the new characters possess, combined with the introduction of [[DLC]] characters, harm R.O.B more than in ''Brawl'', thus resulting in a decline of his standing on the tier list relative to the cast. Despite that, R.O.B. still manages to maintain good success in the competitive scene due to gaining a number of dedicated players to his credit and acheiving impressive tournament results, such as the likes of {{Sm|Holy}}, {{Sm|LoNg0uw}} and especially {{Sm|8BitMan}}. | |||
==How to unlock== | ==How to unlock== | ||
==={{for3ds}}=== | ==={{for3ds}}=== | ||
* Play 70 VS Matches. | * Play 70 VS Matches. | ||
* Collect | * Collect 200 unique [[Trophy|trophies]]. | ||
R.O.B. must then be defeated on [[PictoChat 2]]. | After completing one of the two methods, R.O.B. must then be defeated on [[PictoChat 2]]. | ||
==={{forwiiu}}=== | ==={{forwiiu}}=== | ||
*Play 60 VS Matches. | *Play 60 VS Matches. | ||
R.O.B. must then be defeated on [[Wrecking Crew]]. | *Play through 10 rounds of [[Special Orders|Crazy Orders]] and defeat Crazy Hand. | ||
After completing one of the two methods, R.O.B. must then be defeated on [[Wrecking Crew]]. | |||
==Attributes== | ==Attributes== | ||
R.O.B. is the tenth [[weight|heaviest]] character in the game, yet he possesses | R.O.B. is the tenth-[[weight|heaviest]] character in the game, yet he possesses respectable overall mobility in spite of his weight class. This is thanks to his slightly above-average [[walk]]ing and average [[dash]]ing speeds; above-average [[Air speed|air]], [[Falling speed|falling]], [[fast fall]]ing speeds and [[air acceleration]]; high [[traction]], [[jump]] and [[double jump]]; and low [[gravity]]. Altogether, these attributes allow R.O.B. to outmaneuver some of his fellow heavyweights; make him almost as mobile as a middleweight; and grant him better jumping prowess than most characters of either weight class. | ||
Like in ''Brawl'', R.O.B. is a zoning-oriented character with | Like in ''Brawl'', R.O.B. is a zoning-oriented character with versatile projectiles to retain his opponents at bay. [[Robo Beam]] enables him to attack from considerable distance, and becomes the noticeably stronger [[Super Robo Beam]] when it is left idle for 14.3 seconds. While Robo Beam interrupts opponents faster, Super Robo Beam deals more damage and has higher knockback growth. [[Gyro]] is an auto-[[charge]]able projectile that becomes an [[item]] when fired. Compared to Robo Beam, it has a more favorable angle for disrupting opponents, while also being more manipulable as a projectile and having greater KOing potential. Thanks to R.O.B.'s [[item throw]]s being among the strongest in the game, Gyro is also extremely useful when [[Item throw#Directions and strength|smash thrown]] as an item. | ||
R.O.B. | Aside from his offensive prowess with projectiles, R.O.B. himself also does not have issues against projectiles, courtesy of [[Arm Rotor]]'s ability to [[reflect]] them with greater strength than they initially had. In addition to its reflection ability, Arm Rotor now boasts KO potential, thanks to its finishing hit possessing significantly higher knockback growth. | ||
R.O.B.'s | R.O.B.'s air game is also strong, thanks to the excellent and disjointed ranges of all excluding [[forward aerial|one]] of his aerials. [[Neutral aerial]] has large, disjointed hitboxes that make it a reliable combo starter at low to medium percentages when [[SHFF]]'d, as well as a useful spacing option. In addition, the clean hit can KO at high precents while nearing the blast zones. [[Up aerial]] is one of R.O.B.'s best attacks in his entire kit overall, thanks to its usefulness in harassing airborne opponents by either juggling or KOing them. [[Back aerial|Back]] and [[down aerial]]s are R.O.B.'s most damaging aerials when [[sweetspot]]ted, and have large hitboxes like neutral aerial. However, they also boast specific strengths: the former has recovering potential thanks to it propelling R.O.B. forward slightly, whereas the latter is a [[meteor smash]]. Lastly, [[forward aerial]] is R.O.B.'s fastest aerial, which makes it reliable for spacing, especially when SHFF'd, as well as edge-guarding. | ||
Unlike in ''Brawl'', R.O.B. now boasts respectable | Unlike in ''Brawl'', R.O.B. now boasts respectable KO potential, like his fellow heavyweights. Like his up aerial, back aerial, [[up throw]] and Arm Rotor, R.O.B.'s [[smash attack]]s now boast KO potential, thanks to being buffed in various ways. [[Forward smash]]'s sweetspot deals slightly more damage and higher knockback. Although forward smash's other hitboxes deal less damage, they have been re-positioned farther outward, which improves its range. [[Up smash]]'s sweetspot and [[down smash]] also deal more damage and, like forward smash, have had their hitboxes tweaked for the better: up smash now has hitboxes on R.O.B.'s arms that launch the opponent into its thruster hitboxes, whereas down smash is now a [[semi-spike]]. | ||
R.O.B.'s outstanding [[grab]] game has also been improved. His set of grabs, while short-ranged, are each quick; and his [[pummel]] is characterized with quick speed. [[Forward throw|Forward]] and [[back throw]]s are still limited in regard to utility, but are nevertheless decent for spacing and setting up edge-guards, as well as KOing at very high precentages at the edge. In comparison, R.O.B.'s [[up throw|up]] and [[down throw]]s are much more useful. Up throw is his most damaging throw; a viable KOing option, especially when boosted by [[rage]]; and can even be used for combos at low percentages. In comparison, down throw deals respectable damage, and is a reliable combo starter into his up aerial from 0% to medium percentages. | |||
R.O.B.'s | Although R.O.B. possesses a number of noticeable strengths, he also has some noteworthy shortcomings. Despite his KO potential's drastic improvements, landing his KOing options can still be problematic because of them being laggy and/or possessing unimpressive ranges. The latter trait is especially noticeable in regard to R.O.B.'s arm-based attacks, most of which have hitboxes that have either become smaller and/or tweaked for the worse. For example, his [[grab]] game is hindered by his overall grab now being the shortest-ranged in the game because of his much smaller grabboxes, whereas his [[up tilt]] has drastically less utility because of its adjusted hitboxes. | ||
In addition to the issues within R.O.B.'s hitboxes, his own hurtbox also hinders him, as it has become larger since ''Brawl''. When coupled with his faster falling speed, he is much more susceptible to combo-oriented characters, such as {{SSB4|Luigi}} and {{SSB4|Zero Suit Samus}}. This is further compounded by his aerials' inability to reliably break combos: neutral and down aerials are too sluggish, forward and up aerials only hit in front of and above R.O.B., respectively, and back aerial has both slow start-up and only hits behind him. | |||
While R.O.B.'s zoning game remains his greatest strength, the universal impact to [[projectile camp]]ing has somewhat toned it down. Gyro, in particular, has been the most adversely affected of his projectiles: in addition to retaining its susceptibility to being stolen, a fired Gyro deals drastically less damage and covers less range. The removal of [[glide toss]]ing also significantly hinders its approaching potential. Robo Beam's nerfs are not as severe in comparison, but are nevertheless noticeable: it now deals slightly less damage, and both it and Super Robo Beam travel slower. As a a result of these nerfs, R.O.B. now has a more difficult time dealing with most characters that have better projectiles (such as {{SSB4|Sheik}} and {{SSB4|Diddy Kong}}); attacks that counteract his own projectiles (such as {{SSB4|Fox}} and {{SSB4|Falco}}); or both (such as {{SSB4|Villager}}). | |||
R.O.B. | |||
R.O.B. also received | R.O.B.'s [[Character customization|custom moves]] can alleviate several of his weaknesses. Wide Angle Beam, true to its name, can be aimed in a much wider arc, which enables R.O.B. to catch aerial opponents easily. However, it deals slightly less damage. Infinite Robo Beam, also true to its name, can be shot infinitely. This allows R.O.B. to use his zoning game constantly and defend himself. However, it also deals less damage, cannot ricochet, and Super Robo Beam needs to charge for longer. Reflector Arm acts like a traditional reflector, having a higher reflection multiplier and longer duration. However, R.O.B. will not move when using it, preventing him from pressuring the opponent. | ||
Backward Arm Rotor has a shorter duration, but is a very effective defensive option, as it moves R.O.B. backward, and comes out much faster (contrary to what its description suggests). High-Speed Burner has less fuel, but allows R.O.B. to recover more easily due to its increased aerial movement. Robo Rocket functions like a traditional recovery move, launching R.O.B. upwards, and can even meteor smash. However, it cannot be used in bursts; covers less horizontal distance; and its meteor smash is weak. Fire Gyro deals more damage, but covers less distance when fired. Slip Gyro slides across the stage, making it more predictable, but trips opponents when the Gyro hits them, giving R.O.B. access to many follow-ups. | |||
Overall, R.O.B. is a defensive, yet non-traditional heavyweight zoner that still possesses a strong zoning game, but now wields improved close-range offense. While R.O.B. now has to use close quarters combat more frequently because of his playstyle now being less reliant on his projectiles, he can now effectively KO opponents without having to rack up an outstanding amount of damage, a trait that all of his fellow heavyweights share. As a result, he has become a more potent character than he was in ''Brawl'' and has some dedicated and noteworthy mains to his credit, such as {{Sm|Holy}}, {{Sm|Mister Eric}}, and {{Sm|8BitMan}}. | |||
==Changes from ''[[Super Smash Bros. Brawl]]''== | |||
R.O.B. has received a mixture of [[buff]]s and [[nerf]]s in the transition from ''Brawl'' to ''Smash 4'', but was noticeably nerfed overall. However, he has received noticeable buffs as well. The most prominent improvement was to his KO potential; several of his KO options in ''Brawl'' have become more powerful and/or slightly easier to land, while other moves have been strengthened as a whole to the point of possessing reasonable KO potential, such as his up aerial and down smash. R.O.B. has also received some benefits from the changes to ''Smash 4''{{'}}s mechanics, as the weakening of [[SDI]] improves the reliability of his multi-hitting moves and the changes to hitstun canceling and DI have improved his combo potential. R.O.B. also benefits from the introduction of [[rage]] as it further improves his KO power, while his solid recovery and heavy weight allow him to build up a high amount of rage. R.O.B.'s mobility has also improved significantly, especially in the air, sporting increased [[walking]] speed, [[dashing]] speed, [[air speed]], [[falling speed]], [[air acceleration]], and [[gravity]]; in particular, the latter four are all above-average now, with the latter three no longer being among the lowest in the game, which makes him much more resilient. | |||
However, R.O.B. also received some significant nerfs. His powerful zoning game has been impaired as his projectiles have seen some noticeable downgrades. [[Robo Beam]] travels significantly slower while [[Gyro]] is much weaker when fully charged and its firing rate is slower. R.O.B. was also one of the characters who was hindered the most by the removal of [[glide toss]]ing, as it significantly hinders his approach with Gyros. This makes approaching more prominent, as R.O.B.'s camping and defensive game was significantly toned down. R.O.B. is a larger target and a fair amount of his moves have reduced range, making him an even easier target to hit. Further compounding this is his increased falling speed and gravity, as while it does make him a lot more resilient and makes it drastically easier for him to land, it gives him a high susceptibility to combos, especially considering the changes to hitstun canceling. R.O.B.'s overall frame-data has been nerfed as several of his attacks have increased startup lag, shorter durations, increased ending lag or all three. R.O.B.'s aerial game has also been toned down: R.O.B.'s [[short hop]] is also significantly lower, which greatly reduces his aerial output and his forward and back aerials have increased landing lag with the latter also possessing a much stricter [[auto-cancel]]ing window now, as well as his up and down aerials. While R.O.B. has much greater KO power, his existing KO moves have received some downgrades, making them harder to land, as many of them are noticeably laggier and some of them, especially forward smash and back aerial, now have significantly weaker sourspots. [[Neutral aerial]] is weaker in exchange for having more combo potential, forward aerial is weaker and has increased ending lag, back aerial is drastically laggier and possesses several new sourspots, up aerial deals much less damage (although it connects more reliably and the final hit is stronger) and down aerial is weaker. His [[recovery]] was also slightly nerfed overall, as while his air speed and air acceleration are drastically faster, [[Robo Burner]] travels slower and covers less distance while his aforementioned increased falling speed and slower back aerial further hinder his recovery. | |||
Overall, while R.O.B.'s KO power is greater, it does not compensate for his worse zoning game combined with his worse frame-data, aerial game and recovery. R.O.B. is largely forced to engage in a mix of zoning and close quarters combat in order to score KOs and his worse frame-data, reduced range on multiple moves, larger size and increased susceptibility to combos do not help this matter. The changes to ''Smash 4''{{'}}s mechanics also do not benefit him as much as some other characters as the changes to hitstun canceling is considered a double-edged sword for him and he has seen some notably hindrances especially from the removal of glide tossing. R.O.B. does not even benefit from having a better matchup spread as while he has an easier time against some of the characters who gave him a difficult time in ''Brawl'', such as {{SSB4|Meta Knight}}, {{SSB4|King Dedede}}, {{SSB4|Falco}} and {{SSB4|Olimar}}, due to their severe nerfs, this cannot be said for the entire cast and he has a very difficult time against {{SSB4|Cloud}}, and {{SSB4|Bayonetta}}. As a result, R.O.B. is considerably worse than in ''Brawl'', although he still remains a relatively viable character. | |||
===Aesthetics=== | ===Aesthetics=== | ||
*{{change|R.O.B.'s design has slightly changed. His | *{{change|R.O.B.'s design has slightly changed. His body now has a satin finish, instead of a [[wikipedia:Polishing (metalworking)|polished]] finish; his gray-colored components are darker; his head is slightly smaller; and his eyes are slightly larger and have more defined lenses. Altogether, these changes make R.O.B. appear significantly more in-line with his appearance as a real-life video game peripheral.}} | ||
*{{bugfix|{{GameIcon|ssb4-u}} | *{{change|R.O.B. has received two new [[alternate costume]]s.}} | ||
*{{change| | *{{change|R.O.B.'s default costume now changes depending on the language the game is set to. The Famicom color scheme (which was R.O.B.'s default costume in ''Brawl'') is still the default in the Japanese, Chinese, or Korean versions. All other versions use his NES colors as the default instead. The non-default color scheme appears as the second costume in both cases.}} | ||
*{{change|R.O.B. | *{{change|R.O.B. now faces the foreground at an angle instead of facing directly forward. He also typically faces the screen, regardless of whether he is facing left or right.}} | ||
*{{change|R.O.B. is more expressive; he appears angry while charging his up and down smashes, and during his up and down throws and [[Arm Rotor]]. R.O.B. also appears sad when he is [[grab]]bed.}} | |||
*{{bugfix|{{GameIcon|ssb4-u}}R.O.B. does not emote whatsoever in [[Versus Mode]]. However, he emotes properly in most other game modes, such as [[Training Mode]].}} | |||
*{{change|R.O.B.'s mechanical sound effects are lower pitched.}} | |||
*{{change|Arm-based attacks now emit visual trails that match R.O.B.'s [[Alternate costume|selected color scheme]].}} | |||
===Attributes=== | ===Attributes=== | ||
*{{ | *{{nerf|R.O.B. is larger, making his hurtbox bigger and thus easier to hit. While this would also improve his overall [[range]], this is slightly mitigated by some of his moveset possessing smaller hitboxes.}} | ||
*{{buff|R.O.B. [[walk]]s faster (1.1 → 1.122).}} | *{{buff|R.O.B. [[walk]]s faster (1.1 → 1.122).}} | ||
*{{buff|R.O.B. [[dash]]es faster (1.5 → 1.568).}} | *{{buff|R.O.B. [[dash]]es faster (1.5 → 1.568), although he dashes slower relative to the cast.}} | ||
*{{buff|R.O.B.'s [[air speed]] is faster (0.89 → 1.08).}} | *{{buff|R.O.B.'s [[air speed]] is significantly faster (0.89 → 1.08).}} | ||
*{{change|R.O.B. [[falling speed|falls]] faster (1.2 → 1.6), | *{{buff|R.O.B.'s [[air acceleration]] is drastically higher (0.046 → 0.085), going from the third-slowest in the game to above-average. This also improves his recovery, as his midair jump still halts all his horizontal momentum in the air.}} | ||
*{{change|R.O.B. [[falling speed|falls]] significantly faster (1.2 → 1.6), with him receiving the second-largest increase out of the entire cast, only behind {{SSB4|Lucario}}. Relative to the cast, his falling speed has gone from the 5th-worst in the game to above-average. As a result, he is no longer a [[falling speed|floaty]] character. This significantly improves his vertical endurance, but makes him much more susceptible to combos.}} | |||
**{{buff|His fast-falling speed is also drastically faster (1.68 → 2.56).}} | |||
*{{change|R.O.B.'s [[gravity]] is noticeably higher (0.065 → 0.09), going from the 7th-lowest in the game to above-average. When combined with his significantly increased falling speed, this substantially improves his ground-to-air transitioning and leaves him much less susceptible to juggling, but it also makes him more susceptible to combos, which is further exacerbated by the changes to [[hitstun canceling]] and his larger hurtboxes.}} | |||
*{{buff|R.O.B.'s [[item throw]] is stronger (0.9 → 1.02).}} | |||
*{{buff|[[Roll]]s have a longer duration (frames 4-15 → 4-16) and less ending lag (FAF 35 → 30).}} | |||
*{{nerf|Rolls have a new animation where R.O.B. does not move as far into the Z-axis, allowing his opponents to punish his rolls sooner despite their increased [[intangibility]].}} | |||
*{{buff|[[Air dodge]] has less startup (frame 4 → 3) and ending lag (FAF 40 → 33).}} | |||
*{{nerf|Air dodge has a slightly shorter duration (frames 4-29 → 3-27).}} | |||
*{{nerf|[[Spot dodge]] has more startup lag with a shorter duration (frames 2-20 → 3-17) and has more ending lag (FAF 26 → 27).}} | |||
*{{buff|Opponents gain much more height when [[footstool]]ing off of R.O.B., making him much less susceptible to footstool-based combos.}} | |||
*{{change|The changes to [[hitstun canceling]] both assist and hinder R.O.B.: it significantly improves his own combo potential, but it also makes him more susceptible to combos, especially when combined with his significantly increased falling speed, higher gravity, and larger hurtboxes.}} | |||
===Ground attacks=== | ===Ground attacks=== | ||
*{{change|Neutral attack has updated sound effects.}} | *[[Neutral attack]]: | ||
*{{nerf|Forward tilt | **{{buff|The second hit of neutral attack now has consistent base knockback (40/30 → 40).}} | ||
*{{nerf|Up tilt has significantly | **{{nerf|Both hits of neutral attack have a shorter duration (frames 3-6 → 3-4) and smaller hitboxes as all of their hitboxes excluding the main hitboxes have been removed, while their size (3u → 3.5u) and x/y/z offset (-1/0/-7 (both) → 0/10/12.5 (hit 1), 0/7.7/13 (hit 2)) were not fully compensated. This also means that the first hit always launches vertically (100°/361° → 100°), removing the near hit's ability to [[lock]] opponents.}} | ||
*{{buff| | **{{change|Neutral attack has updated sound effects.}} | ||
*{{buff|Dash attack deals 2% more damage (6% (arms)/5% (arms' tips) → | *[[Forward tilt]]: | ||
*{{nerf| | **{{nerf|Forward tilt has more ending lag (FAF 30 → 34).}} | ||
*{{buff| | **{{nerf|Up angled forward tilt has smaller hitboxes (4.2/4/3.5/4.2u → 4/3.8/2.5/4u).}} | ||
*{{change|Forward smash's animation has changed. R.O.B. now leans forward and positions his arms downward for support in order to fire the optical energy blast | *[[Up tilt]]: | ||
*{{ | **{{nerf|Arms' tip and arms' base up tilt have significantly smaller hitboxes. Up tilt also has a shorter duration (frames 4-8 → 4-7).}} | ||
*{{buff|Down smash deals | **{{buff|Tip up tilt has a slightly larger hitbox.}} | ||
*{{nerf| | *[[Down tilt]]: | ||
**{{buff|Down tilt deals consistent damage (4%/5% → 5%).}} | |||
**{{change|Down tilt now has one extended hitbox rather than four separate hitboxes.}} | |||
**{{nerf|Down tilt has a smaller [[tripping]] chance (40% → 20%).}} | |||
*[[Dash attack]]: | |||
**{{buff|Dash attack deals 2% more damage (6% (arms)/5% (arms' tips) → 7%), deals more knockback (70/65/60 (base), 50 (scaling) → (70/65)/70) and has increased range, improving its spacing potential.}} | |||
**{{nerf|Dash attack has more ending lag (FAF 31 → 36).}} | |||
*[[Forward smash]]: | |||
**{{buff|Base forward smash deals 1% more damage (14% → 15%) and has increased knockback (30 (base), 95 (scaling) → 32/100), improving its KO potential.}} | |||
**{{buff|Forward smash also has a slightly larger hitbox, and its mid and tip hitboxes have been re-positioned farther outward. Altogether, these changes improve its range.}} | |||
**{{nerf|Mid and tip forward smash deal less damage (13% (mid)/12% (tip) → 11.5%/6%) hindering their KO potential despite their higher knockback and have smaller hitboxes. Forward smash also has increased startup (frame 13 → 16) and ending lag (FAF 39 → 55).}} | |||
**{{change|Forward smash's animation has changed. R.O.B. now leans forward and positions his arms downward for support in order to fire the optical energy blast. His head also now rotates when it is [[charging]].}} | |||
**{{change|Forward smash has updated sound effects.}} | |||
*[[Up smash]]: | |||
**{{change|Up smash's sweetspot is now placed on R.O.B.'s base while the sourspot is now the tip. This makes up smash a more powerful KO option against grounded opponents, but hinders its use as an anti-air.}} | |||
**{{buff|Up smash's 12% sourspot has been removed. Its hitboxes have also been re-positioned further upward, improving its range.}} | |||
**{{buff|Up smash has a new initial hit, which deals 3% and launch opponents at 111°. These changes significantly improve its reliability, giving up smash less startup lag (frame 12 → 10) and grant it [[out of shield]] potential.}} | |||
**{{nerf|Up smash has less knockback scaling (100 → 98), hindering its KO potential. It also has a smaller hitbox.}} | |||
**{{nerf|Up smash's main hit has increased start-up lag (frame 12 → 14) and up smash has increased ending lag (FAF 44 → 49).}} | |||
**{{nerf|The removal of [[DACUS]] also slightly hinders up smash's approaching potential.}} | |||
*[[Down smash]]: | |||
**{{buff|Down smash's final hit deals more knockback (90 (base), 105 (scaling) → 37/160), significantly improving its KO potential. It also has larger hitboxes.}} | |||
**{{buff|Due to its angle being altered (70° → 33°), down smash is now a [[semi-spike]], significantly improving its edge-guarding potential.}} | |||
**{{buff|The weakening of [[SDI]] makes down smash significantly more difficult to escape from.}} | |||
**{{nerf|It has increased startup (frame 4 → 7) and ending lag (FAF 35 → 46).}} | |||
**{{nerf|The multi-hits no longer deal consistent damage (2% → 2%/1.5%)}} | |||
===Aerial attacks=== | ===Aerial attacks=== | ||
*{{ | *[[Neutral aerial]]: | ||
*{{nerf|Neutral aerial | **{{change|Neutral aerial deals 2% less damage (10% → 8% (base)/6% (tip)) and has decreased knockback scaling (108 → 100 (base)/98 (tip)). When coupled with the changes to hitstun canceling, these changes grant and improve its combo potential. However, these changes significantly hinder its damage-racking and KO potential.}} | ||
*{{nerf|Forward aerial deals less damage (10% (clean)/6% (late) → 7 | **{{nerf|Neutral aerial has smaller hitboxes (8.0u/6.0u/4.0u → 7.0u/5.0u) and has lost the hitbox that launches opponents at an 80° angle.}} | ||
*{{ | *[[Forward aerial]]: | ||
*{{nerf|Back aerial has | **{{buff|Forward aerial has decreased start-up lag (frame 7 → 6).}} | ||
*{{nerf|Up aerial | **{{nerf|Forward aerial deals less damage (10% (clean)/6% (late) → 7%). While this improves its [[wall of pain]] potential at higher percents combined with R.O.B.'s higher [[air speed]], it significantly hinders its safety at lower percents and its KO potential.}} | ||
*{{ | **{{nerf|It has a smaller hitbox, a shorter duration due to the removal of the late hit (frames 7-17 → 6-7) and more ending lag (FAF 32 → 36). Its higher ending lag, combined with R.O.B.'s lower short hop, prevents R.O.B. from performing another aerial after it in a short hop.}} | ||
*{{buff|Down aerial | **{{nerf|It has more landing lag (12 frames → 15).}} | ||
*{{nerf|Down aerial | *[[Back aerial]]: | ||
**{{buff|Clean back aerial has more base knockback compared to the previous hitbox (30 → 32), improving the clean base's KO potential.}} | |||
**{{buff|Back aerial's hitboxes are positioned farther outward, improving its range.}} | |||
**{{buff|It propels R.O.B. slightly farther, improving its recovery potential (although this is nullified by back aerial's increased lag).}} | |||
**{{nerf|Due to consisting of sweetspots and sourspots instead of a consistent hitbox, back aerial no longer deals consistent damage (11% → 12% (clean base)/10% (clean tip)/6% (late base)/4.5% (late tip)).}} | |||
**{{nerf|While the clean base is stronger, all other hitboxes are weaker, making back aerial a much more difficult aerial to utilize.}} | |||
**{{nerf|Back aerial has more startup lag with a shorter duration (frames 11-25 → 19-23 (clean)/24-29 (late)), and has more ending ending lag (FAF 40 → 53), which is further exacerbated by its worse [[auto-cancel]] window (frame 26 → 46).}} | |||
**{{nerf|It has much more landing lag (12 frames → 22).}} | |||
*[[Up aerial]]: | |||
**{{buff|Up aerial's last hit deals 1% more damage (3% → 4%), has increased knockback (60 (base), 120 (scaling) → 45/180), and launches at a higher angle (60 → 70), granting it KO potential.}} | |||
**{{buff|The weakening of [[SDI]] makes up aerial significantly more difficult to escape from.}} | |||
**{{nerf|Up aerial's loop hits deal less damage (4%/5% → 1.5%), which greatly decreases its overall damage potential (19%/20% → 10%).}} | |||
**{{nerf|Up aerial auto-cancels later (frame 36 → 40), now only doing so at the peak of a short hop.}} | |||
*[[Down aerial]]: | |||
**{{nerf|Mid down aerial deals 2% less damage (13% → 11%) and its knockback was not fully compensated (30 (base), 100 (scaling) → 20/110). The mid hit is now the only hit which can meteor smash opponents hindering its edgeguarding potential. The sweetspot also has a shorter duration (frames 20-24 → 20-21).}} | |||
**{{change|Down aerial has received a late hitbox that deals 8% and launches at [[Sakurai angle|361°]]. This lengthens its duration (frames 20-24 → 20-26), but makes it more susceptible to punishment at low to medium percentages.}} | |||
**{{buff|Down aerial has slightly larger hitboxes, and its hitboxes have been re-positioned farther downward. These changes improve its range. When coupled with the updated edge mechanics and the removal of [[meteor canceling]], these changes also significantly improve its reliability.}} | |||
**{{change|Mid down aerial no longer [[meteor smash]]es grounded opponents (280°/80° → 80°/45°). These changes improve its KO potential but remove its ability to trip.}} | |||
**{{nerf|Down aerial auto-cancels later (frame 27 → 45), significantly hindering its use as a landing and spacing tool.}} | |||
=== | ===Throws/other attacks=== | ||
*{{nerf|All grabs have significantly | *[[Grab]]: | ||
*{{nerf|Standing and pivot grabs have increased start-up lag (6 → 7 (standing), 10 → 11 (pivot)).}} | **{{nerf|All grabs have significantly smaller grabboxes (4.5/3.5u (standing/dash), 4.5/4/3.5u (pivot) → 2.8u (standing/pivot)/2.2u (dash)) and only have one grabbox instead of two. Altogether, R.O.B.'s grab now has the worst range in the game.}} | ||
*{{nerf|Forward throw deals 2% less damage (10% → 8%) | **{{nerf|Standing and pivot grabs have increased start-up lag (frame 6 → 7 (standing), frame 10 → 11 (pivot)).}} | ||
*{{buff|Up throw deals 2% more damage (10% → 12%) | *[[Forward throw]]: | ||
*{{buff|The changes to [[ | **{{nerf|Forward throw deals 2% less damage (10% → 8%).}} | ||
*{{change|R.O.B. has a new edge attack, a fiery blast from his thrusters.}} | *[[Up throw]]: | ||
**{{buff|Up throw deals 2% more damage (10% → 12%), although with compensation on knockback (70 (base), 72 (scaling) → 60/70).}} | |||
**{{buff|The changes to hitstun canceling combined with its altered knockback grant up throw combo potential at low percentages to medium percentages.}} | |||
*[[Down throw]]: | |||
**{{buff|The changes to hitstun canceling also significantly improve down throw's combo potential at low to medium percentages.}} | |||
*[[Edge attack]]: | |||
**{{change|R.O.B. has a new edge attack, a fiery blast from his thrusters.}} | |||
===Special moves=== | ===Special moves=== | ||
* | *[[Robo Beam]]: | ||
*{{buff| | **{{buff|Uncharged Robo Beam deals 2% more damage (5% → 7%).}} | ||
*{{nerf|Robo Beam and Super Robo Beam travel slower.}} | **{{nerf|Robo Beam deals less damage (5% → 4.5%).}} | ||
* | **{{buff|Super Robo Beam deals 1% more damage (9% → 10%). It also charges six seconds faster (1220 frames → 860).}} | ||
*{{change|Super Robo Beam's | **{{nerf|Robo Beam and Super Robo Beam travel slower.}} | ||
*{{nerf| | **{{change|Super Robo Beam's visual effects have changed. It is now wide and whitish yellow with a whitish crimson outline and cerulean trail, instead of being thin and whitish crimson.}} | ||
*{{buff|Arm Rotor | *[[Arm Rotor]]: | ||
*{{buff|Arm Rotor | **{{nerf|Arm Rotor now deals consistent damage (1%/2% (loop)/3%/4% (last) → 1%/3%).}} | ||
*{{nerf| | **{{buff|Arm Rotor now has a finishing hit, making it less punishable. The final hit has increased knockback (40/50 (base), 120 (scaling) → 40/210), granting it KO potential.}} | ||
*{{nerf|Fully charged | **{{buff|Arm Rotor now covers significantly more distance when moved forward or backward, improving its approaching potential and safety.}} | ||
*{{nerf|Gyro's animation has changed. R.O.B. now slightly | **{{buff|The weakening of SDI makes Arm Rotor significantly more difficult to escape from.}} | ||
*{{change|Gyro has updated sound effects. It | *[[Robo Burner]]: | ||
*{{change|R.O.B. has a new [[Final Smash]], [[Super Diffusion Beam]]. Compared to Diffusion Beam, Super Diffusion Beam deals less damage overall and has a shorter duration, but deals more knockback and has more range. Unlike Diffusion Beam, Super Diffusion Beam forces R.O.B. to be stationary throughout its duration.}} | **{{buff|Robo Burner has slightly higher initial upwards acceleration (0.13 → 0.14).}} | ||
**{{change|Robo Burner has increased gravity (0.05 → 0.065).}} | |||
***{{nerf|Because of this, repeated bursts cover less distance.}} | |||
**{{nerf|Robo Burner has less fuel (150 frames → 130).}} | |||
**{{nerf|R.O.B.'s air speed is much lower when using Robo Burner (1.3 → 0.7).}} | |||
**{{nerf|Robo Burner's additional air acceleration is lower (0.025 → 0.02).}} | |||
**{{nerf|Robo Burner's fuel refills at a much slower rate (1.8 → 0.5).}} | |||
***{{nerf|Altogether, these changes hinder Robo Burner's recovery potential.}} | |||
*[[Gyro]]: | |||
**{{nerf|Fully charged Gyro deals 8% less damage (18% → 10%) when fired. Gyro's firing range has also decreased.}} | |||
**{{nerf|Gyro's animation has changed. R.O.B. now recoils slightly when failing to pull a Gyro from his base. This new animation is significantly laggier.}} | |||
**{{change|Gyro has updated sound effects. It now emits a whirring sound while spinning by itself on-stage.}} | |||
**{{nerf|The removal of [[glide toss]]ing significantly hinders Gyro's approach potential.}} | |||
*[[Super Diffusion Beam]]: | |||
**{{change|R.O.B. has a new [[Final Smash]], [[Super Diffusion Beam]]. R.O.B. re-configures his body into a cannon-like form in order to fire a large laser that fans out into smaller lasers that trap the opponent before concluding and then being immediately followed by a large energy blast. Compared to Diffusion Beam, Super Diffusion Beam deals less damage overall and has a shorter duration, but deals more knockback and has more range.}} | |||
**{{nerf|Unlike Diffusion Beam, Super Diffusion Beam forces R.O.B. to be stationary throughout its duration.}} | |||
**{{bugfix|The [[regenerating terrain glitch]] has been fixed.}} | |||
==Update history== | ==Update history== | ||
R.O.B. has received | Like {{SSB4|Mario}} and {{SSB4|Pit}}, R.O.B. has received a very small number of direct changes from game updates. Update [[1.0.4]]'s changes to [[LSI]] indirectly buffed him by enabling his [[Beep Boop]] [[combo]] ({{mvsub|R.O.B.|SSB4|down throw}} → {{mvsub|R.O.B.|SSB4|up aerial}}) to function past low percentages, and become one of the game's most infamous 50/50 [[KO combo]]s out of [[grab]]. However, update [[1.0.6]] notably decreased the [[knockback]] of R.O.B.'s {{mvsub|R.O.B.|SSB4|up throw}}, with it now [[KO]]ing roughly 15-20% later; previously, it was the strongest up throw in the game, and the second strongest [[throw]] of any kind after {{SSB4|Ness}}' {{mvsub|Ness|SSB4|back throw}}. | ||
Despite this, up throw remains a powerful KOing option and one of the best KO throws, especially on [[stage]]s with [[platform]]s. Its lower base knockback also granted it combo potential at low percentages; when coupled with its lower base knockback and launch [[angle]], its combos are more varied compared to down throw's (which can especially just combo into up aerial regardless of percent), such as being able to combo into {{mvsub|R.O.B.|SSB4|up smash}} and {{mvsub|R.O.B.|SSB4|forward aerial}}, which can additionally more easily lead into farther followups. As a result, up throw can now be used to perform more damaging combos at low percents compared to what down throw can do, while additionally conserving the [[fresh]]ness of both down throw and up aerial for more powerful Beep Boops later on. | |||
Update [[1.1.1]]'s increase to [[shieldstun]] indirectly nerfed R.O.B.; in addition to making his relative [[shield]] safety among the cast less impressive because of his moves possessing low [[damage]] output or being [[projectile]]s (and thus saw less increase to their shieldstun than most other characters' moves), getting grabs that he was heavily dependent on to KO became remarkably more difficult, especially with his already terrible grabbing [[range]] that made [[shield grab]]bing difficult even before the shieldstun patch. Lastly, update [[1.1.4]] marginally increased the size of R.O.B.'s [[hurtbox]]es and decreased his [[tripping]] stance's [[invincibility]] [[frame]]s by standardizing it, though these had a negligible impact on his viability. | |||
Although updates [[1.1.3]] to [[1.1.6]] notably nerfed some of R.O.B.'s more difficult [[matchup]]s, such as {{SSB4|Bayonetta}}, {{SSB4|Cloud}}, {{SSB4|Sheik}}, and {{SSB4|Zero Suit Samus}}, they nevertheless remained difficult, with Bayonetta and Cloud in particular remaining a severe problem for R.O.B. as they became the [[meta]]'s most dominant characters. On a related note, [[buff]]s to other characters in these updates have also made many of R.O.B.'s other matchups less favorable, most notably {{SSB4|Lucina}}, {{SSB4|Marth}}, and {{SSB4|Mewtwo}}. Due to remaining relatively static throughout ''Smash 4''{{'}}s lifespan, while DLC introduced largely unfavorable matchups and most of the cast becoming stronger via game updates, R.O.B. became less viable by the end of ''Smash 4''{{'}}s development than he was during the initial release of ''Smash for Wii U''. | |||
'''{{GameIcon|ssb4}} 1.0.5''' | '''{{GameIcon|ssb4}} 1.0.5''' | ||
*{{bugfix| | *{{bugfix|Removed a glitch where throwing [[Gyro]] upward while using [[Robo Burner]] could cause the flames to continue emitting from R.O.B.'s base after Robo Burner concluded.}} | ||
'''{{GameIcon|ssb4}} [[1.0.6]]''' | '''{{GameIcon|ssb4}} [[1.0.6]]''' | ||
*{{nerf|Up throw | *{{nerf|Up throw deals less knockback (70 (base), 72 (scaling) → 60/70). This significantly hinders its KO potential, making it KO about 15-20% later.}} | ||
**{{buff|This reduced base knockback however granted R.O.B. access to more damaging throw combos at lower percents to improve his early damage racking capabilities. Most R.O.B. players however do not consider this enough to make up for the move's reduced KO potential.}} | |||
'''{{GameIcon|ssb4}} [[1.1.4]]''' | '''{{GameIcon|ssb4}} [[1.1.4]]''' | ||
{{UpdateList/1.1.4|char=R.O.B.}} | {{UpdateList/1.1.4|char=R.O.B.}} | ||
'''Technical changelist 1.1.4''' | |||
{| class="wikitable sortable" style="text-align:center" | |||
! Change!!Old value!!New value | |||
|- | |||
|Hurtbox 0 X-axis offset/stretch||0.9||0.7 | |||
|- | |||
|Hurtbox 0 size||3.2||3.4 | |||
|- | |||
|Hurtbox 1 size||3.8||4.0 | |||
|- | |||
|Hurtbox 4 size||3.3||4.0 | |||
|- | |||
|Hurtbox 5 Y-axis offset||4.0||3.8 | |||
|- | |||
|Hurtbox 5 Y-axis stretch||-4.0||-3.8 | |||
|- | |||
|Hurtbox 5 Z-axis offset/stretch||-3.5||-3.3 | |||
|- | |||
|Hurtbox 5 size||2.6||2.9 | |||
|- | |||
|Hurtbox 6 Y-axis offset||4.0||3.8 | |||
|- | |||
|Hurtbox 6 Y-axis stretch||-4.0||-3.8 | |||
|- | |||
|Hurtbox 6 Z-axis offset/stretch||-3.5||-3.3 | |||
|- | |||
|Hurtbox 6 size||2.6||2.9 | |||
|} | |||
==Moveset== | ==Moveset== | ||
''For a gallery of R.O.B.'s hitboxes, see [[/Hitboxes|here]].'' | |||
{{MovesetTable | {{MovesetTable | ||
|game=SSB4 | |game=SSB4 | ||
| Line 133: | Line 262: | ||
|neutral1dmg=3% | |neutral1dmg=3% | ||
|neutral2dmg=3% | |neutral2dmg=3% | ||
|neutraldesc=Two alternating [[Wikipedia:Hook (boxing)|hooks]]. Both hits | |neutraldesc=Two alternating [[Wikipedia:Hook (boxing)|hooks]]. Both of its hits hit on frame 3, which ties it with down tilt as R.O.B.'s fastest attack. Its first hit has almost nonexistent base knockback, average knockback growth and launches at 100°, all of which allow it to [[jab cancel]]. Its most reliable follow-up is down tilt, thanks to it also hitting on frame 3, although it can also jab cancel reliably into forward tilt, smash attacks, or a grab. The tilt attack follow-ups can be performed up to high percentages, while the smash attack and grab follow-ups can be performed on lightweights and middleweights beginning at 80%-85% and heavyweights beginning at 110%-115%. However, it cannot jab cancel reliably against fast-fallers. Conversely, its second hit has very high knockback growth and launches at 361°, which make it useful for spacing. | ||
|ftiltname= | |ftiltname= | ||
|ftiltdmg=8% (arm tip), 6%/5% (arm) | |ftiltdmg=8% (arm's tip), 6%/5% (arm) | ||
|ftiltdesc=A lunging hook. It can be angled and | |ftiltdesc=A lunging hook. It can be angled and the tip of R.O.B.'s arm is decent for spacing beginning at 50%. | ||
|utiltname= | |utiltname= | ||
|utiltdmg=3% (early), 5% (clean tip), 6% (clean base) | |utiltdmg=3% (early), 5% (clean tip), 6% (clean base) | ||
|utiltdesc=Thrusts his arms upward. It is good for starting combos into itself, up smash and up aerial from low to medium | |utiltdesc=Thrusts his arms upward. It is good for starting combos into itself, up smash and up aerial from low to medium percentages, or functioning as an anti-air attack. However, it has very minimal horizontal range, which forces R.O.B. to practically stand next to a grounded opponent in order to land it. | ||
|dtiltname= | |dtiltname= | ||
|dtiltdmg=5% | |dtiltdmg=5% | ||
|dtiltdesc=Thrusts his arms at a low angle. It | |dtiltdesc=Thrusts his arms at a low angle. It hits on frame 3, which ties it with neutral attack as R.O.B.'s fastest attack. Although it has a small chance to [[trip]] opponents, its overall quick speed considerably offsets this and makes it an excellent set-up option. | ||
|dashname= | |dashname= | ||
|dashdmg=8% (arms), 7% (arms' tips) | |dashdmg=8% (arms), 7% (arms' tips) | ||
|dashdesc=A double [[Wikipedia:Professional wrestling attacks#Forearm club|forearm club]]. It can | |dashdesc=A double [[Wikipedia:Professional wrestling attacks#Forearm club|forearm club]]. It can be followed up with forward aerial if the opponent's reaction is read properly. | ||
|fsmashname=S3 | |fsmashname=S3 | ||
|fsmashdmg={{ChargedSmashDmgSSB4|15}} (base), {{ChargedSmashDmgSSB4|11.5}} (mid), {{ChargedSmashDmgSSB4|6}} (tip) | |fsmashdmg={{ChargedSmashDmgSSB4|15}} (base), {{ChargedSmashDmgSSB4|11.5}} (mid), {{ChargedSmashDmgSSB4|6}} (tip) | ||
|fsmashdesc=An optical energy blast, similar to the uncharged [[Robo Beam]]. It can be angled and | |fsmashdesc=An optical energy blast, similar to the uncharged [[Robo Beam]]. It can be angled; has very high knockback growth; and its base hitbox deals respectable damage. Altogether, these enable it to KO middleweights at 109% near the edge. Although slightly weaker, its middle hitbox is still strong enough to KO middleweights at 136% near the edge. However, its range is merely average at best, it has high ending lag and the blast's tip has extremely minimal KO potential. | ||
|usmashname= | |usmashname= | ||
|usmashdmg={{ChargedSmashDmgSSB4|3}} (arms), {{ChargedSmashDmgSSB4|14}} (base), {{ChargedSmashDmgSSB4|13}} (tip) | |usmashdmg={{ChargedSmashDmgSSB4|3}} (arms), {{ChargedSmashDmgSSB4|14}} (base), {{ChargedSmashDmgSSB4|13}} (tip) | ||
|usmashdesc=Performs a handstand and activates his thrusters to | |usmashdesc=Performs a handstand and activates his thrusters to emit a [[Flame|fiery]] blast upward. It hits on frame 10, which is somewhat quick for a smash attack. It also has deceptive horizontal range on the ground, thanks to R.O.B.'s arms possessing hitboxes that launch opponents into the thrusters' hitboxes, the latter of which are fairly powerful. Its base KOs middleweights at 113%, whereas its tip KOs them at 116%. Altogether, these traits make it a reliable KOing option, especially from [[out of shield]] because of R.O.B.'s high traction. However, it has high ending lag. | ||
|dsmashname= | |dsmashname= | ||
|dsmashdmg={{ChargedSmashDmgSSB4|2}} ( | |dsmashdmg={{ChargedSmashDmgSSB4|2}} (hits 1-4 base), {{ChargedSmashDmgSSB4|1.5}} (hits 1-4 tip), {{ChargedSmashDmgSSB4|5}} (hit 5) | ||
|dsmashdesc=Lowers his torso and spins it around rapidly while outstretching his arms to perform a series of [[Wikipedia:Professional wrestling attacks#Clothesline|discus clotheslines]], | |dsmashdesc=Lowers his torso and spins it around rapidly while outstretching his arms to perform a series of [[Wikipedia:Professional wrestling attacks#Clothesline|discus clotheslines]], comparatively like [[Arm Rotor]]. It hits on frame 7, which is disproportionately quick for a smash attack. Thanks to it being a [[semi-spike]] and its last hit's very high knockback growth, it KOs at middleweights at 129% while near the edge o fFinal Destination, and is very effective for edge-guarding. However, its base hitboxes launch the opponent behind R.O.B., which means that he must face away from the edge when attempting to use this move in order to properly launch the opponent off-stage. Like forward and up smash, it also has high ending lag. | ||
|nairname= | |nairname= | ||
|nairdmg=8% (base), 6% (tip) | |nairdmg=8% (base), 6% (tip) | ||
|nairdesc=Activates his thrusters to | |nairdesc=Activates his thrusters to somersault and emit a fiery blast in a circular motion. Its large hitbox, very minimal landing lag and ability to auto-cancel with a short hop collectively make it very useful for spacing, approaching and starting combos. Due to it hitting on frame 18, however, it is punishable if it is not spaced properly. Although its power has been drastically reduced since ''Brawl'', the tip hitbox still has KO potential, as it KOs middleweights at around 130% near the left/right [[blast line]]s. | ||
|fairname= | |fairname= | ||
|fairdmg=7% | |fairdmg=7% | ||
|fairdesc=A double forearm club. It | |fairdesc=A double forearm club. It hits on frame 6, making it R.O.B.'s fastest aerial. It is also ideal for spacing when [[SHFF]]'d, has minimal landing lag and is decent for edge-guarding and leading to a [[wall of pain]]. However, it lacks KO potential because of its average damage output and minimal base knockback. It is also R.O.B.'s only aerial that lacks a disjointed hitbox. | ||
|bairname= | |bairname= | ||
|bairdmg=12% (clean base), 10% (clean tip), 6% (late base), 4.5% (late tip) | |bairdmg=12% (clean base), 10% (clean tip), 6% (late base), 4.5% (late tip) | ||
|bairdesc=Leans forward and activates his thrusters to emit a fiery blast behind himself. | |bairdesc=Leans forward and activates his thrusters to emit a fiery blast behind himself. Its clean base hitbox is strong enough to KO middleweights at 126% while near the edge of Final Destination, thanks to its respectable damage output and very high knockback growth. It is also useable for horizontal recovery, as it slightly propels him forward and does not consume [[Robo Burner]]'s fuel. It can auto-cancel in a short hop due to it altering R.O.B's momentum, but due to it hitting on frame 19 and possessing high ending lag and 22 frames of landing lag, it is very slow and punishable if it is not spaced properly and auto-canceled. | ||
|uairname= | |uairname= | ||
|uairdmg=1.5% (hits 1-4), 4% (hit 5) | |uairdmg=1.5% (hits 1-4), 4% (hit 5) | ||
|uairdesc=Rapidly rotates his arms upward. It | |uairdesc=Rapidly rotates his arms upward. It hits on frame 7, making it R.O.B.'s second-fastest aerial. It is down throw's most reliable follow-up from low to medium percentages. It is also useful for juggling and KOing, as its loop hits maintain the opponent trapped reliably, whereas its last hit's extremely high knockback growth enables it to KO middleweights at 115% while near the upper [[blast line]]. It can also auto-cancel with a short hop. However, it has 22 frames of landing lag like back aerial, which makes it punishable if it is not auto-canceled. | ||
|dairname= | |dairname= | ||
|dairdmg=12% (clean base), 11% (clean mid), 6% (clean tip), 8% (late) | |dairdmg=12% (clean base), 11% (clean mid), 6% (clean tip), 8% (late) | ||
|dairdesc=Activates his thrusters to emit a fiery blast downward. | |dairdesc=Activates his thrusters to emit a fiery blast downward. The middle portion of the blast is a powerful [[meteor smash]], which makes it a very potent edge-guarding option, especially after an [[Edge-guarding#Ledge trump|edge trump]] if the opponent re-grabs the edge. It briefly stalls R.O.B's momentum, allowing it to auto-cancel in a short hop. Due to it hitting on frame 20 and possessing 43 frames of ending lag, it is R.O.B.'s slowest aerial. When coupled with its 21 frames of landing lag, it is punishable if it is not spaced properly and auto-canceled. | ||
|grabname= | |grabname= | ||
|grabdesc=[[wikipedia:Clinch fighting|Clinches]] the opponent. R.O.B.'s grab | |grabdesc=[[wikipedia:Clinch fighting|Clinches]] the opponent. Due to his grabboxes being significantly smaller than in ''Brawl'', R.O.B.'s overall grab is the shortest-ranged in the game, especially compared to R.O.B.'s size similar to {{SSB4|Ganondorf}}. However, R.O.B.'s grabs are extremely quick, and his grab is still somewhat prominent, as up throw and down throw can combo into aerials, and both can KO, the latter with the "Beep Boop" setup, and the former with its high knockback growth. | ||
|pummelname= | |pummelname= | ||
|pummeldmg=2% | |pummeldmg=2% | ||
|pummeldesc=Squeezes the opponent. A fairly | |pummeldesc=Squeezes the opponent. A fairly quick pummel. | ||
|fthrowname= | |fthrowname= | ||
|fthrowdmg=8% | |fthrowdmg=8% | ||
|fthrowdesc=Shoves the opponent | |fthrowdesc=Shoves the opponent forwards. It can be used to set up an edge-guard. It can KO middleweights at around 190% at the edge of Final Destination. | ||
|bthrowname= | |bthrowname= | ||
|bthrowdmg=10% | |bthrowdmg=10% | ||
|bthrowdesc=Flings the opponent | |bthrowdesc=Flings the opponent backwards. Like his forward throw, it is useful for setting up an edge-guard or being a KO option neaar the edge. It can KO middleweights at around 155% by the edge of Final Destination. | ||
|uthrowname= | |uthrowname= | ||
|uthrowdmg=12% | |uthrowdmg=12% | ||
|uthrowdesc=A [[Wikipedia:Piledriver (professional wrestling)|piledriver]]. R.O.B.'s strongest throw and, prior to update [[1.0.6]], it was the strongest up throw in the game | |uthrowdesc=A [[Wikipedia:Piledriver (professional wrestling)#Reverse piledriver|jumping reverse piledriver]]. R.O.B.'s strongest throw and, prior to update [[1.0.6]], it was the strongest up throw in the game, as it was capable of KOing under 150%. As of update 1.0.6, it now KOs middleweights at 174%, although [[platform]]s assist its KO potential considerably: it KOs middleweights at 160% when performed on {{SSB4|Battlefield}}'s low platforms, and KOs them at 145% when performed on Battlefield's top platform. Although rare, R.O.B. can also perform up throw for a [[sacrificial KO]] if it is performed on a moving platform, as he will continue performing the throw all the way to the lower blast line if there is no platform to stop his descent. In addition to its KO potential, it has combo potential thanks to it launching at 80°, with its follow-ups being an upward-angled forward smash, dashing up smash, forward aerial, and up aerial from 0%-40%. However, its smash attack-combos are most reliable against heavyweights and fast-fallers. | ||
|dthrowname= | |dthrowname= | ||
|dthrowdmg=10% | |dthrowdmg=10% | ||
|dthrowdesc=Drills the opponent into the ground | |dthrowdesc=Drills the opponent into the ground headfirst. It has very high base knockback, minimal knockback growth and launches at 88°, which collectively enable it to combo into neutral and up aerials at low to medium percentages. The latter combo has been nicknamed the "Beep Boop" and can even function as a KO set-up at high percentages if R.O.B. can properly read the opponent's reaction. However, its neutral aerial-combo is only reliable beginning at 0%, whereas the "Beep Boop" can be avoided if the opponent DIs horizontally after being thrown. | ||
|floorfname= | |floorfname= | ||
|floorfdmg=7% | |floorfdmg=7% | ||
| Line 195: | Line 324: | ||
|floortname= | |floortname= | ||
|floortdmg=5% | |floortdmg=5% | ||
|floortdesc=Spins his torso around to | |floortdesc=Spins his torso around to throw a low-angled hook around himself while getting up. | ||
|edgename= | |edgename= | ||
|edgedmg=7% | |edgedmg=7% | ||
| Line 201: | Line 330: | ||
|nsdefname=Robo Beam | |nsdefname=Robo Beam | ||
|nsdefdmg=7% (uncharged), 4.5% (Robo Beam), 11% (point-blank Robo Beam), 10% (Super Robo Beam), 17% (point-blank Super Robo Beam) | |nsdefdmg=7% (uncharged), 4.5% (Robo Beam), 11% (point-blank Robo Beam), 10% (Super Robo Beam), 17% (point-blank Super Robo Beam) | ||
|nsdefdesc= | |nsdefdesc=Fires an optical laser. When uncharged, it is a minimal energy blast instead of a laser, and can only damage opponents at point-blank range. However, it can be fired consecutively and has deceptively high knockback growth, which allow it to ward off nearby opponents. Conversely, both Robo Beam and Super Robo Beam can damage opponents from afar and ricochet, but cannot be fired consecutively. Robo Beam and Super Robo Beam also deal noticeably more damage when fired at point-blank range. It is one of R.O.B.'s options for zoning alongside Gyro, with Robo Beam being better for his neutral game, while Super Robo Beam is better for surprising opponents. It and all of its custom variations have [[transcendent priority]]. Uncharged Robo Beam becomes Robo Beam after being left idle for 2.6 seconds (160 frames), and Robo Beam becomes Super Robo Beam after being left idle for 14.3 seconds (860 frames). | ||
|nsc1name=Wide-Angle Beam | |nsc1name=Wide-Angle Beam | ||
|nsc1dmg=7% (uncharged), 3.5% (Robo Beam), 10% (point-blank Robo Beam), 8% (Super Robo Beam), 15% (point-blank Super Robo Beam) | |nsc1dmg=7% (uncharged), 3.5% (Robo Beam), 10% (point-blank Robo Beam), 8% (Super Robo Beam), 15% (point-blank Super Robo Beam) | ||
|nsc1desc=R.O.B. can aim on a much wider arc, | |nsc1desc=R.O.B. can aim on a much wider arc, albeit at the expense of Robo Beam and Super Robo Beam possessing slightly lower damage outputs. Fully charged shots are much quicker and stretch across the screen. | ||
|nsc2name=Infinite Robo Beam | |nsc2name=Infinite Robo Beam | ||
|nsc2dmg=3%/2% (Robo Beam), 7% (point-blank Robo Beam), 10% (Super Robo Beam), 14% (point-blank Super Robo Beam) | |nsc2dmg=3%/2% (Robo Beam), 7% (point-blank Robo Beam), 10% (Super Robo Beam), 14% (point-blank Super Robo Beam) | ||
|nsc2desc=Robo Beam can be fired consecutively, | |nsc2desc=Robo Beam can be fired consecutively, albeit at the expense of a lower damage output, shorter range and its ability to ricochet. These drawbacks also apply to Super Robo Beam, which also takes longer to charge. | ||
|ssdefname=Arm Rotor | |ssdefname=Arm Rotor | ||
|ssdefdmg=1% (loop), 3% (last), 1. | |ssdefdmg=1% (loop, hits 1-20~), 3% (last), 1.5× (reflected projectiles) | ||
|ssdefdesc=Rapidly spins his torso around to perform a series of discus clotheslines that concludes with an uppercut. | |ssdefdesc=Rapidly spins his torso around to perform a series of discus clotheslines that concludes with an uppercut. Mashing the special button extends the duration of the move. Propels R.O.B forward slightly and hovers somewhat in mid-air. Unlike in ''Brawl'', it can trap opponents reliably and its last hit has KO potential, thanks to its extremely high knockback growth enabling it to KO middleweights at 147% while near the edge of Final Destination. It can also [[reflect]] projectiles with 50% more power than their original power, and move R.O.B. forward or backward while the [[control stick]]/circle pad is tilted in the respective direction. It and all of its custom variations have transcendent priority. | ||
|ssc1name=Reflector Arm | |ssc1name=Reflector Arm | ||
|ssc1dmg=2% (loop), 4% (last), 1. | |ssc1dmg=2% (loop), 4% (last), 1.8× (reflected projectiles) | ||
|ssc1desc= | |ssc1desc=Quicker, stronger, and reflects projectiles with 80% more power in comparison to their original power, albeit at the expense of immobilizing R.O.B upon performance, and the hits knock opponents away instead of trapping them. | ||
|ssc2name=Backward Arm Rotor | |ssc2name=Backward Arm Rotor | ||
|ssc2dmg=2% ( | |ssc2dmg=2% (hit 1), 4% (hit 2), 1.5× (reflected projectiles) | ||
|ssc2desc=Deals more damage and moves R.O.B. backward while it is being performed, making it better suited for defense, | |ssc2desc=Deals more damage and moves R.O.B. backward while it is being performed, making it better suited for defense, albeit at the expense of possessing a significantly shorter duration overall. | ||
|usdefname=Robo Burner | |usdefname=Robo Burner | ||
|usdefdmg=— | |usdefdmg=— | ||
|usdefdesc=Activates his thrusters in order to fly. | |usdefdesc=Activates his thrusters in order to fly. When combined with R.O.B.'s high aerial mobility, it grants impressive vertical and horizontal recovering distance, although R.O.B. has a set amount of fuel for usage in order to perform this move. Fuel is recovered overtime as long as R.O.B. is grounded. Tilting the control stick up repeatedly instead of holding the special button while flying can conserve fuel better and allow R.O.B to travel farther. It is one of the few up specials to not cause [[helpless]]ness, as it can be canceled any time by executing an aerial attack, after which R.O.B can reactivate it or perform other moves. Otherwise, R.O.B. cannot perform other special moves, [[fast fall]], or [[air dodge]] while using the Burner. R.O.B. is also immune to [[footstool jump]]s while using this move, although other characters can still jump off of him regardless. It also grants [[intangibility]] on frames 2-4, but only when performed on the ground. | ||
|usc1name=Robo Rocket | |usc1name=Robo Rocket | ||
|usc1dmg=5% (early), 8% (clean) | |usc1dmg=5% (early), 8% (clean) | ||
|usc1desc=Functions like a traditional | |usc1desc=Functions like a traditional recovering move, as R.O.B. simply ascends quickly and gains a small hitbox. It grants outstanding vertical recovery after a jump; does not cause helplessness; can be followed up with any aerial; and can meteor smash if it hits the opponent precisely. However, it grants almost nonexistent horizontal recovering distance. Like Robo Burner, R.O.B must perform an aerial attack in order to fast fall, air dodge, or use his other specials as follow-ups. Additionally, its meteor smash has below-average power. | ||
|usc2name=High-Speed Burner | |usc2name=High-Speed Burner | ||
|usc2dmg=— | |usc2dmg=— | ||
|usc2desc=Grants faster movement speed, | |usc2desc=Grants faster movement speed, albeit at the expense of consuming more fuel. | ||
|dsdefname=Gyro | |dsdefname=Gyro | ||
|dsdefdmg=1% (base), 4%-10% (top), 5% (idle top)<!--because of how items work, this is a "best guess" as to what actions they match up with-->, 8% (thrown) | |dsdefdmg=1% (base), 4%-10% (top), 5% (idle top)<!--because of how items work, this is a "best guess" as to what actions they match up with-->, 8% (thrown) | ||
|dsdefdesc=Charges a spinning top on his base. R.O.B.'s other zoning option alongside Robo Beam, it can be picked up and thrown as an [[item]] after making contact with either the opponent or the stage. However, opponents can | |dsdefdesc=Charges a spinning top on his base. R.O.B.'s other zoning option alongside Robo Beam, it can be picked up and thrown as an [[item]] after making contact with either the opponent or the stage. However, opponents can perform the same and thus utilize the top against him. Gyro requires 1.5 seconds (90 frames) to fully charge. Only a single Gyro can be active at a time, and attempting another will result in R.O.B. flailing in confusion. It lasts longer when launched with the special button, but once picked up and thrown, it dissipates almost immediately. Typically, Gyro deals little knockback when touched, albeit enough to harass opponents attempting to get past. In comparison, it will somewhat launch opponents a short distance toward R.O.B. after being thrown and making contact with the ground again. This enables it to partake in combos if R.O.B. is able to time his attacks and predict his opponent's movements. Due to being an item, however, it can also be grabbed by an opponent and thus used against R.O.B. | ||
|dsc1name=Fire Gyro | |dsc1name=Fire Gyro | ||
|dsc1dmg=7% (base), 3%-12% (top), 6% (idle top), 10% (thrown) | |dsc1dmg=7% (base), 3%-12% (top), 6% (idle top), 10% (thrown) | ||
|dsc1desc=The top is | |dsc1desc=The top is a flame and deals more damage, albeit at the expense of covering less distance and possessing increased ending lag. | ||
|dsc2name=Slip Gyro | |dsc2name=Slip Gyro | ||
|dsc2dmg=2% (base), 3% (top), 3% (idle top), 9% (thrown) | |dsc2dmg=2% (base), 3% (top), 3% (idle top), 9% (thrown) | ||
| Line 237: | Line 366: | ||
|fsname=Super Diffusion Beam | |fsname=Super Diffusion Beam | ||
|fsdmg=0.5%/1% (narrow laser loop/last), 1%/2% (wide laser loop/last), 10% (blast) | |fsdmg=0.5%/1% (narrow laser loop/last), 1%/2% (wide laser loop/last), 10% (blast) | ||
|fsdesc=Re-configures his body into a cannon-like form | |fsdesc=Re-configures his body into a cannon-like form in order to fire a large laser that fans out into smaller lasers. These lasers trap the opponent and deal damage, before [[paralyze|paralyzing]] trapped victims and ending with a large energy blast. It is excellent for damage-racking and can be angled, comparatively like {{b|Zero Laser|Samus}}. Its blast is also quite powerful, as it KOs middleweights at 70% while near the edge of Final Destination. | ||
}} | }} | ||
===Stats=== | |||
{{Attributes | |||
|cast = 58 | |||
|weight = 106 | |||
|rweight = 10 | |||
|dash = 1.3 | |||
|rdash = 49-55 | |||
|run = 1.568 | |||
|rrun = 32 | |||
|walk = 1.122 | |||
|rwalk = 29 | |||
|trac = 0.06 | |||
|rtrac = 14-24 | |||
|airfric = 0.015 | |||
|rairfric = 6-19 | |||
|air = 1.08 | |||
|rair = 21-23 | |||
|baseaccel = 0.04 | |||
|rbaseaccel = 3-5 | |||
|addaccel = 0.045 | |||
|raddaccel = 45 | |||
|gravity = 0.09 | |||
|rgravity = 26-29 | |||
|fall = 1.6 | |||
|rfall = 24-27 | |||
|ff = 2.56 | |||
|rff = 25 | |||
|jumpsquat = 5 | |||
|rjumpsquat = 14-41 | |||
|jumpheight = 38 | |||
|rjumpheight = 9 | |||
|shorthop = 18.378603 | |||
|rshorthop = 8 | |||
|djump = 38 | |||
|rdjump = 11 | |||
}} | |||
===[[Announcer]] call=== | |||
{{audio|Needs announcer calls from other languages.}} | |||
<gallery> | |||
R.O.B. English Announcer SSB4-SSBU.wav|English | |||
R.O.B. Japanese Announcer SSB4-SSBU.wav|Japanese/Chinese | |||
</gallery> | |||
===[[On-screen appearance]]=== | ===[[On-screen appearance]]=== | ||
| Line 249: | Line 422: | ||
{{Taunt/SSB4 | {{Taunt/SSB4 | ||
|char=ROB | |char=ROB | ||
|desc-up=Faces the screen and then spins his head and torso in a circle. | |desc-up=Faces the screen, and then spins his head and torso in a circle. | ||
|desc-side=Faces the screen and sways his head around while emitting flashing sparkles from his eyes. | |desc-side=Faces the screen, and sways his head around in an arc while emitting flashing sparkles from his eyes. | ||
|desc-down=Faces the screen and moves his torso down to his base before spinning it back up into place.}} | |desc-down=Faces the screen, and moves his torso down to his base before spinning it back up into place.}} | ||
===[[Idle pose]]s=== | ===[[Idle pose]]s=== | ||
{{Idle | {{Idle | ||
|desc-1=Briefly looks toward the screen. | |desc-1=Briefly looks toward the screen. | ||
|desc-2=Briefly nods off | |desc-2=Briefly nods off, then shakes his head and wakes up. | ||
|image-1=ROBIdlePose1WiiU.jpg | |image-1=ROBIdlePose1WiiU.jpg | ||
|image-2=ROBIdlePose2WiiU.jpg}} | |image-2=ROBIdlePose2WiiU.jpg}} | ||
| Line 273: | Line 446: | ||
{{Victory/SSB4 | {{Victory/SSB4 | ||
|victory-theme=ROBTheme.ogg | |victory-theme=ROBTheme.ogg | ||
|victory-desc=A remix of ''{{s|wikipedia|Stack-Up}}''{{'}}s memory mode title screen | |victory-desc=A remix of ''{{s|wikipedia|Stack-Up}}''{{'}}s jingle in the memory mode title screen. | ||
|desc-1= | |desc-1=Performs [[Robo Burner]], spins and then lands, after which, his torso lowers and slowly elevates back into place while spinning his head. | ||
|desc-2= | |desc-2=Rears back his arms, then rotates them into a vertical position while spinning his head, after which he performs a cheering gesture while continuing to spin his head. | ||
|desc-3=Sways his head around while emitting flashing sparkles from his eyes. It is almost identical to his side taunt. | |desc-3=Sways his head around while emitting flashing sparkles from his eyes, then slightly adjusts his arms and torso. It is almost identical to his side taunt. | ||
|char=R.O.B.}} | |char=R.O.B.}} | ||
== | ==In [[competitive play]]== | ||
{{ | ===Tier placement and history=== | ||
Thanks to his potent zoning and grab games, R.O.B. was initially considered a high-tier character during ''SSB4''{{'}}s release, comparatively to initial perceptions of him during the early days of ''Brawl''{{'}}s metagame, where he was considered one of the best characters in the game. However, after update [[1.0.6]] nerfed his up throw's power, his reputation declined to the point that he was perceived as a mid-tier character. Nevertheless, R.O.B.'s representation in competitive play remained decent, while he continued to enjoy decent placements thanks to mains such as {{Sm|8BitMan}}, {{Sm|OCEAN}}, and {{Sm|Raffi-X}}. This resulted in him being ranked 20th on the first [[tier list]]. | |||
| | |||
However, other characters like {{SSB4|Donkey Kong}}, {{SSB4|Lucario}} and, most notably, {{SSB4|Toon Link}}, have achieved much stronger results than R.O.B. To further compound this, R.O.B. has become rarer in competitive play due to having unfavorable matchups against all excluding [[Roy (SSB4)|one]] of the DLC characters. This decline in popularity and results would end up with R.O.B. being ranked 28th on the second tier list. Without significant breakthroughs against his unfavorable matchups, as well as further notable changes towards his zoning capabilities, he continued to languish from the addition of the DLC characters and waning perception. All of this led to him falling to 33rd on the third tier list (this drop is notable for being the third-highest between the second and third tier lists). While other top-tier characters continued to have their competitive prospects developed, R.O.B. players have failed to propel his competitive prospects further, leaving his issues towards a large susceptibility to combos and difficulty in landing KO moves exacerbated further. As with the previous drop, he continued to fall behind in the metagame. Thus, this relegates him to 35th on the fourth tier list, although this current ranking for R.O.B. is rather solid as a mid-tier. | |||
{{ | |||
| | |||
| | |||
===[[Official Custom Moveset Project]]=== | ===[[Official Custom Moveset Project]]=== | ||
{{OfficialCustomMoves | {{OfficialCustomMoves | ||
| Line 333: | Line 472: | ||
|set10=1223 | |set10=1223 | ||
}} | }} | ||
===Most historically significant players=== | |||
<!--This character has a ten player limit for this section. Before adding and/or removing a player, read these guidelines: https://www.ssbwiki.com/SmashWiki:Notability#%22Most_historically_significant_players%22_guidelines --> | |||
''See also: [[:Category:R.O.B. players (SSB4)]]'' | |||
*{{Sm|8BitMan|USA}} | *{{Sm|8BitMan|USA}} - One of the best R.O.B. players in the world. Placed 4th at {{Trn|Glitch 2}}, 9th at {{Trn|The Big House 8}}, and 17th at {{Trn|CEO 2015}}, {{Trn|EVO 2015}}, and {{Trn|The Big House 6}} with wins over players such as {{Sm|Fatality}}, {{Sm|Samsora}}, and {{Sm|Salem}}. Ranked 8th on the [[South Florida Power Rankings]]. | ||
*{{Sm|Holy|Canada}} - The best R.O.B. player in Canada. Placed 1st at {{Trn|Get On My Level 2015}}, 2nd at both {{Trn|Canada Cup 2015}} and {{Trn|LAN WAR X}}, 9th at {{Trn|Welcome to the Oven}}, and 17th at {{Trn|Get On My Level 2016}}. Previously ranked 4th on the [[Montreal Power Rankings]]. | |||
*{{Sm|LoNg0uw|Germany}} - The best R.O.B. players in Europe. Placed 3rd at {{Trn|Tech Republic III}}, 7th at {{Trn|Smashdown World}}, 9th at {{Trn|Albion 3}}, and 13th at both {{Trn|B.E.A.S.T 7}} and {{Trn|Syndicate 2017}} with wins over players such as {{Sm|iStudying}}, {{Sm|Meru}}, and {{Sm|RobinGG}}. Ranked 5th on the [[German Power Rankings]]. | |||
*{{Sm|Mister Eric|USA}} - Placed 13th at both {{Trn|Smash 'N' Splash 2}} and {{Trn|Midwest Mayhem 8: North American Tour}}, 17th at both {{Trn|Apex 2016}} and {{Trn|Midwest Mayhem 6: SoCal Invasion}}, and 33rd at {{Trn|2GGC: Midwest Mayhem Saga}} with wins over players such as {{Sm|Logic}}, {{Sm|WaDi}}, and {{Sm|Wizzrobe}}. Ranked 4th on the [[Kentucky Power Rankings]]. | |||
*{{Sm|Holy|Canada}} | *{{Sm|OCEAN|Japan}} - The best R.O.B. player in Japan. Placed 5th at {{Trn|Sumabato 12}}, {{Trn|Umebura BenQ ZOWIE Cup}}, and {{Trn|Karisuma 19}}, and 9th at both {{Trn|Karisuma 16}} and {{Trn|SoCal Regionals 2018}} with wins over players such as {{Sm|Charliedaking}}, {{Sm|HIKARU}}, and {{Sm|Kisha}}. Ranked 96th on the [[JAPAN Power Rankings]]. | ||
*{{Sm|Raffi-X|USA}} - One of the best R.O.B. players in the world. Placed 3rd at {{Trn|Sea Crest Smash}}, 4th at both {{Trn|GUMS 14}} and {{Trn|Shift}}, 17th at {{Trn|Royal Flush}} and 25th at {{Trn|Shine 2018}} with wins over players such as {{Sm|Mr.E}}, {{Sm|Pink Fresh}}, and {{Sm|Raito}}. Ranked 10th on the [[New England Power Rankings]]. | |||
*{{Sm|Robo~Luigi|Spain}} - Placed 9th at {{Trn|B.E.A.S.T 7}}, 13th at both {{Trn|B.E.A.S.T 6}} and {{Trn|Tech Republic III}}, and 25th at both {{Trn|Syndicate 2016}} and {{Trn|Syndicate 2017}} with wins over players such as {{Sm|Afro Smash}}, {{Sm|Suntherion}}, and {{Sm|Tsuna|p=Germany}}. Ranked 4th on the [[Spanish Power Rankings]]. | |||
*{{Sm|LoNg0uw|Germany}} | |||
*{{Sm|Mister Eric|USA}} | |||
*{{Sm|OCEAN|Japan}} | |||
*{{Sm|Raffi-X|USA}} | |||
*{{Sm|Robo~Luigi|Spain}} | |||
==Trophies== | ==[[Trophies]]== | ||
{{Trophy/Fighter | |||
|name=R.O.B. | |||
|image-3ds=ROBTrophy3DS.png | |||
|image-wiiu=ROBTrophyWiiU.png | |||
|mode=Classic | |||
|desc-3ds-ntsc=This NES accessory was released in 1985, a groundbreaking system that controlled the robot via a game on the screen. In Smash Bros., R.O.B. has two projectile weapons and can use his rocket base to fly through the air. If you let his Robo Beam charge over time, it'll make for a powerful blast. | |||
|desc-wiiu-ntsc=This NES accessory was released in 1985—a groundbreaking system that controlled the robot via a game on the screen. In Smash Bros., R.O.B. has two projectile weapons and can use his rocket base to fly through the air. If you let his Robo Beam charge over time, it'll make for a powerful blast. | |||
|desc-pal=Released in Europe in 1986, R.O.B., a peripheral for the NES, was a little robot that responded to flashing lights in games. In this game, he can fire gyros and lasers at his enemies. He also has the ability to hover, which is handy for recoveries. Keep in mind that his Robo Beam can be charged up for an extra-powerful shot. | |||
|gamelist-ntsc={{Trophy games|console1=NES|game1=Nintendo Entertainment System Robotic Operating Buddy|release1=10/1985|console2=DS|game2=Mario Kart DS|release2=11/2005}} | |||
|gamelist-pal={{Trophy games|console1=NES|game1=R.O.B.|release1=09/1986|console2=DS|game2=Mario Kart DS|release2=11/2005}} | |||
}} | |||
{{clrl}} | |||
{{Trophy/Fighter | |||
|name=R.O.B. (Alt.) | |||
|image-3ds=ROBAltTrophy3DS.png | |||
|image-wiiu=ROBAltTrophyWiiU.png | |||
|mode=Alt | |||
|desc-ntsc=R.O.B.'s side smash, S3, fires a laser beam that does more damage up close. You can also aim it slightly up or down before firing. His down special Gyro sends a spinning top hurtling forward and can be charged for more damage. You can even dodge while charging! | |||
|desc-pal=R.O.B.'s side smash, S3, fires a laser beam that does more damage up close. You can also aim it slightly up or down before firing. His down special Gyro sends a spinning top hurtling forwards. While charging it up, you can move left or right to do a quick dodge, then continue charging where you left off! | |||
|gamelist-ntsc={{Trophy games|console1=NES|game1=Nintendo Entertainment System Robotic Operating Buddy|release1=10/1985|console2=DS|game2=Mario Kart DS|release2=11/2005}} | |||
|gamelist-pal={{Trophy games|console1=NES|game1=R.O.B.|release1=09/1986|console2=DS|game2=Mario Kart DS|release2=11/2005}} | |||
}} | |||
{{clrl}} | |||
{{Trophy/Fighter | |||
|name=Super Diffusion Beam | |||
|image=SuperDiffusionBeamTrophyWiiU.png | |||
|desc-ntsc=For R.O.B.'s Final Smash, he folds his arms down, transforms into an invincible cannon, and fires a huge beam that can be panned slowly up and down. The beam splits up partway through into smaller beams that drag foes to the center, where they'll be hit continuously. The assault finishes off with a single wide beam just for good measure. | |||
|desc-pal=For R.O.B.'s Final Smash, he folds his arms down, transforms into an invincible cannon and fires a huge beam that can be aimed slowly up and down. The beam splits up partway through into smaller beams that drag foes to the centre, where they'll be hit continuously. The assault finishes off with a single wide beam, just for good measure. | |||
|game=ssb4-wiiu | |||
}} | |||
{{clrl}} | |||
==In [[Event Match]]es== | ==In [[Event Match]]es== | ||
===Solo Events=== | ===Solo Events=== | ||
* '''[[All-Star Battle: Secret]]''': R.O.B. is one of the opponents fought in this event. All opponents are unlockable characters in previous ''Super Smash Bros.'' games. | * '''[[All-Star Battle: Secret]]''': R.O.B. is one of the opponents fought in this event. All opponents are unlockable characters in previous ''Super Smash Bros.'' games. | ||
* '''[[Mechanical Menace]]''': As {{SSB4|Shulk}}, the player must defeat a metal R.O.B., a metal {{SSB4|Mega Man}} | * '''[[Mechanical Menace]]''': As {{SSB4|Shulk}}, the player must defeat a metal R.O.B., a metal {{SSB4|Mega Man}} and [[Metal Face]] in a [[Stamina Mode|Stamina Battle]]. | ||
* '''[[Robotic Rampage]]''': R.O.B. is allied with two R.O.B.s and must defeat a giant metal R.O.B. | * '''[[Robotic Rampage]]''': R.O.B. is allied with two R.O.B.s and must defeat a giant metal R.O.B. | ||
| Line 393: | Line 530: | ||
==[[Alternate costume (SSB4)#R.O.B.|Alternate costumes]]== | ==[[Alternate costume (SSB4)#R.O.B.|Alternate costumes]]== | ||
R.O.B.'s default costume differs between the international and Japanese versions of ''SSB4''. In the American and PAL region versions, his default costume consists of his Nintendo Entertainment System (NES) color scheme; in the Japanese and Korean versions, his default costume consists of his Family Computer (Famicom) color scheme. This affects the color scheme of R.O.B.'s standard trophy, but not his appearances in the Sound Test for {{for3ds}} or the [[Special Orders]] tickets for {{forwiiu}}. His Final Smash trophy and Classic post-credits scenes in {{forwiiu}} also use his Famicom color scheme. Newly scanned R.O.B amiibo default to the language's default color instead of the color of the R.O.B amiibo, unlike other amiibo variants. | |||
{|style="margin:1em auto 1em auto;text-align:center" | {|style="margin:1em auto 1em auto;text-align:center" | ||
|- | |- | ||
| Line 411: | Line 550: | ||
R.O.B. amiibo.png|The NES design of R.O.B.'s amiibo. | R.O.B. amiibo.png|The NES design of R.O.B.'s amiibo. | ||
R.O.B. amiibo JP.png|The Famicom design of R.O.B.'s amiibo. | R.O.B. amiibo JP.png|The Famicom design of R.O.B.'s amiibo. | ||
R.O.B. unlock notice SSB4-3DS.png|R.O.B.'s unlock notice in {{for3ds}}. | |||
R.O.B. unlock notice SSB4-Wii U.png|R.O.B.'s unlock notice in {{forwiiu}}. | |||
SSB4 R.O.B. Screen-1.jpg|On [[Pilotwings]]. | SSB4 R.O.B. Screen-1.jpg|On [[Pilotwings]]. | ||
SSB4 R.O.B. Screen-2.jpg|Preparing to use his back aerial alongside {{SSB4|Meta Knight}} and {{SSB4|Donkey Kong}}. | SSB4 R.O.B. Screen-2.jpg|Preparing to use his back aerial alongside {{SSB4|Meta Knight}} and {{SSB4|Donkey Kong}}. | ||
| Line 424: | Line 565: | ||
==Trivia== | ==Trivia== | ||
*R.O.B.'s [[Boxing Ring]] English [[Boxing Ring#Character titles|title]] in ''Ultimate'' and the American version of ''Smash 4'', "The Last of His Kind", is a reference to the fact that R.O.B. is [[Ancient Minister|the only surviving member]] of [[R.O.B. Squad|his kind]] following the conclusion of ''Brawl''{{'}}s [[Adventure Mode: The Subspace Emissary]]. | |||
*R.O.B. is the only character in the series to have different default costumes in different regional releases of the same game. | |||
**Despite possessing different default costumes in different regions, the official website shows R.O.B.'s Famicom color scheme in official artwork, although half of the screenshots show his NES color scheme. | |||
**Despite | *Unlike in ''Brawl'', R.O.B. can now be rendered [[helpless]]. This can only be done if he lands on [[Pac-Jump]]'s trampoline while the trampoline is red. | ||
*Unlike in ''Brawl'', R.O.B. can now be rendered [[helpless]]. | *In the ''Wii U'' version of the game, since its release, R.O.B. cannot display emotion in the game's ''Smash'' mode, which is a visual glitch. However, he can properly emote in most other game modes, as well as on any mode in the ''3DS'' version of the game. | ||
* | *R.O.B.'s in-game portrait is the only one that does not briefly emit flashing sparkles when his [[charge]]able attack ([[Gyro]] in his case) is fully charged. | ||
*R.O.B.'s in-game portrait is the only one | *R.O.B.'s status as a video game peripheral is referenced in [[Palutena's Guidance#R.O.B.|Palutena's Guidance to Pit regarding R.O.B.]], in which Pit suggests calling him "Mr. HVC-012". HVC-012 is R.O.B.'s Japanese product ID.<ref>[https://images-na.ssl-images-amazon.com/images/I/41a%2Bb8n8t-L._SY355_.jpg Nintendo Famicom Family Computer ROBOT HVC-012 by Nintendo]</ref> | ||
*R.O.B.'s status as a video game peripheral is referenced in [[Palutena's Guidance#R.O.B.|Palutena's Guidance to Pit regarding R.O.B.]], in which Pit suggests calling him "Mr. HVC-012". HVC-012 is R.O.B.'s Japanese product ID.<ref>[https://images-na.ssl-images-amazon.com/images/I/41a%2Bb8n8t-L._SY355_.jpg Nintendo | |||
==References== | |||
{{reflist}} | |||
{{SSB4Characters}} | {{SSB4Characters}} | ||
{{R.O.B. universe}} | {{R.O.B. universe}} | ||
[[Category:R.O.B. (SSB4)| ]] | [[Category:R.O.B. (SSB4)| ]] | ||
[[Category:Trophies (SSB4-3DS)]] | [[Category:Trophies (SSB4-3DS)]] | ||
[[Category:Trophies (SSB4-Wii U)]] | |||
[[es:R.O.B. (SSB4)]] | |||
Latest revision as of 16:02, March 28, 2024
| R.O.B. in Super Smash Bros. 4 | |
|---|---|
  
| |
| Universe | R.O.B. |
| Other playable appearances | in Brawl in Ultimate |
| Availability | Unlockable |
| Final Smash | Super Diffusion Beam |
| Tier | D (35) |
R.O.B. (ロボット, Robot) is a playable character in Super Smash Bros. 4. After initially being leaked on August 19th, 2014 as part of the ESRB leak, his reappearance to the series was officially announced on SSB4's official website on October 9th, 2014, during which Ganondorf was also announced.[1]
R.O.B.'s realistic "beeping" robotic sounds from Super Smash Bros. Brawl are repurposed in Smash 4.
R.O.B. is ranked 35th out of 54 on the tier list, placing him in the D tier. This is a moderate drop from his placement in Brawl, where he was ranked 18th out of 38, and is his worst placement in the series to date. R.O.B. boasts his reowned strong zoning game and recovery: Robo Beam and Gyro are chargeable, long-ranged projectiles, while Robo Burner is versatile; covers impressive overall distance; and is complimented by his much faster air speed.
R.O.B. also possesses a strong air game, thanks to all excluding one of his aerials possessing disjointed hitboxes, alongside a capable grab game due to the useful applications of his throws. Despite being a heavyweight, R.O.B.'s overall mobility is also respectable. Notably, R.O.B.'s once poor KO potential has been significantly improved, thanks to receiving a number of strong KOing options.
However, R.O.B.'s grounded game lacks range compared to his air game. This is most obvious with his arm-based attacks, especially in regard to his overall grab, which is now the shortest-ranged in the game. While still remaining strong, R.O.B.'s zoning game has also been somewhat toned down; Robo Beam is slower and Gyro deals significantly less damage. R.O.B. is also susceptible to combos because of his heavy weight and large hurtbox. Lastly, his newfound KOing options are hindered by noticeable amounts of start-up lag and overall unsafety.
Overall, R.O.B. is a more powerful character compared to the previous game, thanks to him retaining all of his strengths and possessing noticeably improved KO potential; yet, the larger competition present and several of the tools the new characters possess, combined with the introduction of DLC characters, harm R.O.B more than in Brawl, thus resulting in a decline of his standing on the tier list relative to the cast. Despite that, R.O.B. still manages to maintain good success in the competitive scene due to gaining a number of dedicated players to his credit and acheiving impressive tournament results, such as the likes of Holy, LoNg0uw and especially 8BitMan.
How to unlock[edit]
Super Smash Bros. for Nintendo 3DS[edit]
- Play 70 VS Matches.
- Collect 200 unique trophies.
After completing one of the two methods, R.O.B. must then be defeated on PictoChat 2.
Super Smash Bros. for Wii U[edit]
- Play 60 VS Matches.
- Play through 10 rounds of Crazy Orders and defeat Crazy Hand.
After completing one of the two methods, R.O.B. must then be defeated on Wrecking Crew.
Attributes[edit]
R.O.B. is the tenth-heaviest character in the game, yet he possesses respectable overall mobility in spite of his weight class. This is thanks to his slightly above-average walking and average dashing speeds; above-average air, falling, fast falling speeds and air acceleration; high traction, jump and double jump; and low gravity. Altogether, these attributes allow R.O.B. to outmaneuver some of his fellow heavyweights; make him almost as mobile as a middleweight; and grant him better jumping prowess than most characters of either weight class.
Like in Brawl, R.O.B. is a zoning-oriented character with versatile projectiles to retain his opponents at bay. Robo Beam enables him to attack from considerable distance, and becomes the noticeably stronger Super Robo Beam when it is left idle for 14.3 seconds. While Robo Beam interrupts opponents faster, Super Robo Beam deals more damage and has higher knockback growth. Gyro is an auto-chargeable projectile that becomes an item when fired. Compared to Robo Beam, it has a more favorable angle for disrupting opponents, while also being more manipulable as a projectile and having greater KOing potential. Thanks to R.O.B.'s item throws being among the strongest in the game, Gyro is also extremely useful when smash thrown as an item.
Aside from his offensive prowess with projectiles, R.O.B. himself also does not have issues against projectiles, courtesy of Arm Rotor's ability to reflect them with greater strength than they initially had. In addition to its reflection ability, Arm Rotor now boasts KO potential, thanks to its finishing hit possessing significantly higher knockback growth.
R.O.B.'s air game is also strong, thanks to the excellent and disjointed ranges of all excluding one of his aerials. Neutral aerial has large, disjointed hitboxes that make it a reliable combo starter at low to medium percentages when SHFF'd, as well as a useful spacing option. In addition, the clean hit can KO at high precents while nearing the blast zones. Up aerial is one of R.O.B.'s best attacks in his entire kit overall, thanks to its usefulness in harassing airborne opponents by either juggling or KOing them. Back and down aerials are R.O.B.'s most damaging aerials when sweetspotted, and have large hitboxes like neutral aerial. However, they also boast specific strengths: the former has recovering potential thanks to it propelling R.O.B. forward slightly, whereas the latter is a meteor smash. Lastly, forward aerial is R.O.B.'s fastest aerial, which makes it reliable for spacing, especially when SHFF'd, as well as edge-guarding.
Unlike in Brawl, R.O.B. now boasts respectable KO potential, like his fellow heavyweights. Like his up aerial, back aerial, up throw and Arm Rotor, R.O.B.'s smash attacks now boast KO potential, thanks to being buffed in various ways. Forward smash's sweetspot deals slightly more damage and higher knockback. Although forward smash's other hitboxes deal less damage, they have been re-positioned farther outward, which improves its range. Up smash's sweetspot and down smash also deal more damage and, like forward smash, have had their hitboxes tweaked for the better: up smash now has hitboxes on R.O.B.'s arms that launch the opponent into its thruster hitboxes, whereas down smash is now a semi-spike.
R.O.B.'s outstanding grab game has also been improved. His set of grabs, while short-ranged, are each quick; and his pummel is characterized with quick speed. Forward and back throws are still limited in regard to utility, but are nevertheless decent for spacing and setting up edge-guards, as well as KOing at very high precentages at the edge. In comparison, R.O.B.'s up and down throws are much more useful. Up throw is his most damaging throw; a viable KOing option, especially when boosted by rage; and can even be used for combos at low percentages. In comparison, down throw deals respectable damage, and is a reliable combo starter into his up aerial from 0% to medium percentages.
Although R.O.B. possesses a number of noticeable strengths, he also has some noteworthy shortcomings. Despite his KO potential's drastic improvements, landing his KOing options can still be problematic because of them being laggy and/or possessing unimpressive ranges. The latter trait is especially noticeable in regard to R.O.B.'s arm-based attacks, most of which have hitboxes that have either become smaller and/or tweaked for the worse. For example, his grab game is hindered by his overall grab now being the shortest-ranged in the game because of his much smaller grabboxes, whereas his up tilt has drastically less utility because of its adjusted hitboxes.
In addition to the issues within R.O.B.'s hitboxes, his own hurtbox also hinders him, as it has become larger since Brawl. When coupled with his faster falling speed, he is much more susceptible to combo-oriented characters, such as Luigi and Zero Suit Samus. This is further compounded by his aerials' inability to reliably break combos: neutral and down aerials are too sluggish, forward and up aerials only hit in front of and above R.O.B., respectively, and back aerial has both slow start-up and only hits behind him.
While R.O.B.'s zoning game remains his greatest strength, the universal impact to projectile camping has somewhat toned it down. Gyro, in particular, has been the most adversely affected of his projectiles: in addition to retaining its susceptibility to being stolen, a fired Gyro deals drastically less damage and covers less range. The removal of glide tossing also significantly hinders its approaching potential. Robo Beam's nerfs are not as severe in comparison, but are nevertheless noticeable: it now deals slightly less damage, and both it and Super Robo Beam travel slower. As a a result of these nerfs, R.O.B. now has a more difficult time dealing with most characters that have better projectiles (such as Sheik and Diddy Kong); attacks that counteract his own projectiles (such as Fox and Falco); or both (such as Villager).
R.O.B.'s custom moves can alleviate several of his weaknesses. Wide Angle Beam, true to its name, can be aimed in a much wider arc, which enables R.O.B. to catch aerial opponents easily. However, it deals slightly less damage. Infinite Robo Beam, also true to its name, can be shot infinitely. This allows R.O.B. to use his zoning game constantly and defend himself. However, it also deals less damage, cannot ricochet, and Super Robo Beam needs to charge for longer. Reflector Arm acts like a traditional reflector, having a higher reflection multiplier and longer duration. However, R.O.B. will not move when using it, preventing him from pressuring the opponent.
Backward Arm Rotor has a shorter duration, but is a very effective defensive option, as it moves R.O.B. backward, and comes out much faster (contrary to what its description suggests). High-Speed Burner has less fuel, but allows R.O.B. to recover more easily due to its increased aerial movement. Robo Rocket functions like a traditional recovery move, launching R.O.B. upwards, and can even meteor smash. However, it cannot be used in bursts; covers less horizontal distance; and its meteor smash is weak. Fire Gyro deals more damage, but covers less distance when fired. Slip Gyro slides across the stage, making it more predictable, but trips opponents when the Gyro hits them, giving R.O.B. access to many follow-ups.
Overall, R.O.B. is a defensive, yet non-traditional heavyweight zoner that still possesses a strong zoning game, but now wields improved close-range offense. While R.O.B. now has to use close quarters combat more frequently because of his playstyle now being less reliant on his projectiles, he can now effectively KO opponents without having to rack up an outstanding amount of damage, a trait that all of his fellow heavyweights share. As a result, he has become a more potent character than he was in Brawl and has some dedicated and noteworthy mains to his credit, such as Holy, Mister Eric, and 8BitMan.
Changes from Super Smash Bros. Brawl[edit]
R.O.B. has received a mixture of buffs and nerfs in the transition from Brawl to Smash 4, but was noticeably nerfed overall. However, he has received noticeable buffs as well. The most prominent improvement was to his KO potential; several of his KO options in Brawl have become more powerful and/or slightly easier to land, while other moves have been strengthened as a whole to the point of possessing reasonable KO potential, such as his up aerial and down smash. R.O.B. has also received some benefits from the changes to Smash 4's mechanics, as the weakening of SDI improves the reliability of his multi-hitting moves and the changes to hitstun canceling and DI have improved his combo potential. R.O.B. also benefits from the introduction of rage as it further improves his KO power, while his solid recovery and heavy weight allow him to build up a high amount of rage. R.O.B.'s mobility has also improved significantly, especially in the air, sporting increased walking speed, dashing speed, air speed, falling speed, air acceleration, and gravity; in particular, the latter four are all above-average now, with the latter three no longer being among the lowest in the game, which makes him much more resilient.
However, R.O.B. also received some significant nerfs. His powerful zoning game has been impaired as his projectiles have seen some noticeable downgrades. Robo Beam travels significantly slower while Gyro is much weaker when fully charged and its firing rate is slower. R.O.B. was also one of the characters who was hindered the most by the removal of glide tossing, as it significantly hinders his approach with Gyros. This makes approaching more prominent, as R.O.B.'s camping and defensive game was significantly toned down. R.O.B. is a larger target and a fair amount of his moves have reduced range, making him an even easier target to hit. Further compounding this is his increased falling speed and gravity, as while it does make him a lot more resilient and makes it drastically easier for him to land, it gives him a high susceptibility to combos, especially considering the changes to hitstun canceling. R.O.B.'s overall frame-data has been nerfed as several of his attacks have increased startup lag, shorter durations, increased ending lag or all three. R.O.B.'s aerial game has also been toned down: R.O.B.'s short hop is also significantly lower, which greatly reduces his aerial output and his forward and back aerials have increased landing lag with the latter also possessing a much stricter auto-canceling window now, as well as his up and down aerials. While R.O.B. has much greater KO power, his existing KO moves have received some downgrades, making them harder to land, as many of them are noticeably laggier and some of them, especially forward smash and back aerial, now have significantly weaker sourspots. Neutral aerial is weaker in exchange for having more combo potential, forward aerial is weaker and has increased ending lag, back aerial is drastically laggier and possesses several new sourspots, up aerial deals much less damage (although it connects more reliably and the final hit is stronger) and down aerial is weaker. His recovery was also slightly nerfed overall, as while his air speed and air acceleration are drastically faster, Robo Burner travels slower and covers less distance while his aforementioned increased falling speed and slower back aerial further hinder his recovery.
Overall, while R.O.B.'s KO power is greater, it does not compensate for his worse zoning game combined with his worse frame-data, aerial game and recovery. R.O.B. is largely forced to engage in a mix of zoning and close quarters combat in order to score KOs and his worse frame-data, reduced range on multiple moves, larger size and increased susceptibility to combos do not help this matter. The changes to Smash 4's mechanics also do not benefit him as much as some other characters as the changes to hitstun canceling is considered a double-edged sword for him and he has seen some notably hindrances especially from the removal of glide tossing. R.O.B. does not even benefit from having a better matchup spread as while he has an easier time against some of the characters who gave him a difficult time in Brawl, such as Meta Knight, King Dedede, Falco and Olimar, due to their severe nerfs, this cannot be said for the entire cast and he has a very difficult time against Cloud, and Bayonetta. As a result, R.O.B. is considerably worse than in Brawl, although he still remains a relatively viable character.
Aesthetics[edit]
 R.O.B.'s design has slightly changed. His body now has a satin finish, instead of a polished finish; his gray-colored components are darker; his head is slightly smaller; and his eyes are slightly larger and have more defined lenses. Altogether, these changes make R.O.B. appear significantly more in-line with his appearance as a real-life video game peripheral.
- R.O.B. has received two new alternate costumes.
- R.O.B.'s default costume now changes depending on the language the game is set to. The Famicom color scheme (which was R.O.B.'s default costume in Brawl) is still the default in the Japanese, Chinese, or Korean versions. All other versions use his NES colors as the default instead. The non-default color scheme appears as the second costume in both cases.
- R.O.B. now faces the foreground at an angle instead of facing directly forward. He also typically faces the screen, regardless of whether he is facing left or right.
- R.O.B. is more expressive; he appears angry while charging his up and down smashes, and during his up and down throws and Arm Rotor. R.O.B. also appears sad when he is grabbed.

 R.O.B. does not emote whatsoever in Versus Mode. However, he emotes properly in most other game modes, such as Training Mode.
- R.O.B.'s mechanical sound effects are lower pitched.
- Arm-based attacks now emit visual trails that match R.O.B.'s selected color scheme.
Attributes[edit]
 R.O.B. is larger, making his hurtbox bigger and thus easier to hit. While this would also improve his overall range, this is slightly mitigated by some of his moveset possessing smaller hitboxes.
 R.O.B. walks faster (1.1 → 1.122).
- R.O.B. dashes faster (1.5 → 1.568), although he dashes slower relative to the cast.
- R.O.B.'s air speed is significantly faster (0.89 → 1.08).
- R.O.B.'s air acceleration is drastically higher (0.046 → 0.085), going from the third-slowest in the game to above-average. This also improves his recovery, as his midair jump still halts all his horizontal momentum in the air.
- R.O.B. falls significantly faster (1.2 → 1.6), with him receiving the second-largest increase out of the entire cast, only behind Lucario. Relative to the cast, his falling speed has gone from the 5th-worst in the game to above-average. As a result, he is no longer a floaty character. This significantly improves his vertical endurance, but makes him much more susceptible to combos.
- His fast-falling speed is also drastically faster (1.68 → 2.56).
- R.O.B.'s gravity is noticeably higher (0.065 → 0.09), going from the 7th-lowest in the game to above-average. When combined with his significantly increased falling speed, this substantially improves his ground-to-air transitioning and leaves him much less susceptible to juggling, but it also makes him more susceptible to combos, which is further exacerbated by the changes to hitstun canceling and his larger hurtboxes.
- R.O.B.'s item throw is stronger (0.9 → 1.02).
- Rolls have a longer duration (frames 4-15 → 4-16) and less ending lag (FAF 35 → 30).
- Rolls have a new animation where R.O.B. does not move as far into the Z-axis, allowing his opponents to punish his rolls sooner despite their increased intangibility.
- Air dodge has less startup (frame 4 → 3) and ending lag (FAF 40 → 33).
- Air dodge has a slightly shorter duration (frames 4-29 → 3-27).
- Spot dodge has more startup lag with a shorter duration (frames 2-20 → 3-17) and has more ending lag (FAF 26 → 27).
- Opponents gain much more height when footstooling off of R.O.B., making him much less susceptible to footstool-based combos.
- The changes to hitstun canceling both assist and hinder R.O.B.: it significantly improves his own combo potential, but it also makes him more susceptible to combos, especially when combined with his significantly increased falling speed, higher gravity, and larger hurtboxes.
Ground attacks[edit]
- Neutral attack:
- The second hit of neutral attack now has consistent base knockback (40/30 → 40).
- Both hits of neutral attack have a shorter duration (frames 3-6 → 3-4) and smaller hitboxes as all of their hitboxes excluding the main hitboxes have been removed, while their size (3u → 3.5u) and x/y/z offset (-1/0/-7 (both) → 0/10/12.5 (hit 1), 0/7.7/13 (hit 2)) were not fully compensated. This also means that the first hit always launches vertically (100°/361° → 100°), removing the near hit's ability to lock opponents.
- Neutral attack has updated sound effects.
- Forward tilt:
- Forward tilt has more ending lag (FAF 30 → 34).
- Up angled forward tilt has smaller hitboxes (4.2/4/3.5/4.2u → 4/3.8/2.5/4u).
- Up tilt:
- Arms' tip and arms' base up tilt have significantly smaller hitboxes. Up tilt also has a shorter duration (frames 4-8 → 4-7).
- Tip up tilt has a slightly larger hitbox.
- Down tilt:
- Down tilt deals consistent damage (4%/5% → 5%).
- Down tilt now has one extended hitbox rather than four separate hitboxes.
- Down tilt has a smaller tripping chance (40% → 20%).
- Dash attack:
- Dash attack deals 2% more damage (6% (arms)/5% (arms' tips) → 7%), deals more knockback (70/65/60 (base), 50 (scaling) → (70/65)/70) and has increased range, improving its spacing potential.
- Dash attack has more ending lag (FAF 31 → 36).
- Forward smash:
- Base forward smash deals 1% more damage (14% → 15%) and has increased knockback (30 (base), 95 (scaling) → 32/100), improving its KO potential.
- Forward smash also has a slightly larger hitbox, and its mid and tip hitboxes have been re-positioned farther outward. Altogether, these changes improve its range.
- Mid and tip forward smash deal less damage (13% (mid)/12% (tip) → 11.5%/6%) hindering their KO potential despite their higher knockback and have smaller hitboxes. Forward smash also has increased startup (frame 13 → 16) and ending lag (FAF 39 → 55).
- Forward smash's animation has changed. R.O.B. now leans forward and positions his arms downward for support in order to fire the optical energy blast. His head also now rotates when it is charging.
- Forward smash has updated sound effects.
- Up smash:
- Up smash's sweetspot is now placed on R.O.B.'s base while the sourspot is now the tip. This makes up smash a more powerful KO option against grounded opponents, but hinders its use as an anti-air.
- Up smash's 12% sourspot has been removed. Its hitboxes have also been re-positioned further upward, improving its range.
- Up smash has a new initial hit, which deals 3% and launch opponents at 111°. These changes significantly improve its reliability, giving up smash less startup lag (frame 12 → 10) and grant it out of shield potential.
- Up smash has less knockback scaling (100 → 98), hindering its KO potential. It also has a smaller hitbox.
- Up smash's main hit has increased start-up lag (frame 12 → 14) and up smash has increased ending lag (FAF 44 → 49).
- The removal of DACUS also slightly hinders up smash's approaching potential.
- Down smash:
- Down smash's final hit deals more knockback (90 (base), 105 (scaling) → 37/160), significantly improving its KO potential. It also has larger hitboxes.
- Due to its angle being altered (70° → 33°), down smash is now a semi-spike, significantly improving its edge-guarding potential.
- The weakening of SDI makes down smash significantly more difficult to escape from.
- It has increased startup (frame 4 → 7) and ending lag (FAF 35 → 46).
- The multi-hits no longer deal consistent damage (2% → 2%/1.5%)
Aerial attacks[edit]
- Neutral aerial:
- Neutral aerial deals 2% less damage (10% → 8% (base)/6% (tip)) and has decreased knockback scaling (108 → 100 (base)/98 (tip)). When coupled with the changes to hitstun canceling, these changes grant and improve its combo potential. However, these changes significantly hinder its damage-racking and KO potential.
- Neutral aerial has smaller hitboxes (8.0u/6.0u/4.0u → 7.0u/5.0u) and has lost the hitbox that launches opponents at an 80° angle.
- Forward aerial:
- Forward aerial has decreased start-up lag (frame 7 → 6).
- Forward aerial deals less damage (10% (clean)/6% (late) → 7%). While this improves its wall of pain potential at higher percents combined with R.O.B.'s higher air speed, it significantly hinders its safety at lower percents and its KO potential.
- It has a smaller hitbox, a shorter duration due to the removal of the late hit (frames 7-17 → 6-7) and more ending lag (FAF 32 → 36). Its higher ending lag, combined with R.O.B.'s lower short hop, prevents R.O.B. from performing another aerial after it in a short hop.
- It has more landing lag (12 frames → 15).
- Back aerial:
- Clean back aerial has more base knockback compared to the previous hitbox (30 → 32), improving the clean base's KO potential.
- Back aerial's hitboxes are positioned farther outward, improving its range.
- It propels R.O.B. slightly farther, improving its recovery potential (although this is nullified by back aerial's increased lag).
- Due to consisting of sweetspots and sourspots instead of a consistent hitbox, back aerial no longer deals consistent damage (11% → 12% (clean base)/10% (clean tip)/6% (late base)/4.5% (late tip)).
- While the clean base is stronger, all other hitboxes are weaker, making back aerial a much more difficult aerial to utilize.
- Back aerial has more startup lag with a shorter duration (frames 11-25 → 19-23 (clean)/24-29 (late)), and has more ending ending lag (FAF 40 → 53), which is further exacerbated by its worse auto-cancel window (frame 26 → 46).
- It has much more landing lag (12 frames → 22).
- Up aerial:
- Up aerial's last hit deals 1% more damage (3% → 4%), has increased knockback (60 (base), 120 (scaling) → 45/180), and launches at a higher angle (60 → 70), granting it KO potential.
- The weakening of SDI makes up aerial significantly more difficult to escape from.
- Up aerial's loop hits deal less damage (4%/5% → 1.5%), which greatly decreases its overall damage potential (19%/20% → 10%).
- Up aerial auto-cancels later (frame 36 → 40), now only doing so at the peak of a short hop.
- Down aerial:
- Mid down aerial deals 2% less damage (13% → 11%) and its knockback was not fully compensated (30 (base), 100 (scaling) → 20/110). The mid hit is now the only hit which can meteor smash opponents hindering its edgeguarding potential. The sweetspot also has a shorter duration (frames 20-24 → 20-21).
- Down aerial has received a late hitbox that deals 8% and launches at 361°. This lengthens its duration (frames 20-24 → 20-26), but makes it more susceptible to punishment at low to medium percentages.
- Down aerial has slightly larger hitboxes, and its hitboxes have been re-positioned farther downward. These changes improve its range. When coupled with the updated edge mechanics and the removal of meteor canceling, these changes also significantly improve its reliability.
- Mid down aerial no longer meteor smashes grounded opponents (280°/80° → 80°/45°). These changes improve its KO potential but remove its ability to trip.
- Down aerial auto-cancels later (frame 27 → 45), significantly hindering its use as a landing and spacing tool.
Throws/other attacks[edit]
- Grab:
- All grabs have significantly smaller grabboxes (4.5/3.5u (standing/dash), 4.5/4/3.5u (pivot) → 2.8u (standing/pivot)/2.2u (dash)) and only have one grabbox instead of two. Altogether, R.O.B.'s grab now has the worst range in the game.
- Standing and pivot grabs have increased start-up lag (frame 6 → 7 (standing), frame 10 → 11 (pivot)).
- Forward throw:
- Forward throw deals 2% less damage (10% → 8%).
- Up throw:
- Up throw deals 2% more damage (10% → 12%), although with compensation on knockback (70 (base), 72 (scaling) → 60/70).
- The changes to hitstun canceling combined with its altered knockback grant up throw combo potential at low percentages to medium percentages.
- Down throw:
- The changes to hitstun canceling also significantly improve down throw's combo potential at low to medium percentages.
- Edge attack:
- R.O.B. has a new edge attack, a fiery blast from his thrusters.
Special moves[edit]
- Robo Beam:
- Uncharged Robo Beam deals 2% more damage (5% → 7%).
- Robo Beam deals less damage (5% → 4.5%).
- Super Robo Beam deals 1% more damage (9% → 10%). It also charges six seconds faster (1220 frames → 860).
- Robo Beam and Super Robo Beam travel slower.
- Super Robo Beam's visual effects have changed. It is now wide and whitish yellow with a whitish crimson outline and cerulean trail, instead of being thin and whitish crimson.
- Arm Rotor:
- Arm Rotor now deals consistent damage (1%/2% (loop)/3%/4% (last) → 1%/3%).
- Arm Rotor now has a finishing hit, making it less punishable. The final hit has increased knockback (40/50 (base), 120 (scaling) → 40/210), granting it KO potential.
- Arm Rotor now covers significantly more distance when moved forward or backward, improving its approaching potential and safety.
- The weakening of SDI makes Arm Rotor significantly more difficult to escape from.
- Robo Burner:
- Robo Burner has slightly higher initial upwards acceleration (0.13 → 0.14).
- Robo Burner has increased gravity (0.05 → 0.065).
- Because of this, repeated bursts cover less distance.
- Robo Burner has less fuel (150 frames → 130).
- R.O.B.'s air speed is much lower when using Robo Burner (1.3 → 0.7).
- Robo Burner's additional air acceleration is lower (0.025 → 0.02).
- Robo Burner's fuel refills at a much slower rate (1.8 → 0.5).
- Altogether, these changes hinder Robo Burner's recovery potential.
- Gyro:
- Fully charged Gyro deals 8% less damage (18% → 10%) when fired. Gyro's firing range has also decreased.
- Gyro's animation has changed. R.O.B. now recoils slightly when failing to pull a Gyro from his base. This new animation is significantly laggier.
- Gyro has updated sound effects. It now emits a whirring sound while spinning by itself on-stage.
- The removal of glide tossing significantly hinders Gyro's approach potential.
- Super Diffusion Beam:
- R.O.B. has a new Final Smash, Super Diffusion Beam. R.O.B. re-configures his body into a cannon-like form in order to fire a large laser that fans out into smaller lasers that trap the opponent before concluding and then being immediately followed by a large energy blast. Compared to Diffusion Beam, Super Diffusion Beam deals less damage overall and has a shorter duration, but deals more knockback and has more range.
- Unlike Diffusion Beam, Super Diffusion Beam forces R.O.B. to be stationary throughout its duration.
- The regenerating terrain glitch has been fixed.
Update history[edit]
Like Mario and Pit, R.O.B. has received a very small number of direct changes from game updates. Update 1.0.4's changes to LSI indirectly buffed him by enabling his Beep Boop combo (down throw → up aerial) to function past low percentages, and become one of the game's most infamous 50/50 KO combos out of grab. However, update 1.0.6 notably decreased the knockback of R.O.B.'s up throw, with it now KOing roughly 15-20% later; previously, it was the strongest up throw in the game, and the second strongest throw of any kind after Ness' back throw.
Despite this, up throw remains a powerful KOing option and one of the best KO throws, especially on stages with platforms. Its lower base knockback also granted it combo potential at low percentages; when coupled with its lower base knockback and launch angle, its combos are more varied compared to down throw's (which can especially just combo into up aerial regardless of percent), such as being able to combo into up smash and forward aerial, which can additionally more easily lead into farther followups. As a result, up throw can now be used to perform more damaging combos at low percents compared to what down throw can do, while additionally conserving the freshness of both down throw and up aerial for more powerful Beep Boops later on.
Update 1.1.1's increase to shieldstun indirectly nerfed R.O.B.; in addition to making his relative shield safety among the cast less impressive because of his moves possessing low damage output or being projectiles (and thus saw less increase to their shieldstun than most other characters' moves), getting grabs that he was heavily dependent on to KO became remarkably more difficult, especially with his already terrible grabbing range that made shield grabbing difficult even before the shieldstun patch. Lastly, update 1.1.4 marginally increased the size of R.O.B.'s hurtboxes and decreased his tripping stance's invincibility frames by standardizing it, though these had a negligible impact on his viability.
Although updates 1.1.3 to 1.1.6 notably nerfed some of R.O.B.'s more difficult matchups, such as Bayonetta, Cloud, Sheik, and Zero Suit Samus, they nevertheless remained difficult, with Bayonetta and Cloud in particular remaining a severe problem for R.O.B. as they became the meta's most dominant characters. On a related note, buffs to other characters in these updates have also made many of R.O.B.'s other matchups less favorable, most notably Lucina, Marth, and Mewtwo. Due to remaining relatively static throughout Smash 4's lifespan, while DLC introduced largely unfavorable matchups and most of the cast becoming stronger via game updates, R.O.B. became less viable by the end of Smash 4's development than he was during the initial release of Smash for Wii U.
![]() 1.0.5
1.0.5
- Removed a glitch where throwing Gyro upward while using Robo Burner could cause the flames to continue emitting from R.O.B.'s base after Robo Burner concluded.
- Up throw deals less knockback (70 (base), 72 (scaling) → 60/70). This significantly hinders its KO potential, making it KO about 15-20% later.
- This reduced base knockback however granted R.O.B. access to more damaging throw combos at lower percents to improve his early damage racking capabilities. Most R.O.B. players however do not consider this enough to make up for the move's reduced KO potential.
- Trip invincibility and all trip followups except floor attack have one less frame of invincibility.
- R.O.B.'s hurtbox sizes have been increased and adjusted.
Technical changelist 1.1.4
| Change | Old value | New value |
|---|---|---|
| Hurtbox 0 X-axis offset/stretch | 0.9 | 0.7 |
| Hurtbox 0 size | 3.2 | 3.4 |
| Hurtbox 1 size | 3.8 | 4.0 |
| Hurtbox 4 size | 3.3 | 4.0 |
| Hurtbox 5 Y-axis offset | 4.0 | 3.8 |
| Hurtbox 5 Y-axis stretch | -4.0 | -3.8 |
| Hurtbox 5 Z-axis offset/stretch | -3.5 | -3.3 |
| Hurtbox 5 size | 2.6 | 2.9 |
| Hurtbox 6 Y-axis offset | 4.0 | 3.8 |
| Hurtbox 6 Y-axis stretch | -4.0 | -3.8 |
| Hurtbox 6 Z-axis offset/stretch | -3.5 | -3.3 |
| Hurtbox 6 size | 2.6 | 2.9 |
Moveset[edit]
For a gallery of R.O.B.'s hitboxes, see here.
| Name | Damage | Description | ||
|---|---|---|---|---|
| Neutral attack | 3% | Two alternating hooks. Both of its hits hit on frame 3, which ties it with down tilt as R.O.B.'s fastest attack. Its first hit has almost nonexistent base knockback, average knockback growth and launches at 100°, all of which allow it to jab cancel. Its most reliable follow-up is down tilt, thanks to it also hitting on frame 3, although it can also jab cancel reliably into forward tilt, smash attacks, or a grab. The tilt attack follow-ups can be performed up to high percentages, while the smash attack and grab follow-ups can be performed on lightweights and middleweights beginning at 80%-85% and heavyweights beginning at 110%-115%. However, it cannot jab cancel reliably against fast-fallers. Conversely, its second hit has very high knockback growth and launches at 361°, which make it useful for spacing. | ||
| 3% | ||||
| Forward tilt | 8% (arm's tip), 6%/5% (arm) | A lunging hook. It can be angled and the tip of R.O.B.'s arm is decent for spacing beginning at 50%. | ||
| Up tilt | 3% (early), 5% (clean tip), 6% (clean base) | Thrusts his arms upward. It is good for starting combos into itself, up smash and up aerial from low to medium percentages, or functioning as an anti-air attack. However, it has very minimal horizontal range, which forces R.O.B. to practically stand next to a grounded opponent in order to land it. | ||
| Down tilt | 5% | Thrusts his arms at a low angle. It hits on frame 3, which ties it with neutral attack as R.O.B.'s fastest attack. Although it has a small chance to trip opponents, its overall quick speed considerably offsets this and makes it an excellent set-up option. | ||
| Dash attack | 8% (arms), 7% (arms' tips) | A double forearm club. It can be followed up with forward aerial if the opponent's reaction is read properly. | ||
| Forward smash | S3 | 15% (base), 11.5% (mid), 6% (tip) | An optical energy blast, similar to the uncharged Robo Beam. It can be angled; has very high knockback growth; and its base hitbox deals respectable damage. Altogether, these enable it to KO middleweights at 109% near the edge. Although slightly weaker, its middle hitbox is still strong enough to KO middleweights at 136% near the edge. However, its range is merely average at best, it has high ending lag and the blast's tip has extremely minimal KO potential. | |
| Up smash | 3% (arms), 14% (base), 13% (tip) | Performs a handstand and activates his thrusters to emit a fiery blast upward. It hits on frame 10, which is somewhat quick for a smash attack. It also has deceptive horizontal range on the ground, thanks to R.O.B.'s arms possessing hitboxes that launch opponents into the thrusters' hitboxes, the latter of which are fairly powerful. Its base KOs middleweights at 113%, whereas its tip KOs them at 116%. Altogether, these traits make it a reliable KOing option, especially from out of shield because of R.O.B.'s high traction. However, it has high ending lag. | ||
| Down smash | 2% (hits 1-4 base), 1.5% (hits 1-4 tip), 5% (hit 5) | Lowers his torso and spins it around rapidly while outstretching his arms to perform a series of discus clotheslines, comparatively like Arm Rotor. It hits on frame 7, which is disproportionately quick for a smash attack. Thanks to it being a semi-spike and its last hit's very high knockback growth, it KOs at middleweights at 129% while near the edge o fFinal Destination, and is very effective for edge-guarding. However, its base hitboxes launch the opponent behind R.O.B., which means that he must face away from the edge when attempting to use this move in order to properly launch the opponent off-stage. Like forward and up smash, it also has high ending lag. | ||
| Neutral aerial | 8% (base), 6% (tip) | Activates his thrusters to somersault and emit a fiery blast in a circular motion. Its large hitbox, very minimal landing lag and ability to auto-cancel with a short hop collectively make it very useful for spacing, approaching and starting combos. Due to it hitting on frame 18, however, it is punishable if it is not spaced properly. Although its power has been drastically reduced since Brawl, the tip hitbox still has KO potential, as it KOs middleweights at around 130% near the left/right blast lines. | ||
| Forward aerial | 7% | A double forearm club. It hits on frame 6, making it R.O.B.'s fastest aerial. It is also ideal for spacing when SHFF'd, has minimal landing lag and is decent for edge-guarding and leading to a wall of pain. However, it lacks KO potential because of its average damage output and minimal base knockback. It is also R.O.B.'s only aerial that lacks a disjointed hitbox. | ||
| Back aerial | 12% (clean base), 10% (clean tip), 6% (late base), 4.5% (late tip) | Leans forward and activates his thrusters to emit a fiery blast behind himself. Its clean base hitbox is strong enough to KO middleweights at 126% while near the edge of Final Destination, thanks to its respectable damage output and very high knockback growth. It is also useable for horizontal recovery, as it slightly propels him forward and does not consume Robo Burner's fuel. It can auto-cancel in a short hop due to it altering R.O.B's momentum, but due to it hitting on frame 19 and possessing high ending lag and 22 frames of landing lag, it is very slow and punishable if it is not spaced properly and auto-canceled. | ||
| Up aerial | 1.5% (hits 1-4), 4% (hit 5) | Rapidly rotates his arms upward. It hits on frame 7, making it R.O.B.'s second-fastest aerial. It is down throw's most reliable follow-up from low to medium percentages. It is also useful for juggling and KOing, as its loop hits maintain the opponent trapped reliably, whereas its last hit's extremely high knockback growth enables it to KO middleweights at 115% while near the upper blast line. It can also auto-cancel with a short hop. However, it has 22 frames of landing lag like back aerial, which makes it punishable if it is not auto-canceled. | ||
| Down aerial | 12% (clean base), 11% (clean mid), 6% (clean tip), 8% (late) | Activates his thrusters to emit a fiery blast downward. The middle portion of the blast is a powerful meteor smash, which makes it a very potent edge-guarding option, especially after an edge trump if the opponent re-grabs the edge. It briefly stalls R.O.B's momentum, allowing it to auto-cancel in a short hop. Due to it hitting on frame 20 and possessing 43 frames of ending lag, it is R.O.B.'s slowest aerial. When coupled with its 21 frames of landing lag, it is punishable if it is not spaced properly and auto-canceled. | ||
| Grab | — | Clinches the opponent. Due to his grabboxes being significantly smaller than in Brawl, R.O.B.'s overall grab is the shortest-ranged in the game, especially compared to R.O.B.'s size similar to Ganondorf. However, R.O.B.'s grabs are extremely quick, and his grab is still somewhat prominent, as up throw and down throw can combo into aerials, and both can KO, the latter with the "Beep Boop" setup, and the former with its high knockback growth. | ||
| Pummel | 2% | Squeezes the opponent. A fairly quick pummel. | ||
| Forward throw | 8% | Shoves the opponent forwards. It can be used to set up an edge-guard. It can KO middleweights at around 190% at the edge of Final Destination. | ||
| Back throw | 10% | Flings the opponent backwards. Like his forward throw, it is useful for setting up an edge-guard or being a KO option neaar the edge. It can KO middleweights at around 155% by the edge of Final Destination. | ||
| Up throw | 12% | A jumping reverse piledriver. R.O.B.'s strongest throw and, prior to update 1.0.6, it was the strongest up throw in the game, as it was capable of KOing under 150%. As of update 1.0.6, it now KOs middleweights at 174%, although platforms assist its KO potential considerably: it KOs middleweights at 160% when performed on Battlefield's low platforms, and KOs them at 145% when performed on Battlefield's top platform. Although rare, R.O.B. can also perform up throw for a sacrificial KO if it is performed on a moving platform, as he will continue performing the throw all the way to the lower blast line if there is no platform to stop his descent. In addition to its KO potential, it has combo potential thanks to it launching at 80°, with its follow-ups being an upward-angled forward smash, dashing up smash, forward aerial, and up aerial from 0%-40%. However, its smash attack-combos are most reliable against heavyweights and fast-fallers. | ||
| Down throw | 10% | Drills the opponent into the ground headfirst. It has very high base knockback, minimal knockback growth and launches at 88°, which collectively enable it to combo into neutral and up aerials at low to medium percentages. The latter combo has been nicknamed the "Beep Boop" and can even function as a KO set-up at high percentages if R.O.B. can properly read the opponent's reaction. However, its neutral aerial-combo is only reliable beginning at 0%, whereas the "Beep Boop" can be avoided if the opponent DIs horizontally after being thrown. | ||
| Forward roll Back roll Spot dodge Air dodge |
— | — | ||
| Techs | — | — | ||
| Floor attack (front) Floor getups (front) |
7% | Punches around himself while getting up. | ||
| Floor attack (back) Floor getups (back) |
7% | Punches in front of himself and then behind himself while getting up. | ||
| Floor attack (trip) Floor getups (trip) |
5% | Spins his torso around to throw a low-angled hook around himself while getting up. | ||
| Edge attack Edge getups |
7% | Swings his base forward and activates his thrusters to emit a fiery blast forward while climbing up. | ||
| Neutral special | Default | Robo Beam | 7% (uncharged), 4.5% (Robo Beam), 11% (point-blank Robo Beam), 10% (Super Robo Beam), 17% (point-blank Super Robo Beam) | Fires an optical laser. When uncharged, it is a minimal energy blast instead of a laser, and can only damage opponents at point-blank range. However, it can be fired consecutively and has deceptively high knockback growth, which allow it to ward off nearby opponents. Conversely, both Robo Beam and Super Robo Beam can damage opponents from afar and ricochet, but cannot be fired consecutively. Robo Beam and Super Robo Beam also deal noticeably more damage when fired at point-blank range. It is one of R.O.B.'s options for zoning alongside Gyro, with Robo Beam being better for his neutral game, while Super Robo Beam is better for surprising opponents. It and all of its custom variations have transcendent priority. Uncharged Robo Beam becomes Robo Beam after being left idle for 2.6 seconds (160 frames), and Robo Beam becomes Super Robo Beam after being left idle for 14.3 seconds (860 frames). |
| Custom 1 | Wide-Angle Beam | 7% (uncharged), 3.5% (Robo Beam), 10% (point-blank Robo Beam), 8% (Super Robo Beam), 15% (point-blank Super Robo Beam) | R.O.B. can aim on a much wider arc, albeit at the expense of Robo Beam and Super Robo Beam possessing slightly lower damage outputs. Fully charged shots are much quicker and stretch across the screen. | |
| Custom 2 | Infinite Robo Beam | 3%/2% (Robo Beam), 7% (point-blank Robo Beam), 10% (Super Robo Beam), 14% (point-blank Super Robo Beam) | Robo Beam can be fired consecutively, albeit at the expense of a lower damage output, shorter range and its ability to ricochet. These drawbacks also apply to Super Robo Beam, which also takes longer to charge. | |
| Side special | Default | Arm Rotor | 1% (loop, hits 1-20~), 3% (last), 1.5× (reflected projectiles) | Rapidly spins his torso around to perform a series of discus clotheslines that concludes with an uppercut. Mashing the special button extends the duration of the move. Propels R.O.B forward slightly and hovers somewhat in mid-air. Unlike in Brawl, it can trap opponents reliably and its last hit has KO potential, thanks to its extremely high knockback growth enabling it to KO middleweights at 147% while near the edge of Final Destination. It can also reflect projectiles with 50% more power than their original power, and move R.O.B. forward or backward while the control stick/circle pad is tilted in the respective direction. It and all of its custom variations have transcendent priority. |
| Custom 1 | Reflector Arm | 2% (loop), 4% (last), 1.8× (reflected projectiles) | Quicker, stronger, and reflects projectiles with 80% more power in comparison to their original power, albeit at the expense of immobilizing R.O.B upon performance, and the hits knock opponents away instead of trapping them. | |
| Custom 2 | Backward Arm Rotor | 2% (hit 1), 4% (hit 2), 1.5× (reflected projectiles) | Deals more damage and moves R.O.B. backward while it is being performed, making it better suited for defense, albeit at the expense of possessing a significantly shorter duration overall. | |
| Up special | Default | Robo Burner | — | Activates his thrusters in order to fly. When combined with R.O.B.'s high aerial mobility, it grants impressive vertical and horizontal recovering distance, although R.O.B. has a set amount of fuel for usage in order to perform this move. Fuel is recovered overtime as long as R.O.B. is grounded. Tilting the control stick up repeatedly instead of holding the special button while flying can conserve fuel better and allow R.O.B to travel farther. It is one of the few up specials to not cause helplessness, as it can be canceled any time by executing an aerial attack, after which R.O.B can reactivate it or perform other moves. Otherwise, R.O.B. cannot perform other special moves, fast fall, or air dodge while using the Burner. R.O.B. is also immune to footstool jumps while using this move, although other characters can still jump off of him regardless. It also grants intangibility on frames 2-4, but only when performed on the ground. |
| Custom 1 | Robo Rocket | 5% (early), 8% (clean) | Functions like a traditional recovering move, as R.O.B. simply ascends quickly and gains a small hitbox. It grants outstanding vertical recovery after a jump; does not cause helplessness; can be followed up with any aerial; and can meteor smash if it hits the opponent precisely. However, it grants almost nonexistent horizontal recovering distance. Like Robo Burner, R.O.B must perform an aerial attack in order to fast fall, air dodge, or use his other specials as follow-ups. Additionally, its meteor smash has below-average power. | |
| Custom 2 | High-Speed Burner | — | Grants faster movement speed, albeit at the expense of consuming more fuel. | |
| Down special | Default | Gyro | 1% (base), 4%-10% (top), 5% (idle top), 8% (thrown) | Charges a spinning top on his base. R.O.B.'s other zoning option alongside Robo Beam, it can be picked up and thrown as an item after making contact with either the opponent or the stage. However, opponents can perform the same and thus utilize the top against him. Gyro requires 1.5 seconds (90 frames) to fully charge. Only a single Gyro can be active at a time, and attempting another will result in R.O.B. flailing in confusion. It lasts longer when launched with the special button, but once picked up and thrown, it dissipates almost immediately. Typically, Gyro deals little knockback when touched, albeit enough to harass opponents attempting to get past. In comparison, it will somewhat launch opponents a short distance toward R.O.B. after being thrown and making contact with the ground again. This enables it to partake in combos if R.O.B. is able to time his attacks and predict his opponent's movements. Due to being an item, however, it can also be grabbed by an opponent and thus used against R.O.B. |
| Custom 1 | Fire Gyro | 7% (base), 3%-12% (top), 6% (idle top), 10% (thrown) | The top is a flame and deals more damage, albeit at the expense of covering less distance and possessing increased ending lag. | |
| Custom 2 | Slip Gyro | 2% (base), 3% (top), 3% (idle top), 9% (thrown) | The top slides along the ground instead of bouncing, enabling it to trip opponents. The longer it is charged, the farther it travels. While its base and thrown damage outputs are slightly higher, the top's damage output is lower. | |
| Final Smash | Super Diffusion Beam | 0.5%/1% (narrow laser loop/last), 1%/2% (wide laser loop/last), 10% (blast) | Re-configures his body into a cannon-like form in order to fire a large laser that fans out into smaller lasers. These lasers trap the opponent and deal damage, before paralyzing trapped victims and ending with a large energy blast. It is excellent for damage-racking and can be angled, comparatively like Zero Laser. Its blast is also quite powerful, as it KOs middleweights at 70% while near the edge of Final Destination. | |
Stats[edit]
| Stats | Weight | Dash speed | Walk speed | Traction | Air friction | Air speed | Air acceleration | Gravity | Falling speed | Jumpsquat | Jump Height | Double jump Height |
|---|---|---|---|---|---|---|---|---|---|---|---|---|
| Value | 106 | 1.3 – Initial dash 1.568 – Run |
1.122 | 0.06 | 0.015 | 1.08 | 0.04 – Base 0.045 – Additional |
0.09 | 1.6 – Base 2.56 – Fast-fall |
5 | 38 - Base 18.378603 - Short hop |
38 |
Announcer call[edit]

English
Japanese/Chinese
On-screen appearance[edit]
- Portions of R.O.B.'s body descend from the sky and assemble together.

|
|---|
Taunts[edit]
- Up taunt: Faces the screen, and then spins his head and torso in a circle.
- Side taunt: Faces the screen, and sways his head around in an arc while emitting flashing sparkles from his eyes.
- Down taunt: Faces the screen, and moves his torso down to his base before spinning it back up into place.
| Up taunt | Side taunt | Down taunt |
|---|---|---|

|

|

|
Idle poses[edit]
- Briefly looks toward the screen.
- Briefly nods off, then shakes his head and wakes up.
 |

|
|---|
Crowd cheer[edit]
| English | Japanese | |
|---|---|---|
| Cheer | ||
| Description | R-O-B! | Ro-bot! |
| Pitch | Group chant | Group chant |
Victory poses[edit]
- Performs Robo Burner, spins and then lands, after which, his torso lowers and slowly elevates back into place while spinning his head.
- Rears back his arms, then rotates them into a vertical position while spinning his head, after which he performs a cheering gesture while continuing to spin his head.
- Sways his head around while emitting flashing sparkles from his eyes, then slightly adjusts his arms and torso. It is almost identical to his side taunt.
 |
 |

|
|---|
In competitive play[edit]
Tier placement and history[edit]
Thanks to his potent zoning and grab games, R.O.B. was initially considered a high-tier character during SSB4's release, comparatively to initial perceptions of him during the early days of Brawl's metagame, where he was considered one of the best characters in the game. However, after update 1.0.6 nerfed his up throw's power, his reputation declined to the point that he was perceived as a mid-tier character. Nevertheless, R.O.B.'s representation in competitive play remained decent, while he continued to enjoy decent placements thanks to mains such as 8BitMan, OCEAN, and Raffi-X. This resulted in him being ranked 20th on the first tier list.
However, other characters like Donkey Kong, Lucario and, most notably, Toon Link, have achieved much stronger results than R.O.B. To further compound this, R.O.B. has become rarer in competitive play due to having unfavorable matchups against all excluding one of the DLC characters. This decline in popularity and results would end up with R.O.B. being ranked 28th on the second tier list. Without significant breakthroughs against his unfavorable matchups, as well as further notable changes towards his zoning capabilities, he continued to languish from the addition of the DLC characters and waning perception. All of this led to him falling to 33rd on the third tier list (this drop is notable for being the third-highest between the second and third tier lists). While other top-tier characters continued to have their competitive prospects developed, R.O.B. players have failed to propel his competitive prospects further, leaving his issues towards a large susceptibility to combos and difficulty in landing KO moves exacerbated further. As with the previous drop, he continued to fall behind in the metagame. Thus, this relegates him to 35th on the fourth tier list, although this current ranking for R.O.B. is rather solid as a mid-tier.
Official Custom Moveset Project[edit]
| Character | Custom sets available | ||||
|---|---|---|---|---|---|
| 1231 | 1233 | 1331 | 1333 | 1332 | |
| 2233 | 1131 | 1133 | 1221 | 1223 | |
Most historically significant players[edit]
See also: Category:R.O.B. players (SSB4)
 8BitMan - One of the best R.O.B. players in the world. Placed 4th at Glitch 2, 9th at The Big House 8, and 17th at CEO 2015, EVO 2015, and The Big House 6 with wins over players such as Fatality, Samsora, and Salem. Ranked 8th on the South Florida Power Rankings.
 Holy - The best R.O.B. player in Canada. Placed 1st at Get On My Level 2015, 2nd at both Canada Cup 2015 and LAN WAR X, 9th at Welcome to the Oven, and 17th at Get On My Level 2016. Previously ranked 4th on the Montreal Power Rankings.
 LoNg0uw - The best R.O.B. players in Europe. Placed 3rd at Tech Republic III, 7th at Smashdown World, 9th at Albion 3, and 13th at both B.E.A.S.T 7 and Syndicate 2017 with wins over players such as iStudying, Meru, and RobinGG. Ranked 5th on the German Power Rankings.
- Mister Eric - Placed 13th at both Smash 'N' Splash 2 and Midwest Mayhem 8: North American Tour, 17th at both Apex 2016 and Midwest Mayhem 6: SoCal Invasion, and 33rd at 2GGC: Midwest Mayhem Saga with wins over players such as Logic, WaDi, and Wizzrobe. Ranked 4th on the Kentucky Power Rankings.
 OCEAN - The best R.O.B. player in Japan. Placed 5th at Sumabato 12, Umebura BenQ ZOWIE Cup, and Karisuma 19, and 9th at both Karisuma 16 and SoCal Regionals 2018 with wins over players such as Charliedaking, HIKARU, and Kisha. Ranked 96th on the JAPAN Power Rankings.
- Raffi-X - One of the best R.O.B. players in the world. Placed 3rd at Sea Crest Smash, 4th at both GUMS 14 and Shift, 17th at Royal Flush and 25th at Shine 2018 with wins over players such as Mr.E, Pink Fresh, and Raito. Ranked 10th on the New England Power Rankings.
 Robo~Luigi - Placed 9th at B.E.A.S.T 7, 13th at both B.E.A.S.T 6 and Tech Republic III, and 25th at both Syndicate 2016 and Syndicate 2017 with wins over players such as Afro Smash, Suntherion, and Tsuna. Ranked 4th on the Spanish Power Rankings.
Trophies[edit]


- R.O.B.

 This NES accessory was released in 1985, a groundbreaking system that controlled the robot via a game on the screen. In Smash Bros., R.O.B. has two projectile weapons and can use his rocket base to fly through the air. If you let his Robo Beam charge over time, it'll make for a powerful blast.
- This NES accessory was released in 1985—a groundbreaking system that controlled the robot via a game on the screen. In Smash Bros., R.O.B. has two projectile weapons and can use his rocket base to fly through the air. If you let his Robo Beam charge over time, it'll make for a powerful blast.
 : Nintendo Entertainment System Robotic Operating Buddy (10/1985)
 : Mario Kart DS (11/2005)
 Released in Europe in 1986, R.O.B., a peripheral for the NES, was a little robot that responded to flashing lights in games. In this game, he can fire gyros and lasers at his enemies. He also has the ability to hover, which is handy for recoveries. Keep in mind that his Robo Beam can be charged up for an extra-powerful shot.
- : R.O.B. (09/1986)
- : Mario Kart DS (11/2005)


- R.O.B. (Alt.)
- R.O.B.'s side smash, S3, fires a laser beam that does more damage up close. You can also aim it slightly up or down before firing. His down special Gyro sends a spinning top hurtling forward and can be charged for more damage. You can even dodge while charging!
- : Nintendo Entertainment System Robotic Operating Buddy (10/1985)
- : Mario Kart DS (11/2005)
- R.O.B.'s side smash, S3, fires a laser beam that does more damage up close. You can also aim it slightly up or down before firing. His down special Gyro sends a spinning top hurtling forwards. While charging it up, you can move left or right to do a quick dodge, then continue charging where you left off!
- : R.O.B. (09/1986)
- : Mario Kart DS (11/2005)

- Super Diffusion Beam
- For R.O.B.'s Final Smash, he folds his arms down, transforms into an invincible cannon, and fires a huge beam that can be panned slowly up and down. The beam splits up partway through into smaller beams that drag foes to the center, where they'll be hit continuously. The assault finishes off with a single wide beam just for good measure.
- For R.O.B.'s Final Smash, he folds his arms down, transforms into an invincible cannon and fires a huge beam that can be aimed slowly up and down. The beam splits up partway through into smaller beams that drag foes to the centre, where they'll be hit continuously. The assault finishes off with a single wide beam, just for good measure.
In Event Matches[edit]
Solo Events[edit]
- All-Star Battle: Secret: R.O.B. is one of the opponents fought in this event. All opponents are unlockable characters in previous Super Smash Bros. games.
- Mechanical Menace: As Shulk, the player must defeat a metal R.O.B., a metal Mega Man and Metal Face in a Stamina Battle.
- Robotic Rampage: R.O.B. is allied with two R.O.B.s and must defeat a giant metal R.O.B.
Co-op Events[edit]
- Robots vs. Dragons: R.O.B. and Mega Man must defeat a giant Yoshi, a giant Charizard and Ridley in a Stamina Battle.
- The Ultimate Battle: Two players select a character and must defeat the entire roster.
Alternate costumes[edit]
R.O.B.'s default costume differs between the international and Japanese versions of SSB4. In the American and PAL region versions, his default costume consists of his Nintendo Entertainment System (NES) color scheme; in the Japanese and Korean versions, his default costume consists of his Family Computer (Famicom) color scheme. This affects the color scheme of R.O.B.'s standard trophy, but not his appearances in the Sound Test for Super Smash Bros. for Nintendo 3DS or the Special Orders tickets for Super Smash Bros. for Wii U. His Final Smash trophy and Classic post-credits scenes in Super Smash Bros. for Wii U also use his Famicom color scheme. Newly scanned R.O.B amiibo default to the language's default color instead of the color of the R.O.B amiibo, unlike other amiibo variants.
.png)
| |||||||

|

|

|

|

|

|

|

|
Gallery[edit]
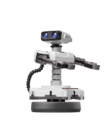
The NES design of R.O.B.'s amiibo.
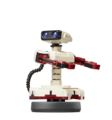
The Famicom design of R.O.B.'s amiibo.
R.O.B.'s unlock notice in Super Smash Bros. for Nintendo 3DS.
R.O.B.'s unlock notice in Super Smash Bros. for Wii U.

On Pilotwings.
Preparing to use his back aerial alongside Meta Knight and Donkey Kong.
Using his side taunt while metal and alongside Diddy Kong and Toon Link.
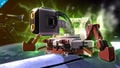
Preparing to use Super Diffusion Beam, his new Final Smash.
Using his down tilt on Rainbow Road.
Preparing to use Robo Burner alongside Olimar.


Trivia[edit]
- R.O.B.'s Boxing Ring English title in Ultimate and the American version of Smash 4, "The Last of His Kind", is a reference to the fact that R.O.B. is the only surviving member of his kind following the conclusion of Brawl's Adventure Mode: The Subspace Emissary.
- R.O.B. is the only character in the series to have different default costumes in different regional releases of the same game.
- Despite possessing different default costumes in different regions, the official website shows R.O.B.'s Famicom color scheme in official artwork, although half of the screenshots show his NES color scheme.
- Unlike in Brawl, R.O.B. can now be rendered helpless. This can only be done if he lands on Pac-Jump's trampoline while the trampoline is red.
- In the Wii U version of the game, since its release, R.O.B. cannot display emotion in the game's Smash mode, which is a visual glitch. However, he can properly emote in most other game modes, as well as on any mode in the 3DS version of the game.
- R.O.B.'s in-game portrait is the only one that does not briefly emit flashing sparkles when his chargeable attack (Gyro in his case) is fully charged.
- R.O.B.'s status as a video game peripheral is referenced in Palutena's Guidance to Pit regarding R.O.B., in which Pit suggests calling him "Mr. HVC-012". HVC-012 is R.O.B.'s Japanese product ID.[2]
References[edit]
| Fighters in Super Smash Bros. 4 | |
|---|---|
| Veterans | Bowser · Captain Falcon · Charizard · Diddy Kong · Donkey Kong · Dr. Mario · Falco · Fox · Ganondorf · Ike · Jigglypuff · King Dedede · Kirby · Link · Lucario · Lucas · Luigi · Mario · Marth · Meta Knight · Mewtwo · Mr. Game & Watch · Ness · Olimar · Peach · Pikachu · Pit · R.O.B. · Roy · Samus · Sheik · Sonic · Toon Link · Wario · Yoshi · Zelda · Zero Suit Samus |
| Newcomers | Bayonetta · Bowser Jr. · Cloud · Corrin · Dark Pit · Duck Hunt · Greninja · Little Mac · Lucina · Mega Man · Mii Fighter (Mii Brawler · Mii Gunner · Mii Swordfighter) · Pac-Man · Palutena · Robin · Rosalina & Luma · Ryu · Shulk · Villager · Wii Fit Trainer |
|
| |
|---|---|
| Fighter | R.O.B. (SSBB · SSB4 · SSBU) |
| Enemies | R.O.B. Squad (R.O.B. Blaster · R.O.B. Launcher · R.O.B. Sentry) |
| Other | Ancient Minister · Isle of the Ancients |
| Trophies, Stickers, and Spirits | Trophies (SSBB · SSB4) · Spirits |
| Music | Gyromite |