Roy (SSB4)/Neutral attack: Difference between revisions
From SmashWiki, the Super Smash Bros. wiki
Jump to navigationJump to search
m (you are understandably fooled by the data structure; when stretch is given, i40 does not exist) |
No edit summary |
||
| (15 intermediate revisions by 11 users not shown) | |||
| Line 1: | Line 1: | ||
[[File:RoyJabSSB4.gif|thumb|270px|Hitbox visualization showing Roy's neutral attack.]] | |||
==Overview== | ==Overview== | ||
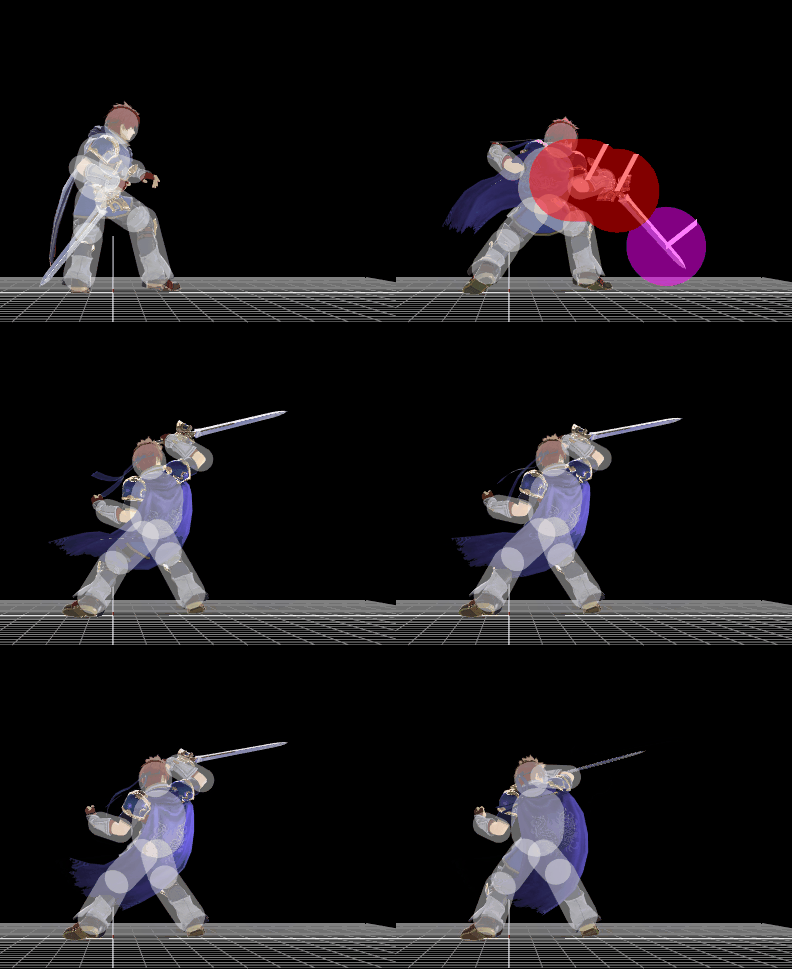
{{SSB4|Roy}}'s neutral attack is an upwards slash in reverse-grip, ending at shoulder height. It easily combos into itself and his forward tilt at low percentages, and other moves like neutral aerial and Blazer at higher percentages, depending on the opponent's DI. Roy's neutral attack is a pivotal part to his metagame as its angle allows for easy follow-ups and comes out very quick. If a well spaced aerial is followed with it, the aerial is usually safe due to the speed beating the opponent's punish option. On some fastfallers, downthrow-jab-regrab can work at low percents, among other possible setups. | |||
{{SSB4|Roy}}'s neutral attack is an upwards slash in reverse-grip, ending at shoulder height. It easily combos into itself and his forward tilt at low percentages. | |||
== | ==Hitboxes== | ||
{{SSB4HitboxTableHeader | {{SSB4HitboxTableHeader}} | ||
{{SSB4HitboxTableRow | |||
}} | |||
{{ | |||
|id=0 | |id=0 | ||
|damage=7.5% | |damage=7.5% | ||
| Line 14: | Line 12: | ||
|ks=40 | |ks=40 | ||
|fkv=0 | |fkv=0 | ||
|r=3. | |r=3.7 | ||
|bn=0 | |bn=0 | ||
|ypos=10 | |ypos=10 | ||
|zpos=7 | |zpos=7.0 to 5.5 | ||
|trip=0 | |trip=0 | ||
|type=Sword | |type=Sword | ||
|effect=Slash | |effect=Slash | ||
|ff=1.3 | |ff=1.3 | ||
| | |rebound=t | ||
|slvl=M | |slvl=M | ||
|sfx=Slash | |sfx=Slash | ||
}} | }} | ||
{{SSB4HitboxTableRow | {{SSB4HitboxTableRow | ||
| Line 59: | Line 39: | ||
|effect=Slash | |effect=Slash | ||
|ff=1.3 | |ff=1.3 | ||
| | |rebound=t | ||
|slvl=M | |slvl=M | ||
|sfx=Slash | |sfx=Slash | ||
}} | }} | ||
{{SSB4HitboxTableRow | {{SSB4HitboxTableRow | ||
| Line 79: | Line 58: | ||
|effect=Slash | |effect=Slash | ||
|ff=0.7 | |ff=0.7 | ||
| | |rebound=t | ||
|slvl=S | |slvl=S | ||
|sfx=Punch | |sfx=Punch | ||
}} | }} | ||
|} | |} | ||
==Timing== | ==Timing== | ||
{|class="wikitable" | |||
!Hitboxes | |||
{| class="wikitable" | |5-7 | ||
|- | |- | ||
! | !Interruptible | ||
|23 | |||
|- | |- | ||
!Animation length | |||
| | |39 | ||
|} | |} | ||
{{FrameStripStart}} | |||
{{FrameStrip|t=Lag|c=4}}{{FrameStrip|t=Hitbox|c=3}}{{FrameStrip|t=Lag|c=15}}{{FrameStrip|t=Interruptible|c=17}} | |||
{{FrameStripEnd}} | |||
{{FrameIconLegend|lag=y|hitbox=y|interruptible=y}} | |||
{{MvSubNavRoy|g=SSB4}} | {{MvSubNavRoy|g=SSB4}} | ||
[[Category:Neutral attacks (SSB4)]] | |||
Latest revision as of 17:19, August 3, 2020
Overview[edit]
Roy's neutral attack is an upwards slash in reverse-grip, ending at shoulder height. It easily combos into itself and his forward tilt at low percentages, and other moves like neutral aerial and Blazer at higher percentages, depending on the opponent's DI. Roy's neutral attack is a pivotal part to his metagame as its angle allows for easy follow-ups and comes out very quick. If a well spaced aerial is followed with it, the aerial is usually safe due to the speed beating the opponent's punish option. On some fastfallers, downthrow-jab-regrab can work at low percents, among other possible setups.
Hitboxes[edit]
Timing[edit]
| Hitboxes | 5-7 |
|---|---|
| Interruptible | 23 |
| Animation length | 39 |
Lag time |
Hitbox |
Interruptible |
|
