R.O.B. (SSB4)/Down tilt: Difference between revisions
From SmashWiki, the Super Smash Bros. wiki
Jump to navigationJump to search
No edit summary |
m (Text replacement - "== ([^=])" to "== $1") |
||
| (5 intermediate revisions by 3 users not shown) | |||
| Line 1: | Line 1: | ||
{{ArticleIcons|ssb4=y}} | {{ArticleIcons|ssb4=y}} | ||
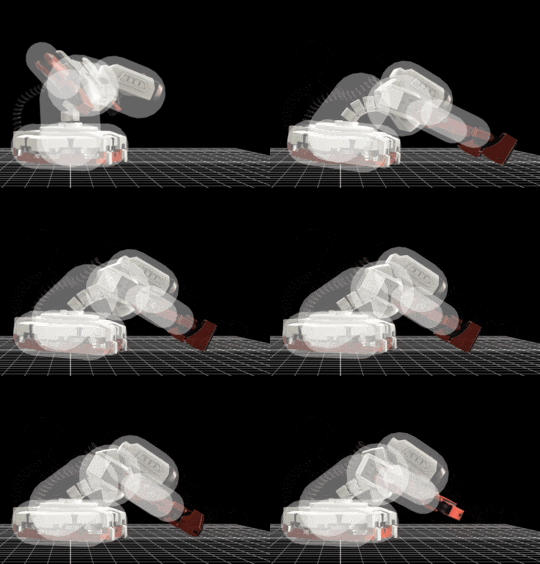
[[File:ROBDTilt.gif|thumb|270px|Hitbox visualization showing R.O.B.'s down tilt.]] | [[File:ROBDTilt.gif|thumb|270px|Hitbox visualization showing R.O.B.'s down tilt.]] | ||
==Overview== | |||
R.O.B. thrusts both of his hands ahead across the floor. Coming out on the very early frame 3, this is one of R.O.B.'s quickest out-of-shield options when facing the opponent, outside of his grab. Due to its low knockback, it can also combo into itself in many situations, allowing the player to rack up damage on the opponent. | |||
==Hitboxes== | ==Hitboxes== | ||
{{SSB4HitboxTableHeader|special=y}} | |||
{{SSB4HitboxTableHeader}} | {{SSB4SpecialHitboxTableRow | ||
{{ | |||
|id=0 | |id=0 | ||
|part=0 | |part=0 | ||
|damage=5% | |damage=5% | ||
|angle=361 | |angle=361 | ||
|af=3 | |||
|bk=2 | |bk=2 | ||
|ks=100 | |ks=100 | ||
| Line 20: | Line 21: | ||
|ypos=1.7 | |ypos=1.7 | ||
|zpos=21.0 | |zpos=21.0 | ||
|ystretch=7.0 | |||
|zstretch=9.0 | |||
|type=Hand | |type=Hand | ||
|sdi=1.0 | |sdi=1.0 | ||
| Line 28: | Line 31: | ||
|} | |} | ||
==Timing== | |||
{|class="wikitable" | |||
!Hitbox | |||
|3 | |||
|- | |||
!Interruptible | |||
|15 | |||
|- | |||
!Animation length | |||
|28 | |||
|} | |||
{{FrameStripStart}} | |||
{{FrameStrip|t=Lag|c=2}}{{FrameStrip|t=Hitbox|c=1}}{{FrameStrip|t=Lag|c=11}}{{FrameStrip|t=Interruptible|c=14}} | |||
{{FrameStripEnd}} | |||
{{FrameIconLegend|lag=y|hitbox=y|interruptible=y}} | |||
{{MvSubNavROB|g=SSB4}} | {{MvSubNavROB|g=SSB4}} | ||
[[Category:R.O.B. (SSB4)]] | [[Category:R.O.B. (SSB4)]] | ||
[[Category:Down tilts (SSB4)]] | [[Category:Down tilts (SSB4)]] | ||
Latest revision as of 02:35, April 13, 2022
Overview[edit]
R.O.B. thrusts both of his hands ahead across the floor. Coming out on the very early frame 3, this is one of R.O.B.'s quickest out-of-shield options when facing the opponent, outside of his grab. Due to its low knockback, it can also combo into itself in many situations, allowing the player to rack up damage on the opponent.
Hitboxes[edit]
Timing[edit]
| Hitbox | 3 |
|---|---|
| Interruptible | 15 |
| Animation length | 28 |
Lag time |
Hitbox |
Interruptible |
|
