SSB4 Icon.png

R.O.B. (SSB4)/Down tilt: Difference between revisions

From SmashWiki, the Super Smash Bros. wiki
Jump to navigationJump to search
No edit summary
Line 1: Line 1:
{{ArticleIcons|ssb4=y}}
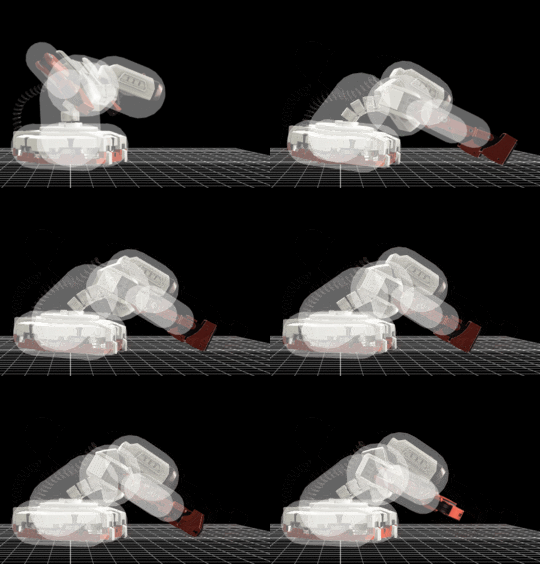
[[File:ROBDTilt.gif|thumb|270px|Hitbox visualization showing R.O.B.'s down tilt.]]
[[File:ROBDTilt.gif|thumb|270px|Hitbox visualization showing R.O.B.'s down tilt.]]
{{technical data}}
 
==Overview==
==Overview==
R.O.B. thrusts both of his hands ahead across the floor. Coming out on the very early frame 3, this is arguably R.O.B.'s quickest out-of-shield option when facing the opponent. Due to its low knockback, it can also combo into itself in many situations, allowing the player to rack up damage on the opponent
R.O.B. thrusts both of his hands ahead across the floor. Coming out on the very early frame 3, this is one of R.O.B.'s quickest out-of-shield option when facing the opponent, outside of his grab. Due to its low knockback, it can also combo into itself in many situations, allowing the player to rack up damage on the opponent.
==Hitboxes==
==Hitboxes==


Revision as of 17:36, December 31, 2020

Hitbox visualization showing R.O.B.'s down tilt.

Overview

R.O.B. thrusts both of his hands ahead across the floor. Coming out on the very early frame 3, this is one of R.O.B.'s quickest out-of-shield option when facing the opponent, outside of his grab. Due to its low knockback, it can also combo into itself in many situations, allowing the player to rack up damage on the opponent.

Hitboxes

ID Part Rehit rate Damage SD Angle BK KS FKV Radius Bone Offset SDIx T% Clang Rebound Type Effect G A Sound Direct Hit bits Blockable Reflectable Absorbable Piercing Heedless No GFX Flinchless Stretch
0 0 0 5% 0 Sakurai angle Forwards 2 100 0 3.4 0 0.0 1.7 21.0 1.0x 1.0x 20% HitboxTableIcon(Clang).png HitboxTableIcon(Rebound).png TypeIcon(Hand).png EffectIcon(Normal).png HitboxTableIcon(GroundedTrue).png HitboxTableIcon(AerialTrue).png M Kick SpecialsDirect.png 63 HitboxTableIcon(Blockable).png HitboxTableIcon(Unreflectable).png HitboxTableIcon(Unabsorbable).png HitboxTableIcon(False).png HitboxTableIcon(False).png HitboxTableIcon(False).png HitboxTableIcon(False).png 0.0 7.0 9.0

Timing

Hitbox 3
Interruptible 15
Animation length 28
FrameIcon(Lag).png FrameIcon(Lag).png FrameIcon(Hitbox).png FrameIcon(Lag).png FrameIcon(Lag).png FrameIcon(Lag).png FrameIcon(Lag).png FrameIcon(Lag).png FrameIcon(Lag).png FrameIcon(Lag).png FrameIcon(Lag).png FrameIcon(Lag).png FrameIcon(Lag).png FrameIcon(Lag).png FrameIcon(Interruptible).png FrameIcon(Interruptible).png FrameIcon(Interruptible).png FrameIcon(Interruptible).png FrameIcon(Interruptible).png FrameIcon(Interruptible).png FrameIcon(Interruptible).png FrameIcon(Interruptible).png FrameIcon(Interruptible).png FrameIcon(Interruptible).png FrameIcon(Interruptible).png FrameIcon(Interruptible).png FrameIcon(Interruptible).png FrameIcon(Interruptible).png
Legend (1 square = 1 frame)
FrameIcon(Lag).png
Lag time
FrameIcon(Hitbox).png
Hitbox
FrameIcon(Interruptible).png
Interruptible