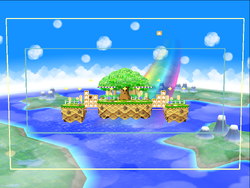
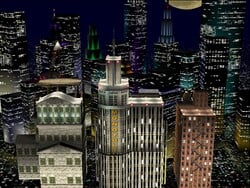
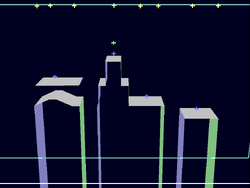
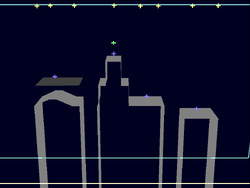
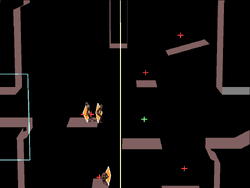
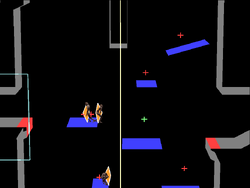
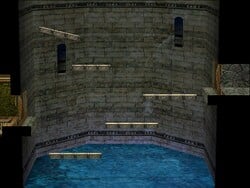
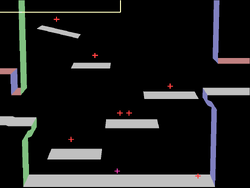
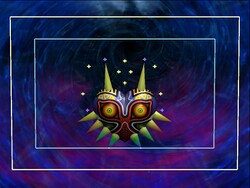
Debug menu (SSBM)/DEVELOP mode: Difference between revisions
Serpent King (talk | contribs) (→Stages: Added Entei, Goomba, Majora's Mask, and Big Blue) |
Serpent King (talk | contribs) (→Stages: First wave of opening texts) |
||
| Line 217: | Line 217: | ||
=Stages= | =Stages= | ||
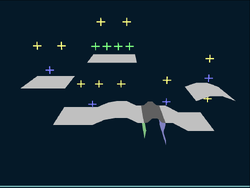
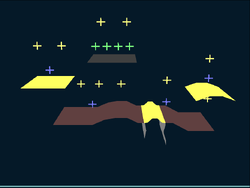
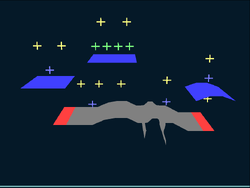
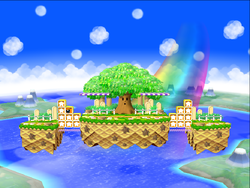
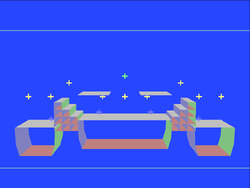
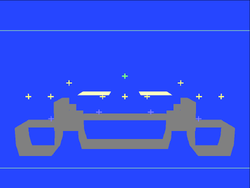
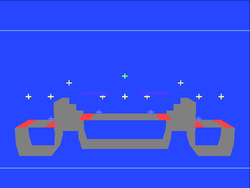
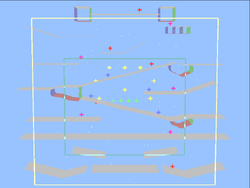
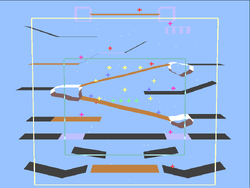
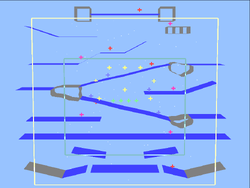
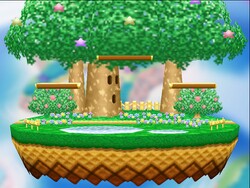
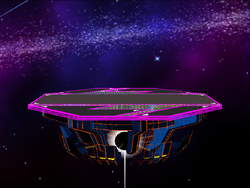
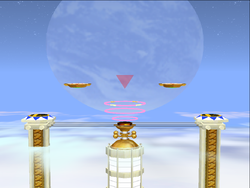
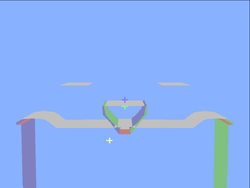
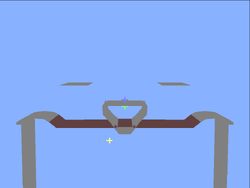
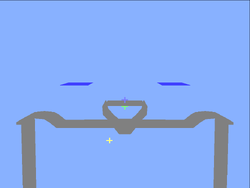
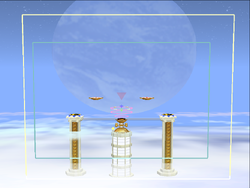
==Fountain of Dreams== | ==Fountain of Dreams== | ||
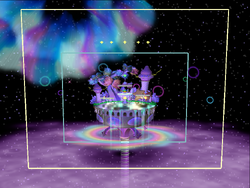
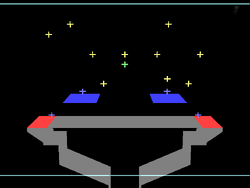
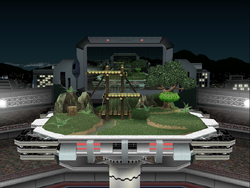
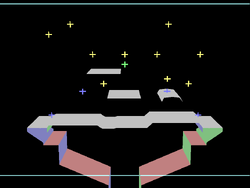
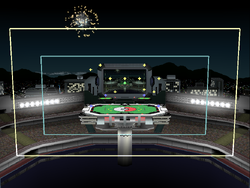
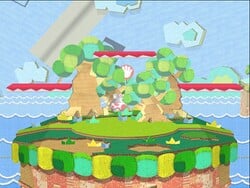
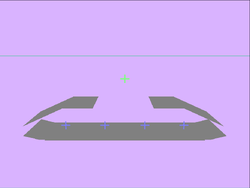
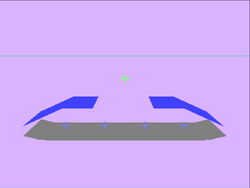
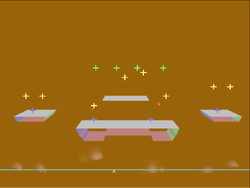
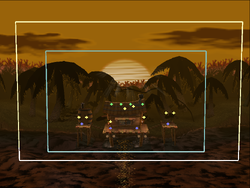
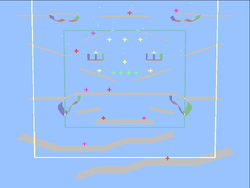
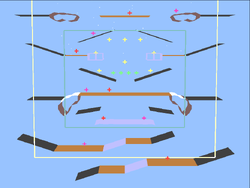
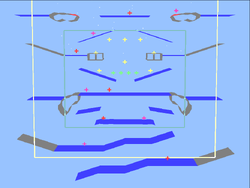
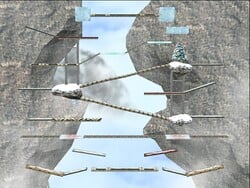
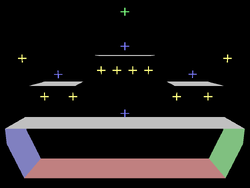
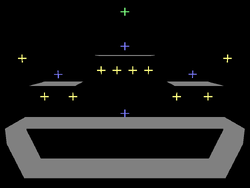
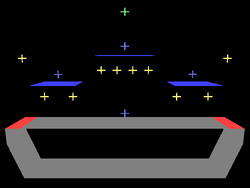
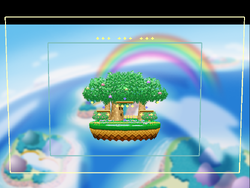
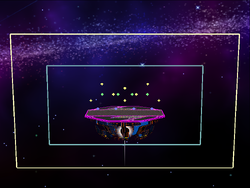
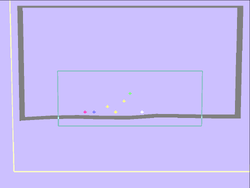
*'''Blast Zone:''' Fountain of Dreams has a rather large blast box. | |||
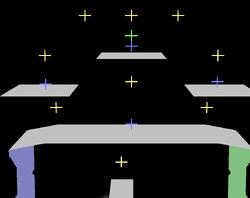
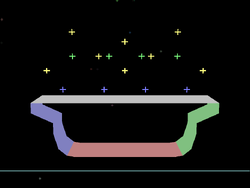
*'''Spawn Points:''' It features 4 spawn points: 1 on each platform, but only 1 respawn point, above the top most platform. | |||
*'''Item Spawn Points:''' The stage has 3 item spawn points all evenly spaced above the main platform, as well as 5 more evenly spaced above the camera box. | |||
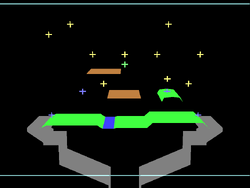
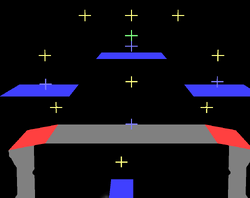
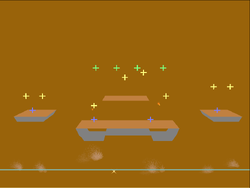
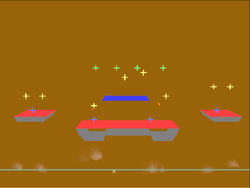
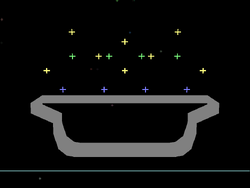
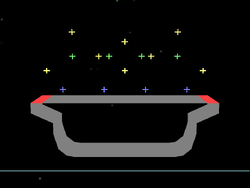
*'''Platforms:''' In addition to the main solid platform, Fountain of Dreams also features 3 drop-through platforms. The 2 lower platforms begin evenly elevated, then randomely rise and fall, while the upper-center platform remains stationary. The main platform is grab-able on both sides. | |||
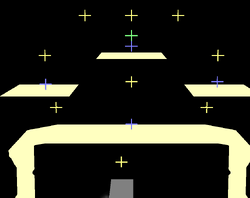
*'''Terrain:''' The 3 aerial platforms have basic terrain, while the main platform has a mostly water terrain with grass terrain on the edges. | |||
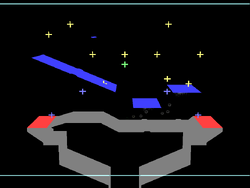
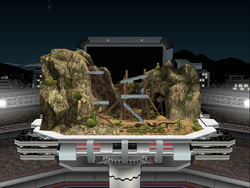
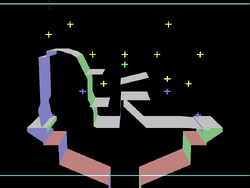
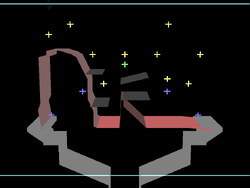
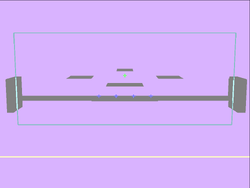
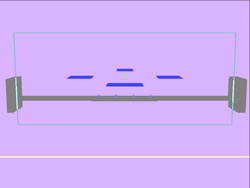
<gallery widths=250px heights=250px perrow=4> | <gallery widths=250px heights=250px perrow=4> | ||
| Line 228: | Line 232: | ||
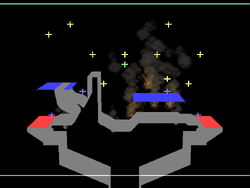
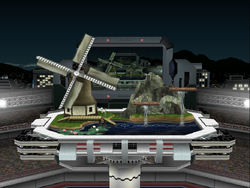
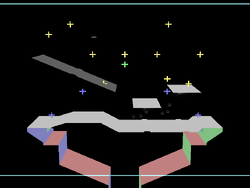
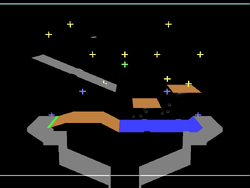
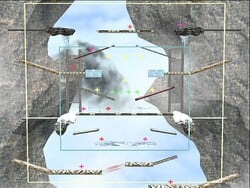
==Pokémon Stadium== | ==Pokémon Stadium== | ||
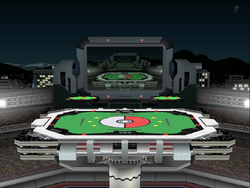
*'''Blast Zone:''' The Pokémon Stadium has a very large blast box. | |||
*'''Spawn Points:''' Spawn points are located on either side of the lower platform, as well as above each of the 2 platforms. Although they cannot be used except for the normal form, spawn points exist in the same location in the all stage forms. The respawn point is located in the same upper-central spot in all forms as well. | |||
*'''Item Spawn Points:''' There are a total of 10 item spawn points scattered in the air above the stage. | |||
===Normal Stage=== | ===Normal Stage=== | ||
*'''Platforms:''' The normal stage form features 2 evenly elevated drop-through platforms, located a short distance above the main, solid platform. The main platform is grab-able from either side. | |||
*'''Terrain:''' This form has only basic terrain | |||
<gallery widths=250px heights=250px perrow=4> | <gallery widths=250px heights=250px perrow=4> | ||
| Line 239: | Line 248: | ||
===Grass Stage=== | ===Grass Stage=== | ||
*'''Platforms:''' The grass stage form has 3 drop-through platforms, each elevated differently from the main platform. This main platform is again grab-able from both sides. | |||
*'''Terrain:''' There are 2 central drop-through platforms that have wooden terrain, and the other right platform has grass terrain. The main platform is mostly covered with grass terrain, although there is a small strip of water terrain just left of the center. | |||
<gallery widths=250px heights=250px perrow=4> | <gallery widths=250px heights=250px perrow=4> | ||
| Line 249: | Line 259: | ||
===Fire Stage=== | ===Fire Stage=== | ||
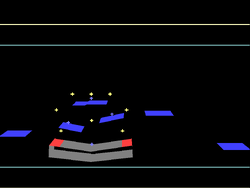
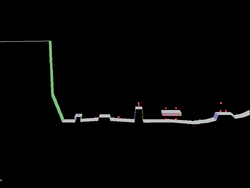
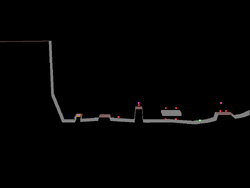
*'''Platforms:''' The fire stage form has 3 drop-through platforms, although it may seem like only 2 at first. The first is the awning of the burning building on the right. The other 2 are located on the branch of the dead tree on the left. The platform technically counts as 2, as the center of it is solid. The main platform, as well as most of the dead tree (minus the aformentioned platforms on the branch) are solid, and either edge of the main platform is grab-able. | |||
*'''Terrain:''' The edges of the main platform, as well as the awning of the burning building on the right have basic terrain. The ground under the awning and also the dead tree on the left have wooden terrain. The rest of the main platform has dirt terrain. | |||
<gallery widths=250px heights=250px perrow=4> | <gallery widths=250px heights=250px perrow=4> | ||
| Line 259: | Line 270: | ||
===Water Stage=== | ===Water Stage=== | ||
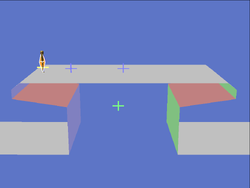
*'''Platforms:''' The water stage form has 3 drop-through platforms, each elevated differently. The one on the left is the windmill. The platform rotates clockwise, then disappears once it has become verticle enough. The other 2 are located towards the right and are elevated differently. The main platform is mostly flat, and again, both of its edges can be grabbed. | |||
*'''Terrain:''' The windmill and the edges of the stage have basic terrain. The bridge on the left and the 2 aerial platforms on the right have wooden terrain and the stream has water terrain. There is also a miniscule strip of grass terrain between the left edge and the bridge. | |||
<gallery widths=250px heights=250px perrow=4> | <gallery widths=250px heights=250px perrow=4> | ||
| Line 269: | Line 281: | ||
===Rock Stage=== | ===Rock Stage=== | ||
*'''Platforms:''' The rock stage form features 4 drop-through platforms, all located in the center of the stage. They are arranged in 2 uneven rows of 2, and the top-right most one is slanted slightly. The main platform is flat at the right, until the center where there is a sharp slant up, then a drop down, followed by the big boulder. There is a very small wall near the right edge that can sometimes mess players up, particularly during a transformation. The main platform is grab-able on both edges, and the boulder is also grab-able from the left | |||
*'''Terrain:''' The edges of the main platform have basic terrain. The flat areas in the left and center have dirt terrain, and the mountain has rock terrain. The aerial platforms have light-metal terrain, while the metal beam in the center has heavy-metal terrain. | |||
<gallery widths=250px heights=250px perrow=4> | <gallery widths=250px heights=250px perrow=4> | ||
| Line 280: | Line 293: | ||
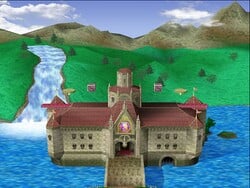
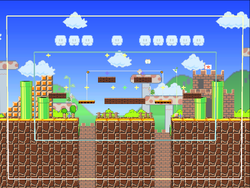
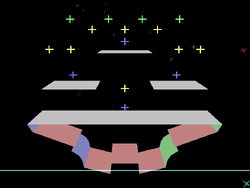
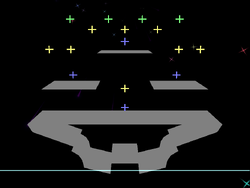
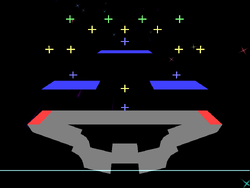
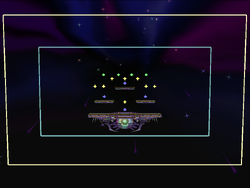
==Princess Peach's Castle== | ==Princess Peach's Castle== | ||
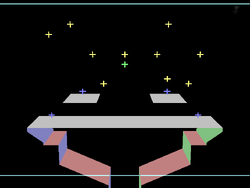
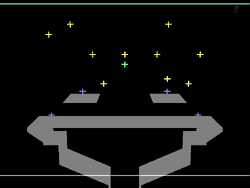
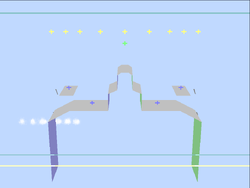
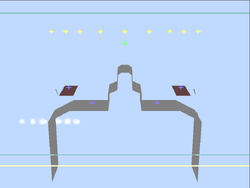
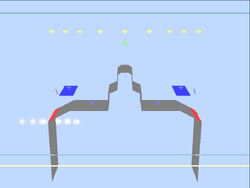
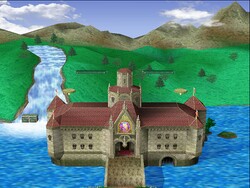
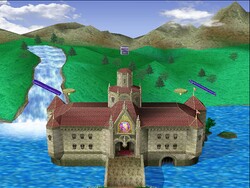
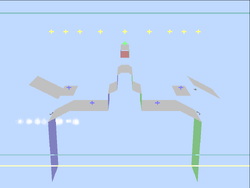
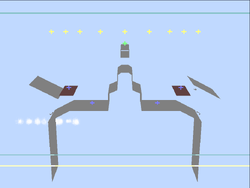
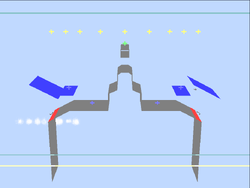
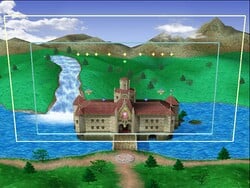
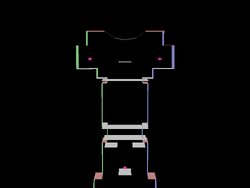
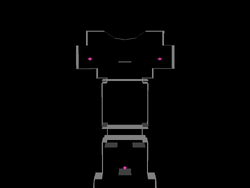
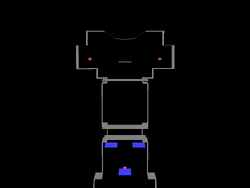
*'''Blast Zone:''' Peaches Castle has a very large blast box. | |||
*'''Spawn Points:''' Spawn points are located in the center of the flat part on either side of the central tower, as well as on both rising platforms. The respawn point is located above the tower. | |||
*'''Item Spawn Points:''' There are 9 item spawn points located towards the very top of the camera box. they are arranged in a straight line, 1 being directly above the tower, 4 being spaced nearly evenly above either side of the tower. | |||
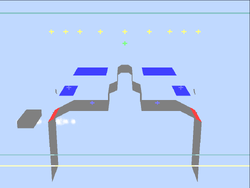
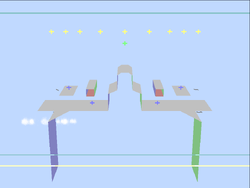
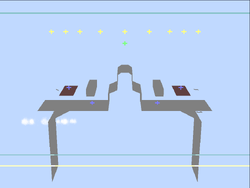
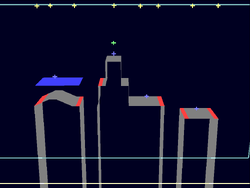
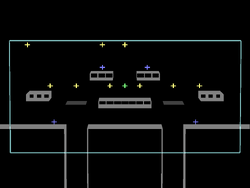
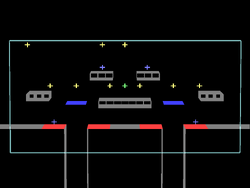
*'''Platforms:''' The entire stage is arranged symmetrically. There are 2 aerial drop-through platforms located near either edge of the stage. They will rise when a player stands on them, and will fall to their original position otherwise. The main platform is composed of a few different parts: there is a tower located in the center of the stage, with a top-most platform, as well as 2 short slanted platforms located a bit lower on either side. The stage then flattens out, then slants downward on either side. The main platform is grab-able on either edge. | |||
*'''Terrain:''' The entire stage has basic terrain, except for the rising platforms, which have light-metal terrain. | |||
===Normal=== | ===Normal=== | ||
<gallery widths=250px heights=250px perrow=4> | <gallery widths=250px heights=250px perrow=4> | ||
CASTL-NRML1-SSBM.jpg|Princess Peach's Castle | CASTL-NRML1-SSBM.jpg|Princess Peach's Castle | ||
| Line 291: | Line 308: | ||
===Green=== | ===Green=== | ||
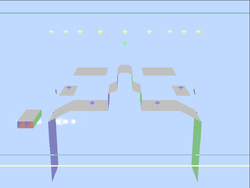
*'''Platforms:''' 2 evenly elevated drop-through platforms appear on either side of the tower. A solid platform also appears off the left edge of the stage. | |||
*'''Terrain:''' All additional platforms have basic terrain. | |||
<gallery widths=250px heights=250px perrow=4> | <gallery widths=250px heights=250px perrow=4> | ||
| Line 301: | Line 319: | ||
===Red=== | ===Red=== | ||
*'''Platforms:''' 2 drop-through platforms appear on either side of the stage even with the lower platforms, extending them. 2 solid platforms also appear level with either side of the the lower platforms of the tower. | |||
*'''Terrain:''' All additional platforms have basic terrain. | |||
<gallery widths=250px heights=250px perrow=4> | <gallery widths=250px heights=250px perrow=4> | ||
| Line 311: | Line 330: | ||
===Blue=== | ===Blue=== | ||
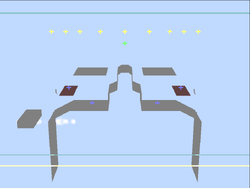
*'''Platforms:''' 2 drop-through platforms appear near either edge. They are each slanted down from the left. A solid platform also appears just above the tower. | |||
*'''Terrain:''' All additional platforms have basic terrain. | |||
<gallery widths=250px heights=250px perrow=4> | <gallery widths=250px heights=250px perrow=4> | ||
| Line 322: | Line 342: | ||
==Kongo Jungle== | ==Kongo Jungle== | ||
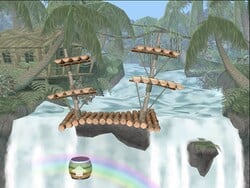
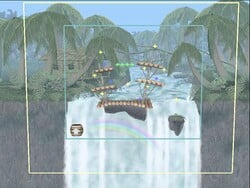
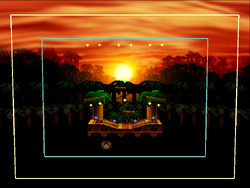
*'''Blast Zone:''' Kongo Jungle has a medium blast box. | |||
*'''Spawn Points:''' Spawn points are located on the upper-left platform, on the middle-left platform, on the middle-right platform, and towards the right of the bottom platform. There are 4 respawn points placed evenly inbetween the top-most platforms. | |||
*'''Item Spawn Points:''' There are 9 item spawn points, scattered around the stage. 3 are located above the bottom platform, 1 above either upper platform, 1 above the middle-left platform, 2 above the middle-right platform, and 1 above the small piece of land on the right. | |||
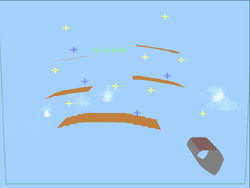
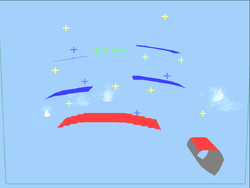
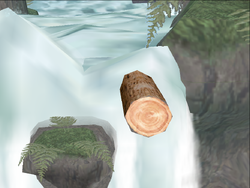
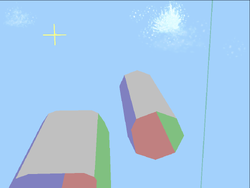
*'''Platforms:''' This stage features 4 drop-through platforms arranged in 2 uneven rows. They sway a little both randomely, and with the weight of players. The bottom platform is solid, immobile, and can be grabbed from either edge. The piece of land also solid, and can be ledge-grabbed from either side as well. In addition, a log can sometimes get caught in the side of the waterfall, and it's edges are also grab-able. | |||
*'''Terrain:''' The bottom platform, aerial platforms, and log all have wooden terrain, while the piece of land has rock terrain. | |||
<gallery widths=250px heights=250px perrow=4> | <gallery widths=250px heights=250px perrow=4> | ||
| Line 337: | Line 361: | ||
==Brinstar== | ==Brinstar== | ||
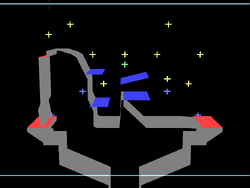
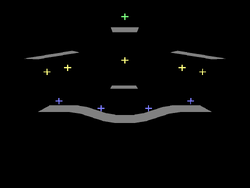
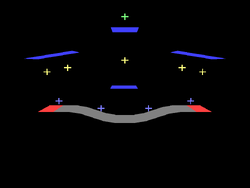
*'''Blast Zone:''' Brinstar has a fairly large blast box. | |||
*'''Spawn Points:''' Spawn points are placed above the left and right aerial platforms, as well as towards the left of the main platform, and towards the right of the main platform. 4 respawn points are arranged in an even line above the upper platform. | |||
*'''Item Spawn Points:''' There are 9 item spawn points: 2 above the left platform, 2 above the upper platform, 1 above the right platform, and 5 above the main platform. | |||
*'''Platforms:''' The 3 aerial platforms are all drop-through. The main platform is solid, and is grab-able on either edge. Breaking the tissue connecting the left and right aerial platforms to the main platform will cause the aerial platform to slant, while breaking the fleshy goop in the center of the main platform will cause the whole thing to split. | |||
*'''Terrain:''' The main platfom has mostly heavy metal-terrain, but the fleshy goop has alien terrain. The left and right aerial platforms also have alien terrain. The upper platform has light-metal terrain. | |||
<gallery widths=250px heights=250px perrow=4> | <gallery widths=250px heights=250px perrow=4> | ||
| Line 348: | Line 376: | ||
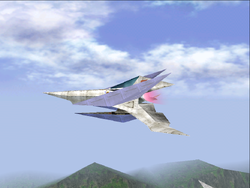
==Corneria== | ==Corneria== | ||
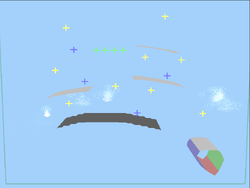
*'''Blast Zone:''' Corneria has a medium-small blast box. | |||
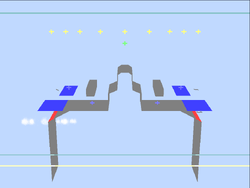
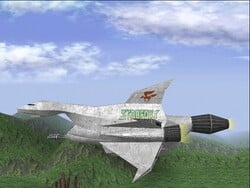
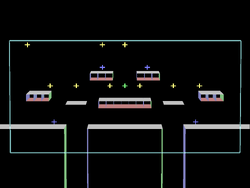
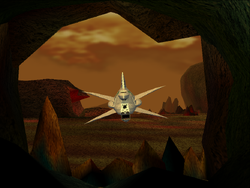
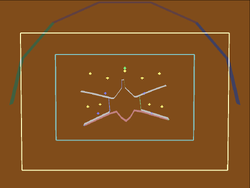
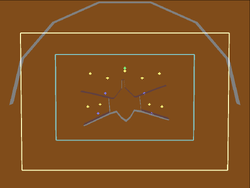
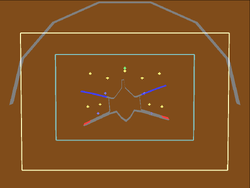
*'''Spawn Points:''' The spawn points are located on the hull and tail of the Great Fox. The respawn point is above the center of the hull. | |||
*'''Item Spawn Points:''' There are 10 item spawn points arranged in a linear-curved fashion above the cockpit, hull, tail, and back jet of the ship. | |||
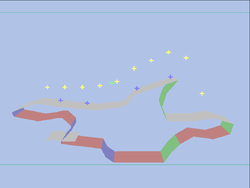
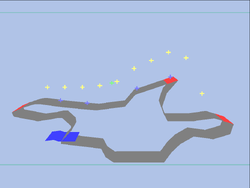
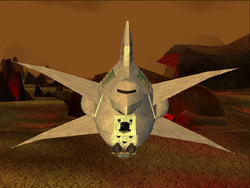
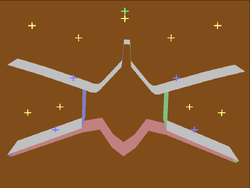
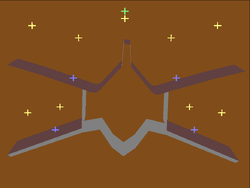
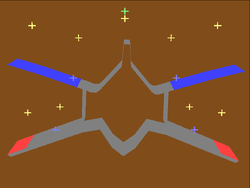
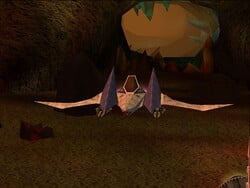
*'''Platforms:''' The jets of the Great Fox are drop-through-able. These can be destroyed, making them intangible. The cockpit, tail, and jet have grab-able edges. Arwings and Wolfens are drop-through-able. | |||
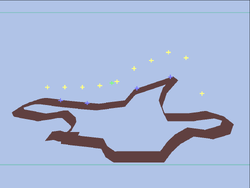
*'''Terrain:''' The entirety of the Great Fox has heavy-metal terrain, while the Arwings and wolfens have basic terrain. | |||
<gallery widths=250px heights=250px perrow=4> | <gallery widths=250px heights=250px perrow=4> | ||
| Line 363: | Line 395: | ||
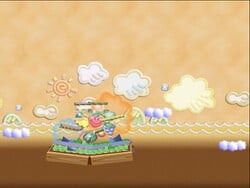
==Yoshi's Story== | ==Yoshi's Story== | ||
*'''Blast Zone:''' Yoshi's Story has a medium-large blast box. | |||
*'''Spawn Points:''' Spawn points are located 1 on each of the 3 aerial platforms and 1 in the center of the main platform. The respawn point is located above the upper platform. | |||
*'''Item Spawn Points:''' There are 9 item spawn points: 3 above the main platform, 1 above either lower platform, 3 above the upper platform, and 1 that moves with the cloud. | |||
*'''Platforms:''' The stage has 3 aerial drop-through platforms, and a main, solid platform with grab-able edges. There is also a cloud that travels in a set path in the lower part of the stage. The cloud is drop-through-able. | |||
*'''Terrain:''' The entire stage has paper terrain, except for the cloud, which has basic terrain. | |||
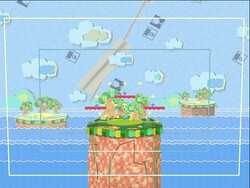
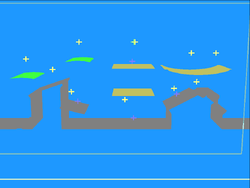
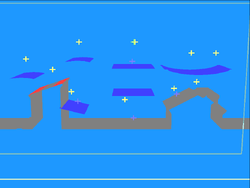
<gallery widths=250px heights=250px perrow=4> | <gallery widths=250px heights=250px perrow=4> | ||
| Line 374: | Line 410: | ||
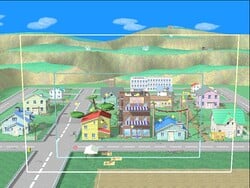
==Onett== | ==Onett== | ||
*'''Blast Zone:''' Onett has a medium-small blast box. This stage has walk-offs on both sides. | |||
*'''Spawn Points:''' Spawn points are located on the lower roof of the left-most house, on the sidewalk near the center, on the upper drug store awning, and on the left roof of the right-most house. The respawn point is located above the upper drug store awning. | |||
*'''Item Spawn Points:''' There are 10 item spawn points: 2 above the tree on the left (different branches), 1 above either roof of the left-most house, 1 above the upper drug store awning, 1 above the center of the sidewalk, 2 above the ribbon on the right, and 1 above either roof on the right-most house | |||
*'''Platforms:''' The 2 tree branches, 2 drug store awnings, ribbon, and the lower roof of the left-most house all have drop-through platforms. In addition, standing on the drug store awnings for too long will cause them to fall down. The upper roof on the left-most house has 2 grab-able edges. All other platforms are solid and featureless | |||
*'''Terrain:''' All the grounded platforms have basic terrain. The tree branches have grass terrain. The drug store awnings and the ribbon have paper terrain. | |||
<gallery widths=250px heights=250px perrow=4> | <gallery widths=250px heights=250px perrow=4> | ||
| Line 927: | Line 967: | ||
==Battlefield== | ==Battlefield== | ||
Battlefield | *'''Blast Zone:''' Battlefield has a moderate-to-large blast box. | ||
*'''Spawn Points:''' Spawn points are located 1 on each of the 3 aerial platforms and 1 in the center of the main platform. There are 4 respawn points arranged evenly above the stage. | |||
*'''Item Spawn Points:''' There are 8 item spawn points: 1 above the center of the main platform, 2 above either of the lower aerial platforms, and 3 above the upper aerial platform. | |||
*'''Platforms:''' The stage has 3 aerial drop-through platforms, and a main, solid platform with grab-able edges. | |||
*'''Terrain:''' The entire stage has basic terrain. | |||
<gallery widths=250px heights=250px perrow=4> | <gallery widths=250px heights=250px perrow=4> | ||
| Line 938: | Line 982: | ||
==Final Destination== | ==Final Destination== | ||
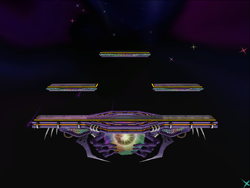
Final Destination | *'''Blast Zone:''' Final Destination has a moderate-to-large blast box. | ||
*'''Spawn Points:''' Spawn points are spaced evenly on the main platform. There are 4 respawn points spaced evenly above the main platform. | |||
*'''Item Spawn Points:''' There are 8 item spawn points arranged symmetrically across the stage. | |||
*'''Platforms:''' The stage has one main platform with grab-able edges. | |||
*'''Terrain:''' The entire stage has basic terrain. | |||
<gallery widths=250px heights=250px perrow=4> | <gallery widths=250px heights=250px perrow=4> | ||
| Line 957: | Line 1,005: | ||
ADVMK-PLATF1-SSBM.png|Mushroom Kingdom showing Platforms | ADVMK-PLATF1-SSBM.png|Mushroom Kingdom showing Platforms | ||
ADVMK-NRML2-SSBM.jpg|Mushroom Kingdom | ADVMK-NRML2-SSBM.jpg|Mushroom Kingdom | ||
ADVMK-STRUCT2-SSBM.png|Mushroom Kingdom showing Structure | ADVMK-STRUCT2-SSBM.png|Mushroom Kingdom showing Structure | ||
ADVMK-TERRA2-SSBM.png|Mushroom Kingdom showing Terrain | ADVMK-TERRA2-SSBM.png|Mushroom Kingdom showing Terrain | ||
ADVMK-PLATF2-SSBM.png|Mushroom Kingdomshowing Platforms | ADVMK-PLATF2-SSBM.png|Mushroom Kingdomshowing Platforms | ||
| Line 1,008: | Line 1,056: | ||
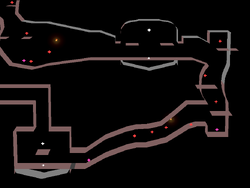
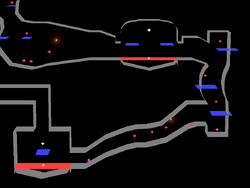
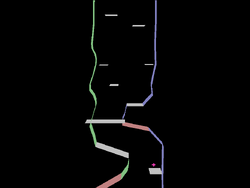
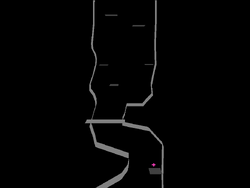
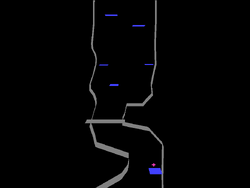
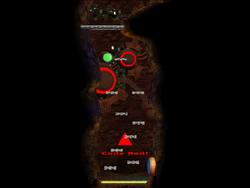
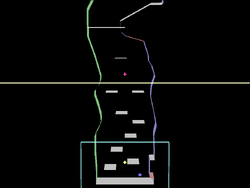
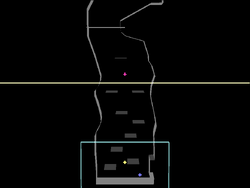
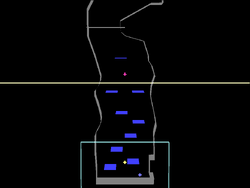
==Adventure Mode: Brinstar Escape Shaft== | ==Adventure Mode: Brinstar Escape Shaft== | ||
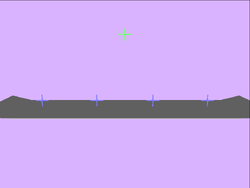
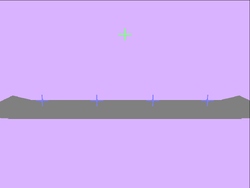
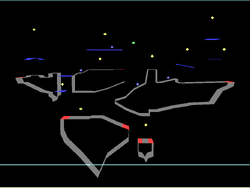
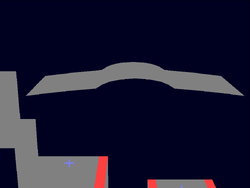
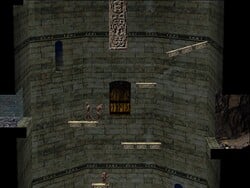
Brinstar Escape Shaft is split into 6 sections by jump-through solid platforms. | |||
*'''Blast Zone:''' The Escape Shaft has a wide and tall blast box. | |||
*'''Spawn Points:''' The spawn point is at the bottom right in the first section, and the respawn point follows player 1. The exit point is on the platform at the very top in the sixth section. | |||
*'''Item Spawn Points:''' Oddly, there is a single item spawn point in the center of the first section. | |||
*'''Trophy/Enemy Spawn Points:''' There are 5 trophy spawn points: 1 towards the top of the first section, 1 on a platform in the second section, 1 on a platform towards the top of the third section, and 1 on either side of the sixth section. | |||
*'''Platforms:''' There are several drop-through platforms throughout the stage, but no grab-able ones. | |||
*'''Terrain:''' Almost all solid platforms have basic terrain, while the aerial platforms have light metal terrain. | |||
<gallery widths=250px heights=250px perrow=4> | <gallery widths=250px heights=250px perrow=4> | ||
Revision as of 13:23, May 12, 2015
Control
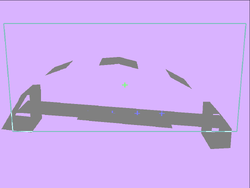
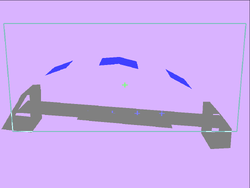
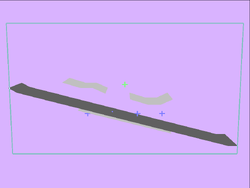
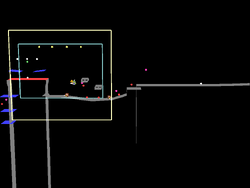
Below is a table detailing the controls for the DEVELOP mode extra controls. Through these controls, one can obtain free control over the camera, see character and stage hitboxes, frame advance the match, see the parts of the stage, and drop items (similar to Training Mode).
| Controls | Effect |
|---|---|
| Pauses the game, but without the usual pause interface. | |
| Hard Pause + |
Frame advances the match. |
| Speeds up gameplay. | |
| Shrinks the player. | |
Displays a list of statistics for each player:
| |
| Shows the current score and any bonuses won. | |
| Pauses the game normally. | |
Rotates through multiple visual effects.
| |
Toggles sound effects and music.
| |
| Displays a set of stress bars detailing the GameCube's work load. | |
| Displays each characters' animation information. | |
| Grows the player. | |
| Sets the player back to normal size. | |
Toggles collision bubbles for all characters and stage elements (See here).
| |
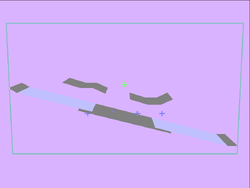
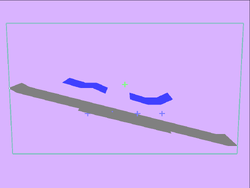
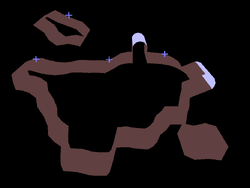
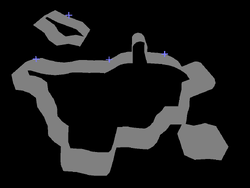
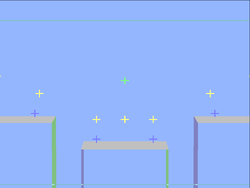
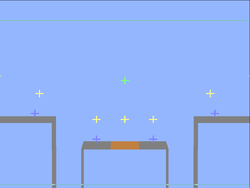
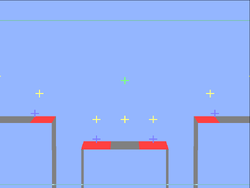
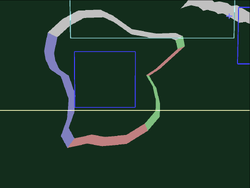
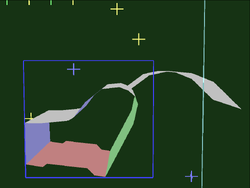
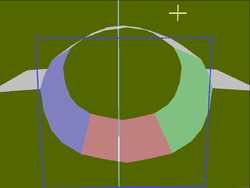
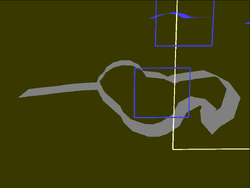
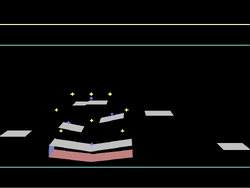
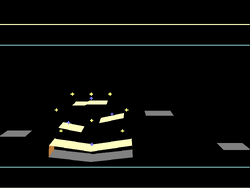
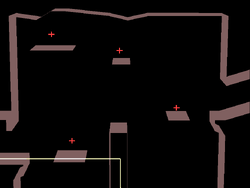
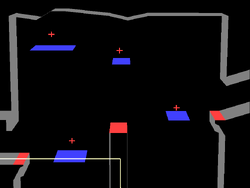
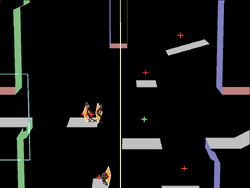
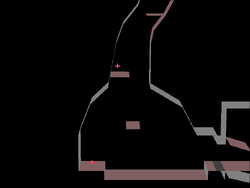
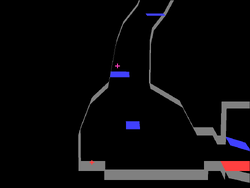
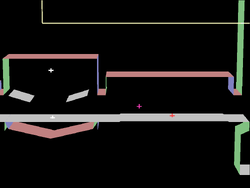
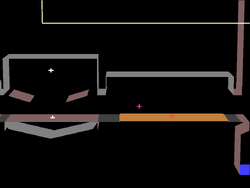
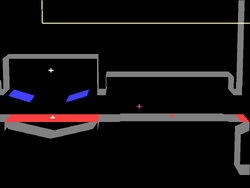
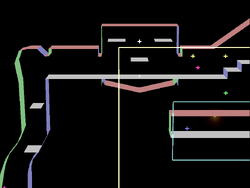
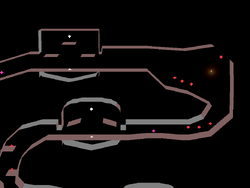
Toggles various stage related visuals, such as spawn points, stage structures, and grab-able ledges (See here).
| |
Toggles collision bubbles for the player (See here).
| |
| Drops item selected on the Item Menu | |
| Display Item Menu and cycle forward through the list (See here). | |
| Display Item Menu and cycle backward through the list (See here). | |
| Display Item Menu and cycle forward through Pokémon on the list (See here). | |
| Display Item Menu and cycle backward through Pokémon on the list (See here). | |
Changes the camera view.
| |
| Used to rotate the camera (free form). | |
| Zooms in and out. | |
| Pans around the screen. |
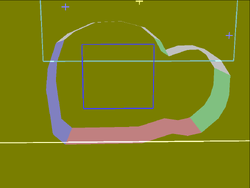
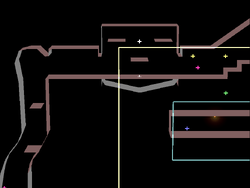
Stage Visual Key
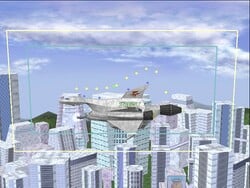
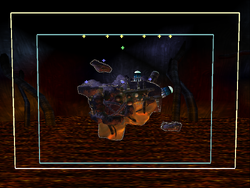
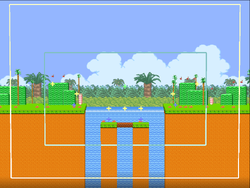
Camera Boxes
| Item | Description |
|---|---|
| Teal Box | Camera Limit |
| Light Yellow Box | Blast Line |
| Blue Box | Camera Focal Box |
| Small Red Box | Unknown; It's attached to each characters' left |
| Small Blue Box | Unknown; It's attached to each characters' right |
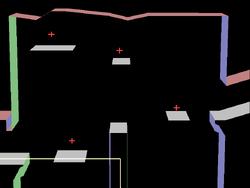
Spawn Points
| Item | Description |
|---|---|
| Blue Plus | Character Starting Point |
| Green Plus | Character Respawn Point |
| Yellow Plus | Item Spawn Point |
| Red Plus | Enemy Spawn Point |
| Magenta Plus | Trophy Spawn Point |
| White Plus | Exit Point |
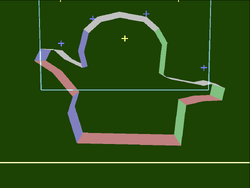
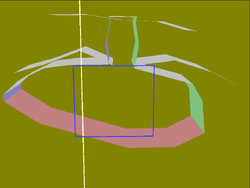
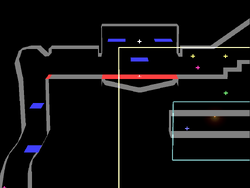
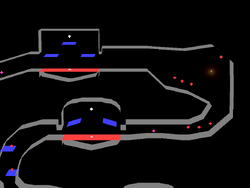
Structures
| Item | Description |
|---|---|
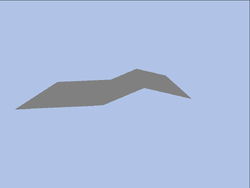
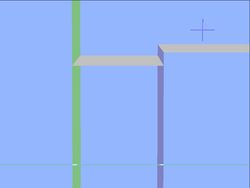
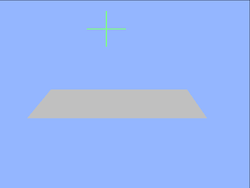
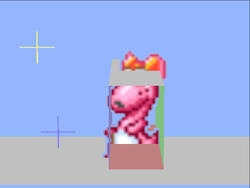
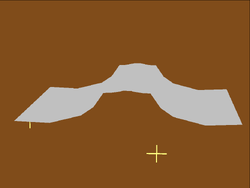
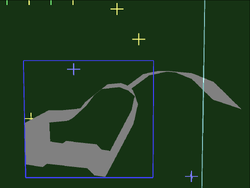
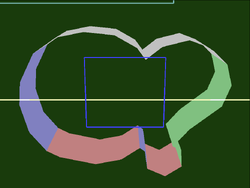
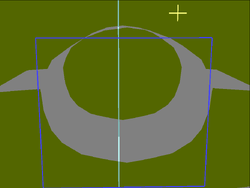
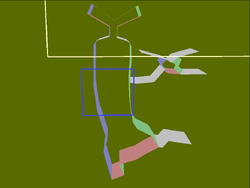
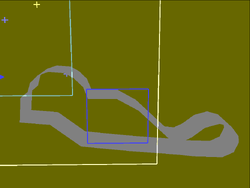
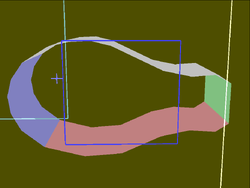
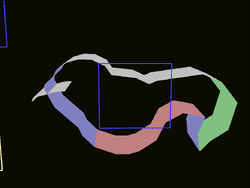
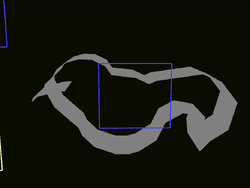
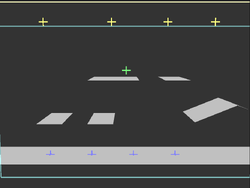
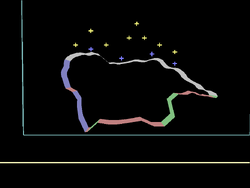
| Gray Structure | Stage Floor |
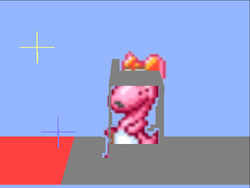
| Red Structure | Stage Ceiling |
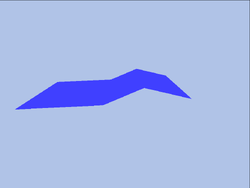
| Blue Structure | Stage Left Wall |
| Green Structure | Stage Right Wall |
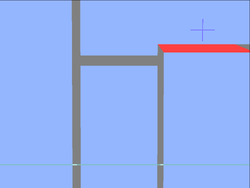
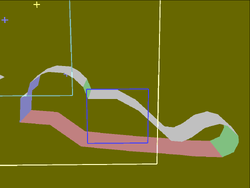
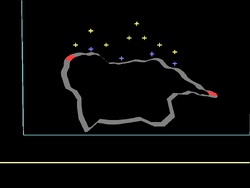
| Gray Platform | Solid No-Grab Platform |
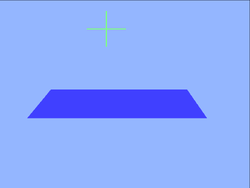
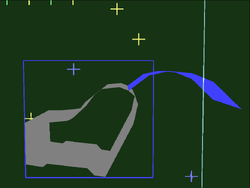
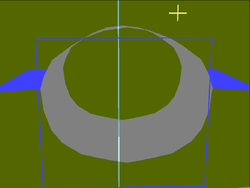
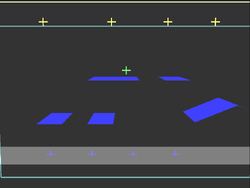
| Blue Platform | Drop-Through Platform |
| Red Platform | Grab Platform |
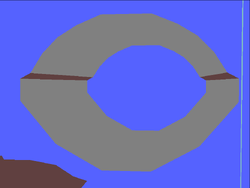
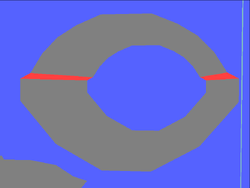
Structures that appear darker then other structures are dynamic, meaning they convert between floor, wall, and ceiling in real-time as they animate. One example is the entirety of Brinstar Depths.
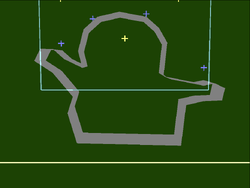
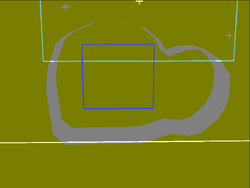
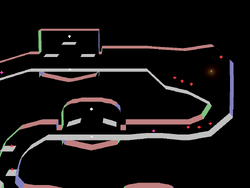
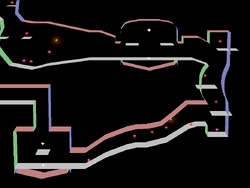
Terrains
| Item | Description |
|---|---|
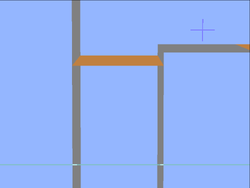
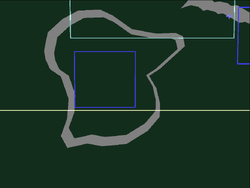
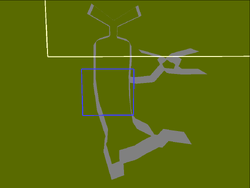
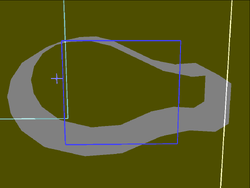
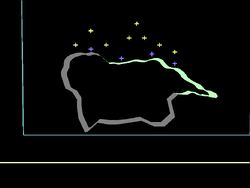
| Gray Platform | Basic Terrain |
| Brown Platform | Rock Terrain |
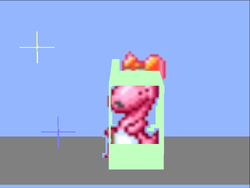
| Light Green Platform | Grass Terrain |
| Dark Red Platform | Dirt Terrain |
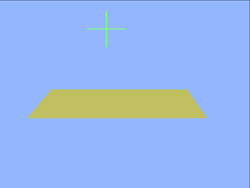
| Light Brown Platform | Wood Terrain |
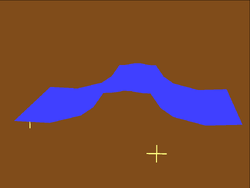
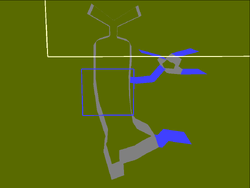
| Blue Platform | Water Terrain |
| Light Blue Platform | Ice Terrain |
| White Platform | Snow Terrain |
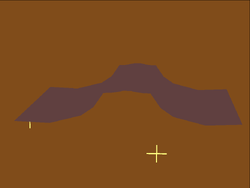
| Dark Gray Platform | Light Metal Terrain |
| Dark Brown Platform | Heavy Metal Terrain |
| Yellow Platform | Alien Goop Terrain |
| Light Gray Platform | Game & Watch Terrain |
| Light Yellow Platform | Checkered Terrain |
Other
| Item | Description |
|---|---|
| Orange Box | Item pickup boxes (when a character's hitbox overlaps the item box, the character can pick it up. |
Collision Bubble Key
This is a list of all hitbox colors and what they are for. For more detail, see here.
| Item | Description |
|---|---|
| Yellow | Damageable |
| Red | Attacking |
| Blue | Intangible |
| Purple | Grabbing |
| Green | Invincible |
| Aqua | Reflecting |
| Cyan | Shielding |
| Cyan-Blue | Absorbing |
| White | Special |
Stages
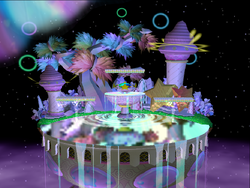
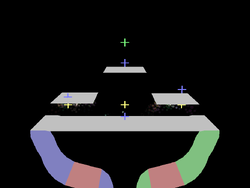
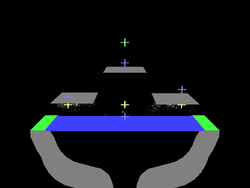
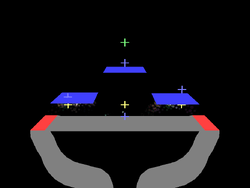
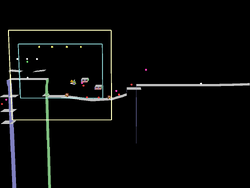
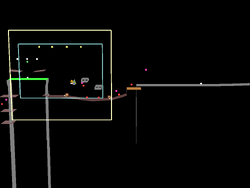
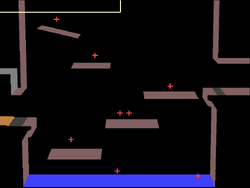
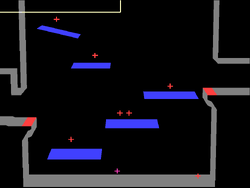
Fountain of Dreams
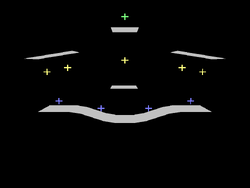
- Blast Zone: Fountain of Dreams has a rather large blast box.
- Spawn Points: It features 4 spawn points: 1 on each platform, but only 1 respawn point, above the top most platform.
- Item Spawn Points: The stage has 3 item spawn points all evenly spaced above the main platform, as well as 5 more evenly spaced above the camera box.
- Platforms: In addition to the main solid platform, Fountain of Dreams also features 3 drop-through platforms. The 2 lower platforms begin evenly elevated, then randomely rise and fall, while the upper-center platform remains stationary. The main platform is grab-able on both sides.
- Terrain: The 3 aerial platforms have basic terrain, while the main platform has a mostly water terrain with grass terrain on the edges.
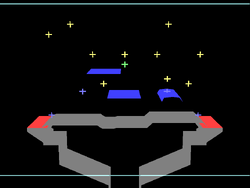
Pokémon Stadium
- Blast Zone: The Pokémon Stadium has a very large blast box.
- Spawn Points: Spawn points are located on either side of the lower platform, as well as above each of the 2 platforms. Although they cannot be used except for the normal form, spawn points exist in the same location in the all stage forms. The respawn point is located in the same upper-central spot in all forms as well.
- Item Spawn Points: There are a total of 10 item spawn points scattered in the air above the stage.
Normal Stage
- Platforms: The normal stage form features 2 evenly elevated drop-through platforms, located a short distance above the main, solid platform. The main platform is grab-able from either side.
- Terrain: This form has only basic terrain
Grass Stage
- Platforms: The grass stage form has 3 drop-through platforms, each elevated differently from the main platform. This main platform is again grab-able from both sides.
- Terrain: There are 2 central drop-through platforms that have wooden terrain, and the other right platform has grass terrain. The main platform is mostly covered with grass terrain, although there is a small strip of water terrain just left of the center.
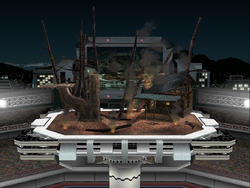
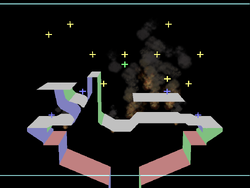
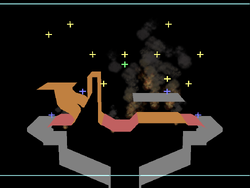
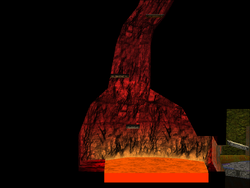
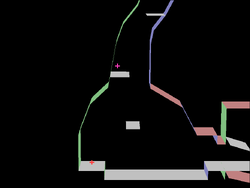
Fire Stage
- Platforms: The fire stage form has 3 drop-through platforms, although it may seem like only 2 at first. The first is the awning of the burning building on the right. The other 2 are located on the branch of the dead tree on the left. The platform technically counts as 2, as the center of it is solid. The main platform, as well as most of the dead tree (minus the aformentioned platforms on the branch) are solid, and either edge of the main platform is grab-able.
- Terrain: The edges of the main platform, as well as the awning of the burning building on the right have basic terrain. The ground under the awning and also the dead tree on the left have wooden terrain. The rest of the main platform has dirt terrain.
Water Stage
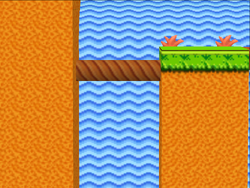
- Platforms: The water stage form has 3 drop-through platforms, each elevated differently. The one on the left is the windmill. The platform rotates clockwise, then disappears once it has become verticle enough. The other 2 are located towards the right and are elevated differently. The main platform is mostly flat, and again, both of its edges can be grabbed.
- Terrain: The windmill and the edges of the stage have basic terrain. The bridge on the left and the 2 aerial platforms on the right have wooden terrain and the stream has water terrain. There is also a miniscule strip of grass terrain between the left edge and the bridge.
Rock Stage
- Platforms: The rock stage form features 4 drop-through platforms, all located in the center of the stage. They are arranged in 2 uneven rows of 2, and the top-right most one is slanted slightly. The main platform is flat at the right, until the center where there is a sharp slant up, then a drop down, followed by the big boulder. There is a very small wall near the right edge that can sometimes mess players up, particularly during a transformation. The main platform is grab-able on both edges, and the boulder is also grab-able from the left
- Terrain: The edges of the main platform have basic terrain. The flat areas in the left and center have dirt terrain, and the mountain has rock terrain. The aerial platforms have light-metal terrain, while the metal beam in the center has heavy-metal terrain.
Princess Peach's Castle
- Blast Zone: Peaches Castle has a very large blast box.
- Spawn Points: Spawn points are located in the center of the flat part on either side of the central tower, as well as on both rising platforms. The respawn point is located above the tower.
- Item Spawn Points: There are 9 item spawn points located towards the very top of the camera box. they are arranged in a straight line, 1 being directly above the tower, 4 being spaced nearly evenly above either side of the tower.
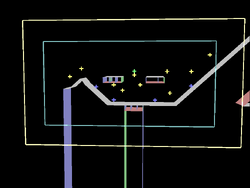
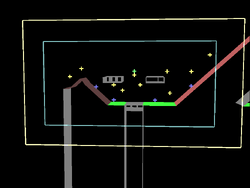
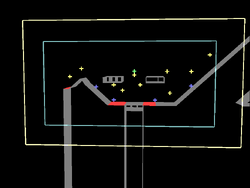
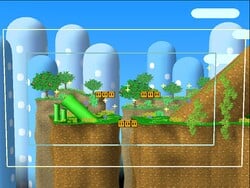
- Platforms: The entire stage is arranged symmetrically. There are 2 aerial drop-through platforms located near either edge of the stage. They will rise when a player stands on them, and will fall to their original position otherwise. The main platform is composed of a few different parts: there is a tower located in the center of the stage, with a top-most platform, as well as 2 short slanted platforms located a bit lower on either side. The stage then flattens out, then slants downward on either side. The main platform is grab-able on either edge.
- Terrain: The entire stage has basic terrain, except for the rising platforms, which have light-metal terrain.
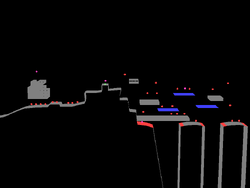
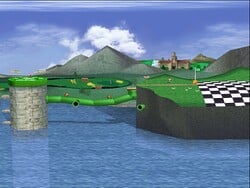
Normal
Green
- Platforms: 2 evenly elevated drop-through platforms appear on either side of the tower. A solid platform also appears off the left edge of the stage.
- Terrain: All additional platforms have basic terrain.
Red
- Platforms: 2 drop-through platforms appear on either side of the stage even with the lower platforms, extending them. 2 solid platforms also appear level with either side of the the lower platforms of the tower.
- Terrain: All additional platforms have basic terrain.
Blue
- Platforms: 2 drop-through platforms appear near either edge. They are each slanted down from the left. A solid platform also appears just above the tower.
- Terrain: All additional platforms have basic terrain.
Kongo Jungle
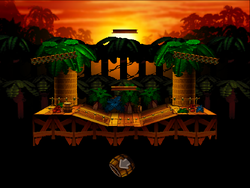
- Blast Zone: Kongo Jungle has a medium blast box.
- Spawn Points: Spawn points are located on the upper-left platform, on the middle-left platform, on the middle-right platform, and towards the right of the bottom platform. There are 4 respawn points placed evenly inbetween the top-most platforms.
- Item Spawn Points: There are 9 item spawn points, scattered around the stage. 3 are located above the bottom platform, 1 above either upper platform, 1 above the middle-left platform, 2 above the middle-right platform, and 1 above the small piece of land on the right.
- Platforms: This stage features 4 drop-through platforms arranged in 2 uneven rows. They sway a little both randomely, and with the weight of players. The bottom platform is solid, immobile, and can be grabbed from either edge. The piece of land also solid, and can be ledge-grabbed from either side as well. In addition, a log can sometimes get caught in the side of the waterfall, and it's edges are also grab-able.
- Terrain: The bottom platform, aerial platforms, and log all have wooden terrain, while the piece of land has rock terrain.
Brinstar
- Blast Zone: Brinstar has a fairly large blast box.
- Spawn Points: Spawn points are placed above the left and right aerial platforms, as well as towards the left of the main platform, and towards the right of the main platform. 4 respawn points are arranged in an even line above the upper platform.
- Item Spawn Points: There are 9 item spawn points: 2 above the left platform, 2 above the upper platform, 1 above the right platform, and 5 above the main platform.
- Platforms: The 3 aerial platforms are all drop-through. The main platform is solid, and is grab-able on either edge. Breaking the tissue connecting the left and right aerial platforms to the main platform will cause the aerial platform to slant, while breaking the fleshy goop in the center of the main platform will cause the whole thing to split.
- Terrain: The main platfom has mostly heavy metal-terrain, but the fleshy goop has alien terrain. The left and right aerial platforms also have alien terrain. The upper platform has light-metal terrain.
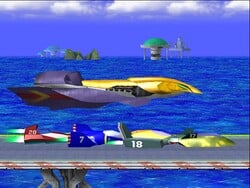
Corneria
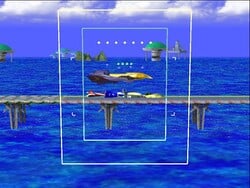
- Blast Zone: Corneria has a medium-small blast box.
- Spawn Points: The spawn points are located on the hull and tail of the Great Fox. The respawn point is above the center of the hull.
- Item Spawn Points: There are 10 item spawn points arranged in a linear-curved fashion above the cockpit, hull, tail, and back jet of the ship.
- Platforms: The jets of the Great Fox are drop-through-able. These can be destroyed, making them intangible. The cockpit, tail, and jet have grab-able edges. Arwings and Wolfens are drop-through-able.
- Terrain: The entirety of the Great Fox has heavy-metal terrain, while the Arwings and wolfens have basic terrain.
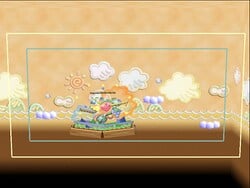
Yoshi's Story
- Blast Zone: Yoshi's Story has a medium-large blast box.
- Spawn Points: Spawn points are located 1 on each of the 3 aerial platforms and 1 in the center of the main platform. The respawn point is located above the upper platform.
- Item Spawn Points: There are 9 item spawn points: 3 above the main platform, 1 above either lower platform, 3 above the upper platform, and 1 that moves with the cloud.
- Platforms: The stage has 3 aerial drop-through platforms, and a main, solid platform with grab-able edges. There is also a cloud that travels in a set path in the lower part of the stage. The cloud is drop-through-able.
- Terrain: The entire stage has paper terrain, except for the cloud, which has basic terrain.
Onett
- Blast Zone: Onett has a medium-small blast box. This stage has walk-offs on both sides.
- Spawn Points: Spawn points are located on the lower roof of the left-most house, on the sidewalk near the center, on the upper drug store awning, and on the left roof of the right-most house. The respawn point is located above the upper drug store awning.
- Item Spawn Points: There are 10 item spawn points: 2 above the tree on the left (different branches), 1 above either roof of the left-most house, 1 above the upper drug store awning, 1 above the center of the sidewalk, 2 above the ribbon on the right, and 1 above either roof on the right-most house
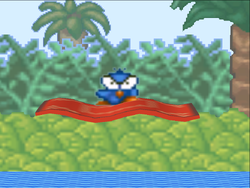
- Platforms: The 2 tree branches, 2 drug store awnings, ribbon, and the lower roof of the left-most house all have drop-through platforms. In addition, standing on the drug store awnings for too long will cause them to fall down. The upper roof on the left-most house has 2 grab-able edges. All other platforms are solid and featureless
- Terrain: All the grounded platforms have basic terrain. The tree branches have grass terrain. The drug store awnings and the ribbon have paper terrain.
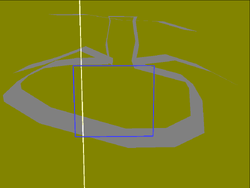
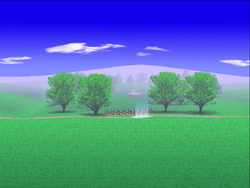
- ONETT-NRML-SSMB.jpg
Onett
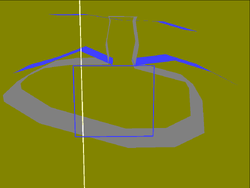
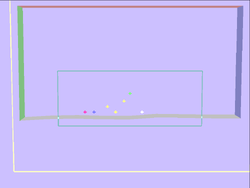
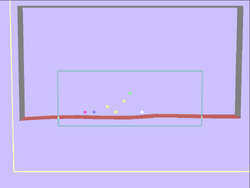
- ONETT-STRUCT.png
Onett showing Structure
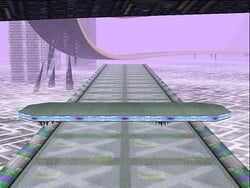
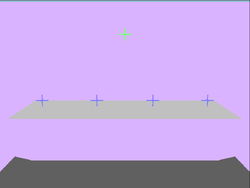
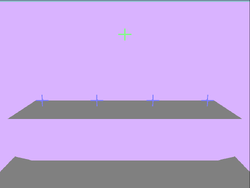
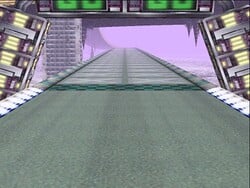
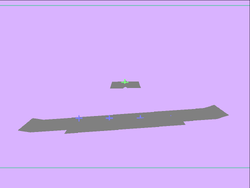
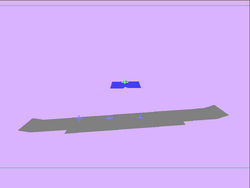
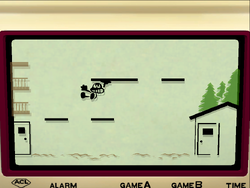
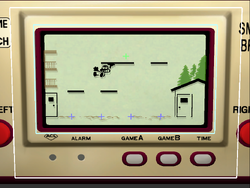
Mute City
Platform
Opening Text
Landing 1
Opening Text
Landing 2
Opening Text
Landing 3
Opening Text
Landing 4
Opening Text
Landing 5
Opening Text
Landing 6
Opening Text
Rainbow Cruise
Opening Text
Jungle Japes
Opening Text
Great Bay
Opening Text
Temple
Opening Text
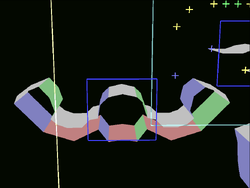
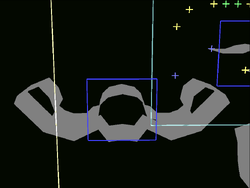
Brinstar Depths
Angle 1
Opening Text
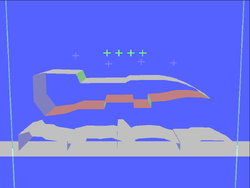
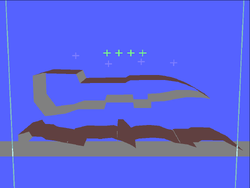
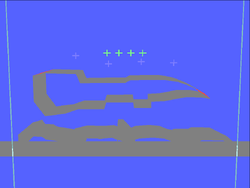
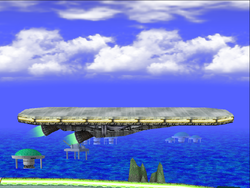
Angle 2
Opening Text
- DEPTH-NRML2-SSBM.jpg
Brinstar Depths
- DEPTH-STRUCT2-SSBM.png
Brinstar Depths showing Structure
- DEPTH-TERRA2-SSBM.png
Brinstar Depths showing Terrain
- DEPTH-PLATF2-SSBM.png
Brinstar Depths showing Platforms
Angle 3
Opening Text
- DEPTH-NRML3-SSBM.jpg
Brinstar Depths
- DEPTH-STRUCT3-SSBM.png
Brinstar Depths showing Structure
- DEPTH-TERRA3-SSBM.png
Brinstar Depths showing Terrain
- DEPTH-PLATF3-SSBM.png
Brinstar Depths showing Platforms
Angle 4
Opening Text
- DEPTH-NRML4-SSBM.jpg
Brinstar Depths
- DEPTH-STRUCT4-SSBM.png
Brinstar Depths showing Structure
- DEPTH-TERRA4-SSBM.png
Brinstar Depths showing Terrain
- DEPTH-PLATF4-SSBM.png
Brinstar Depths showing Platforms
Angle 5
Opening Text
- DEPTH-NRML5-SSBM.jpg
Brinstar Depths
- DEPTH-STRUCT5-SSBM.png
Brinstar Depths showing Structure
- DEPTH-TERRA5-SSBM.png
Brinstar Depths showing Terrain
- DEPTH-PLATF5-SSBM.png
Brinstar Depths showing Platforms
Angle 6
Opening Text
- DEPTH-NRML6-SSBM.jpg
Brinstar Depths
- DEPTH-STRUCT6-SSBM.png
Brinstar Depths showing Structure
- DEPTH-TERRA6-SSBM.png
Brinstar Depths showing Terrain
- DEPTH-PLATF6-SSBM.png
Brinstar Depths showing Platforms
Angle 7
Opening Text
- DEPTH-NRML7-SSBM.jpg
Brinstar Depths
- DEPTH-STRUCT7-SSBM.png
Brinstar Depths showing Structure
- DEPTH-TERRA7-SSBM.png
Brinstar Depths showing Terrain
- DEPTH-PLATF7-SSBM.png
Brinstar Depths showing Platforms
Yoshi's Island
Opening Text
Green Greens
Opening Text
Fourside
Opening Text
Mushroom Kingdom
Opening Text
Mushroom Kingdom II
Opening Text
Venom
Opening Text
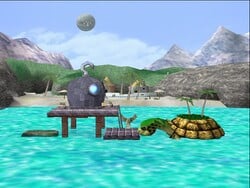
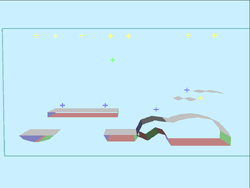
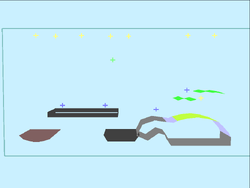
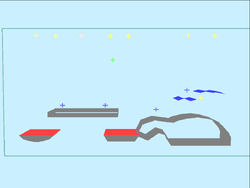
Poké Floats
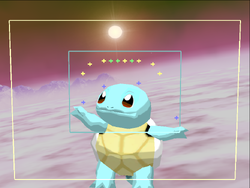
Squirtle
Opening Text
Onix
Opening Text
Psyduck
Opening Text
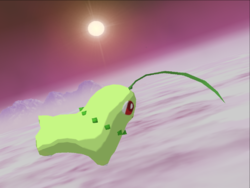
Chikorita
Opening Text
Weezing
Opening Text
Slowpoke
Opening Text
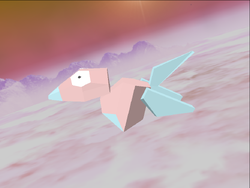
Porygon
Opening Text
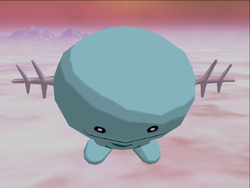
Wooper
Opening Text
Sudowoodo
Opening Text
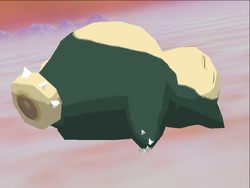
Snorlax
Opening Text
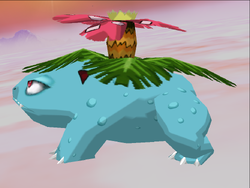
Venusaur
Opening Text
Seel
Opening Text
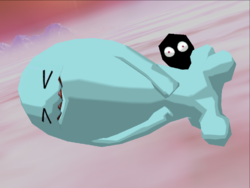
Wobbuffet
Opening Text
Unown
Opening Text
Goldeen
Opening Text
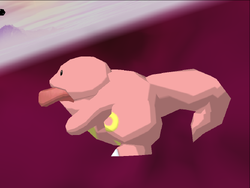
Lickitung
Opening Text
Chansey
Opening Text
Geodude
Opening Text
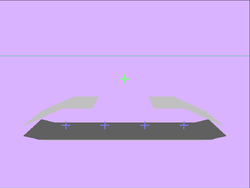
Big Blue
Icicle Mountain
Flat Zone
Opening Text
Dream Land N64
Opening Text
Yoshi's Island N64
Opening Text
Kongo Jungle N64
Opening Text
Battlefield
- Blast Zone: Battlefield has a moderate-to-large blast box.
- Spawn Points: Spawn points are located 1 on each of the 3 aerial platforms and 1 in the center of the main platform. There are 4 respawn points arranged evenly above the stage.
- Item Spawn Points: There are 8 item spawn points: 1 above the center of the main platform, 2 above either of the lower aerial platforms, and 3 above the upper aerial platform.
- Platforms: The stage has 3 aerial drop-through platforms, and a main, solid platform with grab-able edges.
- Terrain: The entire stage has basic terrain.
Final Destination
- Blast Zone: Final Destination has a moderate-to-large blast box.
- Spawn Points: Spawn points are spaced evenly on the main platform. There are 4 respawn points spaced evenly above the main platform.
- Item Spawn Points: There are 8 item spawn points arranged symmetrically across the stage.
- Platforms: The stage has one main platform with grab-able edges.
- Terrain: The entire stage has basic terrain.
Adventure Mode: Mushroom Kingdom
Opening Text
Adventure Mode: Underground Maze
Opening Text
Adventure Mode: Brinstar Escape Shaft
Brinstar Escape Shaft is split into 6 sections by jump-through solid platforms.
- Blast Zone: The Escape Shaft has a wide and tall blast box.
- Spawn Points: The spawn point is at the bottom right in the first section, and the respawn point follows player 1. The exit point is on the platform at the very top in the sixth section.
- Item Spawn Points: Oddly, there is a single item spawn point in the center of the first section.
- Trophy/Enemy Spawn Points: There are 5 trophy spawn points: 1 towards the top of the first section, 1 on a platform in the second section, 1 on a platform towards the top of the third section, and 1 on either side of the sixth section.
- Platforms: There are several drop-through platforms throughout the stage, but no grab-able ones.
- Terrain: Almost all solid platforms have basic terrain, while the aerial platforms have light metal terrain.
Adventure Mode: Grand Prix
Opening Text
Adventure Mode: Icicle Mountain
Opening Text
Special Stage: Race to the Finish
Opening Text
Special Stage: Trophy Collector
Opening Text
Special Stage: All-Star Rest Area
Opening Text
Special Stage: Target Test
Special Stage: Home-Run Stadium
Opening Text
Special Stage: Goomba
Opening Text
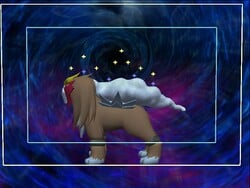
Special Stage: Entei
Opening Text
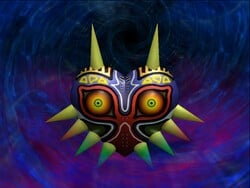
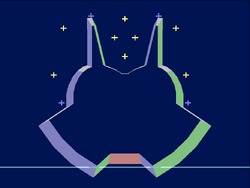
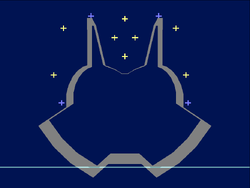
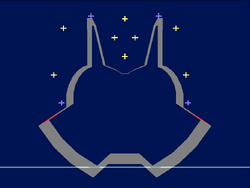
Special Stage: Majora's Mask
Opening Text
Debug Stage: TEST
Opening Text
