Samus (SSB4): Difference between revisions
mNo edit summary |
|||
| (687 intermediate revisions by more than 100 users not shown) | |||
| Line 1: | Line 1: | ||
{{ArticleIcons|ssb4=y}} | {{ArticleIcons|ssb4=y}} | ||
{{disambig2|Samus' | {{disambig2|Samus' appearance in ''Super Smash Bros. 4''|the character in other contexts|Samus Aran}} | ||
{{Infobox Character | {{Infobox Character | ||
|name | |name = Samus | ||
|image | |image = [[File:Samus SSB4.png|250px]] | ||
|game | |game = SSB4 | ||
|ssbgame1 | |ssbgame1 = SSB | ||
|ssbgame2 | |ssbgame2 = SSBM | ||
|ssbgame3 | |ssbgame3 = SSBB | ||
|ssbgame4 = SSBU | |||
|availability = [[Starter character|Starter]] | |availability = [[Starter character|Starter]] | ||
|tier = D | |||
|ranking = 36-37 | |||
}} | }} | ||
'''Samus''' ({{ja|サムス|Samusu}}, ''Samus'') | '''Samus''' ({{ja|サムス|Samusu}}, ''Samus'') is a playable character in ''[[Super Smash Bros. 4]]''. Her return to the series was confirmed in the [[E3 2013]] trailers on June 11th, 2013, while she was also among the first wave of [[amiibo]] figures that are compatible with ''SSB4''. However, unlike in ''Brawl'', Samus is no longer capable of transitioning into {{SSB4|Zero Suit Samus}}, as she is now a standalone character. | ||
Samus is ranked 36th/37th out of 54 on the [[tier list]] (tied with {{SSB4|Robin}}), placing her at the bottom of D tier and middle of mid tier. This is a moderate improvement over her bottom-tier placement in ''Brawl'', where she was ranked 32nd out of 38. Samus possesses multiple projectiles: Her [[Charge Shot]], [[Missile]] and [[Bomb (Samus)|Bomb]], all of which grant her strong zoning potential alongside her [[Grapple Beam]]. Charge Shot also functions as a fearsome KOing option and a strong [[punish]]ing option in many situations due to its high damage output and excellent knockback, while her Bomb and Grapple Beam can aid her recovery, and she has an above average damage output as well. Samus also possesses a great air game: her neutral aerial and sweetspotted back aerial are among the strongest of their type, while her forward and up aerials deal impressive damage and have good follow-up potential, allowing for powerful and highly damaging combos when she finds or sets up an opening, which is further supplemented by set-ups in the form of her dash attack, up tilt, down aerial, down throw and Grapple Beam. | |||
However, Samus also | However, Samus' moveset forces her to be reliant on defensive [[spacing]] to keep opponents at bay. Except for her down tilt, all of her moves are generally less effective at point-blank range, while they also render her prone to trading hits with opponents even at mid-range. When combined with her floatiness and average mobility, these traits can make it difficult for Samus to escape from [[Juggle|juggling]] and other problematic situations. | ||
While Samus has noticeably improved since ''Brawl'', largely due to game updates, most of her fellow [[veteran]]s have also improved at varying degrees. This has resulted in her overall representation being poor (which is compounded by her very high learning curve), although she has attained a dedicated playerbase nevertheless. Thanks to the likes of professionals such as {{Sm|IcyMist}}, {{Sm|ESAM}}, {{Sm|KayJay}}, {{Sm|Afro Smash}} and {{Sm|Jonny Westside}}, Samus' results have continuously improved over time, most notably with IcyMist's 9th place finish at {{b|Royal Flush|tournament}}, Afro Smash's strong results in the United Kingdom, KayJay's 13th place finish at [[Smashdown World]] and ESAM's 1st place at [[Combo Breaker 2017]]. As a result, Samus' placement has notably risen with each iteration of the tier list, and many players label her as a solid character with the potential to rise even further. | |||
==Attributes== | |||
Samus is unique among her fellow heavyweights. While she is tied with {{SSB4|Bowser Jr.}} as the sixth heaviest character in the game, she is a [[Falling speed#Floaty|floaty]] character with slightly below average [[walking]] and [[dash]]ing speeds, average [[air speed]], above average air acceleration, high jump height and slow [[falling speed]]. These attributes grant her an easier time chasing aerial opponents and forcing air dodges, yet also cause her to be juggled rather easily. When combined with her few reliable landing options and slow falling speed, opponents will also have more time to punish Samus as she attempts to return to the stage. In addition, many of her moves artificially extend her hurtboxes, leading to trades, an opponent grabbing her invisible hurtboxes and, in some cases, getting punished after landing a move despite her being visually out of range of the opponent's counterattack. Furthermore, some of the hitboxes on her moves, most notably up smash, forward smash and up aerial, have the issue of failing to connect properly or even whiffing outright. | |||
Samus' moveset is defensive, as she uses her projectiles to space, rack up damage from a distance and pressure shields. [[Charge Shot]] is her most consistent KOing option out of her special moves, courtesy of its increased speed and power. [[Missile]] is mostly used for spacing, due to neither its Homing or Super variants being extremely inefficient at KOing, while [[Bomb (Samus)|Bomb]] grants Samus various mix-ups and can aid her recovery. However, Missile and Bomb also possess valuable utility, in that they can guarantee a shield break when used in conjunction with a sufficiently charged Charge Shot or a sweetspotted back aerial. Lastly, [[Screw Attack]] is a decent out of shield option, a KOing option near the upper blast line and a viable combo finisher from aerial combo strings. Combined with rage, it can KO very early. | |||
In addition, Samus has a strong air game. All of Samus' aerials have no more than 20 frames of landing lag, and her back aerial is one of her best moves courtesy of its power, damage output, speed and range. Her down aerial can be a powerful meteor smash, forward aerial is a good pressuring tool due to its long duration, and up aerial is an excellent combo option. Lastly, her neutral aerial is a viable KOing option as of update 1.1.5. When coupled with her high jumps, Samus' air game is also potent while she is off-stage, as she can recover from nearly anywhere on the stage, stay in position for longer periods of time due to her floatiness, or bait the opponent by stalling in the air and punishing edge-guard attempts. | |||
Samus' grab game is also somewhat useful, as her [[Grapple Beam]] has impressive range, doubles as a [[tether recovery]] and has very little landing lag. Down throw is very useful for starting combos that deal respectable damage and can be used with her neutral, forward and up aerials at varying percentages. Many of her combos can rack up more than 30% and when using platforms to her advantage, or string together multiple times and then be finished with Screw Attack, leading to a KO or dealing 40%-50% at the very least. Lastly, her pummel is tied with {{SSB4|Lucario}}'s as the fastest in the game, although it is also the least damaging one. | |||
However, Samus is not flawless. While her grab range is among the longest in the game as with other tether grabs, the ending lag on all of Samus' grabs makes her very easy to punish if whiffed, and none of her throws can reliably KO on their own. Samus' ground game is mediocre overall as her smash attacks are punishable, with only her forward smash being a fairly reliable KOing option due to its quick start-up lag. Her neutral attack is very mediocre, which is noticeably exemplified in its inability to connect at high percentages and thus limits Samus' anti-pressuring ability. Her tilts can combo, KO, and have decent range, but suffer from her unique hurtbox issue. Due to this and her average dashing speed, most Samus players will often find themselves in the air, where her strengths lie. | |||
Samus also has slight issues with recovery. Her grab aerial has very long range, her jumps are among the highest in the game, Screw Attack is fast and hard to punish, and Bomb jumping provides infinite horizontal recovery, but they are all offset by Screw Attack's only average distance, Bomb's high ending lag in the air and Samus' only average air speed and reliance on her grab aerial to grab ledges from a distance. Altogether, this results in her recovery being linear and predictable. | |||
In regard to [[Character customization|custom moves]], Samus benefits from a few. Apex Screw Attack has slightly more start-up lag and the recovery it provides is slightly worse, but it deals more damage and outstanding knockback, to the point of KOing most middleweights at 75% from the stage and as low as 50% near the upper blast line. Screw Rush, while making her vertical recovery worse, grants more horizontal distance, deals more damage and KOs earlier then Screw Attack depending where it is used on-stage, making it more useful for damage racking. Relentless Missile, while traveling slower, has more accurate tracking as a homing missile while dealing less damage. Turbo Missile travels more distance and is considerably faster than both Missile and Relentless Missile, but at the cost of dealing less damage overall. | |||
Dense Charge Shot is dependent on the matchup and the player's playstyle. As one of the strongest projectiles in the game, it takes a bit longer to charge, and has much less speed and range. However, it gives Samus multiple set-ups due to the length of time the Charge Shot stays in the air and with the increased damage, can force shield breaks much easier and KO much easier. Slip Bomb, while dealing less damage, has the useful property of tripping grounded opponents and meteor smashing airborne opponents, making it useful as a set up for a grab or a punish and an edge-guarding option to spike the opponent. Mega Bomb can be used to stall opponents, since Samus can stay next to the Mega Bomb itself while waiting until it explodes, allowing Samus to either retreat, launch Missiles, charge her Charge Shot, or force an approach. Melee Charge Shot has a shorter charge time than both Charge Shot and Dense Charge shot, while also having considerably more [[hitstun]] and shieldstun with the inclusion of extra pushback after its use, making it extremely safe if shielded or even whiffed. | |||
Overall, Samus is a character that performs best when using her projectiles and grab aerial for spacing in order to set up combos and either finish off pressured opponents off-stage, or KO them outright with Charge Shot. Unlike the majority of veterans, Samus' optimal playstyle is highly unorthodox; as she falls short in regard to zoning-exclusive or melee-exclusive offense, success with Samus requires careful, calculated use of her various tools to keep momentum in her favor, much like in [[Metroid (universe)|her home series]]. As such, she is like {{SSB4|Shulk}} in that she is a character that is hard to master, but greatly rewards patient and calculated play. | |||
==Changes from ''[[Super Smash Bros. Brawl]]''== | |||
Samus has received a mix of [[buff]]s and [[nerf]]s in the transition from ''Brawl'' to ''SSB4'', but while she was initially nerfed despite already being a low tier character, she received significant buffs via game [[updates]] resulting in her ultimately being buffed overall due to her buffs fixing one of her main issues in ''Brawl'' combined with the game's mechanics greatly benefiting her overall. Samus has gained several new KOing options, the most notable of which is [[Charge Shot]], which has drastically increased speed and knockback. The other noteworthy options include her forward smash, up smash, neutral aerial, forward aerial and [[Screw Attack]] improving one of her main weaknesses in the previous game. Forward smash now has a powerful sweetspot in the form of a fiery blast at the tip of her Arm Cannon. Neutral aerial, forward aerial, back aerial, up aerial up smash and Screw Attack have each have had their knockback improved, most notably on neutral aerial (and only to the last hit in Screw Attack's case). Additionally, forward aerial, up smash and Screw Attack's multiple hits now connect better due to alterations to those moves along with the weakening of [[SDI]] to further ensure that opponents cannot escape their respective last hits. | |||
Aside from her new KOing options, Samus benefits from the general changes between ''Brawl'' and ''SSB4''. With the changes to [[hitstun canceling]] and [[DI]], Samus' combo game has been improved. Some of her attacks (most notably her dash attack) have been altered to give them much greater followup potential, and she is able to combo attacks into each other far easier, with multiple combo starters and combo oriented moves, including dash attack, up tilt, forward aerial, up aerial and down aerial. Her [[Missile]]s have been improved as well, with more active frames and having less startup and ending lag for all variants except for the aerial version of the Homing Missile. Samus also greatly benefits from the introduction of [[rage]] as it not only further supplements her improved KO power but it also allows her to KO with her grounded Screw Attack at insanely early percents and her high weight and solid recovery allow her to build up rage. The changes to shields, shield damage and [[shieldstun]] also benefit her, as she can use her Charge Shot, Super Missile and Bomb in tandem with other moves to easily break shields. | |||
Samus' falling speed and gravity have noticeably increased. This makes it much easier for Samus to land however, it also hinders her aerial output as she can no longer perform two aerials in a short hop, autocancel forward aerial in a short hop and it makes her more susceptible to combos. | |||
However, Samus also received a few nerfs. The most significant nerf being the fact that she is no longer connected to {{SSB4|Zero Suit Samus}}. As such, she can no longer utilize her Zero Suit counterpart's far superior mobility and moveset to alleviate her own. As for Samus' more direct nerfs, some of Samus' moves her nerfed frame data with her landing lag in particular being significantly increased. While this is a common nerf across the cast, it harmed Samus more than most other returning veterans as Samus went from having the lowest average landing lag in the game to having fairly mediocre landing lag on her aerials with down aerial and forward aerial seeing the largest increase to their landing lag. This is especially an issue with forward aerial, as it can no longer [[auto-cancel]] in a short hop due to her previously mentioned higher gravity and faster falling speed. While her KO potential has improved, some of Samus' previous KO moves, such as her down tilt and down smash, have lost their previous KO potential. [[Missile]] is harder to camp with due it no longer auto-canceling on landing and she can only use two Homing Missile and one Super Missile at a time, though her projectiles overall are still powerful and useful in their own right. Additionally, Samus' overall damage output is lower (though it is higher relative to the cast) and despite her improved combo potential, some of her moves have reduced followup potential with two notable examples being her landing forward aerial and down aerial. One move which notably got nerfed however was her [[grab aerial]]. While it has increased tether range and it benefits from the changes to ledges, it has increased landing lag, deals less damage and has altered knockback hindering its spacing and followup potential. | |||
Overall, Samus has been buffed overall from ''Brawl'' despite receiving a fair share of nerfs. She has been slightly re-balanced having a worse defensive game due to her higher landing lag, altered Missile and grab aerial but now wielding a slightly improved close-range game, with her damage racking ability and combo game having been vastly improved. Most importantly, she has noticeably improved KOing potential, enabling her to score KOs much easier. While a few of her moves now require slightly more precision, such as her forward smash, neutral aerial and Missile, they compensate for this by being more rewarding. The changes to the game's mechanics also greatly benefit her overall as they make her multi hit moves more reliable, give her access to her greater combo potential and they further supplement her already improved KO potential. As such, she has a relatively high learning curve, but can be quite viable and versatile when mastered, similarly to {{SSB4|Shulk}}. Dedicated players like {{Sm|IcyMist}}, {{Sm|ESAM}}, and {{Sm|Afro Smash}} have managed to bring her some degree of tournament success and continue to develop her metagame. | |||
===Aesthetics=== | ===Aesthetics=== | ||
*{{change|Samus' | *{{change|Samus' design is now based on her appearance in ''{{s|metroidwiki|Metroid: Other M}}''. Her updated design also incorporates numerous black vents within the {{s|metroidwiki|Varia Suit}}'s helmet, shoulder pads, torso and legs, while the suit's {{s|metroidwiki|visor}} and accents are now emerald green, rather than lime green.}} | ||
*{{change|Samus | *{{change|[[Missile]] and [[Bomb (Samus)|Bomb]] have been very slightly updated with general graphical enhancements. Bomb is now red, rather than reddish orange.}} | ||
*{{change|Samus | *{{change|[[Dash]]'s animation has changed. Samus now dashes like she does in ''Other M'', rather than how she does in ''{{s|metroidwiki|Metroid: Zero Mission}}'', ''{{s|metroidwiki|Super Metroid}}'' and ''{{s|metroidwiki|Metroid Fusion}}''.}} | ||
===Attributes=== | ===Attributes=== | ||
*{{change|Samus is | *{{buff|Samus [[Walking|walks]] very slightly faster (1.05 → 1.0615).}} | ||
*{{buff| | *{{buff|Samus [[dash]]es slightly faster (1.445 → 1.504).}} | ||
*{{buff| | *{{buff|Samus's [[air speed]] is faster (0.987 → 1.03).}} | ||
*{{nerf|Samus' | *{{change|Samus's [[falling speed]] is much faster (1.07 → 1.3). This greatly improves her ground-to-air transitioning, but makes her more susceptible to combos.}} | ||
**{{buff|Her [[Fast-fall|fast-falling speed]] is drastically faster (1.498 → 2.08). This significantly improves her aerial mobility and makes her substantially less vulnerable to juggling.}} | |||
*{{change|Samus' [[gravity]] is higher (0.058 → 0.077). When combined with her faster falling speed, this allows her to land significantly more safely, but further increases her susceptibility to combos.}} | |||
*{{buff|[[Jump]] is higher.}} | |||
*{{buff|[[Roll]]s have less ending lag (FAF 45 → 40).}} | |||
*{{buff|[[Air dodge]] has less startup (frame 4 → 3) and ending lag (FAF 50 → 33).}} | |||
*{{nerf|Air dodge has a shorter duration (frames 4-29 → 3-27).}} | |||
*{{nerf|[[Spot dodge]] has a shorter duration (frames 2-20 → 2-17) and more ending lag (FAF 26 → 27).}} | |||
*{{nerf|Samus is no longer connected to {{SSB4|Zero Suit Samus}} via [[Final Smash]], taunt, or menu input usage, with the latter becoming her own separate character. This removes Samus' ability to switch into her Zero Suit counterpart mid-match to adapt to different matchups utilizing Zero Suit Samus' far superior mobility and frame data.}} | |||
===Ground attacks=== | ===Ground attacks=== | ||
*{{ | *[[Neutral attack]]: | ||
*{{nerf|Neutral attack's first hit has less | **{{buff|Neutral attack's second hit has a longer duration (frames 4-6 → 6-9), deals slightly more damage (7% → 8%) and has increased vertical range.}} | ||
*{{buff| | **{{nerf|Neutral attack's first hit has less range having smaller hitboxes (4.3u/4.3u/4.3u → 4u/4u/3u) and a reduced Y (12.8 → 12) and Z position (15.2/10.4/4.4 → 12.2/6.2/0/2). It also has increased base knockback (5 → 8) and decreased hitstun. This allows opponents to shield the second hit at a wider percent range or even be launched out of range for the second hit to land, hindering its utility. The second hit also has more startup lag (frame 4 → 6) further compounding this.}} | ||
*{{ | *[[Forward tilt]]: | ||
*{{buff|Down tilt has slightly | **{{buff|Forward tilt has adjusted hitbox properties. Its non-angled variant has received two sweetspots covering the lower leg and foot that deal more damage and received sourspots on her upper leg and body that deal the same damage as in ''Brawl'' (7%/8% → 7%/8%/9%/10%). Additionally, its upward and downward angles have each received a sweetspot on her foot that deals 1% more damage (10% → 11%). Lastly, the sweetspots's base knockback has been tripled (10 → 30). This significantly improves its KO potential.}} | ||
*{{nerf|Down tilt | **{{nerf|Forward tilt's upward and downward angles have received sourspots covering her upper leg and body (10% → 8%/9%/10%) with the weaker sourspots dealing less knockback on all angles (10 (base), 100 scaling) → 20/70). It also has slightly increased startup (frame 7 → 8) and ending lag (FAF 32 → 34).}} | ||
*{{buff|Forward smash | *[[Down tilt]]: | ||
*{{nerf|Forward smash | **{{buff|Down tilt has slightly increased range.}} | ||
*{{ | **{{nerf|Down tilt deals 2% less damage (14% → 12%) and has decreased knockback scaling (60 → 48), hindering its KO potential to the point it cannot KO middleweights until around 200%.}} | ||
*{{nerf|Down smash | *[[Dash attack]]: | ||
**{{buff|Dash attack has received an early hitbox that deals 7%. It also has adjusted hitbox timings and a longer duration (frames 8-10 (clean)/11-16 (late) → 8-9 (early)/10-13 (clean)/14-18 (late)), decreased ending lag (FAF 38 → 34) and altered knockback (30/20 (base), 80 (scaling) → 80/60). When coupled with the changes to [[hitstun canceling]], these changes significantly improve its combo potential now being her best combo starter.}} | |||
*[[Forward smash]]: | |||
**{{buff|Forward smash has received a sweetspot and a sourspot. The sweetspot is the fiery explosion from the Arm Cannon and deals more damage (14%/13%/12% → 15%/14%/13.5%) and its base knockback has been doubled (20 → 40), while the sourspot also deals more knockback (20 (base), 100 (scaling) → 16/112), making it stronger despite its lower damage. Forward smash also has much greater reach because of the sweetspot, restoring its utility from ''Melee''.}} | |||
**{{nerf|Forward smash has increased ending lag (FAF 44 → 49) and the sourspot deals less damage (14%/13%/12% → 13%/12%/11%).}} | |||
*[[Up smash]]: | |||
**{{nerf|Up smash deals less damage (4% (hits 1-3), 5% (hit 4), 6% (hit 5) 23% (total) → 3% (hits 1-4), 6% (hit 5), 18% (total)).}} | |||
**{{nerf|Hits 1-4 have a shorter duration (3 frames → 2).}} | |||
**{{buff|Up smash's linking hits connect together better as they have a reduced SDI multiplier (1.2x → 0.8x) and the last hit has increased knockback scaling (120 → 150), improving its KO potential.}} | |||
**{{change|Up smash charges one frame sooner (between 10-11 → 9-10).}} | |||
*[[Down smash]]: | |||
**{{nerf|Down smash deals less damage (15% (front)/14% (back) → 10%/12%) and has decreased knockback (90 (base), 50 (scaling) → 70/46 (front), 80/40 → 70/48 (back)), hindering its KO potential. Both hits also have shorter hitbox durations (frames 9-11 (front)/17-19 (back) → 9-10/17-18).}} | |||
**{{buff|Down smash has decreased ending lag (FAF 52 → 45) and it is now a [[semi-spike]] (70° (front), 120° (back) → 31° (both)), granting it edge-guarding potential.}} | |||
===Aerial attacks=== | ===Aerial attacks=== | ||
*{{nerf| | *{{nerf|All aerials' have increased landing lag (9 frames → 16 (neutral), 9 frames → 25 (forward), 12 frames → 18 (back) 9 frames → 12 (up), 9 frames → 20 (down)).}} | ||
*{{nerf| | *{{nerf|Samus' faster falling speed and higher gravity prevent her from performing two neutral, back or up aerials in a short hop.}} | ||
*{{buff| | *[[Neutral aerial]]: | ||
*{{nerf| | **{{buff|Samus has a new [[neutral aerial]]: a spinning roundhouse kick which represents the aerial version of the Counter Attack from ''Metroid: Other M''. Compared to the previous neutral aerial, it deals more damage (9%/6% → 10%/9%/8%) and significantly more knockback (10 (base), 80 (scaling) → 40/100), making it significantly better at KOing and one of the strongest neutral aerials of the game. It also has a back hit that comes out on frame 16 which has a sweetspot which deals 1% less damage compared to the front hit with the same knockback values, making it reliable for KOing too, and a sourspot that deals 8% with much less knockback. Lastly, it launches at a lower angle (361° → 32°), making it better at edgeguarding.}} | ||
*{{buff|Forward aerial | **{{nerf|Neutral aerial has more startup lag with a much shorter duration (frames 5-24 → 8-11/16-24) and less range in front of Samus. Its altered angle and knockback also means that it no longer [[lock]]s opponents removing one of Samus' most reliable locking tools.}} | ||
*{{ | *[[Forward aerial]]: | ||
*{{nerf| | **{{buff|Forward aerial has less startup lag (frame 7 → 6), its 2nd, 3rd and 4th hits launch at the [[Autolink angle|auto-link angle]] and the first four hits have a reduced SDI multiplier (1x → 0.8x) making them connect more reliably and its last hit has increased knockback scaling (100 → 140), improving its edgeguarding potential.}} | ||
*{{buff|Down aerial | **{{change|Forward aerial's first hit now has set knockback (20 (base) → 15 (set)). This allows it to connect more reliably with the later hits but significantly hinders its followup potential when combined with forward aerial's much higher landing lag.}} | ||
*{{nerf|Down aerial | **{{nerf|Forward aerial's first four hits deal less damage (4% (hit 1)/3% (hits 2-4) → 3%/1.6%).}} | ||
*{{ | **{{nerf|Forward aerial has increased ending lag (FAF 56 → 60) and less range having smaller hitboxes (4.3u/4.7u/7.5u → 4u/6u (hits 1-4), 5u/5u/8u → 5.5u/7.2u (hit 5) and a reduced x position (4/71573.79 → 2/9).}} | ||
**{{nerf|Due to Samus's faster falling speed and higher gravity, forward aerial can no longer autocancel in a short hop. Combined with its much higher landing lag, this makes it much worse for approaching.}} | |||
*[[Back aerial]]: | |||
**{{buff|Back aerial's sourspot deals 2% more damage (10% → 12%) and both hits have higher knockback scaling (95/90 (sourspots), 88 (clean) → 98 (both)), making it among the strongest back aerials in the game, improving its KO potential. It also received a late hit on frames 11-14 that deals 9% and less knockback that enables it to be used in a [[Wall of Pain]], improving its utility. Back aerial also has slightly reduced ending lag (FAF 40 → 39).}} | |||
**{{nerf|Back aerial auto-cancels later (frame 32 → 42), although it can still autocancel in a short hop.}} | |||
*[[Up aerial]]: | |||
**{{buff|Up aerial's hits connect together better due to the weakening of SDI and its last hit has increased knockback scaling (120 → 160), granting it KO potential near the upper blast line. It also has juggling potential now due to launching vertically instead of horizontally (361° → 70°).}} | |||
**{{nerf|Up aerial has significantly less edgeguarding potential due to its angle being changed.}} | |||
*[[Down aerial]]: | |||
**{{buff|Down aerial now has an early hit with less startup lag (frame 18 → 17), increased base knockback (2 → 25) and it launches opponents horizontally (270° → 361°) significantly improving its spacing and KO potential on stage. The clean hit also has increased base knockback (2 → 25) which when combined with the removal of [[meteor cancel]]ing, improves its edgeguarding potential. It also now has a late hit which functions similarly to the early hit and lengthens down aerial's duration (frames 18-22 → 17-23).}} | |||
**{{nerf|Down aerial deals less damage (15% → 10% (early)/14% (clean)/11% (late)) and the meteor hitbox has more startup lag with a shorter duration (frames 18-22 → 19-21) and has decreased knockback scaling (100 → 85) which hinders its KO potential when combined with its lower damage despite its higher base knockback. Down aerial is also much worse as a landing option and a combo tool due to its much higher landing lag combined with the attack's alterations.}} | |||
*[[Grab aerial]]: | |||
**{{nerf|Grab aerial deals less damage (4% (early)/7% (clean) → 1%/3.5%) and the sourspot has decreased base knockback (60 → 30) while the sweetspot's knockback was not fully compensated (60 (base), 60 (scaling) → 30/100) hindering the sweetspot's edgeguarding potential. It also has 8 frames of landing lag, rather than auto-canceling. Altogether, these changes greatly hinder grab aerial's spacing and followup potential.}} | |||
**{{buff|Grab aerial has increased range as a [[tether recovery]]. It also received two additional hitboxes.}} | |||
===Throws/other attacks=== | ===Throws/other attacks=== | ||
*{{buff| | *{{buff|All grabs have less startup (frame 17 → 16 (standing/dash), frame 19 → 17 (pivot)) and ending lag (FAF 94 (standing)/74 (dash)/96 (pivot) → 69/67/83).}} | ||
*{{buff| | *{{nerf|All grabs' durations are 5 frames shorter.}} | ||
*[[Pummel]]: | |||
**{{buff|Pummel deals more damage (1% → 1.2%).}} | |||
**{{buff|Pummel has an altered animation, which gives the hitbox more range in front of Samus. This prevents the move from whiffing against certain characters, especially during their hitstun animations.}} | |||
**{{change|Pummel now launches bystanders horizontally (80° → 361°).}} | |||
***{{buff|This makes the pummel safer against bystanders, especially against floatier characters.}} | |||
***{{nerf|However, this also hinders its ability to chain into itself.}} | |||
*[[Up throw]]: | |||
**{{buff|Up throw's hitboxes have a longer duration (1 frame → 2). This means that all five hits will now connect against the entire cast, rather than certain hits whiffing against some lightweights.}} | |||
*[[Down throw]]: | |||
**{{buff|Down throw releases opponents slightly later (frame 19 → 20). When combined with the changes to hitstun canceling and the weakening of [[DI]], this significantly improves down throw's followup potential.}} | |||
*{{buff|The back hit of front floor attack and edge attack no longer have set knockback (90 (set), 100 (scaling) → 80 (base)/50 (floor), 90/20 (edge)).}} | |||
*[[Floor attack]]s: | |||
**{{buff|Front floor attack and the back hit of back floor attack deal 1% more damage (6% → 7%).}} | |||
**{{nerf|The front hit of back floor attack deals less damage (8% → 7%).}} | |||
*[[Edge attack]]: | |||
**{{change|Edge attack deals consistent damage compared to the previous fast edge attack (6%/8% → 7%).}} | |||
**{{nerf|Edge attack has less intangibility (frames 1-23 → 1-22).}} | |||
===Special moves=== | ===Special moves=== | ||
*{{buff| | *[[Charge Shot]]: | ||
*{{nerf| | **{{buff|Charge Shot now uses a charge formula to increase its power and size rather than a stage system consisting of separate hitbox data for each charge. This means that the move is constantly becoming larger and more powerful every frame rather than only after every 16 frames.}} | ||
*{{buff| | **{{buff|Charge Shot has larger hitboxes (1.44u (uncharged)/6u (fully charged) → 1.9u/8u).}} | ||
*{{nerf|Samus' {{ | **{{buff|Charge Shot's projectile travels faster (1.5 (uncharged)/2.65 (fully charged) → 1.8/3.2).}} | ||
*{{buff|[[ | **{{buff|Fully charged Charge Shot has increased knockback scaling (56 → 62), improving its KO potential.}} | ||
*{{nerf| | **{{change|Fully charged Charge Shot has a lower hitlag multiplier (1x → 0.7x).}} | ||
***{{buff|This gives the opponent less time to DI or SDI the move.}} | |||
***{{nerf|However as the move is a projectile, this gives Samus less time to followup after the opponent is no longer in hitlag, both on hit and on shield.}} | |||
**{{nerf|Charge Shot has more ending lag, especially when fully charged (FAF 44 → 54 (uncharged)/61 (fully charged)).}} | |||
***{{nerf|This particularly hurts the fully charged version as when combined with its lower hitlag, this prevents Samus from being to followup out of it at lower percents as well as making the move much more punishable on shield (with the move no longer being completely safe on shield).}} | |||
*[[Missile]]: | |||
**{{buff|Missiles have less startup lag (frame 23 (Homing/Super ground)/25 (Super aerial) → 18/21), longer durations (frames 23-121 (Homing)/23-84 (Super) → 18-118/21-84), and decreased ending lag on the ground (FAF 60 (both) → 57 (Homing)/59 (Super)).}} | |||
**{{buff|Super Missile also has increased base knockback (40 → 50), slightly improving its KO potential.}} | |||
**{{nerf|Samus can only have two Homing Missiles and one Super Missile onscreen at the same time. If she attempts to shoot another one while one is already on-screen, she will perform the firing animation, but no Missile will be fired.}} | |||
**{{nerf|Aerial Homing Missile has more startup (frame 16 → 18) and ending lag (FAF 50 → 57).}} | |||
**{{nerf|Homing Missile targets less reliably and both missiles cover less distance.}} | |||
**{{nerf|Missile no longer auto-cancels on landing, hindering its utility.}} | |||
*{{b|Screw Attack|move}}: | |||
**{{buff|Screw Attack travels more vertical distance, improving its recovery potential, and its last hit has drastically increased knockback scaling (175 (grounded), 160 (aerial) → 240 (both)), granting it KO potential. All of the ground version's multi hits also now have extremely high set knockback which when combined with the inclusion of rage can allow Screw Attack to kill at obscenely low percents if Samus has a high amount of rage.}} | |||
*{{b|Bomb|Samus}}: | |||
**{{buff|Bomb has less ending lag (FAF 47 → 45). Additionally, aerial Bomb can be used faster. When coupled with her faster air speed, these changes improve its horizontal recovery potential.}} | |||
**{{nerf|Aerial Bomb delays Samus' descent for a slightly shorter amount of time and Bomb grants slightly less height, hindering its vertical recovery potential. Additionally, Bombs have more startup lag (frame 53 → 63) and the explosion is now [[Absorption|absorbable]].}} | |||
*{{b|Zero Laser|Samus}}: | |||
**{{nerf|Zero Laser deals less damage overall.}} | |||
**{{buff|Zero Laser has less startup lag and more range.}} | |||
**{{change|Zero Laser's animation has slightly changed. The beam now starts out thin before expanding, rather than starting out wide before thinning. It also produces slightly more prominent visual effects around the Arm Cannon's tip.}} | |||
==Update history== | |||
Samus has been heavily buffed via game updates. She received plenty of significant buffs during game updates, along with two minor nerfs that were either negligible or even fixed outright in later updates, causing her to fare much better after the updates. | |||
In terms of direct changes, Samus started receiving relevant minor buffs in update 1.0.8. Said update saw her up smash buffed so that its hits can connect together better than before, while her grabs' ending lag was reduced, making them slightly safer. Update 1.1.1 bought about more minor buffs; Screw Attack was changed to help its hits connect together better. Her neutral and forward aerials were also slightly buffed, with neutral aerial having its hitbox sizes and timings improved, while forward aerial had its damage output increased and landing lag decreased. | |||
In terms of indirect changes, the changes to shield mechanics brought about by updates [[1.1.0]] and 1.1.1 are a mixed bag for Samus. The new mechanics gave Samus a number of new [[Charge Shot]] combos that allow her to break shields, of which she previously only had one such combo. However, these same changes also make most of her close-ranged attacks more difficult to land out of shield, while the only other moves that have been improved are her down tilt, her forward smash's sweetspot, up smash, and forward aerial, which are already difficult to land (or in up smash's case, requires the opponent to be above on a platform). | |||
However, update 1.1.5 has granted Samus arguably her most noteworthy buffs. Dash attack now has a hitbox that deals 7% at the beginning of the dash, which prevents it from whiffing and makes its hitbox timing virtually identical to ''Brawl''. Forward tilt has been vastly improved; after being nerfed overall in update 1.0.6, all of its hitboxes now deal 2% more damage, its sourspot deals more knockback (thus making it safer and more rewarding upon landing) and its tech-chase combos have effectively been restored after they had been severely weakened to the point of necessitating its sweetspot for said combos to be performed. Like her forward tilt, her neutral aerial's hitboxes all deal 2% more damage, which naturally increases its knockback and improves its damage racking, KO potential, and shield safety. Although they are still unimpressive, her down smash and grabs had their ending lag decreased, making all of them safer and making her down smash a quick anti-pressure option. | |||
Bomb was also changed slightly, as Samus now gets more momentum out of one in the air. Lastly, Samus' attributes were also changed for the better. Her gravity, falling speed, and air speed were increased, which improve her already great survivability and allows her to land more effectively than before, which has been made even easier thanks to the aforementioned Bomb buff. As a result, Samus has been significantly buffed overall as of update 1.1.5, having become considerably better than she was in ''Brawl'' and even better than she was during ''SSB4''{{'}}s initial release. | |||
'''{{GameIcon|ssb4}} [[1.0.6]]''' | |||
*{{buff|Sweetspotted forward tilt deals 1% more damage|7%/8%|8%/9% and its knockback increased, slightly improving its KO potential near the edge.}} | |||
*{{nerf|Forward tilt deals 1% less damage|6%/7%|5%/6% and little to no hitstun due to receiving a sourspot on the middle part of Samus' leg. When coupled with the aforementioned sweetspot buff, forward tilt has lost its ability to lead into [[Charge Shot]] [[Tech-chasing|tech-chases]], hindering its utility.}} | |||
*{{buff|[[Missile|Super Missile]]'s speed increased, although it is rather negligible.}} | |||
'''{{GameIcon|ssb4}} [[1.0.8]]''' | |||
*{{Buff|Up smash improved. Its initial hits' hitbox sizes increased by 0.5u, its last hit's hitbox size increased|7u/3.5u|7.3u/4u and its last hit's knockback growth increased: 135 → 150.}} | |||
*{{Buff|Standing and pivot grabs' ending lag decreased|79 (standing)/92 (pivot)|75/88.}} | |||
'''{{GameIcon|ssb4}} [[1.1.1]]''' | |||
*{{buff|Neutral aerial improved. Its late second hit's knockback growth increased|80|98, its hitboxes' sizes increased: 5.5u (hit 1)/3.5u (hit 2 clean)/2.8u (hit 2 late) → 6u/4u/3.3u and its hitboxes' durations increased by 2 frames.}} | |||
*{{change|Neutral aerial's second hit's angle altered|[[Sakurai angle]]|45°.}} | |||
*{{buff|Forward aerial's loop hits deal 0.6% more damage|1%|1.6%.}} | |||
*{{buff|Forward aerial's landing lag decreased|30 frames|24.}} | |||
*{{buff|[[Charge Shot|Melee Charge Shot]] improved. It deals more damage|5% (uncharged)/18% (fully charged)|6%/20%, its partially charged base knockback increased: 30 → 50 and its fully charged hitbox sizes increased: 8u → 10u.}} | |||
*{{nerf|Partially charged Melee Charge Shot's hitbox sizes decreased|4u|2.5u.}} | |||
*{{change|Fully charged Melee Charge Shot's knockback altered|65 (base)/35 (growth)|70/32.}} | |||
*{{change|Melee Charge Shot's recoil distance increased.}} | |||
*{{buff|[[Screw Attack]]'s loop hits' weight-based knockback increased|150/120|178/140.}} | |||
*{{change|Screw Attack's loop hits' angles altered|100°|96°.}} | |||
'''{{GameIcon|ssb4}} [[1.1.5]]''' | |||
{{UpdateList/1.1.5|char=Samus}} | |||
==Moveset== | ==Moveset== | ||
*Samus can [[wall jump]]. | |||
''For a gallery of Samus's hitboxes, see [[/Hitboxes|here]].'' | |||
{{MovesetTable | {{MovesetTable | ||
|game=SSB4 | |game=SSB4 | ||
|neutralcount=2 | |neutralcount=2 | ||
|neutralname= | |neutralname=Straight ({{ja|ストレート|Sutorēto}}) / Cannon Hammer ({{ja|アームキャノンハンマー|Āmu Kyanon Hanmā}}, ''Arm Cannon Hammer'') | ||
|neutral1dmg=3% | |neutral1dmg=3% | ||
|neutral2dmg=8% | |neutral2dmg=8% | ||
|neutraldesc= | |neutraldesc=A left-handed jab followed by a [[wikipedia:Professional wrestling attacks#Forearm club|forearm club]] with the {{s|metroidwiki|Arm Cannon}}. The first hit can [[jab reset]] and [[jab cancel]], but the attack is mediocre overall. Opponents can usually act out before the second hit connects by shielding or counterattacking, while the second hit may not even connect at high percentages. Depending on the opponent's weight, it is safe and a true combo ranging from 35%-75%, but only if the first hit connects relatively close to the arm and not at the fist. First hit comes out on frame 3, while the second hit comes out 6 frames later, meaning it is a much safer option overall to land the first hit and retreat. The second hit does have KO potential at very high percentages, however. | ||
|ftiltangles=3 | |ftiltangles=3 | ||
|ftiltname= | |ftiltname= | ||
|ftiltupdmg= | |ftiltupdmg=11% (foot), 10% (lower leg), 8% (upper leg), 9% (body) | ||
|ftiltsidedmg= | |ftiltsidedmg=10% (foot), 9% (lower leg), 7% (upper leg), 8% (body) | ||
|ftiltdowndmg= | |ftiltdowndmg=11% (foot), 10% (lower leg), 8% (upper leg), 9% (body) | ||
|ftiltdesc= | |ftiltdesc=A reverse roundhouse kick. Deals more damage and knockback at her heel, while her leg deals less damage and knockback. Can be aimed at strong angles, though if angled up, it can actually miss medium-sized characters like {{SSB4|Mario}}. Comes out on frame 8. The foot sweetspot deals rather potent knockback for a tilt attack, which can KO near the edge at around 150%. At varying percentages, such as from 30%-40% when sweetspotted and 100%-120% when sourspotted, it can lead into a guaranteed [[Charge Shot]]. This is because, regardless of [[tech]]ing, Charge Shot will catch their option in time. | ||
|utiltname= | |utiltname= | ||
|utiltdmg=13% ( | |utiltdmg=13% (grounded), 12% (aerial) | ||
|utiltdesc= | |utiltdesc=An axe kick, which is identical to {{SSB4|Captain Falcon}}'s up tilt. If an opponent is hit directly by her heel as it comes down, they are dealt extra damage. While the move can [[meteor smash]], it oddly only does so on grounded targets, making it ineffective as an edge-guard. Samus' strongest tilt, it is able to KO grounded opponents at 140% or less with rage. However, it has noticeable start-up, due to coming out on frame 15. KOs aerial opponents at the edge around 90% or earlier depending on the opponent's weight. If the opponent misses their grounded tech, it is a good combo starter for her aerials at low to medium percentages, while it functions as a true combo into Charge Shot at high percentages. | ||
|dtiltname= | |dtiltname= | ||
|dtiltdmg=12% | |dtiltdmg=12% | ||
|dtiltdesc= | |dtiltdesc=Kneels and quickly thrusts her Arm Cannon downward to fire a small, fiery blast. It is very fast, due to coming out on frame 6, and deals respectable damage for a tilt attack. However, it has high ending lag and cannot KO until extremely high percentages. It is useful as a close range anti-pressure option on opponents in front of Samus, or as a punishment option. With maximum [[rage]], it can KO middleweights at 150%. | ||
|dashname= | |dashname= | ||
|dashdmg=10% (clean), 6% (late) | |dashdmg=7% (early), 10% (clean), 6% (late) | ||
|dashdesc= | |dashdesc=A shoulder tackle. Deals less damage at its beginning and end. An excellent combo starter as of update 1.1.5, as it can lead into neutral, forward and up aerial or [[Screw Attack]] at a variety of percentages, depending on which hitbox connects. With high amounts of rage, this move forms the start of a two-hit KO combo into Screw Attack, which KOs due to only the first couple of hits of Screw Attack connecting. This combo can KO floaty characters beginning at 0%, and the heaviest characters beginning around 30%. | ||
|fsmashangles=3 | |fsmashangles=3 | ||
|fsmashname= | |fsmashname= | ||
|fsmashupdmg={{ChargedSmashDmgSSB4|15}} ( | |fsmashupdmg={{ChargedSmashDmgSSB4|15}} (blast), {{ChargedSmashDmgSSB4|13}} (Arm Cannon) | ||
|fsmashsidedmg={{ChargedSmashDmgSSB4|14}} ( | |fsmashsidedmg={{ChargedSmashDmgSSB4|14}} (blast), {{ChargedSmashDmgSSB4|12}} (Arm Cannon) | ||
|fsmashdowndmg={{ChargedSmashDmgSSB4|13.5}} ( | |fsmashdowndmg={{ChargedSmashDmgSSB4|13.5}} (blast), {{ChargedSmashDmgSSB4|11}} (Arm Cannon) | ||
|fsmashdesc= | |fsmashdesc=Quickly thrusts her Arm Cannon forward to fire a small, fiery blast. Despite the blast's appearance, the hitbox does not quite reach the end of the blast, and actually reaches slightly into the Arm Cannon's barrel. Despite this, the sweetspot relies heavily on spacing in order to land, as only the blast deals knockback strong enough to KO at 100% from center-stage. Conversely, the Arm Cannon itself KOs at 138%, which makes its overall functionality largely similar to {{SSB4|Mario}}'s forward smash. However, it is tied with {{SSB4|Marth}} and {{SSB4|Lucina}}'s forward smashes as the fastest one in the game, due to coming out on frame 10. It can be angled like her forward tilt, with the upward angle dealing more damage and knockback, though it can typically miss as a result. The downward angle can hit edge hanging opponents, similarly to her down tilt. | ||
|usmashname=Cover Fire<!--official from all-star trophy--> | |usmashname=Cover Fire<!--official from all-star trophy--> ({{ja|ヘルファイア|Herufaia}}, ''Hellfire'') | ||
|usmashdmg={{ChargedSmashDmgSSB4|3}} (hits 1-4), {{ChargedSmashDmgSSB4|6}} (hit 5), 18 | |usmashdmg={{ChargedSmashDmgSSB4|3}} (hits 1-4), {{ChargedSmashDmgSSB4|6}} (hit 5), {{ChargedSmashDmgSSB4|18}} (all hits connect) | ||
|usmashdesc= | |usmashdesc=Fires five fiery blasts in an overhead arcing motion. True to its name, this move works best as an anti-air attack, as its multiple hits give a good amount of aerial protection. Conversely, it is unable to hit grounded opponents unless they are touching Samus. When reversed on the ground, it can poke and hit through shields. KOs at 115% uncharged and around 60%-70% when fully charged. | ||
|dsmashname= | |dsmashname= | ||
|dsmashdmg={{ChargedSmashDmgSSB4|10}} ( | |dsmashdmg={{ChargedSmashDmgSSB4|10}} (front), {{ChargedSmashDmgSSB4|12}} (back) | ||
|dsmashdesc=Samus | |dsmashdesc=A legsweep. A [[semi-spike]], its speed is decent and provides protection against rolls and near edges. However, its power has been significantly toned down since ''Brawl'', as it is now one of the weakest down smashes in the game. KOs at extremely high percentages, making it unreliable. However, its back hit deals more knockback, making it possible to KO at 150% with enough rage, while the front hit can set up an edge-guard. Its ending lag is relatively quick, however, making it more useful as a decent anti-pressure move and a punishment option against rolls due to its ability to hit behind Samus. | ||
|nairname= | |nairname= | ||
|nairdmg= | |nairdmg=10% (hit 1), 9% (hit 2 clean), 8% (hit 2 late) | ||
|nairdesc= | |nairdesc=A spinning roundhouse kick. Hits on both sides quickly and can auto-cancel with a short hopped fast fall. One of the strongest neutral aerials as of update 1.1.5, its front hit and sweetspotted back hit deal very powerful knockback, which makes it a viable KOing option off-stage or near the edge. It is also a decent combo finisher. | ||
|fairname= | |fairname= | ||
|fairdmg=3% (hit 1), 1% (hits 2-4), 5% (hit 5), | |fairdmg=3% (hit 1), 1.6% (hits 2-4), 5% (hit 5), 12.8% (all hits connect) | ||
|fairdesc= | |fairdesc=Fires five fiery blasts in a slow, downward arcing motion. The first four hits drag opponents into the rest of the move, with the last hit carrying the entire attack's knockback. Samus' main aerial move for both combos and protection. Extremely useful as an edge get-up option or against air dodges due to its multiple hits, and using the move immediately after a short hop can hit opponents with the last hit before Samus lands again. As of update 1.1.5, the first hitbox of the move results in all of the move's hits connecting together much better than before, to the point that it functions as a true combo from down throw up to around 70%, or chain into itself at low percentages thanks to Samus' air speed having been increased in that same update. | ||
|bairname= | |bairname= | ||
|bairdmg=14% (clean foot), 12% (clean leg), 9% (late) | |bairdmg=14% (clean foot), 12% (clean leg), 9% (late) | ||
|bairdesc= | |bairdesc=A back kick. It is fast and deals powerful knockback when sweetspotted, which makes it an excellent KOing option, especially while edge-guarding. However, it has a small hitbox like her neutral aerial. When sweetspotted, it is among the strongest back aerials in the game. When sourspotted, it can be used as a [[Wall of Pain]]. KOs under 100% and around 80% at the edge with the clean sourspot and sweetspot respectively. | ||
|uairname= | |uairname= | ||
|uairdmg=3% (hit 1), 1% (hits 2-5), 4% (hit 6), 11% | |uairdmg=3% (hit 1), 1% (hits 2-5), 4% (hit 6), 11% (all hits connect) | ||
|uairdesc=Samus does a | |uairdesc=A diagonal corkscrew flying kick. Hits multiple times, though only the last hit deals moderate knockback. Unlike most multi-hitting attacks, the opponent can easily be launched before the move is complete if Samus does not follow the opponent's previous launch direction. Grounded opponents can be hit by the last hitbox if Samus lands while starting the move in the air, although it is difficult to do so. It is her fastest aerial, due to coming out on frame 5. Useful for landing, breaking some certain combos, and countering aerial approaches. Can be used as a follow-up after a dash attack, grounded up tilt, down aerial, or down throw, all of which can be followed up with another up aerial and/or can be finished off with a [[Screw Attack]]. On stages with platforms, it can even [[zero-to-death]] the entire cast when using a platform to extend the combo. If used high enough at high percents, it can be used as a KO option. | ||
|dairname= | |dairname= | ||
|dairdmg=10% (early), 14% (clean), 11% (late) | |dairdmg=10% (early), 14% (clean), 11% (late) | ||
|dairdesc= | |dairdesc=Swings her Arm Cannon in a downward arcing motion. Hitting with the move's trail will [[meteor smash]] opponents, while the sourspot on the edge of the move at the very start and end deals strong upward diagonal knockback. Auto-cancels from a short hop and is a relatively good combo starter. | ||
|zairname= | |zairname=[[Grapple Beam]] ({{ja|グラップリングビーム|Gurappuringu Bīmu}}, ''Grappling Beam'') | ||
|zairdmg=1.5% (early), 3% (clean) | |zairdmg=1.5% (early), 3% (clean) | ||
|zairdesc= | |zairdesc=Fires the {{s|metroidwiki|Grapple Beam}}. A useful spacing option due to having only 8 frames of landing lag from a short hop. It auto-cancels from a full hop and has impressive range, being the longest grab aerial in game. In addition to its recovery and spacing capabilities, it is good at setting up an opening for a dash attack, which Samus can then further capitalize on with combos. | ||
|grabname= | |grabname=Grapple Beam ({{ja|グラップリングビーム|Gurappuringu Bīmu}}, ''Grappling Beam'') | ||
|grabdesc= | |grabdesc=Fires the Grapple Beam. It has impressive range and is the longest tether grab in the game. However, it is tied with [[Zero Suit Samus (SSB4)|her Zero Suited form]]'s grab as the second slowest in terms of ending lag, making it very punishable if missed. | ||
|pummelname= | |pummelname= | ||
|pummeldmg=1.2% | |pummeldmg=1.2% | ||
|pummeldesc= | |pummeldesc=A palm strike. The second fastest pummel in the game, beaten only by {{SSB4|Lucario}}'s. However, it is also the second least damaging one in the game, after Lucario's. | ||
|fthrowname= | |fthrowname= | ||
|fthrowdmg=9% | |fthrowdmg=9% | ||
|fthrowdesc= | |fthrowdesc=Twirls the opponent overhead, then flings them forward. Low knockback growth prevents it from KOing even the lightest of characters unless with rage at extremely high percentages. | ||
|bthrowname= | |bthrowname= | ||
|bthrowdmg=8% | |bthrowdmg=8% | ||
|bthrowdesc= | |bthrowdesc=Swings the opponent behind herself. Has even lower knockback growth than her forward throw. | ||
|uthrowname= | |uthrowname= | ||
|uthrowdmg=1% (hits 1-5), 4% (throw) | |uthrowdmg=1% (hits 1-5), 4% (throw) | ||
|uthrowdesc= | |uthrowdesc=Hoists the opponent overhead and then blasts them upward with the Grapple Beam. Can combo into Screw Attack or up aerial at 0% against heavyweights or fast-fallers, but it otherwise launches opponents too high for follow-ups. However, on a platform, it can zero-to-death the same characters when followed up by her up aerial and then Screw Attack. Like her forward and back throws, it possesses low knockback growth. | ||
|dthrowname= | |dthrowname= | ||
|dthrowdmg=6% | |dthrowdmg=6% | ||
|dthrowdesc= | |dthrowdesc=Swings the opponent high above her head, then slams them onto the ground. It can be reliably followed up with her neutral, forward and up aerials, Charge Shot and Screw Attack at low to medium percentages. | ||
|floorfname= | |floorfname= | ||
|floorfdmg=7% | |floorfdmg=7% | ||
|floorfdesc= | |floorfdesc=Swings her Arm Cannon in front of herself and then fires a blast behind herself. | ||
|floorbname= | |floorbname= | ||
|floorbdmg=7% | |floorbdmg=7% | ||
|floorbdesc= | |floorbdesc=Performs a low-level roundhouse kick. | ||
|floortname= | |floortname= | ||
|floortdmg=5% | |floortdmg=5% | ||
|floortdesc= | |floortdesc=Performs a shin kick in front of herself and then a back kick behind herself. | ||
|edgename= | |edgename= | ||
|edgedmg=7% | |edgedmg=7% | ||
|edgedesc= | |edgedesc=Performs a legsweep while climbing up. | ||
|nsdefname=Charge Shot | |nsdefname=Charge Shot | ||
|nsdefdmg=3% ( | |nsdefdmg=3% (uncharged), 25% (fully charged) | ||
|nsdefdesc= | |nsdefdesc=[[metroidwiki:Charge Beam|Charges a ball of energy and fires it]]. Unless the move is already charged, Samus will instantly fire the weakest shot if it is used in the air. Boasts excellent KO potential when fully charged, and is a useful intercepting move at a low charge. KOs at 70%-110% depending on rage and the opponent's weight and DI. Can be used to break shields if used in conjunction with her neutral attack, up or down tilts, aerials, Bomb and Super Missile. When using her forward tilt to launch the opponent into [[tumbling]], it can set up a guaranteed combo into Charge Shot regardless of the opponent's tech option, as Charge Shot will always catch their tech direction. | ||
|nsc1name=Dense Charge Shot | |nsc1name=Dense Charge Shot | ||
|nsc1dmg=4% ( | |nsc1dmg=4% (uncharged), 27% (fully charged) | ||
|nsc1desc= | |nsc1desc=The blast deals slightly more damage, more shield damage and considerably more knockback, making it even better for KOing and breaking shields. However, the charge time is increased by 30% and its ending lag after being fired is increased. The shots travel at extremely slow speeds, so much so that three uncharged shots can exist at once, even with the increased lag. As a result, this grants it edge-guarding potential, as it can be used to trap opponents and put them in a problematic position. | ||
|nsc2name=Melee Charge Shot | |nsc2name=Melee Charge Shot | ||
|nsc2dmg= | |nsc2dmg=6% (uncharged), 20% (fully charged) | ||
|nsc2desc=Fires a | |nsc2desc=Fires a shotgun-style energy blast that only hits at point-blank range. Deals more damage when uncharged and takes less time to charge, but deals less damage when fully charged and it has more ending lag. It also deals a massive amount of shieldstun and hitstun, as well as pushing Samus back after being used, making it safe if whiffed or shielded. | ||
|ssdefname=Missile | |ssdefname=Missile | ||
|ssdefdmg=5% ( | |ssdefdmg=5% (Homing), 10% (Super) | ||
|ssdefdesc= | |ssdefdesc=Fires a {{s|metroidwiki|Missile}}, which homes in on the opponent. If the special button is tapped like a smash attack, Samus will instead fire a {{s|metroidwiki|Super Missile}}, which travels in a straight line and deals more damage and knockback. Both variations deal low knockback, but can be used to break a shield if used in conjunction with a fully charged Charge Shot. Both Missile variations can also be used as set-ups by opening up an opportunity for a dash attack, grab aerial, or Charge Shot, while the Super variation sets up better for a true combo into a forward jumping Charge Shot at high percentages. The Homing variation is also useful for catching recoveries and forcing air dodges, which can open up punishment opportunities. | ||
|ssc1name=Relentless Missile | |ssc1name=Relentless Missile | ||
|ssc1dmg=3% ( | |ssc1dmg=3% (Homing), 12% (Super) | ||
|ssc1desc= | |ssc1desc=Missiles are slower and weaker, but have significantly improved homing capabilities. Super Missiles cover less range, but are stronger and have increased KO potential. Only 2 total missiles can exist at once, and no more than 1 super missile. | ||
|ssc2name=Turbo Missile | |ssc2name=Turbo Missile | ||
|ssc2dmg=4% ( | |ssc2dmg=4% (Homing), 9% (Super) | ||
|ssc2desc=Missiles pause | |ssc2desc=Upon being fired, the default Missiles lock onto the opponent's position before flying towards it in a straight line, while Super Missiles pause briefly before shooting forward at a high speed. Both variations deal slightly less damage, but are lightning quick (only one can exist at a time). | ||
|uspage=Screw Attack (move) | |uspage=Screw Attack (move) | ||
|usdefname=Screw Attack | |usdefname=Screw Attack | ||
|usdefdmg=2% ( | |usdefdmg=2% (grounded hit 1), 1% (grounded hits 2-11), 1% (aerial hits 1-12), 12% (all hits connect) | ||
|usdefdesc= | |usdefdesc=[[metroidwiki:Screw Attack|Leaps upward to perform a high-speed somersault while discharging energy]]. Shoots upward if initiated from the ground, while it gains distance slower if started in the air. A useful out of shield option and deals good knockback that can KO around 100% while near the upper blast line. With high rage, certain setups are capable of landing only the initial high-knockback hit, forcing the opponent out of the rest of the move for an abnormally early KO. | ||
|usc1name=Screw Rush | |usc1name=Screw Rush | ||
|usc1dmg=2% (loop), 5% (last) | |usc1dmg=2% (loop, 5 hits), 5% (last), 15% (all hits connect) | ||
|usc1desc=Deals damage more | |usc1desc=Deals more damage and knockback, which grants it better KO potential. However, because it launches opponents horizontally, it only KOs reliably near the edge instead of near the upper blast line. It covers more horizontal distance (launching Samus forward diagonally-up on the ground and angled in the same manner in the air), but covers less vertical distance, making it less effective for recovery. | ||
|usc2name=Apex Screw Attack | |usc2name=Apex Screw Attack | ||
|usc2dmg=2% (hit 1), 9% ( | |usc2dmg=2% (hit 1), 9% (grounded hit 2), 7% (aerial hit 2) | ||
|usc2desc= | |usc2desc=Deals more damage (albeit less total damage)!and much more knockback, which grants it much better KO potential, to the point that it can KO as low as 50% near the upper blast line and without rage, depending on weight and DI. However, it only hits twice and covers significantly less horizontal distance. | ||
|dspage=Bomb (Samus) | |dspage=Bomb (Samus) | ||
|dsdefname=Bomb | |dsdefname=Bomb | ||
|dsdefdmg=4% (contact), 5% (explosion) | |dsdefdmg=4% (contact), 5% (explosion) | ||
|dsdefdesc= | |dsdefdesc=Rolls into her {{s|metroidwiki|Morph Ball}} form and drops a {{s|metroidwiki|Bomb}}, which explodes after a set time. Useful for edge-guarding or to force an opponent to shield. Deals good shield damage, as it is able to break them if used with her up and down tilts or a fully charged Charge Shot. Good for punishing certain recoveries and also useful for punishing the 2 frame-long edge grab vulnerability if timed correctly. Like {{SSB4|Link}} and {{SSB4|Toon Link}}, Samus can use her Bomb to perform a [[bomb recovery]]. | ||
|dsc1name=Slip Bomb | |dsc1name=Slip Bomb | ||
|dsc1dmg=2.5% (grounded explosion), 3.5% (aerial explosion) | |dsc1dmg=2.5% (grounded explosion), 3.5% (aerial explosion) | ||
|dsc1desc=Bombs deal | |dsc1desc=Bombs deal slightly less damage, but [[trip]] grounded opponents and meteor smash aerial ones. This makes them useful for edge-guarding or as a set-up. These bombs fall a little quicker, but shoot vertically out of Samus to just about even things out. | ||
|dsc2name=Mega Bomb | |dsc2name=Mega Bomb | ||
|dsc2dmg=4% (contact), 9% (explosion) | |dsc2dmg=4% (contact), 9% (explosion) | ||
|dsc2desc= | |dsc2desc=Only one Bomb is able to be dropped at a time (though Samus can still enter morph ball), but its explosion has a bigger radius and deals more damage and shield damage, making it better for breaking shields when used in conjunction with Samus' other moves. The bomb takes roughly 3 seconds to detonate, about twice as long as the other two variants. It is also more effective for bomb recoveries. It is based on the {{s|metroidwiki|Power Bomb}}. | ||
|fsname=Zero Laser | |fsname=Zero Laser | ||
|fsdmg=0.5% (fringe loop), 1.5% (main loop), 2.5% (fringe | |fspage=Zero Laser (Samus) | ||
|fsdesc= | |fsdmg=0.5% (fringe loop), 1.5% (main loop), 2.5% (fringe blast), 5.5% (main blast) | ||
|fsdesc=Fires a very large, bluish white energy beam. The beam can be angled slightly up or slightly down. | |||
}} | }} | ||
=== | ===Stats=== | ||
{{Attributes | |||
|cast = 58 | |||
|weight = 108 | |||
|rweight = 6-7 | |||
|dash = 1.86 | |||
|rdash = 4 | |||
|run = 1.504 | |||
|rrun = 37 | |||
|walk = 1.0615 | |||
|rwalk = 36 | |||
|trac = 0.0585 | |||
|rtrac = 26 | |||
|airfric = 0.0075 | |||
|rairfric = 43-48 | |||
|air = 1.03 | |||
|rair = 28 | |||
|baseaccel = 0.04 | |||
|rbaseaccel = 3-5 | |||
|addaccel = 0.05 | |||
|raddaccel = 39-44 | |||
|gravity = 0.077 | |||
|rgravity = 46-47 | |||
|fall = 1.3 | |||
|rfall = 49-50 | |||
|ff = 2.08 | |||
|rff = 49-50 | |||
|jumpsquat = 4 | |||
|rjumpsquat = 1-13 | |||
|jumpheight = 37 | |||
|rjumpheight = 12 | |||
|shorthop = 18 | |||
|rshorthop = 10 | |||
|djump = 37 | |||
|rdjump = 14-15 | |||
}} | |||
=== | ===[[Announcer]] call=== | ||
{{audio|Needs announcer calls from other languages.}} | |||
<gallery> | <gallery> | ||
Samus English Announcer SSB4-SSBU.wav|English/Japanese/Chinese | |||
</gallery> | </gallery> | ||
== | ===[[On-screen appearance]]=== | ||
{{appearance | |||
|desc=Arrives from a {{s|metroidwiki|Save Station}}. | |||
|char=Samus | |||
|game=SSB4}} | |||
===[[Taunt]]s=== | |||
{{Taunt/SSB4 | |||
|char=Samus | |||
|desc-up=Salutes vigorously with her left arm as her thrusters activate. | |||
|desc-side=Faces the screen and demonstrates her Arm Cannon's mechanics. | |||
|desc-down=Aims her Arm Cannon behind herself, then kneels while aiming it in front of herself.}} | |||
===[[Idle pose]]s=== | |||
{{Idle | |||
|desc-1=Rubs her Arm Cannon with one finger. | |||
|desc-2=Brings her Arm Cannon down and then pulls it back up. | |||
|image-1=SamusIdlePose1WiiU.jpg | |||
|image-2=SamusIdlePose2WiiU.jpg}} | |||
===[[Crowd cheer]]=== | |||
{{Crowd | |||
|char=Samus | |||
|game=SSB4 | |||
|desc-us=Sa-mus! | |||
|desc-jp=Sa-mus! | |||
|pitch-us=Group chant | |||
|pitch-jp=Group chant}} | |||
===[[Victory pose]]s=== | |||
{{Victory/SSB4 | |||
|victory-theme=MetroidUniverseTheme.ogg | |||
|victory-desc=A flourished remix based on the jingle that plays when Samus Aran obtains an {{s|metroidwiki|upgrade}} to her {{s|metroidwiki|Power Suit}} or when a ''Metroid'' game is resumed from a {{s|metroidwiki|Save Station}}. | |||
|desc-1=Fires multiple shots from her Arm Cannon while kneeling, then strikes a pose. The pose is based on her appearance on the cover of ''{{s|metroidwiki|Metroid II: Return of Samus}}''. | |||
|desc-2=Performs a reverse roundhouse kick, readies her Arm Cannon, then strikes a pose. | |||
|desc-3=Throws two punches, fires a shot from her Arm Cannon, then strikes a pose. The animation is similar to {{SSB4|Mii Gunner}}'s neutral attack, while the pose is based on her appearance on the cover of ''{{s|metroidwiki|Super Metroid}}''. | |||
|char=Samus}} | |||
==In [[competitive play]]== | |||
===Tier placement and history=== | |||
Samus was initially considered to have improved from ''Brawl'', due to the improvements to her KO potential, a trait she previously lacked in tournament play. However, it soon became clear the buffs to other bottom-tier characters, such as {{SSB4|Mario}}, {{SSB4|Captain Falcon}} and {{SSB4|Link}}, had made them significantly better than her. When combined with glaring blind spots on her hitboxes, extended hurtboxes, and continued struggle to KO, Samus would later be considered one of the worst characters in the game. Despite the buffs gained in game updates, notably update [[1.1.1]], her poorly regarded status remained intact, with only a handful of dedicated mains, such as {{Sm|IcyMist}}, {{Sm|KayJay}}, {{Sm|Afro Smash}} and {{Sm|Jonny Westside}}, having a notable tournament impact. As such, she was ranked 51st on the first ''4BR'' [[tier list]], becoming a bottom-tier character. | |||
It was not until update [[1.1.5]] when Samus gained her most efficient buffs, which allowed her moveset to flow significantly better, improving her offense and eliminating the majority of her blindspots. This resulted in her achieving significantly better placements at tournaments, and benefiting from nerfs given to characters with preferable matchups against her, such as {{SSB4|Bayonetta}}, {{SSB4|Diddy Kong}}, {{SSB4|Sheik}} and {{SSB4|Zero Suit Samus}}. These traits saw Samus ranked 45th on the second tier list and placed in the low tier, eventually rising to 41st on the third tier list, at the top of the low tier. Samus' somewhat more successful tournament placings have improved competitive perception of her, as she rose to 36th/37th on the fourth and final tier list, now a mid-tier character, sharing the spot with {{SSB4|Robin}}. As such, she is considered a far more viable character after game updates, and significantly better than how she was in ''Brawl'', with some smashers, such as {{Sm|ESAM}} and {{Sm|Dabuz}}, claim that a higher placement in the tier list is needed, despite her relatively below-average representation. | |||
===[[Official Custom Moveset Project]]=== | |||
{{OfficialCustomMoves | |||
|char=Samus | |||
|set1=1211 | |||
|set2=1221 | |||
|set3=1231 | |||
|set4=1212 | |||
|set5=1222 | |||
|set6=1232 | |||
|set7=2211 | |||
|set8=2231 | |||
|set9=3211 | |||
|set10=1213 | |||
}} | |||
===Most historically significant players=== | |||
<!--This character has a ten player limit for this section. Before adding and/or removing a player, read these guidelines: https://www.ssbwiki.com/SmashWiki:Notability#%22Most_historically_significant_players%22_guidelines --> | |||
''Any number following the Smasher name indicates placement on the [[PGR 100]], which recognizes the official top 100 players in [[Super Smash Bros. 4]] of all time.'' | |||
:: | ''See also: [[:Category:Samus players (SSB4)]]'' | ||
*{{Sm|Afro Smash|UK}} - The best Samus player in Europe. His most notable run was with 9th at {{Trn|Albion 2}}, garnering some of his best wins at the tournament with {{Sm|iStudying}} and {{Sm|Peli}}. At some smaller events, he placed 7th at both {{Trn|Respawn 5}} and {{Trn|DAT BlastZone 25: The Silver Anniversary}} and 13th at {{Trn|Syndicate 2016}}. Ranked 37th on the [[European Smash 4 Power Rankings]]. | |||
*{{Sm|ESAM|USA}} - Uses Samus as a secondary alongside {{SSB4|Pikachu}} and is one of the best Samus players in the world. He won regional {{Trn|Combo Breaker 2017}} as a solo Samus player and his most notable victory with the character was his win over {{Sm|Ally}} at {{Trn|2GGC: Civil War}}. He has found success with her as a secondary at other tournaments such as 2nd at {{Trn|DreamHack Austin 2018}}, using her against {{Sm|Locus}} in his bracket. He ranked 17th on the [[PGR 100]], being the only Samus representative during the ''Smash 4'' PGR seasons. | |||
SamusTrophy3DS.png|Classic ( | *{{Sm|IcyMist|USA}} - One of the best Samus players in the world. Made one top 8 appearance with {{Trn|Showdown: Battle Royale}}, placing 7th and defeating {{Sm|Ned}}. By the latter half of ''Smash 4'' era, she made notable major placements with 9th at {{Trn|Royal Flush}} and 13th at {{Trn|Super Smash Con 2018}}, notably defeating {{Sm|Elegant}} and {{Sm|Wrath}}. She was also known as the best player online for the majority of the game's competitive lifespan, placing 1st on the [[Wi-Fi Warrior Rank v1]]. | ||
SamusAltTrophy3DS.png|Alt. | *{{Sm|Joker|Mexico}} - The best Samus player in Mexico. Competed regionally on a sparse basis, but still maintained to highlight the character at certain tournaments such as 9th at both {{Trn|Smash Factor 5}} with a notable win over {{Sm|Nanon}} and {{Trn|TGC 7}}. | ||
*{{Sm|Jonny Westside|USA}} - The best Samus player in the world during the first few years of the game's active lifespan. This was mainly seen with many [[SoCal]] events, placing 7th at {{Trn|2GGT: ESAM Saga}} defeating {{Sm|Zenyou}} and Elegant, as well as 9th at {{Trn|2GGT: FOW Saga}}, 13th at {{Trn|2GGT: The False Awakens}}, and 25th at {{Trn|2GGT: Fresh Saga}}. | |||
*{{Sm|Parme|Japan}} - The best Samus player in Japan. Attended almost every [[Sumabato]] from 2017-2018 with strong results, placing 7th at {{Trn|Sumabato 21}} and 9th at {{Trn|Sumabato Smash 4 Final}}, beating players such as {{Sm|komorikiri}} and {{Sm|Kuro}}. | |||
*{{Sm|Pyreeze|USA}} - One of the best Samus players in the United States. He was a respected player in Washington, placing 9th on the Lifetime [[Washington Power Rankings#Super Smash Bros. for Wii U rankings|Western Washington Smash 4 Power Rankings]]. He also placed top 8 at some of the biggest events in Washington such as 5th at {{Trn|Port Priority: A Pacific Northwest Regional}} and 7th at {{Trn|Port Priority 2: Midwest Invasion}} and additionally placed 33rd at {{Trn|Frostbite 2018}}. | |||
==[[Trophies]]== | |||
{{Trophy/Fighter | |||
|name=Samus | |||
|image-3ds=SamusTrophy3DS.png | |||
|image-wiiu=SamusTrophyWiiU.png | |||
|mode=Classic | |||
|desc-3ds-ntsc=Samus Aran has fought her way across a variety of planets in the Metroid series. She wears a Power Suit designed by the Chozo, giving her incredible versatility in a fight. She can wade in, but she favors beams and missiles. A fully charged Charge Shot packs a serious punch! | |||
|desc-wiiu-ntsc=Samus Aran is known for her numerous battles across alien planets in the Metroid series. She wears a Power Suit designed by the Chozo, giving her incredible versatility in a fight. She can wade in with kicks and punches, but she favors beams and missiles. A fully charged Charge Shot packs a serious punch! | |||
|desc-pal=The heroine of the Metroid series, Samus Aran. Her missions take her across the reaches of space, and her Power Suit gives her immeasurable fighting prowess. In this game, she uses a variety of ranged attacks based around beams and missiles. When her Charge Shot is fully charged, it can launch foes with devastating force. | |||
|gamelist-ntsc={{Trophy games|console1=NES|game1=Metroid|release1=08/1987|console2=SNES|game2=Super Metroid|release2=04/1994}} | |||
|gamelist-pal={{Trophy games|console1=NES|game1=Metroid|release1=01/1988|console2=SNES|game2=Super Metroid|release2=07/1994}} | |||
}} | |||
{{clrl}} | |||
{{Trophy/Fighter | |||
|name=Samus (Alt.) | |||
|image-3ds=SamusAltTrophy3DS.png | |||
|image-wiiu=SamusAltTrophyWiiU.png | |||
|mode=Alt | |||
|desc-3ds-ntsc=Samus protects herself from overhead enemies with her up smash, Cover Fire, which can land multiple hits on anyone it connects with. Samus also fires a homing missile by holding sideways and pressing the special-attack button or launches a Super Missile by quickly tapping sideways instead. | |||
|desc-wiiu-ntsc=Samus protects herself from overhead enemies with her up smash, Cover Fire, which can land multiple hits on anyone it connects with. Samus also fires a homing missile by holding sideways and pressing the special-move button or launches a Super Missile by quickly tapping sideways instead. | |||
|desc-pal=Samus's up smash attack, Cover Fire, fires five small blasts overhead, making it great for countering incoming aerial attacks. Her Missile attack fires a homing missile if you hold sideways and then press the special button, but if you do those things at the same time, you'll fire a Super Missile. | |||
|gamelist-ntsc={{Trophy games|console1=NES|game1=Metroid|release1=08/1987|console2=SNES|game2=Super Metroid|release2=04/1994}} | |||
|gamelist-pal={{Trophy games|console1=NES|game1=Metroid|release1=01/1988|console2=SNES|game2=Super Metroid|release2=07/1994}} | |||
}} | |||
{{clrl}} | |||
{{Trophy/Fighter | |||
|name=Zero Laser | |||
|image=ZeroLaserTrophyWiiU.png | |||
|desc-ntsc=Samus unleashes a massive, long-range beam from her Arm Cannon as her Final Smash. Fighters on the edges of the beam will be drawn in, taking more and more damage. The sheer power of this weapon makes it tough to aim once it's firing, but it's possible to adjust the beam up and down. | |||
|desc-pal=In Samus's Final Smash, she unleashes a huge laser beam from her Arm Cannon that draws opponents to the centre of the beam. Quite handy, since the closer they are to the centre, the more damage they'll take! You can also angle it up and down (albeit slowly), letting you catch more of your enemies and create more havoc. | |||
|game=ssb4-wiiu | |||
}} | |||
{{clrl}} | |||
==In [[Event Match]]es== | ==In [[Event Match]]es== | ||
===Solo Events=== | ===Solo Events=== | ||
* '''[[All-Star Battle: Regulars]]''': Samus is one of the opponents fought in this event. All opponents are starter characters from | * '''[[All-Star Battle: Regulars]]''': Samus is one of the opponents fought in this event. All of the opponents are the eight starter characters of the [[List of Super Smash Bros. series characters#"Perfect-attendance crew"|"perfect-attendance crew"]] from ''[[Super Smash Bros.]]'' | ||
* '''[[Galactic Avenger]]''': Samus must defeat [[Dark Samus]] and [[Ridley]] in a 150 HP | * '''[[Galactic Avenger]]''': Samus must defeat [[Dark Samus]] and [[Ridley]] in a [[Stamina Mode|Stamina Battle]]. Dark Samus has 150 HP on Easy/Normal and 180 HP on Hard. | ||
* '''[[Identity Crisis]]''': | * '''[[Identity Crisis]]''': As {{SSB4|Sheik}} and {{SSB4|Zelda}}, the player must defeat Samus and {{SSB4|Zero Suit Samus}}. | ||
===Co-op Events=== | ===Co-op Events=== | ||
* '''[[Final Battle Team-Up]]''': Samus | * '''[[Final Battle Team-Up]]''': Samus, using her Dark Samus [[alternate costume]], is one of the opponents the players must defeat. | ||
* '''[[Poisonous Planet]]''': | * '''[[Poisonous Planet]]''': Samus and {{SSB4|Olimar}} must defeat two giant {{SSB4|Charizard}} in a [[Stamina Mode|Stamina Battle]] before their own health is depleted due to being [[flower]]ed. | ||
* '''[[The Ultimate Battle]]''': Two players select a character and must defeat the entire roster. | * '''[[The Ultimate Battle]]''': Two players select a character and must defeat the entire roster. | ||
| Line 263: | Line 512: | ||
<gallery> | <gallery> | ||
Samus Direct.png|Samus in the Nintendo Direct from April 8th, 2014. | Samus Direct.png|Samus in the Nintendo Direct from April 8th, 2014. | ||
Samus amiibo.png|Samus' | Samus amiibo.png|Samus' [[amiibo]]. | ||
Wily Stage SSB4.jpg|Samus' | Wily Stage SSB4.jpg|Samus' appearance during [[E3]] 2013. | ||
Samus3DS.jpg| | Samus3DS.jpg|Using [[Charge Shot]] while a {{b|Bomb|Samus}} is nearby. | ||
MissileSSB4.jpg| | MissileSSB4.jpg|Using [[Missile|Super Missile]] on {{SSB4|Mario}} as {{SSB4|Kirby}} [[crouch]]es to avoid it. | ||
SamusBomb.jpg|Using {{b|Bomb|Samus}}. | |||
SamusBomb.jpg| | Zero Laser.jpg|Using {{b|Zero Laser|Samus}}, her [[Final Smash]]. | ||
Zero Laser.jpg|Samus | Samus Neutral Attack.png|The second hit of her neutral attack. | ||
Samus Back Air SSB4.jpg|Using her neutral aerial alongside {{SSB4|Link}} and {{SSB4|Luigi}}. | |||
Samus Neutral Attack.png|The second hit of her neutral | Steel Diver SSB4.jpg|Crouching near a [[Steel Diver]] as {{SSB4|Marth}} looks on. | ||
Samus Back Air SSB4.jpg| | |||
Steel Diver SSB4.jpg|[[ | |||
Smash4 Bowser Flying Kick.jpg|Samus and {{SSB4|Bowser}} fighting on [[Arena Ferox]]. | Smash4 Bowser Flying Kick.jpg|Samus and {{SSB4|Bowser}} fighting on [[Arena Ferox]]. | ||
Smash.4 - First Three Ladies.jpg|{{SSB4|Peach}} | Smash.4 - First Three Ladies.jpg|Alongside {{SSB4|Peach}} and {{SSB4|Wii Fit Trainer}}. | ||
Smash.4 - Height Differences.jpg| | Smash.4 - Height Differences.jpg|Using her side taunt alongside {{SSB4|Little Mac}}. | ||
Samus daily.jpg| | Samus daily.jpg|Using her side taunt. | ||
SSB4 - Gust Bellows.jpg|{{SSB4|Toon Link}} using the [[Gust Bellows]] | SSB4 - Gust Bellows.jpg|{{SSB4|Toon Link}} using the [[Gust Bellows]] on Samus. | ||
SSB4 - Samus & ZSSamus.jpg|{{SSB4|Zero Suit Samus}} | SSB4 - Samus & ZSSamus.jpg|{{SSB4|Zero Suit Samus}} and her Power Suit displaying their Jet Boots and thrusters, respectively. | ||
SSB4 - Tether Recovery.jpg|Samus and | SSB4 - Tether Recovery.jpg|Samus and Link simultaneously grabbing an edge with their [[Grapple Beam]] and [[Clawshot]] [[Tether recovery|tether recoveries]]. | ||
SSB4 - Smash Run Samus.jpg|Samus | SSB4 - Smash Run Samus.jpg|Samus fighting enemies in [[Smash Run]]. | ||
Mario Golf Design.jpg|Samus | Mario Golf Design.jpg|Samus displaying her new {{s|metroidwiki|Light Suit}}-inspired alternate costume alongside Mario's new ''{{s|mariowiki|NES Open Tournament Golf}}''-inspired alternate costume. | ||
PyrosphereSamus.jpg|Samus using her [[Charge Shot]] against [[Ridley]]. | |||
Samus Cover.png|Samus as she appears on the cover of {{for3ds}}. | |||
</gallery> | </gallery> | ||
== | ==Trivia== | ||
{{ | *Samus is one of only four characters to have an event where a stage boss must be defeated. The other four who share this trait with Samus are {{SSB4|R.O.B.}}, {{SSB4|Mega Man}}, and {{SSB4|Shulk}}. | ||
{{SSB4Characters}} | {{SSB4Characters}} | ||
{{Metroid universe}} | {{Metroid universe}} | ||
[[Category:Samus (SSB4)]] | [[Category:Samus (SSB4)| ]] | ||
[[Category:Trophies (SSB4-3DS)]] | [[Category:Trophies (SSB4-3DS)]] | ||
[[Category:Trophies (SSB4-Wii U)]] | [[Category:Trophies (SSB4-Wii U)]] | ||
[[es:Samus (SSB4)]] | |||
Latest revision as of 01:14, April 5, 2024
| Samus in Super Smash Bros. 4 | |
|---|---|
 
| |
| Universe | Metroid |
| Other playable appearances | in SSB in Melee in Brawl in Ultimate |
| Availability | Starter |
| Final Smash | Zero Laser |
| Tier | D (36-37) |
Samus (サムス, Samus) is a playable character in Super Smash Bros. 4. Her return to the series was confirmed in the E3 2013 trailers on June 11th, 2013, while she was also among the first wave of amiibo figures that are compatible with SSB4. However, unlike in Brawl, Samus is no longer capable of transitioning into Zero Suit Samus, as she is now a standalone character.
Samus is ranked 36th/37th out of 54 on the tier list (tied with Robin), placing her at the bottom of D tier and middle of mid tier. This is a moderate improvement over her bottom-tier placement in Brawl, where she was ranked 32nd out of 38. Samus possesses multiple projectiles: Her Charge Shot, Missile and Bomb, all of which grant her strong zoning potential alongside her Grapple Beam. Charge Shot also functions as a fearsome KOing option and a strong punishing option in many situations due to its high damage output and excellent knockback, while her Bomb and Grapple Beam can aid her recovery, and she has an above average damage output as well. Samus also possesses a great air game: her neutral aerial and sweetspotted back aerial are among the strongest of their type, while her forward and up aerials deal impressive damage and have good follow-up potential, allowing for powerful and highly damaging combos when she finds or sets up an opening, which is further supplemented by set-ups in the form of her dash attack, up tilt, down aerial, down throw and Grapple Beam.
However, Samus' moveset forces her to be reliant on defensive spacing to keep opponents at bay. Except for her down tilt, all of her moves are generally less effective at point-blank range, while they also render her prone to trading hits with opponents even at mid-range. When combined with her floatiness and average mobility, these traits can make it difficult for Samus to escape from juggling and other problematic situations.
While Samus has noticeably improved since Brawl, largely due to game updates, most of her fellow veterans have also improved at varying degrees. This has resulted in her overall representation being poor (which is compounded by her very high learning curve), although she has attained a dedicated playerbase nevertheless. Thanks to the likes of professionals such as IcyMist, ESAM, KayJay, Afro Smash and Jonny Westside, Samus' results have continuously improved over time, most notably with IcyMist's 9th place finish at Royal Flush, Afro Smash's strong results in the United Kingdom, KayJay's 13th place finish at Smashdown World and ESAM's 1st place at Combo Breaker 2017. As a result, Samus' placement has notably risen with each iteration of the tier list, and many players label her as a solid character with the potential to rise even further.
Attributes[edit]
Samus is unique among her fellow heavyweights. While she is tied with Bowser Jr. as the sixth heaviest character in the game, she is a floaty character with slightly below average walking and dashing speeds, average air speed, above average air acceleration, high jump height and slow falling speed. These attributes grant her an easier time chasing aerial opponents and forcing air dodges, yet also cause her to be juggled rather easily. When combined with her few reliable landing options and slow falling speed, opponents will also have more time to punish Samus as she attempts to return to the stage. In addition, many of her moves artificially extend her hurtboxes, leading to trades, an opponent grabbing her invisible hurtboxes and, in some cases, getting punished after landing a move despite her being visually out of range of the opponent's counterattack. Furthermore, some of the hitboxes on her moves, most notably up smash, forward smash and up aerial, have the issue of failing to connect properly or even whiffing outright.
Samus' moveset is defensive, as she uses her projectiles to space, rack up damage from a distance and pressure shields. Charge Shot is her most consistent KOing option out of her special moves, courtesy of its increased speed and power. Missile is mostly used for spacing, due to neither its Homing or Super variants being extremely inefficient at KOing, while Bomb grants Samus various mix-ups and can aid her recovery. However, Missile and Bomb also possess valuable utility, in that they can guarantee a shield break when used in conjunction with a sufficiently charged Charge Shot or a sweetspotted back aerial. Lastly, Screw Attack is a decent out of shield option, a KOing option near the upper blast line and a viable combo finisher from aerial combo strings. Combined with rage, it can KO very early.
In addition, Samus has a strong air game. All of Samus' aerials have no more than 20 frames of landing lag, and her back aerial is one of her best moves courtesy of its power, damage output, speed and range. Her down aerial can be a powerful meteor smash, forward aerial is a good pressuring tool due to its long duration, and up aerial is an excellent combo option. Lastly, her neutral aerial is a viable KOing option as of update 1.1.5. When coupled with her high jumps, Samus' air game is also potent while she is off-stage, as she can recover from nearly anywhere on the stage, stay in position for longer periods of time due to her floatiness, or bait the opponent by stalling in the air and punishing edge-guard attempts.
Samus' grab game is also somewhat useful, as her Grapple Beam has impressive range, doubles as a tether recovery and has very little landing lag. Down throw is very useful for starting combos that deal respectable damage and can be used with her neutral, forward and up aerials at varying percentages. Many of her combos can rack up more than 30% and when using platforms to her advantage, or string together multiple times and then be finished with Screw Attack, leading to a KO or dealing 40%-50% at the very least. Lastly, her pummel is tied with Lucario's as the fastest in the game, although it is also the least damaging one.
However, Samus is not flawless. While her grab range is among the longest in the game as with other tether grabs, the ending lag on all of Samus' grabs makes her very easy to punish if whiffed, and none of her throws can reliably KO on their own. Samus' ground game is mediocre overall as her smash attacks are punishable, with only her forward smash being a fairly reliable KOing option due to its quick start-up lag. Her neutral attack is very mediocre, which is noticeably exemplified in its inability to connect at high percentages and thus limits Samus' anti-pressuring ability. Her tilts can combo, KO, and have decent range, but suffer from her unique hurtbox issue. Due to this and her average dashing speed, most Samus players will often find themselves in the air, where her strengths lie.
Samus also has slight issues with recovery. Her grab aerial has very long range, her jumps are among the highest in the game, Screw Attack is fast and hard to punish, and Bomb jumping provides infinite horizontal recovery, but they are all offset by Screw Attack's only average distance, Bomb's high ending lag in the air and Samus' only average air speed and reliance on her grab aerial to grab ledges from a distance. Altogether, this results in her recovery being linear and predictable.
In regard to custom moves, Samus benefits from a few. Apex Screw Attack has slightly more start-up lag and the recovery it provides is slightly worse, but it deals more damage and outstanding knockback, to the point of KOing most middleweights at 75% from the stage and as low as 50% near the upper blast line. Screw Rush, while making her vertical recovery worse, grants more horizontal distance, deals more damage and KOs earlier then Screw Attack depending where it is used on-stage, making it more useful for damage racking. Relentless Missile, while traveling slower, has more accurate tracking as a homing missile while dealing less damage. Turbo Missile travels more distance and is considerably faster than both Missile and Relentless Missile, but at the cost of dealing less damage overall.
Dense Charge Shot is dependent on the matchup and the player's playstyle. As one of the strongest projectiles in the game, it takes a bit longer to charge, and has much less speed and range. However, it gives Samus multiple set-ups due to the length of time the Charge Shot stays in the air and with the increased damage, can force shield breaks much easier and KO much easier. Slip Bomb, while dealing less damage, has the useful property of tripping grounded opponents and meteor smashing airborne opponents, making it useful as a set up for a grab or a punish and an edge-guarding option to spike the opponent. Mega Bomb can be used to stall opponents, since Samus can stay next to the Mega Bomb itself while waiting until it explodes, allowing Samus to either retreat, launch Missiles, charge her Charge Shot, or force an approach. Melee Charge Shot has a shorter charge time than both Charge Shot and Dense Charge shot, while also having considerably more hitstun and shieldstun with the inclusion of extra pushback after its use, making it extremely safe if shielded or even whiffed.
Overall, Samus is a character that performs best when using her projectiles and grab aerial for spacing in order to set up combos and either finish off pressured opponents off-stage, or KO them outright with Charge Shot. Unlike the majority of veterans, Samus' optimal playstyle is highly unorthodox; as she falls short in regard to zoning-exclusive or melee-exclusive offense, success with Samus requires careful, calculated use of her various tools to keep momentum in her favor, much like in her home series. As such, she is like Shulk in that she is a character that is hard to master, but greatly rewards patient and calculated play.
Changes from Super Smash Bros. Brawl[edit]
Samus has received a mix of buffs and nerfs in the transition from Brawl to SSB4, but while she was initially nerfed despite already being a low tier character, she received significant buffs via game updates resulting in her ultimately being buffed overall due to her buffs fixing one of her main issues in Brawl combined with the game's mechanics greatly benefiting her overall. Samus has gained several new KOing options, the most notable of which is Charge Shot, which has drastically increased speed and knockback. The other noteworthy options include her forward smash, up smash, neutral aerial, forward aerial and Screw Attack improving one of her main weaknesses in the previous game. Forward smash now has a powerful sweetspot in the form of a fiery blast at the tip of her Arm Cannon. Neutral aerial, forward aerial, back aerial, up aerial up smash and Screw Attack have each have had their knockback improved, most notably on neutral aerial (and only to the last hit in Screw Attack's case). Additionally, forward aerial, up smash and Screw Attack's multiple hits now connect better due to alterations to those moves along with the weakening of SDI to further ensure that opponents cannot escape their respective last hits.
Aside from her new KOing options, Samus benefits from the general changes between Brawl and SSB4. With the changes to hitstun canceling and DI, Samus' combo game has been improved. Some of her attacks (most notably her dash attack) have been altered to give them much greater followup potential, and she is able to combo attacks into each other far easier, with multiple combo starters and combo oriented moves, including dash attack, up tilt, forward aerial, up aerial and down aerial. Her Missiles have been improved as well, with more active frames and having less startup and ending lag for all variants except for the aerial version of the Homing Missile. Samus also greatly benefits from the introduction of rage as it not only further supplements her improved KO power but it also allows her to KO with her grounded Screw Attack at insanely early percents and her high weight and solid recovery allow her to build up rage. The changes to shields, shield damage and shieldstun also benefit her, as she can use her Charge Shot, Super Missile and Bomb in tandem with other moves to easily break shields.
Samus' falling speed and gravity have noticeably increased. This makes it much easier for Samus to land however, it also hinders her aerial output as she can no longer perform two aerials in a short hop, autocancel forward aerial in a short hop and it makes her more susceptible to combos.
However, Samus also received a few nerfs. The most significant nerf being the fact that she is no longer connected to Zero Suit Samus. As such, she can no longer utilize her Zero Suit counterpart's far superior mobility and moveset to alleviate her own. As for Samus' more direct nerfs, some of Samus' moves her nerfed frame data with her landing lag in particular being significantly increased. While this is a common nerf across the cast, it harmed Samus more than most other returning veterans as Samus went from having the lowest average landing lag in the game to having fairly mediocre landing lag on her aerials with down aerial and forward aerial seeing the largest increase to their landing lag. This is especially an issue with forward aerial, as it can no longer auto-cancel in a short hop due to her previously mentioned higher gravity and faster falling speed. While her KO potential has improved, some of Samus' previous KO moves, such as her down tilt and down smash, have lost their previous KO potential. Missile is harder to camp with due it no longer auto-canceling on landing and she can only use two Homing Missile and one Super Missile at a time, though her projectiles overall are still powerful and useful in their own right. Additionally, Samus' overall damage output is lower (though it is higher relative to the cast) and despite her improved combo potential, some of her moves have reduced followup potential with two notable examples being her landing forward aerial and down aerial. One move which notably got nerfed however was her grab aerial. While it has increased tether range and it benefits from the changes to ledges, it has increased landing lag, deals less damage and has altered knockback hindering its spacing and followup potential.
Overall, Samus has been buffed overall from Brawl despite receiving a fair share of nerfs. She has been slightly re-balanced having a worse defensive game due to her higher landing lag, altered Missile and grab aerial but now wielding a slightly improved close-range game, with her damage racking ability and combo game having been vastly improved. Most importantly, she has noticeably improved KOing potential, enabling her to score KOs much easier. While a few of her moves now require slightly more precision, such as her forward smash, neutral aerial and Missile, they compensate for this by being more rewarding. The changes to the game's mechanics also greatly benefit her overall as they make her multi hit moves more reliable, give her access to her greater combo potential and they further supplement her already improved KO potential. As such, she has a relatively high learning curve, but can be quite viable and versatile when mastered, similarly to Shulk. Dedicated players like IcyMist, ESAM, and Afro Smash have managed to bring her some degree of tournament success and continue to develop her metagame.
Aesthetics[edit]
 Samus' design is now based on her appearance in Metroid: Other M. Her updated design also incorporates numerous black vents within the Varia Suit's helmet, shoulder pads, torso and legs, while the suit's visor and accents are now emerald green, rather than lime green.
- Missile and Bomb have been very slightly updated with general graphical enhancements. Bomb is now red, rather than reddish orange.
- Dash's animation has changed. Samus now dashes like she does in Other M, rather than how she does in Metroid: Zero Mission, Super Metroid and Metroid Fusion.
Attributes[edit]
 Samus walks very slightly faster (1.05 → 1.0615).
- Samus dashes slightly faster (1.445 → 1.504).
- Samus's air speed is faster (0.987 → 1.03).
- Samus's falling speed is much faster (1.07 → 1.3). This greatly improves her ground-to-air transitioning, but makes her more susceptible to combos.
- Her fast-falling speed is drastically faster (1.498 → 2.08). This significantly improves her aerial mobility and makes her substantially less vulnerable to juggling.
- Samus' gravity is higher (0.058 → 0.077). When combined with her faster falling speed, this allows her to land significantly more safely, but further increases her susceptibility to combos.
- Jump is higher.
- Rolls have less ending lag (FAF 45 → 40).
- Air dodge has less startup (frame 4 → 3) and ending lag (FAF 50 → 33).
 Air dodge has a shorter duration (frames 4-29 → 3-27).
- Spot dodge has a shorter duration (frames 2-20 → 2-17) and more ending lag (FAF 26 → 27).
- Samus is no longer connected to Zero Suit Samus via Final Smash, taunt, or menu input usage, with the latter becoming her own separate character. This removes Samus' ability to switch into her Zero Suit counterpart mid-match to adapt to different matchups utilizing Zero Suit Samus' far superior mobility and frame data.
Ground attacks[edit]
- Neutral attack:
- Neutral attack's second hit has a longer duration (frames 4-6 → 6-9), deals slightly more damage (7% → 8%) and has increased vertical range.
- Neutral attack's first hit has less range having smaller hitboxes (4.3u/4.3u/4.3u → 4u/4u/3u) and a reduced Y (12.8 → 12) and Z position (15.2/10.4/4.4 → 12.2/6.2/0/2). It also has increased base knockback (5 → 8) and decreased hitstun. This allows opponents to shield the second hit at a wider percent range or even be launched out of range for the second hit to land, hindering its utility. The second hit also has more startup lag (frame 4 → 6) further compounding this.
- Forward tilt:
- Forward tilt has adjusted hitbox properties. Its non-angled variant has received two sweetspots covering the lower leg and foot that deal more damage and received sourspots on her upper leg and body that deal the same damage as in Brawl (7%/8% → 7%/8%/9%/10%). Additionally, its upward and downward angles have each received a sweetspot on her foot that deals 1% more damage (10% → 11%). Lastly, the sweetspots's base knockback has been tripled (10 → 30). This significantly improves its KO potential.
- Forward tilt's upward and downward angles have received sourspots covering her upper leg and body (10% → 8%/9%/10%) with the weaker sourspots dealing less knockback on all angles (10 (base), 100 scaling) → 20/70). It also has slightly increased startup (frame 7 → 8) and ending lag (FAF 32 → 34).
- Down tilt:
- Down tilt has slightly increased range.
- Down tilt deals 2% less damage (14% → 12%) and has decreased knockback scaling (60 → 48), hindering its KO potential to the point it cannot KO middleweights until around 200%.
- Dash attack:
- Dash attack has received an early hitbox that deals 7%. It also has adjusted hitbox timings and a longer duration (frames 8-10 (clean)/11-16 (late) → 8-9 (early)/10-13 (clean)/14-18 (late)), decreased ending lag (FAF 38 → 34) and altered knockback (30/20 (base), 80 (scaling) → 80/60). When coupled with the changes to hitstun canceling, these changes significantly improve its combo potential now being her best combo starter.
- Forward smash:
- Forward smash has received a sweetspot and a sourspot. The sweetspot is the fiery explosion from the Arm Cannon and deals more damage (14%/13%/12% → 15%/14%/13.5%) and its base knockback has been doubled (20 → 40), while the sourspot also deals more knockback (20 (base), 100 (scaling) → 16/112), making it stronger despite its lower damage. Forward smash also has much greater reach because of the sweetspot, restoring its utility from Melee.
- Forward smash has increased ending lag (FAF 44 → 49) and the sourspot deals less damage (14%/13%/12% → 13%/12%/11%).
- Up smash:
- Up smash deals less damage (4% (hits 1-3), 5% (hit 4), 6% (hit 5) 23% (total) → 3% (hits 1-4), 6% (hit 5), 18% (total)).
- Hits 1-4 have a shorter duration (3 frames → 2).
- Up smash's linking hits connect together better as they have a reduced SDI multiplier (1.2x → 0.8x) and the last hit has increased knockback scaling (120 → 150), improving its KO potential.
- Up smash charges one frame sooner (between 10-11 → 9-10).
- Down smash:
- Down smash deals less damage (15% (front)/14% (back) → 10%/12%) and has decreased knockback (90 (base), 50 (scaling) → 70/46 (front), 80/40 → 70/48 (back)), hindering its KO potential. Both hits also have shorter hitbox durations (frames 9-11 (front)/17-19 (back) → 9-10/17-18).
- Down smash has decreased ending lag (FAF 52 → 45) and it is now a semi-spike (70° (front), 120° (back) → 31° (both)), granting it edge-guarding potential.
Aerial attacks[edit]
- All aerials' have increased landing lag (9 frames → 16 (neutral), 9 frames → 25 (forward), 12 frames → 18 (back) 9 frames → 12 (up), 9 frames → 20 (down)).
- Samus' faster falling speed and higher gravity prevent her from performing two neutral, back or up aerials in a short hop.
- Neutral aerial:
- Samus has a new neutral aerial: a spinning roundhouse kick which represents the aerial version of the Counter Attack from Metroid: Other M. Compared to the previous neutral aerial, it deals more damage (9%/6% → 10%/9%/8%) and significantly more knockback (10 (base), 80 (scaling) → 40/100), making it significantly better at KOing and one of the strongest neutral aerials of the game. It also has a back hit that comes out on frame 16 which has a sweetspot which deals 1% less damage compared to the front hit with the same knockback values, making it reliable for KOing too, and a sourspot that deals 8% with much less knockback. Lastly, it launches at a lower angle (361° → 32°), making it better at edgeguarding.
- Neutral aerial has more startup lag with a much shorter duration (frames 5-24 → 8-11/16-24) and less range in front of Samus. Its altered angle and knockback also means that it no longer locks opponents removing one of Samus' most reliable locking tools.
- Forward aerial:
- Forward aerial has less startup lag (frame 7 → 6), its 2nd, 3rd and 4th hits launch at the auto-link angle and the first four hits have a reduced SDI multiplier (1x → 0.8x) making them connect more reliably and its last hit has increased knockback scaling (100 → 140), improving its edgeguarding potential.
- Forward aerial's first hit now has set knockback (20 (base) → 15 (set)). This allows it to connect more reliably with the later hits but significantly hinders its followup potential when combined with forward aerial's much higher landing lag.
- Forward aerial's first four hits deal less damage (4% (hit 1)/3% (hits 2-4) → 3%/1.6%).
- Forward aerial has increased ending lag (FAF 56 → 60) and less range having smaller hitboxes (4.3u/4.7u/7.5u → 4u/6u (hits 1-4), 5u/5u/8u → 5.5u/7.2u (hit 5) and a reduced x position (4/71573.79 → 2/9).
- Due to Samus's faster falling speed and higher gravity, forward aerial can no longer autocancel in a short hop. Combined with its much higher landing lag, this makes it much worse for approaching.
- Back aerial:
- Back aerial's sourspot deals 2% more damage (10% → 12%) and both hits have higher knockback scaling (95/90 (sourspots), 88 (clean) → 98 (both)), making it among the strongest back aerials in the game, improving its KO potential. It also received a late hit on frames 11-14 that deals 9% and less knockback that enables it to be used in a Wall of Pain, improving its utility. Back aerial also has slightly reduced ending lag (FAF 40 → 39).
- Back aerial auto-cancels later (frame 32 → 42), although it can still autocancel in a short hop.
- Up aerial:
- Up aerial's hits connect together better due to the weakening of SDI and its last hit has increased knockback scaling (120 → 160), granting it KO potential near the upper blast line. It also has juggling potential now due to launching vertically instead of horizontally (361° → 70°).
- Up aerial has significantly less edgeguarding potential due to its angle being changed.
- Down aerial:
- Down aerial now has an early hit with less startup lag (frame 18 → 17), increased base knockback (2 → 25) and it launches opponents horizontally (270° → 361°) significantly improving its spacing and KO potential on stage. The clean hit also has increased base knockback (2 → 25) which when combined with the removal of meteor canceling, improves its edgeguarding potential. It also now has a late hit which functions similarly to the early hit and lengthens down aerial's duration (frames 18-22 → 17-23).
- Down aerial deals less damage (15% → 10% (early)/14% (clean)/11% (late)) and the meteor hitbox has more startup lag with a shorter duration (frames 18-22 → 19-21) and has decreased knockback scaling (100 → 85) which hinders its KO potential when combined with its lower damage despite its higher base knockback. Down aerial is also much worse as a landing option and a combo tool due to its much higher landing lag combined with the attack's alterations.
- Grab aerial:
- Grab aerial deals less damage (4% (early)/7% (clean) → 1%/3.5%) and the sourspot has decreased base knockback (60 → 30) while the sweetspot's knockback was not fully compensated (60 (base), 60 (scaling) → 30/100) hindering the sweetspot's edgeguarding potential. It also has 8 frames of landing lag, rather than auto-canceling. Altogether, these changes greatly hinder grab aerial's spacing and followup potential.
- Grab aerial has increased range as a tether recovery. It also received two additional hitboxes.
Throws/other attacks[edit]
- All grabs have less startup (frame 17 → 16 (standing/dash), frame 19 → 17 (pivot)) and ending lag (FAF 94 (standing)/74 (dash)/96 (pivot) → 69/67/83).
- All grabs' durations are 5 frames shorter.
- Pummel:
- Pummel deals more damage (1% → 1.2%).
- Pummel has an altered animation, which gives the hitbox more range in front of Samus. This prevents the move from whiffing against certain characters, especially during their hitstun animations.
- Pummel now launches bystanders horizontally (80° → 361°).
- This makes the pummel safer against bystanders, especially against floatier characters.
- However, this also hinders its ability to chain into itself.
- Up throw:
- Up throw's hitboxes have a longer duration (1 frame → 2). This means that all five hits will now connect against the entire cast, rather than certain hits whiffing against some lightweights.
- Down throw:
- Down throw releases opponents slightly later (frame 19 → 20). When combined with the changes to hitstun canceling and the weakening of DI, this significantly improves down throw's followup potential.
- The back hit of front floor attack and edge attack no longer have set knockback (90 (set), 100 (scaling) → 80 (base)/50 (floor), 90/20 (edge)).
- Floor attacks:
- Front floor attack and the back hit of back floor attack deal 1% more damage (6% → 7%).
- The front hit of back floor attack deals less damage (8% → 7%).
- Edge attack:
- Edge attack deals consistent damage compared to the previous fast edge attack (6%/8% → 7%).
- Edge attack has less intangibility (frames 1-23 → 1-22).
Special moves[edit]
- Charge Shot:
- Charge Shot now uses a charge formula to increase its power and size rather than a stage system consisting of separate hitbox data for each charge. This means that the move is constantly becoming larger and more powerful every frame rather than only after every 16 frames.
- Charge Shot has larger hitboxes (1.44u (uncharged)/6u (fully charged) → 1.9u/8u).
- Charge Shot's projectile travels faster (1.5 (uncharged)/2.65 (fully charged) → 1.8/3.2).
- Fully charged Charge Shot has increased knockback scaling (56 → 62), improving its KO potential.
- Fully charged Charge Shot has a lower hitlag multiplier (1x → 0.7x).
- This gives the opponent less time to DI or SDI the move.
- However as the move is a projectile, this gives Samus less time to followup after the opponent is no longer in hitlag, both on hit and on shield.
- Charge Shot has more ending lag, especially when fully charged (FAF 44 → 54 (uncharged)/61 (fully charged)).
- This particularly hurts the fully charged version as when combined with its lower hitlag, this prevents Samus from being to followup out of it at lower percents as well as making the move much more punishable on shield (with the move no longer being completely safe on shield).
- Missile:
- Missiles have less startup lag (frame 23 (Homing/Super ground)/25 (Super aerial) → 18/21), longer durations (frames 23-121 (Homing)/23-84 (Super) → 18-118/21-84), and decreased ending lag on the ground (FAF 60 (both) → 57 (Homing)/59 (Super)).
- Super Missile also has increased base knockback (40 → 50), slightly improving its KO potential.
- Samus can only have two Homing Missiles and one Super Missile onscreen at the same time. If she attempts to shoot another one while one is already on-screen, she will perform the firing animation, but no Missile will be fired.
- Aerial Homing Missile has more startup (frame 16 → 18) and ending lag (FAF 50 → 57).
- Homing Missile targets less reliably and both missiles cover less distance.
- Missile no longer auto-cancels on landing, hindering its utility.
- Screw Attack:
- Screw Attack travels more vertical distance, improving its recovery potential, and its last hit has drastically increased knockback scaling (175 (grounded), 160 (aerial) → 240 (both)), granting it KO potential. All of the ground version's multi hits also now have extremely high set knockback which when combined with the inclusion of rage can allow Screw Attack to kill at obscenely low percents if Samus has a high amount of rage.
- Bomb:
- Bomb has less ending lag (FAF 47 → 45). Additionally, aerial Bomb can be used faster. When coupled with her faster air speed, these changes improve its horizontal recovery potential.
- Aerial Bomb delays Samus' descent for a slightly shorter amount of time and Bomb grants slightly less height, hindering its vertical recovery potential. Additionally, Bombs have more startup lag (frame 53 → 63) and the explosion is now absorbable.
- Zero Laser:
- Zero Laser deals less damage overall.
- Zero Laser has less startup lag and more range.
- Zero Laser's animation has slightly changed. The beam now starts out thin before expanding, rather than starting out wide before thinning. It also produces slightly more prominent visual effects around the Arm Cannon's tip.
Update history[edit]
Samus has been heavily buffed via game updates. She received plenty of significant buffs during game updates, along with two minor nerfs that were either negligible or even fixed outright in later updates, causing her to fare much better after the updates.
In terms of direct changes, Samus started receiving relevant minor buffs in update 1.0.8. Said update saw her up smash buffed so that its hits can connect together better than before, while her grabs' ending lag was reduced, making them slightly safer. Update 1.1.1 bought about more minor buffs; Screw Attack was changed to help its hits connect together better. Her neutral and forward aerials were also slightly buffed, with neutral aerial having its hitbox sizes and timings improved, while forward aerial had its damage output increased and landing lag decreased.
In terms of indirect changes, the changes to shield mechanics brought about by updates 1.1.0 and 1.1.1 are a mixed bag for Samus. The new mechanics gave Samus a number of new Charge Shot combos that allow her to break shields, of which she previously only had one such combo. However, these same changes also make most of her close-ranged attacks more difficult to land out of shield, while the only other moves that have been improved are her down tilt, her forward smash's sweetspot, up smash, and forward aerial, which are already difficult to land (or in up smash's case, requires the opponent to be above on a platform).
However, update 1.1.5 has granted Samus arguably her most noteworthy buffs. Dash attack now has a hitbox that deals 7% at the beginning of the dash, which prevents it from whiffing and makes its hitbox timing virtually identical to Brawl. Forward tilt has been vastly improved; after being nerfed overall in update 1.0.6, all of its hitboxes now deal 2% more damage, its sourspot deals more knockback (thus making it safer and more rewarding upon landing) and its tech-chase combos have effectively been restored after they had been severely weakened to the point of necessitating its sweetspot for said combos to be performed. Like her forward tilt, her neutral aerial's hitboxes all deal 2% more damage, which naturally increases its knockback and improves its damage racking, KO potential, and shield safety. Although they are still unimpressive, her down smash and grabs had their ending lag decreased, making all of them safer and making her down smash a quick anti-pressure option.
Bomb was also changed slightly, as Samus now gets more momentum out of one in the air. Lastly, Samus' attributes were also changed for the better. Her gravity, falling speed, and air speed were increased, which improve her already great survivability and allows her to land more effectively than before, which has been made even easier thanks to the aforementioned Bomb buff. As a result, Samus has been significantly buffed overall as of update 1.1.5, having become considerably better than she was in Brawl and even better than she was during SSB4's initial release.
- Sweetspotted forward tilt deals 1% more damage: 7%/8% → 8%/9% and its knockback increased, slightly improving its KO potential near the edge.
- Forward tilt deals 1% less damage: 6%/7% → 5%/6% and little to no hitstun due to receiving a sourspot on the middle part of Samus' leg. When coupled with the aforementioned sweetspot buff, forward tilt has lost its ability to lead into Charge Shot tech-chases, hindering its utility.
- Super Missile's speed increased, although it is rather negligible.
- Up smash improved. Its initial hits' hitbox sizes increased by 0.5u, its last hit's hitbox size increased: 7u/3.5u → 7.3u/4u and its last hit's knockback growth increased: 135 → 150.
- Standing and pivot grabs' ending lag decreased: 79 (standing)/92 (pivot) → 75/88.
- Neutral aerial improved. Its late second hit's knockback growth increased: 80 → 98, its hitboxes' sizes increased: 5.5u (hit 1)/3.5u (hit 2 clean)/2.8u (hit 2 late) → 6u/4u/3.3u and its hitboxes' durations increased by 2 frames.
- Neutral aerial's second hit's angle altered: Sakurai angle → 45°.
- Forward aerial's loop hits deal 0.6% more damage: 1% → 1.6%.
- Forward aerial's landing lag decreased: 30 frames → 24.
- Melee Charge Shot improved. It deals more damage: 5% (uncharged)/18% (fully charged) → 6%/20%, its partially charged base knockback increased: 30 → 50 and its fully charged hitbox sizes increased: 8u → 10u.
- Partially charged Melee Charge Shot's hitbox sizes decreased: 4u → 2.5u.
- Fully charged Melee Charge Shot's knockback altered: 65 (base)/35 (growth) → 70/32.
- Melee Charge Shot's recoil distance increased.
- Screw Attack's loop hits' weight-based knockback increased: 150/120 → 178/140.
- Screw Attack's loop hits' angles altered: 100° → 96°.
- Samus' air speed (0.95 → 1.03), falling speed (1.25 → 1.3), fast falling speed (2 → 2.08) and gravity (0.75 → 0.77) increased.
- Dash attack ending lag decreased by four frames (IASA 37 → 33).
- Dash attack has received a new 2 frame hitbox on frame 8 that deals 7%. This makes it no longer whiff at point-blank range.
- All of forward tilt's hitboxes deal 2% more damage (6%/7%/8%/9% → 8%/9%/10%/11%) and the sourspots have more base knockback (10 → 20), overriding the nerf in 1.0.6 and restoring its tech-chasing abilities.
- Down smash ending lag decreased by seven frames (IASA 52 → 45).
- Neutral aerial deals 2% more damage: 8%/6%/7% → 10%/8%/9%.
- The second hit of neutral aerial (late) has a larger hitbox size and z position: 3.3 (hitbox)/5.3/0 (z position) → 3.6/5.4/0.
- Forward aerial's angles have been altered, its hitboxes values have been extended, and its first hit has received a new hitbox that deals 3% to make it connect together better.
- All grabs have decreased ending lag by six frames each (75 (standing)/73 (dash)/89 (pivot) → 69/67/83.
- Homing Missile and Super Missile come out 2 frames earlier: (20/23 → 18/21).
- Super Missile's shooting duration is increased by 2 frames.
- Bombs give Samus more momentum in the air.
- Bomb can be cancelled with a crouch sooner (frame 47 → 45).
Moveset[edit]
- Samus can wall jump.
For a gallery of Samus's hitboxes, see here.
| Name | Damage | Description | ||
|---|---|---|---|---|
| Neutral attack | Straight (ストレート) / Cannon Hammer (アームキャノンハンマー, Arm Cannon Hammer) | 3% | A left-handed jab followed by a forearm club with the Arm Cannon. The first hit can jab reset and jab cancel, but the attack is mediocre overall. Opponents can usually act out before the second hit connects by shielding or counterattacking, while the second hit may not even connect at high percentages. Depending on the opponent's weight, it is safe and a true combo ranging from 35%-75%, but only if the first hit connects relatively close to the arm and not at the fist. First hit comes out on frame 3, while the second hit comes out 6 frames later, meaning it is a much safer option overall to land the first hit and retreat. The second hit does have KO potential at very high percentages, however. | |
| 8% | ||||
| Forward tilt | ↗ | 11% (foot), 10% (lower leg), 8% (upper leg), 9% (body) | A reverse roundhouse kick. Deals more damage and knockback at her heel, while her leg deals less damage and knockback. Can be aimed at strong angles, though if angled up, it can actually miss medium-sized characters like Mario. Comes out on frame 8. The foot sweetspot deals rather potent knockback for a tilt attack, which can KO near the edge at around 150%. At varying percentages, such as from 30%-40% when sweetspotted and 100%-120% when sourspotted, it can lead into a guaranteed Charge Shot. This is because, regardless of teching, Charge Shot will catch their option in time. | |
| → | 10% (foot), 9% (lower leg), 7% (upper leg), 8% (body) | |||
| ↘ | 11% (foot), 10% (lower leg), 8% (upper leg), 9% (body) | |||
| Up tilt | 13% (grounded), 12% (aerial) | An axe kick, which is identical to Captain Falcon's up tilt. If an opponent is hit directly by her heel as it comes down, they are dealt extra damage. While the move can meteor smash, it oddly only does so on grounded targets, making it ineffective as an edge-guard. Samus' strongest tilt, it is able to KO grounded opponents at 140% or less with rage. However, it has noticeable start-up, due to coming out on frame 15. KOs aerial opponents at the edge around 90% or earlier depending on the opponent's weight. If the opponent misses their grounded tech, it is a good combo starter for her aerials at low to medium percentages, while it functions as a true combo into Charge Shot at high percentages. | ||
| Down tilt | 12% | Kneels and quickly thrusts her Arm Cannon downward to fire a small, fiery blast. It is very fast, due to coming out on frame 6, and deals respectable damage for a tilt attack. However, it has high ending lag and cannot KO until extremely high percentages. It is useful as a close range anti-pressure option on opponents in front of Samus, or as a punishment option. With maximum rage, it can KO middleweights at 150%. | ||
| Dash attack | 7% (early), 10% (clean), 6% (late) | A shoulder tackle. Deals less damage at its beginning and end. An excellent combo starter as of update 1.1.5, as it can lead into neutral, forward and up aerial or Screw Attack at a variety of percentages, depending on which hitbox connects. With high amounts of rage, this move forms the start of a two-hit KO combo into Screw Attack, which KOs due to only the first couple of hits of Screw Attack connecting. This combo can KO floaty characters beginning at 0%, and the heaviest characters beginning around 30%. | ||
| Forward smash | ↗ | 15% (blast), 13% (Arm Cannon) | Quickly thrusts her Arm Cannon forward to fire a small, fiery blast. Despite the blast's appearance, the hitbox does not quite reach the end of the blast, and actually reaches slightly into the Arm Cannon's barrel. Despite this, the sweetspot relies heavily on spacing in order to land, as only the blast deals knockback strong enough to KO at 100% from center-stage. Conversely, the Arm Cannon itself KOs at 138%, which makes its overall functionality largely similar to Mario's forward smash. However, it is tied with Marth and Lucina's forward smashes as the fastest one in the game, due to coming out on frame 10. It can be angled like her forward tilt, with the upward angle dealing more damage and knockback, though it can typically miss as a result. The downward angle can hit edge hanging opponents, similarly to her down tilt. | |
| → | 14% (blast), 12% (Arm Cannon) | |||
| ↘ | 13.5% (blast), 11% (Arm Cannon) | |||
| Up smash | Cover Fire (ヘルファイア, Hellfire) | 3% (hits 1-4), 6% (hit 5), 18% (all hits connect) | Fires five fiery blasts in an overhead arcing motion. True to its name, this move works best as an anti-air attack, as its multiple hits give a good amount of aerial protection. Conversely, it is unable to hit grounded opponents unless they are touching Samus. When reversed on the ground, it can poke and hit through shields. KOs at 115% uncharged and around 60%-70% when fully charged. | |
| Down smash | 10% (front), 12% (back) | A legsweep. A semi-spike, its speed is decent and provides protection against rolls and near edges. However, its power has been significantly toned down since Brawl, as it is now one of the weakest down smashes in the game. KOs at extremely high percentages, making it unreliable. However, its back hit deals more knockback, making it possible to KO at 150% with enough rage, while the front hit can set up an edge-guard. Its ending lag is relatively quick, however, making it more useful as a decent anti-pressure move and a punishment option against rolls due to its ability to hit behind Samus. | ||
| Neutral aerial | 10% (hit 1), 9% (hit 2 clean), 8% (hit 2 late) | A spinning roundhouse kick. Hits on both sides quickly and can auto-cancel with a short hopped fast fall. One of the strongest neutral aerials as of update 1.1.5, its front hit and sweetspotted back hit deal very powerful knockback, which makes it a viable KOing option off-stage or near the edge. It is also a decent combo finisher. | ||
| Forward aerial | 3% (hit 1), 1.6% (hits 2-4), 5% (hit 5), 12.8% (all hits connect) | Fires five fiery blasts in a slow, downward arcing motion. The first four hits drag opponents into the rest of the move, with the last hit carrying the entire attack's knockback. Samus' main aerial move for both combos and protection. Extremely useful as an edge get-up option or against air dodges due to its multiple hits, and using the move immediately after a short hop can hit opponents with the last hit before Samus lands again. As of update 1.1.5, the first hitbox of the move results in all of the move's hits connecting together much better than before, to the point that it functions as a true combo from down throw up to around 70%, or chain into itself at low percentages thanks to Samus' air speed having been increased in that same update. | ||
| Back aerial | 14% (clean foot), 12% (clean leg), 9% (late) | A back kick. It is fast and deals powerful knockback when sweetspotted, which makes it an excellent KOing option, especially while edge-guarding. However, it has a small hitbox like her neutral aerial. When sweetspotted, it is among the strongest back aerials in the game. When sourspotted, it can be used as a Wall of Pain. KOs under 100% and around 80% at the edge with the clean sourspot and sweetspot respectively. | ||
| Up aerial | 3% (hit 1), 1% (hits 2-5), 4% (hit 6), 11% (all hits connect) | A diagonal corkscrew flying kick. Hits multiple times, though only the last hit deals moderate knockback. Unlike most multi-hitting attacks, the opponent can easily be launched before the move is complete if Samus does not follow the opponent's previous launch direction. Grounded opponents can be hit by the last hitbox if Samus lands while starting the move in the air, although it is difficult to do so. It is her fastest aerial, due to coming out on frame 5. Useful for landing, breaking some certain combos, and countering aerial approaches. Can be used as a follow-up after a dash attack, grounded up tilt, down aerial, or down throw, all of which can be followed up with another up aerial and/or can be finished off with a Screw Attack. On stages with platforms, it can even zero-to-death the entire cast when using a platform to extend the combo. If used high enough at high percents, it can be used as a KO option. | ||
| Down aerial | 10% (early), 14% (clean), 11% (late) | Swings her Arm Cannon in a downward arcing motion. Hitting with the move's trail will meteor smash opponents, while the sourspot on the edge of the move at the very start and end deals strong upward diagonal knockback. Auto-cancels from a short hop and is a relatively good combo starter. | ||
| Grab aerial | Grapple Beam (グラップリングビーム, Grappling Beam) | 1.5% (early), 3% (clean) | Fires the Grapple Beam. A useful spacing option due to having only 8 frames of landing lag from a short hop. It auto-cancels from a full hop and has impressive range, being the longest grab aerial in game. In addition to its recovery and spacing capabilities, it is good at setting up an opening for a dash attack, which Samus can then further capitalize on with combos. | |
| Grab | Grapple Beam (グラップリングビーム, Grappling Beam) | — | Fires the Grapple Beam. It has impressive range and is the longest tether grab in the game. However, it is tied with her Zero Suited form's grab as the second slowest in terms of ending lag, making it very punishable if missed. | |
| Pummel | 1.2% | A palm strike. The second fastest pummel in the game, beaten only by Lucario's. However, it is also the second least damaging one in the game, after Lucario's. | ||
| Forward throw | 9% | Twirls the opponent overhead, then flings them forward. Low knockback growth prevents it from KOing even the lightest of characters unless with rage at extremely high percentages. | ||
| Back throw | 8% | Swings the opponent behind herself. Has even lower knockback growth than her forward throw. | ||
| Up throw | 1% (hits 1-5), 4% (throw) | Hoists the opponent overhead and then blasts them upward with the Grapple Beam. Can combo into Screw Attack or up aerial at 0% against heavyweights or fast-fallers, but it otherwise launches opponents too high for follow-ups. However, on a platform, it can zero-to-death the same characters when followed up by her up aerial and then Screw Attack. Like her forward and back throws, it possesses low knockback growth. | ||
| Down throw | 6% | Swings the opponent high above her head, then slams them onto the ground. It can be reliably followed up with her neutral, forward and up aerials, Charge Shot and Screw Attack at low to medium percentages. | ||
| Floor attack (front) | 7% | Swings her Arm Cannon in front of herself and then fires a blast behind herself. | ||
| Floor attack (back) | 7% | Performs a low-level roundhouse kick. | ||
| Floor attack (trip) | 5% | Performs a shin kick in front of herself and then a back kick behind herself. | ||
| Edge attack | 7% | Performs a legsweep while climbing up. | ||
| Neutral special | Default | Charge Shot | 3% (uncharged), 25% (fully charged) | Charges a ball of energy and fires it. Unless the move is already charged, Samus will instantly fire the weakest shot if it is used in the air. Boasts excellent KO potential when fully charged, and is a useful intercepting move at a low charge. KOs at 70%-110% depending on rage and the opponent's weight and DI. Can be used to break shields if used in conjunction with her neutral attack, up or down tilts, aerials, Bomb and Super Missile. When using her forward tilt to launch the opponent into tumbling, it can set up a guaranteed combo into Charge Shot regardless of the opponent's tech option, as Charge Shot will always catch their tech direction. |
| Custom 1 | Dense Charge Shot | 4% (uncharged), 27% (fully charged) | The blast deals slightly more damage, more shield damage and considerably more knockback, making it even better for KOing and breaking shields. However, the charge time is increased by 30% and its ending lag after being fired is increased. The shots travel at extremely slow speeds, so much so that three uncharged shots can exist at once, even with the increased lag. As a result, this grants it edge-guarding potential, as it can be used to trap opponents and put them in a problematic position. | |
| Custom 2 | Melee Charge Shot | 6% (uncharged), 20% (fully charged) | Fires a shotgun-style energy blast that only hits at point-blank range. Deals more damage when uncharged and takes less time to charge, but deals less damage when fully charged and it has more ending lag. It also deals a massive amount of shieldstun and hitstun, as well as pushing Samus back after being used, making it safe if whiffed or shielded. | |
| Side special | Default | Missile | 5% (Homing), 10% (Super) | Fires a Missile, which homes in on the opponent. If the special button is tapped like a smash attack, Samus will instead fire a Super Missile, which travels in a straight line and deals more damage and knockback. Both variations deal low knockback, but can be used to break a shield if used in conjunction with a fully charged Charge Shot. Both Missile variations can also be used as set-ups by opening up an opportunity for a dash attack, grab aerial, or Charge Shot, while the Super variation sets up better for a true combo into a forward jumping Charge Shot at high percentages. The Homing variation is also useful for catching recoveries and forcing air dodges, which can open up punishment opportunities. |
| Custom 1 | Relentless Missile | 3% (Homing), 12% (Super) | Missiles are slower and weaker, but have significantly improved homing capabilities. Super Missiles cover less range, but are stronger and have increased KO potential. Only 2 total missiles can exist at once, and no more than 1 super missile. | |
| Custom 2 | Turbo Missile | 4% (Homing), 9% (Super) | Upon being fired, the default Missiles lock onto the opponent's position before flying towards it in a straight line, while Super Missiles pause briefly before shooting forward at a high speed. Both variations deal slightly less damage, but are lightning quick (only one can exist at a time). | |
| Up special | Default | Screw Attack | 2% (grounded hit 1), 1% (grounded hits 2-11), 1% (aerial hits 1-12), 12% (all hits connect) | Leaps upward to perform a high-speed somersault while discharging energy. Shoots upward if initiated from the ground, while it gains distance slower if started in the air. A useful out of shield option and deals good knockback that can KO around 100% while near the upper blast line. With high rage, certain setups are capable of landing only the initial high-knockback hit, forcing the opponent out of the rest of the move for an abnormally early KO. |
| Custom 1 | Screw Rush | 2% (loop, 5 hits), 5% (last), 15% (all hits connect) | Deals more damage and knockback, which grants it better KO potential. However, because it launches opponents horizontally, it only KOs reliably near the edge instead of near the upper blast line. It covers more horizontal distance (launching Samus forward diagonally-up on the ground and angled in the same manner in the air), but covers less vertical distance, making it less effective for recovery. | |
| Custom 2 | Apex Screw Attack | 2% (hit 1), 9% (grounded hit 2), 7% (aerial hit 2) | Deals more damage (albeit less total damage)!and much more knockback, which grants it much better KO potential, to the point that it can KO as low as 50% near the upper blast line and without rage, depending on weight and DI. However, it only hits twice and covers significantly less horizontal distance. | |
| Down special | Default | Bomb | 4% (contact), 5% (explosion) | Rolls into her Morph Ball form and drops a Bomb, which explodes after a set time. Useful for edge-guarding or to force an opponent to shield. Deals good shield damage, as it is able to break them if used with her up and down tilts or a fully charged Charge Shot. Good for punishing certain recoveries and also useful for punishing the 2 frame-long edge grab vulnerability if timed correctly. Like Link and Toon Link, Samus can use her Bomb to perform a bomb recovery. |
| Custom 1 | Slip Bomb | 2.5% (grounded explosion), 3.5% (aerial explosion) | Bombs deal slightly less damage, but trip grounded opponents and meteor smash aerial ones. This makes them useful for edge-guarding or as a set-up. These bombs fall a little quicker, but shoot vertically out of Samus to just about even things out. | |
| Custom 2 | Mega Bomb | 4% (contact), 9% (explosion) | Only one Bomb is able to be dropped at a time (though Samus can still enter morph ball), but its explosion has a bigger radius and deals more damage and shield damage, making it better for breaking shields when used in conjunction with Samus' other moves. The bomb takes roughly 3 seconds to detonate, about twice as long as the other two variants. It is also more effective for bomb recoveries. It is based on the Power Bomb. | |
| Final Smash | Zero Laser | 0.5% (fringe loop), 1.5% (main loop), 2.5% (fringe blast), 5.5% (main blast) | Fires a very large, bluish white energy beam. The beam can be angled slightly up or slightly down. | |
Stats[edit]
| Stats | Weight | Dash speed | Walk speed | Traction | Air friction | Air speed | Air acceleration | Gravity | Falling speed | Jumpsquat | Jump Height | Double jump Height |
|---|---|---|---|---|---|---|---|---|---|---|---|---|
| Value | 108 | 1.86 – Initial dash 1.504 – Run |
1.0615 | 0.0585 | 0.0075 | 1.03 | 0.04 – Base 0.05 – Additional |
0.077 | 1.3 – Base 2.08 – Fast-fall |
4 | 37 - Base 18 - Short hop |
37 |
Announcer call[edit]

English/Japanese/Chinese
On-screen appearance[edit]
- Arrives from a Save Station.

|
|---|
Taunts[edit]
- Up taunt: Salutes vigorously with her left arm as her thrusters activate.
- Side taunt: Faces the screen and demonstrates her Arm Cannon's mechanics.
- Down taunt: Aims her Arm Cannon behind herself, then kneels while aiming it in front of herself.
| Up taunt | Side taunt | Down taunt |
|---|---|---|

|

|

|
Idle poses[edit]
- Rubs her Arm Cannon with one finger.
- Brings her Arm Cannon down and then pulls it back up.
 |

|
|---|
Crowd cheer[edit]
| English | Japanese | |
|---|---|---|
| Cheer | ||
| Description | Sa-mus! | Sa-mus! |
| Pitch | Group chant | Group chant |
Victory poses[edit]
- Fires multiple shots from her Arm Cannon while kneeling, then strikes a pose. The pose is based on her appearance on the cover of Metroid II: Return of Samus.
- Performs a reverse roundhouse kick, readies her Arm Cannon, then strikes a pose.
- Throws two punches, fires a shot from her Arm Cannon, then strikes a pose. The animation is similar to Mii Gunner's neutral attack, while the pose is based on her appearance on the cover of Super Metroid.
 |
 |

|
|---|
In competitive play[edit]
Tier placement and history[edit]
Samus was initially considered to have improved from Brawl, due to the improvements to her KO potential, a trait she previously lacked in tournament play. However, it soon became clear the buffs to other bottom-tier characters, such as Mario, Captain Falcon and Link, had made them significantly better than her. When combined with glaring blind spots on her hitboxes, extended hurtboxes, and continued struggle to KO, Samus would later be considered one of the worst characters in the game. Despite the buffs gained in game updates, notably update 1.1.1, her poorly regarded status remained intact, with only a handful of dedicated mains, such as IcyMist, KayJay, Afro Smash and Jonny Westside, having a notable tournament impact. As such, she was ranked 51st on the first 4BR tier list, becoming a bottom-tier character.
It was not until update 1.1.5 when Samus gained her most efficient buffs, which allowed her moveset to flow significantly better, improving her offense and eliminating the majority of her blindspots. This resulted in her achieving significantly better placements at tournaments, and benefiting from nerfs given to characters with preferable matchups against her, such as Bayonetta, Diddy Kong, Sheik and Zero Suit Samus. These traits saw Samus ranked 45th on the second tier list and placed in the low tier, eventually rising to 41st on the third tier list, at the top of the low tier. Samus' somewhat more successful tournament placings have improved competitive perception of her, as she rose to 36th/37th on the fourth and final tier list, now a mid-tier character, sharing the spot with Robin. As such, she is considered a far more viable character after game updates, and significantly better than how she was in Brawl, with some smashers, such as ESAM and Dabuz, claim that a higher placement in the tier list is needed, despite her relatively below-average representation.
Official Custom Moveset Project[edit]
| Character | Custom sets available | ||||
|---|---|---|---|---|---|
| 1211 | 1221 | 1231 | 1212 | 1222 | |
| 1232 | 2211 | 2231 | 3211 | 1213 | |
Most historically significant players[edit]
Any number following the Smasher name indicates placement on the PGR 100, which recognizes the official top 100 players in Super Smash Bros. 4 of all time.
See also: Category:Samus players (SSB4)
 Afro Smash - The best Samus player in Europe. His most notable run was with 9th at Albion 2, garnering some of his best wins at the tournament with iStudying and Peli. At some smaller events, he placed 7th at both Respawn 5 and DAT BlastZone 25: The Silver Anniversary and 13th at Syndicate 2016. Ranked 37th on the European Smash 4 Power Rankings.
 ESAM - Uses Samus as a secondary alongside Pikachu and is one of the best Samus players in the world. He won regional Combo Breaker 2017 as a solo Samus player and his most notable victory with the character was his win over Ally at 2GGC: Civil War. He has found success with her as a secondary at other tournaments such as 2nd at DreamHack Austin 2018, using her against Locus in his bracket. He ranked 17th on the PGR 100, being the only Samus representative during the Smash 4 PGR seasons.
- IcyMist - One of the best Samus players in the world. Made one top 8 appearance with Showdown: Battle Royale, placing 7th and defeating Ned. By the latter half of Smash 4 era, she made notable major placements with 9th at Royal Flush and 13th at Super Smash Con 2018, notably defeating Elegant and Wrath. She was also known as the best player online for the majority of the game's competitive lifespan, placing 1st on the Wi-Fi Warrior Rank v1.
 Joker - The best Samus player in Mexico. Competed regionally on a sparse basis, but still maintained to highlight the character at certain tournaments such as 9th at both Smash Factor 5 with a notable win over Nanon and TGC 7.
- Jonny Westside - The best Samus player in the world during the first few years of the game's active lifespan. This was mainly seen with many SoCal events, placing 7th at 2GGT: ESAM Saga defeating Zenyou and Elegant, as well as 9th at 2GGT: FOW Saga, 13th at 2GGT: The False Awakens, and 25th at 2GGT: Fresh Saga.
 Parme - The best Samus player in Japan. Attended almost every Sumabato from 2017-2018 with strong results, placing 7th at Sumabato 21 and 9th at Sumabato Smash 4 Final, beating players such as komorikiri and Kuro.
- Pyreeze - One of the best Samus players in the United States. He was a respected player in Washington, placing 9th on the Lifetime Western Washington Smash 4 Power Rankings. He also placed top 8 at some of the biggest events in Washington such as 5th at Port Priority: A Pacific Northwest Regional and 7th at Port Priority 2: Midwest Invasion and additionally placed 33rd at Frostbite 2018.
Trophies[edit]


- Samus

 Samus Aran has fought her way across a variety of planets in the Metroid series. She wears a Power Suit designed by the Chozo, giving her incredible versatility in a fight. She can wade in, but she favors beams and missiles. A fully charged Charge Shot packs a serious punch!
 Samus Aran is known for her numerous battles across alien planets in the Metroid series. She wears a Power Suit designed by the Chozo, giving her incredible versatility in a fight. She can wade in with kicks and punches, but she favors beams and missiles. A fully charged Charge Shot packs a serious punch!
 : Metroid (08/1987)
 : Super Metroid (04/1994)
 The heroine of the Metroid series, Samus Aran. Her missions take her across the reaches of space, and her Power Suit gives her immeasurable fighting prowess. In this game, she uses a variety of ranged attacks based around beams and missiles. When her Charge Shot is fully charged, it can launch foes with devastating force.
- : Metroid (01/1988)
- : Super Metroid (07/1994)


- Samus (Alt.)
- Samus protects herself from overhead enemies with her up smash, Cover Fire, which can land multiple hits on anyone it connects with. Samus also fires a homing missile by holding sideways and pressing the special-attack button or launches a Super Missile by quickly tapping sideways instead.
- Samus protects herself from overhead enemies with her up smash, Cover Fire, which can land multiple hits on anyone it connects with. Samus also fires a homing missile by holding sideways and pressing the special-move button or launches a Super Missile by quickly tapping sideways instead.
- : Metroid (08/1987)
- : Super Metroid (04/1994)
- Samus's up smash attack, Cover Fire, fires five small blasts overhead, making it great for countering incoming aerial attacks. Her Missile attack fires a homing missile if you hold sideways and then press the special button, but if you do those things at the same time, you'll fire a Super Missile.
- : Metroid (01/1988)
- : Super Metroid (07/1994)

- Zero Laser
- Samus unleashes a massive, long-range beam from her Arm Cannon as her Final Smash. Fighters on the edges of the beam will be drawn in, taking more and more damage. The sheer power of this weapon makes it tough to aim once it's firing, but it's possible to adjust the beam up and down.
- In Samus's Final Smash, she unleashes a huge laser beam from her Arm Cannon that draws opponents to the centre of the beam. Quite handy, since the closer they are to the centre, the more damage they'll take! You can also angle it up and down (albeit slowly), letting you catch more of your enemies and create more havoc.
In Event Matches[edit]
Solo Events[edit]
- All-Star Battle: Regulars: Samus is one of the opponents fought in this event. All of the opponents are the eight starter characters of the "perfect-attendance crew" from Super Smash Bros.
- Galactic Avenger: Samus must defeat Dark Samus and Ridley in a Stamina Battle. Dark Samus has 150 HP on Easy/Normal and 180 HP on Hard.
- Identity Crisis: As Sheik and Zelda, the player must defeat Samus and Zero Suit Samus.
Co-op Events[edit]
- Final Battle Team-Up: Samus, using her Dark Samus alternate costume, is one of the opponents the players must defeat.
- Poisonous Planet: Samus and Olimar must defeat two giant Charizard in a Stamina Battle before their own health is depleted due to being flowered.
- The Ultimate Battle: Two players select a character and must defeat the entire roster.
Alternate costumes[edit]
.png)
| |||||||

|

|

|

|

|

|

|

|
Gallery[edit]

Samus in the Nintendo Direct from April 8th, 2014.
Samus' amiibo.
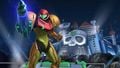
Samus' appearance during E3 2013.
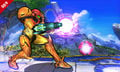
Using Charge Shot while a Bomb is nearby.
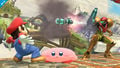
Using Super Missile on Mario as Kirby crouches to avoid it.
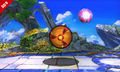
Using Bomb.
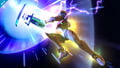
Using Zero Laser, her Final Smash.
The second hit of her neutral attack.
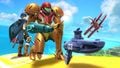
Crouching near a Steel Diver as Marth looks on.
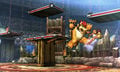
Samus and Bowser fighting on Arena Ferox.
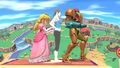
Alongside Peach and Wii Fit Trainer.
Using her side taunt alongside Little Mac.
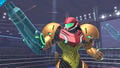
Using her side taunt.
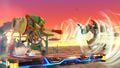
Toon Link using the Gust Bellows on Samus.
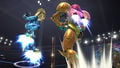
Zero Suit Samus and her Power Suit displaying their Jet Boots and thrusters, respectively.
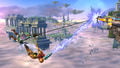
Samus and Link simultaneously grabbing an edge with their Grapple Beam and Clawshot tether recoveries.
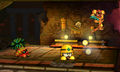
Samus fighting enemies in Smash Run.
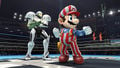
Samus displaying her new Light Suit-inspired alternate costume alongside Mario's new NES Open Tournament Golf-inspired alternate costume.
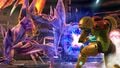
Samus using her Charge Shot against Ridley.
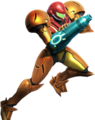
Samus as she appears on the cover of Super Smash Bros. for Nintendo 3DS.


Trivia[edit]
- Samus is one of only four characters to have an event where a stage boss must be defeated. The other four who share this trait with Samus are R.O.B., Mega Man, and Shulk.
| Fighters in Super Smash Bros. 4 | |
|---|---|
| Veterans | Bowser · Captain Falcon · Charizard · Diddy Kong · Donkey Kong · Dr. Mario · Falco · Fox · Ganondorf · Ike · Jigglypuff · King Dedede · Kirby · Link · Lucario · Lucas · Luigi · Mario · Marth · Meta Knight · Mewtwo · Mr. Game & Watch · Ness · Olimar · Peach · Pikachu · Pit · R.O.B. · Roy · Samus · Sheik · Sonic · Toon Link · Wario · Yoshi · Zelda · Zero Suit Samus |
| Newcomers | Bayonetta · Bowser Jr. · Cloud · Corrin · Dark Pit · Duck Hunt · Greninja · Little Mac · Lucina · Mega Man · Mii Fighter (Mii Brawler · Mii Gunner · Mii Swordfighter) · Pac-Man · Palutena · Robin · Rosalina & Luma · Ryu · Shulk · Villager · Wii Fit Trainer |
|
| |
|---|---|
| Fighters | Samus (SSB · SSBM · SSBB · SSB4 · SSBU) · Zero Suit Samus (SSBB · SSB4 · SSBU) · Ridley (SSBU) · Dark Samus (SSBU) |
| Assist Trophies | Metroid · Dark Samus · Mother Brain |
| Bosses | Ridley · Meta Ridley |
| Stages | Planet Zebes · Brinstar · Brinstar Depths · Frigate Orpheon · Norfair · Pyrosphere Brinstar Escape Shaft (Adventure Mode) |
| Item | Screw Attack · Power Suit Piece |
| Enemies | Geemer · Kihunter · Metroid · Reo · FG II-Graham · Joulion · Zero |
| Other | Gunship · Kraid |
| Trophies, Stickers and Spirits | Trophies (SSBM · SSBB · SSB4) · Stickers · Spirits |
| Music | Brawl · SSB4 · Ultimate |
| Masterpieces | Metroid · Super Metroid |