Mewtwo (SSBM)/Down tilt: Difference between revisions
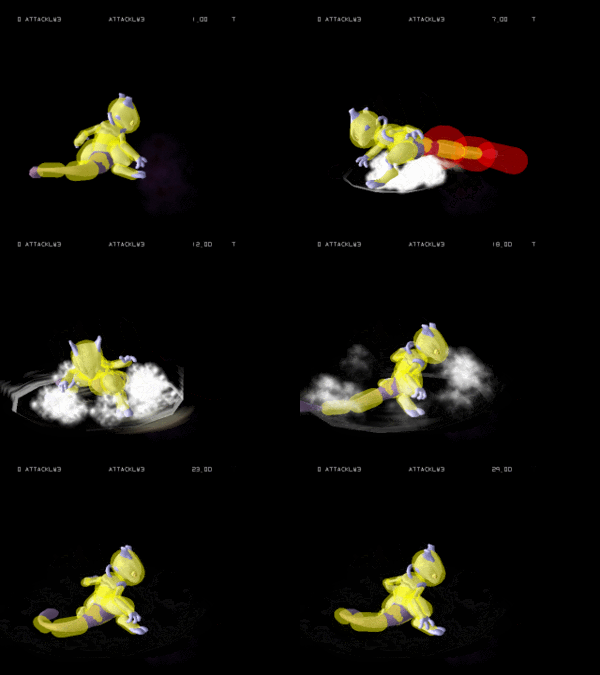
(New Page: {{ArticleIcons|ssbm=y}} thumb|300px|Hitbox visualization showing Mewtwo's down tilt. {{competitive expertise}} ==Overview== ==Hitboxes== {{MeleeHitboxTableH...) |
m (Fine. But I still stand by "completely impossible" being puffery or at least redundant. Sentences should flow/be coherent if the subclause is removed and I think this wording does that better, especially if "and" is on the correct side) |
||
| (7 intermediate revisions by 3 users not shown) | |||
| Line 1: | Line 1: | ||
{{ArticleIcons|ssbm=y}} | {{ArticleIcons|ssbm=y}} | ||
[[File:MewtwoDTiltSSBM.gif|thumb|300px|Hitbox visualization showing Mewtwo's down tilt.]] | [[File:MewtwoDTiltSSBM.gif|thumb|300px|Hitbox visualization showing Mewtwo's down tilt.]] | ||
==Overview== | ==Overview== | ||
Mewtwo does a spin with his tail sticking out. This is generally believed to be one of Mewtwo's best moves as well as one of the best down tilts in all of ''Melee''. | |||
It has exceptional [[startup]], being Mewtwo's fastest move on the ground, with very short [[end lag]] due to its big [[interruptibility]] window. This makes it difficult to punish if it misses and, coupled with its above average [[range]], impossible to punish [[out of shield]] if [[space]]d properly. | |||
It can also start combos, being easily Mewtwo's best combo starter. Typical follow-ups for down tilt include itself at lower percents, its {{mvsub|Mewtwo|SSBM|forward aerial}} to set up a [[juggling]] situation, and its {{mvsub|Mewtwo|SSBM|grab}} to either combo fast fallers with {{mvsub|Mewtwo|SSBM|up throw}}, set up a [[tech chase]] with {{mvsub|Mewtwo|SSBM|down throw}}, or KO its opponent with up or {{mvsub|Mewtwo|SSBM|back throw}}. | |||
==Hitboxes== | ==Hitboxes== | ||
{{MeleeHitboxTableHeader}} | {{MeleeHitboxTableHeader}} | ||
Latest revision as of 13:23, March 17, 2022
Overview[edit]
Mewtwo does a spin with his tail sticking out. This is generally believed to be one of Mewtwo's best moves as well as one of the best down tilts in all of Melee.
It has exceptional startup, being Mewtwo's fastest move on the ground, with very short end lag due to its big interruptibility window. This makes it difficult to punish if it misses and, coupled with its above average range, impossible to punish out of shield if spaced properly.
It can also start combos, being easily Mewtwo's best combo starter. Typical follow-ups for down tilt include itself at lower percents, its forward aerial to set up a juggling situation, and its grab to either combo fast fallers with up throw, set up a tech chase with down throw, or KO its opponent with up or back throw.
Hitboxes[edit]
Timing[edit]
| Hitboxes | 5-7 |
|---|---|
| Interruptible | 20 |
| Animation length | 29 |
Lag time |
Hitbox |
Interruptible |
|
