Ike (SSBU)/Hitboxes: Difference between revisions
From SmashWiki, the Super Smash Bros. wiki
Jump to navigationJump to search
(Making the images smaller to reduce the amount of scrolling) |
|||
| (6 intermediate revisions by 3 users not shown) | |||
| Line 1: | Line 1: | ||
{{ArticleIcons|ultimate=y}} | {{ArticleIcons|ultimate=y}} | ||
==Hitboxes== | |||
{|class="wikitable sortable" | {|class="wikitable sortable" | ||
!Move | !Move | ||
| Line 6: | Line 7: | ||
!Hitbox | !Hitbox | ||
|- | |- | ||
|Neutral attack 1|| || [[File:IkeJab1SSBU.gif|500px]] | |Neutral attack 1|| Bash || [[File:IkeJab1SSBU.gif|500px]] | ||
|- | |- | ||
|Neutral attack 2|| || [[File:IkeJab2SSBU.gif|500px]] | |Neutral attack 2|| Thrust Kick || [[File:IkeJab2SSBU.gif|500px]] | ||
|- | |- | ||
|Neutral attack 3|| || [[File:IkeJab3SSBU.gif|500px]] | |Neutral attack 3|| Swing Down || [[File:IkeJab3SSBU.gif|500px]] | ||
|- | |- | ||
|Forward tilt || | |Forward tilt || Swing Out || [[File:IkeFTiltSSBU.gif|500px]] | ||
|- | |- | ||
|Forward tilt up|| | |Forward tilt up|| Swing Out || [[File:IkeFTiltUpSSBU.gif|500px]] | ||
|- | |- | ||
|Forward tilt down|| | |Forward tilt down|| Swing Out || [[File:IkeFTiltDownSSBU.gif|500px]] | ||
|- | |- | ||
|Up tilt || || [[File:IkeUTiltSSBU.gif|500px]] | |Up tilt || Strike Up || [[File:IkeUTiltSSBU.gif|500px]] | ||
|- | |- | ||
|Down tilt|| | |Down tilt|| Slash Sweep || [[File:IkeDTiltSSBU.gif|500px]] | ||
|- | |- | ||
|Dash attack|| | |Dash attack|| Slash Up || [[File:IkeDashAttackSSBU.gif|500px]] | ||
|- | |- | ||
|Forward smash|| || [[File:IkeFSmashSSBU.gif|500px]] | |Forward smash|| Strike Split || [[File:IkeFSmashSSBU.gif|500px]] | ||
|- | |- | ||
|Up smash || || [[File:IkeUSmashSSBU.gif|500px]] | |Up smash || Strike Down || [[File:IkeUSmashSSBU.gif|500px]] | ||
|- | |- | ||
|Down smash || || [[File:IkeDSmashSSBU.gif|500px]] | |Down smash || Cast Off || [[File:IkeDSmashSSBU.gif|500px]] | ||
|- | |- | ||
|Neutral aerial || || [[File:IkeNAirSSBU.gif|500px]] | |Neutral aerial || Round Slash || [[File:IkeNAirSSBU.gif|500px]] | ||
|- | |- | ||
|Forward aerial|| | |Forward aerial|| Slash Down || [[File:IkeFAirSSBU.gif|500px]] | ||
|- | |- | ||
|Back aerial|| | |Back aerial|| Repositioning Slash || [[File:IkeBAirSSBU.gif|500px]] | ||
|- | |- | ||
|Up aerial || || [[File:IkeUAirSSBU.gif|500px]] | |Up aerial || Rising Swing || [[File:IkeUAirSSBU.gif|500px]] | ||
|- | |- | ||
|Down aerial || | |Down aerial || Strike Down || [[File:IkaDAirSSBU.gif|500px]] | ||
|- | |- | ||
|Neutral special||[[Eruption]]|| [[File:IkeEruptionNoChargeSSBU.gif|500px]] | |Neutral special||[[Eruption]]|| [[File:IkeEruptionNoChargeSSBU.gif|500px]] | ||
| Line 48: | Line 49: | ||
|Side special||[[Quick Draw]] || [[File:IkeQuickDrawSSBU.gif|500px]] | |Side special||[[Quick Draw]] || [[File:IkeQuickDrawSSBU.gif|500px]] | ||
|- | |- | ||
|Up special | |Up special grounded||[[Aether]] || [[File:IkeAetherGroundedSSBU.gif|500px]] | ||
|- | |||
|Up special aerial||[[Aether]] || [[File:IkeAetherAerialSSBU.gif|500px]] | |||
|- | |||
|Up special sword||[[Aether]] || [[File:IkeAetherSwordSSBU.gif|500px]] | |||
|- | |- | ||
|Up special falling||[[Aether]] || [[File:IkeAetherFallingSSBU.gif|500px]] | |Up special falling||[[Aether]] || [[File:IkeAetherFallingSSBU.gif|500px]] | ||
| Line 54: | Line 59: | ||
|Up special landing||[[Aether]] || [[File:IkeAetherLandingSSBU.gif|500px]] | |Up special landing||[[Aether]] || [[File:IkeAetherLandingSSBU.gif|500px]] | ||
|- | |- | ||
|Down special ||[[Counter]]|| [[File:IkeCounterHitSSBU.gif|500px]] | |Down special ||[[Counter]]|| [[File:IkeCounterSSBU.gif|500px]] | ||
|- | |||
|Down special hit ||[[Counter]]|| [[File:IkeCounterHitSSBU.gif|500px]] | |||
|- | |- | ||
|Standing grab || || [[File:IkeGrabSSBU.gif|500px]] | |Standing grab || || [[File:IkeGrabSSBU.gif|500px]] | ||
| Line 72: | Line 79: | ||
|Down throw || || [[File:IkeDThrowSSBU.gif|500px]] | |Down throw || || [[File:IkeDThrowSSBU.gif|500px]] | ||
|- | |- | ||
|Getup attack front || || | |Getup attack front || || [[File:IkeGetupAttackFrontSSBU.gif|500px]] | ||
|- | |- | ||
|Getup attack back || || | |Getup attack back || || [[File:IkeGetupAttackBackSSBU.gif|500px]] | ||
|- | |- | ||
|Getup attack trip || || | |Getup attack trip || || [[File:IkeTripAttackSSBU.gif|500px]] | ||
|- | |- | ||
|Ledge attack || || | |Ledge attack || || [[File:IkeLedgeAttackSSBU.gif|500px]] | ||
|} | |} | ||
[[Category:Ike (SSBU)]] | [[Category:Ike (SSBU)]] | ||
[[Category:Hitboxes (SSBU)]] | [[Category:Hitboxes (SSBU)]] | ||
Latest revision as of 17:11, September 27, 2022
Hitboxes[edit]
| Move | Name | Hitbox |
|---|---|---|
| Neutral attack 1 | Bash | 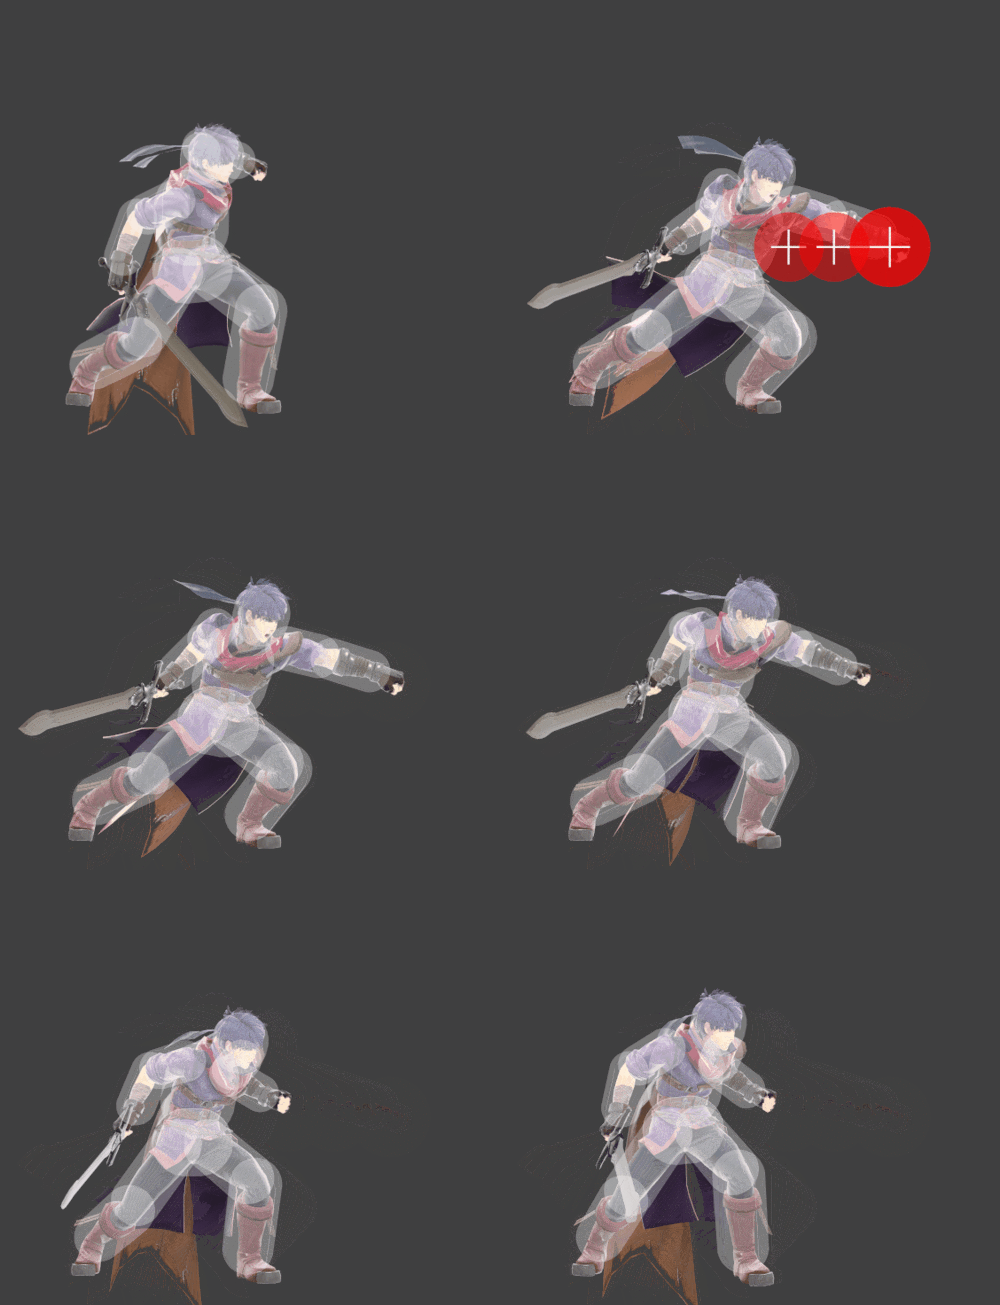
|
| Neutral attack 2 | Thrust Kick | 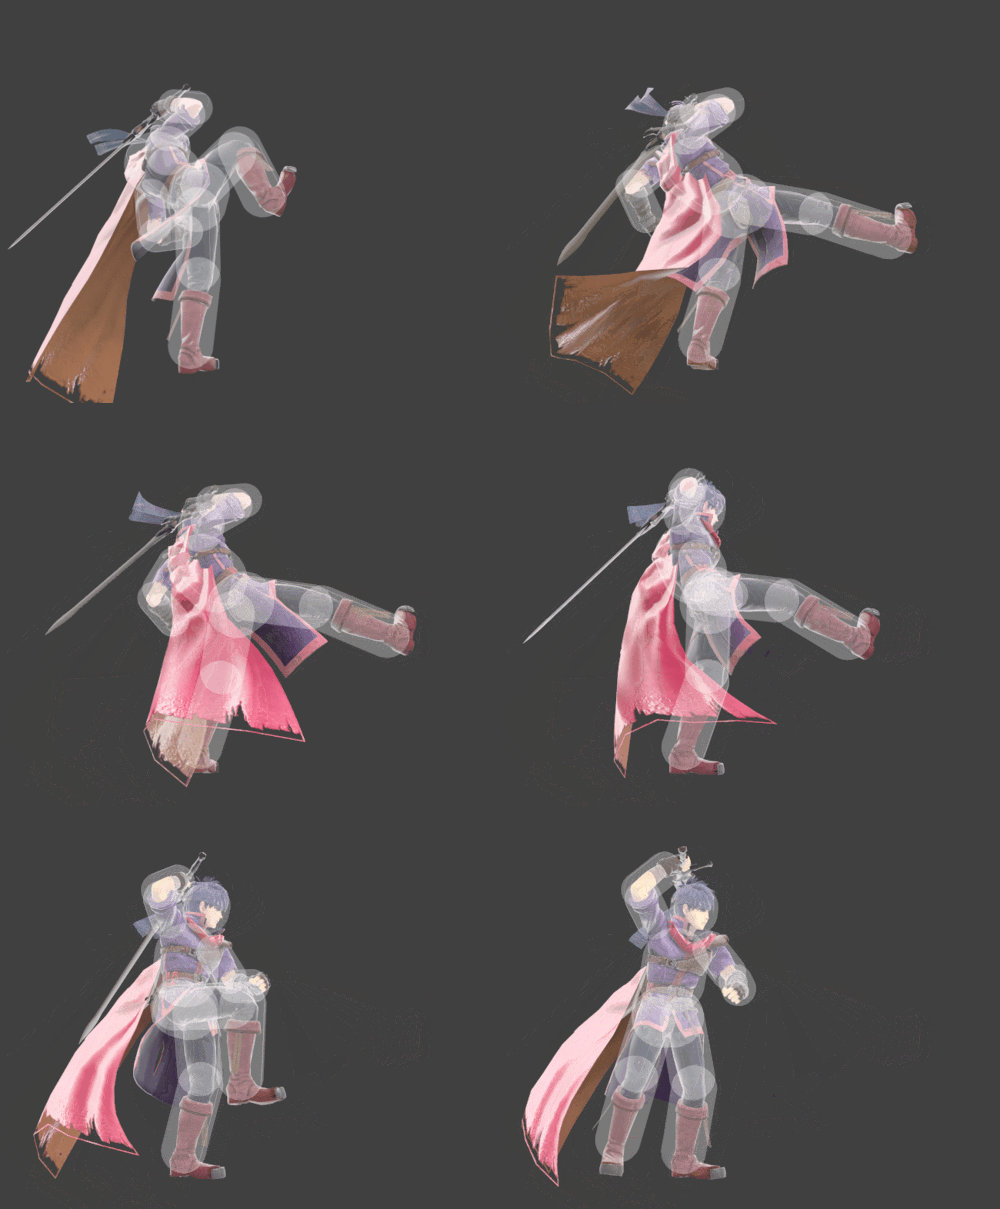
|
| Neutral attack 3 | Swing Down | 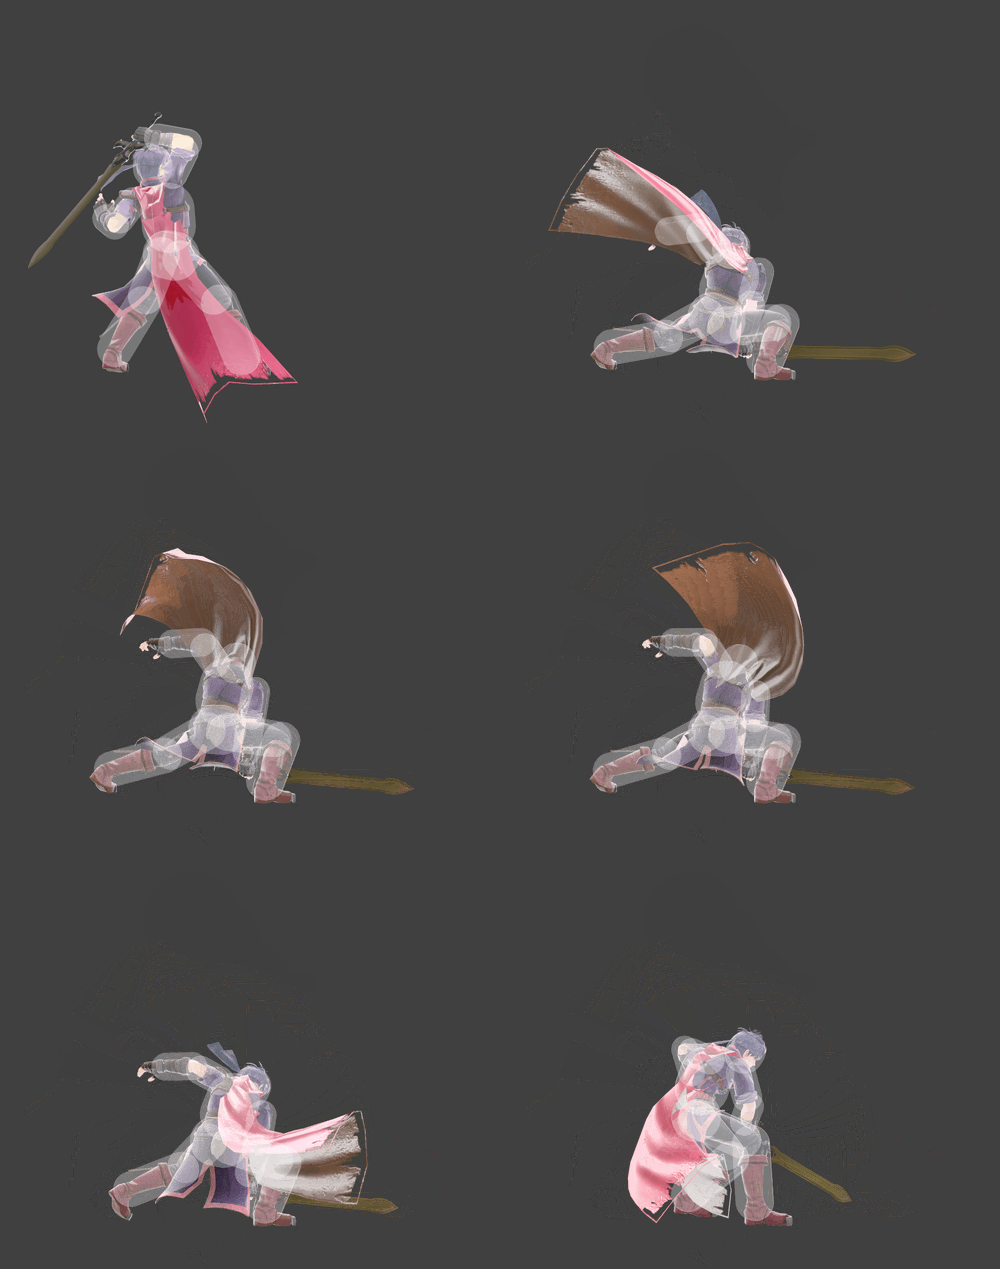
|
| Forward tilt | Swing Out | 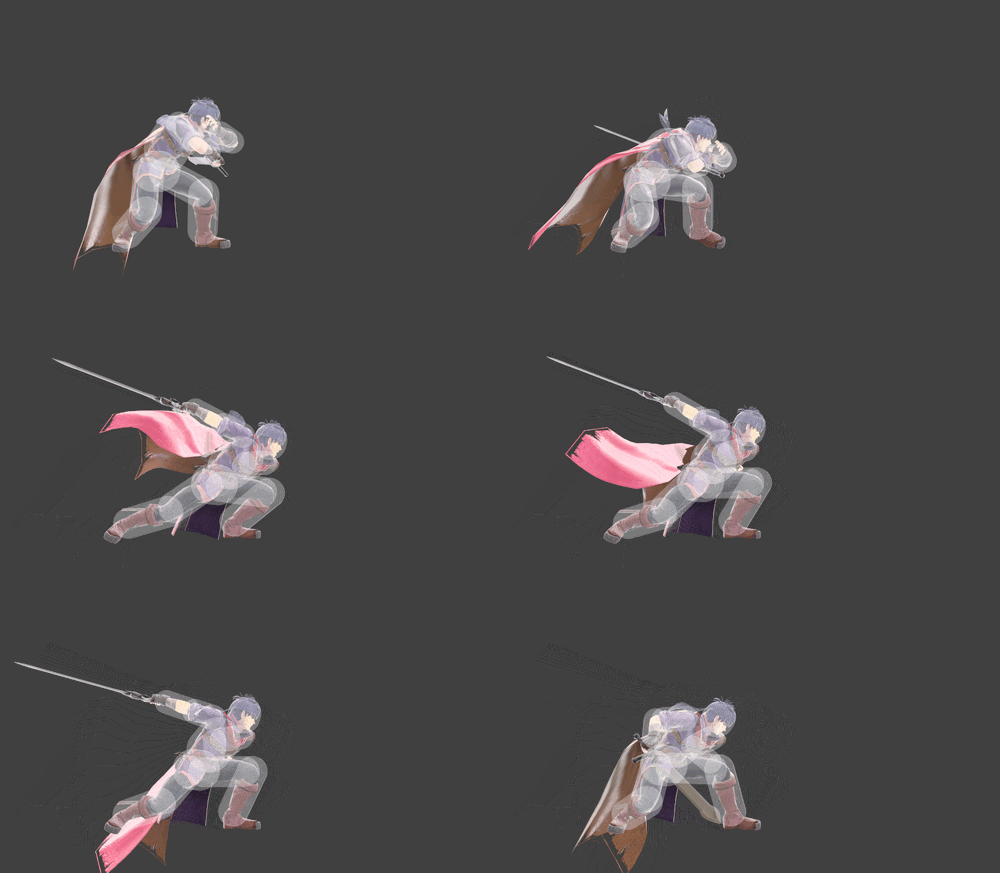
|
| Forward tilt up | Swing Out | 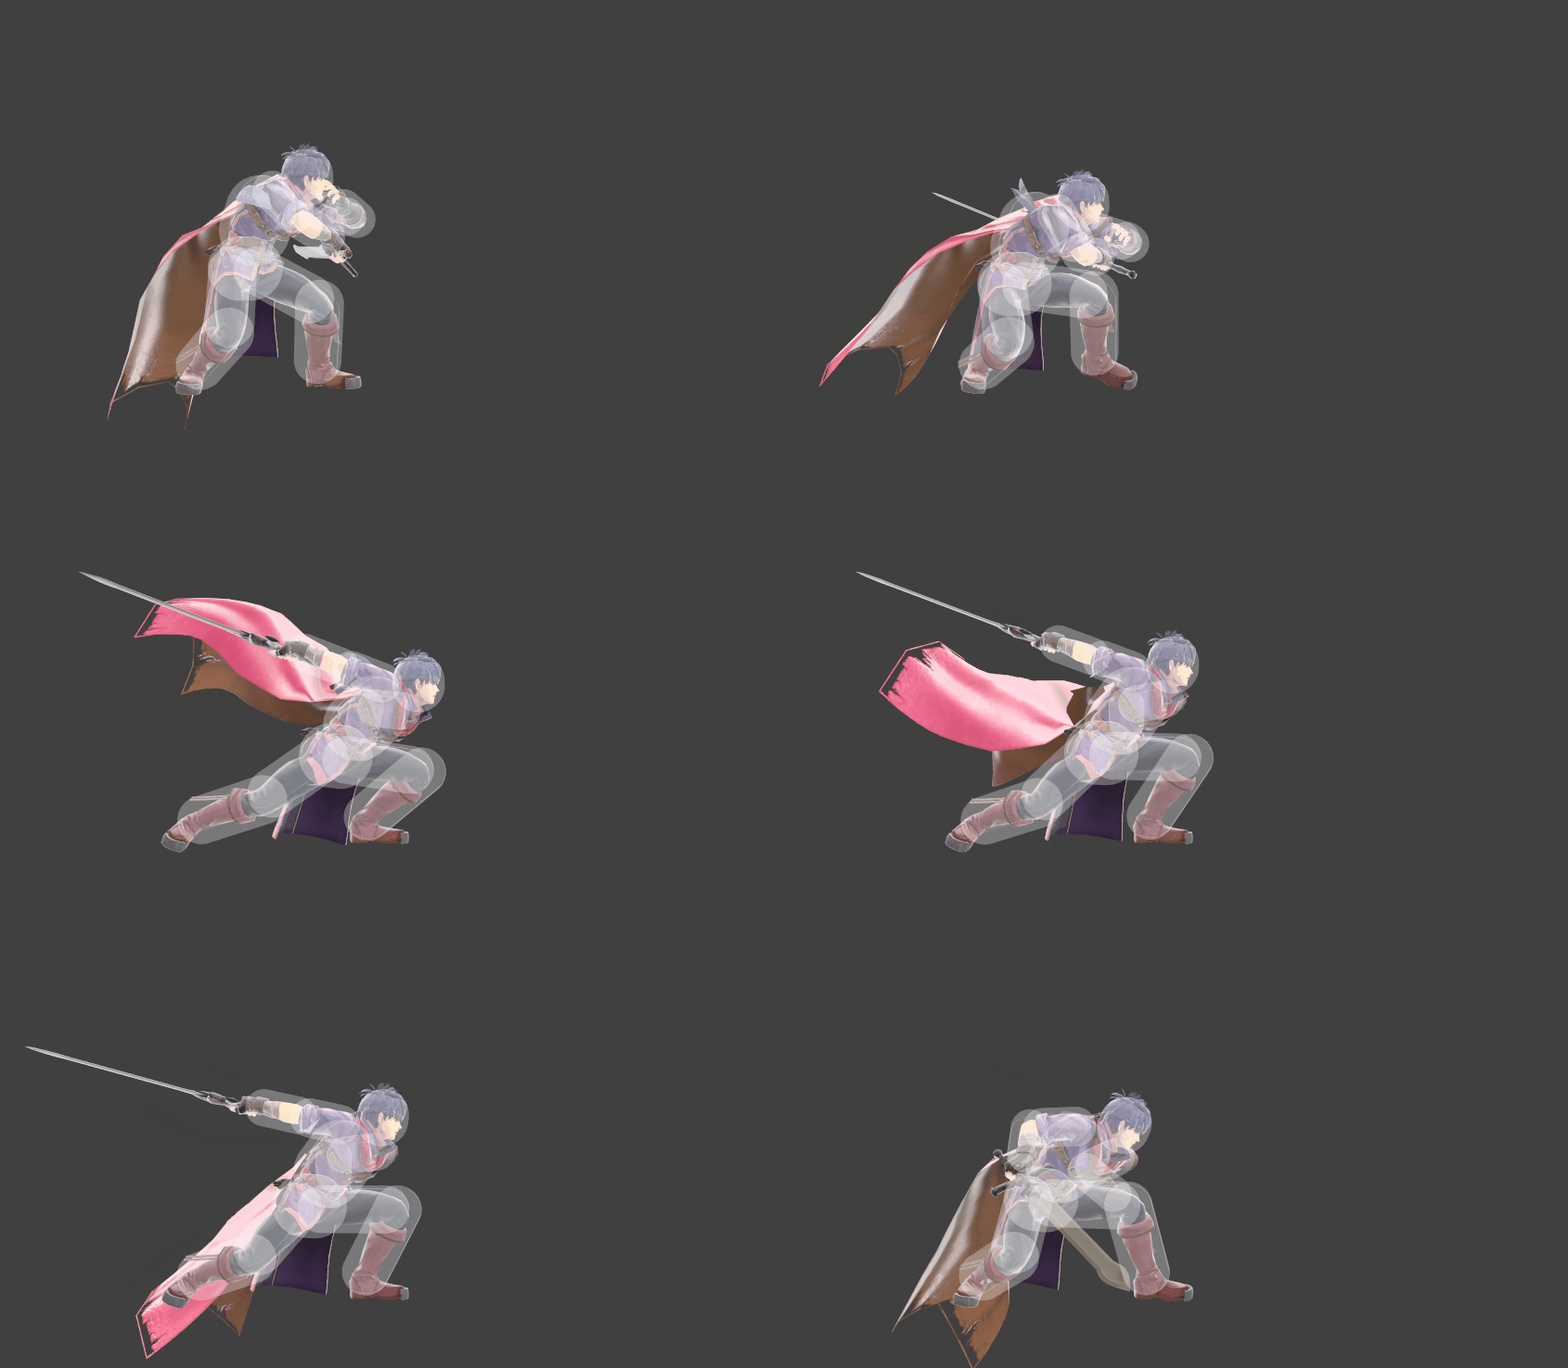
|
| Forward tilt down | Swing Out | 
|
| Up tilt | Strike Up | 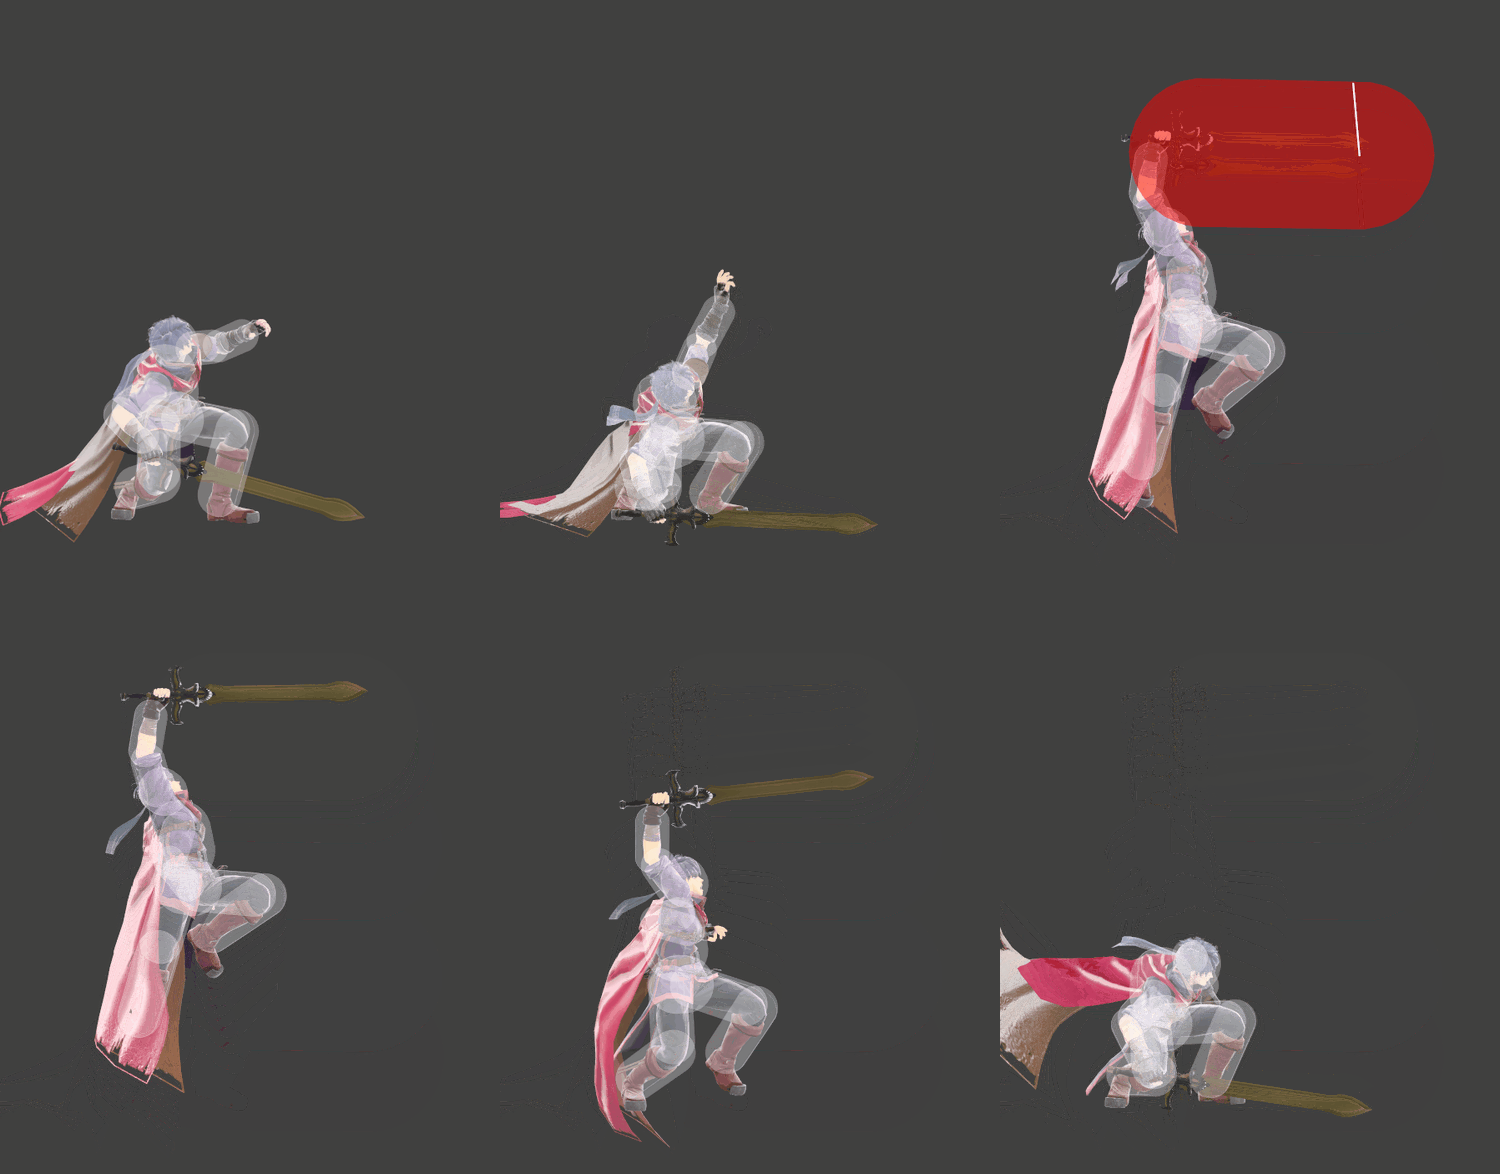
|
| Down tilt | Slash Sweep | 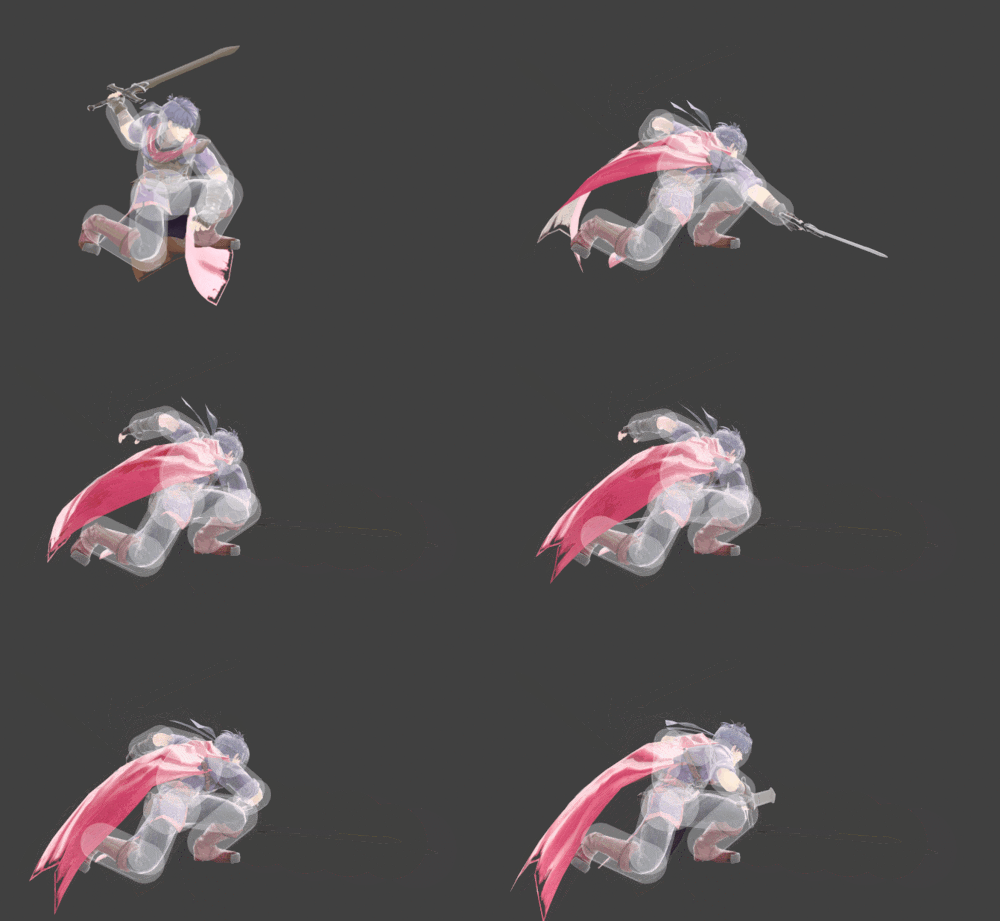
|
| Dash attack | Slash Up | 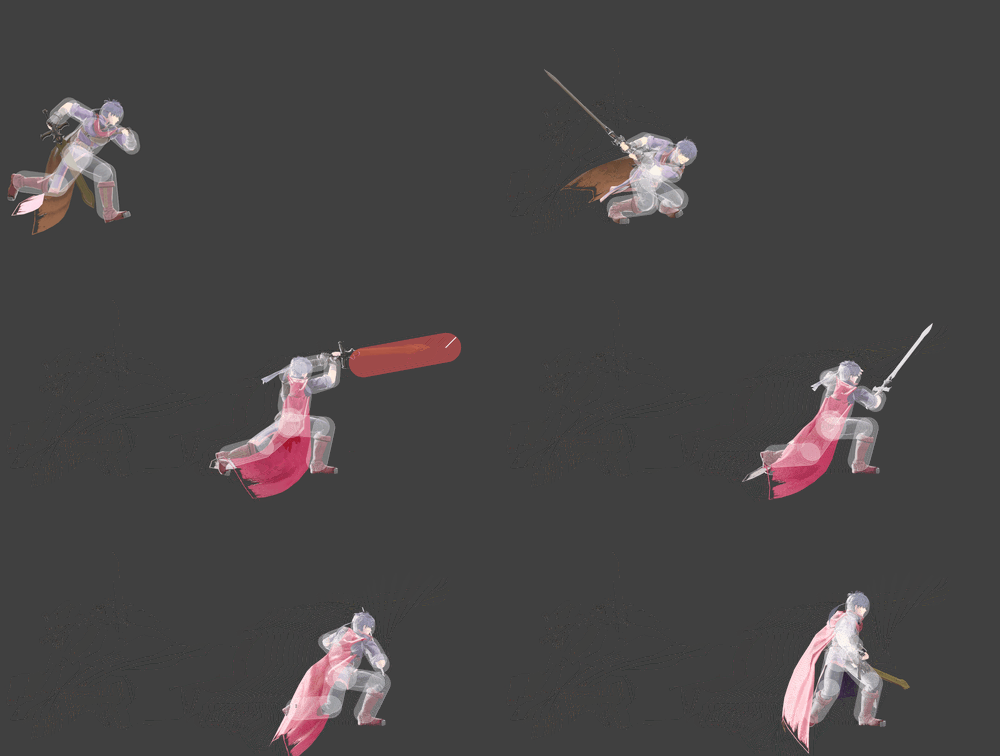
|
| Forward smash | Strike Split | 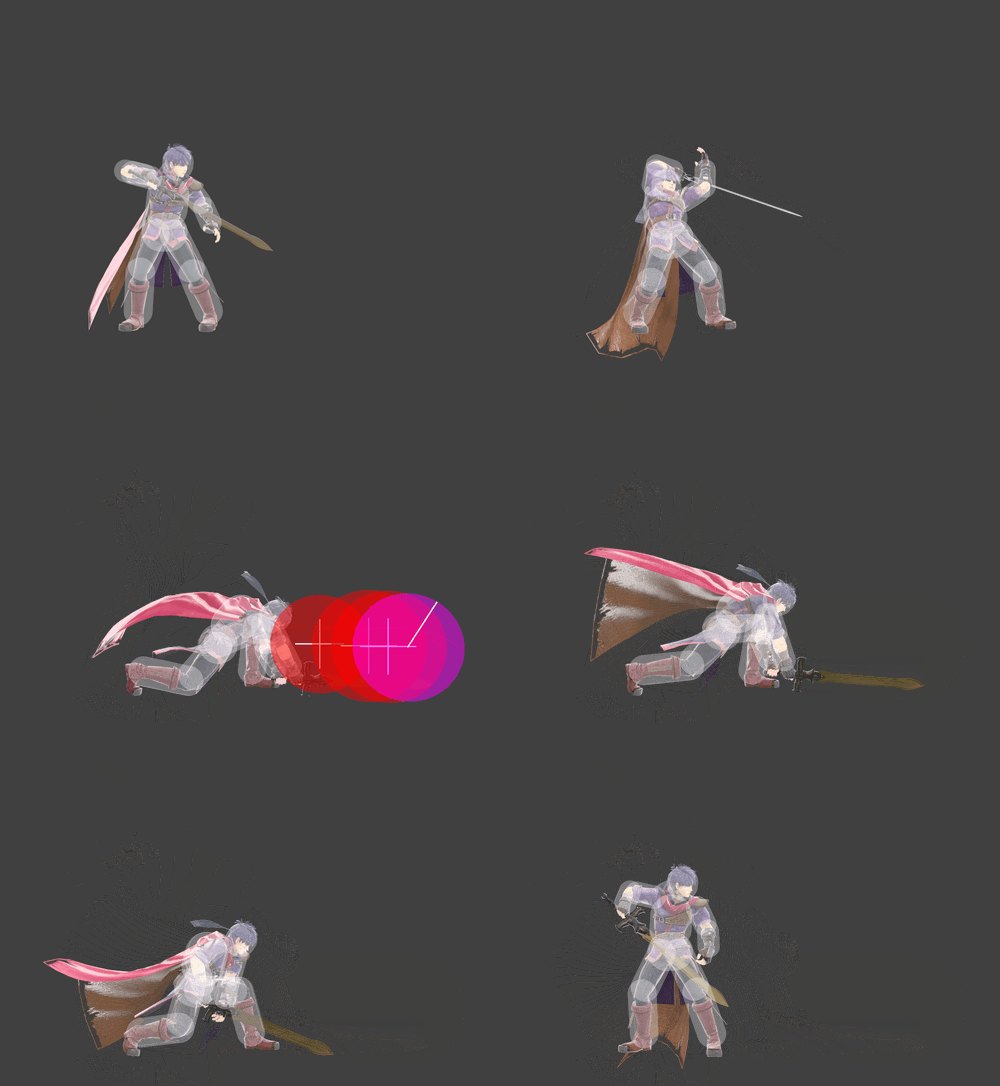
|
| Up smash | Strike Down | 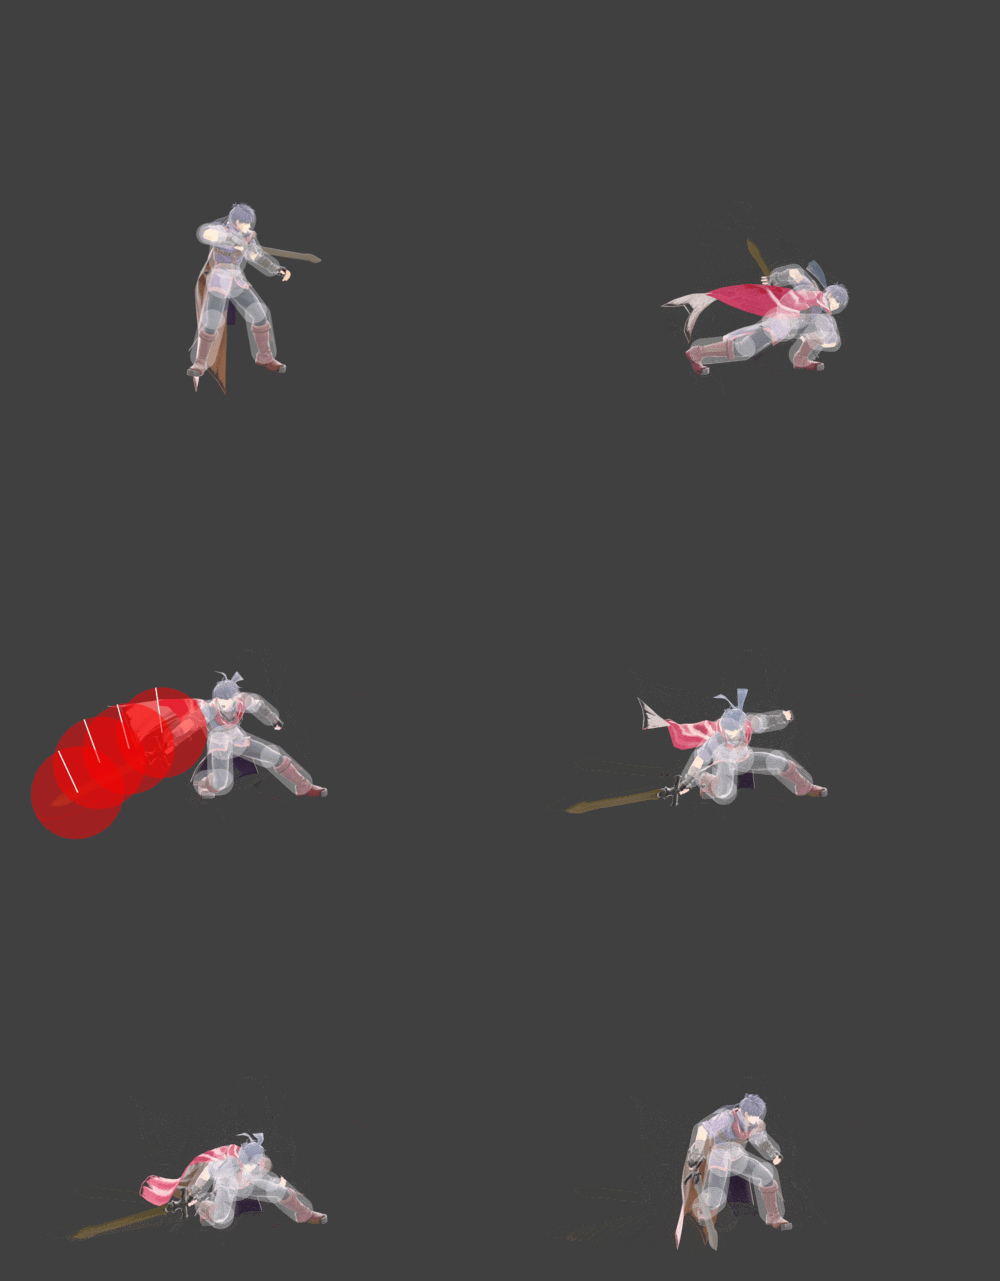
|
| Down smash | Cast Off | 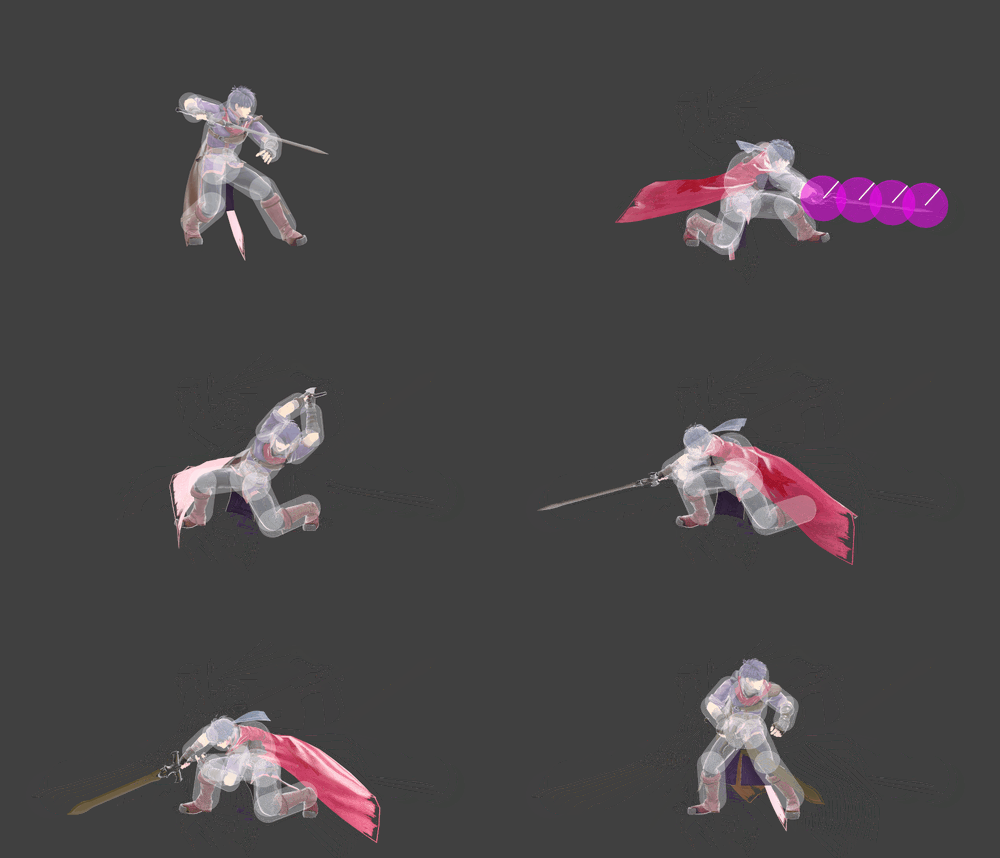
|
| Neutral aerial | Round Slash | 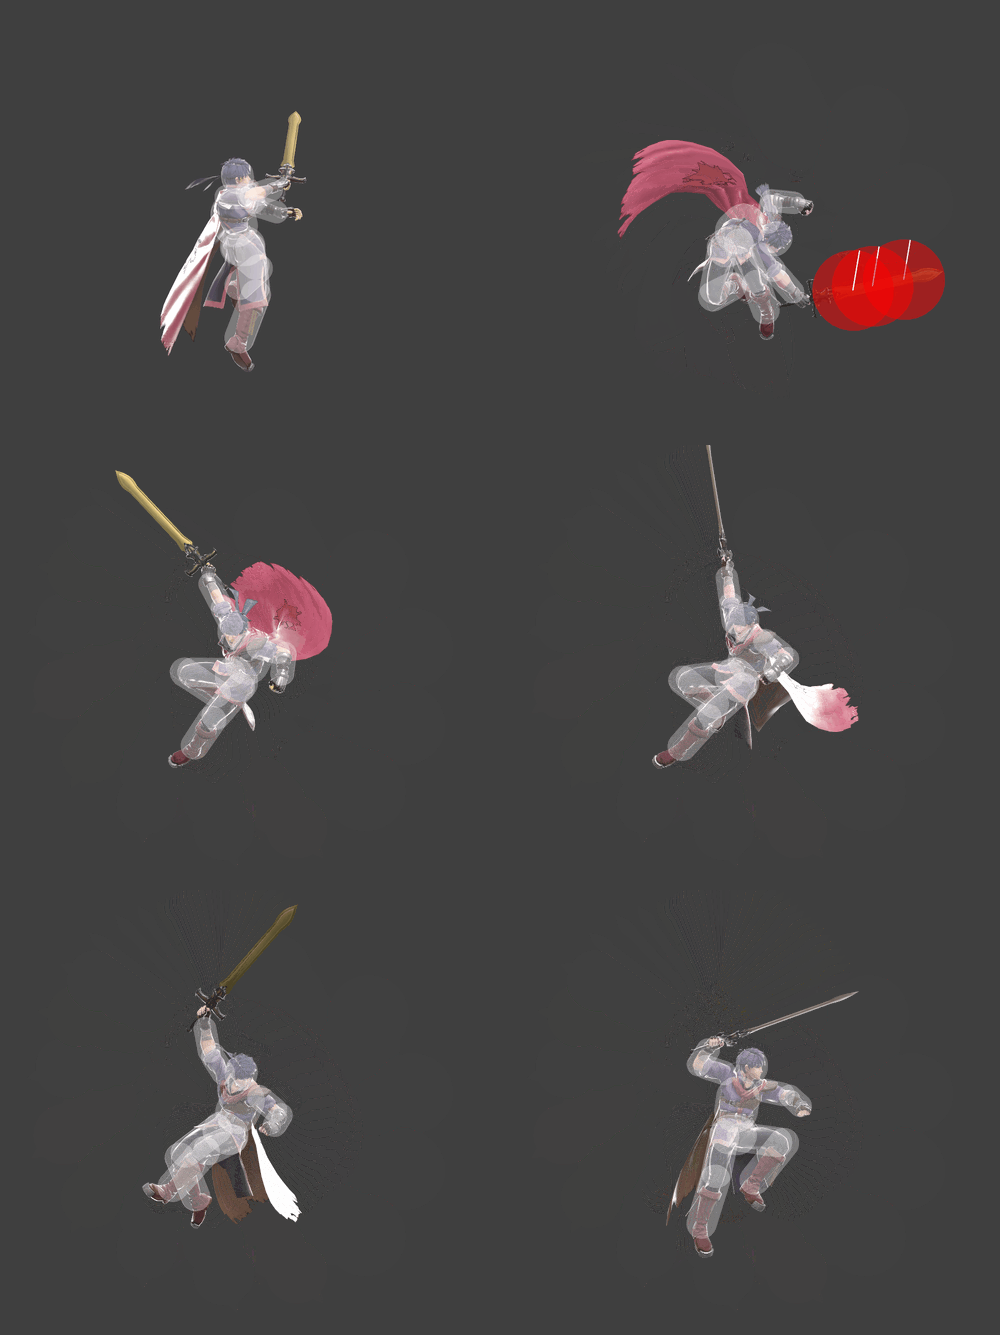
|
| Forward aerial | Slash Down | 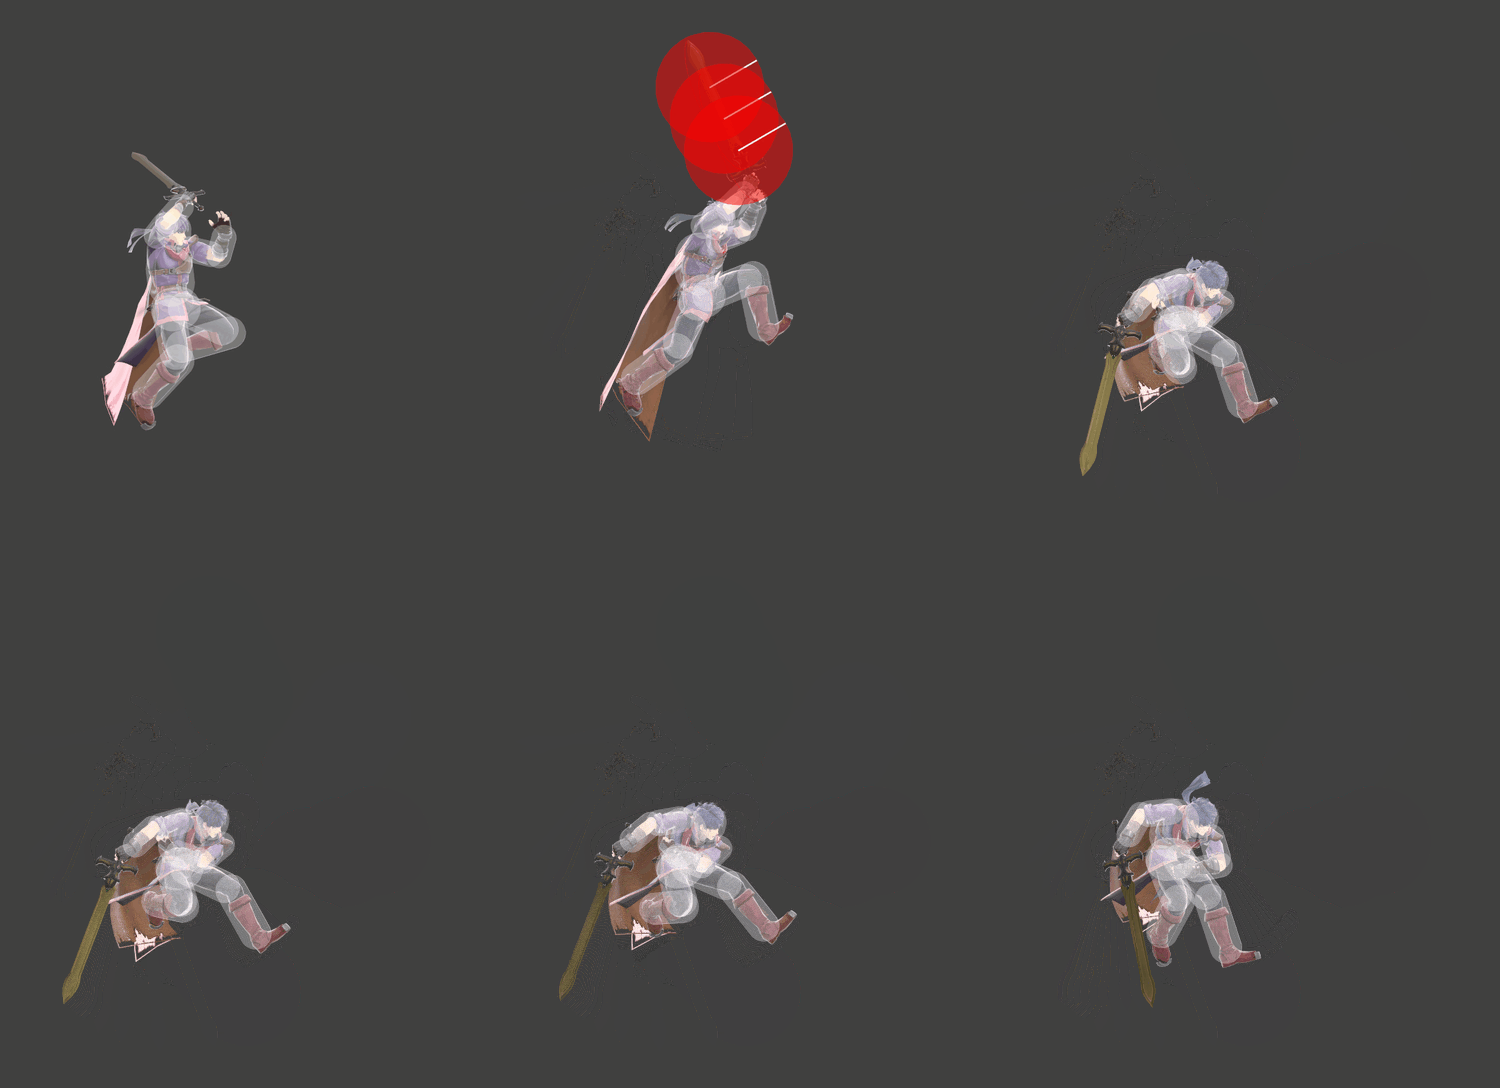
|
| Back aerial | Repositioning Slash | 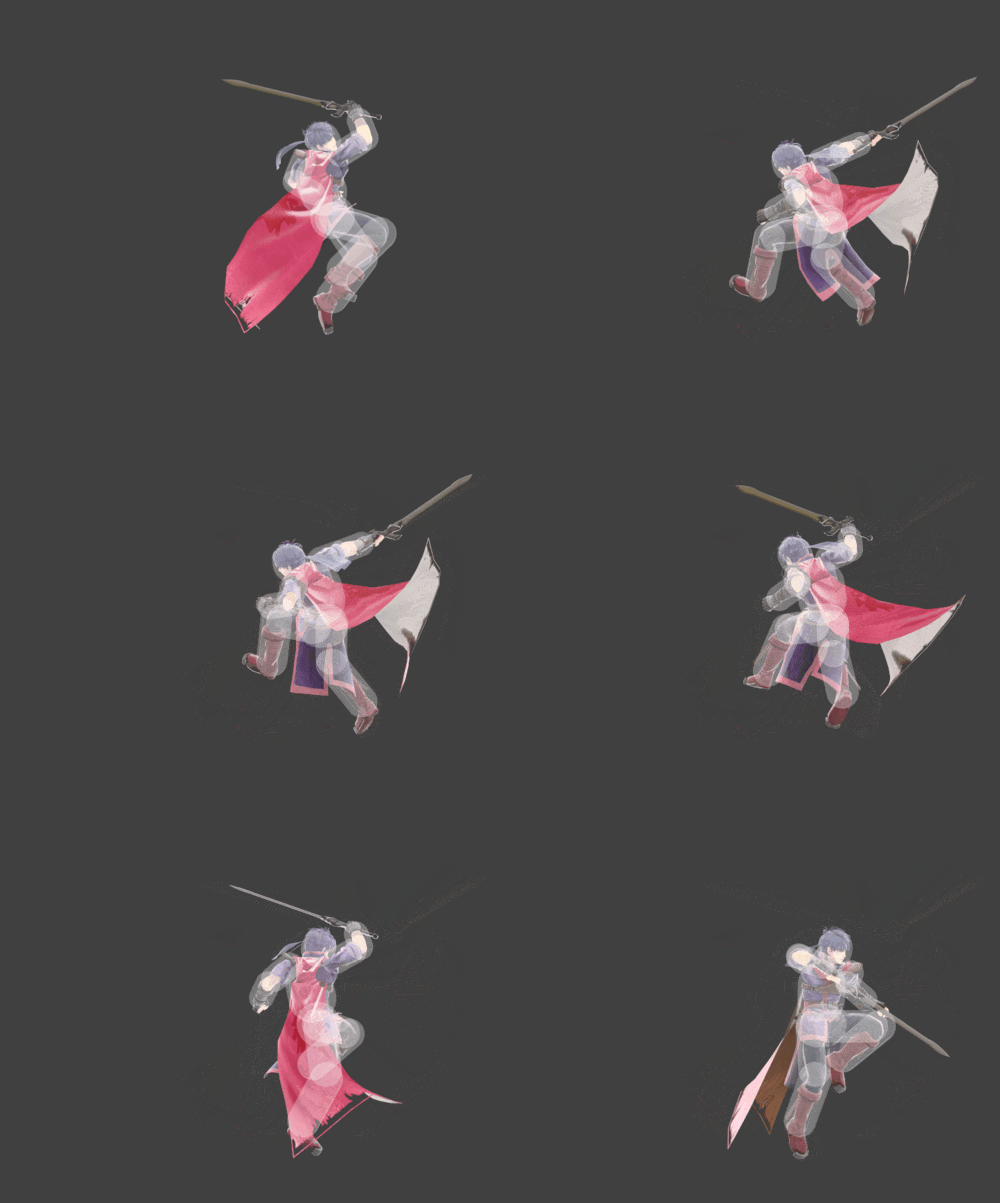
|
| Up aerial | Rising Swing | 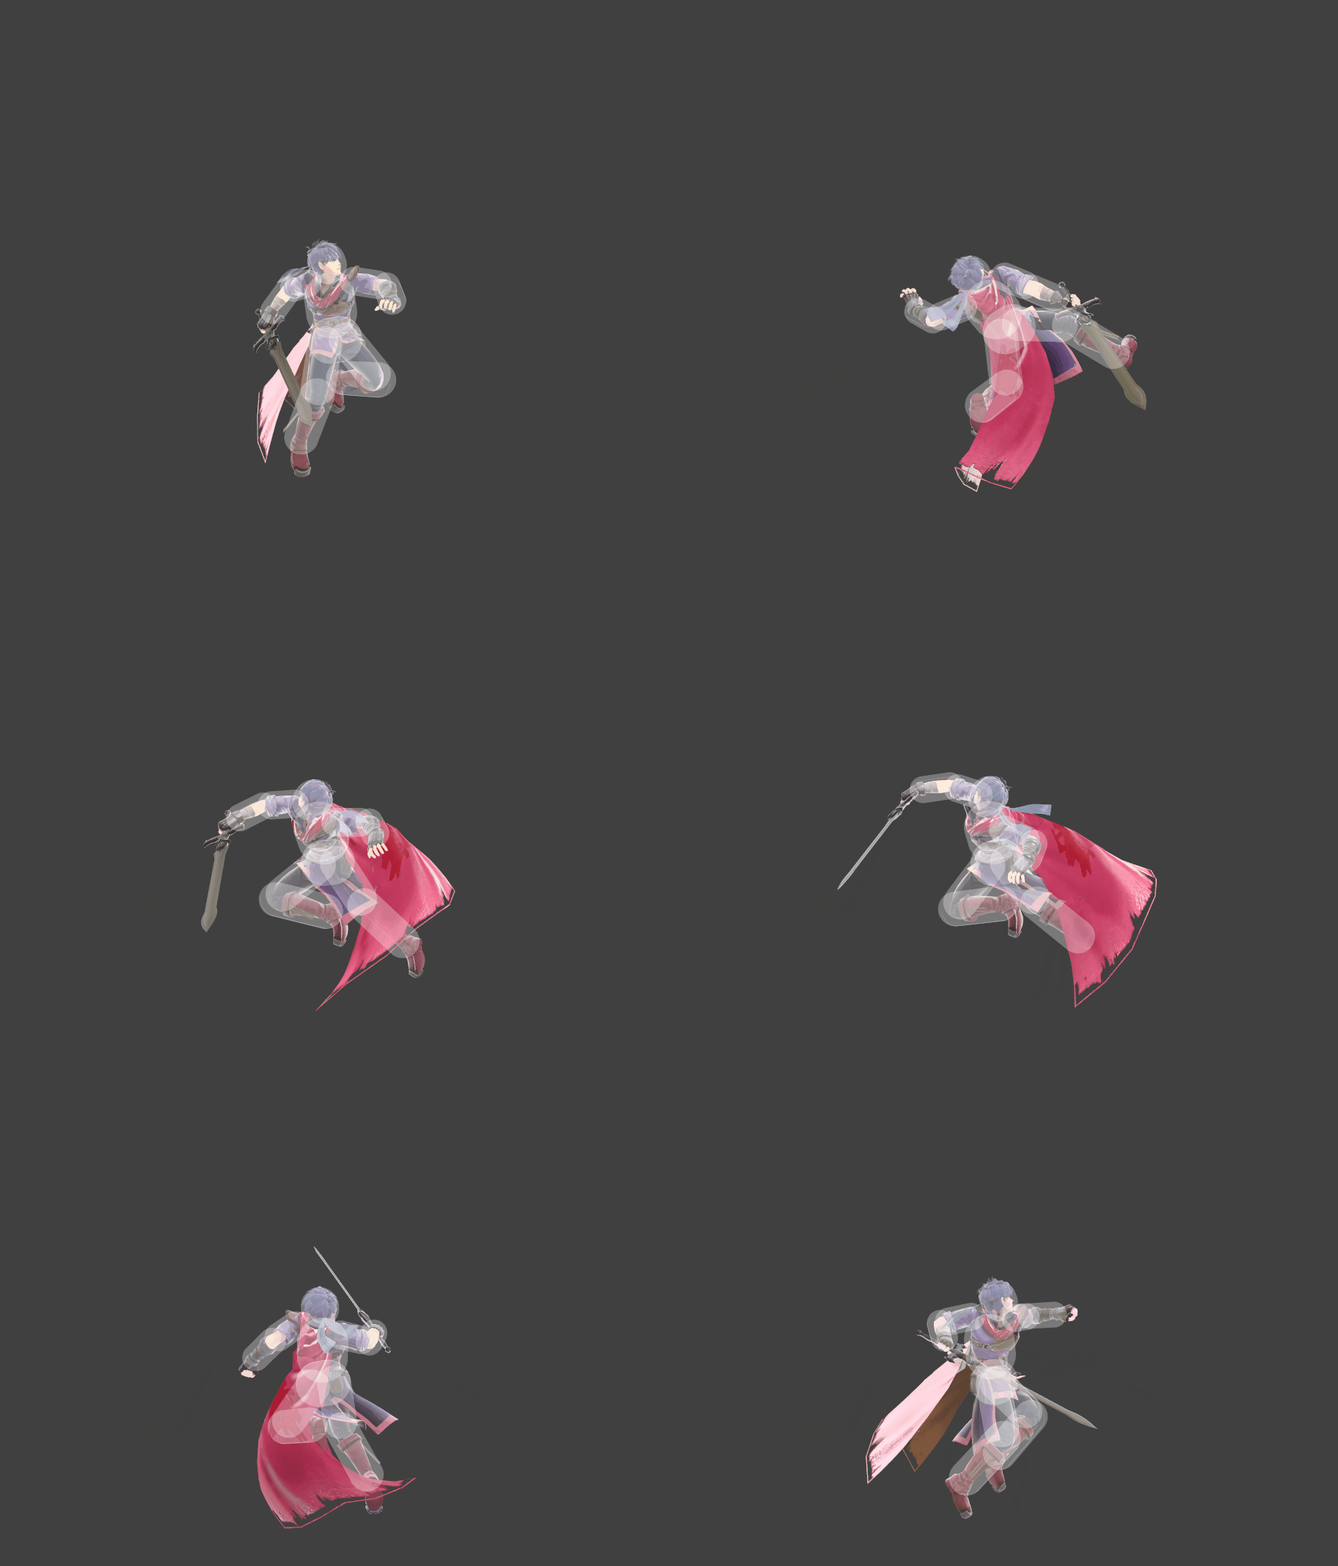
|
| Down aerial | Strike Down | 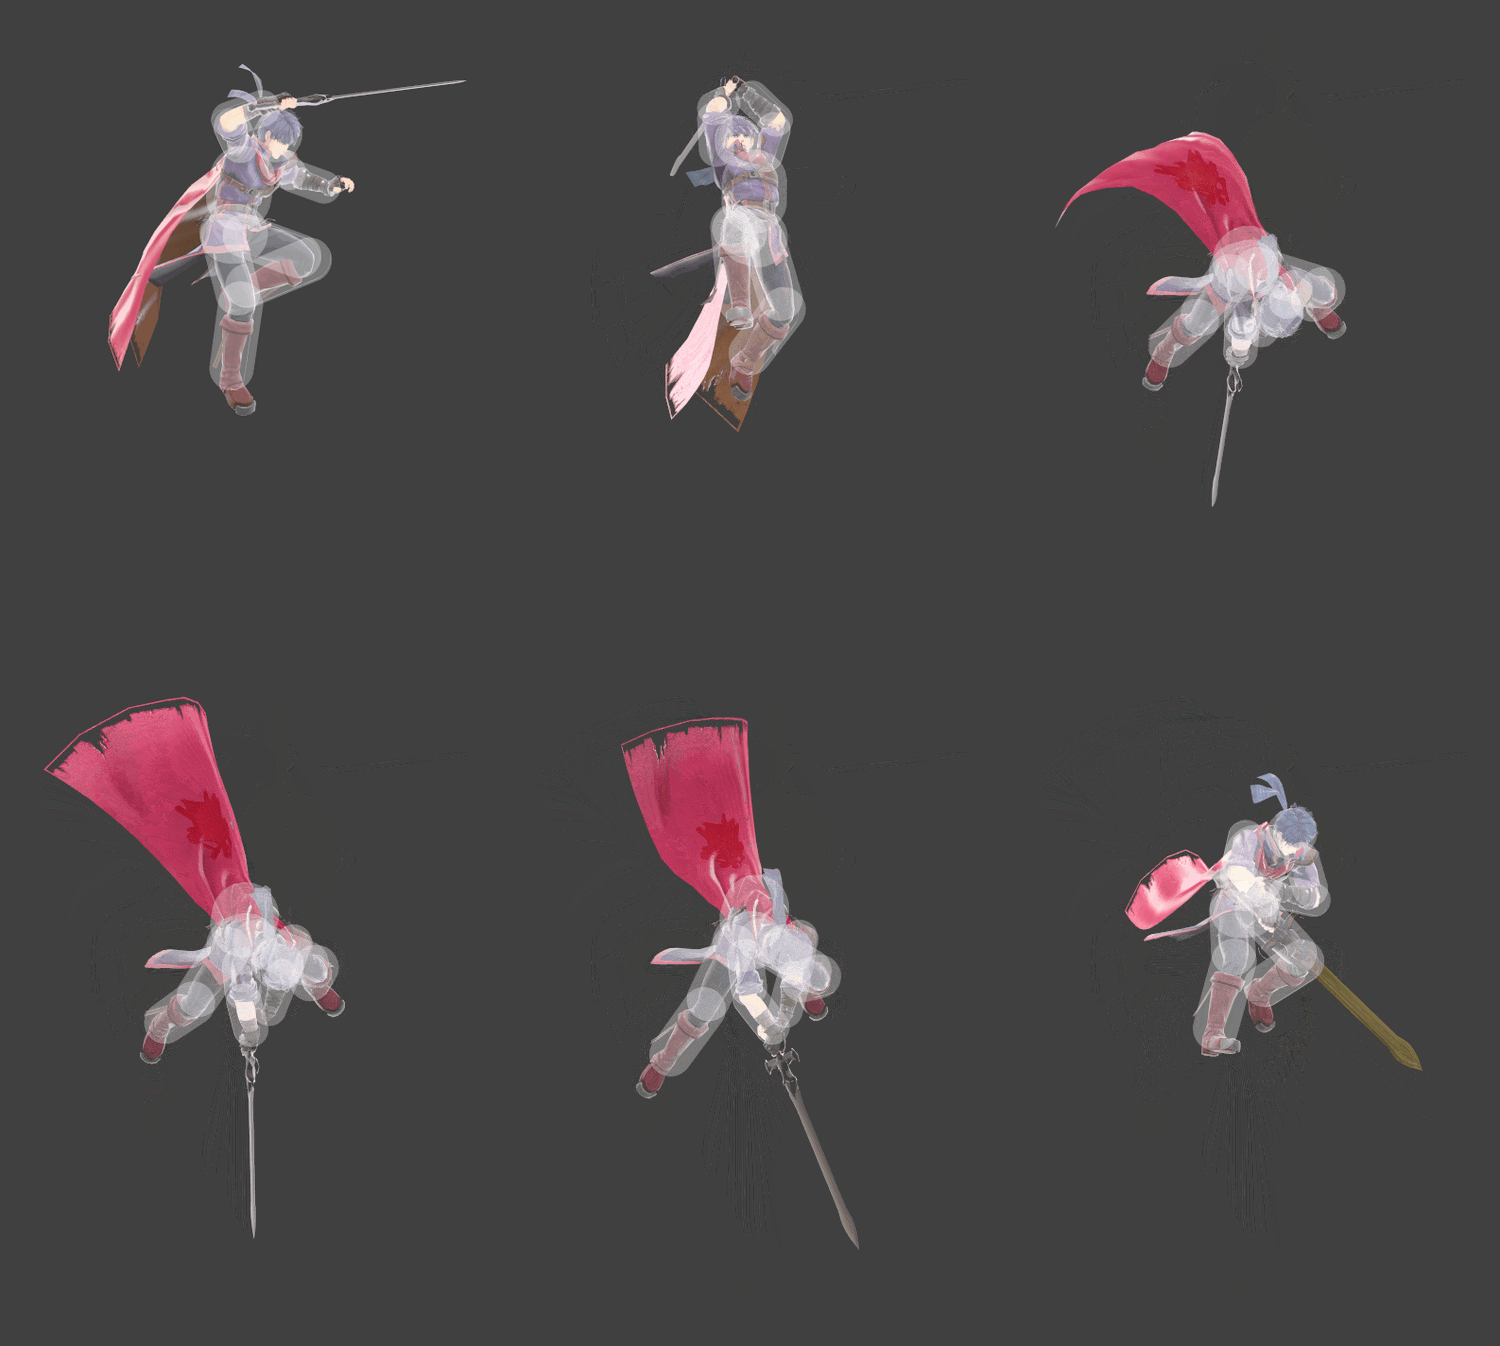
|
| Neutral special | Eruption | 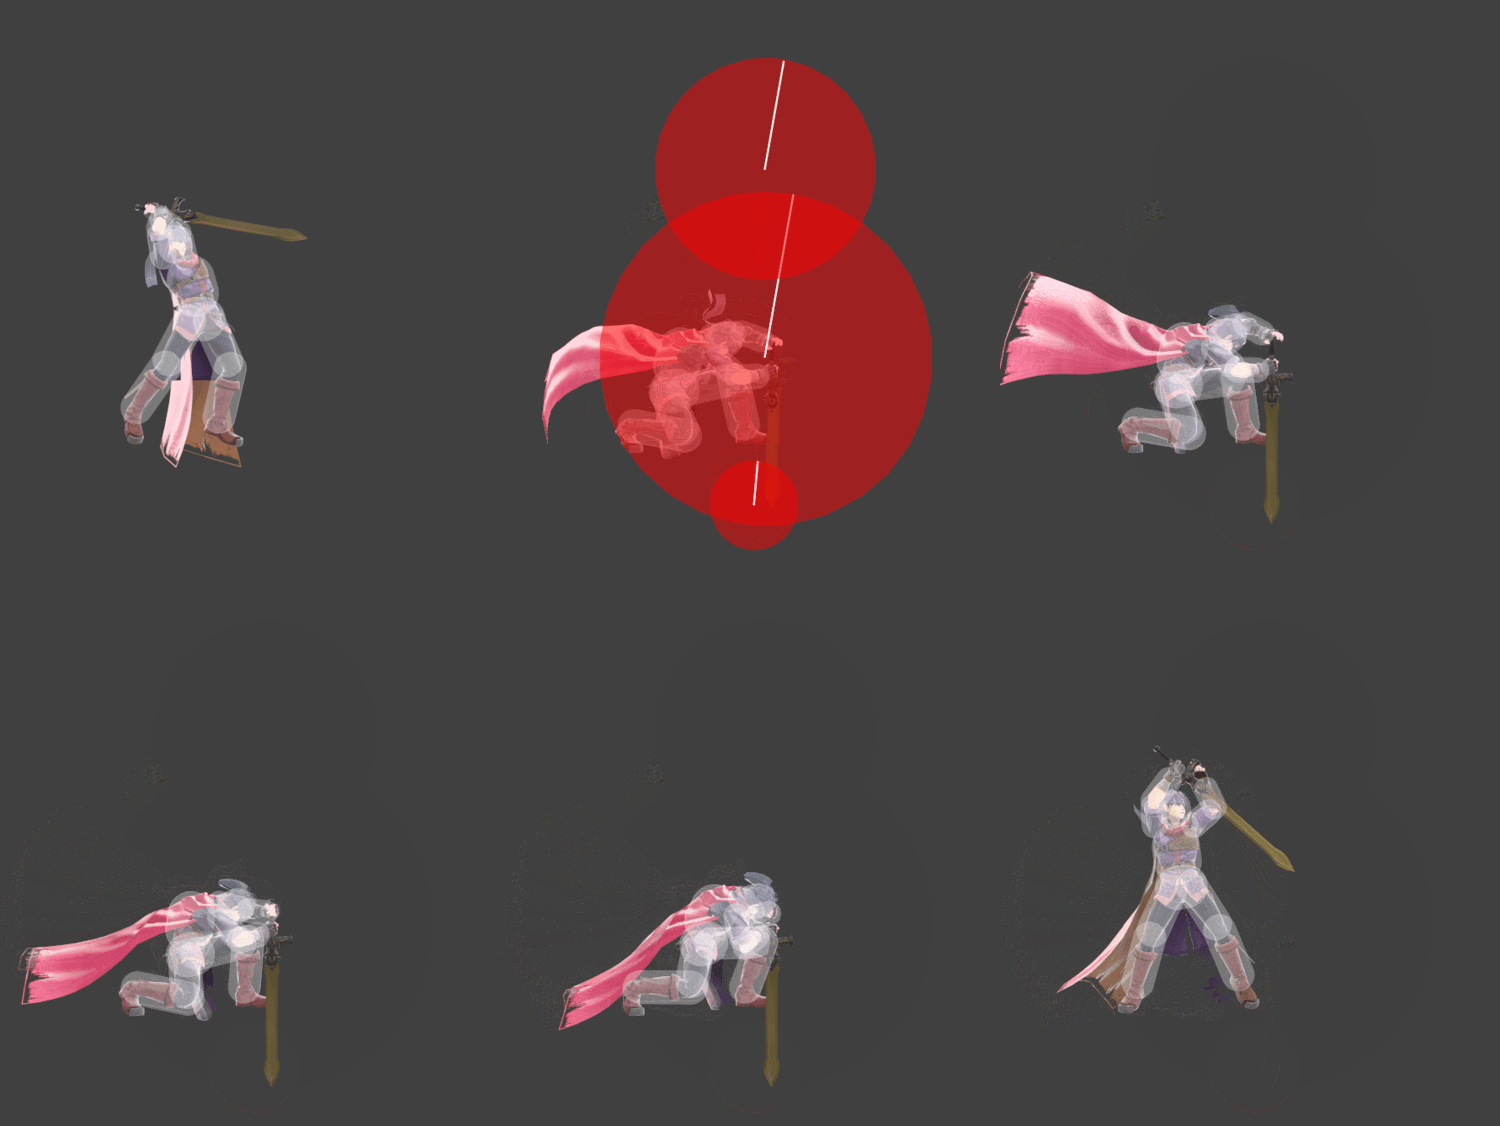
|
| Neutral special half charge | Eruption | 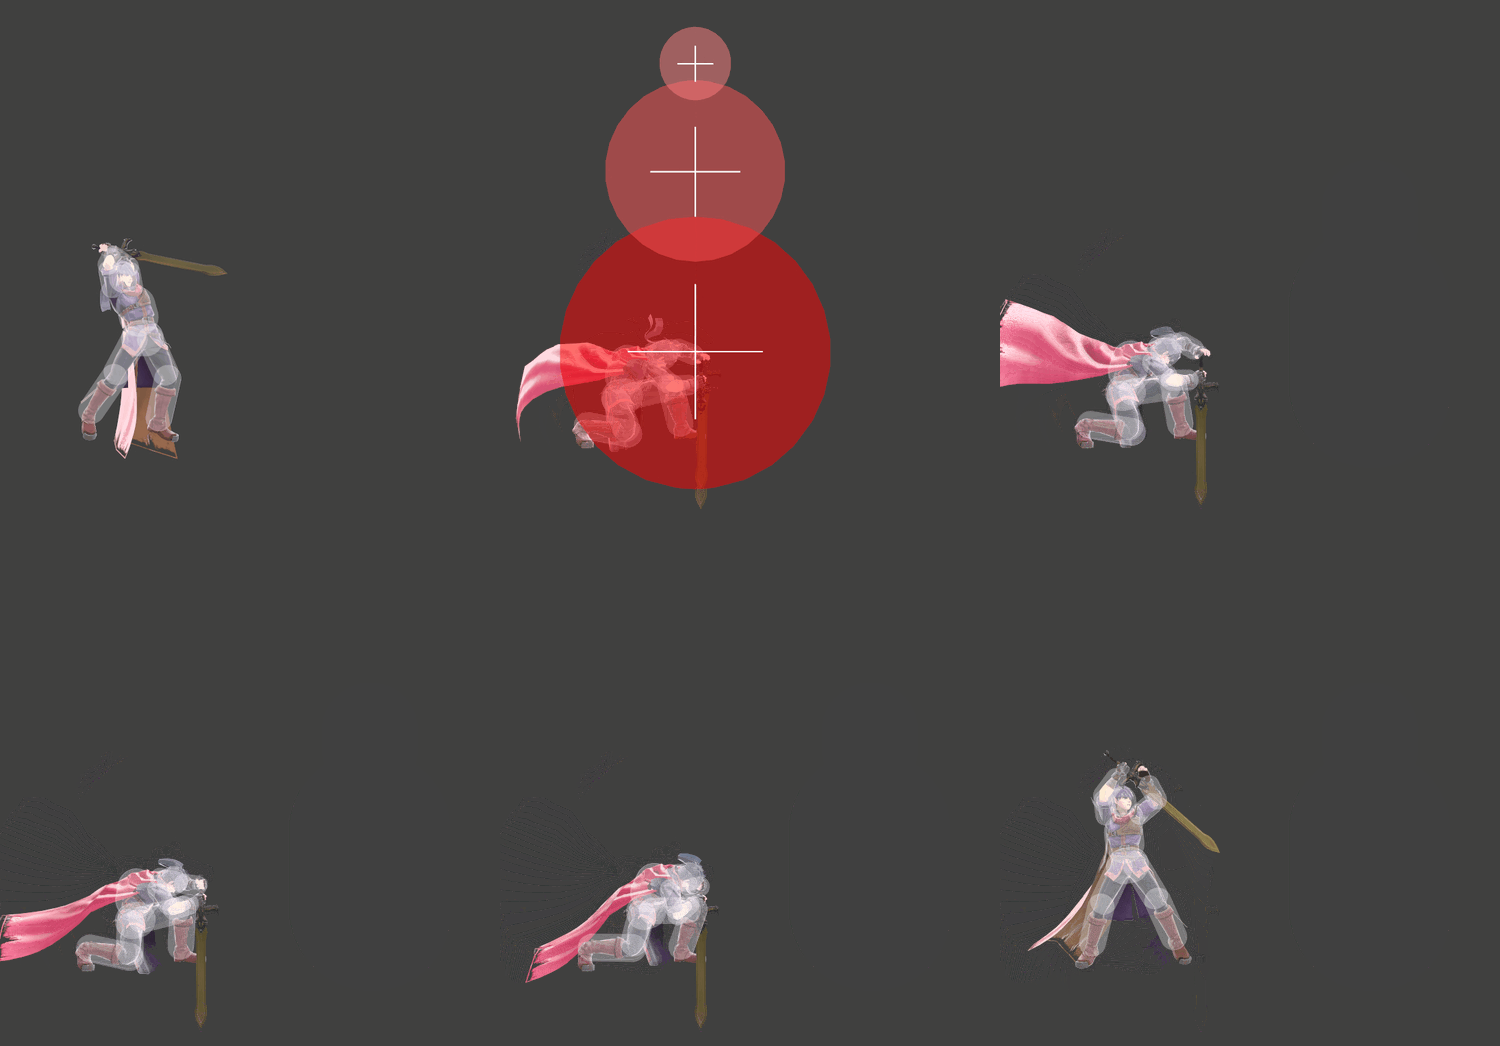
|
| Neutral special full charge | Eruption | 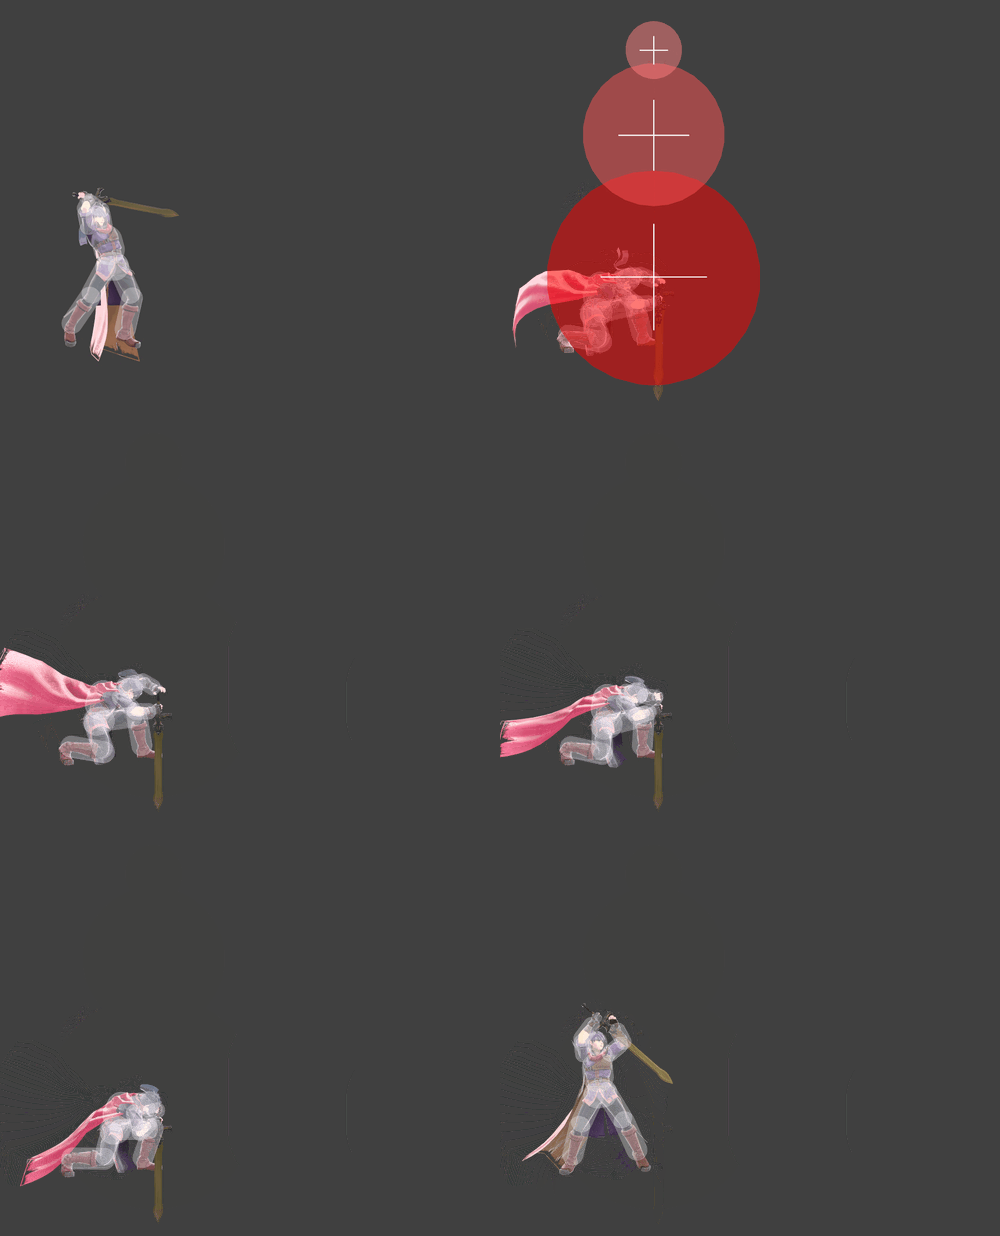
|
| Side special | Quick Draw | 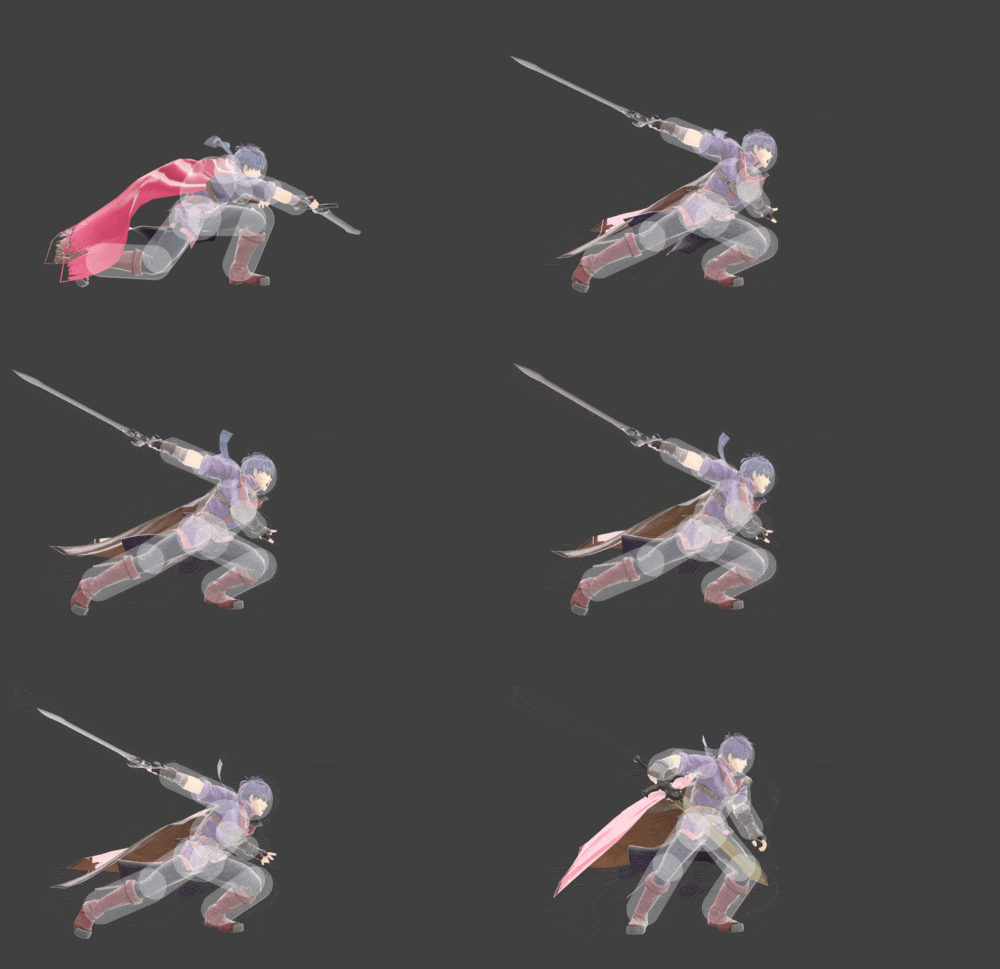
|
| Up special grounded | Aether | 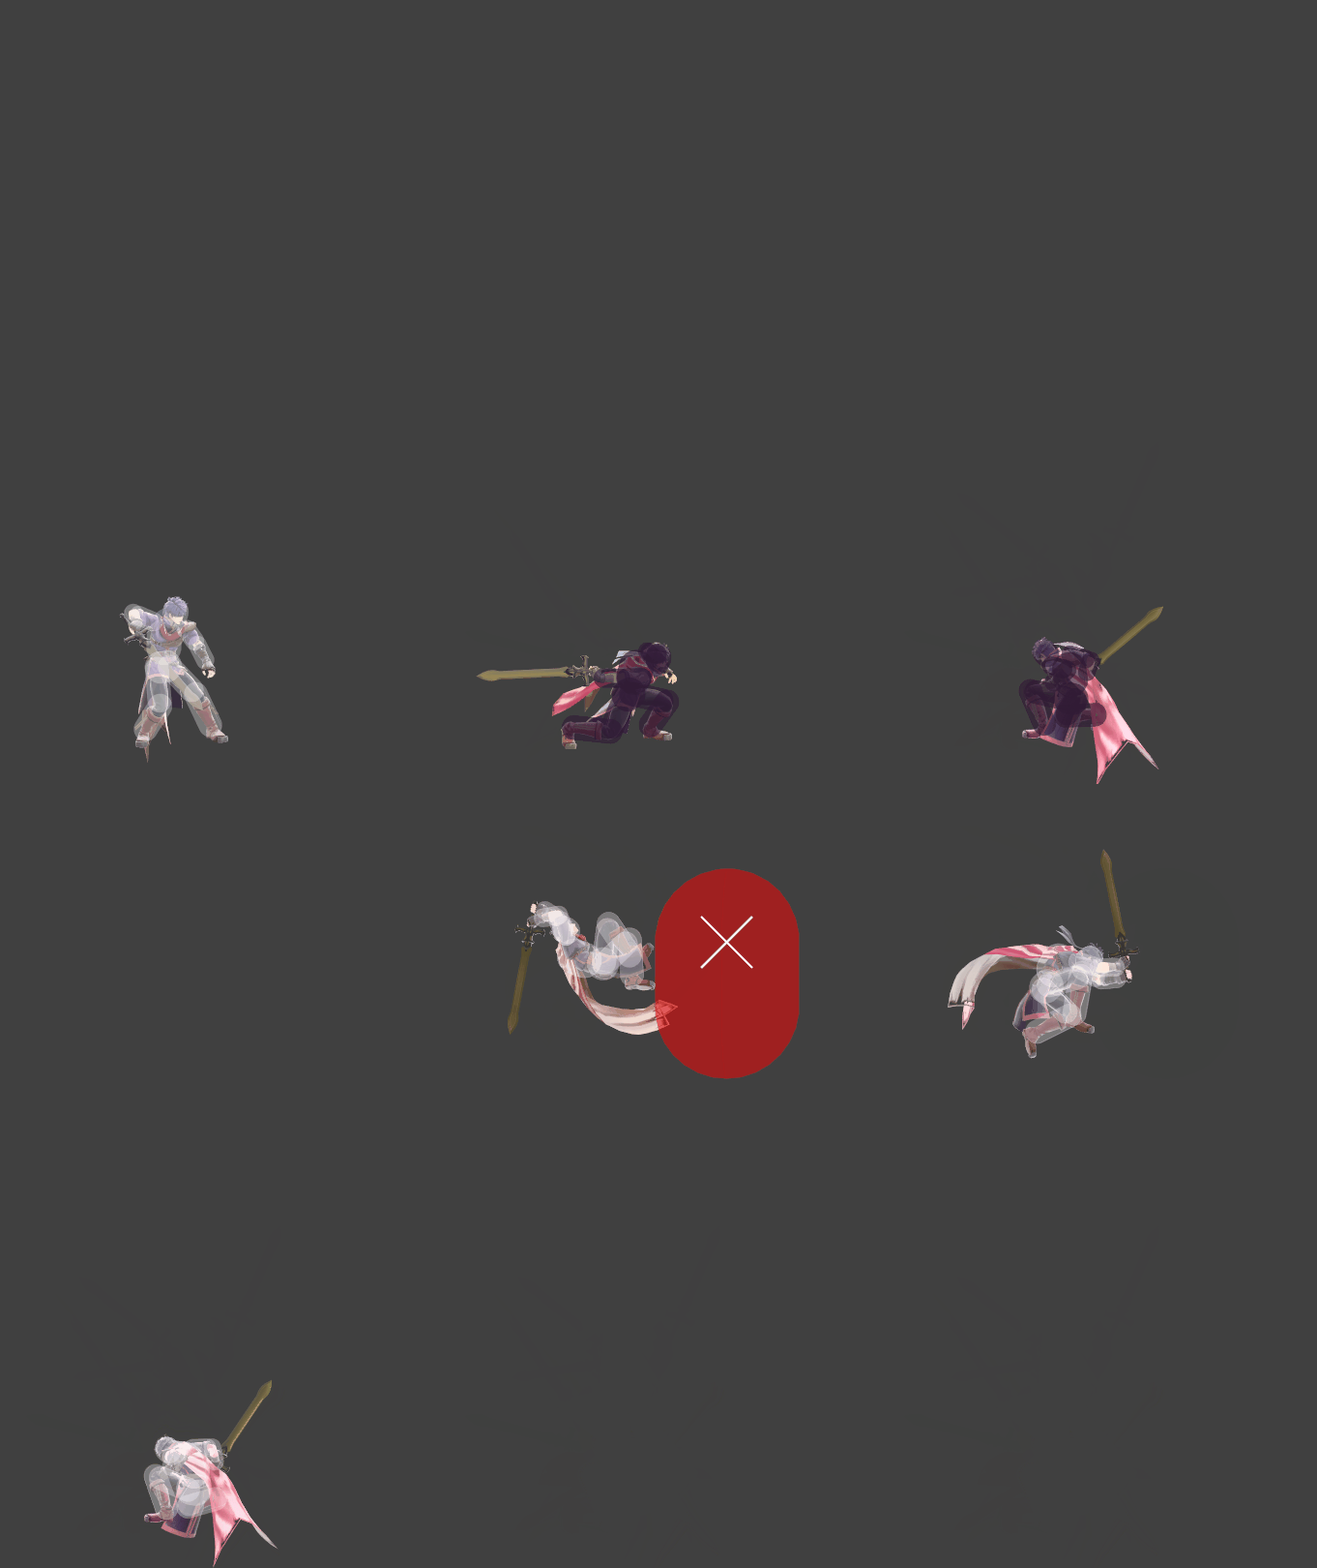
|
| Up special aerial | Aether | 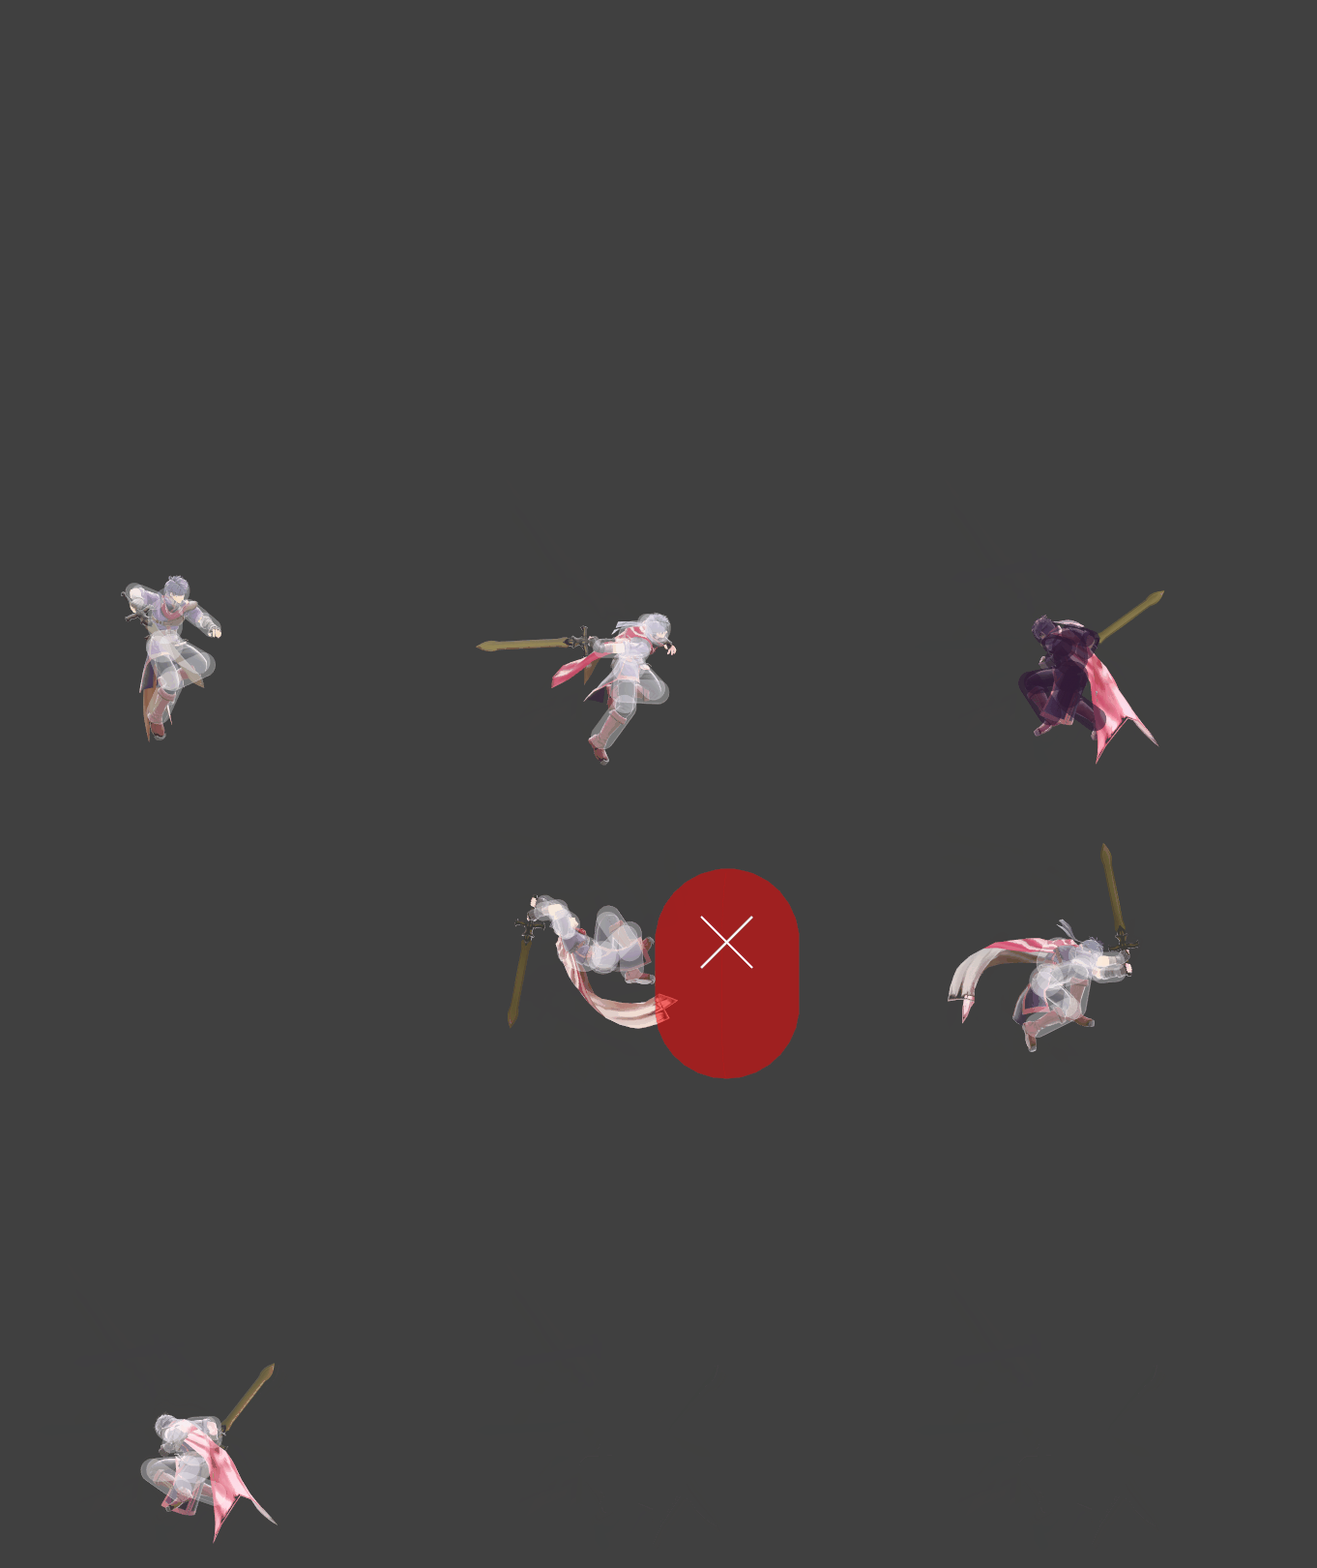
|
| Up special sword | Aether | 
|
| Up special falling | Aether | 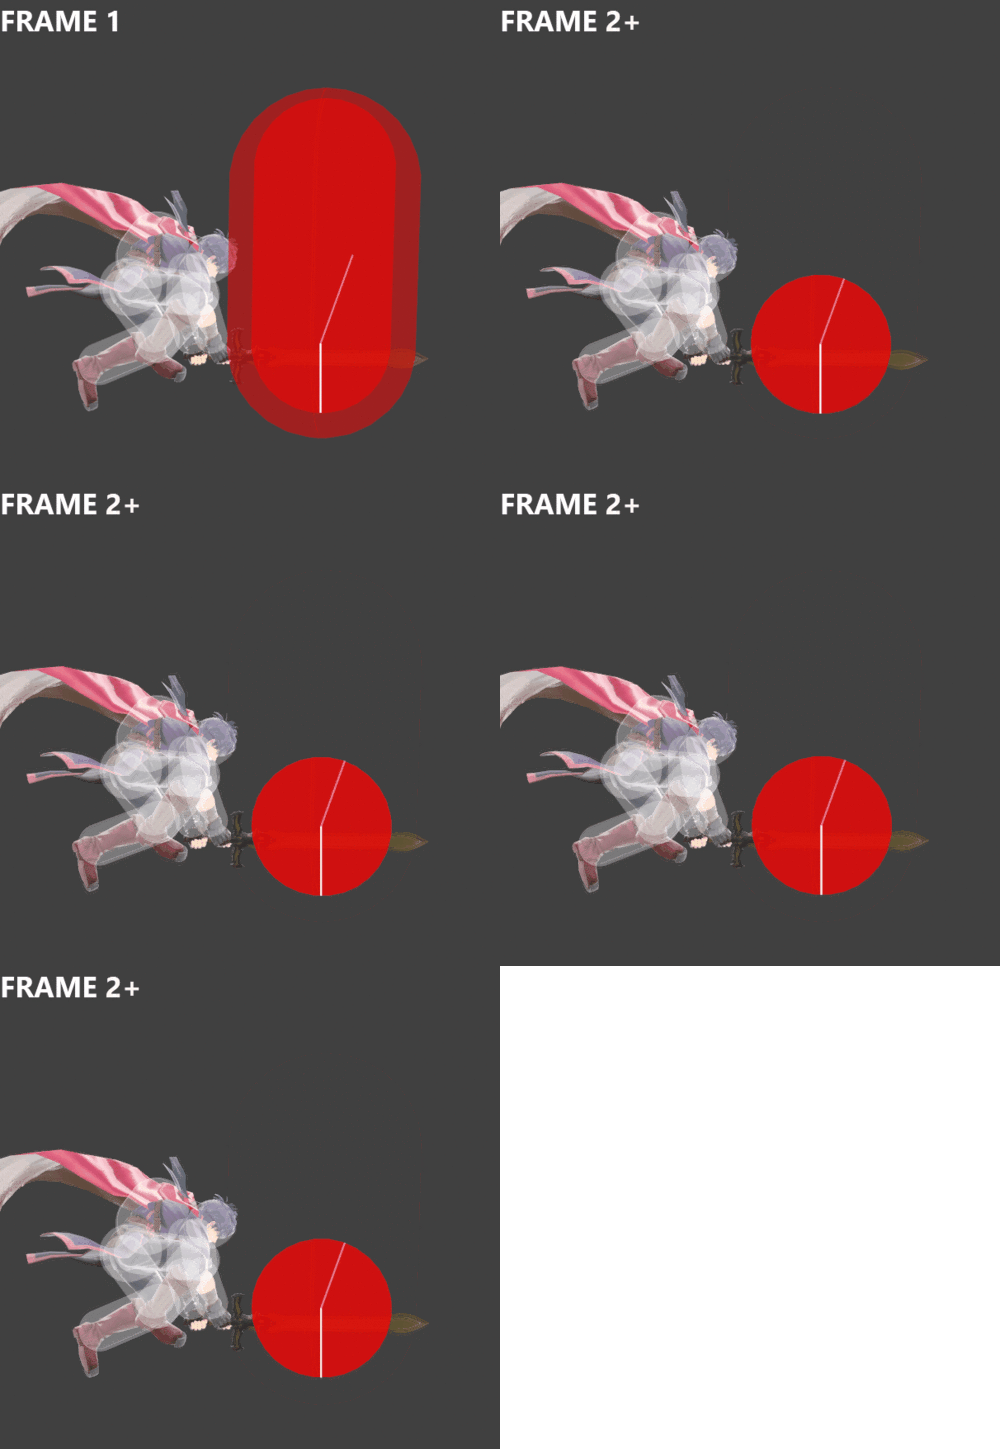
|
| Up special landing | Aether | 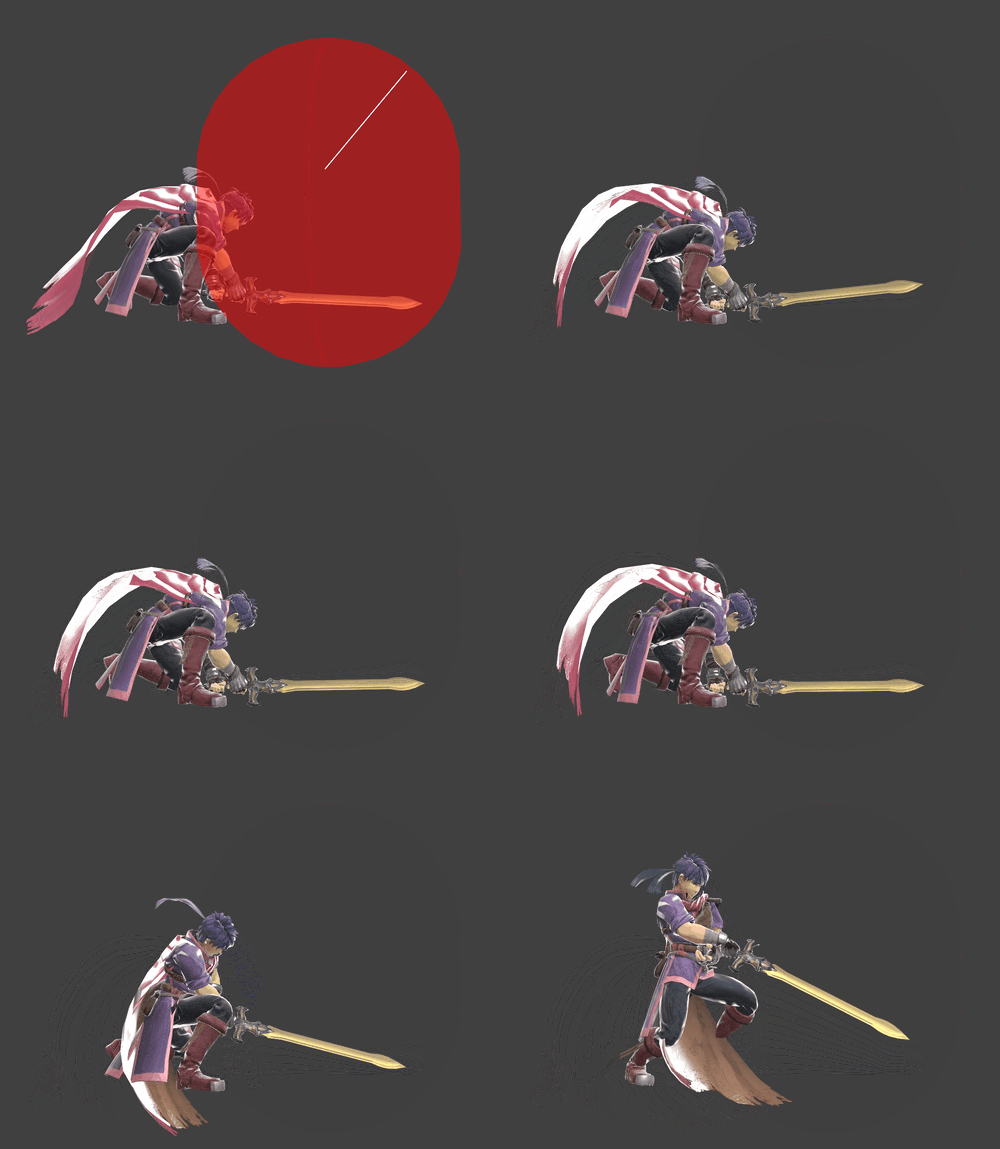
|
| Down special | Counter | 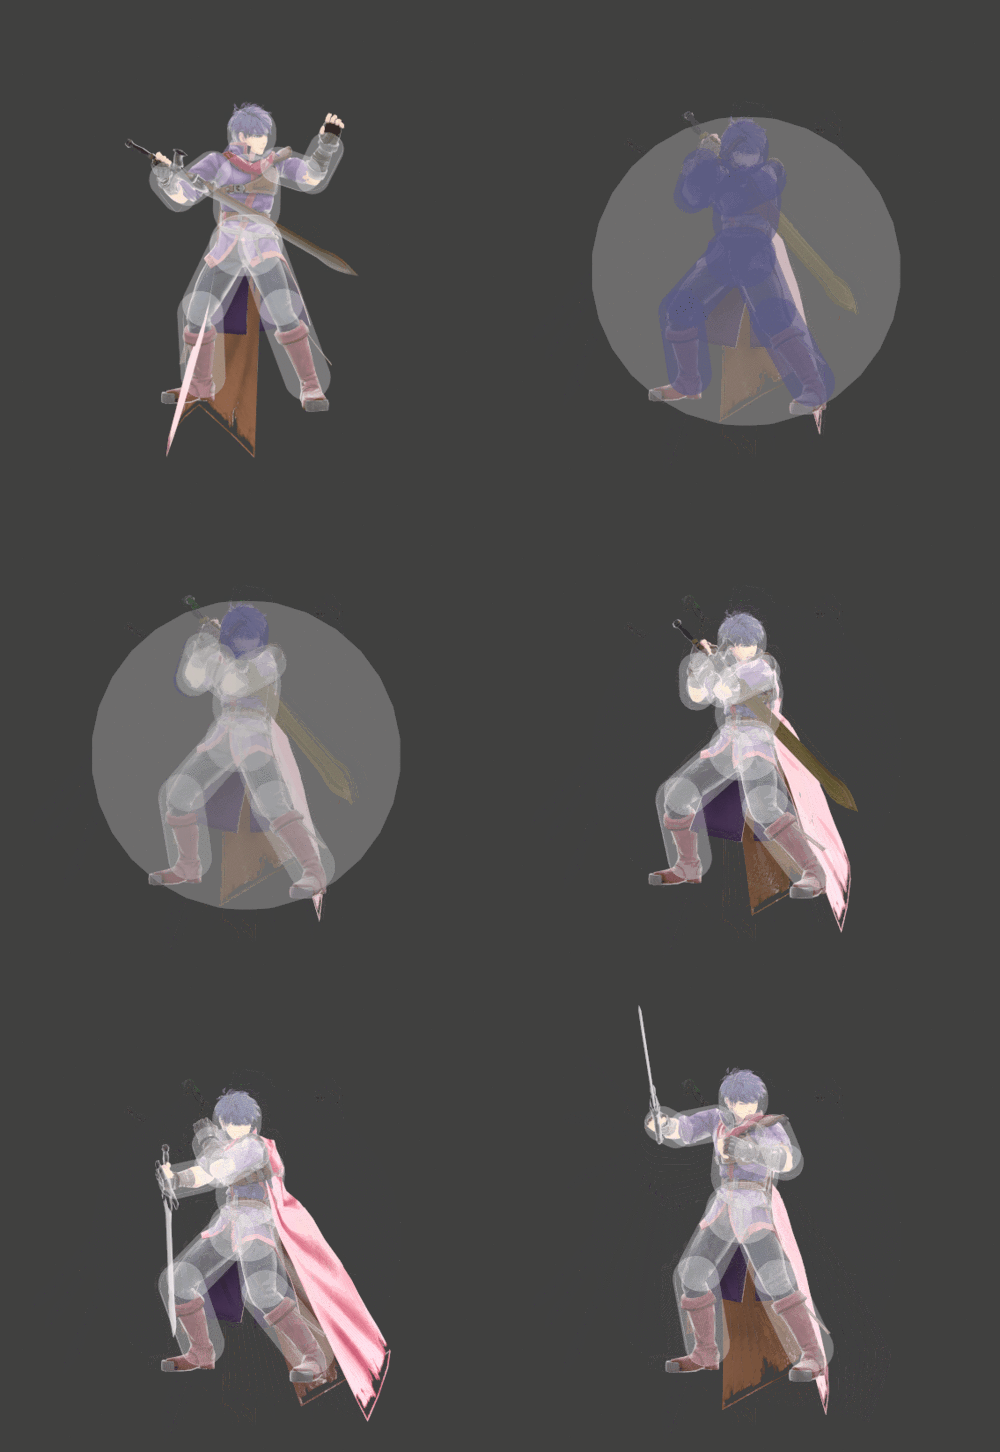
|
| Down special hit | Counter | 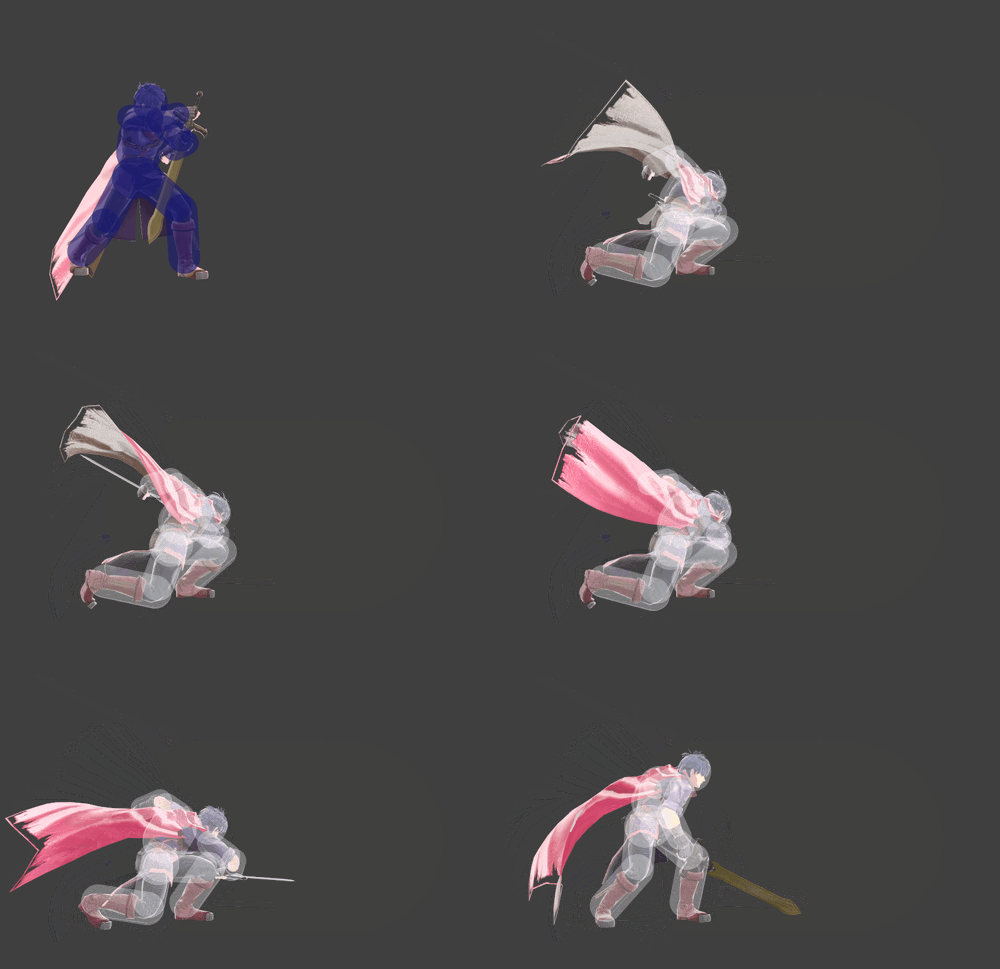
|
| Standing grab | 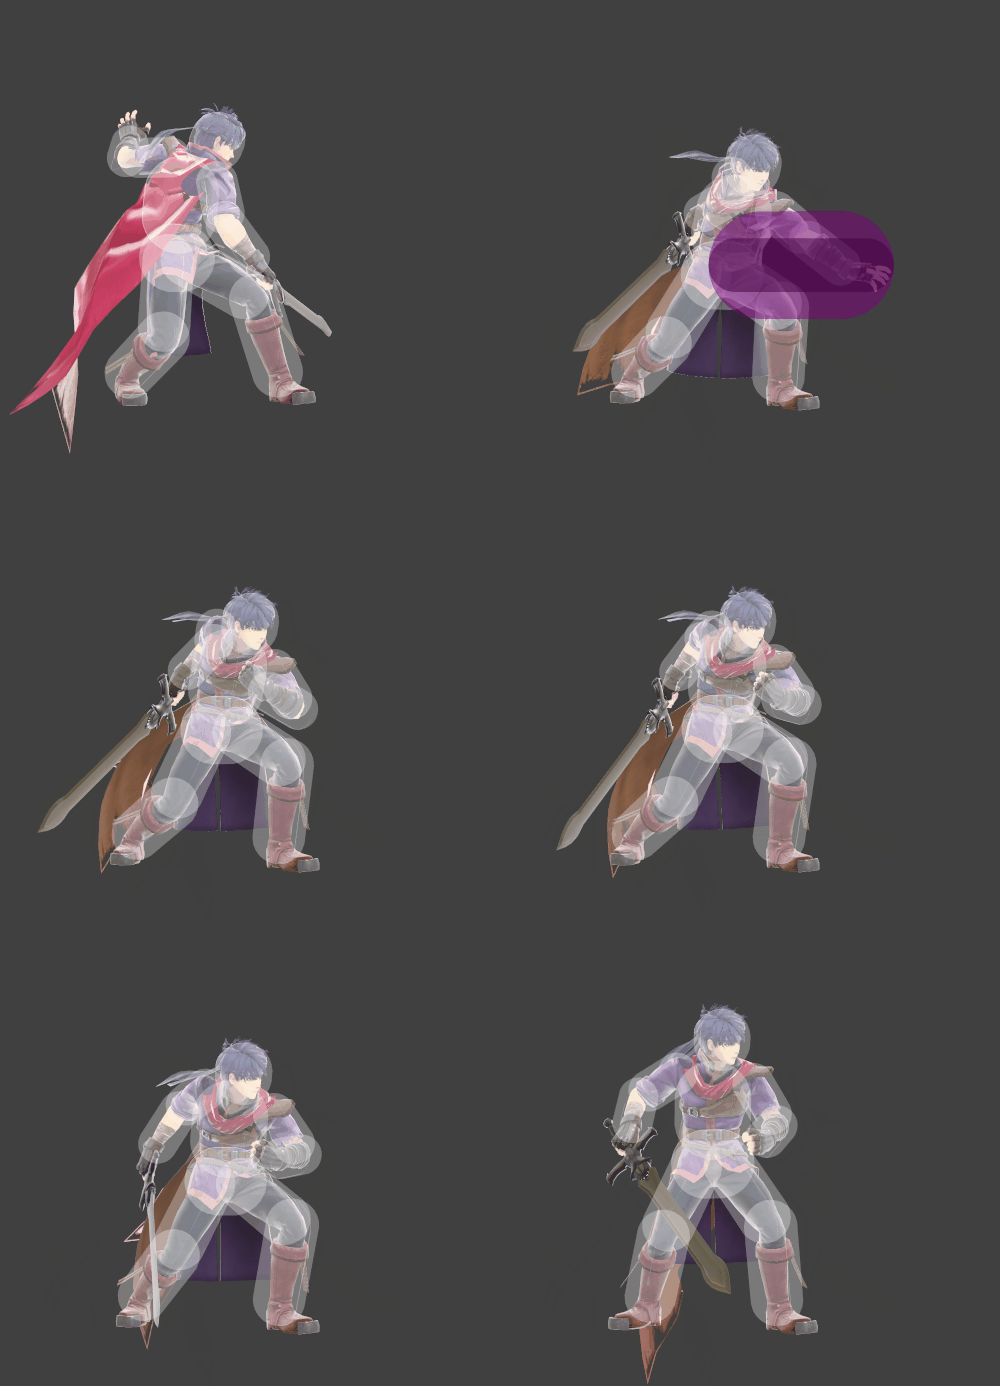
| |
| Dash grab | 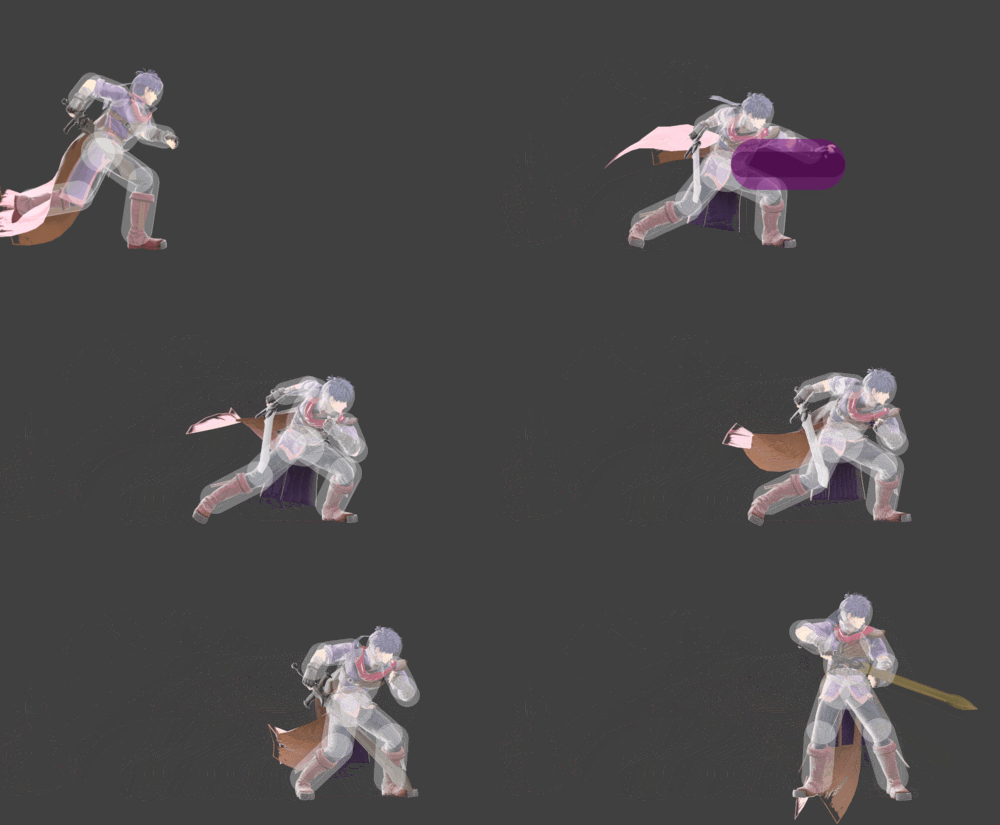
| |
| Pivot grab | 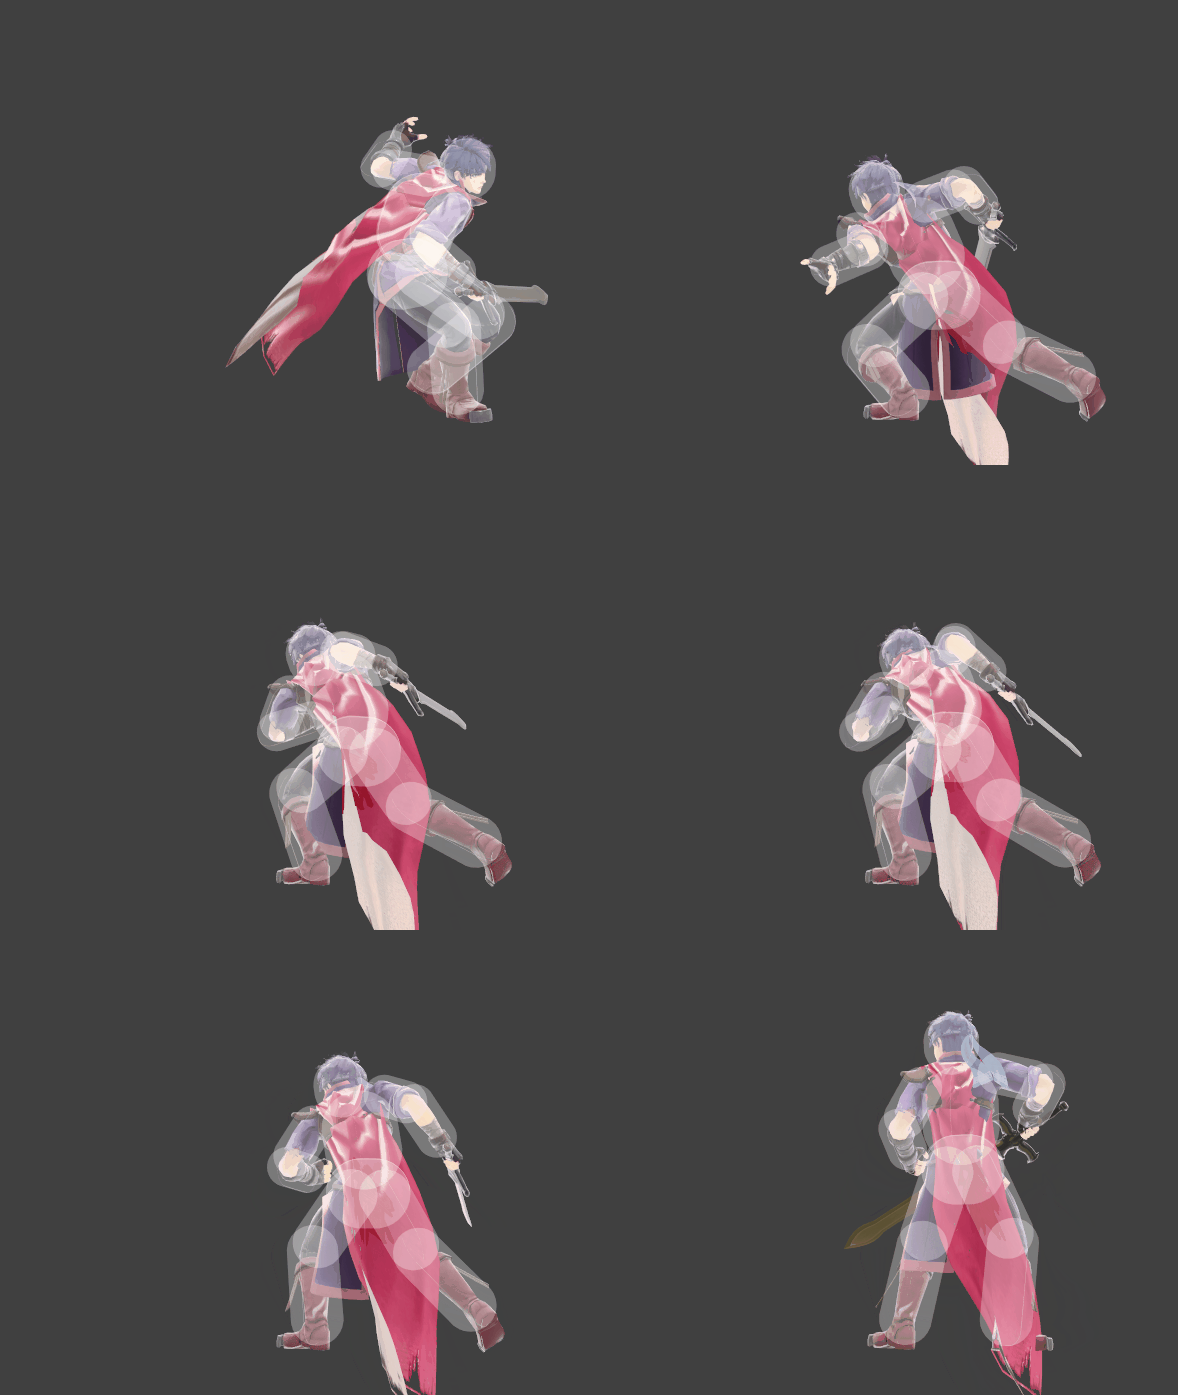
| |
| Pummel | 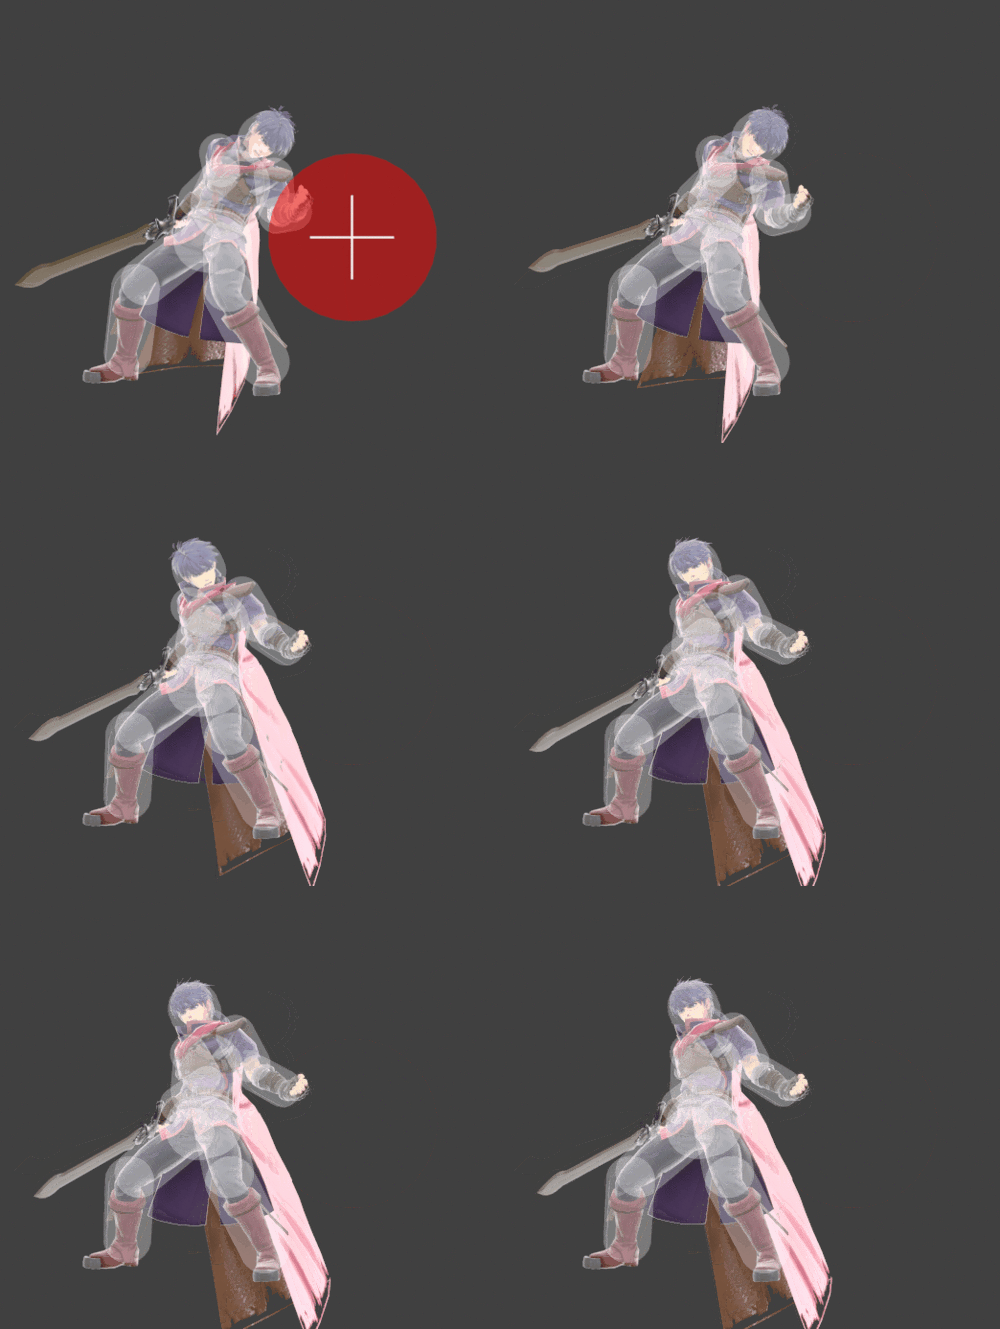
| |
| Forward throw | 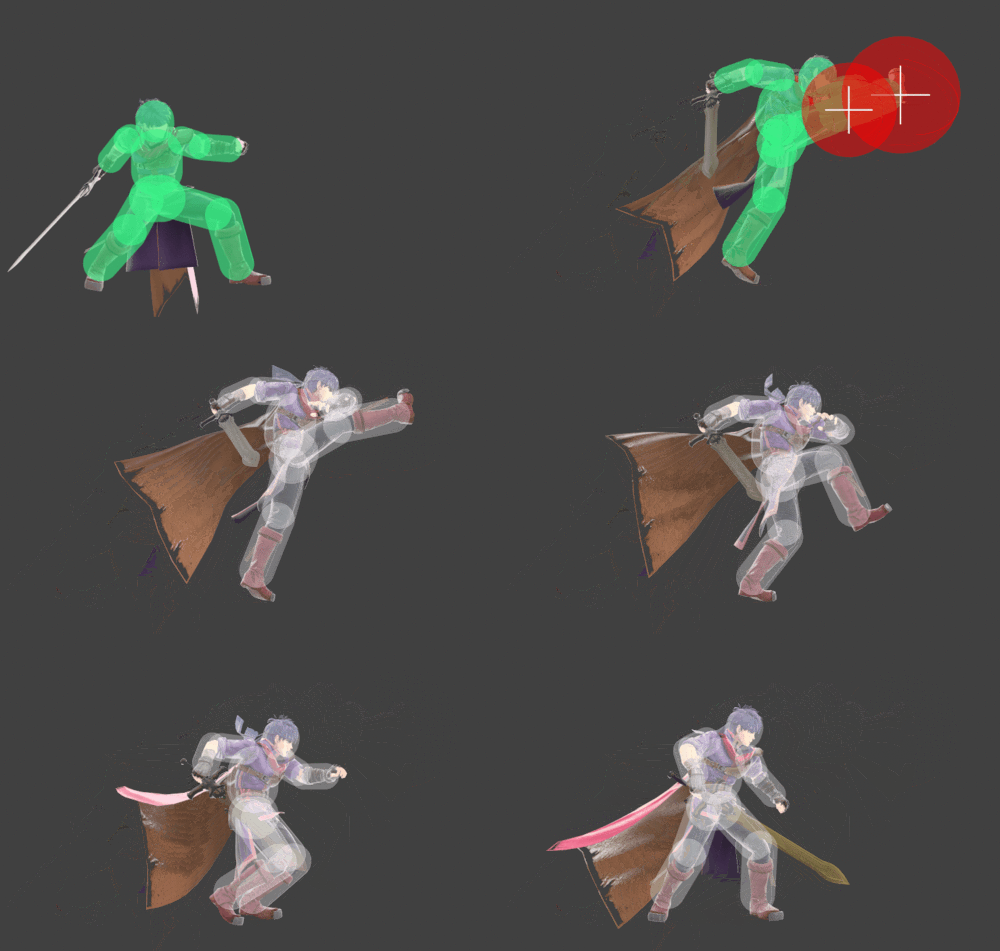
| |
| Back throw | 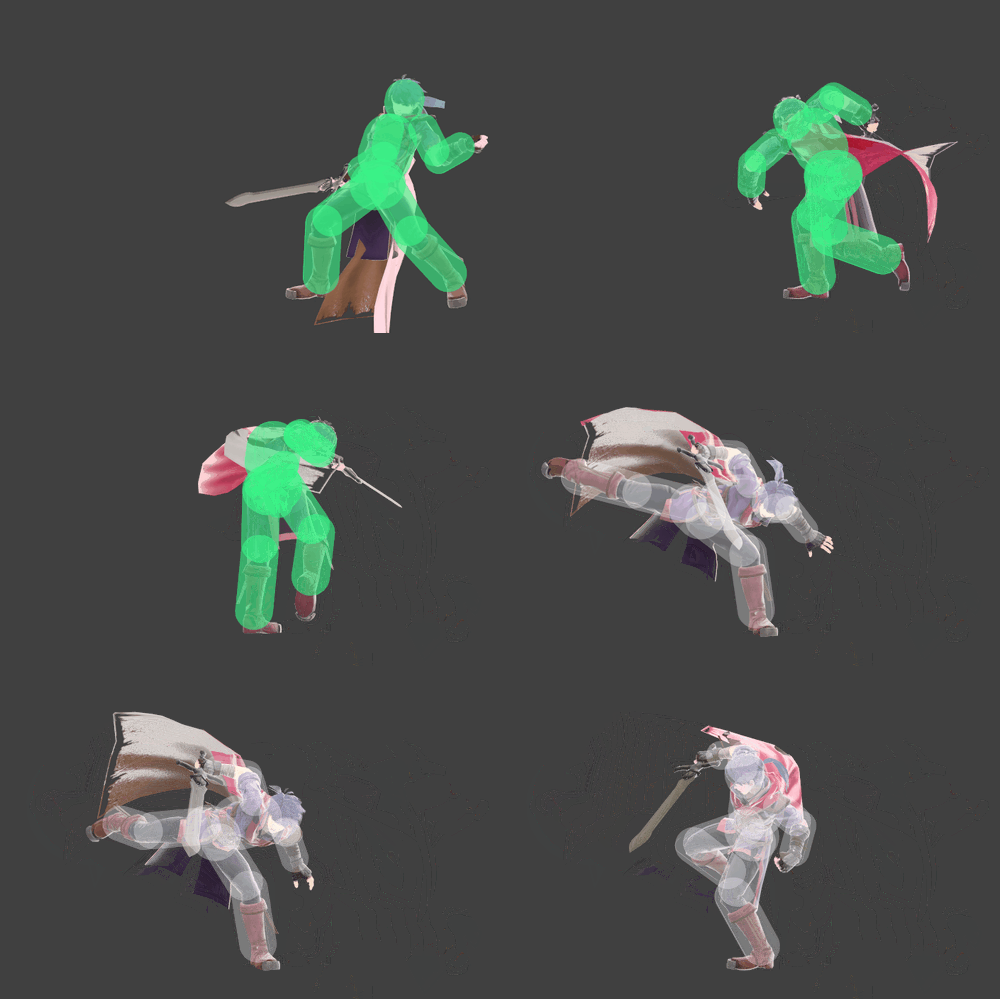
| |
| Up throw | 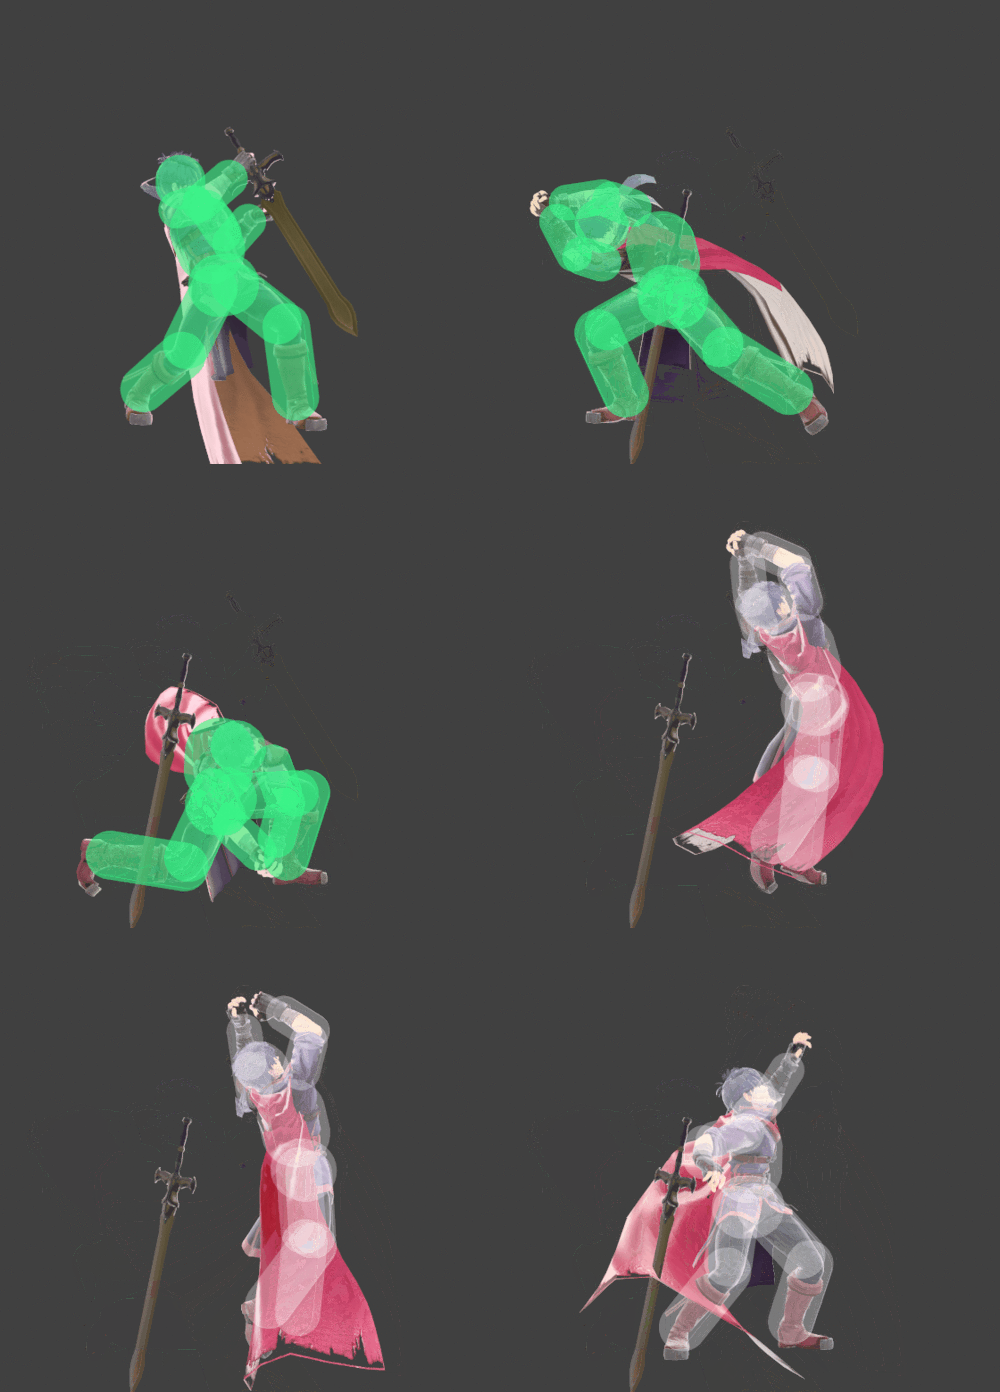
| |
| Down throw | 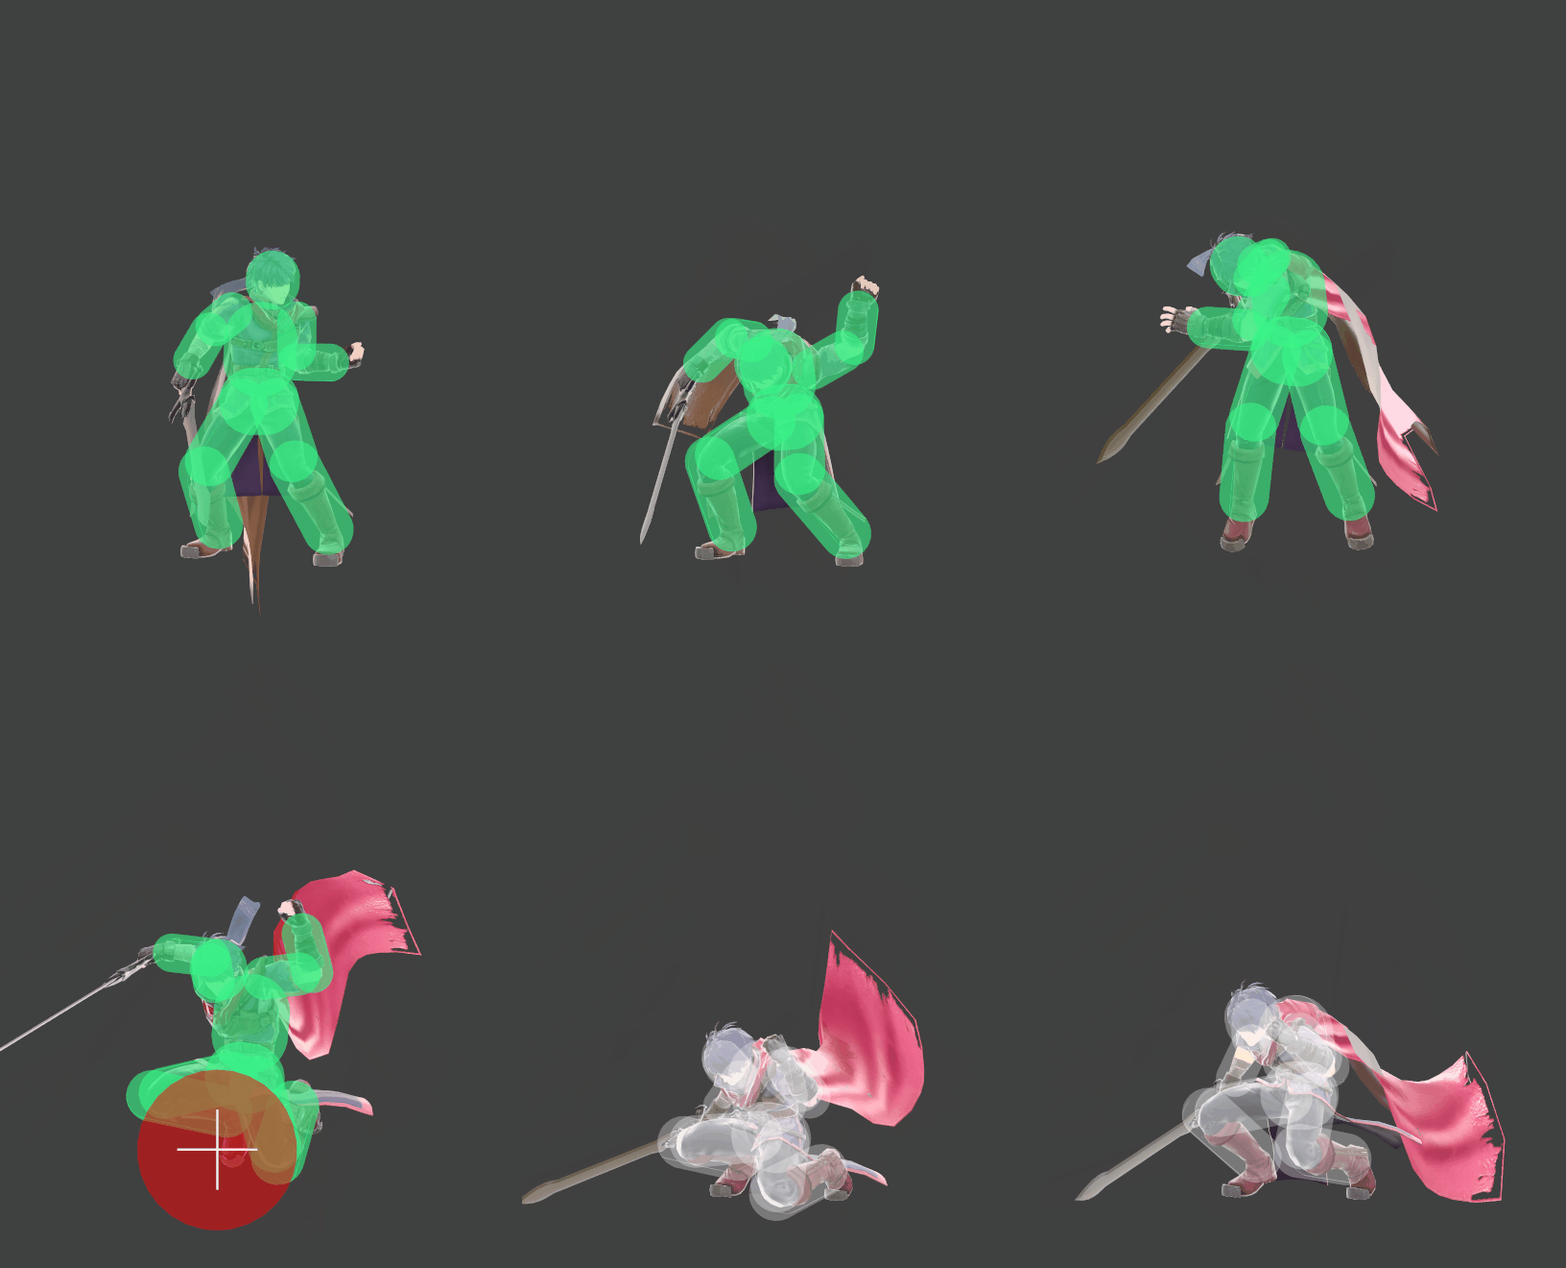
| |
| Getup attack front | 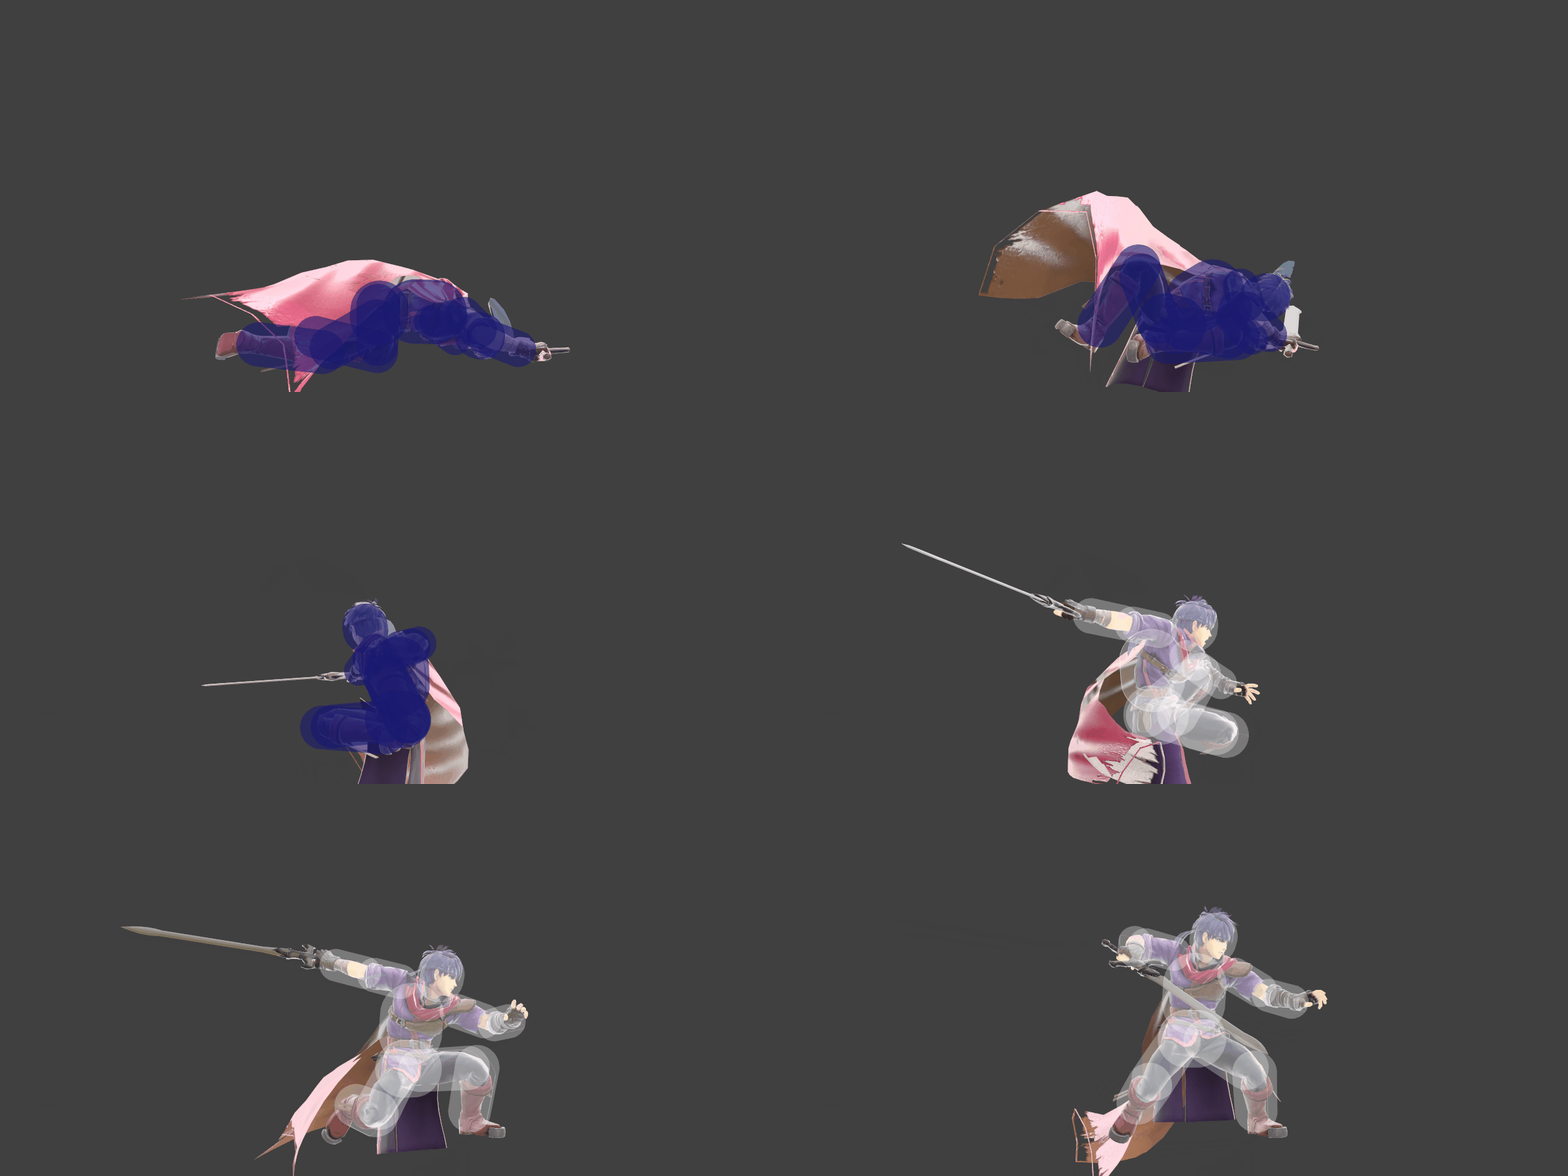
| |
| Getup attack back | 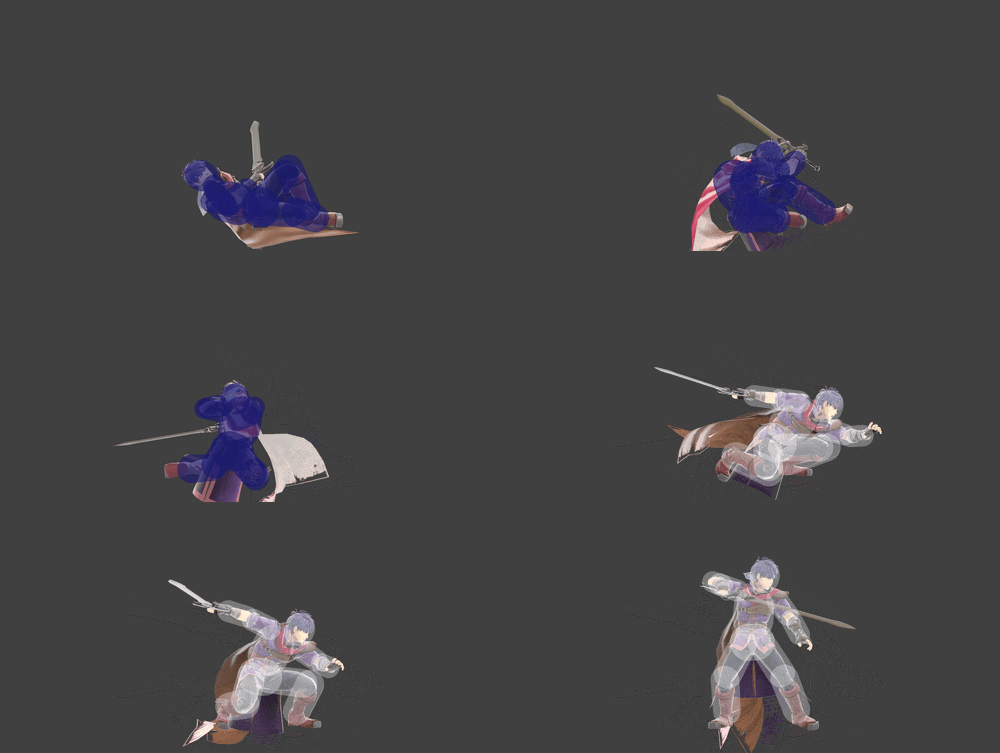
| |
| Getup attack trip | 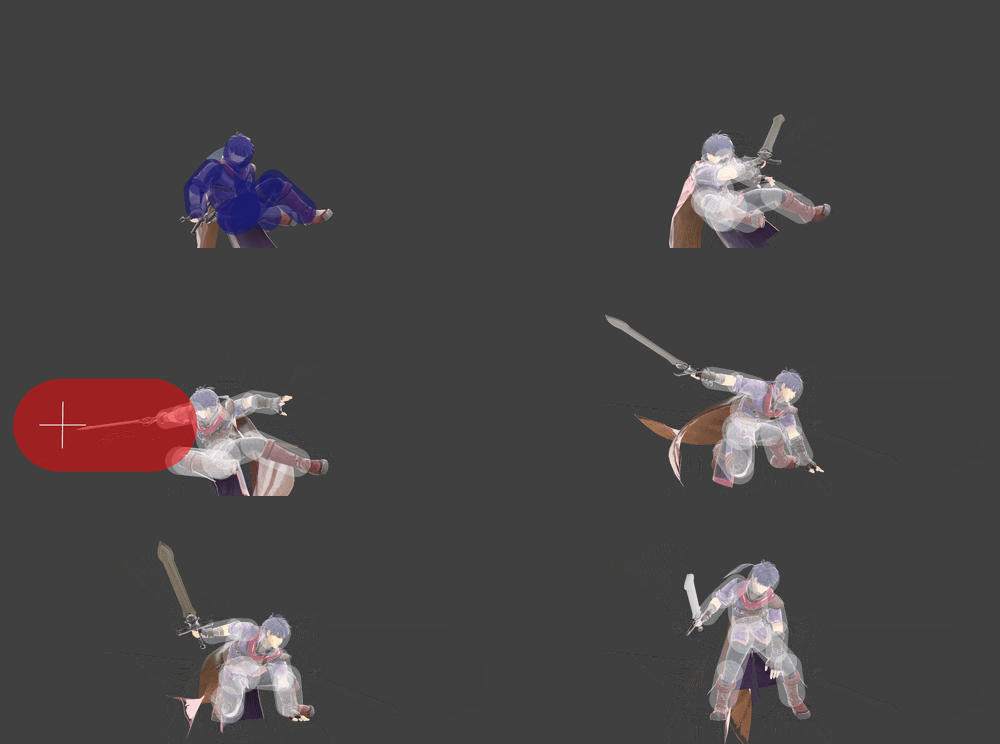
| |
| Ledge attack | 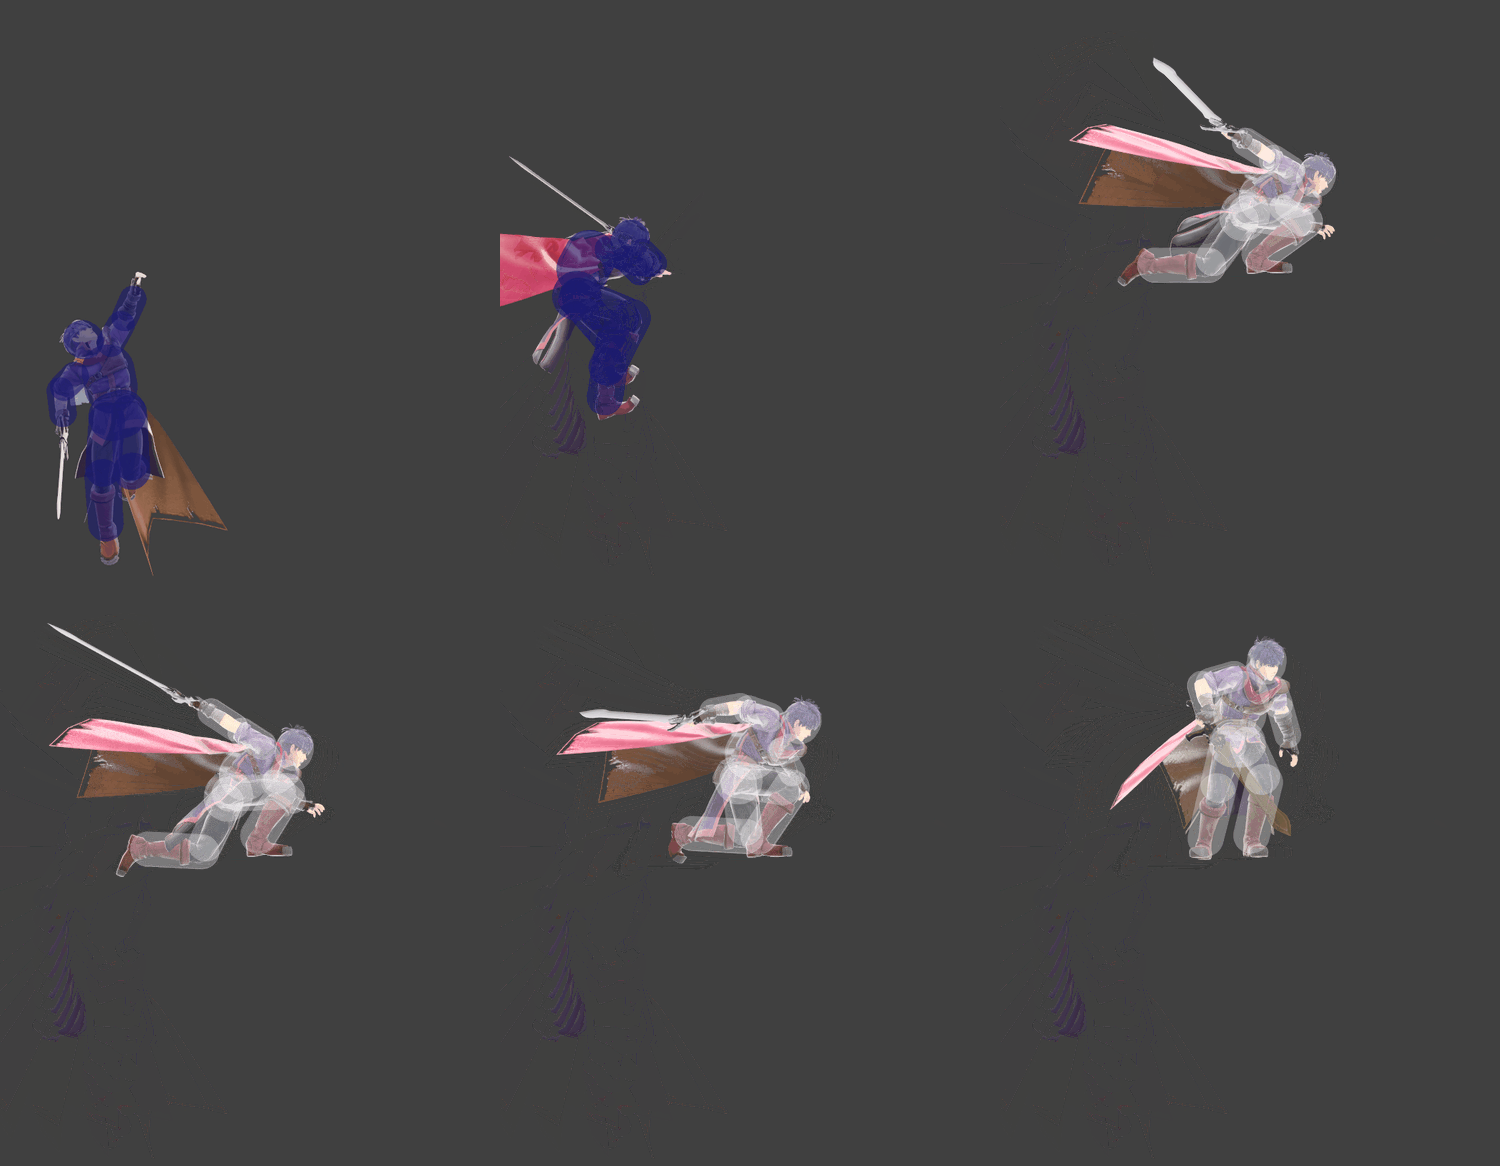
|