SSB4 Icon.png

Diddy Kong (SSB4)/Side special/Default

< Diddy Kong (SSB4)‎ | Side special
Revision as of 15:09, September 13, 2020 by PorpleBot (talk | contribs) (Text replacement - " " to " ")
This article is about the hitbox visualization in Super Smash Bros. 4. For the move itself, see Monkey Flip.
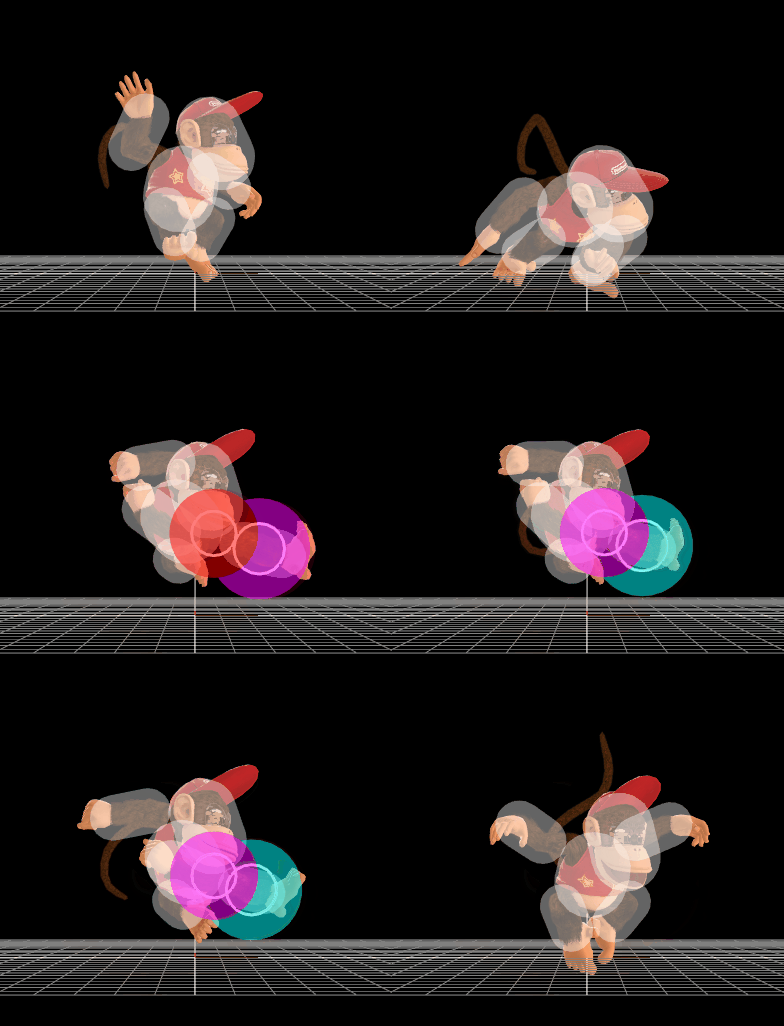
Hitbox visualization showing Diddy Kong's Monkey Flip's Grab.
Hitbox visualization showing Diddy Kong's Monkey Flip's Kick.
Competitive.png This article or section may require competitive expertise.
You can discuss this issue on the talk page or edit this page to improve it.
Data.png This article or section may require additional technical data.
You can discuss this issue on the talk page or edit this page to improve it.

Hitboxes

Kick

ID Part Damage SD Angle BK KS FKV Radius Bone Offset SDIx T% Clang Rebound Type Effect G A Sound Direct
Clean hit
0 0 14% 0   80 50 0 3.5 4 0.0 0.0 0.0 1.0x 1.0x 30%               Kick  
1 0 12% 0   80 50 0 4.0 5 1.0 0.0 0.0 1.0x 1.0x 30%               Kick  
Late hit
0 0 12% 0   80 50 0 3.5 4 0.0 0.0 0.0 1.0x 1.0x 30%               Kick  
1 0 10% 0   80 50 0 4.0 5 1.0 0.0 0.0 1.0x 1.0x 30%               Kick  

Grab (pummel)

ID Part Damage SD Angle BK KS FKV Radius Bone Offset SDIx T% Clang Rebound Type Effect G A Sound Direct
0 0 1% 0   0 0 0 4.0 23 2.5 2.0 0.0 1.0x 1.0x 0%               Kick  

Grab (up attack)

Throw

Hitbox type Damage Angle Base knockback Knockback scaling Fixed knockback value Weight dependent
Throw 5% 361 0 50 0 No

Collateral

ID Part Damage SD Angle BK KS FKV Radius Bone Offset SDIx T% Clang Rebound Type Effect G A Sound Direct
0 0 3% 0   60 150 0 6.0 23 2.5 2.0 0.0 1.0x 1.5x 0%               Kick  
1 0 3% 0   60 150 0 3.0 0 0.0 1.5 -7.0 1.0x 1.5x 0%               Kick  

Grab (forward attack)

Hitbox type Damage Angle Base knockback Knockback scaling Fixed knockback value Weight dependent
Throw 3% 361 0 50 0 No
Throw 7% 361 50 100 0 No