Roy (SSB4): Difference between revisions
Ragnarok320 (talk | contribs) (By this point Cloudy has better wins over Hyper, though the two are still really close.) |
No edit summary |
||
| Line 12: | Line 12: | ||
}} | }} | ||
:{{Cquote|Roy Seals the Deal!|cite=Introduction tagline}} | :{{Cquote|Roy Seals the Deal!|cite=Introduction tagline}} | ||
'''Roy''' ({{ja|ロイ|Roi}}, ''Roy'') is a playable character in ''[[Super Smash Bros. 4]]''. Initially [[Leak#Roy and Ryu data|leaked]] | '''Roy''' ({{ja|ロイ|Roi}}, ''Roy'') is a playable character in ''[[Super Smash Bros. 4]]''. Initially [[Leak#Roy and Ryu data|leaked]] via data mining of update 1.0.6,<ref>[http://www.ign.com/articles/2015/06/13/ryu-and-roy-for-smash-bros-leaked Ryu and Roy for Smash Bros. Wii U, 3DS Leaked]</ref> Roy was formally revealed after {{SSB4|Lucas}} and released alongside him and {{SSB4|Ryu}} on June 14th, 2015,<ref>[http://www.ign.com/articles/2015/06/14/e3-2015-roy-officially-join-super-smash-bros-roster E3 2015: Ryu and Roy Officially Join Super Smash Bros. Roster]</ref> making him the third [[downloadable content|downloadable]] character released and the final downloadable [[veteran]]. {{s|wikipedia|Jun Fukuyama}} reprises his role as Roy's voice actor, and provides new voice clips that mimic the ones he recorded in ''[[Super Smash Bros. Melee]]''. | ||
Roy is currently ranked 44th out of 58 on the | Roy is currently ranked 44th out of 58 on the [[tier list]], placing him in the E tier and making him the lowest ranking DLC character. This is a noticeable improvement from his placement in ''Melee'', where he was ranked 20th out of 26. Two of Roy's greatest perks are his overall mobility and attack speed: his ground and air speeds are among the fastest in the game, and a few of his key attacks also boast quick start-up overall, which collectively allow him to react quickly to an opponent's openings. These traits also complement the [[fireemblemwiki:Binding Blade (weapon)|Sword of Seals]]' inverse [[tipper]], which consists of large sweetspots near its hilt that deal impressive damage and knockback at close range, and thus grant him a number of highly potent KOing options. Roy also benefits from gameplay changes brought about by ''SSB4'': the [[rage]] mechanic supplements his potent sweetspotted attacks, while the updated edge mechanics improve his recovery. | ||
Roy's also boasts an impressively varied combo game: his neutral attack, neutral aerial's first hit, forward throw, down throw and falling up aerial are reliable combo starters, his down tilt and forward throw can initiate [[Tech-chasing|tech-chases]], and [[Double-Edge Dance]] is useful for damage racking. When coupled with the power of his sweetspotted attacks, most of which are capable of KOing at reasonable percents, Roy's combo game is generally very rewarding when successfully performed. | |||
However, Roy | However, Roy has noticeable weaknesses. Despite his overall fast mobility, Roy has an ineffective [[approach]]: his grounded approach has worsened due to the removal of [[wavedash]]ing and [[L-canceling]], while his aerial approach is burdened by his very slow [[air acceleration]] and his aerials' high commitment and inability to [[autocancel]] with a short hop. In addition, Roy is oddly ineffective at spacing for a swordsman: although the Sword of Seals' inverse tipper grants it powerful sweetspots, it is only rewarding at close range, as its sourspots are much weaker in comparison. | ||
His throw combos are | Although Roy's combo game is potent, it does have its limits. His throw-initiated combos are inconsistent due to his throws' low hitstun, while his overall combo game starts to become inconsistent at medium percentages, largely due to the knockback of his sweetspotted moves being too high to allow follow-ups. This makes him heavily reliant on reads and thus gives him few KO set-ups aside from his neutral attack and neutral aerial at high percents. Lastly, Roy suffers from a poor recovery: [[Blazer]]'s predictability and low vertical distance makes him vulnerable to semi-spikes, which is further compounded by his very quick [[falling speed]] also making him very susceptible to combos. | ||
Overall, Roy is a "high-risk, high-reward" character who relies on | Overall, Roy is a "high-risk, high-reward" character who relies on using his speed to find openings before converging into highly damaging, close-ranged combos, all while walling opponents out with his fast attacks. However, he has to be more committal in comparison to other sword characters, forcing the player to limit his approaches without being overly aggressive. While Roy has improved overall since ''Melee'', buffs to several other veterans have also allowed them to fare better in the metagame in comparison. Due to these factors, Roy has below average tournament representation, although he has achieved some degree of competitive success, thanks to the efforts of {{Sm|Hyper Kirby}}. | ||
==Attributes== | ==Attributes== | ||
[[File:RoyMarthComparison.jpeg|400px|thumb|Roy and {{SSB4|Marth}} performing their forward smash attacks. Note that the sweetspot is highlighted by the trail left by their swords: | [[File:RoyMarthComparison.jpeg|400px|thumb|Roy and {{SSB4|Marth}} performing their forward smash attacks. Note that the sweetspot is highlighted by the trail left by their swords: Roy's [[fireemblemwiki:Binding Blade (weapon)|Sword of Seals]] is strongest near its hilt, whereas Marth's {{s|fireemblemwiki|Falchion}} is strongest at its blade's tip.]] | ||
Roy is a [[semi-clone]] of {{SSB4|Marth}}, | Unlike in ''Melee'', Roy is a [[semi-clone]] of {{SSB4|Marth}}, and he now possesses an individualized playstyle thanks to certain mechanical differences. The most notable of these differences is his inverse [[tipper]]: the [[fireemblemwiki:Binding Blade (weapon)|Sword of Seals]] deals more damage and knockback near its hilt, and much less at its blade's tip. However, the Sword of Seals also boasts two other distinct traits: its inverse tipper is much larger than Falchion's tipper, and most of its attacks are less polarizing than Falchion's due to their possession of an additional hitbox that is between both its sweetspot and sourspot. Like Marth, Roy is a [[Weight|middleweight]] and has above average [[walking]] speed, but his other attributes noticeably differ: he has the eleventh fastest [[dash]]ing speed, the fourth fastest [[air speed]], and the fifth fastest [[falling speed]], which collectively make his mobility faster than Marth's. Like Marth, Roy has an effective [[dash-dance|extended dash-dance]], which allows him to read and punish opponents accordingly. However, Roy is tied for the longest initial dash animation (17 frames), giving him a poor shield buffer out of his dash. His [[air acceleration]] is also among the slowest in the game: this not only forces him to commit to any aerial approaches, but also makes his aerial mobility significantly less fluid compared to Marth's, whose air acceleration allows him to easily use retreating aerials. | ||
Roy's attacks | The majority of Roy's attacks have quick start-up, and his overall fast mobility allows him to easily get close to an opponent. By extension, his ability to easily close the gap between himself and his opponent allows him to use his inverse tipper effectively. Once Roy finds an opening, he has several ways to rack up damage. His neutral aerial is perhaps his most versatile move, thanks to its quick start-up, low landing lag, long-lasting hitbox, and utility as a combo starter. His neutral attack is also quick and can easily lead into other moves, such as his throws and tilt attacks. His down and forward throws launch opponents at favorable angles and thus open up combo opportunities for his neutral attack, dash attack, forward tilt, neutral aerial, and [[Double-Edge Dance]]. His down tilt is also a good spacing option, and is useful for [[shield stab]]bing. | ||
Roy also boasts an array of KOing options, with many of his sweetspotted attacks capable of KOing below 130%. While on-stage, his best KOing options are his forward and up tilts, forward and up smashes, and [[Blazer]], due to their quick start-up and high power. Although Roy's offense thrives while he is on-stage, his fast air speed and disjointed range grant him an effective off-stage presence. His forward, back and down aerials are easily capable of KOing, yet they also possess particular strengths: the former two are quick and have wide arcs, while the latter is capable of [[meteor smash]]ing. Although he is a middleweight, Roy's very quick falling speed grants him impressive on-stage endurance, which and he can make great use of [[rage]], which further enhances the knockback of his already powerful moves. | |||
Each of Roy's special moves possess respectable utility. [[Flare Blade]] is a deadly edgeguarding option, especially while on-stage, thanks to its charging ability, overall high power, large hitbox, and deceptively low ending lag. Double-Edge Dance is effective for damage racking, while its final upward and forward hits can KO outright. In addition to its KO potential, Blazer is an excellent [[out of shield]] option that grants [[super armor]] on start-up, can [[stage spike]] careless opponents who attempt to edgeguard him, and can be a [[true combo]] from his neutral attack at specific percents. Lastly, his [[Counter]] is one of the strongest [[counterattack]]s in the game, as its 1.35x damage multiplier makes it devastating when used against a powerful attack. | |||
Roy | However, Roy is hindered by a slew of flaws. While his inverse tipper is one of his greatest strengths, it also forces him to fight at close range in order to be utilized to its fullest. This is further compounded by his [[range]] being decidedly short for a swordsman, as resulting in a whiffed move on Roy's part leaving him open to [[punishment]], while also not being as effective as spacing opponents as other sword-wielding characters. He also can have trouble approaching despite his good mobility, since his neutral aerial is his only quick option to use in order close in and pressure the opponent. Roy's very fast air speed is also offset by his very slow air acceleration, which makes his aerial approach highly committal in general, much like {{SSB4|Ryu}}'s. | ||
Although Roy's combo game is very potent at low percents, it will become inconsistent beginning at medium percents. Unlike Marth, Roy's sourspots are not as reliable at creating combos: while they are still possible to perform, his sourspots require a lot of emphasis on precision and can quickly lose their effectiveness. The high ending lag of Roy's moves and the low [[hitstun]] of his forward and down throws collectively hinder Roy by opening holes in his combo game due to them occasionally making it so that he has to attempt to [[read]] what his opponent will do. His forward throw is also burdened by the fact that most opponents can reliably tech out of its follow-ups. | |||
Roy's | Roy's [[recovery]] is also ineffective despite his impressive mobility. Although Blazer offers excellent protection, can be angled, and covers a decent amount of horizontal distance, it covers little vertical distance and is predictable. When coupled with his very quick falling speed, he is highly susceptible to meteor smashes, and even a sufficiently strong [[semi-spike]] can launch him too far away to recover. Additionally, players unaccustomed to his falling speed will quickly find that any misused aerial off-stage will send him too far off-stage to recover. | ||
Roy's very quick falling speed also makes him very susceptible to [[combo]]s. His unsafe moves offer opponents many opportunities to punish him, and none of his moves are generally reliable enough to consistently break combos. Because of this, many characters with reliable combo moves can rack up large amounts of damage and easily force him off-stage, where he could potentially be KO'd if dealt with accordingly. Lastly, Roy does not have any [[Character customization|custom moves]] due to being a DLC character. As such, he must not only utilize his own special moves properly, but also adapt as best as possible against characters that possess their own custom moves. | |||
Roy has | Overall, Roy's strengths are on par with his weaknesses. While his character archetype is commonly viewed as being in the rushdown and/or glass cannon categories, his cannot effectively function in either role due to his poor recovery, unimpressive range for a swordsman, and vulnerability to combos. Instead, his optimal playstyle consists of limited aggression, playing around an opponent's shields and reactions using his excellent mobility, and capitalizing on openings with his strong combo game and potent KOing options. As a result of these traits, Roy has sparse tournament representation and results at high-level play, although he has nevertheless achieved some competitive success, thanks to players such as {{Sm|Hyper Kirby}}. | ||
==Changes from ''Melee''== | ==Changes from ''Melee''== | ||
Roy is frequently placed within a group of characters ({{SSB4|Bowser}}, {{SSB4|Dr. Mario}}, {{SSB4|Charizard}}, {{SSB4|King Dedede}} and {{SSB4|Pit}}) that are the most noticeably reworked [[veteran]]s in ''SSB4''. In Roy's case, several of his moves were de-cloned from {{SSB4|Marth}}, to the point that he is now a semi- | Roy is frequently placed within a group of characters ({{SSB4|Bowser}}, {{SSB4|Dr. Mario}}, {{SSB4|Charizard}}, {{SSB4|King Dedede}} and {{SSB4|Pit}}) that are the most noticeably reworked [[veteran]]s in ''SSB4''. In Roy's case, several of his moves were de-cloned from {{SSB4|Marth}}, to the point that he is now a semi-clone. Although Roy received a mix of buffs and nerfs in the transition from ''Melee'' to ''SSB4'', he has overall been buffed. | ||
Among Roy's buffs are his greatly improved mobility, now having a faster dashing speed and one of the fastest air speeds in the game, as well as his moveset being notably more rewarding than in ''Melee'': most of his moves are different from Marth, such as his new neutral attack, forward and up tilts, dash attack and down aerial, all of which improve his | Among Roy's buffs are his greatly improved mobility, now having a faster dashing speed and one of the fastest air speeds in the game, as well as his moveset being notably more rewarding than in ''Melee'': most of his moves are different from Marth, such as his new neutral attack, forward and up tilts, dash attack and down aerial, all of which improve his close-ranged offense and combo game, and many of which are more reliable KO moves. His damage output is higher, and his sweetspotted attacks are considerably more powerful, giving him a bevy of new KOing options, which generally alleviates his main weakness from ''Melee''. His attack speed is faster overall, with his aerials in particular having significantly reduced ending and landing lag, [[L-canceling]] notwithstanding. The addition of [[rage]] boosts his KO power even further, while his heavier weight allows him to use it quite effectively. Lastly, Roy's recovery is generally better, thanks to [[Blazer]]'s improved horizontal distance, his faster air speed, and the introduction of edge trumping. | ||
However, Roy has also received several nerfs. Roy now stands at Marth's height, which enlarges his hurtbox, though his attacks have much shorter | However, Roy has also received several nerfs. Roy now stands at Marth's height, which enlarges his hurtbox, though his attacks have much shorter ranges and hitbox durations in spite of this, forcing him to fight at a much closer range, exacerbating one of his key weaknesses in ''Melee''. For the most part, Roy is also harmed by the post-''Melee'' gameplay changes: the loss of [[wavedashing]] and [[L-canceling]], as well as the weakening of [[dash-dancing]], noticeably worsen his approach. The general increase in range for other characters since ''Melee'', such as with {{SSB4|Donkey Kong}} and {{SSB4|Bowser}}, also indirectly hurts him. [[Double-Edge Dance]]'s first hit has almost completely lost its ability to stall his descent due to his faster falling speed, which hurts his recovery despite its improvements. Lastly, Roy's heavier weight makes him easy to combo despite falling speeds being slower in ''SSB4'' than they were in ''Melee''. | ||
Overall, Roy's strengths are much more pronounced than in ''Melee'', though he retains most of the same weaknesses as well. While his sweetspotted attacks are considerably more rewarding, he still has to fight up close in order to rack up damage, while his sub-par survivability makes his playstyle risky. Despite Roy having been | Overall, Roy's strengths are much more pronounced than in ''Melee'', though he retains most of the same weaknesses as well. While his sweetspotted attacks are considerably more rewarding, he still has to fight up close in order to rack up damage, while his sub-par survivability makes his playstyle risky. Despite Roy having been buffed overall, other veterans were also buffed to varying degrees, which downplays his strengths in ''SSB4''{{'}}s metagame. | ||
===Aesthetics=== | ===Aesthetics=== | ||
*{{change|Roy's design is now a combination of his appearance as a {{s|fireemblemwiki|Great Lord}} in ''{{s|fireemblemwiki|Fire Emblem: The Binding Blade}}'' and his appearance as an [[fireemblemwiki:Downloadable content in Fire Emblem Awakening#Characters|Einherjar]] in ''{{s|fireemblemwiki|Fire Emblem Awakening}}''. Additionally, he has slightly smaller eyes, a slightly more muscular physique, and slightly shorter hair. Lastly, he is more expressive overall, as he scowls and/or sternly clenches his teeth during some attacks.}} | *{{change|Roy's design is now a combination of his appearance as a {{s|fireemblemwiki|Great Lord}} in ''{{s|fireemblemwiki|Fire Emblem: The Binding Blade}}'' and his appearance as an [[fireemblemwiki:Downloadable content in Fire Emblem Awakening#Characters|Einherjar]] in ''{{s|fireemblemwiki|Fire Emblem Awakening}}''. Additionally, he has slightly smaller eyes, a slightly more muscular physique, and slightly shorter hair. Lastly, he is more expressive overall, as now he scowls and/or sternly clenches his teeth during some attacks.}} | ||
*{{change|The [[fireemblemwiki:Binding Blade (weapon)|Sword of Seals]]' trail now clearly indicates its sweetspot's location, similarly to {{s|fireemblemwiki|Falchion}}.}} | *{{change|The [[fireemblemwiki:Binding Blade (weapon)|Sword of Seals]]' trail now clearly indicates its sweetspot's location, similarly to {{s|fireemblemwiki|Falchion}}.}} | ||
*{{change|Roy now swings the Sword of Seals in a reverse grip or with both hands, except for any attack animations retained from Marth, such as down tilt or up aerial. As a result, the Sword of Seals now aesthetically functions as a heavier sword compared to Falchion and the {{s|fireemblemwiki|Parallel Falchion}}, which appear to be swung with less effort.}} | *{{change|Roy now swings the Sword of Seals in a reverse grip or with both hands, except for any attack animations retained from Marth, such as down tilt or up aerial. As a result, the Sword of Seals now aesthetically functions as a heavier sword compared to Falchion and the {{s|fireemblemwiki|Parallel Falchion}}, which appear to be swung with less effort.}} | ||
*{{change|Roy now has an [[on-screen appearance]], an up [[taunt]] and a down taunt.}} | *{{change|Roy now has an [[on-screen appearance]], an up [[taunt]], and a down taunt.}} | ||
*{{change|Roy now has unique [[idle pose]]s, rather than variations of Marth's. However, he has the same stance as Marth while holding a light [[item]].}} | *{{change|Roy now has unique [[idle pose]]s, rather than variations of Marth's. However, he has the same stance as Marth while holding a light [[item]].}} | ||
*{{change|[[Jump]], [[sidestep]], and [[shield]] break's animations have changed.}} | *{{change|[[Jump]], [[sidestep]], and [[shield]] break's animations have changed.}} | ||
===Attributes=== | ===Attributes=== | ||
*{{nerf|Roy is taller, as he now stands at Marth's height. This makes his hurtbox larger. | *{{nerf|Roy is taller, as he now stands at Marth's height. This makes his hurtbox larger. While this would also improve his overall [[range]], this is largely mitigated by the aforementioned alterations to his sword swings making many of his attacks having smaller hitboxes and altered hitbox placements.}} | ||
*{{change|Roy is [[weight|heavier]] (85 → 95). This improves his endurance, but makes him more susceptible to combos.}} | *{{change|Roy is [[weight|heavier]] (85 → 95). This improves his endurance, but makes him more susceptible to combos.}} | ||
*{{nerf|Roy [[ | *{{nerf|Roy [[Walking|walks]] slower (1.2 → 1.15).}} | ||
*{{buff|Roy [[dash]]es faster (1.61 → 1.95).}} | *{{buff|Roy [[dash]]es faster (1.61 → 1.95).}} | ||
*{{buff|Roy's [[air speed]] is faster (0.9 → 1.24).}} | *{{buff|Roy's [[air speed]] is faster (0.9 → 1.24).}} | ||
| Line 71: | Line 71: | ||
===Ground attacks=== | ===Ground attacks=== | ||
*{{buff|Roy has a new neutral attack, a reverse gripped upward slice. Compared to the previous neutral attack, it deals more damage (3%/5%/6% → 4.8%/7.5%/7.5%) and base knockback (30/5 → 40/32), has less ending lag (interruptibility frame 26 → 23) and | *{{buff|Roy has a new neutral attack, a reverse gripped upward slice. Compared to the previous neutral attack, it deals more damage (3%/5%/6% → 4.8%/7.5%/7.5%) and base knockback (30/5 → 40/32), has less ending lag (interruptibility frame 26 → 23) and has a different angle ([[Sakurai angle|361°]] → 62°/32°). Altogether, these traits make it better for combos.}} | ||
*{{nerf|Neutral attack has more start-up lag and its duration is | *{{nerf|Neutral attack has more start-up lag and its duration is shorter (5 frames → 3) compared to the previous neutral attack.}} | ||
*{{buff|Roy has a new forward tilt, a reverse gripped downward slash. Compared to the previous forward tilt, it deals more damage (12%/10%/7% → 12.5%/9%/8%) and knockback (60/30 (base)/70 (scaling) → 30/40 (base)/100/80 (scaling)) and has less start-up (frame 9 → 8) and ending lag (interruptibility frame 40 → 32). Altogether, these traits making it better for KOing.}} | *{{buff|Roy has a new forward tilt, a reverse gripped downward slash. Compared to the previous forward tilt, it deals more damage (12%/10%/7% → 12.5%/9%/8%) and knockback (60/30 (base)/70 (scaling) → 30/40 (base)/100/80 (scaling)) and has less start-up (frame 9 → 8) and ending lag (interruptibility frame 40 → 32). Altogether, these traits making it better for KOing.}} | ||
*{{nerf|Forward tilt's duration is | *{{nerf|Forward tilt's duration is shorter (5 frames → 3) than the previous forward tilt's.}} | ||
*{{buff|Roy has a new up tilt, a reverse gripped overhead arcing slash. Compared to the previous up tilt, it deals more damage (6%/8%/9%/10% → 7%/12%), making it much stronger than the previous up tilt despite having less knockback scaling (120/118/116/100 → 103). It also has less start-up (frame 7 → 6) and ending lag (interruptibility frame 40 → 39) and its sourspot has more base knockback (20 → 30). Altogether, these traits make it better for KOing and combos.}} | *{{buff|Roy has a new up tilt, a reverse gripped overhead arcing slash. Compared to the previous up tilt, it deals more damage (6%/8%/9%/10% → 7%/12%), making it much stronger than the previous up tilt despite having less knockback scaling (120/118/116/100 → 103). It also has less start-up (frame 7 → 6) and ending lag (interruptibility frame 40 → 39) and its sourspot has more base knockback (20 → 30). Altogether, these traits make it better for KOing and combos.}} | ||
*{{nerf|Up tilt's duration is | *{{nerf|Up tilt's duration is shorter (7 frames → 5) than the previous up tilt's.}} | ||
*{{nerf|Sweetspotted down tilt deals 1% less damage (12% → 11%).}} | *{{nerf|Sweetspotted down tilt deals 1% less damage (12% → 11%).}} | ||
*{{buff|Sourspotted down tilt deals 0.5% more damage (6% → 6.5%).}} | *{{buff|Sourspotted down tilt deals 0.5% more damage (6% → 6.5%).}} | ||
*{{buff|Down tilt has decreased start-up lag (frame 8 → 7) | *{{buff|Down tilt has decreased start-up lag (frame 8 → 7).}} | ||
*{{nerf|Down tilt has decreased base knockback (90/70 → 50/40), increased ending lag (interruptibility frame 20 → 22) and its duration is | *{{nerf|Down tilt has decreased base knockback (90/70 → 50/40), increased ending lag (interruptibility frame 20 → 22) and its duration is shorter (3 frames → 2).}} | ||
*{{change|Down tilt is now a [[semi-spike]] (80° → 30°). This improves its edgeguard and [[tech-chase]] potentials, but significantly hinders its combo potential.}} | |||
*{{buff|Roy has a new dash attack, an inward horizontal slash. Compared to the previous dash attack, it deals more damage (12%/6% → 13%/9%), knockback (70/35 (base)/55/60 (scaling) → 65/60 (base)/82/60 (scaling)) and its sweetspot has a different angle (110° → 52°). Altogether, these traits make it better for KOing.}} | *{{buff|Roy has a new dash attack, an inward horizontal slash. Compared to the previous dash attack, it deals more damage (12%/6% → 13%/9%), knockback (70/35 (base)/55/60 (scaling) → 65/60 (base)/82/60 (scaling)) and its sweetspot has a different angle (110° → 52°). Altogether, these traits make it better for KOing.}} | ||
*{{nerf|Dash attack has more start-up (frame 12 → 13) and ending lag (interruptibility frame 40 → 50) compared to the previous dash attack.}} | *{{nerf|Dash attack has more start-up (frame 12 → 13) and ending lag (interruptibility frame 40 → 50) compared to the previous dash attack.}} | ||
*{{buff|Due to the damage multiplier for fully charged smash attacks being increased from ''Melee'' to ''SSB4'' (1.3671x → 1.4x), fully charged forward and up smashes deal more damage (27.324%/16.4052% → 28%/16.8% (forward), 22.639176% → 23.8% (up)).}} | *{{buff|Due to the damage multiplier for fully charged smash attacks being increased from ''Melee'' to ''SSB4'' (1.3671x → 1.4x), fully charged forward and up smashes deal more damage (27.324%/16.4052% → 28%/16.8% (forward), 22.639176% → 23.8% (up)).}} | ||
*{{nerf|Roy has a new forward smash, a rotating two-handed slash based on his regular attack as a Great Lord in ''Fire Emblem: The Binding Blade''. Compared to the previous forward smash, its sweetspot has less base knockback (80 → 70) and | *{{nerf|Roy has a new forward smash, a rotating two-handed downward slash based on his regular attack as a Great Lord in ''Fire Emblem: The Binding Blade''. Compared to the previous forward smash, its sweetspot has less base knockback (80 → 70) and is smaller due to having a "medium-spot" that deals 3% less damage (20% → 17%). Its also has more start-up (frame 12 → 14) and ending lag (interruptibility frame 54 → 55), less vertical range, and its duration is shorter (3 frames → 2).}} | ||
*{{buff|Forward smash has more knockback scaling (65 → 70), making it better at KOing compared to the previous forward smash.}} | *{{buff|Forward smash has more knockback scaling (65 → 70), making it better at KOing compared to the previous forward smash.}} | ||
*{{buff|Due to the changes to [[stale move negation]], up smash deals 0.44% more damage (16.56% → 17%). It also has decreased start-up lag and its duration is | *{{buff|Due to the changes to [[stale move negation]], up smash deals 0.44% more damage (16.56% → 17%). It also has decreased start-up lag and its duration is longer (10 frames → 12). Additionally, its [[spike]] hitbox now properly keeps opponents in place for the other hits. Lastly, it grants intangibility to Roy's arm throughout its duration.}} | ||
*{{nerf|Up smash has increased ending lag (interruptibility frame 46 → 59) and its last hit has decreased base knockback (73 → 70).}} | *{{nerf|Up smash has increased ending lag (interruptibility frame 46 → 59) and its last hit has decreased base knockback (73 → 70).}} | ||
*{{nerf|Down smash's front hit deals less damage (21%/14% → 15%/10%) | *{{nerf|Down smash's front hit deals less damage (21%/14% → 15%/10%), hindering its KO potential.}} | ||
*{{buff|Down smash's back hit deals more damage (16%/8% → 17%/11%). It also has decreased ending lag (interruptibility frame 72 → 63) | *{{buff|Down smash's back hit deals more damage (16%/8% → 17%/11%) and its angles have been altered (75°/361° → 50°/47°/361°), improving its KO potential. It also has decreased ending lag (interruptibility frame 72 → 63).}} | ||
*{{nerf|Down smash's hits' durations are shorter (3 frames → 2).}} | |||
*{{change|Down smash's knockback properties have been reversed, making the back hit stronger than the front hit.}} | *{{change|Down smash's knockback properties have been reversed, making the back hit stronger than the front hit.}} | ||
| Line 97: | Line 99: | ||
*{{buff|Neutral, forward, back and down aerials deal more damage (4%, 8%/5% → 4%/6% (neutral), 8.5%/5%, 8%/5% → 11%/7% (forward), 9%/6% → 12%/9% (back), 6%/9% → 10%/15% (down)).}} | *{{buff|Neutral, forward, back and down aerials deal more damage (4%, 8%/5% → 4%/6% (neutral), 8.5%/5%, 8%/5% → 11%/7% (forward), 9%/6% → 12%/9% (back), 6%/9% → 10%/15% (down)).}} | ||
*{{nerf|Neutral, forward, and up aerials autocancel later (frame 32 → 47 (neutral), frame 30 → 33 (forward), frame 30 → 38 (up)), which removes forward aerial's ability to autocancel.}} | *{{nerf|Neutral, forward, and up aerials autocancel later (frame 32 → 47 (neutral), frame 30 → 33 (forward), frame 30 → 38 (up)), which removes forward aerial's ability to autocancel.}} | ||
*{{buff|Neutral aerial's hits have decreased start-up lag (frame 7 | *{{buff|Neutral aerial's hits have decreased start-up lag (frame 7 → frame 6 (hit 1), frame 17 → frame 15 (hit 2)). Its second hit also has increased knockback scaling (80 → 100) and its angle has been altered (361° → 50°). Altogether, these traits improve its combo potential.}} | ||
*{{buff|Forward aerial deals more knockback (30/10 (base)/70 (scaling) → 50/80).}} | *{{buff|Forward aerial deals more knockback (30/10 (base)/70 (scaling) → 50/80).}} | ||
*{{nerf|Forward aerial's animation has slightly changed. Roy now swings the Sword of Seals while further leaning forward and with his legs being positioned differently. Compared to the previous animation, | *{{nerf|Forward aerial's animation has slightly changed. Roy now swings the Sword of Seals while further leaning forward and with his legs being positioned differently. Compared to the previous animation, it has more start-up lag (frame 5 → 10).}} | ||
*{{buff|Back aerial has increased knockback scaling (70 → 100), improving its KO potential. It also autocancels earlier (frame 34 → 32).}} | *{{buff|Back aerial has increased knockback scaling (70 → 100), improving its KO potential. It also autocancels earlier (frame 34 → 32).}} | ||
*{{buff|Up aerial's duration is | *{{buff|Up aerial's duration is longer (5 frames → 7) and its sweetspot has increased knockback (20 (base)/70 (scaling) → 40/80), improving its juggling potential.}} | ||
*{{buff|Roy has a new down aerial, a two-handed slash between his legs, similar to {{SSB4|Ike}}'s down aerial. Compared to the previous down aerial, it has more vertical range, its sweetspot is easier to land, and its sourspot is able to KO grounded opponents around 160%, making it better at KOing. Its increased damage output and the removal of [[Meteor smash#Meteor canceling|meteor canceling]] also make its meteor smash considerably stronger than the previous down aerial's.}} | *{{buff|Roy has a new down aerial, a two-handed downward slash between his legs, similar to {{SSB4|Ike}}'s down aerial. Compared to the previous down aerial, it has more vertical range, its sweetspot is easier to land, and its sourspot is able to KO grounded opponents around 160%, making it better at KOing. Its increased damage output and the removal of [[Meteor smash#Meteor canceling|meteor canceling]] also make its meteor smash considerably stronger than the previous down aerial's.}} | ||
*{{nerf|Down aerial has less diagonal range, comes out later, and its duration is | *{{nerf|Down aerial has less diagonal range, comes out later, and its duration is shorter (4 frames → 2) compared to the previous down aerial.}} | ||
*{{change|Down aerial has different knockback (40 (base)/70 (scaling) → 20/30 (base)/90 (scaling)) compared to the previous down aerial.}} | *{{change|Down aerial has different knockback (40 (base)/70 (scaling) → 20/30 (base)/90 (scaling)) compared to the previous down aerial.}} | ||
| Line 115: | Line 117: | ||
*{{nerf|Down throw deals 1% less damage (6% → 5%).}} | *{{nerf|Down throw deals 1% less damage (6% → 5%).}} | ||
*{{buff|Down throw's angle has been altered (361° → 80°), improving its combo potential.}} | *{{buff|Down throw's angle has been altered (361° → 80°), improving its combo potential.}} | ||
*{{change|The removal of [[chain grab]]bing both helps and hinders Roy. It results in him no longer being susceptible to chain grabs while his faster falling speed results in him no longer being susceptible to pseudo-chain grabs. However, it hinders his damaging racking potential.}} | *{{change|The removal of [[chain grab]]bing both helps and hinders Roy. It results in him no longer being susceptible to chain grabs, while his faster falling speed results in him no longer being susceptible to pseudo-chain grabs. However, it hinders his damaging racking potential.}} | ||
*{{buff|Front and back floor attacks deal 1% more damage (6% → 7%).}} | *{{buff|Front and back floor attacks deal 1% more damage (6% → 7%).}} | ||
===Special moves=== | ===Special moves=== | ||
*{{buff|[[Flare Blade]] can be charged up to deal more damage before the full charge without receiving recoil damage (41% → 45%). It also has increased interruptibility for a few frames upon its hitbox coming out, despite its ending lag.}} | *{{buff|[[Flare Blade]] can be charged up to deal more damage before the full charge without receiving recoil damage (41% → 45%). It also has increased interruptibility for a few frames upon its hitbox coming out, despite its ending lag.}} | ||
*{{nerf|Flare Blade has increased start-up lag, its duration is | *{{nerf|Flare Blade has increased start-up lag, its duration is shorter (6 frames → 4), a smaller hitbox, and its takes slightly more time to fully charge. It has also received a sourspot at the edges of the attack that deals 15% less damage (50% → 35%) and has less knockback scaling (83 → 70).}} | ||
*{{change|Flare Blade has updated visual and sound effects, the latter of which stops being emitted when fully charged and before the move's explosion. All of its stages now unleash a minor explosion, with most of the higher stages unleashing the large explosions from ''Melee''.}} | *{{change|Flare Blade has updated visual and sound effects, the latter of which stops being emitted when fully charged and before the move's explosion. All of its stages now unleash a minor explosion, with most of the higher stages unleashing the large explosions from ''Melee''.}} | ||
*{{change|Flare Blade's animation has slightly changed. Roy now briefly lifts the Sword of Seals with both hands to his | *{{change|Flare Blade's animation has slightly changed. Roy now briefly lifts the Sword of Seals with both hands to his side when returning to his neutral stance.}} | ||
*{{buff|[[Double-Edge Dance]] requires less technical precision. | *{{buff|[[Double-Edge Dance]] requires less technical precision. Additionally, every hit aside from its first and fourth downward hits have decreased start-up lag. Lastly, Double-Edge Dance's third downward hit no longer consists of multiple hits and launches at a lower trajectory, improving its reliability to connect with its fourth hit.}} | ||
*{{nerf|Double-Edge Dance deals less damage and knockback, has decreased vertical range and increased ending lag. Roy's | *{{nerf|Double-Edge Dance deals less damage and knockback, has decreased vertical range, and increased ending lag. Additionally, Roy's faster falling speed also significantly hinders its first hit's recovery potential. Lastly, its third upward hit is no longer a meteor smash, removing its KO potential.}} | ||
*{{change|Double-Edge Dance now has [[transcendent priority]]. This improves its reliability at close range, but removes its ability to cancel non-transcendent [[projectile]]s.}} | *{{change|Double-Edge Dance now has [[transcendent priority]]. This improves its reliability at close range, but removes its ability to cancel non-transcendent [[projectile]]s.}} | ||
*{{change|All variations of Double-Edge Dance's third hit connect together better with | *{{change|All variations of Double-Edge Dance's third hit connect together better with its fourth hit, improving their combo potentials. However, they have lost their KO potentials.}} | ||
*{{change|Double-Edge Dance's animation has changed. The slashes are now identical to | *{{change|Double-Edge Dance's animation has changed. The slashes are now identical to [[Dancing Blade]] from ''Brawl''.}} | ||
*{{buff|[[Blazer]] deals 2.82% more damage (13.18% → 16%) and its last hit has increased knockback (10 (base)/100 (scaling) → 40/130), improving its KO potential. | *{{buff|[[Blazer]] deals 2.82% more damage (13.18% → 16%) and its last hit has increased knockback (10 (base)/100 (scaling) → 40/130) and lasting hitboxes, improving its KO potential. Additionally, it received more intangibility frames on start-up if used from the ground and can be reversed before start-up, improving its safety. Lastly, it covers significantly more horizontal distance near its peak, improving its horizontal recovery potential.}} | ||
*{{nerf|Blazer | *{{nerf|Blazer covers less vertical distance, hindering its vertical recovery potential.}} | ||
*{{change|Blazer's first hit has significantly decreased set knockback (200 → 160/120). This allows every hit to connect together better, but removes its one-hit KO potential against the lightest characters.}} | *{{change|Blazer's first hit has significantly decreased set knockback (200 → 160/120). This allows every hit to connect together better, but removes its one-hit KO potential against the lightest characters.}} | ||
*{{change|Blazer's animation has slightly changed. Roy now performs the jumping slash while holding the Sword of Seals in a reverse grip.}} | *{{change|Blazer's animation has slightly changed. Roy now performs the jumping slash while holding the Sword of Seals in a reverse grip.}} | ||
*{{nerf|[[Counter]]'s damage multiplier has decreased (1.5x → 1.35x), | *{{nerf|[[Counter]]'s damage multiplier has decreased (1.5x → 1.35x), with its knockback not being properly compensated (30 (base)/90/70 (scaling) → 35 (base)/100/70 (scaling)). This hinders its KO potential, although it is still one of the strongest [[counterattack]]s in the game.}} | ||
*{{buff|Counter's duration is longer (13 frames → 19).}} | |||
*{{buff|Counter's animation has changed. Its counterattack now resembles Roy's long-ranged basic attack animation with the Sword of Seals in ''Fire Emblem: The Binding Blade''. Compared to the previous animation, its has more horizontal range.}} | *{{buff|Counter's animation has changed. Its counterattack now resembles Roy's long-ranged basic attack animation with the Sword of Seals in ''Fire Emblem: The Binding Blade''. Compared to the previous animation, its has more horizontal range.}} | ||
*{{change|Roy now has a [[Final Smash]], [[Critical Hit]]. Unlike Marth | *{{change|Roy now has a [[Final Smash]], [[Critical Hit]]. Unlike Marth and Lucina's Critical Hit, which propel them at a high speed in a straightforward line, Roy's Critical Hit is stationary and has him swing the Sword of Seals around himself, which can trap opponents, before performing a slash in front of himself that emits a short-ranged explosion. Unlike Marth and Lucina's Critical Hit, Roy's Critical Hit is not a [[one-hit KO]].}} | ||
==Update history== | ==Update history== | ||
| Line 142: | Line 144: | ||
'''{{GameIcon|ssb4}} [[1.1.0]]''' | '''{{GameIcon|ssb4}} [[1.1.0]]''' | ||
*{{buff|[[Blazer]] has received additional hitboxes.}} | *{{buff|[[Blazer]] has received additional hitboxes.}} | ||
*{{nerf|Blazer's first and last hits deal 1% less damage|6% (hit 1 sweetspot)/5% (hit 1 sourspot), 9% (hit 5 sweetspot)/8% (hit 5 sourspot)|5%/4%, 8%/7%, hindering its KO potential.}} | *{{nerf|Blazer's first and last hits deal 1% less damage|6.5% (hit 1 sweetspot)/5% (hit 1 sourspot), 9% (hit 5 sweetspot)/8% (hit 5 sourspot)|5.5%/4%, 8%/7%, hindering its KO potential.}} | ||
*{{change|{{GameIcon|ssb4-3ds}}Roy performs his down [[taunt]] instead of his fist pump [[idle pose]] after a player chooses a path in [[Classic Mode]].}} | *{{change|{{GameIcon|ssb4-3ds}}Roy performs his down [[taunt]] instead of his fist pump [[idle pose]] after a player chooses a path in [[Classic Mode]].}} | ||
| Line 153: | Line 155: | ||
|neutralname= | |neutralname= | ||
|neutralcount=1 | |neutralcount=1 | ||
|neutral1dmg=7.5% (sweetspot), | |neutral1dmg=7.5% (sweetspot), 4.8% (sourspot) | ||
|neutraldesc=A reversed gripped upward slice. Easily chains into itself, forward tilt and a grab at low percents, and his forward and up aerials at high percents. Starts at frame 5, making it a great tool for spacing, combos, and stopping approaches. Overall, it is one of Roy's most versatile attacks. | |neutraldesc=A reversed gripped upward slice. Easily chains into itself, forward tilt and a grab at low percents, and his forward and up aerials at high percents. Starts at frame 5, making it a great tool for spacing, combos, and stopping approaches. Overall, it is one of Roy's most versatile attacks. | ||
|ftiltname= | |ftiltname= | ||
|ftiltdmg=12.5% (sweetspot), 9% (near), 8% (far) | |ftiltdmg=12.5% (sweetspot), 9% (near), 8% (far) | ||
|ftiltdesc=A reverse gripped downward slash | |ftiltdesc=A reverse gripped downward slash. Very strong for a tilt attack, it usually KOs around 120% from center-stage when sweetspotted, making it a viable KO option. However, it has noticeable ending lag, making it punishable. The sweetspot is safe on shield if Roy does not directly touch the opponent's shield. | ||
|utiltname= | |utiltname= | ||
|utiltdmg=12% (sweetspot), 7% (sourspot) | |utiltdmg=12% (sweetspot), 7% (sourspot) | ||
|utiltdesc=A reverse gripped overhead arcing slash. Very strong like his forward tilt, it usually KOs around 110% when sweetspotted. However, it has rather low horizontal range and high ending lag, which | |utiltdesc=A reverse gripped overhead arcing slash. Very strong like his forward tilt, it usually KOs around 110% when sweetspotted. However, it has rather low horizontal range and high ending lag, which make it very punishable on shield. | ||
|dtiltname= | |dtiltname= | ||
|dtiltdmg=11% (sweetspot), 6.5% (sourspot) | |dtiltdmg=11% (sweetspot), 6.5% (sourspot) | ||
|dtiltdesc=A | |dtiltdesc=A kneeling thrust, identical to {{SSB4|Marth}} and {{SSB4|Lucina}}'s down tilts. Has the lowest amount of ending lag out of his tilt attacks, and is useful for [[shield stab]]bing, edgeguarding or starting [[Tech-chasing|tech-chases]] due to being a [[semi-spike]]. However, it has much less knockback growth than his other tilts. | ||
|dashname= | |dashname= | ||
|dashdmg=13% (sweetspot), 9% (sourspot) | |dashdmg=13% (sweetspot), 9% (sourspot) | ||
| Line 169: | Line 171: | ||
|fsmashname= | |fsmashname= | ||
|fsmashdmg={{ChargedSmashDmgSSB4|20}} (close), {{ChargedSmashDmgSSB4|17}} (mid), {{ChargedSmashDmgSSB4|12}} (far) | |fsmashdmg={{ChargedSmashDmgSSB4|20}} (close), {{ChargedSmashDmgSSB4|17}} (mid), {{ChargedSmashDmgSSB4|12}} (far) | ||
|fsmashdesc=Rotates his body to perform a lunging, two-handed downward slash. It is one of the strongest forward smashes in the game | |fsmashdesc=Rotates his body to perform a lunging, two-handed downward slash. It is one of the strongest forward smashes in the game when sweetspotted, as it can KO as low as 40% with [[rage]]. It also has very long disjointed range due to Roy lunging while performing it, and it comes out on frame 14, which is rather fast for a smash attack of its power. However, it has high ending lag and its hitbox does not last long, which make it very punishable when whiffed. | ||
|usmashname=Flame Sword | |usmashname=Flame Sword | ||
|usmashdmg={{ChargedSmashDmgSSB4|1}} (hit 1), {{ChargedSmashDmgSSB4|2}} (hits 2-4), {{ChargedSmashDmgSSB4|10}} (hit 5) | |usmashdmg={{ChargedSmashDmgSSB4|1}} (hit 1), {{ChargedSmashDmgSSB4|2}} (hits 2-4), {{ChargedSmashDmgSSB4|10}} (hit 5) | ||
|usmashdesc=An upward thrust, which ignites the Sword of Seals' tip and concludes with a small explosion. Powerful enough to KO middleweights around 100% while uncharged. Good for juggling opponents in the air, as Roy's arm | |usmashdesc=An upward thrust, which ignites the Sword of Seals' tip and concludes with a small explosion. Powerful enough to KO middleweights around 100% while uncharged. Good for juggling opponents in the air, as it grants intangibility to Roy's arm throughout its duration. If the initial portion of the thrust connects, the attack's multiple hits are much slower than if the opponent is only caught in the explosion. If it hits someone that is not on the ground (with all hits), it does additional damage and knockback. High ending lag like his other smash attacks. | ||
|dsmashname= | |dsmashname= | ||
|dsmashdmg={{ChargedSmashDmgSSB4|15}} (front sweetspot), {{ChargedSmashDmgSSB4|17}} (back sweetspot) {{ChargedSmashDmgSSB4|10}} (front sourspot), {{ChargedSmashDmgSSB4|11}} (back sourspot) | |dsmashdmg={{ChargedSmashDmgSSB4|15}} (front sweetspot), {{ChargedSmashDmgSSB4|17}} (back sweetspot) {{ChargedSmashDmgSSB4|10}} (front sourspot), {{ChargedSmashDmgSSB4|11}} (back sourspot) | ||
|dsmashdesc=A crouching outward slash in front of himself and then behind himself. Weaker than his other smash attacks, but it has the fastest | |dsmashdesc=A crouching outward slash in front of himself and then behind himself. Weaker than his other smash attacks, but it has the fastest start-up, and is useful for punishing rolls. Can KO uncharged around the 120% range if sweetspotted with the front hit, and around 100% sweetspotted with the back hit. While it has very quick start-up, it has the longest ending lag of all his smash attacks, which makes it very punishable when whiffed. | ||
|nairname= | |nairname= | ||
|nairdmg=6% (hit 1 sweetspot), 4% (hit 1 sourspot), 8.5% (hit 2 sweetspot), 5% (hit 2 sourspot) | |nairdmg=6% (hit 1 sweetspot), 4% (hit 1 sourspot), 8.5% (hit 2 sweetspot), 5% (hit 2 sourspot) | ||
|nairdesc=An inward horizontal slash followed by a spinning, outward horizontal slash. One of Roy's most useful spacing and combo options due to its quick | |nairdesc=An inward horizontal slash followed by a spinning, outward horizontal slash. One of Roy's most useful spacing and combo options due to its quick start-up, long-lasting hitbox, and low landing lag. The second hit is capable of attacking behind him, and the sourspot can catch opponents before he lands. The first hit is risky due to its short range, but it is a surprisingly effective combo starter. Very useful for KO set-ups at high percents, as landing the first hit can lead into an up tilt, up smash, or [[Blazer]]. | ||
|fairname= | |fairname= | ||
|fairdmg=11% (sweetspot), 7% (sourspot) | |fairdmg=11% (sweetspot), 7% (sourspot) | ||
|fairdesc=A downward slash. | |fairdesc=A downward slash. It is fairly strong when sweetspotted, as it can KO opponents reliably while on-stage and especially off-stage. Good for air-to-air combat because of its low ending lag. It is possible to jump out of one from a short hop, and it can be used twice before landing from a jump. If performed fast enough, it can combo into itself when using his double jump. | ||
|bairname= | |bairname= | ||
|bairdmg=12% (sweetspot), 9% (sourspot) | |bairdmg=12% (sweetspot), 9% (sourspot) | ||
|bairdesc=Rotates his body to perform an upward slice. | |bairdesc=Rotates his body to perform an upward slice. It is stronger than forward aerial, and can KO opponents reliably while on-stage and especially off-stage. Covers good vertical and horizontal range. Like with Marth and Lucina's back aerials, it turns Roy around when used. Unlike their back aerials, however, its sourspot can [[lock]] opponents at medium percents if they miss a tech. | ||
|uairname= | |uairname= | ||
|uairdmg=9% (sweetspot), 6% (sourspot) | |uairdmg=9% (sweetspot), 6% (sourspot) | ||
|uairdesc=A backflipping, upward arcing slash. The weakest of Roy's aerials in terms of damage and knockback, but | |uairdesc=A backflipping, upward arcing slash. The weakest of Roy's aerials in terms of damage and knockback, but it is his fastest one, due to it coing out on frame 5. Its large arc and speed also make it suitable for juggling and/or combos, as it is able to follow up with most of his grounded attacks at low percents while he is falling, and into his aerials at high percents. Its sourspot also has a long duration, which allows it to function as a KO set-up. | ||
|dairname= | |dairname= | ||
|dairdmg=15% (sweetspot), 10% (sourspot) | |dairdmg=15% (sweetspot), 10% (sourspot) | ||
|dairdesc=A | |dairdesc=A two-handed, downward slash between his legs, similar to {{SSB4|Ike}}'s down aerial. It has a powerful [[meteor smash]] hitbox near the Sword of Seals' hilt, while the rest of its blade launches opponents upward. KOs around 130% when sweetspotted on-stage. However, it has considerable ending and landing lag, which makes it risky to use off-stage, especially due to Roy's falling speed. | ||
|grabname= | |grabname= | ||
|grabdesc=Reaches out with his free hand. | |grabdesc=Reaches out with his free hand. | ||
| Line 198: | Line 200: | ||
|fthrowname= | |fthrowname= | ||
|fthrowdmg=5% | |fthrowdmg=5% | ||
|fthrowdesc=Spins and flings the opponent forward. Has low ending lag and low knockback, which allow it to combo into a neutral attack or forward tilt at low percents, and a dash attack at medium percents. It can also potentially combo into a dashing up smash if the opponent does not react in time and works very well as a set-up for a neutral aerial, which, when hit, can chain into even more combos. At higher percents it | |fthrowdesc=Spins and flings the opponent forward. Has low ending lag and low knockback, which allow it to combo into a neutral attack or forward tilt at low percents, and a dash attack at medium percents. It can also potentially combo into a dashing up smash if the opponent does not react in time, and works very well as a set-up for a neutral aerial, which, when hit, can chain into even more combos. At higher percents, it is also able to set up a tech-chase. | ||
|bthrowname= | |bthrowname= | ||
|bthrowdmg=5% | |bthrowdmg=5% | ||
| Line 204: | Line 206: | ||
|uthrowname= | |uthrowname= | ||
|uthrowdmg=6% | |uthrowdmg=6% | ||
|uthrowdesc=Heaves the opponent upward with his free hand. Like Marth | |uthrowdesc=Heaves the opponent upward with his free hand. Like Marth and Lucina's up throws, it is Roy's only throw with KO potential, as it starts KOing around 170%. | ||
|dthrowname= | |dthrowname= | ||
|dthrowdmg=5% | |dthrowdmg=5% | ||
| Line 216: | Line 218: | ||
|floortname= | |floortname= | ||
|floortdmg=5% | |floortdmg=5% | ||
|floortdesc=Hops briskly to his feet | |floortdesc=Hops briskly to his feet to perform a thrust to the left and a slash to the right. | ||
|edgename= | |edgename= | ||
|edgedmg=8% | |edgedmg=8% | ||
| Line 222: | Line 224: | ||
|nsdefname=Flare Blade | |nsdefname=Flare Blade | ||
|nsdefdmg=6%-45%, 50% (fully charged sweetspot), 36% (fully charged sourspot) | |nsdefdmg=6%-45%, 50% (fully charged sweetspot), 36% (fully charged sourspot) | ||
|nsdefdesc=Rears back and ignites the Sword of Seals' blade before performing a lunging two-handed downward slash | |nsdefdesc=Rears back and ignites the Sword of Seals' blade before performing a lunging, two-handed downward slash that generates an explosion. Functions similarly to [[Eruption]], as it can be charged before unleashing the explosion, with the explosion's size growing as it charges. It has very high knockback growth while uncharged, and the ability to quickly increase its damage output via charging. When fully charged, it is capable of [[one-hit KO]]ing all but {{SSB4|Shulk}} with the [[Monado Arts|Shield Art]] active and {{SSB4|Bowser}} from center-stage. To further supplement its power, it has surprisingly minimal ending lag, as Roy is able to act out of it almost immediately. However, a fully charged explosion deals 10% [[recoil damage]]. The fully charged explosion also has a sourspot at its edges that deals much less damage and knockback and is not a OHKO, though it is still powerful enough to KO at 41%. It is possibly Roy's best option to use to punish a [[stun]]ned opponent because of its OHKO potential when fully charged, especially considering Roy's good shield pressuring potential. | ||
|nsc1name=N/A | |nsc1name=N/A | ||
|nsc1dmg= | |nsc1dmg= | ||
| Line 231: | Line 233: | ||
|ssdefname=Double-Edge Dance | |ssdefname=Double-Edge Dance | ||
|ssdefdmg=3%-5% (first hit), 2%-3% (second forward hit), 2%-3% (second upward hit), 1%-3% (second downward hit), 2%-3% (third forward hit), 3% (third upward hit), 4% (third downward hit), 6% (last forward hit), 5% (last upward hit), 2% (last downward hits 1-4), 6% (last downward hit 5) | |ssdefdmg=3%-5% (first hit), 2%-3% (second forward hit), 2%-3% (second upward hit), 1%-3% (second downward hit), 2%-3% (third forward hit), 3% (third upward hit), 4% (third downward hit), 6% (last forward hit), 5% (last upward hit), 2% (last downward hits 1-4), 6% (last downward hit 5) | ||
|ssdefdesc=A combination of sword swings, which can be influenced by directional inputs. The finishing swing is one of three options: an upward slice with good KO power at high percents but low range (tilting the control stick up), a downward slash with good KO power at high percents near the edge (no control stick input or tilting the control stick forward), or a flurry of low-angled thrusts that deal the most amount of damage but the least amount of knockback (tilting the control stick down). Its animations are identical to [[Dancing Blade]] and its first hit stalls Roy's descent, although it is largely ineffective for recovery due to his falling speed being much faster than Marth | |ssdefdesc=A combination of sword swings, which can be influenced by directional inputs. The finishing swing is one of three options: an upward slice with good KO power at high percents but low range (tilting the control stick up), a downward slash with good KO power at high percents near the edge (no control stick input or tilting the control stick forward), or a flurry of low-angled thrusts that deal the most amount of damage but the least amount of knockback (tilting the control stick down). Its animations are identical to [[Dancing Blade]] and its first hit stalls Roy's descent, although it is largely ineffective for recovery due to his falling speed being much faster than Marth and Lucina's. However, its overall knockback is slightly stronger than Dancing Blade, and the last hit of each variation deals [[flame]] damage unlike Dancing Blade due to the Sword of Seals' blade igniting. | ||
|ssc1name=N/A | |ssc1name=N/A | ||
|ssc1dmg= | |ssc1dmg= | ||
| Line 239: | Line 241: | ||
|ssc2desc= | |ssc2desc= | ||
|usdefname=Blazer | |usdefname=Blazer | ||
|usdefdmg=5% (hit 1 sweetspot), 4% (hit 1 sourspot), 1% (hits 2-4), 8% (hit 5 sweetspot), 7% (hit 5 sourspot) | |usdefdmg=5.5% (grounded hit 1 sweetspot), 4% (grounded hit 1 sourspot), 4.5% (aerial hit 1), 1.1% (grounded hits 2-4), 1% (aerial hits 2-4), 8% (hit 5 sweetspot), 7% (hit 5 sourspot), 6% (aerial hit 5) | ||
|usdefdesc=A jumping reverse gripped slash, which ignites the Sword of Seals' blade. Hits multiple times and can be angled diagonally, though this causes the slash to cover less vertical distance. | |usdefdesc=A jumping reverse gripped slash, which ignites the Sword of Seals' blade. Hits multiple times and can be angled diagonally, though this causes the slash to cover less vertical distance. A viable [[out of shield]] and KOing option, its grounded version is more powerful, as it KOs around 110% if all hits connect. Its grounded version also grants super armor at its beginning. However, it is a sub-par recovery option, due to it covering decent horizontal distance, but very minimal vertical distance. | ||
|usc1name=N/A | |usc1name=N/A | ||
|usc1dmg= | |usc1dmg= | ||
| Line 249: | Line 251: | ||
|dsdefname=Counter | |dsdefname=Counter | ||
|dsdefdmg=1.35x (min 8%) | |dsdefdmg=1.35x (min 8%) | ||
|dsdefdesc=[[fireemblemwiki:Counter|Parries and then | |dsdefdesc=[[fireemblemwiki:Counter|Parries]] and then [[counterattack]]s against any incoming attacks with an outward slash that ignites the Sword of Seals' blade. It has the highest damage multiplier of any counterattack in the game by default, with only [[Vision]] surpassing it while the [[Monado Arts|Buster Art]] is active. However, its counter window is relatively short, and it is tied with [[Double Team]] for having the third highest amount of start-up lag out of every counterattack in the game. Roy may also say "{{ja|いまだ!|Imada!}}" (''"Now!"'') or "{{ja|そこ!|Soko!}}" (''"There!"'') if successful. | ||
|dsc1name=N/A | |dsc1name=N/A | ||
|dsc1dmg= | |dsc1dmg= | ||
| Line 258: | Line 260: | ||
|fsname=Critical Hit | |fsname=Critical Hit | ||
|fsdmg=1% (hits 1-10), 35% (hit 11) | |fsdmg=1% (hits 1-10), 35% (hit 11) | ||
|fsdesc=Swings the Sword of Seals in a | |fsdesc=Swings the Sword of Seals in a circular motion, which ignites its blade, before performing a two-handed, downward slash that generates a powerful explosion. Unlike Marth and Lucina's Critical Hit, Roy's is not a one-hit KO. The circular swing can connect up to four times from the front, though it can hit up to ten times if performed on an opponent behind Roy. | ||
}} | }} | ||
===[[On-screen appearance]]=== | ===[[On-screen appearance]]=== | ||
{{appearance | {{appearance | ||
|desc=Warps onto the stage using [[fireemblemwiki:Warp (staff)|warp magic]] while crouching, with the Sword of Seals stuck in the ground when he appears. He then pulls it out with a flourish before assuming his idle stance | |desc=Warps onto the stage using [[fireemblemwiki:Warp (staff)|warp magic]] while crouching, with the Sword of Seals stuck in the ground when he appears. He then pulls it out with a flourish before assuming his idle stance. | ||
|char=Roy | |char=Roy | ||
|game=SSB4}} | |game=SSB4}} | ||
| Line 303: | Line 305: | ||
====Active==== | ====Active==== | ||
*{{Sm|CloudY|Mexico}} - The best Roy player in Mexico. | *{{Sm|CloudY|Mexico}} - The best Roy player in Mexico. | ||
*{{Sm| | *{{Sm|Hyper Kirby|USA}} - The best Roy player in the world. | ||
*{{Sm|Lunchables|USA}} | *{{Sm|Lunchables|USA}} | ||
*{{Sm|Onies|Japan}} - The best Roy player in Japan. | *{{Sm|Onies|Japan}} - The best Roy player in Japan. | ||
*{{Sm|Serew|Netherlands}} - The best Roy player in the Netherlands. | *{{Sm|Serew|Netherlands}} - The best Roy player in the Netherlands. | ||
*{{Sm|Sethlon|USA}} | *{{Sm|Sethlon|USA}} - Placed 17th at [[Low Tier City 4]] and 65th at [[Super Smash Con 2016]]. | ||
*{{Sm|TheFlow|France}} - The best Roy player in France. | *{{Sm|TheFlow|France}} - The best Roy player in France. | ||
====Inactive==== | ====Inactive==== | ||
*{{Sm|BlueLink|Italy}} - Formerly ranked 1st on the [[Italian Power Rankings]]. | *{{Sm|BlueLink|Italy}} - Formerly ranked 1st on the [[Italian Power Rankings]] prior to his retirement. | ||
*{{Sm|Neath|France}} - | *{{Sm|Manny}} - Placed 7th at [[Frame Perfect Series]] and 9th at [[Shine 2016]]. | ||
*{{Sm|NEO|USA}} - | *{{Sm|Neath|France}} - The best Roy player in France prior to switching to {{SSB4|Diddy Kong}}. | ||
*{{Sm|Ryo|USA}} - | *{{Sm|NEO|USA}} - Formerly ranked 5th on the [[MD/VA Power Rankings]] prior to his retirement. | ||
*{{Sm|Ryo|USA}} - Placed 9th at Super Smash Con 2016, 33rd at [[2GGT: ZeRo Saga]], and 49th at [[GENESIS 4]]. He also helped advance Roy's metagame. | |||
===Tier placement and history=== | ===Tier placement and history=== | ||
Roy's initial perception among the community was very positive; players almost immediately recognized his powerful offense due to the prominent strengths of his sweetspotted attacks, heavily damaging throw set-ups, and significantly improved mobility. These views were especially noted because his semi-clone, {{SSB4|Marth}}, | Roy's initial perception among the community was very positive; players almost immediately recognized his powerful offense due to the prominent strengths of his sweetspotted attacks, heavily damaging throw set-ups, and significantly improved mobility. These views were especially noted because his semi-clone, {{SSB4|Marth}}, and by extension {{SSB4|Lucina}}, were considered poor characters at the time. Despite his extremely low representation, which is unseen of a perceived high-tier character, most of the community believed that Roy was a viable character, with {{Sm|ZeRo}} notably going as far as saying he was the best sword-wielding character in the game. Even so, his viability was also disputed due to his sparse tournament representation and results. Furthermore, characters considered worse than him received a variety of buffs in later updates, with a corresponding increase in tournament results and representation than Roy, while his weaknesses were made much more apparent to the community. As such, opinions on Roy quickly started to change due to his vulnerability to combos, weak recovery, and how his playstyle requires him to use close-ranged combat despite his ineffective approach and unimpressive range. In spite of these flaws and his sparse representation and results, Roy was ranked 32nd on the first [[tier list]], placing him at the top of the low-tier. | ||
However, update [[1.1.4]] granted Marth and Lucina major buffs that significantly increased their effectiveness, while Roy only gained minor landing lag decreases to his aerials. This resulted in them, especially Marth, achieving improved results from professionals and saw their opinions reassessed as those of a high-tier and a mid-tier character, respectively. Conversely, Roy remained a low-tier character due to the minimal effectiveness of his buffs from update 1.1.4. His position relative to the cast was still disputed; some professionals like ZeRo reconsidered him to be on the lower | However, update [[1.1.4]] granted Marth and Lucina major buffs that significantly increased their effectiveness, while Roy only gained minor landing lag decreases to his aerials. This resulted in them, especially Marth, achieving improved results from professionals and saw their opinions reassessed as those of a high-tier and a mid-tier character, respectively. Conversely, Roy remained a low-tier character due to the minimal effectiveness of his buffs from update 1.1.4. His position relative to the cast was still disputed; some professionals like ZeRo reconsidered him to be on the lower portion of the mid-tier, whereas others like {{Sm|Abadango}} considered him one of the worst characters in the game. | ||
In spite of his sparse tournament representation, he received some results from the few professionals who do main him. The biggest upset occurred at [[Super Smash Con 2016]], where {{Sm|Ryo}} went on a two-game win streak while using Roy against Abadango's {{SSB4|Mewtwo}}. Although Abadango would defeat Ryo in their third match by counterpicking with {{SSB4|Rosalina & Luma}}, he only did so narrowly. These results, however, were not enough to repair Roy's negative perception, and subsequently saw Roy being ranked 50th on the second tier list, placing him at the bottom of the low-tier. | |||
Despite this, three Roy players ({{Sm|Manny}}, {{Sm|VoiD}} and {{Sm|ScAtt}}) managed to place 4th, 7th and 25th, respectively, at [[Smash the Record 2016]], with the former two having played against each other in a Roy ditto. Ryo also managed to achieve better results with Roy. When coupled with Ryo's previous feat at Super Smash Con, Roy was ranked 44th on the third and current tier list, placing him in the upper portion of the low-tier. | |||
Overall, Roy's standing relative to the cast remains among the most divisive and debatable of the entire cast. While his tier placement is still slightly contested to this day due to his polarized strengths and weaknesses, many players agree that Roy could be ranked higher in future tier lists. | |||
==Trophies== | ==Trophies== | ||
| Line 337: | Line 344: | ||
:'''Critical Hit''' | :'''Critical Hit''' | ||
::{{flag|ntsc}} ''For | ::{{flag|ntsc}} ''For Roy's Final Smash, he traps enemies in a circular swing of the blade, brings it up behind him, and then, in a blast of fire, brings the blade down for a powerful finisher! The downward attack is powerful on its own but doesn't have much range, so make sure you’re close enough to hit your enemies with the full combo and really seal their fate!'' | ||
::{{flag|pal}} ''For | ::{{flag|pal}} ''For Roy's Final Smash, he traps enemies in a circular swing of the blade, brings it up behind him, and then, in a blast of fire, brings the blade down for a powerful finisher! The downward attack is powerful on its own but doesn't have much range, so make sure you’re close enough to hit your enemies with the full combo and really seal their fate!'' | ||
<center> | <center> | ||
<gallery> | <gallery> | ||
| Line 379: | Line 386: | ||
Roy Screen-6.jpg|Alongside {{SSB4|Zero Suit Samus}} and {{SSB4|Wii Fit Trainer}}. | Roy Screen-6.jpg|Alongside {{SSB4|Zero Suit Samus}} and {{SSB4|Wii Fit Trainer}}. | ||
Roy Screen-7.jpg|Using [[Flare Blade]] on {{SSB4|Link}}. | Roy Screen-7.jpg|Using [[Flare Blade]] on {{SSB4|Link}}. | ||
Roy Screen-8.jpg|All of Roy's alternate | Roy Screen-8.jpg|All of Roy's [[alternate costume]]s. | ||
Roy Screen-9.jpg|Using Double-Edge Dance's last forward hit on [[Rosalina & Luma (SSB4)|Rosalina]] and {{SSB4|Yoshi}}. | Roy Screen-9.jpg|Using Double-Edge Dance's last forward hit on [[Rosalina & Luma (SSB4)|Rosalina]] and {{SSB4|Yoshi}}. | ||
Roy Screen-10.jpg|Using his up taunt alongside male and female {{SSB4|Robin}}. | Roy Screen-10.jpg|Using his up taunt alongside male and female {{SSB4|Robin}}. | ||
| Line 399: | Line 406: | ||
*Roy, {{SSB4|Marth}}, and {{SSB4|Cloud}} are the only characters to speak Japanese in every regional release of ''SSB4''. | *Roy, {{SSB4|Marth}}, and {{SSB4|Cloud}} are the only characters to speak Japanese in every regional release of ''SSB4''. | ||
*Like Marth in his transition from ''Melee'' to ''Brawl'', Roy's first and third [[victory pose]]s have swapped quotes. | *Like Marth in his transition from ''Melee'' to ''Brawl'', Roy's first and third [[victory pose]]s have swapped quotes. | ||
*If Roy's [[on-screen appearance]] occurs on one of | *If Roy's [[on-screen appearance]] occurs on one of [[Distant Planet]]'s leaf [[platform]]s, he will descend with the leaf, but the Sword of Seals will remain stationary in the air until it returns to Roy once the battle actually starts. | ||
<!--If you're gonna write something about the Roy/Roy Koopa or Superspicy Curry references in the trailer, don't, because they are already on the SSB4 trailers page--> | <!--If you're gonna write something about the Roy/Roy Koopa or Superspicy Curry references in the trailer, don't, because they are already on the SSB4 trailers page--> | ||
Revision as of 02:06, May 11, 2017
| Roy in Super Smash Bros. 4 | |
|---|---|
 
| |
| Universe | Fire Emblem |
| Other playable appearance | in Melee |
| Availability | Downloadable |
| Final Smash | Critical Hit |
| Tier | E (44) |
| “ | Roy Seals the Deal! | ” |
| —Introduction tagline | ||
Roy (ロイ, Roy) is a playable character in Super Smash Bros. 4. Initially leaked via data mining of update 1.0.6,[1] Roy was formally revealed after Lucas and released alongside him and Ryu on June 14th, 2015,[2] making him the third downloadable character released and the final downloadable veteran. Jun Fukuyama reprises his role as Roy's voice actor, and provides new voice clips that mimic the ones he recorded in Super Smash Bros. Melee.
Roy is currently ranked 44th out of 58 on the tier list, placing him in the E tier and making him the lowest ranking DLC character. This is a noticeable improvement from his placement in Melee, where he was ranked 20th out of 26. Two of Roy's greatest perks are his overall mobility and attack speed: his ground and air speeds are among the fastest in the game, and a few of his key attacks also boast quick start-up overall, which collectively allow him to react quickly to an opponent's openings. These traits also complement the Sword of Seals' inverse tipper, which consists of large sweetspots near its hilt that deal impressive damage and knockback at close range, and thus grant him a number of highly potent KOing options. Roy also benefits from gameplay changes brought about by SSB4: the rage mechanic supplements his potent sweetspotted attacks, while the updated edge mechanics improve his recovery.
Roy's also boasts an impressively varied combo game: his neutral attack, neutral aerial's first hit, forward throw, down throw and falling up aerial are reliable combo starters, his down tilt and forward throw can initiate tech-chases, and Double-Edge Dance is useful for damage racking. When coupled with the power of his sweetspotted attacks, most of which are capable of KOing at reasonable percents, Roy's combo game is generally very rewarding when successfully performed.
However, Roy has noticeable weaknesses. Despite his overall fast mobility, Roy has an ineffective approach: his grounded approach has worsened due to the removal of wavedashing and L-canceling, while his aerial approach is burdened by his very slow air acceleration and his aerials' high commitment and inability to autocancel with a short hop. In addition, Roy is oddly ineffective at spacing for a swordsman: although the Sword of Seals' inverse tipper grants it powerful sweetspots, it is only rewarding at close range, as its sourspots are much weaker in comparison.
Although Roy's combo game is potent, it does have its limits. His throw-initiated combos are inconsistent due to his throws' low hitstun, while his overall combo game starts to become inconsistent at medium percentages, largely due to the knockback of his sweetspotted moves being too high to allow follow-ups. This makes him heavily reliant on reads and thus gives him few KO set-ups aside from his neutral attack and neutral aerial at high percents. Lastly, Roy suffers from a poor recovery: Blazer's predictability and low vertical distance makes him vulnerable to semi-spikes, which is further compounded by his very quick falling speed also making him very susceptible to combos.
Overall, Roy is a "high-risk, high-reward" character who relies on using his speed to find openings before converging into highly damaging, close-ranged combos, all while walling opponents out with his fast attacks. However, he has to be more committal in comparison to other sword characters, forcing the player to limit his approaches without being overly aggressive. While Roy has improved overall since Melee, buffs to several other veterans have also allowed them to fare better in the metagame in comparison. Due to these factors, Roy has below average tournament representation, although he has achieved some degree of competitive success, thanks to the efforts of Hyper Kirby.
Attributes

Unlike in Melee, Roy is a semi-clone of Marth, and he now possesses an individualized playstyle thanks to certain mechanical differences. The most notable of these differences is his inverse tipper: the Sword of Seals deals more damage and knockback near its hilt, and much less at its blade's tip. However, the Sword of Seals also boasts two other distinct traits: its inverse tipper is much larger than Falchion's tipper, and most of its attacks are less polarizing than Falchion's due to their possession of an additional hitbox that is between both its sweetspot and sourspot. Like Marth, Roy is a middleweight and has above average walking speed, but his other attributes noticeably differ: he has the eleventh fastest dashing speed, the fourth fastest air speed, and the fifth fastest falling speed, which collectively make his mobility faster than Marth's. Like Marth, Roy has an effective extended dash-dance, which allows him to read and punish opponents accordingly. However, Roy is tied for the longest initial dash animation (17 frames), giving him a poor shield buffer out of his dash. His air acceleration is also among the slowest in the game: this not only forces him to commit to any aerial approaches, but also makes his aerial mobility significantly less fluid compared to Marth's, whose air acceleration allows him to easily use retreating aerials.
The majority of Roy's attacks have quick start-up, and his overall fast mobility allows him to easily get close to an opponent. By extension, his ability to easily close the gap between himself and his opponent allows him to use his inverse tipper effectively. Once Roy finds an opening, he has several ways to rack up damage. His neutral aerial is perhaps his most versatile move, thanks to its quick start-up, low landing lag, long-lasting hitbox, and utility as a combo starter. His neutral attack is also quick and can easily lead into other moves, such as his throws and tilt attacks. His down and forward throws launch opponents at favorable angles and thus open up combo opportunities for his neutral attack, dash attack, forward tilt, neutral aerial, and Double-Edge Dance. His down tilt is also a good spacing option, and is useful for shield stabbing.
Roy also boasts an array of KOing options, with many of his sweetspotted attacks capable of KOing below 130%. While on-stage, his best KOing options are his forward and up tilts, forward and up smashes, and Blazer, due to their quick start-up and high power. Although Roy's offense thrives while he is on-stage, his fast air speed and disjointed range grant him an effective off-stage presence. His forward, back and down aerials are easily capable of KOing, yet they also possess particular strengths: the former two are quick and have wide arcs, while the latter is capable of meteor smashing. Although he is a middleweight, Roy's very quick falling speed grants him impressive on-stage endurance, which and he can make great use of rage, which further enhances the knockback of his already powerful moves.
Each of Roy's special moves possess respectable utility. Flare Blade is a deadly edgeguarding option, especially while on-stage, thanks to its charging ability, overall high power, large hitbox, and deceptively low ending lag. Double-Edge Dance is effective for damage racking, while its final upward and forward hits can KO outright. In addition to its KO potential, Blazer is an excellent out of shield option that grants super armor on start-up, can stage spike careless opponents who attempt to edgeguard him, and can be a true combo from his neutral attack at specific percents. Lastly, his Counter is one of the strongest counterattacks in the game, as its 1.35x damage multiplier makes it devastating when used against a powerful attack.
However, Roy is hindered by a slew of flaws. While his inverse tipper is one of his greatest strengths, it also forces him to fight at close range in order to be utilized to its fullest. This is further compounded by his range being decidedly short for a swordsman, as resulting in a whiffed move on Roy's part leaving him open to punishment, while also not being as effective as spacing opponents as other sword-wielding characters. He also can have trouble approaching despite his good mobility, since his neutral aerial is his only quick option to use in order close in and pressure the opponent. Roy's very fast air speed is also offset by his very slow air acceleration, which makes his aerial approach highly committal in general, much like Ryu's.
Although Roy's combo game is very potent at low percents, it will become inconsistent beginning at medium percents. Unlike Marth, Roy's sourspots are not as reliable at creating combos: while they are still possible to perform, his sourspots require a lot of emphasis on precision and can quickly lose their effectiveness. The high ending lag of Roy's moves and the low hitstun of his forward and down throws collectively hinder Roy by opening holes in his combo game due to them occasionally making it so that he has to attempt to read what his opponent will do. His forward throw is also burdened by the fact that most opponents can reliably tech out of its follow-ups.
Roy's recovery is also ineffective despite his impressive mobility. Although Blazer offers excellent protection, can be angled, and covers a decent amount of horizontal distance, it covers little vertical distance and is predictable. When coupled with his very quick falling speed, he is highly susceptible to meteor smashes, and even a sufficiently strong semi-spike can launch him too far away to recover. Additionally, players unaccustomed to his falling speed will quickly find that any misused aerial off-stage will send him too far off-stage to recover.
Roy's very quick falling speed also makes him very susceptible to combos. His unsafe moves offer opponents many opportunities to punish him, and none of his moves are generally reliable enough to consistently break combos. Because of this, many characters with reliable combo moves can rack up large amounts of damage and easily force him off-stage, where he could potentially be KO'd if dealt with accordingly. Lastly, Roy does not have any custom moves due to being a DLC character. As such, he must not only utilize his own special moves properly, but also adapt as best as possible against characters that possess their own custom moves.
Overall, Roy's strengths are on par with his weaknesses. While his character archetype is commonly viewed as being in the rushdown and/or glass cannon categories, his cannot effectively function in either role due to his poor recovery, unimpressive range for a swordsman, and vulnerability to combos. Instead, his optimal playstyle consists of limited aggression, playing around an opponent's shields and reactions using his excellent mobility, and capitalizing on openings with his strong combo game and potent KOing options. As a result of these traits, Roy has sparse tournament representation and results at high-level play, although he has nevertheless achieved some competitive success, thanks to players such as Hyper Kirby.
Changes from Melee
Roy is frequently placed within a group of characters (Bowser, Dr. Mario, Charizard, King Dedede and Pit) that are the most noticeably reworked veterans in SSB4. In Roy's case, several of his moves were de-cloned from Marth, to the point that he is now a semi-clone. Although Roy received a mix of buffs and nerfs in the transition from Melee to SSB4, he has overall been buffed.
Among Roy's buffs are his greatly improved mobility, now having a faster dashing speed and one of the fastest air speeds in the game, as well as his moveset being notably more rewarding than in Melee: most of his moves are different from Marth, such as his new neutral attack, forward and up tilts, dash attack and down aerial, all of which improve his close-ranged offense and combo game, and many of which are more reliable KO moves. His damage output is higher, and his sweetspotted attacks are considerably more powerful, giving him a bevy of new KOing options, which generally alleviates his main weakness from Melee. His attack speed is faster overall, with his aerials in particular having significantly reduced ending and landing lag, L-canceling notwithstanding. The addition of rage boosts his KO power even further, while his heavier weight allows him to use it quite effectively. Lastly, Roy's recovery is generally better, thanks to Blazer's improved horizontal distance, his faster air speed, and the introduction of edge trumping.
However, Roy has also received several nerfs. Roy now stands at Marth's height, which enlarges his hurtbox, though his attacks have much shorter ranges and hitbox durations in spite of this, forcing him to fight at a much closer range, exacerbating one of his key weaknesses in Melee. For the most part, Roy is also harmed by the post-Melee gameplay changes: the loss of wavedashing and L-canceling, as well as the weakening of dash-dancing, noticeably worsen his approach. The general increase in range for other characters since Melee, such as with Donkey Kong and Bowser, also indirectly hurts him. Double-Edge Dance's first hit has almost completely lost its ability to stall his descent due to his faster falling speed, which hurts his recovery despite its improvements. Lastly, Roy's heavier weight makes him easy to combo despite falling speeds being slower in SSB4 than they were in Melee.
Overall, Roy's strengths are much more pronounced than in Melee, though he retains most of the same weaknesses as well. While his sweetspotted attacks are considerably more rewarding, he still has to fight up close in order to rack up damage, while his sub-par survivability makes his playstyle risky. Despite Roy having been buffed overall, other veterans were also buffed to varying degrees, which downplays his strengths in SSB4's metagame.
Aesthetics
 Roy's design is now a combination of his appearance as a Great Lord in Fire Emblem: The Binding Blade and his appearance as an Einherjar in Fire Emblem Awakening. Additionally, he has slightly smaller eyes, a slightly more muscular physique, and slightly shorter hair. Lastly, he is more expressive overall, as now he scowls and/or sternly clenches his teeth during some attacks.
- The Sword of Seals' trail now clearly indicates its sweetspot's location, similarly to Falchion.
- Roy now swings the Sword of Seals in a reverse grip or with both hands, except for any attack animations retained from Marth, such as down tilt or up aerial. As a result, the Sword of Seals now aesthetically functions as a heavier sword compared to Falchion and the Parallel Falchion, which appear to be swung with less effort.
- Roy now has an on-screen appearance, an up taunt, and a down taunt.
- Roy now has unique idle poses, rather than variations of Marth's. However, he has the same stance as Marth while holding a light item.
- Jump, sidestep, and shield break's animations have changed.
Attributes
 Roy is taller, as he now stands at Marth's height. This makes his hurtbox larger. While this would also improve his overall range, this is largely mitigated by the aforementioned alterations to his sword swings making many of his attacks having smaller hitboxes and altered hitbox placements.
- Roy is heavier (85 → 95). This improves his endurance, but makes him more susceptible to combos.
- Roy walks slower (1.2 → 1.15).
 Roy dashes faster (1.61 → 1.95).
- Roy's air speed is faster (0.9 → 1.24).
- Roy falls slower (2.4 → 1.8), although he still has the fifth fastest falling speed in the game.
- The removal of wavedashing and L-canceling and the weakening of dash-dancing have hindered Roy's neutral and approach games.
Ground attacks
- Roy has a new neutral attack, a reverse gripped upward slice. Compared to the previous neutral attack, it deals more damage (3%/5%/6% → 4.8%/7.5%/7.5%) and base knockback (30/5 → 40/32), has less ending lag (interruptibility frame 26 → 23) and has a different angle (361° → 62°/32°). Altogether, these traits make it better for combos.
- Neutral attack has more start-up lag and its duration is shorter (5 frames → 3) compared to the previous neutral attack.
- Roy has a new forward tilt, a reverse gripped downward slash. Compared to the previous forward tilt, it deals more damage (12%/10%/7% → 12.5%/9%/8%) and knockback (60/30 (base)/70 (scaling) → 30/40 (base)/100/80 (scaling)) and has less start-up (frame 9 → 8) and ending lag (interruptibility frame 40 → 32). Altogether, these traits making it better for KOing.
- Forward tilt's duration is shorter (5 frames → 3) than the previous forward tilt's.
- Roy has a new up tilt, a reverse gripped overhead arcing slash. Compared to the previous up tilt, it deals more damage (6%/8%/9%/10% → 7%/12%), making it much stronger than the previous up tilt despite having less knockback scaling (120/118/116/100 → 103). It also has less start-up (frame 7 → 6) and ending lag (interruptibility frame 40 → 39) and its sourspot has more base knockback (20 → 30). Altogether, these traits make it better for KOing and combos.
- Up tilt's duration is shorter (7 frames → 5) than the previous up tilt's.
- Sweetspotted down tilt deals 1% less damage (12% → 11%).
- Sourspotted down tilt deals 0.5% more damage (6% → 6.5%).
- Down tilt has decreased start-up lag (frame 8 → 7).
- Down tilt has decreased base knockback (90/70 → 50/40), increased ending lag (interruptibility frame 20 → 22) and its duration is shorter (3 frames → 2).
- Down tilt is now a semi-spike (80° → 30°). This improves its edgeguard and tech-chase potentials, but significantly hinders its combo potential.
- Roy has a new dash attack, an inward horizontal slash. Compared to the previous dash attack, it deals more damage (12%/6% → 13%/9%), knockback (70/35 (base)/55/60 (scaling) → 65/60 (base)/82/60 (scaling)) and its sweetspot has a different angle (110° → 52°). Altogether, these traits make it better for KOing.
- Dash attack has more start-up (frame 12 → 13) and ending lag (interruptibility frame 40 → 50) compared to the previous dash attack.
- Due to the damage multiplier for fully charged smash attacks being increased from Melee to SSB4 (1.3671x → 1.4x), fully charged forward and up smashes deal more damage (27.324%/16.4052% → 28%/16.8% (forward), 22.639176% → 23.8% (up)).
- Roy has a new forward smash, a rotating two-handed downward slash based on his regular attack as a Great Lord in Fire Emblem: The Binding Blade. Compared to the previous forward smash, its sweetspot has less base knockback (80 → 70) and is smaller due to having a "medium-spot" that deals 3% less damage (20% → 17%). Its also has more start-up (frame 12 → 14) and ending lag (interruptibility frame 54 → 55), less vertical range, and its duration is shorter (3 frames → 2).
- Forward smash has more knockback scaling (65 → 70), making it better at KOing compared to the previous forward smash.
- Due to the changes to stale move negation, up smash deals 0.44% more damage (16.56% → 17%). It also has decreased start-up lag and its duration is longer (10 frames → 12). Additionally, its spike hitbox now properly keeps opponents in place for the other hits. Lastly, it grants intangibility to Roy's arm throughout its duration.
- Up smash has increased ending lag (interruptibility frame 46 → 59) and its last hit has decreased base knockback (73 → 70).
- Down smash's front hit deals less damage (21%/14% → 15%/10%), hindering its KO potential.
- Down smash's back hit deals more damage (16%/8% → 17%/11%) and its angles have been altered (75°/361° → 50°/47°/361°), improving its KO potential. It also has decreased ending lag (interruptibility frame 72 → 63).
- Down smash's hits' durations are shorter (3 frames → 2).
- Down smash's knockback properties have been reversed, making the back hit stronger than the front hit.
Aerial attacks
- All aerials have decreased ending lag (interruptibility frame 50 → 46 (neutral), 35 → 30 (forward), 43 → 36 (back), 49 → 42 (up), 64 → 52 (down)).
- Due to the removal of L-canceling, all aerials' landing lag were not fully compensated and increased all of them as a result (20/10 (normal/L-canceled) → 11 (neutral), 20/10 → 13 (forward), 24/12 → 16 (back), 18/9 → 14 (up), 32/16 → 23 (down)), hindering his neutral game.
- Neutral, forward, back and down aerials deal more damage (4%, 8%/5% → 4%/6% (neutral), 8.5%/5%, 8%/5% → 11%/7% (forward), 9%/6% → 12%/9% (back), 6%/9% → 10%/15% (down)).
- Neutral, forward, and up aerials autocancel later (frame 32 → 47 (neutral), frame 30 → 33 (forward), frame 30 → 38 (up)), which removes forward aerial's ability to autocancel.
- Neutral aerial's hits have decreased start-up lag (frame 7 → frame 6 (hit 1), frame 17 → frame 15 (hit 2)). Its second hit also has increased knockback scaling (80 → 100) and its angle has been altered (361° → 50°). Altogether, these traits improve its combo potential.
- Forward aerial deals more knockback (30/10 (base)/70 (scaling) → 50/80).
- Forward aerial's animation has slightly changed. Roy now swings the Sword of Seals while further leaning forward and with his legs being positioned differently. Compared to the previous animation, it has more start-up lag (frame 5 → 10).
- Back aerial has increased knockback scaling (70 → 100), improving its KO potential. It also autocancels earlier (frame 34 → 32).
- Up aerial's duration is longer (5 frames → 7) and its sweetspot has increased knockback (20 (base)/70 (scaling) → 40/80), improving its juggling potential.
- Roy has a new down aerial, a two-handed downward slash between his legs, similar to Ike's down aerial. Compared to the previous down aerial, it has more vertical range, its sweetspot is easier to land, and its sourspot is able to KO grounded opponents around 160%, making it better at KOing. Its increased damage output and the removal of meteor canceling also make its meteor smash considerably stronger than the previous down aerial's.
- Down aerial has less diagonal range, comes out later, and its duration is shorter (4 frames → 2) compared to the previous down aerial.
- Down aerial has different knockback (40 (base)/70 (scaling) → 20/30 (base)/90 (scaling)) compared to the previous down aerial.
Throws/other attacks
- All grabs have significantly decreased ranges.
- Dash grab has decreased start-up lag (frame 10 → 8).
- Pummel deals 1% less damage (3% → 2%).
- Pummel is faster.
- Up throw deals 1% more damage (5% → 6%).
- Up throw has decreased knockback scaling (130 → 100), hindering its KO potential.
- Down throw deals 1% less damage (6% → 5%).
- Down throw's angle has been altered (361° → 80°), improving its combo potential.
- The removal of chain grabbing both helps and hinders Roy. It results in him no longer being susceptible to chain grabs, while his faster falling speed results in him no longer being susceptible to pseudo-chain grabs. However, it hinders his damaging racking potential.
- Front and back floor attacks deal 1% more damage (6% → 7%).
Special moves
- Flare Blade can be charged up to deal more damage before the full charge without receiving recoil damage (41% → 45%). It also has increased interruptibility for a few frames upon its hitbox coming out, despite its ending lag.
- Flare Blade has increased start-up lag, its duration is shorter (6 frames → 4), a smaller hitbox, and its takes slightly more time to fully charge. It has also received a sourspot at the edges of the attack that deals 15% less damage (50% → 35%) and has less knockback scaling (83 → 70).
- Flare Blade has updated visual and sound effects, the latter of which stops being emitted when fully charged and before the move's explosion. All of its stages now unleash a minor explosion, with most of the higher stages unleashing the large explosions from Melee.
- Flare Blade's animation has slightly changed. Roy now briefly lifts the Sword of Seals with both hands to his side when returning to his neutral stance.
- Double-Edge Dance requires less technical precision. Additionally, every hit aside from its first and fourth downward hits have decreased start-up lag. Lastly, Double-Edge Dance's third downward hit no longer consists of multiple hits and launches at a lower trajectory, improving its reliability to connect with its fourth hit.
- Double-Edge Dance deals less damage and knockback, has decreased vertical range, and increased ending lag. Additionally, Roy's faster falling speed also significantly hinders its first hit's recovery potential. Lastly, its third upward hit is no longer a meteor smash, removing its KO potential.
- Double-Edge Dance now has transcendent priority. This improves its reliability at close range, but removes its ability to cancel non-transcendent projectiles.
- All variations of Double-Edge Dance's third hit connect together better with its fourth hit, improving their combo potentials. However, they have lost their KO potentials.
- Double-Edge Dance's animation has changed. The slashes are now identical to Dancing Blade from Brawl.
- Blazer deals 2.82% more damage (13.18% → 16%) and its last hit has increased knockback (10 (base)/100 (scaling) → 40/130) and lasting hitboxes, improving its KO potential. Additionally, it received more intangibility frames on start-up if used from the ground and can be reversed before start-up, improving its safety. Lastly, it covers significantly more horizontal distance near its peak, improving its horizontal recovery potential.
- Blazer covers less vertical distance, hindering its vertical recovery potential.
- Blazer's first hit has significantly decreased set knockback (200 → 160/120). This allows every hit to connect together better, but removes its one-hit KO potential against the lightest characters.
- Blazer's animation has slightly changed. Roy now performs the jumping slash while holding the Sword of Seals in a reverse grip.
- Counter's damage multiplier has decreased (1.5x → 1.35x), with its knockback not being properly compensated (30 (base)/90/70 (scaling) → 35 (base)/100/70 (scaling)). This hinders its KO potential, although it is still one of the strongest counterattacks in the game.
- Counter's duration is longer (13 frames → 19).
- Counter's animation has changed. Its counterattack now resembles Roy's long-ranged basic attack animation with the Sword of Seals in Fire Emblem: The Binding Blade. Compared to the previous animation, its has more horizontal range.
- Roy now has a Final Smash, Critical Hit. Unlike Marth and Lucina's Critical Hit, which propel them at a high speed in a straightforward line, Roy's Critical Hit is stationary and has him swing the Sword of Seals around himself, which can trap opponents, before performing a slash in front of himself that emits a short-ranged explosion. Unlike Marth and Lucina's Critical Hit, Roy's Critical Hit is not a one-hit KO.
Update history
Roy received some minor buffs from game updates. Update 1.1.0 gave Blazer additional hitboxes, making it easier to land. However, the same update reduced the damage outputs of its first and last hits, which slightly weakened its KO potential. The changes to shield mechanics brought about by updates 1.1.0 and 1.1.1 have made Roy's sweetspotted attacks much safer at the cost of his sourspotted attacks being unsafer, to the point where his semi-clone, Lucina, has safer attacks than both him and Marth. Lastly and most prominently, update 1.1.4 decreased the landing lag on all of his aerials and improved Double-Edge Dance's start-up and ending lag.
- Blazer has received additional hitboxes.
- Blazer's first and last hits deal 1% less damage: 6.5% (hit 1 sweetspot)/5% (hit 1 sourspot), 9% (hit 5 sweetspot)/8% (hit 5 sourspot) → 5.5%/4%, 8%/7%, hindering its KO potential.
-
 Roy performs his down taunt instead of his fist pump idle pose after a player chooses a path in Classic Mode.
- Neutral aerial landing lag: 13 → 11
- Forward aerial landing lag: 15 → 13
- Up aerial landing lag: 16 → 14
- Back aerial landing lag: 19 → 16
- Down aerial landing lag: 28 → 23
- Double Edge Dance improved. The first hit hits one frame earlier (7 → 6), has one frame less of endlag both grounded and in the air (IASA: 42/32→ 41/31).
Moveset
| Name | Damage | Description | ||
|---|---|---|---|---|
| Neutral attack | 7.5% (sweetspot), 4.8% (sourspot) | A reversed gripped upward slice. Easily chains into itself, forward tilt and a grab at low percents, and his forward and up aerials at high percents. Starts at frame 5, making it a great tool for spacing, combos, and stopping approaches. Overall, it is one of Roy's most versatile attacks. | ||
| Forward tilt | 12.5% (sweetspot), 9% (near), 8% (far) | A reverse gripped downward slash. Very strong for a tilt attack, it usually KOs around 120% from center-stage when sweetspotted, making it a viable KO option. However, it has noticeable ending lag, making it punishable. The sweetspot is safe on shield if Roy does not directly touch the opponent's shield. | ||
| Up tilt | 12% (sweetspot), 7% (sourspot) | A reverse gripped overhead arcing slash. Very strong like his forward tilt, it usually KOs around 110% when sweetspotted. However, it has rather low horizontal range and high ending lag, which make it very punishable on shield. | ||
| Down tilt | 11% (sweetspot), 6.5% (sourspot) | A kneeling thrust, identical to Marth and Lucina's down tilts. Has the lowest amount of ending lag out of his tilt attacks, and is useful for shield stabbing, edgeguarding or starting tech-chases due to being a semi-spike. However, it has much less knockback growth than his other tilts. | ||
| Dash attack | 13% (sweetspot), 9% (sourspot) | An inward horizontal slash. It has good KO potential for a dash attack, KOing when sweetspotted around 130%, however it has moderate start-up and high ending lag, making it very unsafe on shield. | ||
| Forward smash | 20% (close), 17% (mid), 12% (far) | Rotates his body to perform a lunging, two-handed downward slash. It is one of the strongest forward smashes in the game when sweetspotted, as it can KO as low as 40% with rage. It also has very long disjointed range due to Roy lunging while performing it, and it comes out on frame 14, which is rather fast for a smash attack of its power. However, it has high ending lag and its hitbox does not last long, which make it very punishable when whiffed. | ||
| Up smash | Flame Sword | 1% (hit 1), 2% (hits 2-4), 10% (hit 5) | An upward thrust, which ignites the Sword of Seals' tip and concludes with a small explosion. Powerful enough to KO middleweights around 100% while uncharged. Good for juggling opponents in the air, as it grants intangibility to Roy's arm throughout its duration. If the initial portion of the thrust connects, the attack's multiple hits are much slower than if the opponent is only caught in the explosion. If it hits someone that is not on the ground (with all hits), it does additional damage and knockback. High ending lag like his other smash attacks. | |
| Down smash | 15% (front sweetspot), 17% (back sweetspot) 10% (front sourspot), 11% (back sourspot) | A crouching outward slash in front of himself and then behind himself. Weaker than his other smash attacks, but it has the fastest start-up, and is useful for punishing rolls. Can KO uncharged around the 120% range if sweetspotted with the front hit, and around 100% sweetspotted with the back hit. While it has very quick start-up, it has the longest ending lag of all his smash attacks, which makes it very punishable when whiffed. | ||
| Neutral aerial | 6% (hit 1 sweetspot), 4% (hit 1 sourspot), 8.5% (hit 2 sweetspot), 5% (hit 2 sourspot) | An inward horizontal slash followed by a spinning, outward horizontal slash. One of Roy's most useful spacing and combo options due to its quick start-up, long-lasting hitbox, and low landing lag. The second hit is capable of attacking behind him, and the sourspot can catch opponents before he lands. The first hit is risky due to its short range, but it is a surprisingly effective combo starter. Very useful for KO set-ups at high percents, as landing the first hit can lead into an up tilt, up smash, or Blazer. | ||
| Forward aerial | 11% (sweetspot), 7% (sourspot) | A downward slash. It is fairly strong when sweetspotted, as it can KO opponents reliably while on-stage and especially off-stage. Good for air-to-air combat because of its low ending lag. It is possible to jump out of one from a short hop, and it can be used twice before landing from a jump. If performed fast enough, it can combo into itself when using his double jump. | ||
| Back aerial | 12% (sweetspot), 9% (sourspot) | Rotates his body to perform an upward slice. It is stronger than forward aerial, and can KO opponents reliably while on-stage and especially off-stage. Covers good vertical and horizontal range. Like with Marth and Lucina's back aerials, it turns Roy around when used. Unlike their back aerials, however, its sourspot can lock opponents at medium percents if they miss a tech. | ||
| Up aerial | 9% (sweetspot), 6% (sourspot) | A backflipping, upward arcing slash. The weakest of Roy's aerials in terms of damage and knockback, but it is his fastest one, due to it coing out on frame 5. Its large arc and speed also make it suitable for juggling and/or combos, as it is able to follow up with most of his grounded attacks at low percents while he is falling, and into his aerials at high percents. Its sourspot also has a long duration, which allows it to function as a KO set-up. | ||
| Down aerial | 15% (sweetspot), 10% (sourspot) | A two-handed, downward slash between his legs, similar to Ike's down aerial. It has a powerful meteor smash hitbox near the Sword of Seals' hilt, while the rest of its blade launches opponents upward. KOs around 130% when sweetspotted on-stage. However, it has considerable ending and landing lag, which makes it risky to use off-stage, especially due to Roy's falling speed. | ||
| Grab | — | Reaches out with his free hand. | ||
| Pummel | 2% | A knee strike. A fairly fast pummel. | ||
| Forward throw | 5% | Spins and flings the opponent forward. Has low ending lag and low knockback, which allow it to combo into a neutral attack or forward tilt at low percents, and a dash attack at medium percents. It can also potentially combo into a dashing up smash if the opponent does not react in time, and works very well as a set-up for a neutral aerial, which, when hit, can chain into even more combos. At higher percents, it is also able to set up a tech-chase. | ||
| Back throw | 5% | Tosses the opponent behind himself. Has weak diagonal knockback that causes the throw to have a somewhat fixed trajectory even at high percents. Low hitstun like his other throws, but its angle allows Roy to read the opponent's reaction and capitalize on it. If the opponent does not expect it, this can lead into down aerial at low percents or a back aerial for a KO at high percents near the edge, although the latter requires precise timing. | ||
| Up throw | 6% | Heaves the opponent upward with his free hand. Like Marth and Lucina's up throws, it is Roy's only throw with KO potential, as it starts KOing around 170%. | ||
| Down throw | 5% | A one-armed body slam. Aesthetically, it appears almost identical to forward throw, with its only difference being a shockwave effect to indicate the opponent hitting the ground. Mechanically, it functions much differently, as it launches the opponent directly above Roy and is a true combo into Blazer on most characters up to medium percents. Additionally, its low base knockback and low knockback growth allow it to combo into neutral attack, up tilt and forward tilt at low percents, with the neutral attack combo allowing for the possibility of chaining into another grab if the opponent does not react in time. However, its low hitstun makes it unreliable past low percents. | ||
| Floor attack (front) | 7% | Gets up while slashing to the left and then to the right. | ||
| Floor attack (back) | 7% | Gets into a kneeling position and then slices around himself as he gets up. | ||
| Floor attack (trip) | 5% | Hops briskly to his feet to perform a thrust to the left and a slash to the right. | ||
| Edge attack | 8% | Performs an outward slash while climbing up. | ||
| Neutral special | Default | Flare Blade | 6%-45%, 50% (fully charged sweetspot), 36% (fully charged sourspot) | Rears back and ignites the Sword of Seals' blade before performing a lunging, two-handed downward slash that generates an explosion. Functions similarly to Eruption, as it can be charged before unleashing the explosion, with the explosion's size growing as it charges. It has very high knockback growth while uncharged, and the ability to quickly increase its damage output via charging. When fully charged, it is capable of one-hit KOing all but Shulk with the Shield Art active and Bowser from center-stage. To further supplement its power, it has surprisingly minimal ending lag, as Roy is able to act out of it almost immediately. However, a fully charged explosion deals 10% recoil damage. The fully charged explosion also has a sourspot at its edges that deals much less damage and knockback and is not a OHKO, though it is still powerful enough to KO at 41%. It is possibly Roy's best option to use to punish a stunned opponent because of its OHKO potential when fully charged, especially considering Roy's good shield pressuring potential. |
| Custom 1 | N/A | |||
| Custom 2 | N/A | |||
| Side special | Default | Double-Edge Dance | 3%-5% (first hit), 2%-3% (second forward hit), 2%-3% (second upward hit), 1%-3% (second downward hit), 2%-3% (third forward hit), 3% (third upward hit), 4% (third downward hit), 6% (last forward hit), 5% (last upward hit), 2% (last downward hits 1-4), 6% (last downward hit 5) | A combination of sword swings, which can be influenced by directional inputs. The finishing swing is one of three options: an upward slice with good KO power at high percents but low range (tilting the control stick up), a downward slash with good KO power at high percents near the edge (no control stick input or tilting the control stick forward), or a flurry of low-angled thrusts that deal the most amount of damage but the least amount of knockback (tilting the control stick down). Its animations are identical to Dancing Blade and its first hit stalls Roy's descent, although it is largely ineffective for recovery due to his falling speed being much faster than Marth and Lucina's. However, its overall knockback is slightly stronger than Dancing Blade, and the last hit of each variation deals flame damage unlike Dancing Blade due to the Sword of Seals' blade igniting. |
| Custom 1 | N/A | |||
| Custom 2 | N/A | |||
| Up special | Default | Blazer | 5.5% (grounded hit 1 sweetspot), 4% (grounded hit 1 sourspot), 4.5% (aerial hit 1), 1.1% (grounded hits 2-4), 1% (aerial hits 2-4), 8% (hit 5 sweetspot), 7% (hit 5 sourspot), 6% (aerial hit 5) | A jumping reverse gripped slash, which ignites the Sword of Seals' blade. Hits multiple times and can be angled diagonally, though this causes the slash to cover less vertical distance. A viable out of shield and KOing option, its grounded version is more powerful, as it KOs around 110% if all hits connect. Its grounded version also grants super armor at its beginning. However, it is a sub-par recovery option, due to it covering decent horizontal distance, but very minimal vertical distance. |
| Custom 1 | N/A | |||
| Custom 2 | N/A | |||
| Down special | Default | Counter | 1.35x (min 8%) | Parries and then counterattacks against any incoming attacks with an outward slash that ignites the Sword of Seals' blade. It has the highest damage multiplier of any counterattack in the game by default, with only Vision surpassing it while the Buster Art is active. However, its counter window is relatively short, and it is tied with Double Team for having the third highest amount of start-up lag out of every counterattack in the game. Roy may also say "いまだ!" ("Now!") or "そこ!" ("There!") if successful. |
| Custom 1 | N/A | |||
| Custom 2 | N/A | |||
| Final Smash | Critical Hit | 1% (hits 1-10), 35% (hit 11) | Swings the Sword of Seals in a circular motion, which ignites its blade, before performing a two-handed, downward slash that generates a powerful explosion. Unlike Marth and Lucina's Critical Hit, Roy's is not a one-hit KO. The circular swing can connect up to four times from the front, though it can hit up to ten times if performed on an opponent behind Roy. | |
On-screen appearance
- Warps onto the stage using warp magic while crouching, with the Sword of Seals stuck in the ground when he appears. He then pulls it out with a flourish before assuming his idle stance.

|
|---|
Taunts
- Up taunt: Triumphantly holds the Sword of Seals overhead.
- Side taunt: Winds back before striking a pose while holding the Sword of Seals in a reverse grip while saying "僕 は 負けない!" ("I won't lose!") This line was one of his victory quotes in Melee.
- Down taunt: Kneels and twirls the Sword of Seals behind himself while yelling "Heee-ya!" This taunt returns from Melee.
| Up taunt | Side taunt | Down taunt |
|---|---|---|

|

|

|
Idle poses
- Pumps his fist while smiling. Unusually, this is actually a part of his standing animation and, unlike other idle poses, it can be seen in the character customization screen.
- Rubs the edge of the Sword of Seals' blade.
 |

|
|---|
Crowd cheer
| English | Japanese | |
|---|---|---|
| Cheer | ||
| Description | Roy's our boy! | Roy! Roy! Roy! |
| Pitch | Female | Female |
Victory poses
- Swings the Sword of Seals once over his shoulder, then swings it down and behind him while facing left with his free hand clenched, saying "真の戦いは、これからだ。" ("The real battle is yet to come.")
- Spins the Sword of Seals one and a half times and then sheaths it, saying "苦しい戦いだった。" ("That was a difficult battle.") This replaces his victory animation from Melee, where he plunged the Sword of Seals into the ground.
- Flourishes the Sword of Seals in a circle before posing with it by his side, saying "守るべきもののために、負けられない!" ("For the sake of those I must protect, I will not lose!")
 |
 |

|
|---|
In competitive play
Notable players
Active
 CloudY - The best Roy player in Mexico.
 Hyper Kirby - The best Roy player in the world.
- Lunchables
 Onies - The best Roy player in Japan.
 Serew - The best Roy player in the Netherlands.
- Sethlon - Placed 17th at Low Tier City 4 and 65th at Super Smash Con 2016.
 TheFlow - The best Roy player in France.
Inactive
 BlueLink - Formerly ranked 1st on the Italian Power Rankings prior to his retirement.
- Manny - Placed 7th at Frame Perfect Series and 9th at Shine 2016.
- Neath - The best Roy player in France prior to switching to Diddy Kong.
- NEO - Formerly ranked 5th on the MD/VA Power Rankings prior to his retirement.
- Ryo - Placed 9th at Super Smash Con 2016, 33rd at 2GGT: ZeRo Saga, and 49th at GENESIS 4. He also helped advance Roy's metagame.
Tier placement and history
Roy's initial perception among the community was very positive; players almost immediately recognized his powerful offense due to the prominent strengths of his sweetspotted attacks, heavily damaging throw set-ups, and significantly improved mobility. These views were especially noted because his semi-clone, Marth, and by extension Lucina, were considered poor characters at the time. Despite his extremely low representation, which is unseen of a perceived high-tier character, most of the community believed that Roy was a viable character, with ZeRo notably going as far as saying he was the best sword-wielding character in the game. Even so, his viability was also disputed due to his sparse tournament representation and results. Furthermore, characters considered worse than him received a variety of buffs in later updates, with a corresponding increase in tournament results and representation than Roy, while his weaknesses were made much more apparent to the community. As such, opinions on Roy quickly started to change due to his vulnerability to combos, weak recovery, and how his playstyle requires him to use close-ranged combat despite his ineffective approach and unimpressive range. In spite of these flaws and his sparse representation and results, Roy was ranked 32nd on the first tier list, placing him at the top of the low-tier.
However, update 1.1.4 granted Marth and Lucina major buffs that significantly increased their effectiveness, while Roy only gained minor landing lag decreases to his aerials. This resulted in them, especially Marth, achieving improved results from professionals and saw their opinions reassessed as those of a high-tier and a mid-tier character, respectively. Conversely, Roy remained a low-tier character due to the minimal effectiveness of his buffs from update 1.1.4. His position relative to the cast was still disputed; some professionals like ZeRo reconsidered him to be on the lower portion of the mid-tier, whereas others like Abadango considered him one of the worst characters in the game.
In spite of his sparse tournament representation, he received some results from the few professionals who do main him. The biggest upset occurred at Super Smash Con 2016, where Ryo went on a two-game win streak while using Roy against Abadango's Mewtwo. Although Abadango would defeat Ryo in their third match by counterpicking with Rosalina & Luma, he only did so narrowly. These results, however, were not enough to repair Roy's negative perception, and subsequently saw Roy being ranked 50th on the second tier list, placing him at the bottom of the low-tier.
Despite this, three Roy players (Manny, VoiD and ScAtt) managed to place 4th, 7th and 25th, respectively, at Smash the Record 2016, with the former two having played against each other in a Roy ditto. Ryo also managed to achieve better results with Roy. When coupled with Ryo's previous feat at Super Smash Con, Roy was ranked 44th on the third and current tier list, placing him in the upper portion of the low-tier.
Overall, Roy's standing relative to the cast remains among the most divisive and debatable of the entire cast. While his tier placement is still slightly contested to this day due to his polarized strengths and weaknesses, many players agree that Roy could be ranked higher in future tier lists.
Trophies
- Roy
- Roy, the main character of Fire Emblem: The Binding Blade, returns for the first time since Melee! In The Binding Blade, Roy led the troops of Pherae into battle in his ailing father’s stead, and now he brings his speed and talent for short-range combat into this game. His sword, the Sword of Seals, is uniquely powerful at the base of the blade.
 : Fire Emblem: The Binding Blade
- Roy (Alt)
 His sword, the Sword of Seals, is uniquely powerful at the base of the blade. Flare Blade creates an explosion in front of Roy that can be charged by holding down the button. Take care, though, because at the highest levels of charge, Roy himself will catch fire and take damage! His side special, Double-Edge Dance, changes for each strike after the first depending on whether you hold up or down while attacking.
 Flare Blade creates an explosion in front of Roy that can be charged by holding down the button. Take care, though, because at the highest levels of charge, Roy himself will catch fire and take damage! His side special, Double-Edge Dance, changes for each strike after the first depending on whether you hold up or down while attacking.
- : Fire Emblem: The Binding Blade
- Critical Hit
- For Roy's Final Smash, he traps enemies in a circular swing of the blade, brings it up behind him, and then, in a blast of fire, brings the blade down for a powerful finisher! The downward attack is powerful on its own but doesn't have much range, so make sure you’re close enough to hit your enemies with the full combo and really seal their fate!
- For Roy's Final Smash, he traps enemies in a circular swing of the blade, brings it up behind him, and then, in a blast of fire, brings the blade down for a powerful finisher! The downward attack is powerful on its own but doesn't have much range, so make sure you’re close enough to hit your enemies with the full combo and really seal their fate!
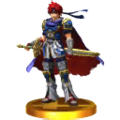
Classic (3DS)

Alt. (3DS)
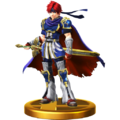
Classic (Wii U)
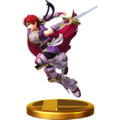
Alt. (Wii U)
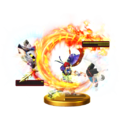
Critical Hit (Roy)


Alternate costumes
.png)
| |||||||

|

|

|

|

|

|

|

|
Reveal trailer
<youtube>w8XIj05irtU</youtube>
Gallery

Roy's splash art.
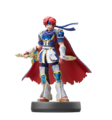
Roy's amiibo.
Using his down taunt.
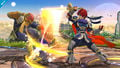
Using his new neutral attack on Captain Falcon.
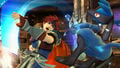
Using Double-Edge Dance's third upward hit on Lucario.
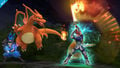
Using Critical Hit, his Final Smash, on Lucario and Charizard.
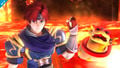
Alongside Roy Koopa.
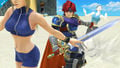
Alongside Zero Suit Samus and Wii Fit Trainer.
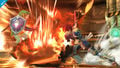
Using Flare Blade on Link.

All of Roy's alternate costumes.

Using his up taunt alongside male and female Robin.


Trivia
- Roy's animations reference Fire Emblem: The Binding Blade:
- His forward smash resembles his regular attack as a Great Lord in The Binding Blade, to the point where the freeze frame upon landing is modeled after the exact frame as the ending blow of said attack.
- Counter's counterattack animation resembles his long-ranged basic attack animation with the Sword of Seals.
- His up taunt is based on the cutscene illustration from The Binding Blade where he draws the Sword of Seals for the first time.
- Roy's pose in his official art is nearly identical to his pose in his official art for Melee.
- Aspects of Roy's sound design have been carried over from Melee:
- All of his sourspotted attacks emit a punch/kick sound effect instead of a slashing sound effect.
- He uses different voice clips when using battering items.
- When he is dizzy, his corresponding voice clip loops constantly instead of playing only once.
- He uses more than one voice clip for his smash attacks.
- He only has one voice clip upon being KO'd.
- Roy's up smash, Flame Sword, shares the same name as Mega Man's forward aerial.
- Roy, Marth, and Cloud are the only characters to speak Japanese in every regional release of SSB4.
- Like Marth in his transition from Melee to Brawl, Roy's first and third victory poses have swapped quotes.
- If Roy's on-screen appearance occurs on one of Distant Planet's leaf platforms, he will descend with the leaf, but the Sword of Seals will remain stationary in the air until it returns to Roy once the battle actually starts.
| Fighters in Super Smash Bros. 4 | |
|---|---|
| Veterans | Bowser · Captain Falcon · Charizard · Diddy Kong · Donkey Kong · Dr. Mario · Falco · Fox · Ganondorf · Ike · Jigglypuff · King Dedede · Kirby · Link · Lucario · Lucas · Luigi · Mario · Marth · Meta Knight · Mewtwo · Mr. Game & Watch · Ness · Olimar · Peach · Pikachu · Pit · R.O.B. · Roy · Samus · Sheik · Sonic · Toon Link · Wario · Yoshi · Zelda · Zero Suit Samus |
| Newcomers | Bayonetta · Bowser Jr. · Cloud · Corrin · Dark Pit · Duck Hunt · Greninja · Little Mac · Lucina · Mega Man · Mii Fighter (Mii Brawler · Mii Gunner · Mii Swordfighter) · Pac-Man · Palutena · Robin · Rosalina & Luma · Ryu · Shulk · Villager · Wii Fit Trainer |
|
| |
|---|---|
| Fighters | Marth (SSBM · SSBB · SSB4 · SSBU) · Roy (SSBM · SSB4 · SSBU) · Ike (SSBB · SSB4 · SSBU) · Lucina (SSB4 · SSBU) · Robin (SSB4 · SSBU) · Corrin (SSB4 · SSBU) · Chrom (SSBU) · Byleth (SSBU) |
| Assist Trophies | Lyn · Black Knight · Tiki |
| Stages | Castle Siege · Arena Ferox · Coliseum · Garreg Mach Monastery |
| Item | Killing Edge |
| Other | Sothis |
| Trophies, Stickers and Spirits | Trophies (SSBM · SSBB · SSB4) · Stickers · Spirits |
| Music | Brawl · SSB4 · Ultimate |
| Masterpieces | Fire Emblem: Shadow Dragon and the Blade of Light · Fire Emblem: Mystery of the Emblem |