Overview
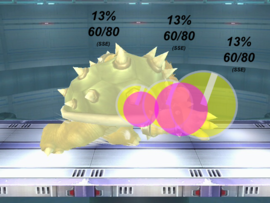
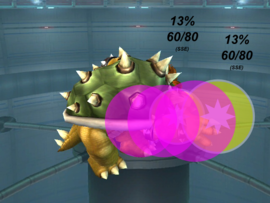
Bowser’s side special is called Flying Slam. Grabs the opponent with his hand and does a massive flying suplex. Can be used to commit Bowsercide, which under most circumstances KOs the opponent first. The slam KOs at 146% in Final Destination, and its angle makes DIing risky.
Throw and Grabbbox Data
Ground Grab
| ID | Radius | Bone | Offset | G | A | ||
|---|---|---|---|---|---|---|---|
| 0 | 6.0 | 0 | 0.0 | 0.8 | 20.0 | ||
| 1 | 4.0 | 0 | 0.0 | 8.0 | 11.0 | ||
Air Grab
| ID | Radius | Bone | Offset | G | A | ||
|---|---|---|---|---|---|---|---|
| 0 | 9.0 | 0 | 0.0 | 8.0 | 18.0 | ||
| 1 | 8.0 | 0 | 0.0 | 8.0 | 11.0 | ||
| 2 | 8.0 | 0 | 0.0 | 8.0 | 6.0 | ||
Throw
| ID | Damage | Angle | BK | KS | FKV | Bone | SDIx | FFx | T% | Type | Effect | Sound | |
|---|---|---|---|---|---|---|---|---|---|---|---|---|---|
| 0 | 18% | Forwards | 80 | 50 | 0 | 0 | 1.0x | None | 0% | None | |||
| 1 | 5% | Forwards | 30 | 30 | 0 | 0 | 1.0x | None | 0% | None | |||
Timing
Ground grab
| Grab | 8-10 |
|---|---|
| Animation length | 37 |
Air grab
| Grab | 17-19 |
|---|---|
| Animation length | 43 |
Throw
The timing only includes once Bowser lands.
| Throw | 14 |
|---|---|
| Animation length | 48 |
| Lag time |
Grab |
Throw point |
|

