Combo: Difference between revisions
No edit summary |
Dhiaalhanai (talk | contribs) (added Falcon, ZSS, Lucas, Ness, and Roy Combos in smash 4, Falon combo in 64, and Jiggs and Marth combos in Melee) |
||
| Line 19: | Line 19: | ||
==Notable Combos== | ==Notable Combos== | ||
===''SSB''=== | ===''SSB''=== | ||
*{{SSB|Captain Falcon}}: Multiple [[up aerial]]s followed by [[Falcon Dive]], known as the Stairway to Heaven. | *{{SSB|Captain Falcon}}: Multiple [[up aerial]]s followed by [[Falcon Dive]], known as the Stairway to Heaven. He can also perform a variation of the Ken Combo by chaining his up aerial into his down aerial spike. | ||
*{{SSB|Kirby}}: Multiple [[up tilt]]s, which can rack up heavy damage, lead into aerials, or be used to break [[shield]]s. | *{{SSB|Kirby}}: Multiple [[up tilt]]s, which can rack up heavy damage, lead into aerials, or be used to break [[shield]]s. | ||
*{{SSB|Pikachu}}: Tent combo, made up of a combination of up tilts and throws, along with other moves, in the tent portion of [[Hyrule Castle]]. | *{{SSB|Pikachu}}: Tent combo, made up of a combination of up tilts and throws, along with other moves, in the tent portion of [[Hyrule Castle]]. | ||
| Line 28: | Line 28: | ||
*{{SSBM|Fox}}: Because of his Reflector's horizontal launch angle and low knockback scaling, Fox can chain his Reflector into itself as well as other moves, such as his up smash. Consecutive shines are known as multi-shining. | *{{SSBM|Fox}}: Because of his Reflector's horizontal launch angle and low knockback scaling, Fox can chain his Reflector into itself as well as other moves, such as his up smash. Consecutive shines are known as multi-shining. | ||
*Fox: A KO combo involving his up throw leading into an up aerial, particularly devastating against floaty characters. | *Fox: A KO combo involving his up throw leading into an up aerial, particularly devastating against floaty characters. | ||
*{{SSBM|Jigglypuff}}: Jigglypuff's multiple jumps and excellent aerial mobility allow it to chain multiple back aerials and carry opponents offstage towards the blast line. Known as the [[Wall of Pain]]. | *{{SSBM|Jigglypuff}}: Jigglypuff's multiple jumps and excellent aerial mobility allow it to chain multiple back aerials and carry opponents offstage towards the blast line. Known as the [[Wall of Pain]]. Against the space animals, Jigglypuff's up throw leads into an up aerial, and finishes with Rest, guaranteeing a KO at ludicrously low damages. This combo is known as the [[Space Animal Slayer]]. | ||
*{{SSBM|Marth}}: Multiple [[forward aerial]]s followed by a down air spike, known as the Ken Combo. | *{{SSBM|Marth}}: Multiple [[forward aerial]]s followed by a down air spike, known as the Ken Combo. Against the space animals, Marth can chain throw with his up throw. | ||
*{{SSBM|Sheik}}: While her [[down throw]] can chain-throw a number of characters, against characters immune to the chain-grab, Shiek can combo into other moves, notably her [[up smash]], if she reads her opponents' reaction, and this is effective at both racking damage and KOing. | *{{SSBM|Sheik}}: While her [[down throw]] can chain-throw a number of characters, against characters immune to the chain-grab, Shiek can combo into other moves, notably her [[up smash]], if she reads her opponents' reaction, and this is effective at both racking damage and KOing. | ||
| Line 42: | Line 42: | ||
===''Smash 4''=== | ===''Smash 4''=== | ||
*{{SSB4|Captain Falcon}}: His down throw combos into two or three up aerials, as well as his neutral aerial. Depending on the opponent's DI, he can combo into his Knee Smash from a down throw. | |||
*{{SSB4|Diddy Kong}}: Known as the "Hoo-hah", prior to patch 1.0.6, Diddy could combo his down throw into an up aerial, or even two at low percents, being a quick and easy damage racker and KO string. The aforementioned patch changed the angle and knockback of his down throw and decreased its hitstun, and also drastically decreased the damage and knockback of his up aerial. | *{{SSB4|Diddy Kong}}: Known as the "Hoo-hah", prior to patch 1.0.6, Diddy could combo his down throw into an up aerial, or even two at low percents, being a quick and easy damage racker and KO string. The aforementioned patch changed the angle and knockback of his down throw and decreased its hitstun, and also drastically decreased the damage and knockback of his up aerial. | ||
*{{SSB4|Donkey Kong}}: Dubbed the "Ding-Dong," his [[forward throw|cargo]] up throw can chain into his up aerial for racking up damage and KOing. | *{{SSB4|Donkey Kong}}: Dubbed the "Ding-Dong," his [[forward throw|cargo]] up throw can chain into his up aerial for racking up damage and KOing. | ||
*{{SSB4|Fox}}: Up tilt combos into itself, and can finish with one of his aerials. At high percents, his down aerial combos into his up smash for a KO. | *{{SSB4|Fox}}: Up tilt combos into itself, and can finish with one of his aerials. At high percents, his down aerial combos into his up smash for a KO. | ||
*{{SSB4|Kirby}}: Down aerial is almost guaranteed to be followable by tilts (up tilt in particular), [[grab]]s, [[jab]]s, aerials, and or smash attacks based on percentage and which way the opponent DIs. The smashes in particular, if successful, can lead to KOs. | *{{SSB4|Kirby}}: Down aerial is almost guaranteed to be followable by tilts (up tilt in particular), [[grab]]s, [[jab]]s, aerials, and or smash attacks based on percentage and which way the opponent DIs. The smashes in particular, if successful, can lead to KOs. | ||
*{{SSB4|Lucas}}: Down throw chains into multiple neutral aerials. At high percents, his down throw confirms into his up aerial for a KO. | |||
*{{SSB4|Luigi}}: Previously, his down throw had very low knockback scaling, which allowed Luigi to perform combos even at KO percents, with his down throw easily leading into his [[Luigi Cyclone]] or [[Super Jump Punch]] for a KO. However, patch 1.1.1 greatly increased the knockback scaling of his down throw, removing followups at high percents. Still, his down throw is an effective combo starter, and by combing into the spiking hitbox of his down air, he can perform a pseudo-chaingrab by fastfalling and regrabbing. | *{{SSB4|Luigi}}: Previously, his down throw had very low knockback scaling, which allowed Luigi to perform combos even at KO percents, with his down throw easily leading into his [[Luigi Cyclone]] or [[Super Jump Punch]] for a KO. However, patch 1.1.1 greatly increased the knockback scaling of his down throw, removing followups at high percents. Still, his down throw is an effective combo starter, and by combing into the spiking hitbox of his down air, he can perform a pseudo-chaingrab by fastfalling and regrabbing. | ||
*{{SSB4|Mario}}: His down throw leads into multiple up tilts, followed by two up aerials, and finishing with a Super Jump Punch. | *{{SSB4|Mario}}: His down throw leads into multiple up tilts, followed by two up aerials, and finishing with a Super Jump Punch. | ||
*{{SSB4|Meta Knight}}: His down throw and dash attack combo into multiple up aerials, ending with high-altitude Shuttle Loop for a KO. Alternatively, Mach Tornado can be used. | *{{SSB4|Meta Knight}}: His down throw and dash attack combo into multiple up aerials, ending with high-altitude Shuttle Loop for a KO. Alternatively, Mach Tornado can be used. | ||
*{{SSB4|Ness}}: Down throw combos into multiple forward aerials. | |||
*{{SSB4|Pikachu}}: Up throw leads into [[Thunder]] for a KO if the opponent doesn't DI. | *{{SSB4|Pikachu}}: Up throw leads into [[Thunder]] for a KO if the opponent doesn't DI. | ||
*{{SSB4|R.O.B.}}: His down throw leads into a guaranteed up aerial for a deadly KO combo, known as the "Beep-Boop". | *{{SSB4|R.O.B.}}: His down throw leads into a guaranteed up aerial for a deadly KO combo, known as the "Beep-Boop". | ||
*{{SSB4|Roy}}: His down throw combos into his jab, which can then lead into a regrab and another down throw. His jab alone combos into itself at low percents. Also, his neutral aerial can chain into itself at low percents. | |||
*{{SSB4|Ryu}}: His tapped up tilt is notorious for comboing into itself, and leading into his [[Shoryuken]] at high percents for a KO. | *{{SSB4|Ryu}}: His tapped up tilt is notorious for comboing into itself, and leading into his [[Shoryuken]] at high percents for a KO. | ||
*{{SSB4|Sheik}}: Her forward and down throws can start long combos using many forward aerials. Her forward throw also leads into [[Bouncing Fish]], being an easy and useful damage racker. Also, her forward tilt can chain into itself at low percents. | *{{SSB4|Sheik}}: Her forward and down throws can start long combos using many forward aerials. Her forward throw also leads into [[Bouncing Fish]], being an easy and useful damage racker. Also, her forward tilt can chain into itself at low percents. | ||
*{{SSB4|Zero Suit Samus}}: Her down throw can lead into two up aerials, finishing with a high-altitude [[Boost Kick]], KOing very early if done properly. | *{{SSB4|Zero Suit Samus}}: Her down throw can lead into two up aerials, finishing with a high-altitude [[Boost Kick]], KOing very early if done properly. At mid-percents, her neutral aerial combos into her [[Flip Jump]], KOing if she gets the spiking hitbox. | ||
==See also== | ==See also== | ||
Revision as of 11:06, November 29, 2015
A combo is a sequence of attacks that is guaranteed (or very likely) to occur if the first attack hits the enemy. The exact definition of a combo may change from player to player. Some definitions may include:
- A single attack that consists of multiple hits that can string into each other (see natural combo).
- Any sequence of attacks that keeps the opponent in hitstun. These are commonly known as true combos.
- Any sequence of attacks that counts as a combo according to the combo counter (which allows for one consecutive frame of non-hitstun).
- Any sequence of attacks that is very hard to DI (or in certain cases, tech) out of.
- Any sequence of attacks that cannot be DI'd out of if performed perfectly.
- Any sequence of attacks that prevent the opponent from landing (possibly by tech) or ledge-grabbing.
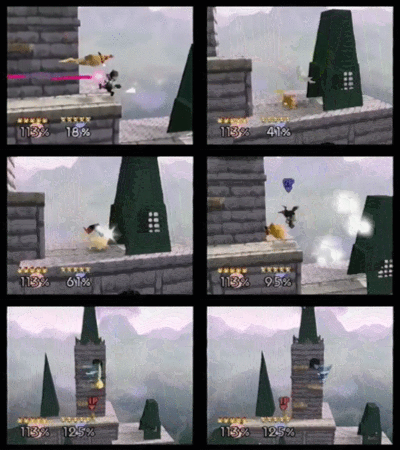
- Any attack that sends an opponent into a stage hazard that then leaves them vulnerable to other attacks, such as knocking an opponent into a tornado on Hyrule Castle in Smash 64, then jumping above the tornado and using a meteor smash to knock the opponent back down into the tornado after they're launched up to rack damage, or using an aerial to KO.
- Any sequence of attacks performed by two doubles teammates on an opponent to deal extra damage (known as a team combo).
Combos are used to quickly rack up damage on opponents. In Super Smash Bros. and Super Smash Bros. Melee, true combos are very commonly used at low to mid percents due to the long periods of hitstun that leave the opponent vulnerable to attacks. Inescapable strings of attacks in these games started at low percents can easily rack up over 50% of damage, and in SSB, every character can perform a guaranteed zero-to-death combo. In Super Smash Bros. Brawl, however, the ability of characters to act during hitstun after a short period of time means that most combos can escaped out of at higher launch speeds. As a result, true combos in Brawl generally work at only very low percents with moves that deal very low base knockback. In Super Smash Bros. 4, the ability to air dodge out of hitstun is removed, making combos more common. However, since most moves have increased base knockback, they are neither as extensive nor as varied as the SSB and Melee combos.
Notable Combos
SSB
- Captain Falcon: Multiple up aerials followed by Falcon Dive, known as the Stairway to Heaven. He can also perform a variation of the Ken Combo by chaining his up aerial into his down aerial spike.
- Kirby: Multiple up tilts, which can rack up heavy damage, lead into aerials, or be used to break shields.
- Pikachu: Tent combo, made up of a combination of up tilts and throws, along with other moves, in the tent portion of Hyrule Castle.
Melee
- Captain Falcon: The Sacred Combo, involving a Knee Smash to knock opponents offstage, and then jumping off and finishing them with a Falcon Punch.
- Falco: The Pillar combo, which involves launching opponents into the air with his Reflector and then following up with a down air spike. Other moves can be added, such as up tilts, back aerials, and up throws. When done properly, this combo is excellent for wearing down shields.
- Fox: Because of his Reflector's horizontal launch angle and low knockback scaling, Fox can chain his Reflector into itself as well as other moves, such as his up smash. Consecutive shines are known as multi-shining.
- Fox: A KO combo involving his up throw leading into an up aerial, particularly devastating against floaty characters.
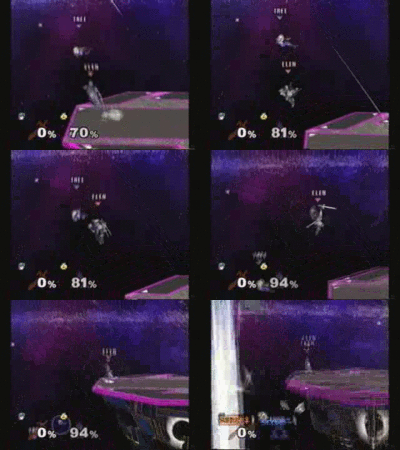
- Jigglypuff: Jigglypuff's multiple jumps and excellent aerial mobility allow it to chain multiple back aerials and carry opponents offstage towards the blast line. Known as the Wall of Pain. Against the space animals, Jigglypuff's up throw leads into an up aerial, and finishes with Rest, guaranteeing a KO at ludicrously low damages. This combo is known as the Space Animal Slayer.
- Marth: Multiple forward aerials followed by a down air spike, known as the Ken Combo. Against the space animals, Marth can chain throw with his up throw.
- Sheik: While her down throw can chain-throw a number of characters, against characters immune to the chain-grab, Shiek can combo into other moves, notably her up smash, if she reads her opponents' reaction, and this is effective at both racking damage and KOing.
Brawl
- Falco: His down throw chaingrab racks on about 50%, and can lead into a dash attack, which can be cancelled into an up smash, for a total of over 60% damage. Alternatively, Falco can finish with a down air meteor smash, which is effective at the ledge.
- Ice Climbers: Well-known for their variety of chain-throws, which can be used to 0-death any character in the game.
- King Dedede: His down throw, with its uniquely set knockback, can chain-throw many characters at any percent, and can be finished with his back throw for a KO.
- Kirby: The Gonzo combo, consisting of a forward throw, which leads into an up aerial, followed by an up tilt, and finishes with a back aerial, for 38% damage.
- Meta Knight: Being one of the fastest attacks in the game, his up aerial, when combined with his multiple jumps, can combo itself for 30% damage. For finishers, Mach Tornado can be used, for a total of 50% and an early KO if done near the upper blast line. Shuttle Loop can be used as well, and its semi-spike angle is useful for starting edgeguards. Lastly, neutral aerial can add on another 19%. The variation using Mach Tornado is known as the Rufio combo.
- Pikachu: Down throw can chain grab fast-fallers to KO percents, where they can be finished with a Thunderspike.
- Sheik: Her forward tilt can combo itself for as much as 50%.
Smash 4
- Captain Falcon: His down throw combos into two or three up aerials, as well as his neutral aerial. Depending on the opponent's DI, he can combo into his Knee Smash from a down throw.
- Diddy Kong: Known as the "Hoo-hah", prior to patch 1.0.6, Diddy could combo his down throw into an up aerial, or even two at low percents, being a quick and easy damage racker and KO string. The aforementioned patch changed the angle and knockback of his down throw and decreased its hitstun, and also drastically decreased the damage and knockback of his up aerial.
- Donkey Kong: Dubbed the "Ding-Dong," his cargo up throw can chain into his up aerial for racking up damage and KOing.
- Fox: Up tilt combos into itself, and can finish with one of his aerials. At high percents, his down aerial combos into his up smash for a KO.
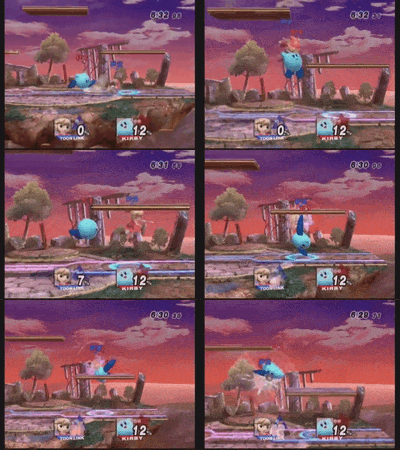
- Kirby: Down aerial is almost guaranteed to be followable by tilts (up tilt in particular), grabs, jabs, aerials, and or smash attacks based on percentage and which way the opponent DIs. The smashes in particular, if successful, can lead to KOs.
- Lucas: Down throw chains into multiple neutral aerials. At high percents, his down throw confirms into his up aerial for a KO.
- Luigi: Previously, his down throw had very low knockback scaling, which allowed Luigi to perform combos even at KO percents, with his down throw easily leading into his Luigi Cyclone or Super Jump Punch for a KO. However, patch 1.1.1 greatly increased the knockback scaling of his down throw, removing followups at high percents. Still, his down throw is an effective combo starter, and by combing into the spiking hitbox of his down air, he can perform a pseudo-chaingrab by fastfalling and regrabbing.
- Mario: His down throw leads into multiple up tilts, followed by two up aerials, and finishing with a Super Jump Punch.
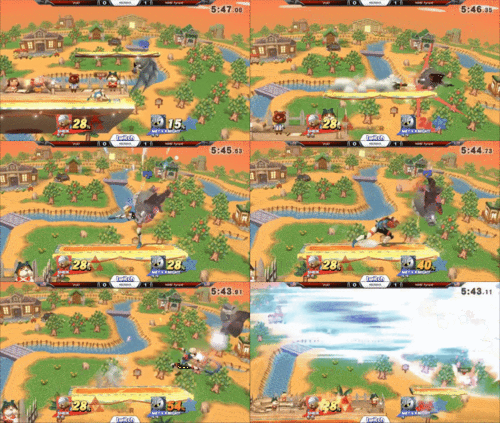
- Meta Knight: His down throw and dash attack combo into multiple up aerials, ending with high-altitude Shuttle Loop for a KO. Alternatively, Mach Tornado can be used.
- Ness: Down throw combos into multiple forward aerials.
- Pikachu: Up throw leads into Thunder for a KO if the opponent doesn't DI.
- R.O.B.: His down throw leads into a guaranteed up aerial for a deadly KO combo, known as the "Beep-Boop".
- Roy: His down throw combos into his jab, which can then lead into a regrab and another down throw. His jab alone combos into itself at low percents. Also, his neutral aerial can chain into itself at low percents.
- Ryu: His tapped up tilt is notorious for comboing into itself, and leading into his Shoryuken at high percents for a KO.
- Sheik: Her forward and down throws can start long combos using many forward aerials. Her forward throw also leads into Bouncing Fish, being an easy and useful damage racker. Also, her forward tilt can chain into itself at low percents.
- Zero Suit Samus: Her down throw can lead into two up aerials, finishing with a high-altitude Boost Kick, KOing very early if done properly. At mid-percents, her neutral aerial combos into her Flip Jump, KOing if she gets the spiking hitbox.


