Cloud (SSB4): Difference between revisions
(comes from dissidia. better translation based on that dub) |
m (→Moveset: Fixed an incorrect number and slight grammar change) |
||
| (437 intermediate revisions by more than 100 users not shown) | |||
| Line 1: | Line 1: | ||
{{ArticleIcons|ssb4=y}} | {{ArticleIcons|ssb4=y}} | ||
{{Disambig2|Cloud's appearance in '' | {{Disambig2|Cloud's appearance in ''Super Smash Bros. 4''|the character in other contexts|Cloud Strife}} | ||
{{Infobox Character | {{Infobox Character | ||
|name = Cloud | |name = Cloud | ||
|image = [[File:Cloud SSB4.png| | |image = {{tabber|title1=Final Fantasy VII|content1=[[File:Cloud SSB4.png|x250px]]|title2=Advent Children|content2=[[File:Cloud Advent Children SSB4.png|x250px]]}} | ||
|game = SSB4 | |game = SSB4 | ||
|ssbgame1 = Ultimate | |||
|universe = {{uv|Final Fantasy}} | |universe = {{uv|Final Fantasy}} | ||
|availability = [[Downloadable content|Downloadable]] | |availability = [[Downloadable content (SSB4)|Downloadable]] | ||
|tier = S | |tier = S | ||
|ranking = 2 | |ranking = 2-3 | ||
}} | }} | ||
:{{Cquote|Cloud Storms Into Battle!|cite=Introduction Tagline}} | :{{Cquote|''Cloud Storms Into Battle!''|cite=Introduction Tagline}} | ||
'''Cloud''' ({{ja|クラウド|Kuraudo}}, ''Cloud'') is a playable character | '''Cloud''' ({{ja|クラウド|Kuraudo}}, ''Cloud'') is a playable character in ''[[Super Smash Bros. 4]]''. He was officially announced during the November 12th, 2015 [[Nintendo Direct]], and released as the fifth [[Downloadable content (SSB4)|downloadable character]] on December 15th, 2015. He is one of six third-party characters in the game, alongside [[Capcom]]'s {{SSB4|Mega Man}} and {{SSB4|Ryu}}, [[Sega]]'s {{SSB4|Sonic}} and {{SSB4|Bayonetta}}, and [[Bandai Namco]]'s {{SSB4|Pac-Man}}. | ||
In all [[region]]s, Cloud is voiced by {{s|wikipedia|Takahiro Sakurai}}, his official Japanese voice actor from ''{{iw|khwiki|Kingdom Hearts|game}}'' onward. This is likely because his original English voice actor, {{iw|wikipedia|Steve Burton|actor}} (who voiced Cloud in English from ''Kingdom Hearts'' to ''{{s|wikipedia|Dissidia Final Fantasy NT}}'') is a union-based voice actor. | |||
Cloud | Cloud is ranked 2nd/3rd out of 54 on the [[tier list]], tying him with {{SSB4|Diddy Kong}} and placing him in the S tier. The [[Buster Sword]] grants him some of the greatest [[reach]] and longest [[disjoint]]ed hitboxes of any character; furthermore, he is highly mobile both in the air and on the ground, with a fast [[dash]] and high [[air speed]]. This, together with surprisingly fast frame data for a character of his range and power, grants Cloud potent zoning, [[spacing]], and [[neutral game]]s. The speed and utility of his [[aerial attack]]s make him dangerous in the air, and his attacks flow together well, letting him [[combo]] with ease. Cloud can also force [[approach]]es by using [[Limit Charge]], while a full [[charge]] boosts his mobility even further and significantly strengthens his [[special move]]s. | ||
Despite his strengths, Cloud has his fair share of flaws. Cloud's primary flaw is his poor [[recovery]]. Despite his aerial maneuverability and an effective [[wall jump]], [[Climhazzard]] gains very little height and no horizontal distance; its inability to [[sweetspot]] [[edge]]s for most of its duration also leaves him vulnerable to [[gimp]]ing. His KO ability is weaker if Limit Break is not fully charged, as many of his strongest attacks are risky to use due to their punishability if missed. Furthermore, his attacks require precise spacing to be safely and effectively landed, especially off-stage. Cloud also has difficulty approaching from the ground, due to his unsafe ground attacks, and [[Blade Beam]], his only projectile, is slow and punishable when not under the effects of Limit; additionally, his grab is one of the shortest of the cast, and his throws generally have low damage output and very little combo potential. Finally, Cloud's height, average [[weight]] and [[falling speed]] make him very susceptible to combos. | |||
Despite his flaws and risks, Cloud's innate strengths have allowed him to maintain excellent tournament results, with a large playerbase that either use him as a [[main]] or as a fallback [[pocket character]]. | |||
==Attributes== | ==Attributes== | ||
Cloud is a | Cloud is a [[Weight|middleweight]] swordfighter with surprisingly quick mobility overall. He has average [[walking speed]], the tenth fastest [[dash]]ing speed, above-average [[air speed]], average [[air acceleration]], and a fast [[jumpsquat]], granting him both quick ground and aerial mobility. He has above average [[falling speed]] and high [[gravity]], however, preventing him from staying in the air for long despite his good aerial maneuverability. Under Limit Break status, his mobility is even better; his traction slightly improves, his walking speed becomes the eleventh fastest, his dashing speed the fifth fastest, his falling speed the fourth fastest, and his airspeed becomes the fastest in the game under normal circumstances (only being slower than the lightest possible {{SSB4|Mii Brawler}}, [[Wario-Man]], and [[Giga Mac]]). His increased gravity and falling speed, however, make his jumps slightly lower and prevent him from auto-canceling some of his [[aerial attack]]s (notably [[back aerial]] and [[up aerial]]) as easily. As a result, his Limit Break status only marginally benefits his aerial mobility, but it can nevertheless help him move along the ground better. | ||
Cloud's greatest asset is | Cloud's greatest asset is the overall [[range]] throughout his moveset, courtesy of his Buster Sword: it grants Cloud's attacks the overall second longest [[disjointed]] range in the game, surpassed only by {{SSB4|Shulk}}. Thanks to his range and speed, Cloud can space out the opponent quite easily, stuff out opposing [[approach]]es and adeptly [[Punishment|punish]] most careless attacks. A prime example of this trait is Cloud's aerial attacks: his [[neutral aerial]] covers a very wide area, making it a go-to option for spacing or air-to-ground transition movement. It is also very fast on both ends, can [[autocancel]] from a short hop, and has a low launching angle, all of which make it a great [[edgeguarding]] tool despite its low [[knockback]]. | ||
His | His up aerial has good [[damage]] output, decent knockback, high speed, a long duration, a very generous autocancel window, and an enormous overall hitbox, making it an all-purpose attack and discouraging most opponents from trying to attack Cloud from overhead. His [[down aerial]] is not only a very strong [[meteor smash]] when sweetspotted, but also possesses one of the most active late hitboxes in the game, which grants it good anti-juggling potential and allows him to follow up into another move if it connects while he is falling. Like up aerial, it also has a long autocancel window, being able to autocancel from a jump regardless of his Limit Break status. Back aerial has tremendous range, decent power, and the lowest [[landing lag]] among Cloud's aerials, and also autocancels from a short hop, allowing him to edgeguard and space effectively, though it can often miss low opponents. Forward aerial is very strong when hitting clean, and is also a [[meteor smash]] on aerial opponents when sweetspotted. Like down aerial, it autocancels from a full jump and has low landing lag in relation to its range and power, however, it has the slowest startup of his aerials, making it his riskiest aerial to use regardless. | ||
His grounded moveset is not quite as overwhelming. His [[neutral attack]] is his fastest attack, and the third hit can force a [[tech-chase]]. His [[down tilt]] is a low-profile slide and can be a great tool to put the opponent at a disadvantage. His [[up tilt]] is a reliable combo starter until high percentages, chaining into itself at low percentages, and comboing into [[up smash]] or his neutral, back and up aerials. His up smash, in particular, covers a very large arc, has decent speed, and high knockback despite its surprisingly low damage, making it his best and least risky KOing option out of his standard moveset. His [[forward tilt]] has decent power and speed, but has little utility aside from as a quick punish, or being used as a [[KO]]ing option at extreme percentages. His [[dash attack]] is a fast punishing tool from a distance and, due to its power, can put opponents in a bad position. It is easily punished when shielded or avoided, however. Cloud's [[forward smash]] is his most powerful non-Limit Break move, though to compensate it also takes the longest to start and is very punishable if it whiffs. His [[down smash]] is also prone to punishment if the front hit is avoided, but it drags the opponent into the back hit if it connects, the latter being a strong semi-spike. | |||
Cloud's special moveset also offer interesting options. [[Blade Beam]] is a [[projectile]] with good range and activity, making it useful for forcing approaches, though it gets weakened over the duration and has high endlag, which hampers its otherwise useful utility. It also stalls Cloud in the air, giving it additional, if situational, utility in [[guard breaking]]. [[Cross Slash]] is very similar to [[Dancing Blade]] and [[Double-Edge Dance]], requiring additional inputs from the player to initiate the remaining slashes. In contrast, it has wider input windows, but the full move is only allowed to continue if all hits connect. It can also stall Cloud in the air, just like Blade Beam, though much more briefly. [[Climhazzard]] is similar to [[Aether]] and [[Final Cutter]], as it is an ascending slash, but differs from them in that it can be followed by an optional descending slash. This allows Cloud to mix-up his [[recovery]] and enables Climhazzard to function as his fastest [[out of shield]] option, though it is very risky to use. | |||
In reference to ''Final Fantasy VII'', Cloud possesses a unique Limit Break mechanic. It manifests itself in the form of a gauge, which becomes visible while charging it to show its progress, similarly to {{SSB4|Little Mac}}'s [[Power Meter]]. Cloud can charge Limit Break by dealing 250% damage, receiving 100% damage, or by instantly charging it with his down special, [[Limit Charge]]. Unlike most other chargeable special moves, it can be canceled with a simple special move button press, or even [[instant charge-cancel|instantly canceled]] into an attack, the latter being a trait shared only with [[Gyro]]. After it is full, Cloud gets a boost in all of his movement attributes except for attack speed, allowing him to move very quickly across the stage and in the air, with his overall mobility almost rivaling that of {{SSB4|Captain Falcon}} and {{SSB4|Sonic}}. In addition, all of Cloud's special attacks are given a single-use power boost, with all of them dealing more damage and high knockback to the point of KOing reliably around 90%-120%. Limit Charge is also converted to Finishing Touch, a spinning slash with such tremendous knockback that can KO most characters around 60%-70%. It also emits a [[Windbox|whirlwind]] that pushes away opponents, making it harder to punish and providing Cloud a situational method of [[gimp]]ing weak recoveries. With the exception of Finishing Touch, all Limit Break specials are also granted brief [[intangibility]] upon start-up, as well as additional properties: Blade Beam is faster, stronger, and has [[transcendent priority]]; Cross Slash requires no additional button inputs and strikes five times immediately, has very low ending lag in relation to its immense power, and stalls him completely in the air; and Climhazzard grants more vertical distance and much more horizontal momentum, as well as having the ability to [[edge sweetspot]] at any time. With all these benefits underneath the Limit Break status, players must be wary of this, as one small slip-up from the opponent can give Cloud the perfect opportunity to strike and turn the tide of battle instantaneously, making Cloud's Limit Break a mechanic that should not be taken lightly when in the hands of a competent player. | |||
Overall, while Cloud has all the tools required to be successful, the player is forced to manage | However, Cloud has some severe flaws. The most prominent one is his poor recovery. Despite his aerial mobility and jump height is arguably better than most sword-wielding characters, his diagonal speed remains slow when compared to them, making him prone to [[edgeguarding]] and [[gimping]], and making it mandatory to stay a safe distance within reaching the edge. Climhazzard is also a terrible recovery move for many reasons: it grants below-average vertical distance, little horizontal momentum, its ascending hit is completely incapable of edge sweetspotting, and its descending hit cannot edge sweetspot until it covers some prior distance. Additionally, if for any reason Cloud gets hit at the apex of Climhazzard, he is not able to tech a single-hit move regardless of how far or near he is to a wall, although he can still tech if he gets hit by a command grab or a multiple hit move. These factors make Cloud's recovery somewhat comparable to that of Little Mac, {{SSB4|Ganondorf}} and {{SSB4|Dr. Mario}}, in the sense that it is one of the riskiest and most ineffective without use of his [[wall jump]] or Limit Break Climhazzard (which loses the active hitbox near the end of his ascent, making it less safe than the regular Climhazzard in some situations). Cloud can stall his descent with Blade Beam and Cross Slash, although they only do so after one use. Additionally, the former's slower start-up and ending lag can make its use problematic against opponents already close to the edge or in prime position to reflect it, while the latter slows down his air speed significantly. The last problem about his recovery is that if he gets grabbed near the edge without his double jump and gets air released, he will not be able to return to the stage unless he properly times a Blade Beam to stall towards the edge, uses aerials or air dodges to reset his momentum, or possesses a Limit Break. | ||
Another glaring flaw is his grab game. Cloud's grab range is abysmally short, having the third shortest overall in the game. His throws' damage outputs are only average at best, and barring down throw at low percents, they lack any sort of combo potential, making them comparable to {{SSB4|Jigglypuff}}'s throws in regard to inefficiency. His forward and back throws' decent speed are significantly offset by the problematic combination of their virtual lack of combo potential and low knockback scaling. Additionally, both fail to KO before 300%, unless the opponent is light and Cloud is at the edge upon performing them. His up and down throws both have misleading power, failing to KO until well beyond 200%. Up throw has too much ending lag for reliably comboing, while down throw doesn't have reliable combos at low percentages and loses all of its combo potential past low-mid percentages if the opponent DIs properly. | |||
Despite his huge range, projectile and combo options granting him a strong neutral game, Cloud has a below average approach at best. His approach options are linear, with dash attack being easily punishable, neutral aerial having a hitbox that starts from behind, up aerial being very predictable and being surprisingly punishable on shield if not spaced well, and having other attacks that either lack the frame data or the utility to be used as reliable options for approaching such as his poor grab game. Cloud also has no reliable means of escaping pressure. His neutral attack and down tilt are his fastest ground options, while Climhazzard can work as an out of shield option. However, they are noticeably unsafe on shield, while none of his fast aerial attacks start from the front or below him. Down aerial's late hitbox can be used to escape juggling directly from below him, but its otherwise narrow hitbox allows opponents to hit Cloud laterally. Thus, Cloud is fairly easy to combo, and is just as easily forced on the defensive if his attacks are improperly spaced. While Cloud also possesses an abundance of strong finishers, his KOing ability is somewhat inconsistent. None of his strongest finishers are easy to land in the [[neutral game]] and they can be easily punished if avoided or shielded, his weaker moves such as his forward tilt and back aerial require good positioning to KO reliably, and he lacks reliable set-ups into his strongest or best finishers. | |||
Aside from Limit Charge, his special moves have some noticeable weaknesses. Blade Beam is relatively slow in regard to start-up and ending lag, as well as depreciating in damage over time or when used in the air. Cross Slash is not always consistent with linking all five of its hits due to SDI or landing different parts of the hitboxes, along with being very prone to [[stale-move negation]] due to being a very reliable damage racking option. In addition to its aforementioned weaknesses in regard to recovery, Climhazzard is also very punishable if shielded and easily DI'd out of, while all of his specials only boast KO power when they are boosted by the Limit Break. The Limit Break mechanic itself is also problematic. It acts as a double-edged sword, as it increases Cloud's fall speed and gravity at full charge, making recovery without the use of Climhazzard deceptively difficult, and rendering Cloud even easier to combo at medium percentages. It makes precise use of his special attacks mandatory, as his Limit Break specials are still blockable and possess limited range; while Limit Blade Beam can be used as a ranged KOing option, it can just as easily be [[reflection|reflected]] or otherwise avoided at the tip of its range, leaving Cloud wide open to punishment. Finishing Touch deals only 1% and has very high ending lag that renders Cloud vulnerable if the slash or whirlwind do not hit. Finally, Cloud lacks [[Character customization|custom moves]] like his fellow [[Downloadable content|DLC]] characters, and while this does not seem to be a problem considering his Limit Break-boosted specials, the lack of variety for the normal special moves does hinder his matchups against more optimized custom characters. | |||
Overall, while Cloud has all the tools required to be successful, the player is forced to manage his resources to the best of their ability, and they must avoid being thrown off the stage at all times. His combo game and KOing ability, while unique and powerful, can sometimes be inconsistent. Even though Cloud has many playstyles applicable to him, the combination of all of the traits above make him a fundamentals-oriented character most of the time. His weaknesses, however, are still offset by his amazing strengths in his great range, quick frame data in proportion to his range, high damage output and power, and amazing mobility (especially under Limit Break status), with most smashers agreeing he has few losing matchups (the most prominent one being {{SSB4|Sheik}}). Much like {{SSB4|Mario}}, Cloud has a relatively low learning curve and skill floor that makes him an effective choice for beginners and inexperienced players, though due to the benefits that his most difficult techniques can offer when they are mastered, he continues to be one of the most viable characters in high-level play. His tournament representation and results are strong, with notable players like [[Smasher:Javi (Smash 4)|Javi]], {{Sm|komorikiri}}, {{Sm|MkLeo}}, {{Sm|Ned}} and {{Sm|Tweek}} all having placed high in national tournaments, and he is considered to be an even better character for doubles play, as his Limit Break specials are more reliable and easier to land at the end of a team combo, he can provide stage control and wall out the opponents for a teammate, and his teammate can assist him in recovering easily onto the stage. Thus, Cloud's doubles representation is much stronger in comparison to his singles results, with smashers like {{Sm|MVD}} and {{Sm|Nairo}} using him to great success. | |||
==Update history== | ==Update history== | ||
Cloud | Cloud was slightly nerfed in update [[1.1.5]]. His up aerial deals less damage without any changes to its knockback values, which hinders its KO potential in exchange for allowing it to combo for longer. His KO potential in general was also slightly toned down, as forward smash, down smash, Limit Break Cross Slash, and most notably aerial Finishing Touch received reductions to their knockback. These nerfs, however, have not significantly impacted Cloud's viability, compared to the more severe nerfs to fellow top tiers {{SSB4|Meta Knight}}, {{SSB4|Sheik}} and {{SSB4|Bayonetta}} in updates 1.1.5 and [[1.1.6]]. As a result, while Cloud is slightly worse individually than he was at his release, he is considered to be overall better relative to the cast, and remains a viable character in the [[metagame]]. | ||
'''{{GameIcon|ssb4}} [[1.1.5]]''' | '''{{GameIcon|ssb4}} [[1.1.5]]''' | ||
| Line 44: | Line 53: | ||
==Moveset== | ==Moveset== | ||
*Cloud can [[wall jump]]. | *Cloud can [[wall jump]]. | ||
''For a gallery of Cloud's hitboxes, see [[/Hitboxes|here]].'' | |||
{{MovesetTable | {{MovesetTable | ||
|game=SSB4 | |game=SSB4 | ||
|nocustoms=y | |||
|neutralname= | |neutralname= | ||
|neutralcount=3 | |neutralcount=3 | ||
|neutral1dmg=2.5% | |neutral1dmg=2.5% | ||
|neutral2dmg=2% | |neutral2dmg=2% | ||
|neutral3dmg= | |neutral3dmg=3.5% | ||
|neutraldesc=A | |neutraldesc=A side kick, followed by a mid-level roundhouse kick, followed by an outward slash. All hits are executed very quickly and have high range (particularly the kicks). The last hit can be used to [[tech-chase]] due to its low [[semi-spike]] knockback, but it's slow to end and can fail to connect at high percentages. | ||
|ftiltname= | |ftiltname= | ||
|ftiltdmg=11% | |ftiltdmg=11% | ||
|ftiltdesc=An | |ftiltdesc=An inward slash. It has quick start-up, but moderate ending lag. It is Cloud's only tilt that has reasonable KO potential, KOing middleweights around 120% at the edge. It is based on his basic attack in ''Final Fantasy VII''. | ||
|utiltname= | |utiltname= | ||
|utiltdmg=8% | |utiltdmg=8% | ||
|utiltdesc=An overhead arcing | |utiltdesc=An overhead arcing slash. Its hitbox starts behind Cloud with a larger front hitbox, although it does not extend beside Cloud and makes it unable to hit smaller characters beside him. It is fast and has a fairly large hitbox, although its knockback is lacking. It can reliably start combos, chaining into itself at 0% and into aerials at low percentages. | ||
|dtiltname= | |dtiltname=Sliding ({{ja|スライディング|Suraidingu}}) | ||
|dtiltdmg=6% ( | |dtiltdmg=6% (knee), 7% (leg) | ||
|dtiltdesc=A | |dtiltdesc=A [[Wikipedia:Dropkick#Baseball slide|baseball slide]]. His legs are intangible while the hitbox is active, and it will sometimes deal less damage if landed early. It has very quick start-up, propels Cloud a good distance forward, launches opponents vertically, and significantly lowers his hurtbox. Altogether, these traits make it useful as a [[punishment]] option, as well as a capable set-up option into aerial attacks. | ||
|dashname= | |dashname= | ||
|dashdmg=11% (clean), 8% (late) | |dashdmg=11% (clean), 8% (late) | ||
|dashdesc= | |dashdesc=Thrusts the sharp edge of the Buster Sword forward while holding it diagonally. It deals more damage at the beginning, has a lingering hitbox and its moderately high knockback enables it to KO at high percentages. | ||
|fsmashname= | |fsmashname=Triple Buster ({{ja|トリプルバスター|Toripuru Basutā}}) | ||
|fsmashdmg={{ChargedSmashDmgSSB4|3}} (hit 1), {{ChargedSmashDmgSSB4|2}} (hit 2 center), {{ChargedSmashDmgSSB4|3}} (hit 2 hilt), {{ChargedSmashDmgSSB4|4}} (hit 2 tip), {{ChargedSmashDmgSSB4|12}} (hit 3 tip),{{ChargedSmashDmgSSB4|13}} (hit 3 non-tip) | |fsmashdmg={{ChargedSmashDmgSSB4|3}} (hit 1), {{ChargedSmashDmgSSB4|2}} (hit 2 center), {{ChargedSmashDmgSSB4|3}} (hit 2 hilt), {{ChargedSmashDmgSSB4|4}} (hit 2 tip), {{ChargedSmashDmgSSB4|12}} (hit 3 tip), {{ChargedSmashDmgSSB4|13}} (hit 3 non-tip) | ||
|fsmashdesc= | |fsmashdesc=Performs three extremely fast slashes in front of himself. The first two hits combo into the third, which has higher range and immense knockback for the move's start-up (19 frames). It is Cloud's strongest non-Limit Break move, KOing middleweights around 100% at center-stage, but it has high ending lag and deals below average [[shieldstun]]. Additionally, each hit is only active for one frame, which means it can be dodged entirely with a well-timed [[roll]] or [[sidestep]]. It resembles the depiction of Cross Slash in the ''Kingdom Hearts'' series, and may also be a reference to the effects of the Double Cut Materia in ''Final Fantasy VII''. | ||
|usmashname= | |usmashname= | ||
|usmashdmg={{ChargedSmashDmgSSB4|13}} ( | |usmashdmg={{ChargedSmashDmgSSB4|13}} (early/tip), {{ChargedSmashDmgSSB4|12}} (mid/hilt), {{ChargedSmashDmgSSB4|8}} (late) | ||
|usmashdesc= | |usmashdesc=Swings the Buster Sword upward in a wide arc. Has some startup (15 frames) and moderate ending lag, and its KO power is only average compared to most other up smashes, but it has long range in front of, above, and slightly behind Cloud. KOs middleweights around 125%. | ||
|dsmashname= | |dsmashname=Double Thrust ({{ja|ダブルスラスト|Daburu Surasuto}}) | ||
|dsmashdmg={{ChargedSmashDmgSSB4|4}} (hit 1), {{ChargedSmashDmgSSB4|12}} (hit 2) | |dsmashdmg={{ChargedSmashDmgSSB4|4}} (hit 1), {{ChargedSmashDmgSSB4|12}} (hit 2) | ||
|dsmashdesc= | |dsmashdesc=Kneels and thrusts the Buster Sword's hilt forward, then performs a reverse gripped thrust behind himself. The first hit launches opponents into the second, though it is possible to [[tech]] after the first hit, causing the second to miss. The first hit can [[stage spike]] with ease due to its angle, while the second hit is a semi-spike, making it useful for launching opponents with weak horizontal recoveries off-stage. It hits on frame 8, making it Cloud's fastest smash attack. KOs middleweights around 140%. | ||
|nairname= | |nairname= | ||
|nairdmg=8% | |nairdmg=8% | ||
|nairdesc= | |nairdesc=A circular slash around himself. It is long-ranged, very fast, [[autocancel]]s from a short hop, making it a solid all-purpose move that is difficult to punish. Unusually, the move has a [[frame speed multiplier]] of 0.75×, making it faster to execute in-game. | ||
|fairname= | |fairname=Meteor Slash ({{ja|メテオスラッシュ|Meteo Surasshu}}) | ||
|fairdmg=14% (clean sweetspot), 13% (clean sourspot), 11% (late) | |fairdmg=14% (clean sweetspot), 13% (clean sourspot), 11% (late) | ||
|fairdesc=Briefly pauses and then | |fairdesc=Briefly pauses and then performs a downward slash. It is his slowest aerial to start, hitting on frame 18, but a sweetspot on the middle of the blade as it comes down powerfully [[meteor smash]]es aerial opponents. Grounded opponents are sent at a more vertical angle by the sweetspot. If contact is made once the blade stops, it deals weaker knockback. Its ending lag is moderate, though its landing lag is low for its range and power, and it autocancels from a full jump. It can be [[frame cancelling|frame canceled]] if hit with the sweetspot, allowing for more follow-ups. It closely resembles Braver, Cloud's initial Limit Break and Cloud’s attack animation when using the Deathblow Materia in ''Final Fantasy VII''. | ||
|bairname= | |bairname= | ||
|bairdmg=13% | |bairdmg=13% | ||
|bairdesc= | |bairdesc=Turns around to perform an outward slash. Has very long range and good knockback, KOing middleweights at around 115% near the edge. This makes it an effective spacing and KO option. It also has low landing lag (14 frames), autocancels from a short hop, and can be used to perform a [[wall of pain]] at low percentages. It has limited vertical range, however, and its hitbox is only active for two frames. It resembles the sword strike he does during his Meteorain Limit Break. | ||
|uairname= | |uairname= | ||
|uairdmg=12% (clean), 8.5% (late) | |uairdmg=12% (clean), 8.5% (late) | ||
|uairdesc=Thrusts the sharp edge of the Buster Sword upward | |uairdesc=Thrusts the sharp edge of the Buster Sword's blade upward while holding it parallel to the ground. Has [[sex kick]] properties. The initial hitbox is notoriously large and the move lasts a deceptively long time, allowing it to cover air dodges easily. While the range shortens somewhat after the initial strike, it is still long enough to allow Cloud to [[shark]] through platforms, contest with almost any down aerial in the game, and easily combo and [[juggle]] enemies. The move hits quickly, has low landing lag, and autocancels in a short hop. It also has decent power behind it, KOing grounded middleweights at around 160%. Interestingly, it shifts most of Cloud's hurtbox significantly forwards on the Z-axis, allowing him to avoid certain moves. It is commonly considered one of the best moves in the game. | ||
|dairname= | |dairname= | ||
|dairdmg=13% (clean aerial sourspot, grounded opponent), 15% (aerial sweetspot), 8% (late) | |dairdmg=13% (clean aerial sourspot, grounded opponent), 15% (aerial sweetspot), 8% (late) | ||
|dairdesc=A downward | |dairdesc=A downward thrust. Striking directly beneath Cloud with the first few frames meteor smashes aerial opponents, while the lingering hitbox hits opponents upwards and away, allowing the move to easily start combos or set up powerful KO moves at medium percentages. The move is often difficult to punish due to its high range, especially when autocanceled. KOs grounded middleweights around 135% when hit clean. | ||
|grabname= | |grabname= | ||
|grabdesc=Reaches out with his left hand. | |grabdesc=Reaches out with his left hand. Has the third-lowest range out of all standing grabs, though his [[pivot grab]] has increased range. | ||
|pummelname= | |pummelname= | ||
|pummeldmg=3% | |pummeldmg=3% | ||
|pummeldesc=A knee strike. Moderately slow, but one of the most damaging pummels in the game. | |pummeldesc=A knee strike. Moderately slow, but one of the most damaging pummels in the game. | ||
|fthrowname= | |fthrowname= | ||
|fthrowdmg=4% (hit 1), 3% ( | |fthrowdmg=4% (hit 1), 3% (throw) | ||
|fthrowdesc=A | |fthrowdesc=A modified [[wikipedia:dropkick#Dropsault|dropsault]]. It has low knockback, usually used for positioning or throwing opponents off-stage. It resembles Somersault, a Limit Break used by [http://finalfantasy.wikia.com/wiki/Tifa_Lockhart Tifa Lockhart], one of Cloud's party members in ''Final Fantasy VII''. | ||
|bthrowname= | |bthrowname= | ||
|bthrowdmg=3% (hit 1), 3% ( | |bthrowdmg=3% (hit 1), 3% (throw) | ||
|bthrowdesc= | |bthrowdesc=A spinning back kick. At lower percentages, it is capable of tech-chasing with Blade Beam or his dash attack against middleweights and heavyweights. | ||
|uthrowname= | |uthrowname= | ||
|uthrowdmg=2% (hit 1), 2.5% (hit 2), 4% ( | |uthrowdmg=2% (hit 1), 2.5% (hit 2), 4% (throw) | ||
|uthrowdesc=A | |uthrowdesc=A {{s|wikipedia|540 kick}}. However, it is unable to KO at reasonable percentages, and should the opponent be in the middle of the stage and be at such percentages (around 215% for middleweights), up throw will be more effective at KOing. It vaguely resembles Tifa's Waterkick Limit Break, albeit kicking vertically instead of horizontally. | ||
|dthrowname= | |dthrowname= | ||
|dthrowdmg=7% | |dthrowdmg=7% | ||
|dthrowdesc=A one-handed body slam. It launches opponents | |dthrowdesc=A one-handed body slam. It launches opponents behind him with low base knockback; it is Cloud's only combo throw, though it is a lackluster one. It also KOs earlier than any of his other throws, especially near the edge, though still not until extremely high percentages. It resembles Tifa's Meteor Strike Limit Break, albeit performed while grounded instead of in the air. | ||
|floorfname= | |floorfname= | ||
|floorfdmg=7% | |floorfdmg=7% | ||
|floorfdesc= | |floorfdesc=Swings the Buster Sword around himself before getting up. | ||
|floorbname= | |floorbname= | ||
|floorbdmg=7% | |floorbdmg=7% | ||
|floorbdesc= | |floorbdesc=Swings the Buster Sword around himself before getting up. | ||
|floortname= | |floortname= | ||
|floortdmg=5% | |floortdmg=5% | ||
|floortdesc= | |floortdesc=Swings the Buster Sword around himself before getting up. | ||
|edgename= | |edgename= | ||
|edgedmg=8% | |edgedmg=8% | ||
|edgedesc= | |edgedesc=Performs an inward slash while climbing up. | ||
| | |nsname=Blade Beam | ||
| | |nsdmg=8% (grounded clean), 6% (grounded late), 6.4% (aerial clean), 4.8% (aerial late), 6% (Limit Break hit 1), 2% (Limit Break hits 2-6), 3% (Limit Break hit 7) | ||
| | |nsdesc=Swings the Buster Sword upward and in front of himself in order to launch a green, crescent-shaped energy beam as a [[projectile]]. It comes out and moves rather slowly, but travels a long distance and has a large hitbox. It is stronger if used on the ground and hit early. The aerial version is slower and deals less damage, but gives Cloud a slight lift. Like most projectiles, it disappears on contact with an object or enemy. The Limit Break variant possesses [[transcendent priority]], moves much faster across the ground and hits multiple times, with its last hit having great KO potential. It is still weaker and slower when performed in midair, however. | ||
| | |ssname=Cross Slash | ||
|ssdmg=4% (hit 1), 3% (hit 2-4), 6% (hit 5), 5% (Limit Break hit 1), 3% (Limit Break hits 2-4), 10% (Limit Break hit 5) | |||
|ssdesc=Performs a downwards slash. On contact with an enemy, pressing the special button allows this slash to transition into a series of follow-up slashes, together spelling the kanji {{ja|凶|kyō}} ("misfortune"). The full attack deals high damage and moderate knockback, making it a superb [[punishing]] option at close range. It is weak against shield, however, as all stages of the attack are slow and punishable if missed. Its Limit Break variant results in Cloud unleashing all five strikes with a single input regardless of whether he hits anything. It also noticeably increases both the damage and KO potential of the move, KOing middleweights at 100% from the center of the stage, while reducing the move's ending lag to such an extent that it becomes nearly impossible to punish without being right behind Cloud as he unleashes the move. Additionally, Limit Cross Slash deals a high amount of [[shield damage]], and the final hit has a slightly larger hitbox than the default.<ref>[https://twitter.com/ruben_dal/status/859110965501206528]</ref> It is commonly considered Cloud's most effective Limit Break move due to its abundance of positive traits, as well as one of the game's best moves overall. | |||
|usname=Climhazzard | |||
|usdmg=3% (hit 1), 4% (hits 2-3), 3% (hit 4), 6% (Limit Break hit 1), 7% (Limit Break hit 2) | |||
|usdesc=A leaping reverse gripped slash. If the special button is pressed again, it is followed with a descending reverse gripped slash. The first hit deals set knockback that leads into the second hit, which has a sweetspot at the center of the Buster Sword's blade that meteor smashes opponents as Cloud descends. It is Cloud's primary recovery move, though it is notable for being very ineffective due to multiple traits: it grants poor distance with low vertical height and almost no horizontal momentum, and Cloud cannot tech any single-hit move if he is hit at the apex of Climhazzard's first hit, unless it is a [[command grab]] or a multiple hit move. Additionally, the descending slash cannot be cancelled and isn't able to sweetspot the edge until Cloud has fallen a certain distance with it, making it unsuitable to use offstage. Its fast startup makes it a good surprise attack when grounded, particularly as an [[out of shield]] option. Its Limit Break variant greatly strengthens the first (but not second) hit of the move (allowing it to KO grounded middleweights at around 125%), allows it to sweetspot edges throughout, and grants Cloud much greater vertical and horizontal distance. | |||
|dsname=Limit Charge | |||
| | |dsdmg=1% (Finishing Touch) | ||
| | |dsdesc=Holds out the Buster Sword and remains still. This manually [[charge]]s the Limit Gauge. While the move is being held, a text box labelled "Limit" appears above Cloud, which contains an otherwise-invisible meter that denotes the current level of Limit and increases as it is charged. The Limit Gauge will reach full charge either by using Limit Charge for 400 frames (6.67 seconds), but can be alternatively filled by dealing 250% or receiving 100%, and each of these methods stack with each other. The move can be [[charge-cancel]]ed by pressing the [[shield]] button, hitting the control stick left or right (which triggers a roll), grabbing, or pressing the special button again (the latter of which has an 8-frame delay). When the Limit Gauge is filled, Cloud is surrounded by a blue, flame-like energy, and his speed and mobility receive a noticeable increase. As long as he is in this state, he has access to much more powerful, one-use variants of his special attacks, as listed above. Using any of these attacks will empty the Limit Gauge and return Cloud to his normal state, even if the move misses or is interrupted. The Limit Break variation of Limit Charge itself is an entirely different attack called '''Finishing Touch'''; Cloud slashes in an arc around himself, generating a large whirlwind that deals only 1% damage but deals tremendous knockback, enough to KO most opponents before 70%. The move hits on frame 16, but has very high ending lag and almost no shieldstun due to its damage output. The attack is weaker as a whole when performed in the air, however, KOing about 24% later when hit in front, and 36% later with the back hitbox. The attack's hitbox is deceptively large, and it generates a powerful [[windbox]] that extends even further beyond the Buster Sword's range, [[push]]ing opponents away. Finishing Touch's animation may be based on [https://static.wikia.nocookie.net/finalfantasy/images/8/80/Cloud_Tornado_Limit_Sketch.jpg/ Tornado], an unused Limit Break in ''Final Fantasy VII''. | ||
| | |||
| | |||
| | |||
| | |||
| | |||
| | |||
|dsc1name=N/A | |dsc1name=N/A | ||
|dsc1dmg= | |dsc1dmg= | ||
| Line 154: | Line 147: | ||
|dsc2desc= | |dsc2desc= | ||
|fsname=Omnislash | |fsname=Omnislash | ||
|fsdmg=3% (hit 1), 2% (hits 2- | |fsdmg=3% (hit 1), 2% (hits 2-15), 5% (hit 16), 4% (hit 17, falling), 10% (hit 18, explosion), 50% (all hits connect) | ||
|fsdesc= | |fsdesc=Rushes forward at high speed and attacks, unleashing a series of slashes that concludes with a powerful, descending slash that triggers an explosion. At the beginning of the move, with a text box appearing above him that displays "Omnislash" as he proceeds to flings any opponents he runs into to the top of the screen. After the series of slashes, Cloud charges up a final slash, in which he descends and slashes the opponent downward to the stage and results in a huge explosion that launches the opponent. One of the most powerful [[Final Smash]]es in the game when successful, as it can KO as low as 22%. Unlike Marth and Lucina's Critical Hit, Cloud will dash off the edges of platforms if Omnislash is initiated next to one, and he cannot cancel the move. | ||
}} | |||
===Stats=== | |||
{{Attributes | |||
|cast = 58 | |||
|weight = 100 | |||
|rweight = 17-21 | |||
|dash = 1.8 | |||
|rdash = 5-8 | |||
|run = 1.97 | |||
|rrun = 10 | |||
|walk = 1.1 | |||
|rwalk = 30-32 | |||
|trac = 0.055 | |||
|rtrac = 28-33 | |||
|airfric = 0.009 | |||
|rairfric = 33-36 | |||
|air = 1.1 | |||
|rair = 14-19 | |||
|baseaccel = 0.01 | |||
|rbaseaccel = 10-54 | |||
|addaccel = 0.06 | |||
|raddaccel = 35 | |||
|gravity = 0.098 | |||
|rgravity = 18 | |||
|fall = 1.68 | |||
|rfall = 14-15 | |||
|ff = 2.688 | |||
|rff = 15-16 | |||
|jumpsquat = 4 | |||
|rjumpsquat = 1-13 | |||
|jumpheight = 32.5 | |||
|rjumpheight = 36-37 | |||
|shorthop = 17 | |||
|rshorthop = 20-21 | |||
|djump = 32 | |||
|rdjump = 37-38 | |||
}} | }} | ||
===[[Announcer]] call=== | |||
{{audio|Needs announcer calls from other languages.}} | |||
<gallery> | |||
Cloud English Announcer SSB4-SSBU.wav|English/Japanese/Chinese | |||
Cloud French Announcer SSBU.wav|French | |||
Cloud Russian Announcer SSBU.wav|Russian | |||
</gallery> | |||
===[[On-screen appearance]]=== | ===[[On-screen appearance]]=== | ||
{{Appearance | {{Appearance | ||
|desc=Falls from the sky and catches the Buster Sword with a | |desc=Falls from the sky and catches the Buster Sword with a flourish. | ||
|char=Cloud | |char=Cloud | ||
|game=SSB4}} | |game=SSB4}} | ||
| Line 167: | Line 205: | ||
{{Taunt/SSB4 | {{Taunt/SSB4 | ||
|char=Cloud | |char=Cloud | ||
|desc-up= | |desc-up=Twirls the Buster Sword in front of himself before positioning it on his shoulders while saying "{{ja|興味ないね|Kyōmi nai ne}}" ("Not interested"). It's the same animation of Cloud's victory pose from ''Final Fantasy VII'', and also resembles Cloud's official artwork for both ''SSB4'' and ''Final Fantasy VII''. | ||
|desc-side=Places the Buster Sword on his back and cups his hands together in front of him, generating a green glow. It is his spellcasting animation from ''Final Fantasy VII'', complete with its original sound effect and glowing energy field. | |||
|desc-down=Places | |desc-down=Places the Buster Sword on its tip and leans against it in a casual manner while scoffing. It resembles the cocky pose he assumes in many cutscenes throughout ''Final Fantasy VII''.}} | ||
===[[Idle pose]]s=== | ===[[Idle pose]]s=== | ||
{{Idle | {{Idle | ||
|desc-1= | |desc-1=Pulls the Buster Sword back and rubs the edge of its blade. | ||
|desc-2=Holds the Buster Sword upward in front of himself. | |desc-2=Holds the Buster Sword upward in front of himself with both hands. | ||
|image-1=CloudIdlePose1WiiU.jpg | |image-1=CloudIdlePose1WiiU.jpg | ||
|image-2=CloudIdlePose2WiiU.jpg}} | |image-2=CloudIdlePose2WiiU.jpg}} | ||
| Line 190: | Line 228: | ||
{{Victory/SSB4 | {{Victory/SSB4 | ||
|victory-theme=Victory! (Final Fantasy).ogg | |victory-theme=Victory! (Final Fantasy).ogg | ||
|victory-desc=A remix of | |victory-desc=A remix of Victory Fanfare from ''Final Fantasy VII'', which is itself a variant of Victory Fanfare heard throughout the ''Final Fantasy'' series. Unlike other themes, it plays continuously, replacing the results theme. | ||
|desc-1=While facing the screen, Cloud twirls the Buster Sword with one hand and places it on his back while looking away from the camera, saying {{ja|悪く思うな|Waruku omou na.}} ("No hard feelings.") | |desc-1=While facing the screen, Cloud twirls the Buster Sword with one hand and places it on his back while looking away from the camera, saying {{ja|悪く思うな|Waruku omou na.}} ("No hard feelings.") Based on his victory animation in Final Fantasy VII. | ||
|desc-2=While turning away, Cloud twirls the Buster Sword, places it on his back and then glares at the screen, saying {{ja|ついてないな|Tsuite nai na.}} ("Better luck next time.") | |desc-2=While turning away, Cloud twirls the Buster Sword, places it on his back and then glares at the screen, saying {{ja|ついてないな|Tsuite nai na.}} ("Better luck next time.") | ||
|desc-3=Rushes forward, quickly slashes the Buster Sword twice, and then assumes a battle stance similar to his idle animation, saying {{ja|お前に俺は倒せない|Omae ni ore wa taosenai.}} ("You cannot defeat me.") | |desc-3=Rushes forward, quickly slashes the Buster Sword twice, and then assumes a battle stance similar to his idle animation, saying {{ja|お前に俺は倒せない|Omae ni ore wa taosenai.}} ("You cannot defeat me.") | ||
|char=Cloud}} | |char=Cloud}} | ||
==In competitive play== | ==In [[competitive play]]== | ||
=== | ===Most historically significant players=== | ||
<!--This character has a fifteen player limit for this section. Before adding and/or removing a player, read these guidelines: https://www.ssbwiki.com/SmashWiki:Notability#%22Most_historically_significant_players%22_guidelines --> | |||
''See also: [[:Category:Cloud players (SSB4)]]'' | |||
== | *{{Sm|ANTi|USA}} - Used Cloud as a secondary alongside {{SSB4|Mario}} and {{SSB4|Zero Suit Samus}}. Placed 1st at both {{Trn|CEO 2016}} and {{Trn|Get On My Level 2017}}, 3rd at {{Trn|DreamHack Austin 2018}}, 4th at {{Trn|2GG: Hyrule Saga}}, and 5th at {{Trn|DreamHack Atlanta 2017}} with wins over players such as {{Sm|Elegant}}, {{Sm|Samsora}}, and {{Sm|MVD}}. | ||
*{{Sm| | *{{Sm|Blacktwins|Canada}} - Co-mained Cloud alongside {{SSB4|Mario}} and is considered the best Cloud player in Canada. Placed 7th at {{Trn|Get On My Level 2017}}, 9th at {{Trn|Smash 'N' Splash 3}}, 13th at {{Trn|Shine 2018}}, and 17th at both {{Trn|DreamHack Montreal 2017}} and {{Trn|The Big House 8}} with wins over players such as {{Sm|Mew2King}}, {{Sm|Darkshad}}, and {{Sm|SuperGirlKels}}. Ranked 10th on the [[Canada Smash Ranking]]. | ||
*{{Sm|Javi|Mexico|p=Smash 4}} - Co-mained Cloud with {{SSB4|Sheik}} and is considered one of the best Cloud players in Mexico. Placed 4th at {{Trn|Canada Cup 2016}}, 7th at {{Trn|Smash Factor 5}}, 9th at {{Trn|2GGC: GENESIS Saga}}, and 17th at both {{Trn|2GGC: West Side Saga}} and {{Trn|The Big House 7}} with wins over players such as {{Sm|MkLeo}}, {{Sm|Larry Lurr}}, and {{Sm|Ally}}. | |||
*{{Sm|komorikiri|Japan}} - One of the best Cloud players in the world. Placed 1st at both {{Trn|Sumabato 12}} and {{Trn|Smashdown World}}, 2nd at {{Trn|2GGC: GENESIS Saga}}, and 3rd at both {{Trn|The Big House 6}} and {{Trn|MomoCon 2018}}. | |||
*{{Sm|Mangalitza♀|Japan}} - Placed 1st at {{Trn|Sumabato 21}}, 9th at both {{Trn|Sumabato 23}} and {{Trn|Sumabato 27}}, 13th at {{Trn|Sumabato Tokaigi Qualifier}}, and 17th at {{Trn|Sumabato 28}} with wins over players such as {{Sm|komorikiri}}, {{Sm|Choco}}, and {{Sm|T}}. Ranked 52nd on the [[JAPAN Power Rankings]]. | |||
*{{Sm|Mao|Japan}} - Placed 5th at {{Trn|Sumabato 21}}, 9th at both {{Trn|Umebura 27}} and {{Trn|Sumabato Smash 4 Final}}, 13th at {{Trn|Umebura Tokaigi Qualifier 1}}, and 17th at {{Trn|EVO Japan 2018}} with wins over players such as {{Sm|Abadango}}, {{Sm|Nietono}}, and {{Sm|Raito}}. Ranked 38th on the [[JAPAN Power Rankings]]. | |||
*{{Sm|Masashi|Japan}} - One of the best Cloud players in Japan. Placed 1st at {{Trn|Sumabato 26}}, 2nd at {{Trn|Sumabato 24}}, 5th at {{Trn|Sumabato 23}}, 7th at {{Trn|Sumabato 18}}, and 13th at {{Trn|Sumabato Smash 4 Final}} with wins over players such as {{Sm|Shuton}}, {{Sm|Raito}}, and {{Sm|Etsuji}}. Ranked 15th on the [[JAPAN Power Rankings]]. | |||
*{{Sm|MattyG|USA}} - The best Cloud player in New England. Placed 7th at both {{Trn|Too Hot to Handle}} and {{Trn|Super FamiCon 2017}}, 13th at {{Trn|Super Smash Con 2017}}, and 17th at both {{Trn|Shine 2017}} and {{Trn|The Big House 7}} with wins over players such as {{Sm|Kameme}}, {{Sm|Marss}}, and {{Sm|Light|p=Connecticut}}. Ranked 5th on the [[New England Power Rankings]]. | |||
*{{Sm|Mew2King|USA}} - One of the best Cloud players during the first few years of the game's competitive lifespan. Placed 2nd at {{Trn|Endgame}}, 3rd at {{Trn|Enthusiast Gaming Live Expo}}, 5th at both {{Trn|Get On My Level 2016}} and {{Trn|Shine 2016}}, and 17th at {{Trn|Frostbite 2018}} with wins over players such as {{Sm|ZeRo}}, {{Sm|Ally}}, and {{Sm|Larry Lurr}}. | |||
*{{Sm|MkLeo|Mexico}} - Co-mained Cloud with {{SSB4|Marth}} and is considered the best Cloud player in the world, winning {{Trn|2GGT: ZeRo Saga}}, {{Trn|IBP Masters Showdown}}, {{Trn|GENESIS 5}}, {{Trn|SwitchFest}}, and {{Trn|Super Smash Con 2018}}. | |||
*{{Sm|Ned|USA}} - One of the best Cloud players in the United States. Placed 2nd at {{Trn|Midwest Mayhem 5}}, 5th at {{Trn|Endgame}}, 13th at both {{Trn|Showdown: Battle Royale}} and {{Trn|Smash 'N' Splash 4}}, and 17th at {{Trn|Frostbite 2017}} with wins over players such as {{Sm|ZeRo}}, {{Sm|Ally}}, and {{Sm|Larry Lurr}}. | |||
*{{Sm|Purple~H|Germany}} - The best Cloud player in Europe. Placed 5th at {{Trn|SALT}}, {{Trn|Syndicate 2017}}, and {{Trn|PPT Berlin}}, 7th at {{Trn|Syndicate 2016}}, and 9th at {{Trn|Albion 2}} with wins over players such as {{Sm|S1}} and {{Sm|quiK}}. Ranked 7th on the [[European Smash 4 Power Rankings]]. | |||
*{{Sm|RAIN|Japan}} - One of the best Cloud players in Japan. Placed 5th at both {{Trn|Umebura 29}} and {{Trn|Umebura Smash 4 Final}}, 9th at both {{Trn|EVO 2015}} and {{Trn|Apex 2016}}, and 13th at {{Trn|Umebura 33}}. | |||
*{{Sm|Ralphie|USA}} - Placed 1st at {{Trn|Xanadu - End of an Era}}, 9th at both {{Trn|Collision XV}} and {{Trn|Super Smash Con 2018}}, and 17th at both {{Trn|Smash 'N' Splash 4}} and {{Trn|Smash Sounds}} with wins over players such as {{Sm|Ally}}, {{Sm|Mr. E}}, and {{Sm|Sinji}}. Ranked 7th on the [[New York City Power Rankings]]. | |||
*{{Sm|Tweek|USA}} - One of the best Cloud players in the world. Placed 1st at {{Trn|2GGC: MkLeo Saga}} and {{Trn|2GG: Hyrule Saga}}, 3rd at both {{Trn|Shots Fired 2}} and {{Trn|Royal Flush}}, and 4th at {{Trn|EVO 2017}}. | |||
===Tier placement, history and bans in doubles tournaments=== | |||
Since his release, players saw Cloud as a high-tier character, thanks to his incredible combination of range, mobility, power, and Limit Break mechanic; the latter in particular was highly valued for its ability to not only grant his special moves KO potential disproportionate for and beyond his weight class, but also make them fast and safe, especially Cross Slash. This positive outlook on Cloud was even more apparent in doubles play, where he can greatly benefit from having a teammate to alleviate his weak recovery and helping to land his Limit Break specials as the finisher to team combos, while Cloud himself can provide stage control and wall out his opponents for his teammate. Following his release, he started seeing strong results thanks to professionals such as {{Sm|komorikiri}}, {{Sm|Mew2King}} and {{Sm|Tweek}}, which led him to be ranked 12th on the first ''4BR'' [[tier list]], placing him at the middle of the B tier, confirming his high-tier status. | |||
With the release of {{SSB4|Corrin}} and {{SSB4|Bayonetta}}, the subsequent nerfs to them and other top-tier characters, and various advancements to his metagame, Cloud became a very popular character in tournaments. His own nerfs did not seriously hinder him, and he remained a fundamentally strong character choice for both newer and professional players, the latter of which saw {{Sm|MkLeo}} formally picking him up. This was apparent with him appearing more frequently in the top placings of tournaments in comparison to some top-tier characters like {{SSB4|Sheik}} and {{SSB4|Zero Suit Samus}}, and consistently winning almost every major doubles event at tournaments. As a result of this spike in popularity and success, Cloud was ranked 2nd on the second tier list, placing him in the S tier; his tier rise was tied with {{SSB4|Palutena}}'s for the fifth highest between the first and second tier lists. | |||
{{ | Despite his success, Cloud's placement initially received mixed thoughts from the community, as his rather exploitable weaknesses held him back from consistently achieving top 8 placings in singles for several national tournaments, such as {{Trn|EVO 2017}} (the highest ranking Cloud being komorikiri, who placed 17th) and {{Trn|Super Smash Con 2016}} (the highest ranking solo Cloud being Tweek, who placed 13th). As his metagame progressed, however, Cloud's singles results became considerably more consistent, as players, especially MkLeo, Tweek, and komorikiri, started seeing more top 8 placements at national tournaments. Although Cloud would drop to 3rd place on the third tier list due to the rise of Bayonetta, his continued consistency would see him rise back to 2nd/3rd place on the fourth and final tier list, tying him with {{SSB4|Diddy Kong}}. | ||
At the end of the game's main competitive lifespan, however, many players once again questioned Cloud's tier placement as his results as a solo main weren't as impressive compared to other characters such as Diddy Kong, {{SSB4|Sheik}}, {{SSB4|Zero Suit Samus}}, {{SSB4|Fox}}, and {{SSB4|Rosalina & Luma}}. Furthermore, several smashers pointed out that top players were getting better at exploiting the character's poor recovery. Finally, MkLeo and Tweek, two of the best Cloud players in the world, started to use Bayonetta more frequently, leading to a small decline in representation at top level play. Due to all of this, a few players such as {{Sm|Mr.R}} and MkLeo claimed that Cloud is overrated and that he should be ranked slightly lower while other players claim that his polarizing strengths are too strong for him to be ranked any lower. | |||
:'''Cloud''' | =====Banned in Doubles===== | ||
{{split|Wide-reaching character bans could have pages, see [[Talk:Steve (SSBU)]]}} | |||
In doubles tournaments, Cloud was considered by many players to be [[broken]] enough to ban, as he was banned at the following tournaments. Thanks to his many advantages, Cloud players consistently won ''Smash 4'' doubles tournaments after his release. This was evident with Cloud in ''Smash 4'' doubles [https://intheloop837.wordpress.com/2018/04/09/data-cloud-in-doubles-an-analysis/ being more dominant than Meta Knight in ''Brawl'' singles]. | |||
*{{flag|Canada}} {{Trn|Get On My Level 2018}} (double Cloud only) | |||
*{{flag|USA}} {{Trn|CEO 2018}} <ref>{{cite web|url=https://twitter.com/ceojebailey/status/997598615362301952|title=Cloud banned at CEO 2018 doubles}}</ref> | |||
*{{flag|USA}} {{Trn|Smash 'N' Splash 4}} | |||
*{{flag|USA}} {{Trn|Shine 2018}} | |||
*{{flag|USA}} {{Trn|DreamHack Atlanta 2018}} | |||
{{ | ==[[List of Super Smash Bros. 4 character trailers#Cloud|Reveal trailer]]== | ||
{{#widget:YouTube|id=nc3CY31kMJ4}} | |||
{{clr}} | |||
==[[Trophies]]== | |||
{{Trophy/Fighter | |||
|name=Cloud | |||
|image-3ds=CloudTrophy3DS.png | |||
|image-wiiu=CloudTrophyWiiU.png | |||
|mode=Classic | |||
|desc=The protagonist of FINAL FANTASY VII, Cloud wields the enormous Buster Sword, a memento from his comrade Zack. Once a SOLDIER of Shinra, he now fights as a mercenary against the corporation he originally served. His decision to join AVALANCHE’<!--Do not change to a normal apostrophe, single-quote is used in the game-->s insurgence, however, will transform his destiny. | |||
|gamelist={{Trophy games|game1=FINAL FANTASY VII|release1=11/1997}} | |||
}} | |||
{{clrl}} | |||
{{Trophy | {{Trophy/Fighter | ||
|name=Cloud (Alt.) | |||
|image-3ds=CloudAltTrophy3DS.png | |||
|image-wiiu=CloudAltTrophyWiiU.png | |||
|mode=Alt | |||
|desc=Filling the Limit Gauge allows Cloud to perform a Limit Break, supercharging his next special move. His down special becomes Finishing Touch. With a huge swing of his sword, Cloud summons a whirlwind that inflicts only 1% damage, but boasts brutal launch power. Go for a KO while his foes' damage is still low! | |||
|gamelist={{Trophy games|game1=FINAL FANTASY VII|release1=11/1997}} | |||
}} | |||
{{clrl}} | |||
{{Trophy/Fighter | |||
|name=Omnislash | |||
|image=OmnislashTrophyWiiU.png | |||
|desc=Cloud sets out to prevent Sephiroth from sending Meteor crashing into the planet. The fate of the world on his shoulders, Cloud confronts his enemy one on one. He unleashes a flurry of swift slashes before delivering the finishing blow. In Smash Bros., the final strike creates an explosion, launching nearby fighters. | |||
|game=ssb4-wiiu | |||
}} | |||
{{clrl}} | |||
==[[Alternate costume (SSB4)#Cloud|Alternate costumes]]== | ==[[Alternate costume (SSB4)#Cloud|Alternate costumes]]== | ||
Cloud's default costume is based on his appearance in ''Final Fantasy VII''. He has an alternate costume based on his appearance in ''{{iw|wikipedia|Final Fantasy VII: Advent Children}}'', known as "Cloudy Wolf" in ''Dissidia Final Fantasy'', which | Cloud's default costume is based on his appearance in ''Final Fantasy VII'' while accommodating some changes to his design originating from ''Dissidia Final Fantasy'', namely the redesigned SOLDIER logo on his belt and a redesigned pauldron. He has an alternate costume based on his appearance in ''{{iw|wikipedia|Final Fantasy VII: Advent Children}}'', known as "Cloudy Wolf" in ''Dissidia Final Fantasy'', which replaces the Buster Sword with the [http://finalfantasy.wikia.com/wiki/Fusion_Sword Fusion Sword]. It has two minor variants: one with a long sleeve covering Cloud's left arm to hide the visible signs of his [http://finalfantasy.wikia.com/wiki/Geostigma Geostigma], and the other revealing Cloud's left arm after he has been cured of Geostigma, as well as a red ribbon wrapped around it, which he and his party wear in memory of {{s|wikipedia|Aerith Gainsborough}}. | ||
{|style="margin:1em auto 1em auto;text-align:center" | {|style="margin:1em auto 1em auto;text-align:center" | ||
|- | |- | ||
|colspan=8|[[ | |colspan=8|[[File:Cloud Palette (SSB4).png|link=Alternate costume (SSB4)#Cloud]] | ||
|- | |- | ||
|{{Head|Cloud|g=SSB4|s=50px}} | |{{Head|Cloud|g=SSB4|s=50px}} | ||
| Line 270: | Line 326: | ||
==Gallery== | ==Gallery== | ||
<gallery> | <gallery> | ||
SSB4 CloudSplashArt.png|Cloud's splash art. | |||
Cloud amiibo.png|Cloud's [[amiibo]]. | |||
Cloud amiibo AC.png|Cloud's alternate [[amiibo]] based on his ''Advent Children'' costume. | |||
Cloud unlock notice SSB4-Wii U.png|Cloud's unlock notice in {{forwiiu}} after downloading him from the [[Nintendo eShop]]. | |||
Cloud poster.jpg|Cloud's poster used on the official website. | Cloud poster.jpg|Cloud's poster used on the official website. | ||
Cloud2.jpg|Cloud jumping alongside {{SSB4|Mario}}'s [[Fireball]] and {{SSB4|Samus}}' neutral aerial. | |||
Cloud2.jpg|Cloud jumping | |||
Cloud3.jpg|Using [[Blade Beam]] on {{SSB4|Charizard}}. | Cloud3.jpg|Using [[Blade Beam]] on {{SSB4|Charizard}}. | ||
Cloud4.jpg|Cloud on [[Final Destination (SSB4)|Final Destination]]. | Cloud4.jpg|Cloud on [[Final Destination (SSB4)|Final Destination]]. | ||
Cloud5.jpg|Cloud | Cloud5.jpg|Cloud on [[Midgar]], with Bahamut ZERO in the background. | ||
Cloud6.jpg|Cloud alongside {{SSB4|Wii Fit Trainer}} and {{SSB4|Lucario}} around the Summon Materia. | Cloud6.jpg|Cloud alongside {{SSB4|Wii Fit Trainer}} and {{SSB4|Lucario}} around the Summon Materia. | ||
Cloud7.jpg|Using the [[Limit Break]]-boosted [[Cross Slash]] on {{SSB4|Ganondorf}}. | Cloud7.jpg|Using the [[Limit Break]]-boosted [[Cross Slash]] on {{SSB4|Ganondorf}}. | ||
Cloud8.jpg|Cloud [[dash]]ing from {{SSB4|Link}}. | Cloud8.jpg|Cloud [[dash]]ing away from {{SSB4|Link}}. | ||
Cloud9.jpg|The last hit of Cloud's neutral attack. | Cloud9.jpg|The last hit of Cloud's neutral attack. | ||
Cloud10.jpg|Cloud on [[Gaur Plain]]. | Cloud10.jpg|Cloud on [[Gaur Plain]]. | ||
Cloud_Screen-3.jpg|Cloud alongside {{SSB4|Ness}} and Wii Fit Trainer on [[Wuhu Island]]'s boat. Cloud being in a [[stun]]ned state references a scene in ''Final Fantasy VII'' where he gets motion sickness. | Cloud_Screen-3.jpg|Cloud alongside {{SSB4|Ness}} and Wii Fit Trainer on [[Wuhu Island]]'s boat. Cloud being in a [[stun]]ned state references a scene in ''Final Fantasy VII'' where he gets motion sickness. | ||
Cloud_Screen-4.jpg|Using [[Limit Charge]]. | Cloud_Screen-4.jpg|Using [[Limit Charge]]. | ||
Cloud_Screen-5.jpg|Two Clouds, with one using Cross Slash and the other using the Limit Break-boosted Cross Slash. | Cloud_Screen-5.jpg|Two Clouds, with one using Cross Slash and the other using the Limit Break-boosted Cross Slash. | ||
| Line 294: | Line 352: | ||
==Trivia== | ==Trivia== | ||
*Cloud makes a few references to his home game | [[File:Cloud (Advent Children) Screen KO.jpg|thumb|Cloud's screen KO, referencing his official pose.]] | ||
*Cloud makes a few references to his home game, ''Final Fantasy VII: Advent Children'', and the ''Dissidia Final Fantasy'' games: | |||
**His pose in his official artwork matches his pose from his official artwork from ''Final Fantasy VII''. Conversely, the pose for his ''Advent Children'' costume resembles his official artwork from ''Dissidia Final Fantasy''. | **His pose in his official artwork matches his pose from his official artwork from ''Final Fantasy VII''. Conversely, the pose for his ''Advent Children'' costume resembles his official artwork from ''Dissidia Final Fantasy''. | ||
***Humorously, Cloud strikes a variation of the first pose when he is [[ | ***Humorously, Cloud strikes a variation of the first pose when he is [[screen KO]]'d. | ||
**His attacks emit unique blunt sounds when they hit opponents, while his side taunt emits a unique sound when performed. These sound effects originate from ''Final Fantasy VII'', | **His attacks emit unique blunt sounds when they hit opponents, while his side taunt emits a unique sound when performed. These sound effects originate from ''Final Fantasy VII'', similarly to how {{SSBB|Snake}} and {{SSB4|Ryu}} emit sound effects from their respective home series. | ||
**His idle stance is identical to his battle stance in later appearances such as the ''Dissidia Final Fantasy'' series, leading with his left leg instead of his right as he does in his original appearance in ''Final Fantasy VII''. | |||
**The greenish coloration of the Buster Sword's trail is a reference to [http://finalfantasy.fandom.com/wiki/Mako Mako], a liquid that is used as the primary energy source within ''Final Fantasy VII''. It also possesses the ability to grant superhuman abilities to humans via genetic experimentation, especially when used in conjunction with Jenova cells, a process which granted Cloud his superhuman abilities. | |||
**His idle stance | **Cloud's body emits blue Mako when his Limit Break is fully charged. This is a reference to his final battle against [[Sephiroth]] in ''Advent Children''. | ||
**The coloration of the Buster Sword's trail is a reference to the | **His on-screen appearance, which has him landing and then catching the Buster Sword, is a reference to the end of his battle against Sephiroth in ''Advent Children'', where the separated blades of the Fusion Swords strike around him and he catches the "core" blade as it falls. | ||
**Cloud glides forwards when he [[dash]]es. This is a reference to the dashing mechanic in the ''Dissidia Final Fantasy'' games, where all characters dash in a manner akin to flying, which can also be performed in midair. | |||
*Cloud glides | |||
*Cloud and {{SSB4|Bayonetta}} are the only characters with alternate costumes that sport a change of weapon. In Cloud's case, his ''Advent Children'' costume sees him wield the Fusion Swords from that movie instead of the Buster Sword, though they cannot be separated into their individual components. | *Cloud and {{SSB4|Bayonetta}} are the only characters with alternate costumes that sport a change of weapon. In Cloud's case, his ''Advent Children'' costume sees him wield the Fusion Swords from that movie instead of the Buster Sword, though they cannot be separated into their individual components. | ||
*Cloud is the second DLC character from a newly added [[universe]], succeeding Ryu and preceding Bayonetta. | *Cloud is the second DLC character from a newly added [[universe]], succeeding Ryu and preceding Bayonetta. | ||
*Cloud has an alternate [[KO| | **He is also one of said characters to come from a newly integrated company, being [[Square Enix]], followed by {{SSBU|Banjo & Kazooie}} ([[Microsoft]]) and {{SSBU|Terry}} ([[SNK]]) in ''Ultimate''. | ||
* | **While {{SSBU|Joker}} comes from [[Atlus]], as evidenced by their crediting in the copyright of ''Ultimate'', it is a subsidiary of Sega. The same applies to {{SSBU|Steve}}, who was created by [[Mojang]], which is also a subsidiary of [[Microsoft]]. | ||
*Cloud, Roy, Ryu, {{SSB4|Corrin}}, and Bayonetta are the only characters | *Cloud has an alternate [[KO|blast KO]] line in which he mutters ({{ja|ミスった|Misutta}}, "Missed it"), making him one of the few characters who says anything during a KO, and the only character to have a Japanese KO line in non-Japanese versions of the game. | ||
*Cloud and {{SSB4|Little Mac}} are the only characters who have special moves that affect the in-game camera, with both [[Straight Lunge#KO Uppercut|KO Uppercut]] and all but [[Blade Beam|one]] of Cloud's [[Limit Charge|Limit Break]] moves zooming in and slowing down time upon hitting their targets. Notably, both characters' attacks involve dealing and receiving damage before they can be used. In ''Ultimate'', this feature would be given to multiple other fighters in the [[Special Zoom]]. | |||
*Cloud, Roy, Ryu, {{SSB4|Corrin}}, and Bayonetta are the only characters to use different sound clips when using battering items. Coincidentally, all of them are DLC. | |||
**These same character's voice clips are in much lower quality than the rest of the cast in {{for3ds}}. | |||
*Cloud is the only DLC character with an alternate outfit to not have a trophy with the pose made with the alternate artwork in both versions of ''SSB4'', with it only appearing in the Wii U version. | |||
**He is also the only DLC character who is able to pseudo-[[crawl]] in ''SSB4''. | |||
*In ''Smash 3DS'', if Kirby attempts to inhale Cloud but the move is interrupted by Cloud attacking, the Buster Sword will not make its usual blunt impact noises for the duration of the match. | |||
==References== | |||
{{reflist}} | |||
{{SSB4Characters}} | {{SSB4Characters}} | ||
{{Final Fantasy universe}} | {{Final Fantasy universe}} | ||
[[Category:Cloud (SSB4)| ]] | |||
[[Category:Cloud (SSB4)]] | [[Category:Third-party characters]] | ||
[[Category:Third party characters]] | |||
[[Category:Downloadable content]] | [[Category:Downloadable content]] | ||
[[Category:Cloud]] | [[Category:Trophies (SSB4-3DS)]] | ||
[[Category:Trophies (SSB4-Wii U)]] | |||
[[Category:Square Enix]] | |||
[[es:Cloud (SSB4)]] | |||
Latest revision as of 08:09, April 26, 2024
| Cloud in Super Smash Bros. 4 | |
|---|---|
  
| |
| Universe | Final Fantasy |
| Other playable appearance | in Ultimate |
| Availability | Downloadable |
| Final Smash | Omnislash |
| Tier | S (2-3) |
| “ | Cloud Storms Into Battle! | ” |
| —Introduction Tagline | ||
Cloud (クラウド, Cloud) is a playable character in Super Smash Bros. 4. He was officially announced during the November 12th, 2015 Nintendo Direct, and released as the fifth downloadable character on December 15th, 2015. He is one of six third-party characters in the game, alongside Capcom's Mega Man and Ryu, Sega's Sonic and Bayonetta, and Bandai Namco's Pac-Man.
In all regions, Cloud is voiced by Takahiro Sakurai, his official Japanese voice actor from Kingdom Hearts onward. This is likely because his original English voice actor, Steve Burton (who voiced Cloud in English from Kingdom Hearts to Dissidia Final Fantasy NT) is a union-based voice actor.
Cloud is ranked 2nd/3rd out of 54 on the tier list, tying him with Diddy Kong and placing him in the S tier. The Buster Sword grants him some of the greatest reach and longest disjointed hitboxes of any character; furthermore, he is highly mobile both in the air and on the ground, with a fast dash and high air speed. This, together with surprisingly fast frame data for a character of his range and power, grants Cloud potent zoning, spacing, and neutral games. The speed and utility of his aerial attacks make him dangerous in the air, and his attacks flow together well, letting him combo with ease. Cloud can also force approaches by using Limit Charge, while a full charge boosts his mobility even further and significantly strengthens his special moves.
Despite his strengths, Cloud has his fair share of flaws. Cloud's primary flaw is his poor recovery. Despite his aerial maneuverability and an effective wall jump, Climhazzard gains very little height and no horizontal distance; its inability to sweetspot edges for most of its duration also leaves him vulnerable to gimping. His KO ability is weaker if Limit Break is not fully charged, as many of his strongest attacks are risky to use due to their punishability if missed. Furthermore, his attacks require precise spacing to be safely and effectively landed, especially off-stage. Cloud also has difficulty approaching from the ground, due to his unsafe ground attacks, and Blade Beam, his only projectile, is slow and punishable when not under the effects of Limit; additionally, his grab is one of the shortest of the cast, and his throws generally have low damage output and very little combo potential. Finally, Cloud's height, average weight and falling speed make him very susceptible to combos.
Despite his flaws and risks, Cloud's innate strengths have allowed him to maintain excellent tournament results, with a large playerbase that either use him as a main or as a fallback pocket character.
Attributes[edit]
Cloud is a middleweight swordfighter with surprisingly quick mobility overall. He has average walking speed, the tenth fastest dashing speed, above-average air speed, average air acceleration, and a fast jumpsquat, granting him both quick ground and aerial mobility. He has above average falling speed and high gravity, however, preventing him from staying in the air for long despite his good aerial maneuverability. Under Limit Break status, his mobility is even better; his traction slightly improves, his walking speed becomes the eleventh fastest, his dashing speed the fifth fastest, his falling speed the fourth fastest, and his airspeed becomes the fastest in the game under normal circumstances (only being slower than the lightest possible Mii Brawler, Wario-Man, and Giga Mac). His increased gravity and falling speed, however, make his jumps slightly lower and prevent him from auto-canceling some of his aerial attacks (notably back aerial and up aerial) as easily. As a result, his Limit Break status only marginally benefits his aerial mobility, but it can nevertheless help him move along the ground better.
Cloud's greatest asset is the overall range throughout his moveset, courtesy of his Buster Sword: it grants Cloud's attacks the overall second longest disjointed range in the game, surpassed only by Shulk. Thanks to his range and speed, Cloud can space out the opponent quite easily, stuff out opposing approaches and adeptly punish most careless attacks. A prime example of this trait is Cloud's aerial attacks: his neutral aerial covers a very wide area, making it a go-to option for spacing or air-to-ground transition movement. It is also very fast on both ends, can autocancel from a short hop, and has a low launching angle, all of which make it a great edgeguarding tool despite its low knockback.
His up aerial has good damage output, decent knockback, high speed, a long duration, a very generous autocancel window, and an enormous overall hitbox, making it an all-purpose attack and discouraging most opponents from trying to attack Cloud from overhead. His down aerial is not only a very strong meteor smash when sweetspotted, but also possesses one of the most active late hitboxes in the game, which grants it good anti-juggling potential and allows him to follow up into another move if it connects while he is falling. Like up aerial, it also has a long autocancel window, being able to autocancel from a jump regardless of his Limit Break status. Back aerial has tremendous range, decent power, and the lowest landing lag among Cloud's aerials, and also autocancels from a short hop, allowing him to edgeguard and space effectively, though it can often miss low opponents. Forward aerial is very strong when hitting clean, and is also a meteor smash on aerial opponents when sweetspotted. Like down aerial, it autocancels from a full jump and has low landing lag in relation to its range and power, however, it has the slowest startup of his aerials, making it his riskiest aerial to use regardless.
His grounded moveset is not quite as overwhelming. His neutral attack is his fastest attack, and the third hit can force a tech-chase. His down tilt is a low-profile slide and can be a great tool to put the opponent at a disadvantage. His up tilt is a reliable combo starter until high percentages, chaining into itself at low percentages, and comboing into up smash or his neutral, back and up aerials. His up smash, in particular, covers a very large arc, has decent speed, and high knockback despite its surprisingly low damage, making it his best and least risky KOing option out of his standard moveset. His forward tilt has decent power and speed, but has little utility aside from as a quick punish, or being used as a KOing option at extreme percentages. His dash attack is a fast punishing tool from a distance and, due to its power, can put opponents in a bad position. It is easily punished when shielded or avoided, however. Cloud's forward smash is his most powerful non-Limit Break move, though to compensate it also takes the longest to start and is very punishable if it whiffs. His down smash is also prone to punishment if the front hit is avoided, but it drags the opponent into the back hit if it connects, the latter being a strong semi-spike.
Cloud's special moveset also offer interesting options. Blade Beam is a projectile with good range and activity, making it useful for forcing approaches, though it gets weakened over the duration and has high endlag, which hampers its otherwise useful utility. It also stalls Cloud in the air, giving it additional, if situational, utility in guard breaking. Cross Slash is very similar to Dancing Blade and Double-Edge Dance, requiring additional inputs from the player to initiate the remaining slashes. In contrast, it has wider input windows, but the full move is only allowed to continue if all hits connect. It can also stall Cloud in the air, just like Blade Beam, though much more briefly. Climhazzard is similar to Aether and Final Cutter, as it is an ascending slash, but differs from them in that it can be followed by an optional descending slash. This allows Cloud to mix-up his recovery and enables Climhazzard to function as his fastest out of shield option, though it is very risky to use.
In reference to Final Fantasy VII, Cloud possesses a unique Limit Break mechanic. It manifests itself in the form of a gauge, which becomes visible while charging it to show its progress, similarly to Little Mac's Power Meter. Cloud can charge Limit Break by dealing 250% damage, receiving 100% damage, or by instantly charging it with his down special, Limit Charge. Unlike most other chargeable special moves, it can be canceled with a simple special move button press, or even instantly canceled into an attack, the latter being a trait shared only with Gyro. After it is full, Cloud gets a boost in all of his movement attributes except for attack speed, allowing him to move very quickly across the stage and in the air, with his overall mobility almost rivaling that of Captain Falcon and Sonic. In addition, all of Cloud's special attacks are given a single-use power boost, with all of them dealing more damage and high knockback to the point of KOing reliably around 90%-120%. Limit Charge is also converted to Finishing Touch, a spinning slash with such tremendous knockback that can KO most characters around 60%-70%. It also emits a whirlwind that pushes away opponents, making it harder to punish and providing Cloud a situational method of gimping weak recoveries. With the exception of Finishing Touch, all Limit Break specials are also granted brief intangibility upon start-up, as well as additional properties: Blade Beam is faster, stronger, and has transcendent priority; Cross Slash requires no additional button inputs and strikes five times immediately, has very low ending lag in relation to its immense power, and stalls him completely in the air; and Climhazzard grants more vertical distance and much more horizontal momentum, as well as having the ability to edge sweetspot at any time. With all these benefits underneath the Limit Break status, players must be wary of this, as one small slip-up from the opponent can give Cloud the perfect opportunity to strike and turn the tide of battle instantaneously, making Cloud's Limit Break a mechanic that should not be taken lightly when in the hands of a competent player.
However, Cloud has some severe flaws. The most prominent one is his poor recovery. Despite his aerial mobility and jump height is arguably better than most sword-wielding characters, his diagonal speed remains slow when compared to them, making him prone to edgeguarding and gimping, and making it mandatory to stay a safe distance within reaching the edge. Climhazzard is also a terrible recovery move for many reasons: it grants below-average vertical distance, little horizontal momentum, its ascending hit is completely incapable of edge sweetspotting, and its descending hit cannot edge sweetspot until it covers some prior distance. Additionally, if for any reason Cloud gets hit at the apex of Climhazzard, he is not able to tech a single-hit move regardless of how far or near he is to a wall, although he can still tech if he gets hit by a command grab or a multiple hit move. These factors make Cloud's recovery somewhat comparable to that of Little Mac, Ganondorf and Dr. Mario, in the sense that it is one of the riskiest and most ineffective without use of his wall jump or Limit Break Climhazzard (which loses the active hitbox near the end of his ascent, making it less safe than the regular Climhazzard in some situations). Cloud can stall his descent with Blade Beam and Cross Slash, although they only do so after one use. Additionally, the former's slower start-up and ending lag can make its use problematic against opponents already close to the edge or in prime position to reflect it, while the latter slows down his air speed significantly. The last problem about his recovery is that if he gets grabbed near the edge without his double jump and gets air released, he will not be able to return to the stage unless he properly times a Blade Beam to stall towards the edge, uses aerials or air dodges to reset his momentum, or possesses a Limit Break.
Another glaring flaw is his grab game. Cloud's grab range is abysmally short, having the third shortest overall in the game. His throws' damage outputs are only average at best, and barring down throw at low percents, they lack any sort of combo potential, making them comparable to Jigglypuff's throws in regard to inefficiency. His forward and back throws' decent speed are significantly offset by the problematic combination of their virtual lack of combo potential and low knockback scaling. Additionally, both fail to KO before 300%, unless the opponent is light and Cloud is at the edge upon performing them. His up and down throws both have misleading power, failing to KO until well beyond 200%. Up throw has too much ending lag for reliably comboing, while down throw doesn't have reliable combos at low percentages and loses all of its combo potential past low-mid percentages if the opponent DIs properly.
Despite his huge range, projectile and combo options granting him a strong neutral game, Cloud has a below average approach at best. His approach options are linear, with dash attack being easily punishable, neutral aerial having a hitbox that starts from behind, up aerial being very predictable and being surprisingly punishable on shield if not spaced well, and having other attacks that either lack the frame data or the utility to be used as reliable options for approaching such as his poor grab game. Cloud also has no reliable means of escaping pressure. His neutral attack and down tilt are his fastest ground options, while Climhazzard can work as an out of shield option. However, they are noticeably unsafe on shield, while none of his fast aerial attacks start from the front or below him. Down aerial's late hitbox can be used to escape juggling directly from below him, but its otherwise narrow hitbox allows opponents to hit Cloud laterally. Thus, Cloud is fairly easy to combo, and is just as easily forced on the defensive if his attacks are improperly spaced. While Cloud also possesses an abundance of strong finishers, his KOing ability is somewhat inconsistent. None of his strongest finishers are easy to land in the neutral game and they can be easily punished if avoided or shielded, his weaker moves such as his forward tilt and back aerial require good positioning to KO reliably, and he lacks reliable set-ups into his strongest or best finishers.
Aside from Limit Charge, his special moves have some noticeable weaknesses. Blade Beam is relatively slow in regard to start-up and ending lag, as well as depreciating in damage over time or when used in the air. Cross Slash is not always consistent with linking all five of its hits due to SDI or landing different parts of the hitboxes, along with being very prone to stale-move negation due to being a very reliable damage racking option. In addition to its aforementioned weaknesses in regard to recovery, Climhazzard is also very punishable if shielded and easily DI'd out of, while all of his specials only boast KO power when they are boosted by the Limit Break. The Limit Break mechanic itself is also problematic. It acts as a double-edged sword, as it increases Cloud's fall speed and gravity at full charge, making recovery without the use of Climhazzard deceptively difficult, and rendering Cloud even easier to combo at medium percentages. It makes precise use of his special attacks mandatory, as his Limit Break specials are still blockable and possess limited range; while Limit Blade Beam can be used as a ranged KOing option, it can just as easily be reflected or otherwise avoided at the tip of its range, leaving Cloud wide open to punishment. Finishing Touch deals only 1% and has very high ending lag that renders Cloud vulnerable if the slash or whirlwind do not hit. Finally, Cloud lacks custom moves like his fellow DLC characters, and while this does not seem to be a problem considering his Limit Break-boosted specials, the lack of variety for the normal special moves does hinder his matchups against more optimized custom characters.
Overall, while Cloud has all the tools required to be successful, the player is forced to manage his resources to the best of their ability, and they must avoid being thrown off the stage at all times. His combo game and KOing ability, while unique and powerful, can sometimes be inconsistent. Even though Cloud has many playstyles applicable to him, the combination of all of the traits above make him a fundamentals-oriented character most of the time. His weaknesses, however, are still offset by his amazing strengths in his great range, quick frame data in proportion to his range, high damage output and power, and amazing mobility (especially under Limit Break status), with most smashers agreeing he has few losing matchups (the most prominent one being Sheik). Much like Mario, Cloud has a relatively low learning curve and skill floor that makes him an effective choice for beginners and inexperienced players, though due to the benefits that his most difficult techniques can offer when they are mastered, he continues to be one of the most viable characters in high-level play. His tournament representation and results are strong, with notable players like Javi, komorikiri, MkLeo, Ned and Tweek all having placed high in national tournaments, and he is considered to be an even better character for doubles play, as his Limit Break specials are more reliable and easier to land at the end of a team combo, he can provide stage control and wall out the opponents for a teammate, and his teammate can assist him in recovering easily onto the stage. Thus, Cloud's doubles representation is much stronger in comparison to his singles results, with smashers like MVD and Nairo using him to great success.
Update history[edit]
Cloud was slightly nerfed in update 1.1.5. His up aerial deals less damage without any changes to its knockback values, which hinders its KO potential in exchange for allowing it to combo for longer. His KO potential in general was also slightly toned down, as forward smash, down smash, Limit Break Cross Slash, and most notably aerial Finishing Touch received reductions to their knockback. These nerfs, however, have not significantly impacted Cloud's viability, compared to the more severe nerfs to fellow top tiers Meta Knight, Sheik and Bayonetta in updates 1.1.5 and 1.1.6. As a result, while Cloud is slightly worse individually than he was at his release, he is considered to be overall better relative to the cast, and remains a viable character in the metagame.
 End of roll intangibility: Frame 17 → 15
- Forward smash's third hit has lower knockback scaling (119 → 115).
- Down smash's second hit has lower knockback scaling (96 → 94).
- Up aerial deals less damage (13% (clean)/9.5% (late) →12%/8.5%), hindering its KO potential.
 However, this also improves its combo potential.
- Limit Break Cross Slash has lower knockback scaling (155 → 153).
- Limit Charge takes 42 frames (0.7 seconds) longer to fully charge.
- Aerial Finishing Touch has lower knockback scaling (417 (clean)/390 (late)/100 (windbox) → 359/335/86).
Moveset[edit]
- Cloud can wall jump.
For a gallery of Cloud's hitboxes, see here.
| Name | Damage | Description | ||
|---|---|---|---|---|
| Neutral attack | 2.5% | A side kick, followed by a mid-level roundhouse kick, followed by an outward slash. All hits are executed very quickly and have high range (particularly the kicks). The last hit can be used to tech-chase due to its low semi-spike knockback, but it's slow to end and can fail to connect at high percentages. | ||
| 2% | ||||
| 3.5% | ||||
| Forward tilt | 11% | An inward slash. It has quick start-up, but moderate ending lag. It is Cloud's only tilt that has reasonable KO potential, KOing middleweights around 120% at the edge. It is based on his basic attack in Final Fantasy VII. | ||
| Up tilt | 8% | An overhead arcing slash. Its hitbox starts behind Cloud with a larger front hitbox, although it does not extend beside Cloud and makes it unable to hit smaller characters beside him. It is fast and has a fairly large hitbox, although its knockback is lacking. It can reliably start combos, chaining into itself at 0% and into aerials at low percentages. | ||
| Down tilt | Sliding (スライディング) | 6% (knee), 7% (leg) | A baseball slide. His legs are intangible while the hitbox is active, and it will sometimes deal less damage if landed early. It has very quick start-up, propels Cloud a good distance forward, launches opponents vertically, and significantly lowers his hurtbox. Altogether, these traits make it useful as a punishment option, as well as a capable set-up option into aerial attacks. | |
| Dash attack | 11% (clean), 8% (late) | Thrusts the sharp edge of the Buster Sword forward while holding it diagonally. It deals more damage at the beginning, has a lingering hitbox and its moderately high knockback enables it to KO at high percentages. | ||
| Forward smash | Triple Buster (トリプルバスター) | 3% (hit 1), 2% (hit 2 center), 3% (hit 2 hilt), 4% (hit 2 tip), 12% (hit 3 tip), 13% (hit 3 non-tip) | Performs three extremely fast slashes in front of himself. The first two hits combo into the third, which has higher range and immense knockback for the move's start-up (19 frames). It is Cloud's strongest non-Limit Break move, KOing middleweights around 100% at center-stage, but it has high ending lag and deals below average shieldstun. Additionally, each hit is only active for one frame, which means it can be dodged entirely with a well-timed roll or sidestep. It resembles the depiction of Cross Slash in the Kingdom Hearts series, and may also be a reference to the effects of the Double Cut Materia in Final Fantasy VII. | |
| Up smash | 13% (early/tip), 12% (mid/hilt), 8% (late) | Swings the Buster Sword upward in a wide arc. Has some startup (15 frames) and moderate ending lag, and its KO power is only average compared to most other up smashes, but it has long range in front of, above, and slightly behind Cloud. KOs middleweights around 125%. | ||
| Down smash | Double Thrust (ダブルスラスト) | 4% (hit 1), 12% (hit 2) | Kneels and thrusts the Buster Sword's hilt forward, then performs a reverse gripped thrust behind himself. The first hit launches opponents into the second, though it is possible to tech after the first hit, causing the second to miss. The first hit can stage spike with ease due to its angle, while the second hit is a semi-spike, making it useful for launching opponents with weak horizontal recoveries off-stage. It hits on frame 8, making it Cloud's fastest smash attack. KOs middleweights around 140%. | |
| Neutral aerial | 8% | A circular slash around himself. It is long-ranged, very fast, autocancels from a short hop, making it a solid all-purpose move that is difficult to punish. Unusually, the move has a frame speed multiplier of 0.75×, making it faster to execute in-game. | ||
| Forward aerial | Meteor Slash (メテオスラッシュ) | 14% (clean sweetspot), 13% (clean sourspot), 11% (late) | Briefly pauses and then performs a downward slash. It is his slowest aerial to start, hitting on frame 18, but a sweetspot on the middle of the blade as it comes down powerfully meteor smashes aerial opponents. Grounded opponents are sent at a more vertical angle by the sweetspot. If contact is made once the blade stops, it deals weaker knockback. Its ending lag is moderate, though its landing lag is low for its range and power, and it autocancels from a full jump. It can be frame canceled if hit with the sweetspot, allowing for more follow-ups. It closely resembles Braver, Cloud's initial Limit Break and Cloud’s attack animation when using the Deathblow Materia in Final Fantasy VII. | |
| Back aerial | 13% | Turns around to perform an outward slash. Has very long range and good knockback, KOing middleweights at around 115% near the edge. This makes it an effective spacing and KO option. It also has low landing lag (14 frames), autocancels from a short hop, and can be used to perform a wall of pain at low percentages. It has limited vertical range, however, and its hitbox is only active for two frames. It resembles the sword strike he does during his Meteorain Limit Break. | ||
| Up aerial | 12% (clean), 8.5% (late) | Thrusts the sharp edge of the Buster Sword's blade upward while holding it parallel to the ground. Has sex kick properties. The initial hitbox is notoriously large and the move lasts a deceptively long time, allowing it to cover air dodges easily. While the range shortens somewhat after the initial strike, it is still long enough to allow Cloud to shark through platforms, contest with almost any down aerial in the game, and easily combo and juggle enemies. The move hits quickly, has low landing lag, and autocancels in a short hop. It also has decent power behind it, KOing grounded middleweights at around 160%. Interestingly, it shifts most of Cloud's hurtbox significantly forwards on the Z-axis, allowing him to avoid certain moves. It is commonly considered one of the best moves in the game. | ||
| Down aerial | 13% (clean aerial sourspot, grounded opponent), 15% (aerial sweetspot), 8% (late) | A downward thrust. Striking directly beneath Cloud with the first few frames meteor smashes aerial opponents, while the lingering hitbox hits opponents upwards and away, allowing the move to easily start combos or set up powerful KO moves at medium percentages. The move is often difficult to punish due to its high range, especially when autocanceled. KOs grounded middleweights around 135% when hit clean. | ||
| Grab | — | Reaches out with his left hand. Has the third-lowest range out of all standing grabs, though his pivot grab has increased range. | ||
| Pummel | 3% | A knee strike. Moderately slow, but one of the most damaging pummels in the game. | ||
| Forward throw | 4% (hit 1), 3% (throw) | A modified dropsault. It has low knockback, usually used for positioning or throwing opponents off-stage. It resembles Somersault, a Limit Break used by Tifa Lockhart, one of Cloud's party members in Final Fantasy VII. | ||
| Back throw | 3% (hit 1), 3% (throw) | A spinning back kick. At lower percentages, it is capable of tech-chasing with Blade Beam or his dash attack against middleweights and heavyweights. | ||
| Up throw | 2% (hit 1), 2.5% (hit 2), 4% (throw) | A 540 kick. However, it is unable to KO at reasonable percentages, and should the opponent be in the middle of the stage and be at such percentages (around 215% for middleweights), up throw will be more effective at KOing. It vaguely resembles Tifa's Waterkick Limit Break, albeit kicking vertically instead of horizontally. | ||
| Down throw | 7% | A one-handed body slam. It launches opponents behind him with low base knockback; it is Cloud's only combo throw, though it is a lackluster one. It also KOs earlier than any of his other throws, especially near the edge, though still not until extremely high percentages. It resembles Tifa's Meteor Strike Limit Break, albeit performed while grounded instead of in the air. | ||
| Forward roll Back roll Spot dodge Air dodge |
— | — | ||
| Techs | — | — | ||
| Floor attack (front) Floor getups (front) |
7% | Swings the Buster Sword around himself before getting up. | ||
| Floor attack (back) Floor getups (back) |
7% | Swings the Buster Sword around himself before getting up. | ||
| Floor attack (trip) Floor getups (trip) |
5% | Swings the Buster Sword around himself before getting up. | ||
| Edge attack Edge getups |
8% | Performs an inward slash while climbing up. | ||
| Neutral special | Blade Beam | 8% (grounded clean), 6% (grounded late), 6.4% (aerial clean), 4.8% (aerial late), 6% (Limit Break hit 1), 2% (Limit Break hits 2-6), 3% (Limit Break hit 7) | Swings the Buster Sword upward and in front of himself in order to launch a green, crescent-shaped energy beam as a projectile. It comes out and moves rather slowly, but travels a long distance and has a large hitbox. It is stronger if used on the ground and hit early. The aerial version is slower and deals less damage, but gives Cloud a slight lift. Like most projectiles, it disappears on contact with an object or enemy. The Limit Break variant possesses transcendent priority, moves much faster across the ground and hits multiple times, with its last hit having great KO potential. It is still weaker and slower when performed in midair, however. | |
| Side special | Cross Slash | 4% (hit 1), 3% (hit 2-4), 6% (hit 5), 5% (Limit Break hit 1), 3% (Limit Break hits 2-4), 10% (Limit Break hit 5) | Performs a downwards slash. On contact with an enemy, pressing the special button allows this slash to transition into a series of follow-up slashes, together spelling the kanji 凶 ("misfortune"). The full attack deals high damage and moderate knockback, making it a superb punishing option at close range. It is weak against shield, however, as all stages of the attack are slow and punishable if missed. Its Limit Break variant results in Cloud unleashing all five strikes with a single input regardless of whether he hits anything. It also noticeably increases both the damage and KO potential of the move, KOing middleweights at 100% from the center of the stage, while reducing the move's ending lag to such an extent that it becomes nearly impossible to punish without being right behind Cloud as he unleashes the move. Additionally, Limit Cross Slash deals a high amount of shield damage, and the final hit has a slightly larger hitbox than the default.[1] It is commonly considered Cloud's most effective Limit Break move due to its abundance of positive traits, as well as one of the game's best moves overall. | |
| Up special | Climhazzard | 3% (hit 1), 4% (hits 2-3), 3% (hit 4), 6% (Limit Break hit 1), 7% (Limit Break hit 2) | A leaping reverse gripped slash. If the special button is pressed again, it is followed with a descending reverse gripped slash. The first hit deals set knockback that leads into the second hit, which has a sweetspot at the center of the Buster Sword's blade that meteor smashes opponents as Cloud descends. It is Cloud's primary recovery move, though it is notable for being very ineffective due to multiple traits: it grants poor distance with low vertical height and almost no horizontal momentum, and Cloud cannot tech any single-hit move if he is hit at the apex of Climhazzard's first hit, unless it is a command grab or a multiple hit move. Additionally, the descending slash cannot be cancelled and isn't able to sweetspot the edge until Cloud has fallen a certain distance with it, making it unsuitable to use offstage. Its fast startup makes it a good surprise attack when grounded, particularly as an out of shield option. Its Limit Break variant greatly strengthens the first (but not second) hit of the move (allowing it to KO grounded middleweights at around 125%), allows it to sweetspot edges throughout, and grants Cloud much greater vertical and horizontal distance. | |
| Down special | Limit Charge | 1% (Finishing Touch) | Holds out the Buster Sword and remains still. This manually charges the Limit Gauge. While the move is being held, a text box labelled "Limit" appears above Cloud, which contains an otherwise-invisible meter that denotes the current level of Limit and increases as it is charged. The Limit Gauge will reach full charge either by using Limit Charge for 400 frames (6.67 seconds), but can be alternatively filled by dealing 250% or receiving 100%, and each of these methods stack with each other. The move can be charge-canceled by pressing the shield button, hitting the control stick left or right (which triggers a roll), grabbing, or pressing the special button again (the latter of which has an 8-frame delay). When the Limit Gauge is filled, Cloud is surrounded by a blue, flame-like energy, and his speed and mobility receive a noticeable increase. As long as he is in this state, he has access to much more powerful, one-use variants of his special attacks, as listed above. Using any of these attacks will empty the Limit Gauge and return Cloud to his normal state, even if the move misses or is interrupted. The Limit Break variation of Limit Charge itself is an entirely different attack called Finishing Touch; Cloud slashes in an arc around himself, generating a large whirlwind that deals only 1% damage but deals tremendous knockback, enough to KO most opponents before 70%. The move hits on frame 16, but has very high ending lag and almost no shieldstun due to its damage output. The attack is weaker as a whole when performed in the air, however, KOing about 24% later when hit in front, and 36% later with the back hitbox. The attack's hitbox is deceptively large, and it generates a powerful windbox that extends even further beyond the Buster Sword's range, pushing opponents away. Finishing Touch's animation may be based on Tornado, an unused Limit Break in Final Fantasy VII. | |
| Final Smash | Omnislash | 3% (hit 1), 2% (hits 2-15), 5% (hit 16), 4% (hit 17, falling), 10% (hit 18, explosion), 50% (all hits connect) | Rushes forward at high speed and attacks, unleashing a series of slashes that concludes with a powerful, descending slash that triggers an explosion. At the beginning of the move, with a text box appearing above him that displays "Omnislash" as he proceeds to flings any opponents he runs into to the top of the screen. After the series of slashes, Cloud charges up a final slash, in which he descends and slashes the opponent downward to the stage and results in a huge explosion that launches the opponent. One of the most powerful Final Smashes in the game when successful, as it can KO as low as 22%. Unlike Marth and Lucina's Critical Hit, Cloud will dash off the edges of platforms if Omnislash is initiated next to one, and he cannot cancel the move. | |
Stats[edit]
| Stats | Weight | Dash speed | Walk speed | Traction | Air friction | Air speed | Air acceleration | Gravity | Falling speed | Jumpsquat | Jump Height | Double jump Height |
|---|---|---|---|---|---|---|---|---|---|---|---|---|
| Value | 100 | 1.8 – Initial dash 1.97 – Run |
1.1 | 0.055 | 0.009 | 1.1 | 0.01 – Base 0.06 – Additional |
0.098 | 1.68 – Base 2.688 – Fast-fall |
4 | 32.5 - Base 17 - Short hop |
32 |
Announcer call[edit]

English/Japanese/Chinese
French
Russian
On-screen appearance[edit]
- Falls from the sky and catches the Buster Sword with a flourish.

|
|---|
Taunts[edit]
- Up taunt: Twirls the Buster Sword in front of himself before positioning it on his shoulders while saying "興味ないね" ("Not interested"). It's the same animation of Cloud's victory pose from Final Fantasy VII, and also resembles Cloud's official artwork for both SSB4 and Final Fantasy VII.
- Side taunt: Places the Buster Sword on his back and cups his hands together in front of him, generating a green glow. It is his spellcasting animation from Final Fantasy VII, complete with its original sound effect and glowing energy field.
- Down taunt: Places the Buster Sword on its tip and leans against it in a casual manner while scoffing. It resembles the cocky pose he assumes in many cutscenes throughout Final Fantasy VII.
| Up taunt | Side taunt | Down taunt |
|---|---|---|

|

|

|
Idle poses[edit]
- Pulls the Buster Sword back and rubs the edge of its blade.
- Holds the Buster Sword upward in front of himself with both hands.
 |

|
|---|
Crowd cheer[edit]
| English | Japanese | |
|---|---|---|
| Cheer | ||
| Description | Cloud! Cloud! Cloud! | Ku-rau-do! |
| Pitch | Group chant | Female |
Victory poses[edit]
- While facing the screen, Cloud twirls the Buster Sword with one hand and places it on his back while looking away from the camera, saying 悪く思うな ("No hard feelings.") Based on his victory animation in Final Fantasy VII.
- While turning away, Cloud twirls the Buster Sword, places it on his back and then glares at the screen, saying ついてないな ("Better luck next time.")
- Rushes forward, quickly slashes the Buster Sword twice, and then assumes a battle stance similar to his idle animation, saying お前に俺は倒せない ("You cannot defeat me.")
 |
 |

|
|---|
In competitive play[edit]
Most historically significant players[edit]
See also: Category:Cloud players (SSB4)
 ANTi - Used Cloud as a secondary alongside Mario and Zero Suit Samus. Placed 1st at both CEO 2016 and Get On My Level 2017, 3rd at DreamHack Austin 2018, 4th at 2GG: Hyrule Saga, and 5th at DreamHack Atlanta 2017 with wins over players such as Elegant, Samsora, and MVD.
 Blacktwins - Co-mained Cloud alongside Mario and is considered the best Cloud player in Canada. Placed 7th at Get On My Level 2017, 9th at Smash 'N' Splash 3, 13th at Shine 2018, and 17th at both DreamHack Montreal 2017 and The Big House 8 with wins over players such as Mew2King, Darkshad, and SuperGirlKels. Ranked 10th on the Canada Smash Ranking.
 Javi - Co-mained Cloud with Sheik and is considered one of the best Cloud players in Mexico. Placed 4th at Canada Cup 2016, 7th at Smash Factor 5, 9th at 2GGC: GENESIS Saga, and 17th at both 2GGC: West Side Saga and The Big House 7 with wins over players such as MkLeo, Larry Lurr, and Ally.
 komorikiri - One of the best Cloud players in the world. Placed 1st at both Sumabato 12 and Smashdown World, 2nd at 2GGC: GENESIS Saga, and 3rd at both The Big House 6 and MomoCon 2018.
- Mangalitza♀ - Placed 1st at Sumabato 21, 9th at both Sumabato 23 and Sumabato 27, 13th at Sumabato Tokaigi Qualifier, and 17th at Sumabato 28 with wins over players such as komorikiri, Choco, and T. Ranked 52nd on the JAPAN Power Rankings.
- Mao - Placed 5th at Sumabato 21, 9th at both Umebura 27 and Sumabato Smash 4 Final, 13th at Umebura Tokaigi Qualifier 1, and 17th at EVO Japan 2018 with wins over players such as Abadango, Nietono, and Raito. Ranked 38th on the JAPAN Power Rankings.
- Masashi - One of the best Cloud players in Japan. Placed 1st at Sumabato 26, 2nd at Sumabato 24, 5th at Sumabato 23, 7th at Sumabato 18, and 13th at Sumabato Smash 4 Final with wins over players such as Shuton, Raito, and Etsuji. Ranked 15th on the JAPAN Power Rankings.
- MattyG - The best Cloud player in New England. Placed 7th at both Too Hot to Handle and Super FamiCon 2017, 13th at Super Smash Con 2017, and 17th at both Shine 2017 and The Big House 7 with wins over players such as Kameme, Marss, and Light. Ranked 5th on the New England Power Rankings.
- Mew2King - One of the best Cloud players during the first few years of the game's competitive lifespan. Placed 2nd at Endgame, 3rd at Enthusiast Gaming Live Expo, 5th at both Get On My Level 2016 and Shine 2016, and 17th at Frostbite 2018 with wins over players such as ZeRo, Ally, and Larry Lurr.
- MkLeo - Co-mained Cloud with Marth and is considered the best Cloud player in the world, winning 2GGT: ZeRo Saga, IBP Masters Showdown, GENESIS 5, SwitchFest, and Super Smash Con 2018.
- Ned - One of the best Cloud players in the United States. Placed 2nd at Midwest Mayhem 5, 5th at Endgame, 13th at both Showdown: Battle Royale and Smash 'N' Splash 4, and 17th at Frostbite 2017 with wins over players such as ZeRo, Ally, and Larry Lurr.
 Purple~H - The best Cloud player in Europe. Placed 5th at SALT, Syndicate 2017, and PPT Berlin, 7th at Syndicate 2016, and 9th at Albion 2 with wins over players such as S1 and quiK. Ranked 7th on the European Smash 4 Power Rankings.
- RAIN - One of the best Cloud players in Japan. Placed 5th at both Umebura 29 and Umebura Smash 4 Final, 9th at both EVO 2015 and Apex 2016, and 13th at Umebura 33.
- Ralphie - Placed 1st at Xanadu - End of an Era, 9th at both Collision XV and Super Smash Con 2018, and 17th at both Smash 'N' Splash 4 and Smash Sounds with wins over players such as Ally, Mr. E, and Sinji. Ranked 7th on the New York City Power Rankings.
- Tweek - One of the best Cloud players in the world. Placed 1st at 2GGC: MkLeo Saga and 2GG: Hyrule Saga, 3rd at both Shots Fired 2 and Royal Flush, and 4th at EVO 2017.
Tier placement, history and bans in doubles tournaments[edit]
Since his release, players saw Cloud as a high-tier character, thanks to his incredible combination of range, mobility, power, and Limit Break mechanic; the latter in particular was highly valued for its ability to not only grant his special moves KO potential disproportionate for and beyond his weight class, but also make them fast and safe, especially Cross Slash. This positive outlook on Cloud was even more apparent in doubles play, where he can greatly benefit from having a teammate to alleviate his weak recovery and helping to land his Limit Break specials as the finisher to team combos, while Cloud himself can provide stage control and wall out his opponents for his teammate. Following his release, he started seeing strong results thanks to professionals such as komorikiri, Mew2King and Tweek, which led him to be ranked 12th on the first 4BR tier list, placing him at the middle of the B tier, confirming his high-tier status.
With the release of Corrin and Bayonetta, the subsequent nerfs to them and other top-tier characters, and various advancements to his metagame, Cloud became a very popular character in tournaments. His own nerfs did not seriously hinder him, and he remained a fundamentally strong character choice for both newer and professional players, the latter of which saw MkLeo formally picking him up. This was apparent with him appearing more frequently in the top placings of tournaments in comparison to some top-tier characters like Sheik and Zero Suit Samus, and consistently winning almost every major doubles event at tournaments. As a result of this spike in popularity and success, Cloud was ranked 2nd on the second tier list, placing him in the S tier; his tier rise was tied with Palutena's for the fifth highest between the first and second tier lists.
Despite his success, Cloud's placement initially received mixed thoughts from the community, as his rather exploitable weaknesses held him back from consistently achieving top 8 placings in singles for several national tournaments, such as EVO 2017 (the highest ranking Cloud being komorikiri, who placed 17th) and Super Smash Con 2016 (the highest ranking solo Cloud being Tweek, who placed 13th). As his metagame progressed, however, Cloud's singles results became considerably more consistent, as players, especially MkLeo, Tweek, and komorikiri, started seeing more top 8 placements at national tournaments. Although Cloud would drop to 3rd place on the third tier list due to the rise of Bayonetta, his continued consistency would see him rise back to 2nd/3rd place on the fourth and final tier list, tying him with Diddy Kong.
At the end of the game's main competitive lifespan, however, many players once again questioned Cloud's tier placement as his results as a solo main weren't as impressive compared to other characters such as Diddy Kong, Sheik, Zero Suit Samus, Fox, and Rosalina & Luma. Furthermore, several smashers pointed out that top players were getting better at exploiting the character's poor recovery. Finally, MkLeo and Tweek, two of the best Cloud players in the world, started to use Bayonetta more frequently, leading to a small decline in representation at top level play. Due to all of this, a few players such as Mr.R and MkLeo claimed that Cloud is overrated and that he should be ranked slightly lower while other players claim that his polarizing strengths are too strong for him to be ranked any lower.
Banned in Doubles[edit]

In doubles tournaments, Cloud was considered by many players to be broken enough to ban, as he was banned at the following tournaments. Thanks to his many advantages, Cloud players consistently won Smash 4 doubles tournaments after his release. This was evident with Cloud in Smash 4 doubles being more dominant than Meta Knight in Brawl singles.
- Get On My Level 2018 (double Cloud only)
- CEO 2018 [2]
- Smash 'N' Splash 4
- Shine 2018
- DreamHack Atlanta 2018
Reveal trailer[edit]
Trophies[edit]


- Cloud
- The protagonist of FINAL FANTASY VII, Cloud wields the enormous Buster Sword, a memento from his comrade Zack. Once a SOLDIER of Shinra, he now fights as a mercenary against the corporation he originally served. His decision to join AVALANCHE’s insurgence, however, will transform his destiny.
- FINAL FANTASY VII (11/1997)


- Cloud (Alt.)
- Filling the Limit Gauge allows Cloud to perform a Limit Break, supercharging his next special move. His down special becomes Finishing Touch. With a huge swing of his sword, Cloud summons a whirlwind that inflicts only 1% damage, but boasts brutal launch power. Go for a KO while his foes' damage is still low!
- FINAL FANTASY VII (11/1997)

- Omnislash
- Cloud sets out to prevent Sephiroth from sending Meteor crashing into the planet. The fate of the world on his shoulders, Cloud confronts his enemy one on one. He unleashes a flurry of swift slashes before delivering the finishing blow. In Smash Bros., the final strike creates an explosion, launching nearby fighters.
Alternate costumes[edit]
Cloud's default costume is based on his appearance in Final Fantasy VII while accommodating some changes to his design originating from Dissidia Final Fantasy, namely the redesigned SOLDIER logo on his belt and a redesigned pauldron. He has an alternate costume based on his appearance in Final Fantasy VII: Advent Children, known as "Cloudy Wolf" in Dissidia Final Fantasy, which replaces the Buster Sword with the Fusion Sword. It has two minor variants: one with a long sleeve covering Cloud's left arm to hide the visible signs of his Geostigma, and the other revealing Cloud's left arm after he has been cured of Geostigma, as well as a red ribbon wrapped around it, which he and his party wear in memory of Aerith Gainsborough.

| |||||||

|

|

|

|

|

|

|

|
Gallery[edit]
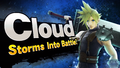
Cloud's splash art.
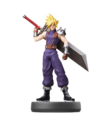
Cloud's amiibo.
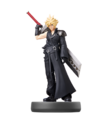
Cloud's alternate amiibo based on his Advent Children costume.
Cloud's unlock notice in Super Smash Bros. for Wii U after downloading him from the Nintendo eShop.
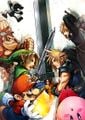
Cloud's poster used on the official website.
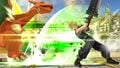
Using Blade Beam on Charizard.
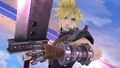
Cloud on Final Destination.
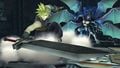
Cloud on Midgar, with Bahamut ZERO in the background.
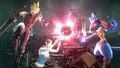
Cloud alongside Wii Fit Trainer and Lucario around the Summon Materia.
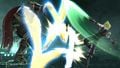
Using the Limit Break-boosted Cross Slash on Ganondorf.
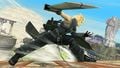
The last hit of Cloud's neutral attack.

Cloud on Gaur Plain.

Cloud alongside Ness and Wii Fit Trainer on Wuhu Island's boat. Cloud being in a stunned state references a scene in Final Fantasy VII where he gets motion sickness.
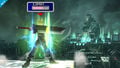
Using Limit Charge.
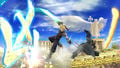
Two Clouds, with one using Cross Slash and the other using the Limit Break-boosted Cross Slash.
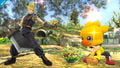
Cloud with a Mii Fighter wearing the Chocobo hat.
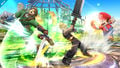
Using Blade Beam on Link.
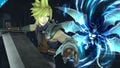
Standing on Midgar, with Bahamut ZERO in the background.
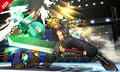
Using Cross Slash on Luigi in Super Smash Bros. for Nintendo 3DS.
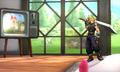
Using his up taunt on Living Room.


Trivia[edit]
_Screen_KO.jpg)
- Cloud makes a few references to his home game, Final Fantasy VII: Advent Children, and the Dissidia Final Fantasy games:
- His pose in his official artwork matches his pose from his official artwork from Final Fantasy VII. Conversely, the pose for his Advent Children costume resembles his official artwork from Dissidia Final Fantasy.
- Humorously, Cloud strikes a variation of the first pose when he is screen KO'd.
- His attacks emit unique blunt sounds when they hit opponents, while his side taunt emits a unique sound when performed. These sound effects originate from Final Fantasy VII, similarly to how Snake and Ryu emit sound effects from their respective home series.
- His idle stance is identical to his battle stance in later appearances such as the Dissidia Final Fantasy series, leading with his left leg instead of his right as he does in his original appearance in Final Fantasy VII.
- The greenish coloration of the Buster Sword's trail is a reference to Mako, a liquid that is used as the primary energy source within Final Fantasy VII. It also possesses the ability to grant superhuman abilities to humans via genetic experimentation, especially when used in conjunction with Jenova cells, a process which granted Cloud his superhuman abilities.
- Cloud's body emits blue Mako when his Limit Break is fully charged. This is a reference to his final battle against Sephiroth in Advent Children.
- His on-screen appearance, which has him landing and then catching the Buster Sword, is a reference to the end of his battle against Sephiroth in Advent Children, where the separated blades of the Fusion Swords strike around him and he catches the "core" blade as it falls.
- Cloud glides forwards when he dashes. This is a reference to the dashing mechanic in the Dissidia Final Fantasy games, where all characters dash in a manner akin to flying, which can also be performed in midair.
- His pose in his official artwork matches his pose from his official artwork from Final Fantasy VII. Conversely, the pose for his Advent Children costume resembles his official artwork from Dissidia Final Fantasy.
- Cloud and Bayonetta are the only characters with alternate costumes that sport a change of weapon. In Cloud's case, his Advent Children costume sees him wield the Fusion Swords from that movie instead of the Buster Sword, though they cannot be separated into their individual components.
- Cloud is the second DLC character from a newly added universe, succeeding Ryu and preceding Bayonetta.
- He is also one of said characters to come from a newly integrated company, being Square Enix, followed by Banjo & Kazooie (Microsoft) and Terry (SNK) in Ultimate.
- While Joker comes from Atlus, as evidenced by their crediting in the copyright of Ultimate, it is a subsidiary of Sega. The same applies to Steve, who was created by Mojang, which is also a subsidiary of Microsoft.
- Cloud has an alternate blast KO line in which he mutters (ミスった, "Missed it"), making him one of the few characters who says anything during a KO, and the only character to have a Japanese KO line in non-Japanese versions of the game.
- Cloud and Little Mac are the only characters who have special moves that affect the in-game camera, with both KO Uppercut and all but one of Cloud's Limit Break moves zooming in and slowing down time upon hitting their targets. Notably, both characters' attacks involve dealing and receiving damage before they can be used. In Ultimate, this feature would be given to multiple other fighters in the Special Zoom.
- Cloud, Roy, Ryu, Corrin, and Bayonetta are the only characters to use different sound clips when using battering items. Coincidentally, all of them are DLC.
- These same character's voice clips are in much lower quality than the rest of the cast in Super Smash Bros. for Nintendo 3DS.
- Cloud is the only DLC character with an alternate outfit to not have a trophy with the pose made with the alternate artwork in both versions of SSB4, with it only appearing in the Wii U version.
- He is also the only DLC character who is able to pseudo-crawl in SSB4.
- In Smash 3DS, if Kirby attempts to inhale Cloud but the move is interrupted by Cloud attacking, the Buster Sword will not make its usual blunt impact noises for the duration of the match.
References[edit]
| Fighters in Super Smash Bros. 4 | |
|---|---|
| Veterans | Bowser · Captain Falcon · Charizard · Diddy Kong · Donkey Kong · Dr. Mario · Falco · Fox · Ganondorf · Ike · Jigglypuff · King Dedede · Kirby · Link · Lucario · Lucas · Luigi · Mario · Marth · Meta Knight · Mewtwo · Mr. Game & Watch · Ness · Olimar · Peach · Pikachu · Pit · R.O.B. · Roy · Samus · Sheik · Sonic · Toon Link · Wario · Yoshi · Zelda · Zero Suit Samus |
| Newcomers | Bayonetta · Bowser Jr. · Cloud · Corrin · Dark Pit · Duck Hunt · Greninja · Little Mac · Lucina · Mega Man · Mii Fighter (Mii Brawler · Mii Gunner · Mii Swordfighter) · Pac-Man · Palutena · Robin · Rosalina & Luma · Ryu · Shulk · Villager · Wii Fit Trainer |
|
| |
|---|---|
| Fighters | Cloud (SSB4 · SSBU) · Sephiroth (SSBU) |
| Stages | Midgar · Northern Cave |
| Other | Aerith Gainsborough · Bahamut ZERO · Barret Wallace · Chocobo · Ifrit · Leviathan · Odin · Ramuh · Tifa Lockhart |
| Trophies & Spirits | Trophies · Spirits |
| Music | SSB4 · Ultimate |
| Related universe | Kingdom Hearts |