Template:SSBU stage table: Difference between revisions
From SmashWiki, the Super Smash Bros. wiki
Jump to navigationJump to search
m (Why did Boxing Ring use the Smash version?) Tag: Mobile edit |
mNo edit summary Tag: Undo |
||
| Line 65: | Line 65: | ||
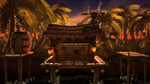
|colspan=2|[[File:SSBU-Yoshi's Island (SSB).png|150x90px|link=Super Happy Tree]]<br>{{gameIcon|SSB}} [[Super Happy Tree]]<br>{{symbol|yoshi|20px}} | |colspan=2|[[File:SSBU-Yoshi's Island (SSB).png|150x90px|link=Super Happy Tree]]<br>{{gameIcon|SSB}} [[Super Happy Tree]]<br>{{symbol|yoshi|20px}} | ||
|- | |- | ||
|colspan=2|[[File:SSBU-Yoshi's Island (SSBM).png|150x90px|link=Yoshi's Island (SSBM)]]<br>{{gameIcon|SSBM}} [[Yoshi's Island (SSBM)|Yoshi's Island (Melee)]]<br>{{symbol|yoshi|20px}} | |||
|colspan=2|[[File:SSBU-Yoshi's Story.png|150x90px|link=Yoshi's Story]]<br>{{gameIcon|SSBM}} [[Yoshi's Story]]<br>{{symbol|yoshi|20px}} | |colspan=2|[[File:SSBU-Yoshi's Story.png|150x90px|link=Yoshi's Story]]<br>{{gameIcon|SSBM}} [[Yoshi's Story]]<br>{{symbol|yoshi|20px}} | ||
|colspan=2|[[File:SSBU-Yoshi's Island (SSBB).png|150x90px|link=Yoshi's Island (SSBB)]]<br>{{gameIcon|SSBB}} {{SSBB|Yoshi's Island}}<br>{{symbol|yoshi|20px}} | |colspan=2|[[File:SSBU-Yoshi's Island (SSBB).png|150x90px|link=Yoshi's Island (SSBB)]]<br>{{gameIcon|SSBB}} {{SSBB|Yoshi's Island}}<br>{{symbol|yoshi|20px}} | ||
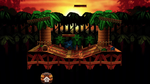
|colspan=2|[[File:SSBU-Kongo Jungle.png|150x90px|link=Kongo Jungle (SSB)]]<br>{{gameIcon|SSB}} {{SSB|Kongo Jungle}}<br>{{symbol|dk|20px}} | |colspan=2|[[File:SSBU-Kongo Jungle.png|150x90px|link=Kongo Jungle (SSB)]]<br>{{gameIcon|SSB}} {{SSB|Kongo Jungle}}<br>{{symbol|dk|20px}} | ||
| Line 131: | Line 131: | ||
|colspan=2|[[File:SSBU-Tortimer Island.png|150x90px|link=Tortimer Island]]<br>{{gameIcon|SSB4-3DS}} [[Tortimer Island]]<br>{{symbol|ac|20px}} | |colspan=2|[[File:SSBU-Tortimer Island.png|150x90px|link=Tortimer Island]]<br>{{gameIcon|SSB4-3DS}} [[Tortimer Island]]<br>{{symbol|ac|20px}} | ||
|colspan=2|[[File:SSBU-Town and City.png|150x90px|link=Town and City]]<br>{{gameIcon|SSB4-U}} [[Town and City]]<br>{{symbol|ac|20px}} | |colspan=2|[[File:SSBU-Town and City.png|150x90px|link=Town and City]]<br>{{gameIcon|SSB4-U}} [[Town and City]]<br>{{symbol|ac|20px}} | ||
|colspan=2|[[File:SSBU-Boxing Ring.png|150x90px|link=Boxing Ring]]<br>{{gameIcon|SSB4}} [[Boxing Ring]]<br>{{symbol|po|20px}} | |||
|colspan=2|[[File:SSBU-Wii Fit Studio.png|150x90px|link=Wii Fit Studio]]<br>{{gameIcon|SSB4-U}} [[Wii Fit Studio]]<br>{{symbol|wf|20px}} | |colspan=2|[[File:SSBU-Wii Fit Studio.png|150x90px|link=Wii Fit Studio]]<br>{{gameIcon|SSB4-U}} [[Wii Fit Studio]]<br>{{symbol|wf|20px}} | ||
|colspan=2|[[File:SSBU-Gaur Plain.png|150x90px|link=Gaur Plain]]<br>{{gameIcon|SSB4}} [[Gaur Plain]]<br>{{symbol|xb|20px}} | |colspan=2|[[File:SSBU-Gaur Plain.png|150x90px|link=Gaur Plain]]<br>{{gameIcon|SSB4}} [[Gaur Plain]]<br>{{symbol|xb|20px}} | ||
|- | |- | ||
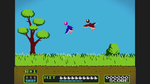
|colspan=2|[[File:SSBU-Duck Hunt.png|150x90px|link=Duck Hunt (stage)]]<br>{{gameIcon|SSB4}} {{b|Duck Hunt|stage}}<br>{{symbol|dh|20px}} | |colspan=2|[[File:SSBU-Duck Hunt.png|150x90px|link=Duck Hunt (stage)]]<br>{{gameIcon|SSB4}} {{b|Duck Hunt|stage}}<br>{{symbol|dh|20px}} | ||
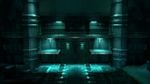
|colspan=2|[[File:SSBU-Shadow Moses Island 2.jpg|150x90px|link=Shadow Moses Island]]<br>{{gameIcon|SSBB}} [[Shadow Moses Island]]<br>{{symbol|mg|20px}} | |||
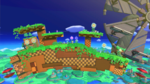
|colspan=2|[[File:SSBU-Green Hill Zone.png|150x90px|link=Green Hill Zone]]<br>{{gameIcon|SSBB}} [[Green Hill Zone]]<br>{{symbol|sonic|20px}} | |||
|colspan=2|[[File:SSBU-Windy Hill Zone.png|150x90px|link=Windy Hill Zone]]<br>{{gameIcon|SSB4-U}} [[Windy Hill Zone]]<br>{{symbol|sonic|20px}} | |||
|colspan=2|[[File:SSBU-Wily Castle.png|150x90px|link=Wily Castle]]<br>{{gameIcon|SSB4}} [[Wily Castle]]<br>{{symbol|mm|20px}} | |||
|colspan=2|[[File:SSBU-Pac-Land.png|150x90px|link=Pac-Land]]<br>{{gameIcon|SSB4-U}} [[Pac-Land]]<br>{{symbol|pm|20px}} | |||
|- | |||
|colspan=2|[[File:SSBU-Suzaku Castle.png|150x90px|link=Suzaku Castle]]<br>{{gameIcon|SSB4}} [[Suzaku Castle]]<br>{{symbol|sf|20px}} | |||
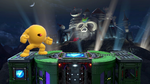
|colspan=2|[[File:SSBU-Midgar.jpg|150x90px|link=Midgar]]<br>{{gameIcon|SSB4}} [[Midgar]]<br>{{symbol|ff|20px}} | |||
|colspan=2|[[File:SSBU-Umbra Clock Tower.png|150x90px|link=Umbra Clock Tower]]<br>{{gameIcon|SSB4}} [[Umbra Clock Tower]]<br>{{symbol|bayonetta|20px}} | |||
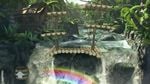
|colspan=2|[[File:SSBU-Hanenbow.png|150x90px|link=Hanenbow]]<br>{{gameIcon|SSBB}} [[Hanenbow]]<br>{{symbol|ep|20px}} | |colspan=2|[[File:SSBU-Hanenbow.png|150x90px|link=Hanenbow]]<br>{{gameIcon|SSBB}} [[Hanenbow]]<br>{{symbol|ep|20px}} | ||
|colspan=2|[[File:SSBU-PictoChat 2.png|150x90px|link=PictoChat 2]]<br>{{gameIcon|SSB4-3DS}} [[PictoChat 2]]<br>{{symbol|ds|20px}} | |colspan=2|[[File:SSBU-PictoChat 2.png|150x90px|link=PictoChat 2]]<br>{{gameIcon|SSB4-3DS}} [[PictoChat 2]]<br>{{symbol|ds|20px}} | ||
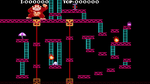
|colspan=2|[[File:SSBU-Balloon Fight.png|150x90px|link=Balloon Fight]]<br>{{gameIcon|SSB4-3DS}} [[Balloon Fight]]<br>{{symbol|bf|20px}} | |colspan=2|[[File:SSBU-Balloon Fight.png|150x90px|link=Balloon Fight]]<br>{{gameIcon|SSB4-3DS}} [[Balloon Fight]]<br>{{symbol|bf|20px}} | ||
|- | |||
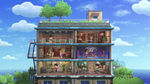
|colspan=2|[[File:SSBU-Living Room.png|150x90px|link=Living Room]]<br>{{gameIcon|SSB4-3DS}} [[Living Room]]<br>{{symbol|nd|20px}} | |colspan=2|[[File:SSBU-Living Room.png|150x90px|link=Living Room]]<br>{{gameIcon|SSB4-3DS}} [[Living Room]]<br>{{symbol|nd|20px}} | ||
|colspan=2|[[File:SSBU-Find Mii.png|150x90px|link=Find Mii]]<br>{{gameIcon|SSB4-3DS}} [[Find Mii]]<br>{{symbol|streetpass|20px}} | |colspan=2|[[File:SSBU-Find Mii.png|150x90px|link=Find Mii]]<br>{{gameIcon|SSB4-3DS}} [[Find Mii]]<br>{{symbol|streetpass|20px}} | ||
|colspan=2|[[File:SSBU-Tomodachi Life.png|150x90px|link=Tomodachi Life]]<br>{{gameIcon|SSB4-3DS}} [[Tomodachi Life]]<br>{{symbol|tomodachi|20px}} | |colspan=2|[[File:SSBU-Tomodachi Life.png|150x90px|link=Tomodachi Life]]<br>{{gameIcon|SSB4-3DS}} [[Tomodachi Life]]<br>{{symbol|tomodachi|20px}} | ||
|colspan=2|[[File:SSBU-Wrecking Crew.png|150x90px|link=Wrecking Crew]]<br>{{gameIcon|SSB4-U}} [[Wrecking Crew]]<br>{{symbol|wreckingcrew|20px}} | |colspan=2|[[File:SSBU-Wrecking Crew.png|150x90px|link=Wrecking Crew]]<br>{{gameIcon|SSB4-U}} [[Wrecking Crew]]<br>{{symbol|wreckingcrew|20px}} | ||
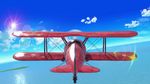
|colspan=2|[[File:SSBU-Pilotwings.png|150x90px|link=Pilotwings]]<br>{{gameIcon|SSB4-U}} [[Pilotwings]]<br>{{symbol|pw|20px}} | |colspan=2|[[File:SSBU-Pilotwings.png|150x90px|link=Pilotwings]]<br>{{gameIcon|SSB4-U}} [[Pilotwings]]<br>{{symbol|pw|20px}} | ||
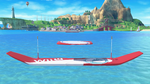
|colspan=2|[[File:SSBU-Wuhu Island.png|150x90px|link=Wuhu Island]]<br>{{gameIcon|SSB4-U}} [[Wuhu Island]]<br>{{symbol|wuhu|20px}} | |colspan=2|[[File:SSBU-Wuhu Island.png|150x90px|link=Wuhu Island]]<br>{{gameIcon|SSB4-U}} [[Wuhu Island]]<br>{{symbol|wuhu|20px}} | ||
|} | |} | ||