Template:SSB4-U stage table: Difference between revisions
From SmashWiki, the Super Smash Bros. wiki
Jump to navigationJump to search
No edit summary |
(Undid edit by 74.128.26.19: it was fine) |
||
| Line 7: | Line 7: | ||
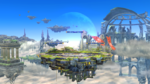
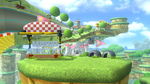
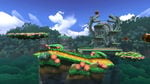
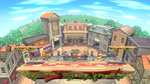
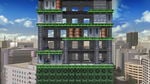
|colspan=1|[[File:SSB4UMushroomKingdomU.jpg|150x90px|link=Mushroom Kingdom U]]<br>[[Mushroom Kingdom U]]<br>{{symbol|mario|20px}} | |colspan=1|[[File:SSB4UMushroomKingdomU.jpg|150x90px|link=Mushroom Kingdom U]]<br>[[Mushroom Kingdom U]]<br>{{symbol|mario|20px}} | ||
|colspan=1|[[File:SSB4UMarioCircuit8.jpg|150x90px|link=Mario Circuit (SSB4)]]<br>{{SSB4|Mario Circuit}}<br>{{symbol|mario|20px}} | |colspan=1|[[File:SSB4UMarioCircuit8.jpg|150x90px|link=Mario Circuit (SSB4)]]<br>{{SSB4|Mario Circuit}}<br>{{symbol|mario|20px}} | ||
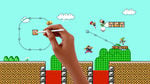
|colspan=1|[[File:SuperMarioMakerWiiU.jpg|150x90px|link=Super Mario Maker]]<br>[[Super Mario Maker]] <small>(DLC)</small><br>{{symbol|mario|20px}} | |||
|- | |- | ||
|colspan=1|[[File:SSBUPeach'sCastle64.PNG|150x90px|link=Peach's Castle]]<br>{{gameIcon|SSB}} <span style="font-size:87%">[[Peach's Castle|Peach's Castle (64)]]</span> <small>(DLC)</small><br>{{symbol|mario|20px}} | |colspan=1|[[File:SSBUPeach'sCastle64.PNG|150x90px|link=Peach's Castle]]<br>{{gameIcon|SSB}} <span style="font-size:87%">[[Peach's Castle|Peach's Castle (64)]]</span> <small>(DLC)</small><br>{{symbol|mario|20px}} | ||
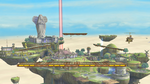
|colspan=1|[[File:SSB4UDelfinoPlaza.png|150x90px|link=Delfino Plaza]]<br>{{gameIcon|SSBB}} [[Delfino Plaza]]<br>{{symbol|mario|20px}} | |colspan=1|[[File:SSB4UDelfinoPlaza.png|150x90px|link=Delfino Plaza]]<br>{{gameIcon|SSBB}} [[Delfino Plaza]]<br>{{symbol|mario|20px}} | ||
| Line 14: | Line 14: | ||
|colspan=1|[[File:SSB4UMarioCircuit.jpg|150x90px|link=Mario Circuit (SSBB)]]<br>{{gameIcon|SSBB}} [[Mario Circuit (SSBB)|Mario Circuit (Brawl)]]<br>{{symbol|mario|20px}} | |colspan=1|[[File:SSB4UMarioCircuit.jpg|150x90px|link=Mario Circuit (SSBB)]]<br>{{gameIcon|SSBB}} [[Mario Circuit (SSBB)|Mario Circuit (Brawl)]]<br>{{symbol|mario|20px}} | ||
|colspan=1|[[File:SSB4UWoollyWorld.jpg|150x90px|link=Woolly World]]<br>[[Woolly World]]<br>{{symbol|yoshi|20px}} | |colspan=1|[[File:SSB4UWoollyWorld.jpg|150x90px|link=Woolly World]]<br>[[Woolly World]]<br>{{symbol|yoshi|20px}} | ||
|colspan=1|[[File:SSB4UYoshisIsland.png|150x90px|link=Yoshi's Island (SSBM)]]<br>{{gameIcon|SSBM}} {{SSBM|Yoshi's Island}}<br>{{symbol|yoshi|20px}} | |colspan=1|[[File:SSB4UYoshisIsland.png|150x90px|link=Yoshi's Island (SSBM)]]<br>{{gameIcon|SSBM}} {{SSBM|Yoshi's Island}}<br>{{symbol|yoshi|20px}} | ||
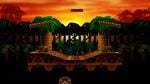
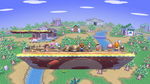
|colspan=1|[[File:SSB4UJungleHijinxs.jpg|150x90px|link=Jungle Hijinxs]]<br>[[Jungle Hijinxs]]<br>{{symbol|dk|20px}} | |colspan=1|[[File:SSB4UJungleHijinxs.jpg|150x90px|link=Jungle Hijinxs]]<br>[[Jungle Hijinxs]]<br>{{symbol|dk|20px}} | ||
|- | |||
|colspan=1|[[File:SSB4UKongoJungle64.jpg|150x90px|link=Kongo Jungle (SSB)|Kongo Jungle 64]]<br>{{gameIcon|SSB}} '''[[Kongo Jungle 64]]'''<br>{{symbol|dk|20px}} | |colspan=1|[[File:SSB4UKongoJungle64.jpg|150x90px|link=Kongo Jungle (SSB)|Kongo Jungle 64]]<br>{{gameIcon|SSB}} '''[[Kongo Jungle 64]]'''<br>{{symbol|dk|20px}} | ||
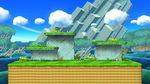
|colspan=1|[[File:SSB4U75m.png|150x90px|link=75m]]<br>{{gameIcon|SSBB}} [[75m]]<br>{{symbol|dk|20px}} | |colspan=1|[[File:SSB4U75m.png|150x90px|link=75m]]<br>{{gameIcon|SSBB}} [[75m]]<br>{{symbol|dk|20px}} | ||
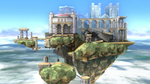
|colspan=1|[[File:SSB4USkyloft.png|150x90px|link=Skyloft]]<br>[[Skyloft]]<br>{{symbol|zelda|20px}} | |colspan=1|[[File:SSB4USkyloft.png|150x90px|link=Skyloft]]<br>[[Skyloft]]<br>{{symbol|zelda|20px}} | ||
|colspan=1|[[File:SSBUHyruleCastle64.PNG|150x90px|link=Hyrule Castle]]<br>{{gameIcon|SSB}} <span style="font-size:92%">[[Hyrule Castle|Hyrule Castle (64)]]</span> <small>(DLC)</small><br>{{symbol|zelda|20px}} | |colspan=1|[[File:SSBUHyruleCastle64.PNG|150x90px|link=Hyrule Castle]]<br>{{gameIcon|SSB}} <span style="font-size:92%">[[Hyrule Castle|Hyrule Castle (64)]]</span> <small>(DLC)</small><br>{{symbol|zelda|20px}} | ||
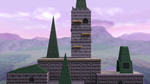
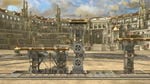
|colspan=1|[[File:SSB4UTemple.png|150x90px|link=Temple]]<br>{{gameIcon|SSBM}} [[Temple]]<br>{{symbol|zelda|20px}} | |colspan=1|[[File:SSB4UTemple.png|150x90px|link=Temple]]<br>{{gameIcon|SSBM}} [[Temple]]<br>{{symbol|zelda|20px}} | ||
|colspan=1|[[File:SSB4UBridgeOfEldin.png|150x90px|link=Bridge of Eldin]]<br>{{gameIcon|SSBB}} [[Bridge of Eldin]]<br>{{symbol|zelda|20px}} | |colspan=1|[[File:SSB4UBridgeOfEldin.png|150x90px|link=Bridge of Eldin]]<br>{{gameIcon|SSBB}} [[Bridge of Eldin]]<br>{{symbol|zelda|20px}} | ||
|colspan=1|[[File:Pirate Ship SSBU.jpg|150x90px|link=Pirate Ship]]<br>{{gameIcon|SSBB}} [[Pirate Ship]] <small>(DLC)</small><br>{{symbol|zelda|20px}} | |colspan=1|[[File:Pirate Ship SSBU.jpg|150x90px|link=Pirate Ship]]<br>{{gameIcon|SSBB}} [[Pirate Ship]] <small>(DLC)</small><br>{{symbol|zelda|20px}} | ||
|- | |||
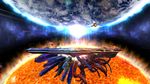
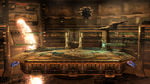
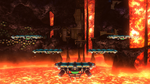
|colspan=1|[[File:Pyrosphere press image.jpg|150x90px|link=Pyrosphere]]<br>[[Pyrosphere]]<br>{{symbol|metroid|20px}} | |colspan=1|[[File:Pyrosphere press image.jpg|150x90px|link=Pyrosphere]]<br>[[Pyrosphere]]<br>{{symbol|metroid|20px}} | ||
|colspan=1|[[File:SSB4UNorfair.png|150x90px|link=Norfair]]<br>{{gameIcon|SSBB}} [[Norfair]]<br>{{symbol|metroid|20px}} | |colspan=1|[[File:SSB4UNorfair.png|150x90px|link=Norfair]]<br>{{gameIcon|SSBB}} [[Norfair]]<br>{{symbol|metroid|20px}} | ||
|colspan=1|[[File:SSB4UTheGreatCaveOffensive.jpg|150x90px|link=The Great Cave Offensive]]<br>[[The Great Cave Offensive]]<br>{{symbol|kirby|20px}} | |colspan=1|[[File:SSB4UTheGreatCaveOffensive.jpg|150x90px|link=The Great Cave Offensive]]<br>[[The Great Cave Offensive]]<br>{{symbol|kirby|20px}} | ||
|colspan=1|[[File:SSB4UDreamLand64.png|150x90px|link=Dream Land (SSB)]]<br>{{gameIcon|SSB}} <span style="font-size:95%">[[Dream Land (SSB)|Dream Land (64)]]</span> <small>(DLC)</small><br>{{symbol|kirby|20px}} | |colspan=1|[[File:SSB4UDreamLand64.png|150x90px|link=Dream Land (SSB)]]<br>{{gameIcon|SSB}} <span style="font-size:95%">[[Dream Land (SSB)|Dream Land (64)]]</span> <small>(DLC)</small><br>{{symbol|kirby|20px}} | ||
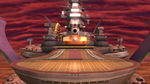
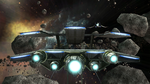
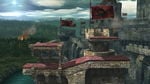
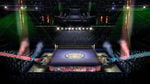
|colspan=1|[[File:SSB4UHalberd.jpg|150x90px|link=Halberd]]<br>{{gameIcon|SSBB}} [[Halberd]]<br>{{symbol|kirby|20px}} | |colspan=1|[[File:SSB4UHalberd.jpg|150x90px|link=Halberd]]<br>{{gameIcon|SSBB}} [[Halberd]]<br>{{symbol|kirby|20px}} | ||
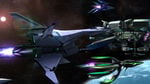
|colspan=1|[[File:SSB4UOrbitalGateAssault.jpg|150x90px|link=Orbital Gate Assault]]<br>[[Orbital Gate Assault]]<br>{{symbol|starfox|20px}} | |colspan=1|[[File:SSB4UOrbitalGateAssault.jpg|150x90px|link=Orbital Gate Assault]]<br>[[Orbital Gate Assault]]<br>{{symbol|starfox|20px}} | ||
|colspan=1|[[File:SSB4ULylatCruise.png|150x90px|link=Lylat Cruise]]<br>{{gameIcon|SSBB}} [[Lylat Cruise]]<br>{{symbol|starfox|20px}} | |colspan=1|[[File:SSB4ULylatCruise.png|150x90px|link=Lylat Cruise]]<br>{{gameIcon|SSBB}} [[Lylat Cruise]]<br>{{symbol|starfox|20px}} | ||
|- | |||
|colspan=1|[[File:SSB4UKalosPokemonLeague.jpg|150x90px|link=Kalos Pokémon League]]<br>[[Kalos Pokémon League]]<br>{{symbol|pokemon|20px}} | |colspan=1|[[File:SSB4UKalosPokemonLeague.jpg|150x90px|link=Kalos Pokémon League]]<br>[[Kalos Pokémon League]]<br>{{symbol|pokemon|20px}} | ||
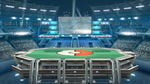
|colspan=1|[[File:SSB4UPokemonStadium2.jpg|150x90px|link=Pokémon Stadium 2]]<br>{{gameIcon|SSBB}} '''[[Pokémon Stadium 2]]'''<br>{{symbol|pokemon|20px}} | |colspan=1|[[File:SSB4UPokemonStadium2.jpg|150x90px|link=Pokémon Stadium 2]]<br>{{gameIcon|SSBB}} '''[[Pokémon Stadium 2]]'''<br>{{symbol|pokemon|20px}} | ||
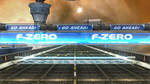
|colspan=1|[[File:SSB4UPortTownAeroDive.png|150x90px|link=Port Town Aero Dive]]<br>{{gameIcon|SSBB}} [[Port Town Aero Dive]]<br>{{symbol|fzero|20px}} | |colspan=1|[[File:SSB4UPortTownAeroDive.png|150x90px|link=Port Town Aero Dive]]<br>{{gameIcon|SSBB}} [[Port Town Aero Dive]]<br>{{symbol|fzero|20px}} | ||
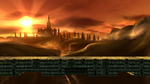
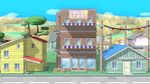
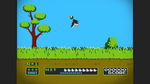
|colspan=1|[[File:SSB4UOnett.jpg|150x90px|link=Onett]]<br>{{gameIcon|SSBM}} [[Onett]]<br>{{symbol|eb|20px}} | |colspan=1|[[File:SSB4UOnett.jpg|150x90px|link=Onett]]<br>{{gameIcon|SSBM}} [[Onett]]<br>{{symbol|eb|20px}} | ||
| Line 41: | Line 40: | ||
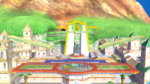
|colspan=1|[[File:SSB4UCastleSiege.jpg|150x90px|link=Castle Siege]]<br>{{gameIcon|SSBB}} [[Castle Siege]]<br>{{symbol|fe|20px}} | |colspan=1|[[File:SSB4UCastleSiege.jpg|150x90px|link=Castle Siege]]<br>{{gameIcon|SSBB}} [[Castle Siege]]<br>{{symbol|fe|20px}} | ||
|colspan=1|[[File:SSB4UFlatZoneX.jpg|150x90px|link=Flat Zone X]]<br>'''[[Flat Zone X]]'''<br>{{symbol|gw|20px}} | |colspan=1|[[File:SSB4UFlatZoneX.jpg|150x90px|link=Flat Zone X]]<br>'''[[Flat Zone X]]'''<br>{{symbol|gw|20px}} | ||
|- | |||
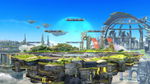
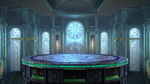
|colspan=1|[[File:PalutenasTempleWiiUFull.png|150x90px|link=Palutena's Temple]]<br>[[Palutena's Temple]]<br>{{symbol|ki|20px}} | |colspan=1|[[File:PalutenasTempleWiiUFull.png|150x90px|link=Palutena's Temple]]<br>[[Palutena's Temple]]<br>{{symbol|ki|20px}} | ||
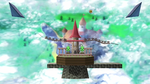
|colspan=1|[[File:SSB4USkyworld.png|150x90px|link=Skyworld]]<br>{{gameIcon|SSBB}} [[Skyworld]]<br>{{symbol|kidicarus|20px}} | |colspan=1|[[File:SSB4USkyworld.png|150x90px|link=Skyworld]]<br>{{gameIcon|SSBB}} [[Skyworld]]<br>{{symbol|kidicarus|20px}} | ||
|colspan=1|[[File:SSB4UGamer.jpg|150x90px|link=Gamer]]<br>[[Gamer]]<br>{{symbol|wario|20px}} | |colspan=1|[[File:SSB4UGamer.jpg|150x90px|link=Gamer]]<br>[[Gamer]]<br>{{symbol|wario|20px}} | ||
| Line 56: | Line 55: | ||
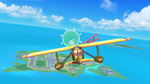
|colspan=1|[[File:SSB4UPilotwings.jpg|150x90px|link=Pilotwings]]<br>[[Pilotwings]]<br>{{symbol|pw|20px}} | |colspan=1|[[File:SSB4UPilotwings.jpg|150x90px|link=Pilotwings]]<br>[[Pilotwings]]<br>{{symbol|pw|20px}} | ||
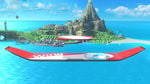
|colspan=1|[[File:SSB4UWuhuIsland.jpg|150x90px|link=Wuhu Island]]<br>[[Wuhu Island]]<br>{{symbol|wuhu|20px}} | |colspan=1|[[File:SSB4UWuhuIsland.jpg|150x90px|link=Wuhu Island]]<br>[[Wuhu Island]]<br>{{symbol|wuhu|20px}} | ||
|colspan=1|[[File:SSB4 - Miiverse.jpg|150x90px|link=Miiverse]]<br>[[Miiverse]] <small>(DLC)</small><br>{{symbol|miiverse|20px}} | |||
|- | |- | ||
|colspan=1| | |colspan=1| | ||
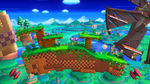
|colspan=1|[[File:Windy Hill press image.jpg|150x90px|link=Windy Hill Zone]]<br>[[Windy Hill Zone]]<br>{{symbol|sonic|20px}} | |colspan=1|[[File:Windy Hill press image.jpg|150x90px|link=Windy Hill Zone]]<br>[[Windy Hill Zone]]<br>{{symbol|sonic|20px}} | ||
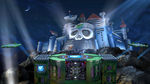
|colspan=1|[[File:Wilys_fortress.png|150x90px|link=Wily Castle]]<br>[[Wily Castle]]<br>{{symbol|megaman|20px}} | |colspan=1|[[File:Wilys_fortress.png|150x90px|link=Wily Castle]]<br>[[Wily Castle]]<br>{{symbol|megaman|20px}} | ||
| Line 63: | Line 63: | ||
|colspan=1|[[File:Ryu's stage.png|150x90px|link=Suzaku Castle]]<br>[[Suzaku Castle]] <small>(DLC)</small><br>{{symbol|streetfighter|20px}} | |colspan=1|[[File:Ryu's stage.png|150x90px|link=Suzaku Castle]]<br>[[Suzaku Castle]] <small>(DLC)</small><br>{{symbol|streetfighter|20px}} | ||
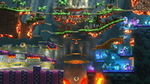
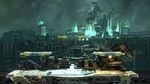
|colspan=1|[[File:Midgar.jpg|150x90px|link=Midgar]]<br>[[Midgar]] <small>(DLC)</small><br>{{symbol|finalfantasy|20px}} | |colspan=1|[[File:Midgar.jpg|150x90px|link=Midgar]]<br>[[Midgar]] <small>(DLC)</small><br>{{symbol|finalfantasy|20px}} | ||
|colspan=1| | |||
|} | |} | ||
<small>'''Bold''' denotes [[Unlockable stage#Super Smash Bros. for Wii U|unlockable stages]].</small> | <small>'''Bold''' denotes [[Unlockable stage#Super Smash Bros. for Wii U|unlockable stages]].</small> | ||
Revision as of 14:55, December 14, 2015


Bold denotes unlockable stages.