Template:SSB4-U stage table: Difference between revisions
From SmashWiki, the Super Smash Bros. wiki
Jump to navigationJump to search
(Seeing how Wii Fit Trainer has been moved to be after Little Mac in the Fighter templates, the stage templates should follow suit.) |
No edit summary Tag: Mobile edit |
||
| (19 intermediate revisions by 8 users not shown) | |||
| Line 1: | Line 1: | ||
{|class="wikitable" style="text-align:center;margin:1em auto 1em auto" | {|class="wikitable" style="text-align:center;margin:1em auto 1em auto" | ||
!width= | !width=77px style="padding:0;"| | ||
!width= | !width=77px style="padding:0;"| | ||
!width= | !width=77px style="padding:0;"| | ||
!width= | !width=77px style="padding:0;"| | ||
!width= | !width=77px style="padding:0;"| | ||
!width= | !width=77px style="padding:0;"| | ||
!width= | !width=77px style="padding:0;"| | ||
!width= | !width=77px style="padding:0;"| | ||
!width= | !width=77px style="padding:0;"| | ||
!width= | !width=77px style="padding:0;"| | ||
!width= | !width=77px style="padding:0;"| | ||
!width= | !width=77px style="padding:0;"| | ||
!width= | !width=77px style="padding:0;"| | ||
!width= | !width=77px style="padding:0;"| | ||
|- | |- | ||
!colspan=14|New stages (34) | |||
|- | |- | ||
|colspan=2|[[File: | |colspan=2|[[File:BattlefieldDayNightCycle1WiiUSSB4.png|150x90px|link=Battlefield (SSB4)]]<br>{{SSB4|Battlefield}}<br>{{symbol|ssb|20px}} | ||
|colspan=2|[[File: | |colspan=2|[[File:SSB4 WII U Final-Destination.jpg|150x90px|link=Final Destination (SSB4)]]<br>{{SSB4|Final Destination}}<br>{{symbol|ssb|20px}} | ||
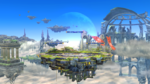
|colspan=2|[[File: | |colspan=2|[[File:SSB4UBigBattlefield.jpg|150x90px|link=Big Battlefield]]<br>[[Big Battlefield]]<br>{{symbol|ssb|20px}} | ||
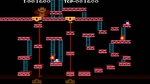
|colspan=2|[[File: | |colspan=2|[[File:SSB4UMushroomKingdomU.jpg|150x90px|link=Mushroom Kingdom U]]<br>[[Mushroom Kingdom U]]<br>{{symbol|smb|20px}} | ||
|colspan=2|[[File: | |colspan=2|[[File:Mario_Galaxy.jpg|150x90px|link=Mario Galaxy]]<br>[[Mario Galaxy]]<br>{{symbol|smb|20px}} | ||
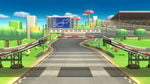
|colspan=2|[[File: | |colspan=2|[[File:SSB4UMarioCircuit8.jpg|150x90px|link=Mario Circuit]]<br>[[Mario Circuit]]<br>{{symbol|smb|20px}} | ||
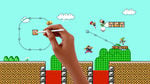
|colspan=2|[[File: | |colspan=2|[[File:SuperMarioMakerWiiU.jpg|150x90px|link=Super Mario Maker]]<br>[[Super Mario Maker]] <small><small>(DLC)</small></small><br>{{symbol|smb|20px}} | ||
|- | |- | ||
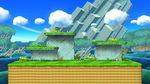
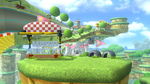
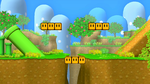
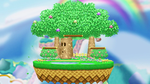
|colspan=2|[[File:SSB4UWoollyWorld.jpg|150x90px|link=Woolly World]]<br>[[Woolly World]]<br>{{symbol|yoshi|20px}} | |colspan=2|[[File:SSB4UWoollyWorld.jpg|150x90px|link=Woolly World]]<br>[[Woolly World]]<br>{{symbol|yoshi|20px}} | ||
|colspan=2|[[File: | |colspan=2|[[File:SSB4UJungleHijinxs.jpg|150x90px|link=Jungle Hijinxs]]<br>[[Jungle Hijinxs]]<br>{{symbol|dk|20px}} | ||
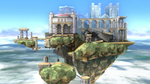
|colspan=2|[[File:SSB4USkyloft.png|150x90px|link=Skyloft]]<br>[[Skyloft]]<br>{{symbol|zelda|20px}} | |colspan=2|[[File:SSB4USkyloft.png|150x90px|link=Skyloft]]<br>[[Skyloft]]<br>{{symbol|zelda|20px}} | ||
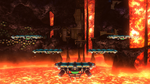
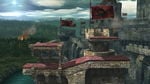
|colspan=2|[[File:Pyrosphere press image.jpg|150x90px|link=Pyrosphere]]<br>[[Pyrosphere]]<br>{{symbol|metroid|20px}} | |colspan=2|[[File:Pyrosphere press image.jpg|150x90px|link=Pyrosphere]]<br>[[Pyrosphere]]<br>{{symbol|metroid|20px}} | ||
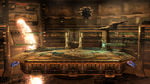
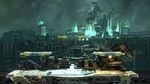
|colspan=2|[[File:SSB4UTheGreatCaveOffensive.jpg|150x90px|link=The Great Cave Offensive]]<br>[[The Great Cave Offensive]]<br>{{symbol|kirby|20px}} | |colspan=2|[[File:SSB4UTheGreatCaveOffensive.jpg|150x90px|link=The Great Cave Offensive]]<br>[[The Great Cave Offensive]]<br>{{symbol|kirby|20px}} | ||
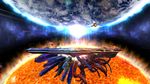
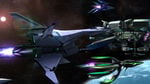
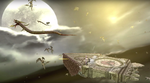
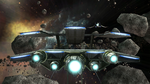
|colspan=2|[[File:SSB4UOrbitalGateAssault.jpg|150x90px|link=Orbital Gate Assault]]<br>[[Orbital Gate Assault]]<br>{{symbol|fox|20px}} | |||
|colspan=2|[[File:SSB4UKalosPokemonLeague.jpg|150x90px|link=Kalos Pokémon League]]<br>[[Kalos Pokémon League]]<br>{{symbol|pkmn|20px}} | |||
|colspan=2|[[File:SSB4UOrbitalGateAssault.jpg|150x90px|link=Orbital Gate Assault]]<br>[[Orbital Gate Assault]]<br>{{symbol| | |||
|colspan=2|[[File: | |||
|- | |- | ||
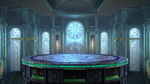
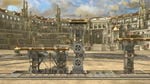
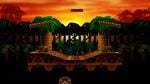
|colspan=2|[[File:SSB4UColiseum.jpg|150x90px|link=Coliseum]]<br>[[Coliseum]]<br>{{symbol|fe|20px}} | |colspan=2|[[File:SSB4UColiseum.jpg|150x90px|link=Coliseum]]<br>[[Coliseum]]<br>{{symbol|fe|20px}} | ||
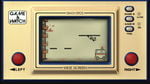
|colspan=2|[[File:SSB4UFlatZoneX.jpg|150x90px|link=Flat Zone X]]<br>'''[[Flat Zone X]]'''<br>{{symbol|gw|20px}} | |colspan=2|[[File:SSB4UFlatZoneX.jpg|150x90px|link=Flat Zone X]]<br>'''[[Flat Zone X]]'''<br>{{symbol|gw|20px}} | ||
|colspan=2|[[File:PalutenasTempleWiiUFull.png|150x90px|link=Palutena's Temple]]<br>[[Palutena's Temple]]<br>{{symbol|ki|20px}} | |colspan=2|[[File:PalutenasTempleWiiUFull.png|150x90px|link=Palutena's Temple]]<br>[[Palutena's Temple]]<br>{{symbol|ki|20px}} | ||
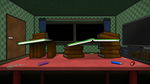
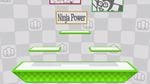
|colspan=2|[[File:SSB4UGamer.jpg|150x90px|link=Gamer]]<br>[[Gamer]]<br>{{symbol|wario|20px}} | |colspan=2|[[File:SSB4UGamer.jpg|150x90px|link=Gamer]]<br>[[Gamer]]<br>{{symbol|wario|20px}} | ||
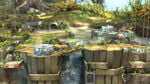
|colspan=2|[[File:Garden of Hope press image.jpg|150x90px|link=Garden of Hope]]<br>[[Garden of Hope]]<br>{{symbol|pikmin|20px}} | |colspan=2|[[File:Garden of Hope press image.jpg|150x90px|link=Garden of Hope]]<br>[[Garden of Hope]]<br>{{symbol|pikmin|20px}} | ||
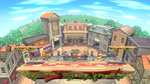
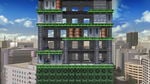
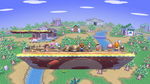
|colspan=2|[[File:Town and City 1.png|150x90px|link=Town and City]]<br>[[Town and City]]<br>{{symbol|ac|20px}} | |colspan=2|[[File:Town and City 1.png|150x90px|link=Town and City]]<br>[[Town and City]]<br>{{symbol|ac|20px}} | ||
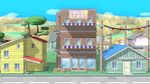
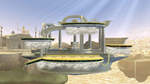
|colspan=2|[[File: | |colspan=2|[[File:Wii Fit Studio press image.jpg|150x90px|link=Wii Fit Studio]]<br>[[Wii Fit Studio]]<br>{{symbol|wf|20px}} | ||
|colspan=2|[[File: | |- | ||
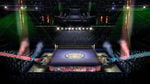
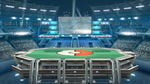
|colspan=2|[[File:Boxing Ring Punch Out.jpg|150x90px|link=Boxing Ring]]<br>[[Boxing Ring]]<br>{{symbol|po|20px}} | |||
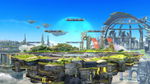
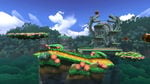
|colspan=2|[[File:Gaur Plain Wii U.png|150x90px|link=Gaur Plain]]<br>[[Gaur Plain]]<br>{{symbol|xb|20px}} | |||
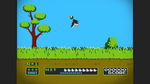
|colspan=2|[[File:SSB4UDuckHuntStage.jpg|150x90px|link=Duck Hunt (stage)]]<br>'''{{b|Duck Hunt|stage}}'''<br>{{symbol|dh|20px}} | |||
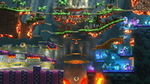
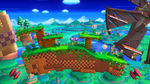
|colspan=2|[[File:Windy Hill press image.jpg|150x90px|link=Windy Hill Zone]]<br>[[Windy Hill Zone]]<br>{{symbol|sonic|20px}} | |||
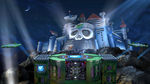
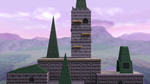
|colspan=2|[[File:Wilys_fortress.png|150x90px|link=Wily Castle]]<br>[[Wily Castle]]<br>{{symbol|mm|20px}} | |||
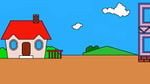
|colspan=2|[[File:SSB4UPac-Land.jpg|150x90px|link=Pac-Land]]<br>'''[[Pac-Land]]'''<br>{{symbol|pm|20px}} | |||
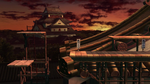
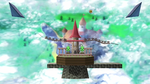
|colspan=2|[[File:SSB4WiiUSukazuCastle.png|150x90px|link=Suzaku Castle]]<br>[[Suzaku Castle]] <small><small>(DLC)</small></small><br>{{symbol|sf|20px}} | |||
|- | |- | ||
|colspan=2|[[File: | | | ||
|colspan=2|[[File: | |colspan=2|[[File:Midgar.jpg|150x90px|link=Midgar]]<br>[[Midgar]] <small><small>(DLC)</small></small><br>{{symbol|ff|20px}} | ||
|colspan=2|[[File:SSB4 - Umbra Clock Tower.png|150x90px|link=Umbra Clock Tower]]<br>[[Umbra Clock Tower]] <small><small>(DLC)</small></small><br>{{symbol|bayonetta|20px}} | |||
|colspan=2|[[File:SSB4UWreckingCrew.jpg|150x90px|link=Wrecking Crew]]<br>[[Wrecking Crew]]<br>{{symbol|wreckingcrew|20px}} | |colspan=2|[[File:SSB4UWreckingCrew.jpg|150x90px|link=Wrecking Crew]]<br>[[Wrecking Crew]]<br>{{symbol|wreckingcrew|20px}} | ||
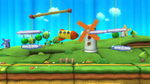
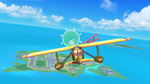
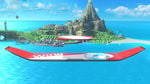
|colspan=2|[[File:SSB4UPilotwings.jpg|150x90px|link=Pilotwings]]<br>[[Pilotwings]]<br>{{symbol|pw|20px}} | |colspan=2|[[File:SSB4UPilotwings.jpg|150x90px|link=Pilotwings]]<br>[[Pilotwings]]<br>{{symbol|pw|20px}} | ||
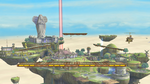
|colspan=2|[[File:SSB4UWuhuIsland.jpg|150x90px|link=Wuhu Island]]<br>[[Wuhu Island]]<br>{{symbol|wuhu|20px}} | |colspan=2|[[File:SSB4UWuhuIsland.jpg|150x90px|link=Wuhu Island]]<br>[[Wuhu Island]]<br>{{symbol|wuhu|20px}} | ||
|colspan=2|[[File:SSB4 - Miiverse.jpg|150x90px|link=Miiverse]]<br>[[Miiverse]] <small>( | |colspan=2|[[File:SSB4 - Miiverse.jpg|150x90px|link=Miiverse]]<br>[[Miiverse]] <small><small>(1.0.8)</small></small><br>{{symbol|miiverse|20px}} | ||
| | |||
|- | |- | ||
| | !colspan=14|Familiar stages (21) | ||
|colspan=2|[[File: | |- | ||
|colspan=2|[[File: | |colspan=2|[[File:SSBUPeach'sCastle64.PNG|150x90px|link=Peach's Castle]]<br>{{gameIcon|SSB}} <span style="font-size:87%">[[Peach's Castle|Peach's Castle (64)]]</span> <small><small>(DLC)</small></small><br>{{symbol|smb|20px}} | ||
|colspan=2|[[File: | |colspan=2|[[File:SSB4UDelfinoPlaza.png|150x90px|link=Delfino Plaza]]<br>{{gameIcon|SSBB}} [[Delfino Plaza]]<br>{{symbol|smb|20px}} | ||
|colspan=2|[[File: | |colspan=2|[[File:SSB4UMarioCircuit.jpg|150x90px|link=Figure-8 Circuit]]<br>{{gameIcon|SSBB}} [[Figure-8 Circuit|Mario Circuit (Brawl)]]<br>{{symbol|smb|20px}} | ||
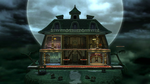
|colspan=2|[[File: | |colspan=2|[[File:SSB4ULuigisMansion.png|150x90px|link=Luigi's Mansion]]<br>{{gameIcon|SSBB}} [[Luigi's Mansion]]<br>{{symbol|smb|20px}} | ||
|colspan=2|[[File: | |colspan=2|[[File:SSB4UYoshisIsland.png|150x90px|link=Yoshi's Island (SSBM)]]<br>{{gameIcon|SSBM}} {{SSBM|Yoshi's Island}}<br>{{symbol|yoshi|20px}} | ||
| | |colspan=2|[[File:SSB4UKongoJungle64.jpg|150x90px|link=Kongo Jungle]]<br>{{gameIcon|SSB}} '''[[Kongo Jungle|Kongo Jungle 64]]'''<br>{{symbol|dk|20px}} | ||
|colspan=2|[[File:SSB4U75m.png|150x90px|link=75m]]<br>{{gameIcon|SSBB}} [[75m]]<br>{{symbol|dk|20px}} | |||
|- | |||
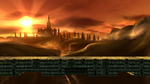
|colspan=2|[[File:SSBUHyruleCastle64.PNG|150x90px|link=Hyrule Castle]]<br>{{gameIcon|SSB}} <span style="font-size:92%">[[Hyrule Castle|Hyrule Castle (64)]]</span> <small><small>(DLC)</small></small><br>{{symbol|zelda|20px}} | |||
|colspan=2|[[File:SSB4UTemple.png|150x90px|link=Temple]]<br>{{gameIcon|SSBM}} [[Temple]]<br>{{symbol|zelda|20px}} | |||
|colspan=2|[[File:SSB4UBridgeOfEldin.png|150x90px|link=Bridge of Eldin]]<br>{{gameIcon|SSBB}} [[Bridge of Eldin]]<br>{{symbol|zelda|20px}} | |||
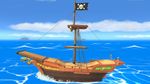
|colspan=2|[[File:Pirate Ship Wii U.jpg|150x90px|link=Pirate Ship]]<br>{{gameIcon|SSBB}} [[Pirate Ship]] <small><small>(DLC)</small></small><br>{{symbol|zelda|20px}} | |||
|colspan=2|[[File:SSB4UNorfair.png|150x90px|link=Norfair]]<br>{{gameIcon|SSBB}} [[Norfair]]<br>{{symbol|metroid|20px}} | |||
|colspan=2|[[File:SSB4UDreamLand64.png|150x90px|link=Dream Land]]<br>{{gameIcon|SSB}} <span style="font-size:95%">[[Dream Land|Dream Land (64)]]</span> <small><small>(DLC)</small></small><br>{{symbol|kirby|20px}} | |||
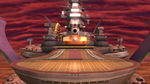
|colspan=2|[[File:SSB4UHalberd.jpg|150x90px|link=Halberd]]<br>{{gameIcon|SSBB}} [[Halberd]]<br>{{symbol|kirby|20px}} | |||
|- | |||
|colspan=2|[[File:SSB4ULylatCruise.png|150x90px|link=Lylat Cruise]]<br>{{gameIcon|SSBB}} [[Lylat Cruise]]<br>{{symbol|fox|20px}} | |||
|colspan=2|[[File:SSB4UPokemonStadium2.jpg|150x90px|link=Pokémon Stadium 2]]<br>{{gameIcon|SSBB}} '''[[Pokémon Stadium 2]]'''<br>{{symbol|pkmn|20px}} | |||
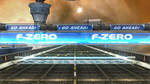
|colspan=2|[[File:SSB4UPortTownAeroDive.png|150x90px|link=Port Town Aero Dive]]<br>{{gameIcon|SSBB}} [[Port Town Aero Dive]]<br>{{symbol|fz|20px}} | |||
|colspan=2|[[File:SSB4UOnett.jpg|150x90px|link=Onett]]<br>{{gameIcon|SSBM}} [[Onett]]<br>{{symbol|eb|20px}} | |||
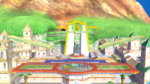
|colspan=2|[[File:SSB4UCastleSiege.jpg|150x90px|link=Castle Siege]]<br>{{gameIcon|SSBB}} [[Castle Siege]]<br>{{symbol|fe|20px}} | |||
|colspan=2|[[File:SSB4USkyworld.png|150x90px|link=Skyworld]]<br>{{gameIcon|SSBB}} [[Skyworld]]<br>{{symbol|kidicarus|20px}} | |||
|colspan=2|[[File:SSB4USmashville.jpg|150x90px|link=Smashville]]<br>{{gameIcon|SSBB}} '''[[Smashville]]'''<br>{{symbol|ac|20px}} | |||
|} | |} | ||
<small>'''Bold''' denotes [[Unlockable stage#Super Smash Bros. for Wii U|unlockable stages]].</small> | <small>'''Bold''' denotes [[Unlockable stage#Super Smash Bros. for Wii U|unlockable stages]].</small> | ||
Latest revision as of 12:41, December 12, 2023


Bold denotes unlockable stages.