User:The Jacketed Terrapin/Smash Bros. Universe Statistics: Difference between revisions
From SmashWiki, the Super Smash Bros. wiki
Jump to navigationJump to search
(→Universes by Super Smash Bros. Debut Game: Thank you, Omega Toad.) |
mNo edit summary |
||
| (8 intermediate revisions by 3 users not shown) | |||
| Line 1: | Line 1: | ||
{{DISPLAYTITLE:User:The Jacketed Terrapin/''Smash Bros.'' Universe Statistics}} | {{DISPLAYTITLE:User:The Jacketed Terrapin/''Smash Bros.'' Universe Statistics}} | ||
This is a list of every universe in the ''Super Smash Bros.'' series. | |||
Here is the order of the types of universes: | Here is the order of the types of universes: | ||
| Line 32: | Line 26: | ||
!Name | !Name | ||
!Logo | !Logo | ||
!Main Representation | !Main Representation | ||
|- | |- | ||
|{{uv|Mario}} | |{{uv|Mario}} | ||
|[[File:MarioTitle.svg|100px]] | |[[File:MarioTitle.svg|100px]] | ||
|[[File:Mario SSB.png|100x100px|link=Mario (SSB)]][[File:Luigi SSB.png|100x100px|link=Luigi (SSB)]] | |[[File:Mario SSB.png|100x100px|link=Mario (SSB)]][[File:Luigi SSB.png|100x100px|link=Luigi (SSB)]] | ||
|- | |- | ||
|{{uv|Donkey Kong}} | |{{uv|Donkey Kong}} | ||
|[[File:DonkeyKongTitle.png|100px]] | |[[File:DonkeyKongTitle.png|100px]] | ||
|[[File:Donkey Kong SSB.png|100x100px|link=Donkey Kong (SSB)]] | |[[File:Donkey Kong SSB.png|100x100px|link=Donkey Kong (SSB)]] | ||
|- | |- | ||
|{{uv|The Legend of Zelda}} | |{{uv|The Legend of Zelda}} | ||
|[[File:Zelda logo ssbu.png|100px]] | |[[File:Zelda logo ssbu.png|100px]] | ||
|[[File:Link SSB.png|100x100px|link=Link (SSB)]] | |[[File:Link SSB.png|100x100px|link=Link (SSB)]] | ||
|- | |- | ||
|{{uv|Metroid}} | |{{uv|Metroid}} | ||
|[[File:Metroidtitle.png|100px]] | |[[File:Metroidtitle.png|100px]] | ||
|[[File:Samus SSB.png|100x100px|link=Samus (SSB)]] | |[[File:Samus SSB.png|100x100px|link=Samus (SSB)]] | ||
|- | |- | ||
|{{uv|Yoshi}} | |{{uv|Yoshi}} | ||
|[[File:Yoshi logo.png|100px]] | |[[File:Yoshi logo.png|100px]] | ||
|[[File:Yoshi SSB.png|100x100px|link=Yoshi (SSB)]] | |[[File:Yoshi SSB.png|100x100px|link=Yoshi (SSB)]] | ||
|- | |- | ||
|{{uv|Kirby}} | |{{uv|Kirby}} | ||
|[[File:KirbyTitle.png|100px]] | |[[File:KirbyTitle.png|100px]] | ||
|[[File:Kirby SSB.png|100x100px|link=Kirby (SSB)]] | |[[File:Kirby SSB.png|100x100px|link=Kirby (SSB)]] | ||
|- | |- | ||
|{{uv|Star Fox}} | |{{uv|Star Fox}} | ||
|[[File:StarFoxTitle.png|100px]] | |[[File:StarFoxTitle.png|100px]] | ||
|[[File:Fox SSB.png|100x100px|link=Fox (SSB)]] | |[[File:Fox SSB.png|100x100px|link=Fox (SSB)]] | ||
|- | |- | ||
|{{uv|Pokémon}} | |{{uv|Pokémon}} | ||
|[[File:Pokémontitle.png|100px]] | |[[File:Pokémontitle.png|100px]] | ||
|[[File:Pikachu SSB.png|100x100px|link=Pikachu (SSB)]][[File:Jigglypuff SSB.png|50px|link=Jigglypuff (SSB)]] | |[[File:Pikachu SSB.png|100x100px|link=Pikachu (SSB)]][[File:Jigglypuff SSB.png|50px|link=Jigglypuff (SSB)]] | ||
|- | |- | ||
|{{uv|EarthBound}} | |{{uv|EarthBound}} | ||
|[[File:EarthboundTitle.svg|100px]] | |[[File:EarthboundTitle.svg|100px]] | ||
|[[File:Ness SSB.png|100x100px|link=Ness (SSB)]] | |[[File:Ness SSB.png|100x100px|link=Ness (SSB)]] | ||
|- | |- | ||
|{{uv|F-Zero}} | |{{uv|F-Zero}} | ||
|[[File:FZeroTitle.png|100px]] | |[[File:FZeroTitle.png|100px]] | ||
|[[File:Captain Falcon SSB.png|100x100px|link=Captain Falcon (SSB)]] | |[[File:Captain Falcon SSB.png|100x100px|link=Captain Falcon (SSB)]] | ||
|- | |- | ||
|{{uv|GoldenEye}} | |{{uv|GoldenEye}} | ||
|[[File:GoldenEye logo.png|100px]] | |[[File:GoldenEye logo.png|100px]] | ||
|[[File:MotionSensorBombIconSSB.png|100x100px|link=Motion-Sensor Bomb]] | |[[File:MotionSensorBombIconSSB.png|100x100px|link=Motion-Sensor Bomb]] | ||
|} | |} | ||
| Line 122: | Line 80: | ||
!Name | !Name | ||
!Logo | !Logo | ||
!Main Representation | !Main Representation | ||
|- | |- | ||
|{{uv|Ice Climber}} | |{{uv|Ice Climber}} | ||
|[[File:IceClimberTitle.gif|100px]] | |[[File:IceClimberTitle.gif|100px]] | ||
|[[File:Ice Climbers SSBM.jpg|100x100px|link=Ice Climbers (SSBM)]] | |[[File:Ice Climbers SSBM.jpg|100x100px|link=Ice Climbers (SSBM)]] | ||
|- | |- | ||
|{{uv|Fire Emblem}} | |{{uv|Fire Emblem}} | ||
|[[File:Fire Emblem logo.svg|100px]] | |[[File:Fire Emblem logo.svg|100px]] | ||
|[[File:Marth SSBM.jpg|100x100px|link=Marth (SSBM)]][[File:Roy SSBM.jpg|100x100px|link=Roy (SSBM)]] | |[[File:Marth SSBM.jpg|100x100px|link=Marth (SSBM)]][[File:Roy SSBM.jpg|100x100px|link=Roy (SSBM)]] | ||
|- | |- | ||
|{{uv|Game & Watch}} | |{{uv|Game & Watch}} | ||
|[[File:Game & Watch logo.svg|100px]] | |[[File:Game & Watch logo.svg|100px]] | ||
|[[File:Mr. Game & Watch SSBM.jpg|100x100px|link=Mr. Game & Watch (SSBM)]] | |[[File:Mr. Game & Watch SSBM.jpg|100x100px|link=Mr. Game & Watch (SSBM)]] | ||
|- | |- | ||
|{{uv|Panel de Pon}} | |{{uv|Panel de Pon}} | ||
|[[File:Panel de Pon logo.png|100px]] | |[[File:Panel de Pon logo.png|100px]] | ||
|[[File:Lip's Stick Trophy Melee.png|100x100px|link=Lip's Stick]] | |[[File:Lip's Stick Trophy Melee.png|100x100px|link=Lip's Stick]] | ||
|- | |- | ||
|{{uv|Balloon Fight}} | |{{uv|Balloon Fight}} | ||
|[[File:BalloonFightUniverseLogo.png|100px]] | |[[File:BalloonFightUniverseLogo.png|100px]] | ||
|[[File:Flipper Trophy Melee.png|100x100px|link=Flipper]] | |[[File:Flipper Trophy Melee.png|100x100px|link=Flipper]] | ||
|- | |- | ||
|{{uv|Perfect Dark}} | |{{uv|Perfect Dark}} | ||
|[[File:Perfect Dark logo.png|100px]] | |[[File:Perfect Dark logo.png|100px]] | ||
|[[File:Proximity Mine Trophy Melee.png|100x100px|link=Motion Sensor Bomb]][[File:Cloaking Device Trophy Melee.png|100x100px|link=Cloaking Device]] | |[[File:Proximity Mine Trophy Melee.png|100x100px|link=Motion Sensor Bomb]][[File:Cloaking Device Trophy Melee.png|100x100px|link=Cloaking Device]] | ||
|- | |- | ||
|{{uvm|Card Hero}} | |{{uvm|Card Hero}} | ||
|[[File:Card Hero logo.gif|100px]] | |[[File:Card Hero logo.gif|100px]] | ||
|[[File:Maruo Maruhige Trophy Melee.png|100x100px]] | |[[File:Maruo Maruhige Trophy Melee.png|100x100px]] | ||
|- | |- | ||
|{{uvm|Wave Race}} | |{{uvm|Wave Race}} | ||
|[[File:Wave Race logo.png|100px]] | |[[File:Wave Race logo.png|100px]] | ||
|[[File:Ryota Hayami Trophy Melee.png|100x100px]] | |[[File:Ryota Hayami Trophy Melee.png|100x100px]] | ||
|- | |- | ||
|{{uvm|1080°}} | |{{uvm|1080°}} | ||
|[[File:1080 logo.png|100px]] | |[[File:1080 logo.png|100px]] | ||
|[[File:Kensuke Kimachi Trophy Melee.png|100x100px]] | |[[File:Kensuke Kimachi Trophy Melee.png|100x100px]] | ||
|- | |- | ||
|{{uvm|Doshin the Giant}} | |{{uvm|Doshin the Giant}} | ||
|[[File:Doshin the Giant logo.png|100px]] | |[[File:Doshin the Giant logo.png|100px]] | ||
|[[File:Love Giant Trophy Melee.png|100x100px]][[File:Hate Giant Trophy Melee.png|100x100px]] | |[[File:Love Giant Trophy Melee.png|100x100px]][[File:Hate Giant Trophy Melee.png|100x100px]] | ||
|- | |- | ||
|{{uv|Custom Robo}} | |{{uv|Custom Robo}} | ||
|[[File:Custom Robo logo.png|100px]] | |[[File:Custom Robo logo.png|100px]] | ||
|[[File:Ray Mk II Trophy Melee.png|100x100px]][[File:Bayonette Trophy Melee.png|100x100px]][[File:Annie Trophy Melee.png|100x100px]] | |||
|[[File:Ray | |||
|- | |- | ||
|{{uv|Animal Crossing}} | |{{uv|Animal Crossing}} | ||
|[[File:AnimalCrossingTitle.png|100px]] | |[[File:AnimalCrossingTitle.png|100px]] | ||
|[[File:Tom Nook Trophy Melee.png|100x100px]][[File:Totakeke Trophy Melee.png|100x100px]][[File:Mr. Resetti Trophy Melee.png|100x100px]] | |[[File:Tom Nook Trophy Melee.png|100x100px]][[File:Totakeke Trophy Melee.png|100x100px]][[File:Mr. Resetti Trophy Melee.png|100x100px]] | ||
|- | |- | ||
|{{uv|Kururin}} | |{{uv|Kururin}} | ||
|[[File:Kuru Kuru Kururin logo.png|100px]] | |[[File:Kuru Kuru Kururin logo.png|100px]] | ||
|[[File:Heririn Trophy Melee.png|100x100px]] | |[[File:Heririn Trophy Melee.png|100x100px]] | ||
|- | |- | ||
|{{uvm|Cubivore}} | |{{uvm|Cubivore}} | ||
|[[File:Cubivore logo.png|100px]] | |[[File:Cubivore logo.png|100px]] | ||
|[[File:Alpha Trophy Melee.png|100x100px]] | |[[File:Alpha Trophy Melee.png|100x100px]] | ||
|- | |- | ||
|{{uv|Pikmin}} | |{{uv|Pikmin}} | ||
|[[File:PikminLogo.png|100px]] | |[[File:PikminLogo.png|100px]] | ||
|[[File:Pikmin Trophy Melee.png|100x100px]][[File:Olimar Trophy Melee.png|100x100px]] | |[[File:Pikmin Trophy Melee.png|100x100px]][[File:Olimar Trophy Melee.png|100x100px]] | ||
|- | |- | ||
|{{uv|Excite}} | |{{uv|Excite}} | ||
|[[File:Excitebike logo.png|100px]] | |[[File:Excitebike logo.png|100px]] | ||
|[[File:Excite Bike Trophy Melee.png|100x100px]] | |[[File:Excite Bike Trophy Melee.png|100x100px]] | ||
|- | |- | ||
|{{uv|Devil World}} | |{{uv|Devil World}} | ||
|[[File:Devil World logo.png|100px]] | |[[File:Devil World logo.png|100px]] | ||
|[[File:Tamagon Trophy Melee.png|100x100px]] | |[[File:Tamagon Trophy Melee.png|100x100px]] | ||
|- | |- | ||
|{{uv|Duck Hunt}} | |{{uv|Duck Hunt}} | ||
|[[File:Duck Hunt Title.png|100px]] | |[[File:Duck Hunt Title.png|100px]] | ||
|[[File:Ducks Trophy Melee.png|100x100px]] | |[[File:Ducks Trophy Melee.png|100x100px]] | ||
|- | |- | ||
|{{uv|Clu Clu Land}} | |{{uv|Clu Clu Land}} | ||
|[[File:Clu Clu Land logo.png|100px]] | |[[File:Clu Clu Land logo.png|100px]] | ||
|[[File:Bubbles Trophy Melee.png|100x100px]] | |[[File:Bubbles Trophy Melee.png|100x100px]] | ||
|- | |- | ||
|{{uv|Wrecking Crew}} | |{{uv|Wrecking Crew}} | ||
|[[File:WreckingCrewLogo.png|100px]] | |[[File:WreckingCrewLogo.png|100px]] | ||
|[[File:Eggplant Man Trophy Melee.png|100x100px]] | |[[File:Eggplant Man Trophy Melee.png|100x100px]] | ||
|- | |- | ||
|{{uvm|Mach Rider}} | |{{uvm|Mach Rider}} | ||
|[[File:Mach Rider logo.png|100px]] | |[[File:Mach Rider logo.png|100px]] | ||
|[[File:Mach Rider Trophy Melee.png|100x100px]] | |[[File:Mach Rider Trophy Melee.png|100x100px]] | ||
|- | |- | ||
|{{uv|Kid Icarus}} | |{{uv|Kid Icarus}} | ||
|[[File:Kid Icarus Classic Logo.png|100px]] | |[[File:Kid Icarus Classic Logo.png|100px]] | ||
|[[File:Pit Trophy Melee.png|100x100px]] | |[[File:Pit Trophy Melee.png|100x100px]] | ||
|- | |- | ||
|{{uv|SimCity}} | |{{uv|SimCity}} | ||
|[[File:Sim City logo.png|100px]] | |[[File:Sim City logo.png|100px]] | ||
|[[File:Dr. Wright Trophy Melee.png|100x100px]] | |[[File:Dr. Wright Trophy Melee.png|100x100px]] | ||
|- | |- | ||
|{{uvm|Shin Onigashima}} | |{{uvm|Shin Onigashima}} | ||
|[[File:Shin Onigashima logo.png|100px]] | |[[File:Shin Onigashima logo.png|100px]] | ||
|[[File:Donbe & Hikari Trophy Melee.png|100x100px]] | |[[File:Donbe & Hikari Trophy Melee.png|100x100px]] | ||
|- | |- | ||
|{{uvm|Detective Club}} | |{{uvm|Detective Club}} | ||
|[[File:Detective Club logo.png|100px]] | |[[File:Detective Club logo.png|100px]] | ||
|[[File:Ayumi Tachibana Trophy Melee.png|100x100px]] | |[[File:Ayumi Tachibana Trophy Melee.png|100x100px]] | ||
|- | |- | ||
|{{uvm|Famicom Grand Prix}} | |{{uvm|Famicom Grand Prix}} | ||
|[[File:Famicom Grand Prix logo.png|100px]] | |[[File:Famicom Grand Prix logo.png|100px]] | ||
|[[File:Monster Trophy Melee.png|100x100px]] | |[[File:Monster Trophy Melee.png|100x100px]] | ||
|- | |- | ||
|{{uv|Sheriff}} | |{{uv|Sheriff}} | ||
|[[File:Sheriff arcadeflyer.png|100px]] | |[[File:Sheriff arcadeflyer.png|100px]] | ||
|[[File:Sheriff Trophy Melee.png|100x100px]] | |[[File:Sheriff Trophy Melee.png|100x100px]] | ||
|} | |} | ||
| Line 323: | Line 197: | ||
!Name | !Name | ||
!Logo | !Logo | ||
!Main Representation | !Main Representation | ||
|- | |- | ||
|{{uv|Wario}} | |{{uv|Wario}} | ||
|[[File:WarioSeriesTitle.png|100px]] | |[[File:WarioSeriesTitle.png|100px]] | ||
|[[File:Wario SSBB.jpg|100x100px|link=Wario (SSBB)]] | |[[File:Wario SSBB.jpg|100x100px|link=Wario (SSBB)]] | ||
|- | |- | ||
|{{uv|Metal Gear}} | |{{uv|Metal Gear}} | ||
|[[File:MetalGearTitle.svg|100px]] | |[[File:MetalGearTitle.svg|100px]] | ||
|[[File:Snake SSBB.jpg|100x100px|link=Snake (SSBB)]] | |[[File:Snake SSBB.jpg|100x100px|link=Snake (SSBB)]] | ||
|- | |- | ||
|{{uv|Sonic}} | |{{uv|Sonic}} | ||
|[[File:Sonic the Hedgehog logo.svg|100px]] | |[[File:Sonic the Hedgehog logo.svg|100px]] | ||
|[[File:Sonic SSBB.jpg|100x100px|link=Sonic (SSBB)]] | |[[File:Sonic SSBB.jpg|100x100px|link=Sonic (SSBB)]] | ||
|- | |- | ||
|{{uv|R.O.B.}} | |{{uv|R.O.B.}} | ||
|[[File:ROB series logo.png|100px]] | |[[File:ROB series logo.png|100px]] | ||
|[[File:R.O.B. SSBB.jpg|100x100px|link=R.O.B. (SSBB)]] | |[[File:R.O.B. SSBB.jpg|100x100px|link=R.O.B. (SSBB)]] | ||
|- | |- | ||
|{{uv|Nintendogs}} | |{{uv|Nintendogs}} | ||
|[[File:Nintendogs logo.png|100px]] | |[[File:Nintendogs logo.png|100px]] | ||
|[[File:NintendogAssist.jpg|100x100px|link=Nintendog]] | |[[File:NintendogAssist.jpg|100x100px|link=Nintendog]] | ||
|- | |- | ||
|{{uv|The Legendary Starfy}} | |{{uv|The Legendary Starfy}} | ||
|[[File:Starfy logo.png|100px]] | |[[File:Starfy logo.png|100px]] | ||
|[[File:StarfyDojo.jpg|100x100px|link=Starfy]] | |[[File:StarfyDojo.jpg|100x100px|link=Starfy]] | ||
|- | |- | ||
|{{uv|Punch-Out!!}} | |{{uv|Punch-Out!!}} | ||
|[[File:Punch-Out!! logo.png|100px]] | |[[File:Punch-Out!! logo.png|100px]] | ||
|[[File:Mac.jpg|100x100px|link=Little Mac]] | |[[File:Mac.jpg|100x100px|link=Little Mac]] | ||
|- | |- | ||
|{{uv|Nintendo Wars}} | |{{uv|Nintendo Wars}} | ||
|[[File:Advance Wars logo.png|100px]] | |[[File:Advance Wars logo.png|100px]] | ||
|[[File:Infantry and Tanks Brawl.jpg|100x100px|link=Infantry & Tanks]] | |[[File:Infantry and Tanks Brawl.jpg|100x100px|link=Infantry & Tanks]] | ||
|- | |- | ||
|{{uv|Jam with the Band}} | |{{uv|Jam with the Band}} | ||
|[[File:Daigasso! Band Brothers logo.png|100px]] | |[[File:Daigasso! Band Brothers logo.png|100px]] | ||
|[[File:BarbaraAT.jpg|100x100px|link=Barbara]] | |[[File:BarbaraAT.jpg|100x100px|link=Barbara]] | ||
|- | |- | ||
|{{uv|Golden Sun}} | |{{uv|Golden Sun}} | ||
|[[File:Golden Sun logo.png|100px]] | |[[File:Golden Sun logo.png|100px]] | ||
|[[File:Isaac Brawl.png|100x100px|link=Isaac]] | |[[File:Isaac Brawl.png|100x100px|link=Isaac]] | ||
|- | |- | ||
|{{uv|Sin and Punishment}} | |{{uv|Sin and Punishment}} | ||
|[[File:Sin and Punishment logo.png|100px]] | |[[File:Sin and Punishment logo.png|100px]] | ||
|[[File:SakiAmamiya.jpg|100x100px|link=Saki]] | |[[File:SakiAmamiya.jpg|100x100px|link=Saki]] | ||
|- | |- | ||
|{{uv|Drill Dozer}} | |{{uv|Drill Dozer}} | ||
|[[File:Drill Dozer logo.png|100px]] | |[[File:Drill Dozer logo.png|100px]] | ||
|[[File:JillAssist.jpg|100x100px|link=Jill]] | |[[File:JillAssist.jpg|100x100px|link=Jill]] | ||
|- | |- | ||
|''[[Nintendo DS (universe)|PictoChat]]'' | |''[[Nintendo DS (universe)|PictoChat]]'' | ||
|[[File:PictoChat Logo.png|100px]] | |[[File:PictoChat Logo.png|100px]] | ||
|[[File:PictoChatMan.jpg|100x100px|link=PictoChat]] | |[[File:PictoChatMan.jpg|100x100px|link=PictoChat]] | ||
|- | |- | ||
|{{uv|Electroplankton}} | |{{uv|Electroplankton}} | ||
|[[File:ElectroplanktonTitle.jpeg|100px]] | |[[File:ElectroplanktonTitle.jpeg|100px]] | ||
|[[File:Hanenbow.jpg|100x100px|link=Hanenbow]] | |[[File:Hanenbow.jpg|100x100px|link=Hanenbow]] | ||
|- | |- | ||
|{{uvm|Magical Starsign}} | |{{uvm|Magical Starsign}} | ||
|[[File:Magical Vacation logo.png|100px]] | |[[File:Magical Vacation logo.png|100px]] | ||
|[[File:Mokka - Brawl Trophy.png|100x100px]][[File:Pyrite - Brawl Trophy.png|100x100px]][[File:Putty - Brawl Trophy.png|100x100px]] | |[[File:Mokka - Brawl Trophy.png|100x100px]][[File:Pyrite - Brawl Trophy.png|100x100px]][[File:Putty - Brawl Trophy.png|100x100px]] | ||
|- | |- | ||
|{{uvm|Chōsōjū Mecha MG}} | |{{uvm|Chōsōjū Mecha MG}} | ||
|[[File:Chosoju Mecha MG logo.jpg|100px]] | |[[File:Chosoju Mecha MG logo.jpg|100px]] | ||
|[[File:Warrior Mech Gauss - Brawl Trophy.png|100x100px]][[File:HM Mech Rosa - Brawl Trophy.png|100x100px]][[File:Musketeer Daltania - Brawl Trophy.png|100x100px]] | |[[File:Warrior Mech Gauss - Brawl Trophy.png|100x100px]][[File:HM Mech Rosa - Brawl Trophy.png|100x100px]][[File:Musketeer Daltania - Brawl Trophy.png|100x100px]] | ||
|- | |- | ||
|{{uvm|Chibi-Robo!}} | |{{uvm|Chibi-Robo!}} | ||
|[[File:Chibi-Robo logo.png|100px]] | |[[File:Chibi-Robo logo.png|100px]] | ||
|[[File:Chibi-Robo - Brawl Trophy.png|100x100px]][[File:Telly Vision - Brawl Trophy.png|100x100px]] | |[[File:Chibi-Robo - Brawl Trophy.png|100x100px]][[File:Telly Vision - Brawl Trophy.png|100x100px]] | ||
|- | |- | ||
|{{uvm|Hotel Dusk}} | |{{uvm|Hotel Dusk}} | ||
|[[File:Hotel Dusk logo.png|100px]] | |[[File:Hotel Dusk logo.png|100px]] | ||
|[[File:Kyle Hyde - Brawl Trophy.png|100x100px]] | |[[File:Kyle Hyde - Brawl Trophy.png|100x100px]] | ||
|- | |- | ||
|{{uvm|Trace Memory}} | |{{uvm|Trace Memory}} | ||
|[[File:Trace Memory logo.jpg|100px]] | |[[File:Trace Memory logo.jpg|100px]] | ||
|[[File:Ashley Robbins - Brawl Trophy.png|100x100px]] | |[[File:Ashley Robbins - Brawl Trophy.png|100x100px]] | ||
|- | |- | ||
|{{uvm|Ouendan}} | |{{uvm|Ouendan}} | ||
|[[File:Ouendan Logo.png|70px]][[File:Ouendan logo.jpg|100px]] | |[[File:Ouendan Logo.png|70px]][[File:Ouendan logo.jpg|100px]] | ||
|[[File:Ouendan - Brawl Trophy.png|100x100px]][[File:Elite Beat Agents - Brawl Trophy.png|100x100px]] | |[[File:Ouendan - Brawl Trophy.png|100x100px]][[File:Elite Beat Agents - Brawl Trophy.png|100x100px]] | ||
|- | |- | ||
|{{uvm|bit Generations}} | |{{uvm|bit Generations}} | ||
|[[File:Bit Generations logo.png|100px]] | |[[File:Bit Generations logo.png|100px]] | ||
|[[File:Brawl Sticker Orbiter (Digiluxe).png|50px]][[File:Brawl Sticker Chromatron (Digiluxe).png|50px]][[File:Brawl Sticker Boundish (Digiluxe).png|50px]]<br>[[File:Brawl Sticker Digidrive (Digiluxe).png|50px]][[File:Brawl Sticker Rotohex (Digiluxe).png|50px]] | |[[File:Brawl Sticker Orbiter (Digiluxe).png|50px]][[File:Brawl Sticker Chromatron (Digiluxe).png|50px]][[File:Brawl Sticker Boundish (Digiluxe).png|50px]]<br>[[File:Brawl Sticker Digidrive (Digiluxe).png|50px]][[File:Brawl Sticker Rotohex (Digiluxe).png|50px]] | ||
|- | |- | ||
|{{uvm|Big Brain Academy}} | |{{uvm|Big Brain Academy}} | ||
|[[File:Big Brain Academy logo.png|100px]] | |[[File:Big Brain Academy logo.png|100px]] | ||
|[[File:Brawl Sticker Dr. Lobe (Big Brain Academy).png|50px]][[File:Brawl Sticker Dr. Lobe (Big Brain Academy WD).png|50px]] | |[[File:Brawl Sticker Dr. Lobe (Big Brain Academy).png|50px]][[File:Brawl Sticker Dr. Lobe (Big Brain Academy WD).png|50px]] | ||
|- | |- | ||
|{{uvm|Sennen Kazoku}} | |{{uvm|Sennen Kazoku}} | ||
|[[File:Sennen Kazoku logo.png|100px]] | |[[File:Sennen Kazoku logo.png|100px]] | ||
|[[File:Brawl Sticker Aijou Boom no Ya (Sennen Kazoku).png|50px]][[File:Brawl Sticker Cupit (Sennen Kazoku).png|50px]]<br>[[File:Brawl Sticker Akuma (Sennen Kazoku).png|50px]][[File:Brawl Sticker Kamisama (Sennen Kazoku).png|50px]] | |[[File:Brawl Sticker Aijou Boom no Ya (Sennen Kazoku).png|50px]][[File:Brawl Sticker Cupit (Sennen Kazoku).png|50px]]<br>[[File:Brawl Sticker Akuma (Sennen Kazoku).png|50px]][[File:Brawl Sticker Kamisama (Sennen Kazoku).png|50px]] | ||
|- | |- | ||
|{{uvm|Slide Adventure | |{{uvm|Slide Adventure MAGKID}} | ||
|[[File:Slide Adventure MAGKID logo.png|100px]] | |[[File:Slide Adventure MAGKID logo.png|100px]] | ||
|[[File:Brawl Sticker Midori Mushi (Slide Adventure MAGKID).png|50px]][[File:Brawl Sticker Magkid (Slide Adventure MAGKID).png|50px]] | |[[File:Brawl Sticker Midori Mushi (Slide Adventure MAGKID).png|50px]][[File:Brawl Sticker Magkid (Slide Adventure MAGKID).png|50px]] | ||
|- | |- | ||
|{{uvm|Stunt Race FX}} | |{{uvm|Stunt Race FX}} | ||
|[[File:Stunt Race FX logo.png|100px]] | |[[File:Stunt Race FX logo.png|100px]] | ||
|[[File:Brawl Sticker F-Type (Wild Trax).png|50px]][[File:Brawl Sticker Tractor Trailer (Wild Trax).png|50px]] | |[[File:Brawl Sticker F-Type (Wild Trax).png|50px]][[File:Brawl Sticker Tractor Trailer (Wild Trax).png|50px]] | ||
|- | |- | ||
|{{uvm|English Training}} | |{{uvm|English Training}} | ||
|[[File:English Training logo.png|100px]] | |[[File:English Training logo.png|100px]] | ||
|[[File:Brawl Sticker Dzuke-chan (English Training).png|50px]] | |[[File:Brawl Sticker Dzuke-chan (English Training).png|50px]] | ||
|- | |- | ||
|{{uv|Pilotwings}} | |{{uv|Pilotwings}} | ||
|[[File:Pilotwings logo.png|100px]] | |[[File:Pilotwings logo.png|100px]] | ||
|[[File:Brawl Sticker Instructor (Pilotwings).png|50px]] | |[[File:Brawl Sticker Instructor (Pilotwings).png|50px]] | ||
|- | |- | ||
| | |{{uv|The Mysterious Murasame Castle}} | ||
|[[File:Nazo no Murasamejo Logo.png|100px]] | |[[File:Nazo no Murasamejo Logo.png|100px]] | ||
|[[File:Brawl Sticker Takamaru (Nazo no Murasamejo).png|50px]] | |[[File:Brawl Sticker Takamaru (Nazo no Murasamejo).png|50px]] | ||
|- | |- | ||
|{{uvm|X}} | |{{uvm|X}} | ||
|[[File:X logo.gif|100px]] | |[[File:X logo.gif|100px]] | ||
|[[File:Brawl Sticker Training Academy Coach (X).png|50px]] | |[[File:Brawl Sticker Training Academy Coach (X).png|50px]] | ||
|- | |- | ||
| | |{{uv|Kaeru no Tame ni Kane wa Naru}} | ||
|[[File:For the Frog the Bell Tolls logo.png|100px]] | |[[File:For the Frog the Bell Tolls logo.png|100px]] | ||
|[[File:Brawl Sticker Sabure Prince (Kaeru no Tame ni Kane wa Naru).png|50px]] | |[[File:Brawl Sticker Sabure Prince (Kaeru no Tame ni Kane wa Naru).png|50px]] | ||
|- | |- | ||
|{{uvm|Ice Hockey}} | |{{uvm|Ice Hockey}} | ||
|[[File:Ice Hockey logo.png|100px]] | |[[File:Ice Hockey logo.png|100px]] | ||
|[[File:Brawl Sticker Fat Hockey Player (Ice Hockey).png|50px]] | |[[File:Brawl Sticker Fat Hockey Player (Ice Hockey).png|50px]] | ||
|- | |- | ||
|{{uvm|Wild Gunman}} | |{{uvm|Wild Gunman}} | ||
|[[File:Wild Gunman Logo.png|100px]] | |[[File:Wild Gunman Logo.png|100px]] | ||
|[[File:Brawl Sticker Wild Gunman.png|50px]] | |[[File:Brawl Sticker Wild Gunman.png|50px]] | ||
|- | |- | ||
|{{uvm|Yakuman}} | |{{uvm|Yakuman}} | ||
|[[File:Yakuman logo.png|100px]] | |[[File:Yakuman logo.png|100px]] | ||
|[[File:Brawl Sticker Yakuman Player (Yakuman).png|50px]] | |[[File:Brawl Sticker Yakuman Player (Yakuman).png|50px]] | ||
|- | |- | ||
|{{uv|Joy Mech Fight}} | |{{uv|Joy Mech Fight}} | ||
|[[File:Joy Mech Fight logo.png|100px]] | |[[File:Joy Mech Fight logo.png|100px]] | ||
|[[File:Brawl Sticker Sukapon (Joy Mech Fight).png|50px]] | |[[File:Brawl Sticker Sukapon (Joy Mech Fight).png|50px]] | ||
|- | |- | ||
|{{uvm|Shaberu! | |{{uvm|Shaberu! DS Oryōri Navi}} | ||
|[[File:Shaberu DS Oryori Navi logo.gif|100px]] | |[[File:Shaberu DS Oryori Navi logo.gif|100px]] | ||
|[[File:Brawl Sticker Chef (Shaberu! DS Cooking Navi).png|50px]] | |[[File:Brawl Sticker Chef (Shaberu! DS Cooking Navi).png|50px]] | ||
|- | |- | ||
|{{uvm|Soccer}} | |{{uvm|Soccer}} | ||
|[[File:Soccer logo.png|100px]] | |[[File:Soccer logo.png|100px]] | ||
|[[File:Cd.png|50px]]<br>''{{SSBBMusicLink|Nintendo|Famicom Medley}}''<br>(''Soccer'' portion) | |[[File:Cd.png|50px]]<br>''{{SSBBMusicLink|Nintendo|Famicom Medley}}''<br>(''Soccer'' portion) | ||
|- | |- | ||
|{{uvm|Urban Champion}} | |{{uvm|Urban Champion}} | ||
|[[File:Urban Champion logo.png|100px]] | |[[File:Urban Champion logo.png|100px]] | ||
|[[File:Cd.png|50px]]<br>''{{SSBBMusicLink|Nintendo|Famicom Medley}}''<br>(''Urban Champion'' portion) | |[[File:Cd.png|50px]]<br>''{{SSBBMusicLink|Nintendo|Famicom Medley}}''<br>(''Urban Champion'' portion) | ||
|- | |- | ||
|{{uv|Brain Age}} | |{{uv|Brain Age}} | ||
|[[File:Brain Age logo.png|100px]] | |[[File:Brain Age logo.png|100px]] | ||
|[[File:Cd.png|50px]]<br>''{{SSBBMusicLink|Nintendo|Brain Age: Train Your Brain in Minutes a Day}}'' | |[[File:Cd.png|50px]]<br>''{{SSBBMusicLink|Nintendo|Brain Age: Train Your Brain in Minutes a Day}}'' | ||
|- | |- | ||
|{{uv|Wii Sports}} | |{{uv|Wii Sports}} | ||
|[[File:Wii Sports logo.png|100px]] | |[[File:Wii Sports logo.png|100px]] | ||
|[[File:Cd.png|50px]]<br>''{{SSBBMusicLink|Nintendo|Opening Theme (Wii Sports)}}'' | |[[File:Cd.png|50px]]<br>''{{SSBBMusicLink|Nintendo|Opening Theme (Wii Sports)}}'' | ||
|- | |- | ||
|''[[Mii (universe)#Wii Play|Wii Play]]'' | |''[[Mii (universe)#Wii Play|Wii Play]]'' | ||
|[[File:Wii Play logo.png|100px]] | |[[File:Wii Play logo.png|100px]] | ||
|[[File:Cd.png|50px]]<br>''{{SSBBMusicLink|Nintendo|Charge! (Wii Play)}}'' | |[[File:Cd.png|50px]]<br>''{{SSBBMusicLink|Nintendo|Charge! (Wii Play)}}'' | ||
|- | |- | ||
|{{uvm3|Tetris}} | |{{uvm3|Tetris}} | ||
|[[File:Tetris logo.svg|100px]] | |[[File:Tetris logo.svg|100px]] | ||
|[[File:Cd.png|50px]]<br>''{{SSBBMusicLink|Nintendo|Tetris: Type A}}''<br>''{{SSBBMusicLink|Nintendo|Tetris: Type B}}'' | |[[File:Cd.png|50px]]<br>''{{SSBBMusicLink|Nintendo|Tetris: Type A}}''<br>''{{SSBBMusicLink|Nintendo|Tetris: Type B}}'' | ||
|} | |} | ||
| Line 623: | Line 371: | ||
!rowspan=2|Name | !rowspan=2|Name | ||
!rowspan=2|Logo | !rowspan=2|Logo | ||
!colspan=2|Main Representation | !colspan=2|Main Representation | ||
|- | |- | ||
| Line 633: | Line 378: | ||
|{{uv|Mega Man}} | |{{uv|Mega Man}} | ||
|[[File:Mega Man logo.png|100px]] | |[[File:Mega Man logo.png|100px]] | ||
|colspan=2|[[File:Mega Man SSB4.png|100x100px|link=Mega Man (SSB4)]] | |colspan=2|[[File:Mega Man SSB4.png|100x100px|link=Mega Man (SSB4)]] | ||
|- | |- | ||
|{{uv|Wii Fit}} | |{{uv|Wii Fit}} | ||
|[[File:Wii Fit logo.svg|100px]] | |[[File:Wii Fit logo.svg|100px]] | ||
|colspan=2|[[File:Wii Fit Trainer SSB4.png|100x100px|link=Wii Fit Trainer (SSB4)]] | |colspan=2|[[File:Wii Fit Trainer SSB4.png|100x100px|link=Wii Fit Trainer (SSB4)]] | ||
|- | |- | ||
|{{uv|Pac-Man}} | |{{uv|Pac-Man}} | ||
|[[File:Pac-Man title.png|100px]] | |[[File:Pac-Man title.png|100px]] | ||
|colspan=2|[[File:Pac-Man SSB4.png|100x100px|link=Pac-Man (SSB4)]] | |colspan=2|[[File:Pac-Man SSB4.png|100x100px|link=Pac-Man (SSB4)]] | ||
|- | |- | ||
|{{uv|Xenoblade Chronicles}} | |{{uv|Xenoblade Chronicles}} | ||
|[[File:XenobladeBanner.png|100px]] | |[[File:XenobladeBanner.png|100px]] | ||
|colspan=2|[[File:Shulk SSB4.png|100x100px|link=Shulk (SSB4)]] | |colspan=2|[[File:Shulk SSB4.png|100x100px|link=Shulk (SSB4)]] | ||
|- | |- | ||
|{{uv|Color TV-Game}} | |{{uv|Color TV-Game}} | ||
|[[File:Color TV Game logo.png|100px]] | |[[File:Color TV Game logo.png|100px]] | ||
|colspan=2|[[File:ColorTVGame15TrophyWiiU.png|100x100px|link=Color TV-Game 15]] | |colspan=2|[[File:ColorTVGame15TrophyWiiU.png|100x100px|link=Color TV-Game 15]] | ||
|- | |- | ||
|{{uv|Dillon's Rolling Western}} | |{{uv|Dillon's Rolling Western}} | ||
|[[File: | |[[File:Dillon's Rolling Western logo.png|100px]] | ||
|colspan=2|[[File:DillonTrophyWiiU.png|100x100px|link=Dillon]] | |colspan=2|[[File:DillonTrophyWiiU.png|100x100px|link=Dillon]] | ||
|- | |- | ||
|{{uv|Steel Diver}} | |{{uv|Steel Diver}} | ||
|[[File:Steel Diver logo.png|100px]] | |[[File:Steel Diver logo.png|100px]] | ||
|colspan=2|[[File:SteelDiverGunTrophyWiiU.png|100x100px|link=Steel Diver]] | |colspan=2|[[File:SteelDiverGunTrophyWiiU.png|100x100px|link=Steel Diver]] | ||
|- | |- | ||
|{{uv|Galaxian}} | |{{uv|Galaxian}} | ||
|[[File:Galaxian logo.png|100px]] | |[[File:Galaxian logo.png|100px]] | ||
|colspan=2|[[File:BossGalagaTrophyWiiU.png|100x100px|link=Boss Galaga]] | |colspan=2|[[File:BossGalagaTrophyWiiU.png|100x100px|link=Boss Galaga]] | ||
|- | |- | ||
|''[[StreetPass Mii Plaza (universe)#Find Mii|Find Mii]]'' | |''[[StreetPass Mii Plaza (universe)#Find Mii|Find Mii]]'' | ||
|[[File:Find Mii logo.jpg|100px]] | |[[File:Find Mii logo.jpg|100px]] | ||
|[[File:SSB4 Find Mii.JPG|100x100px|link=Find Mii]] | |[[File:SSB4 Find Mii.JPG|100x100px|link=Find Mii]] | ||
|[[File:Cd.png|50px]]<br>''{{SSB4MusicLink|Nintendo|Dark Lord}}''<br>''{{SSB4MusicLink|Nintendo|Save the World, Heroes!}}''<br>(Both DLC) | |[[File:Cd.png|50px]]<br>''{{SSB4MusicLink|Nintendo|Dark Lord}}''<br>''{{SSB4MusicLink|Nintendo|Save the World, Heroes!}}''<br>(Both DLC) | ||
| Line 697: | Line 415: | ||
|{{uv|Tomodachi}} | |{{uv|Tomodachi}} | ||
|[[File:Tomodachi.png|100px]] | |[[File:Tomodachi.png|100px]] | ||
|[[File:SSB4 Tomodachi Life.jpg|100x100px|link=Tomodachi Life]] | |[[File:SSB4 Tomodachi Life.jpg|100x100px|link=Tomodachi Life]] | ||
|[[File:Cd.png|50px]]<br>''{{SSB4MusicLink|Nintendo|Tomodachi Life}}''<br>(DLC) | |[[File:Cd.png|50px]]<br>''{{SSB4MusicLink|Nintendo|Tomodachi Life}}''<br>(DLC) | ||
| Line 705: | Line 420: | ||
|{{uv|Dig Dug}} | |{{uv|Dig Dug}} | ||
|[[File:Dig Dug logo.png|100px]] | |[[File:Dig Dug logo.png|100px]] | ||
|[[File:PookaTrophy3DS.png|100x100px|link=Pooka]] | |[[File:PookaTrophy3DS.png|100x100px|link=Pooka]] | ||
|[[File:Nr pooka.png]] | |[[File:Nr pooka.png]] | ||
| Line 713: | Line 425: | ||
|{{uv|Xevious}} | |{{uv|Xevious}} | ||
|[[File:Xevious logo.png|100px]] | |[[File:Xevious logo.png|100px]] | ||
|[[File:BacuraTrophy3DS.png|100x100px|link=Bacura]] | |[[File:BacuraTrophy3DS.png|100x100px|link=Bacura]] | ||
|[[File:Nr solvalou.png]][[File:Nr genesis.png]] | |[[File:Nr solvalou.png]][[File:Nr genesis.png]] | ||
| Line 721: | Line 430: | ||
|{{uv|Rhythm Heaven}} | |{{uv|Rhythm Heaven}} | ||
|[[File:Rhythm-heaven-logo.png|100px]] | |[[File:Rhythm-heaven-logo.png|100px]] | ||
|[[File:SneakySpiritTrophy3DS.png|100x100px|link=Sneaky Spirit]] | |[[File:SneakySpiritTrophy3DS.png|100x100px|link=Sneaky Spirit]] | ||
|[[File:MarshalCamMissRibbonTrophyWiiU.png|100x100px]][[File:Wrestler&ReporterTrophyWiiU.png|100x100px]] | |[[File:MarshalCamMissRibbonTrophyWiiU.png|100x100px]][[File:Wrestler&ReporterTrophyWiiU.png|100x100px]] | ||
| Line 729: | Line 435: | ||
|{{uvm3|Mappy}} | |{{uvm3|Mappy}} | ||
|[[File:Mappy logo.png|100px]] | |[[File:Mappy logo.png|100px]] | ||
|colspan=2|[[File:PacManUp1-SSB4.png|100x100px|link=Pac-Jump]] | |colspan=2|[[File:PacManUp1-SSB4.png|100x100px|link=Pac-Jump]] | ||
|- | |- | ||
|{{uvm3|King & Balloon}} | |{{uvm3|King & Balloon}} | ||
|[[File:King & Balloon logo.png|100px]] | |[[File:King & Balloon logo.png|100px]] | ||
|[[File:Nr king.png]] | |[[File:Nr king.png]] | ||
|No representation<br>in ''for Wii U'' | |No representation<br>in ''for Wii U'' | ||
| Line 744: | Line 444: | ||
|{{uvm3|Rally-X}} | |{{uvm3|Rally-X}} | ||
|[[File:Rally-X logo.png|100px]] | |[[File:Rally-X logo.png|100px]] | ||
|colspan=2|[[File:Nr mycar.png]] | |colspan=2|[[File:Nr mycar.png]] | ||
|- | |- | ||
|{{uvm3|Bosconian}} | |{{uvm3|Bosconian}} | ||
|[[File:Bosconian logo.png|100px]] | |[[File:Bosconian logo.png|100px]] | ||
|colspan=2|[[File:Nr bosconian.png]] | |colspan=2|[[File:Nr bosconian.png]] | ||
|- | |- | ||
|{{uvm3|Libble Rabble}} | |{{uvm3|Libble Rabble}} | ||
|[[File:Libble Rabble logo.png|100px]] | |[[File:Libble Rabble logo.png|100px]] | ||
|colspan=2|[[File:Nr topcup.png]] | |colspan=2|[[File:Nr topcup.png]] | ||
|- | |- | ||
|{{uvm3|Babylonian Castle Saga}} | |{{uvm3|Babylonian Castle Saga}} | ||
|[[File:Tower of Druaga logo.png|100px]] | |[[File:Tower of Druaga logo.png|100px]] | ||
|colspan=2|[[File:Nr gil.png]] | |colspan=2|[[File:Nr gil.png]] | ||
|- | |- | ||
|{{uvm3|Dragon Buster}} | |{{uvm3|Dragon Buster}} | ||
|[[File:Dragon Buster logo.png|100px]] | |[[File:Dragon Buster logo.png|100px]] | ||
|colspan=2|[[File:Nr clovis.png]] | |colspan=2|[[File:Nr clovis.png]] | ||
|- | |- | ||
|{{uvm3|Baraduke}} | |{{uvm3|Baraduke}} | ||
|[[File:Baraduke logo.png|100px]] | |[[File:Baraduke logo.png|100px]] | ||
|colspan=2|[[File:Nr paccet.png]] | |colspan=2|[[File:Nr paccet.png]] | ||
|- | |- | ||
|{{uvm3|Sky Kid}} | |{{uvm3|Sky Kid}} | ||
|[[File:Sky Kid logo.png|100px]] | |[[File:Sky Kid logo.png|100px]] | ||
|colspan=2|[[File:Nr baron.png]] | |colspan=2|[[File:Nr baron.png]] | ||
|- | |- | ||
|{{uvm3|Taiko no Tatsujin}} | |{{uvm3|Taiko no Tatsujin}} | ||
|[[File:Taiko no Tatsujin English logo.png|100px]] | |[[File:Taiko no Tatsujin English logo.png|100px]] | ||
|colspan=2|[[File:Nr don.png]] | |||
|colspan=2|[[File: | |||
|- | |- | ||
|{{uvm|Hogan's Alley}} | |{{uvm|Hogan's Alley}} | ||
|[[File:Hogan's Alley Logo.png|100px]] | |[[File:Hogan's Alley Logo.png|100px]] | ||
|colspan=2|[[File:CanTrophyWiiU.png|100x100px|link=Trick Shot]] | |colspan=2|[[File:CanTrophyWiiU.png|100x100px|link=Trick Shot]] | ||
|- | |- | ||
|{{uvm|Calciobit}} | |{{uvm|Calciobit}} | ||
|[[File:Calciobit logo.png|100px]] | |[[File:Calciobit logo.png|100px]] | ||
|[[File:FootballPlayersTrophy3DS.png|100x100px]] | |[[File:FootballPlayersTrophy3DS.png|100x100px]] | ||
|No representation<br>in ''for Wii U'' | |No representation<br>in ''for Wii U'' | ||
| Line 815: | Line 485: | ||
|{{uvm|Freakyforms}} | |{{uvm|Freakyforms}} | ||
|[[File:Freakyforms logo.png|100px]] | |[[File:Freakyforms logo.png|100px]] | ||
|[[File:KingRoyTrophy3DS.png|100x100px]] | |[[File:KingRoyTrophy3DS.png|100x100px]] | ||
|[[File:Cd.png|50px]]<br>''{{SSB4MusicLink|Nintendo|Freakyforms: Your Creations, Alive! Medley}}''<br>(DLC) | |[[File:Cd.png|50px]]<br>''{{SSB4MusicLink|Nintendo|Freakyforms: Your Creations, Alive! Medley}}''<br>(DLC) | ||
| Line 823: | Line 490: | ||
|{{uvm|Thru}} | |{{uvm|Thru}} | ||
|[[File:Thru logo.jpg|100px]] | |[[File:Thru logo.jpg|100px]] | ||
|[[File:KetzalsCorridorsTrophy3DS.png|100x100px]] | |[[File:KetzalsCorridorsTrophy3DS.png|100x100px]] | ||
|No representation<br>in ''for Wii U'' | |No representation<br>in ''for Wii U'' | ||
| Line 831: | Line 495: | ||
|{{uvm|Sakura Samurai}} | |{{uvm|Sakura Samurai}} | ||
|[[File:Sakura Samurai logo.jpg|100px]] | |[[File:Sakura Samurai logo.jpg|100px]] | ||
|[[File:SakuraSamuraiTrophy3DS.png|100x100px]] | |[[File:SakuraSamuraiTrophy3DS.png|100x100px]] | ||
|[[File:Cd.png|50px]]<br>''{{SSB4MusicLink|Nintendo|Boss 1 (Sakura Samurai: Art of the Sword)}}'' | |[[File:Cd.png|50px]]<br>''{{SSB4MusicLink|Nintendo|Boss 1 (Sakura Samurai: Art of the Sword)}}'' | ||
| Line 839: | Line 500: | ||
|{{uv|Fatal Frame}} | |{{uv|Fatal Frame}} | ||
|[[File:Fatal Frame logo.png|100px]] | |[[File:Fatal Frame logo.png|100px]] | ||
|[[File:MayaTrophy3DS.png|100x100px]] | |[[File:MayaTrophy3DS.png|100x100px]] | ||
|[[File:MioMayuAmakuraTrophyWiiU.png|100x100px]] | |[[File:MioMayuAmakuraTrophyWiiU.png|100x100px]] | ||
| Line 847: | Line 505: | ||
|{{uvm3|Culdcept}} | |{{uvm3|Culdcept}} | ||
|[[File:Culdcept logo.png|100px]] | |[[File:Culdcept logo.png|100px]] | ||
|[[File:GoliganTrophy3DS.png|100x100px]] | |[[File:GoliganTrophy3DS.png|100x100px]] | ||
|[[File:Cd.png|50px]]<br>''{{SSB4MusicLink|Nintendo|Culdcept}}'' | |[[File:Cd.png|50px]]<br>''{{SSB4MusicLink|Nintendo|Culdcept}}'' | ||
| Line 855: | Line 510: | ||
|{{uvm|HarmoKnight}} | |{{uvm|HarmoKnight}} | ||
|[[File:HarmoKnight logo.png|100px]] | |[[File:HarmoKnight logo.png|100px]] | ||
|[[File:TempoTrophy3DS.png|100x100px]] | |[[File:TempoTrophy3DS.png|100x100px]] | ||
|No representation<br>in ''for Wii U'' | |No representation<br>in ''for Wii U'' | ||
| Line 863: | Line 515: | ||
|{{uvm|Style Savvy}} | |{{uvm|Style Savvy}} | ||
|[[File:Style Savvy logo.png|100px]] | |[[File:Style Savvy logo.png|100px]] | ||
|[[File:EvieTrophy3DS.png|100x100px]] | |[[File:EvieTrophy3DS.png|100x100px]] | ||
|[[File:Cd.png|50px]]<br>''{{SSB4MusicLink|Nintendo|Style Savvy: Trendsetters}}''<br>''{{SSB4MusicLink|Nintendo|Pop Fashion Show}}'' | |[[File:Cd.png|50px]]<br>''{{SSB4MusicLink|Nintendo|Style Savvy: Trendsetters}}''<br>''{{SSB4MusicLink|Nintendo|Pop Fashion Show}}'' | ||
| Line 871: | Line 520: | ||
|{{uvm|Pushmo}} | |{{uvm|Pushmo}} | ||
|[[File:Pushmo logo.png|100px]] | |[[File:Pushmo logo.png|100px]] | ||
|[[File:MalloTrophy3DS.png|100x100px]] | |[[File:MalloTrophy3DS.png|100x100px]] | ||
|No representation<br>in ''for Wii U'' | |No representation<br>in ''for Wii U'' | ||
| Line 879: | Line 525: | ||
|{{uvm|Fluidity}} | |{{uvm|Fluidity}} | ||
|[[File:Fluidity logo.png|100px]] | |[[File:Fluidity logo.png|100px]] | ||
|[[File:EddyTrophy3DS.png|100x100px]] | |[[File:EddyTrophy3DS.png|100x100px]] | ||
|No representation<br>in ''for Wii U'' | |No representation<br>in ''for Wii U'' | ||
|- | |- | ||
|{{uvm| | |{{uvm|Nintendoji}} | ||
|[[File:Nintendouji logo.png|100px]] | |[[File:Nintendouji logo.png|100px]] | ||
|[[File:NintendoujiTrophy3DS.png|100x100px]] | |[[File:NintendoujiTrophy3DS.png|100x100px]] | ||
|No representation<br>in ''for Wii U'' | |No representation<br>in ''for Wii U'' | ||
| Line 895: | Line 535: | ||
|''[[StreetPass Mii Plaza (universe)#Monster Manor|Monster Manor]]'' | |''[[StreetPass Mii Plaza (universe)#Monster Manor|Monster Manor]]'' | ||
|[[File:Monster Manor logo.jpg|100px]] | |[[File:Monster Manor logo.jpg|100px]] | ||
|[[File:IrisArchwellTrophy3DS.png|100x100px]][[File:ArzodiusTrophy3DS.png|100x100px]] | |[[File:IrisArchwellTrophy3DS.png|100x100px]][[File:ArzodiusTrophy3DS.png|100x100px]] | ||
|No representation<br>in ''for Wii U'' | |No representation<br>in ''for Wii U'' | ||
| Line 903: | Line 540: | ||
|''[[StreetPass Mii Plaza (universe)#Warrior's Way|Warrior's Way]]'' | |''[[StreetPass Mii Plaza (universe)#Warrior's Way|Warrior's Way]]'' | ||
|[[File:Warrior's Way logo.jpg|100px]] | |[[File:Warrior's Way logo.jpg|100px]] | ||
|[[File:WentworthTrophy3DS.png|100x100px]][[File:FynalleTrophy3DS.png|100x100px]] | |[[File:WentworthTrophy3DS.png|100x100px]][[File:FynalleTrophy3DS.png|100x100px]] | ||
|No representation<br>in ''for Wii U'' | |No representation<br>in ''for Wii U'' | ||
| Line 911: | Line 545: | ||
|''[[StreetPass Mii Plaza (universe)#Mii Force|Mii Force]]'' | |''[[StreetPass Mii Plaza (universe)#Mii Force|Mii Force]]'' | ||
|[[File:Mii Force logo.jpg|100px]] | |[[File:Mii Force logo.jpg|100px]] | ||
|[[File:SquadLeaderTrophy3DS.png|100x100px]][[File:GoldBoneTrophy3DS.png|100x100px]] | |[[File:SquadLeaderTrophy3DS.png|100x100px]][[File:GoldBoneTrophy3DS.png|100x100px]] | ||
|[[File:MiiForceHelmet.jpg|200px]] | |[[File:MiiForceHelmet.jpg|200px]] | ||
| Line 919: | Line 550: | ||
|''[[StreetPass Mii Plaza (universe)#Flower Town|Flower Town]]'' | |''[[StreetPass Mii Plaza (universe)#Flower Town|Flower Town]]'' | ||
|[[File:Flower Town logo.jpg|100px]] | |[[File:Flower Town logo.jpg|100px]] | ||
|[[File:MendelBlossomTrophy3DS.png|100x100px]] | |[[File:MendelBlossomTrophy3DS.png|100x100px]] | ||
|[[File:MasterGardener'sCrown.jpg|200px]] | |[[File:MasterGardener'sCrown.jpg|200px]] | ||
| Line 927: | Line 555: | ||
|{{uvm|Rusty's Real Deal Baseball}} | |{{uvm|Rusty's Real Deal Baseball}} | ||
|[[File:Rusty's Real Deal Baseball logo.jpg|100px]] | |[[File:Rusty's Real Deal Baseball logo.jpg|100px]] | ||
|[[File:InujiDarumeshiTrophy3DS.png|100x100px]][[File:RustySluggerTrophy3DS.png|100x100px]] | |[[File:InujiDarumeshiTrophy3DS.png|100x100px]][[File:RustySluggerTrophy3DS.png|100x100px]] | ||
|No representation<br>in ''for Wii U'' | |No representation<br>in ''for Wii U'' | ||
| Line 935: | Line 560: | ||
|{{uvm|Fossil Fighters}} | |{{uvm|Fossil Fighters}} | ||
|[[File:Fossil Fighters logo.jpg|100px]] | |[[File:Fossil Fighters logo.jpg|100px]] | ||
|[[File:FossilFightersTrophy3DS.png|100x100px]] | |[[File:FossilFightersTrophy3DS.png|100x100px]] | ||
|No representation<br>in ''for Wii U'' | |No representation<br>in ''for Wii U'' | ||
| Line 946: | Line 568: | ||
!Name | !Name | ||
!Logo | !Logo | ||
!Main Representation | !Main Representation | ||
|- | |- | ||
|{{uvm3|Metro-Cross}} | |{{uvm3|Metro-Cross}} | ||
|[[File:Metro-Cross logo.png|100px]] | |[[File:Metro-Cross logo.png|100px]] | ||
|[[File:Nr runner.png]] | |[[File:Nr runner.png]] | ||
|- | |- | ||
|{{uvm3|Valkyrie}} | |{{uvm3|Valkyrie}} | ||
|[[File:Valkyrie logo.png|100px]] | |[[File:Valkyrie logo.png|100px]] | ||
|[[File:Nr valkyrie.png]] | |[[File:Nr valkyrie.png]] | ||
|- | |- | ||
|{{uvm|Captain Rainbow}} | |{{uvm|Captain Rainbow}} | ||
|[[File:Captain Rainbow logo.png|100px]] | |[[File:Captain Rainbow logo.png|100px]] | ||
|[[File:CaptainRainbowTrophyWiiU.png|100x100px]][[File:FatMacTrophyWiiU.png|100x100px]] | |[[File:CaptainRainbowTrophyWiiU.png|100x100px]][[File:FatMacTrophyWiiU.png|100x100px]] | ||
|- | |- | ||
|{{uv|Art Academy}} | |{{uv|Art Academy}} | ||
|[[File:Art Academy logo.png|100px]] | |[[File:Art Academy logo.png|100px]] | ||
|[[File:VinceTrophyWiiU.png|100x100px]] | |[[File:VinceTrophyWiiU.png|100x100px]] | ||
|- | |- | ||
|{{uvm|Zangeki no Reginleiv}} | |{{uvm|Zangeki no Reginleiv}} | ||
|[[File:Zangeki no Reginleiv logo.png|100px]] | |[[File:Zangeki no Reginleiv logo.png|100px]] | ||
|[[File:FreyTrophyWiiU.png|100x100px]][[File:FreyaTrophyWiiU.png|100x100px]] | |[[File:FreyTrophyWiiU.png|100x100px]][[File:FreyaTrophyWiiU.png|100x100px]] | ||
|- | |- | ||
|{{uvm|The Last Story}} | |{{uvm|The Last Story}} | ||
|[[File:The Last Story logo.jpg|100px]] | |[[File:The Last Story logo.jpg|100px]] | ||
|[[File:ZaelTrophyWiiU.png|100x100px]][[File:CalistaTrophyWiiU.png|100x100px]] | |[[File:ZaelTrophyWiiU.png|100x100px]][[File:CalistaTrophyWiiU.png|100x100px]] | ||
|- | |- | ||
|{{uvm|Pandora's Tower}} | |{{uvm|Pandora's Tower}} | ||
|[[File:Pandora's Tower logo.png|100px]] | |[[File:Pandora's Tower logo.png|100px]] | ||
|[[File:ElenaAeronTrophyWiiU.png|100x100px]] | |[[File:ElenaAeronTrophyWiiU.png|100x100px]] | ||
|- | |- | ||
|{{uvm3|Rayman}} | |{{uvm3|Rayman}} | ||
|[[File:Rayman logo.png|100px]] | |[[File:Rayman logo.png|100px]] | ||
|[[File:RaymanTrophyWiiU.png|100x100px]][[File:GloboxTrophyWiiU.png|100x100px]][[File:BarbaraTrophyWiiU.png|100x100px]] | |[[File:RaymanTrophyWiiU.png|100x100px]][[File:GloboxTrophyWiiU.png|100x100px]][[File:BarbaraTrophyWiiU.png|100x100px]] | ||
|- | |- | ||
|''[[Mii (universe)#Nintendo Land|Nintendo Land]]'' | |''[[Mii (universe)#Nintendo Land|Nintendo Land]]'' | ||
|[[File:Nintendo Land logo.png|100px]] | |[[File:Nintendo Land logo.png|100px]] | ||
|[[File:MonitaTrophyWiiU.png|100x100px]] | |[[File:MonitaTrophyWiiU.png|100x100px]] | ||
|- | |- | ||
|{{uvm3|BIT.TRIP}} | |{{uvm3|BIT.TRIP}} | ||
|[[File:BIT TRIP logo.png|100px]] | |[[File:BIT TRIP logo.png|100px]] | ||
|[[File:CommanderVideoTrophyWiiU.png|100x100px]] | |[[File:CommanderVideoTrophyWiiU.png|100x100px]] | ||
|- | |- | ||
|{{uvm3|The Wonderful 101}} | |{{uvm3|The Wonderful 101}} | ||
|[[File:The Wonderful 101 logo.png|100px]] | |[[File:The Wonderful 101 logo.png|100px]] | ||
|[[File:WonderRedTrophyWiiU.png|100x100px]][[File:WonderBlueTrophyWiiU.png|100x100px]][[File:WonderGreenTrophyWiiU.png|100x100px]][[File:WonderPinkTrophyWiiU.png|100x100px]]<br>[[File:WonderYellowTrophyWiiU.png|100x100px]][[File:WonderWhiteTrophyWiiU.png|100x100px]][[File:WonderBlackTrophyWiiU.png|100x100px]] | |[[File:WonderRedTrophyWiiU.png|100x100px]][[File:WonderBlueTrophyWiiU.png|100x100px]][[File:WonderGreenTrophyWiiU.png|100x100px]][[File:WonderPinkTrophyWiiU.png|100x100px]]<br>[[File:WonderYellowTrophyWiiU.png|100x100px]][[File:WonderWhiteTrophyWiiU.png|100x100px]][[File:WonderBlackTrophyWiiU.png|100x100px]] | ||
|- | |- | ||
|{{uvm3|Dragon Spirit}} | |{{uvm3|Dragon Spirit}} | ||
|[[File:Dragon Spirit logo.png|100px]] | |[[File:Dragon Spirit logo.png|100px]] | ||
|[[File:Cd.png|50px]]<br>''{{SSB4MusicLink|Namco|Namco Arcade '80s Retro Medley 2}}''<br>(''Dragon Spirit'' portion) | |[[File:Cd.png|50px]]<br>''{{SSB4MusicLink|Namco|Namco Arcade '80s Retro Medley 2}}''<br>(''Dragon Spirit'' portion) | ||
|- | |- | ||
|{{uvm3|Wonder Momo}} | |{{uvm3|Wonder Momo}} | ||
|[[File:Wonder Momo logo.png|100px]] | |[[File:Wonder Momo logo.png|100px]] | ||
|[[File:Cd.png|50px]]<br>''{{SSB4MusicLink|Namco|Namco Arcade '80s Retro Medley 2}}''<br>(''Wonder Momo'' portion) | |[[File:Cd.png|50px]]<br>''{{SSB4MusicLink|Namco|Namco Arcade '80s Retro Medley 2}}''<br>(''Wonder Momo'' portion) | ||
|- | |- | ||
|{{uvm3|Thunder Ceptor}} | |{{uvm3|Thunder Ceptor}} | ||
|[[File:Thunder Ceptor logo.png|100px]] | |[[File:Thunder Ceptor logo.png|100px]] | ||
|[[File:Cd.png|50px]]<br>''{{SSB4MusicLink|Namco|Namco Arcade '80s Retro Medley 2}}''<br>(''Thunder Ceptor'' portion) | |[[File:Cd.png|50px]]<br>''{{SSB4MusicLink|Namco|Namco Arcade '80s Retro Medley 2}}''<br>(''Thunder Ceptor'' portion) | ||
|- | |- | ||
|{{uvm3|Yokai Dochuki}} | |{{uvm3|Yokai Dochuki}} | ||
|[[File:Shadow Land logo.png|100px]] | |[[File:Shadow Land logo.png|100px]] | ||
|[[File:Cd.png|50px]]<br>''{{SSB4MusicLink|Namco|Yokai Dochuki Retro Medley}}'' | |[[File:Cd.png|50px]]<br>''{{SSB4MusicLink|Namco|Yokai Dochuki Retro Medley}}'' | ||
|- | |- | ||
|{{uvm3|Bravoman}} | |{{uvm3|Bravoman}} | ||
|[[File:Bravoman logo.png|100px]] | |[[File:Bravoman logo.png|100px]] | ||
|[[File:Cd.png|50px]]<br>''{{SSB4MusicLink|Namco|Bravoman Retro Medley}}'' | |[[File:Cd.png|50px]]<br>''{{SSB4MusicLink|Namco|Bravoman Retro Medley}}'' | ||
|- | |- | ||
|{{uvm3|Baten Kaitos}} | |{{uvm3|Baten Kaitos}} | ||
|[[File:Baten Kaitos logo.jpg|100px]] | |[[File:Baten Kaitos logo.jpg|100px]] | ||
|[[File:Cd.png|50px]]<br>''{{SSB4MusicLink|Nintendo|The valedictory elegy}}'' | |[[File:Cd.png|50px]]<br>''{{SSB4MusicLink|Nintendo|The valedictory elegy}}'' | ||
|- | |- | ||
|{{uvm|Soma Bringer}} | |{{uvm|Soma Bringer}} | ||
|[[File:Soma Bringer logo.jpg|100px]] | |[[File:Soma Bringer logo.jpg|100px]] | ||
|[[File:Cd.png|50px]]<br>''{{SSB4MusicLink|Nintendo|Attack (Soma Bringer)}}'' | |[[File:Cd.png|50px]]<br>''{{SSB4MusicLink|Nintendo|Attack (Soma Bringer)}}'' | ||
|- | |- | ||
|{{uvm3|Glory of Heracles}} | |{{uvm3|Glory of Heracles}} | ||
|[[File:Glory of Heracles logo.png|100px]] | |[[File:Glory of Heracles logo.png|100px]] | ||
|[[File:Cd.png|50px]]<br>''{{SSB4MusicLink|Nintendo|Glory of Heracles}}'' | |[[File:Cd.png|50px]]<br>''{{SSB4MusicLink|Nintendo|Glory of Heracles}}'' | ||
|- | |- | ||
|{{uvm|AR Games}} | |{{uvm|AR Games}} | ||
|[[File:AR Games logo.png|100px]] | |[[File:AR Games logo.png|100px]] | ||
|[[File:Cd.png|50px]]<br>''{{SSB4MusicLink|Nintendo|Dragon Battle}}'' | |[[File:Cd.png|50px]]<br>''{{SSB4MusicLink|Nintendo|Dragon Battle}}'' | ||
|- | |- | ||
|{{uvm|NES Remix}} | |{{uvm|NES Remix}} | ||
|[[File:NES Remix logo.png|100px]] | |[[File:NES Remix logo.png|100px]] | ||
|[[File:Cd.png|50px]]<br>''{{SSB4MusicLink|Nintendo|Title Theme (NES Remix 2)}}'' | |[[File:Cd.png|50px]]<br>''{{SSB4MusicLink|Nintendo|Title Theme (NES Remix 2)}}'' | ||
|} | |} | ||
| Line 1,103: | Line 659: | ||
!Name | !Name | ||
!Logo | !Logo | ||
!Main Representation | !Main Representation | ||
|- | |- | ||
|{{uv|Street Fighter}} | |{{uv|Street Fighter}} | ||
|[[File:StreetFighterTitle.png|100px]] | |[[File:StreetFighterTitle.png|100px]] | ||
|[[File:Ryu SSB4.png|100x100px|link=Ryu (SSB4)]]<br>(Both versions) | |[[File:Ryu SSB4.png|100x100px|link=Ryu (SSB4)]]<br>(Both versions) | ||
|- | |- | ||
|{{uv|Miiverse}} | |{{uv|Miiverse}} | ||
|[[File:Miiverse Logo.png|100px]] | |[[File:Miiverse Logo.png|100px]] | ||
|[[File:SSB4 - Miiverse.jpg|100x100px|link=Miiverse]]<br>({{GameIcon|SSB4-U}} only) | |[[File:SSB4 - Miiverse.jpg|100x100px|link=Miiverse]]<br>({{GameIcon|SSB4-U}} only) | ||
|- | |- | ||
|{{uv|Splatoon}} | |{{uv|Splatoon}} | ||
|[[File:Splatoon logo.png|100px]] | |[[File:Splatoon logo.png|100px]] | ||
|[[File:InklingTrophyWiiU.png|100x100px]]<br>(Both versions) | |[[File:InklingTrophyWiiU.png|100x100px]]<br>(Both versions) | ||
|- | |- | ||
|{{uv|Virtua Fighter}} | |{{uv|Virtua Fighter}} | ||
|[[File:Virtua Fighter logo.png|100px]] | |[[File:Virtua Fighter logo.png|100px]] | ||
|[[File:SSB4 Mii Fighter Akira.jpg|100x100px]][[File:SSB4 Mii Fighter Jacky.jpg|100x100px]]<br>(Both versions) | |[[File:SSB4 Mii Fighter Akira.jpg|100x100px]][[File:SSB4 Mii Fighter Jacky.jpg|100x100px]]<br>(Both versions) | ||
|- | |- | ||
|{{uv|Tekken}} | |{{uv|Tekken}} | ||
|[[File:Tekken logo.gif|100px]] | |[[File:Tekken logo.gif|100px]] | ||
|[[File:SSB4 Mii Fighter Heihachi.jpg|100x100px]]<br>(Both versions) | |[[File:SSB4 Mii Fighter Heihachi.jpg|100x100px]]<br>(Both versions) | ||
|- | |- | ||
|''[[Mii (universe)#Wii Party|Wii Party]]'' | |''[[Mii (universe)#Wii Party|Wii Party]]'' | ||
|[[File:Wii Party logo.png|100px]] | |[[File:Wii Party logo.png|100px]] | ||
|[[File:Cd.png|50px]]<br>''{{SSB4MusicLink|Nintendo|Final Results (Wii Party U)}}''<br>({{GameIcon|SSB4-U}} only) | |[[File:Cd.png|50px]]<br>''{{SSB4MusicLink|Nintendo|Final Results (Wii Party U)}}''<br>({{GameIcon|SSB4-U}} only) | ||
|- | |- | ||
|{{uvm3|Tales}} | |{{uvm3|Tales}} | ||
|[[File:Tales of Series logo.png|100px]] | |[[File:Tales of Series logo.png|100px]] | ||
|[[File:DLC Costume Lloyd Outfit.png|100x100px]]<br>(Both versions) | |[[File:DLC Costume Lloyd Outfit.png|100x100px]]<br>(Both versions) | ||
|- | |- | ||
|{{uv|Monster Hunter}} | |{{uv|Monster Hunter}} | ||
|[[File:Monster Hunter logo.png|100px]] | |[[File:Monster Hunter logo.png|100px]] | ||
|[[File:SSB4 Mii Fighter Hunter M.jpg|100x100px]][[File:SSB4 Mii Fighter Hunter F.jpg|100x100px]]<br>[[File:SSB4 Mii Fighter Rathalos M.jpg|100x100px]][[File:SSB4 Mii Fighter Rathalos F.jpg|100x100px]]<br>(Both versions) | |[[File:SSB4 Mii Fighter Hunter M.jpg|100x100px]][[File:SSB4 Mii Fighter Hunter F.jpg|100x100px]]<br>[[File:SSB4 Mii Fighter Rathalos M.jpg|100x100px]][[File:SSB4 Mii Fighter Rathalos F.jpg|100x100px]]<br>(Both versions) | ||
|- | |- | ||
|{{uv|Final Fantasy}} | |{{uv|Final Fantasy}} | ||
|[[File:FinalFantasyLogo.svg|100px]] | |[[File:FinalFantasyLogo.svg|100px]] | ||
|[[File:Cloud SSB4.png|100x100px|link=Cloud (SSB4)]]<br>(Both versions) | |[[File:Cloud SSB4.png|100x100px|link=Cloud (SSB4)]]<br>(Both versions) | ||
|- | |- | ||
|{{uv|Bayonetta}} | |{{uv|Bayonetta}} | ||
|[[File:BayonettaLogo.png|100px]] | |[[File:BayonettaLogo.png|100px]] | ||
|[[File:Bayonetta SSB4.png|100x100px|link=Bayonetta (SSB4)]]<br>(Both versions) | |[[File:Bayonetta SSB4.png|100x100px|link=Bayonetta (SSB4)]]<br>(Both versions) | ||
|} | |} | ||
| Line 1,185: | Line 708: | ||
!Name | !Name | ||
!Logo | !Logo | ||
!Main Representation | !Main Representation | ||
|- | |- | ||
|{{uv|Castlevania}} | |{{uv|Castlevania}} | ||
|[[File:CastlevaniaLogo.png|100px]] | |[[File:CastlevaniaLogo.png|100px]] | ||
|[[File:Simon SSBU.png|100x100px|link=Simon (SSBU)]][[File:Richter SSBU.png|100x100px|link=Richter (SSBU)]] | |[[File:Simon SSBU.png|100x100px|link=Simon (SSBU)]][[File:Richter SSBU.png|100x100px|link=Richter (SSBU)]] | ||
|- | |- | ||
|{{uv|Swapnote}} | |{{uv|Swapnote}} | ||
|[[File:Swapnote logo.png|100px]] | |[[File:Swapnote logo.png|100px]] | ||
|[[File:Nikki Assist Trophy (SSBU).png|100x100px|link=Nikki]] | |[[File:Nikki Assist Trophy (SSBU).png|100x100px|link=Nikki]] | ||
|- | |- | ||
|{{uv|Nintendo Badge Arcade}} | |{{uv|Nintendo Badge Arcade}} | ||
|[[File:Nintendo Badge Arcade logo.png|100px]] | |[[File:Nintendo Badge Arcade logo.png|100px]] | ||
|[[File:Arcade Bunny Assist Trophy (SSBU).png|100x100px|link=Arcade Bunny]] | |[[File:Arcade Bunny Assist Trophy (SSBU).png|100x100px|link=Arcade Bunny]] | ||
|- | |- | ||
|{{uv|ARMS}} | |{{uv|ARMS}} | ||
|[[File:ARMS logo.svg|100px]] | |[[File:ARMS logo.svg|100px]] | ||
|[[File:Spring Man Assist Trophy (SSBU).png|100x100px|link=Spring Man]] | |[[File:Spring Man Assist Trophy (SSBU).png|100x100px|link=Spring Man]] | ||
|- | |- | ||
|{{uv|Bomberman}} | |{{uv|Bomberman}} | ||
|[[File:Bomberman logo.png|100px]] | |[[File:Bomberman logo.png|100px]] | ||
|[[File:Bomberman Assist Trophy (SSBU).png|100x100px|link=Bomberman]] | |[[File:Bomberman Assist Trophy (SSBU).png|100x100px|link=Bomberman]] | ||
|- | |- | ||
|{{uv|Shovel Knight}} | |{{uv|Shovel Knight}} | ||
|[[File:ShovelKnightLogo.png|100px]] | |[[File:ShovelKnightLogo.png|100px]] | ||
|[[File:Shovel Knight Assist Trophy (SSBU).png|100x100px|link=Shovel Knight]] | |[[File:Shovel Knight Assist Trophy (SSBU).png|100x100px|link=Shovel Knight]] | ||
|- | |- | ||
|{{uvm3|Katamari}} | |{{uvm3|Katamari}} | ||
|[[File:Katamari Damacy logo.png|100px]] | |[[File:Katamari Damacy logo.png|100px]] | ||
|[[File:Nr prince.png]] | |[[File:Nr prince.png]] | ||
|- | |- | ||
|''[[Mii (universe)#Wii Music|Wii Music]]'' | |''[[Mii (universe)#Wii Music|Wii Music]]'' | ||
|[[File:Wii Music Logo.jpg|100px]] | |[[File:Wii Music Logo.jpg|100px]] | ||
|[[File:SSBU spirit Sebastian Tute.png|100x100px]] | |[[File:SSBU spirit Sebastian Tute.png|100x100px]] | ||
|- | |- | ||
|''[[StreetPass Mii Plaza (universe)#Ultimate Angler|Ultimate Angler]]'' | |''[[StreetPass Mii Plaza (universe)#Ultimate Angler|Ultimate Angler]]'' | ||
|[[File:Ultimate Angler icon.png|100px]] | |[[File:Ultimate Angler icon.png|100px]] | ||
|[[File:SSBU spirit Coraline.png|100x100px]] | |[[File:SSBU spirit Coraline.png|100x100px]] | ||
|- | |- | ||
|''[[StreetPass Mii Plaza (universe)#Ninja Launcher|Ninja Launcher]]'' | |''[[StreetPass Mii Plaza (universe)#Ninja Launcher|Ninja Launcher]]'' | ||
|[[File:Ninja Launcher icon.png|100px]] | |[[File:Ninja Launcher icon.png|100px]] | ||
|[[File:SSBU spirit Shinobu.png|100x100px]] | |[[File:SSBU spirit Shinobu.png|100x100px]] | ||
|- | |- | ||
|''[[StreetPass Mii Plaza (universe)#Feed Mii|Feed Mii]]'' | |''[[StreetPass Mii Plaza (universe)#Feed Mii|Feed Mii]]'' | ||
|[[File:Feed Mii icon.png|100px]] | |[[File:Feed Mii icon.png|100px]] | ||
|[[File:SSBU spirit Crispin.png|100x100px]] | |[[File:SSBU spirit Crispin.png|100x100px]] | ||
|- | |- | ||
|''[[StreetPass Mii Plaza (universe)#Slot Car Rivals|Slot Car Rivals]]'' | |''[[StreetPass Mii Plaza (universe)#Slot Car Rivals|Slot Car Rivals]]'' | ||
|[[File:SlotCarRivals.png|100px]] | |[[File:SlotCarRivals.png|100px]] | ||
|[[File:SSBU spirit Nico Fire.png|100x100px]] | |[[File:SSBU spirit Nico Fire.png|100x100px]] | ||
|- | |- | ||
|{{uvm|Baseball}} | |{{uvm|Baseball}} | ||
|[[File:Baseball logo.png|100px]] | |[[File:Baseball logo.png|100px]] | ||
|[[File:SSBU spirit Pitcher & Batter.png|100x100px]] | |[[File:SSBU spirit Pitcher & Batter.png|100x100px]] | ||
|- | |- | ||
|{{uvm|Tennis}} | |{{uvm|Tennis}} | ||
|[[File:Tennis logo.png|100px]] | |[[File:Tennis logo.png|100px]] | ||
|[[File:SSBU spirit Tennis Player.png|100x100px]] | |[[File:SSBU spirit Tennis Player.png|100x100px]] | ||
|- | |- | ||
|{{uvm|Volleyball}} | |{{uvm|Volleyball}} | ||
|[[File:Volleyball logo.png|100px]] | |[[File:Volleyball logo.png|100px]] | ||
|[[File:SSBU spirit Volleyball Player.png|100x100px]] | |[[File:SSBU spirit Volleyball Player.png|100x100px]] | ||
|- | |- | ||
|{{uvm|Yūyūki}} | |{{uvm|Yūyūki}} | ||
|[[File:Yuyuki logo.png|100px]] | |[[File:Yuyuki logo.png|100px]] | ||
|[[File:SSBU spirit Goku & Chao.png|100x100px]] | |[[File:SSBU spirit Goku & Chao.png|100x100px]] | ||
|- | |- | ||
|{{uvm|Mole Mania}} | |{{uvm|Mole Mania}} | ||
|[[File:Mole mania logo.png|100px]] | |[[File:Mole mania logo.png|100px]] | ||
|[[File:SSBU spirit Muddy Mole.png|100x100px]] | |[[File:SSBU spirit Muddy Mole.png|100x100px]] | ||
|- | |- | ||
|{{uvm|Battle Clash}} | |{{uvm|Battle Clash}} | ||
|[[File:Battle Clash logo.png|100px]] | |[[File:Battle Clash logo.png|100px]] | ||
|[[File:SSBU spirit ST Falcon.png|100x100px]] | |[[File:SSBU spirit ST Falcon.png|100x100px]] | ||
|- | |- | ||
|{{uvm|Marvelous}} | |{{uvm|Marvelous}} | ||
|[[File:Marvelous logo.gif|100px]] | |[[File:Marvelous logo.gif|100px]] | ||
|[[File:SSBU spirit Dion, Max, & Jack.png|100x100px]] | |[[File:SSBU spirit Dion, Max, & Jack.png|100x100px]] | ||
|- | |- | ||
|{{uvm|Sutte Hakkun}} | |{{uvm|Sutte Hakkun}} | ||
|[[File:Sutte Hakkun logo.gif|100px]] | |[[File:Sutte Hakkun logo.gif|100px]] | ||
|[[File:SSBU spirit Hakkun.png|100x100px]] | |[[File:SSBU spirit Hakkun.png|100x100px]] | ||
|- | |- | ||
|{{uvm|Hajimari no Mori}} | |{{uvm|Hajimari no Mori}} | ||
|[[File:Hajimari no Mori logo.gif|100px]] | |[[File:Hajimari no Mori logo.gif|100px]] | ||
|[[File:SSBU spirit Girl from Hajimari no Mori.png|100x100px]] | |[[File:SSBU spirit Girl from Hajimari no Mori.png|100x100px]] | ||
|- | |- | ||
|{{uvm|Teleroboxer}} | |{{uvm|Teleroboxer}} | ||
|[[File:Teleroboxer Logo.png|100px]] | |[[File:Teleroboxer Logo.png|100px]] | ||
|[[File:SSBU spirit Harry.png|100x100px]] | |[[File:SSBU spirit Harry.png|100x100px]] | ||
|- | |- | ||
|{{uvm|Napoleon}} | |{{uvm|Napoleon}} | ||
|[[File:Napoleon logo.jpg|100px]] | |[[File:Napoleon logo.jpg|100px]] | ||
|[[File:SSBU spirit Alessandro Inzaghi.png|100x100px]] | |[[File:SSBU spirit Alessandro Inzaghi.png|100x100px]] | ||
|- | |- | ||
|{{uvm|Tomato Adventure}} | |{{uvm|Tomato Adventure}} | ||
|[[File:Tomato Adventure.jpg|100px]] | |[[File:Tomato Adventure.jpg|100px]] | ||
|[[File:SSBU spirit DeMille.png|100x100px]][[File:SSBU spirit Tomatrio.png|100x100px]] | |[[File:SSBU spirit DeMille.png|100x100px]][[File:SSBU spirit Tomatrio.png|100x100px]] | ||
|- | |- | ||
|{{uvm|Chalien}} | |{{uvm|Chalien}} | ||
|[[File:Chee-Chai Alien logo.png|100px]] | |[[File:Chee-Chai Alien logo.png|100px]] | ||
|[[File:SSBU spirit Li'l Blue.png|100x100px]] | |[[File:SSBU spirit Li'l Blue.png|100x100px]] | ||
|- | |- | ||
|{{uvm3|The Tower}} | |{{uvm3|The Tower}} | ||
|[[File:The Tower logo.png|100px]] | |[[File:The Tower logo.png|100px]] | ||
|[[File:SSBU spirit Yama.png|100x100px]] | |[[File:SSBU spirit Yama.png|100x100px]] | ||
|- | |- | ||
|{{uvm|Eternal Darkness}} | |{{uvm|Eternal Darkness}} | ||
|[[File:Eternal Darkness logo.png|100px]] | |[[File:Eternal Darkness logo.png|100px]] | ||
|[[File:SSBU spirit Alexandra Roivas.png|100x100px]] | |[[File:SSBU spirit Alexandra Roivas.png|100x100px]] | ||
|- | |- | ||
|{{uvm|GiFTPiA}} | |{{uvm|GiFTPiA}} | ||
|[[File:GiFTPiA logo.png|100px]] | |[[File:GiFTPiA logo.png|100px]] | ||
|[[File:SSBU spirit Mappo.png|100x100px]] | |[[File:SSBU spirit Mappo.png|100x100px]] | ||
|- | |- | ||
|{{uvm|Project Hacker}} | |{{uvm|Project Hacker}} | ||
|[[File:Project Hacker logo.jpg|100px]] | |[[File:Project Hacker logo.jpg|100px]] | ||
|[[File:SSBU spirit Satoru Amatsubo.png|100x100px]] | |[[File:SSBU spirit Satoru Amatsubo.png|100x100px]] | ||
|- | |- | ||
|{{uvm|Kurikin | |{{uvm|Kurikin Nano Island Story}} | ||
|[[File:Kurikin logo.png|100px]] | |[[File:Kurikin logo.png|100px]] | ||
|[[File:SSBU spirit Kurikin.png|100x100px]] | |[[File:SSBU spirit Kurikin.png|100x100px]] | ||
|- | |- | ||
|{{uvm|Number Battle}} | |{{uvm|Number Battle}} | ||
|[[File:Number Battle logo.jpg|100px]] | |[[File:Number Battle logo.jpg|100px]] | ||
|[[File:SSBU spirit Hsien.png|100x100px]] | |[[File:SSBU spirit Hsien.png|100x100px]] | ||
|- | |- | ||
|{{uvm|ASH: | |{{uvm|ASH: Archaic Sealed Heat}} | ||
|[[File:ASH logo.png|100px]] | |[[File:ASH logo.png|100px]] | ||
|[[File:SSBU spirit Aisya.png|100x100px]] | |[[File:SSBU spirit Aisya.png|100x100px]] | ||
|- | |- | ||
|{{uvm|Make 10: | |{{uvm|Make 10: A Journey of Numbers}} | ||
|[[File:Make 10 logo.png|100px]] | |[[File:Make 10 logo.png|100px]] | ||
|[[File:SSBU spirit Num Diddly.png|100x100px]] | |[[File:SSBU spirit Num Diddly.png|100x100px]] | ||
|- | |- | ||
|{{uvm|Looksley's Line Up}} | |{{uvm|Looksley's Line Up}} | ||
|[[File:Looksleys Line Up logo.jpg|100px]] | |[[File:Looksleys Line Up logo.jpg|100px]] | ||
|[[File:SSBU spirit Looksley.png|100x100px]] | |[[File:SSBU spirit Looksley.png|100x100px]] | ||
|- | |- | ||
|{{uvm|Tsukutte Utau: | |{{uvm|Tsukutte Utau: Saru Band}} | ||
|[[File:Saru Band logo.png|100px]] | |[[File:Saru Band logo.png|100px]] | ||
|[[File:SSBU spirit Prince Saruno.png|100x100px]] | |[[File:SSBU spirit Prince Saruno.png|100x100px]] | ||
|- | |- | ||
|{{uvm|Disaster: | |{{uvm|Disaster: Day of Crisis}} | ||
|[[File:Disaster Day of Crisis Logo.png|100px]] | |[[File:Disaster Day of Crisis Logo.png|100px]] | ||
|[[File:SSBU spirit Raymond Bryce.png|100x100px]] | |[[File:SSBU spirit Raymond Bryce.png|100x100px]] | ||
|- | |- | ||
|{{uvm|Takt of Magic}} | |{{uvm|Takt of Magic}} | ||
|[[File:Takt of Magic logo.jpg|100px]] | |[[File:Takt of Magic logo.jpg|100px]] | ||
|[[File:SSBU spirit Orville.png|100x100px]] | |[[File:SSBU spirit Orville.png|100x100px]] | ||
|- | |- | ||
|{{uvm|And-Kensaku}} | |{{uvm|And-Kensaku}} | ||
|[[File:And-Kensaku logo.png|100px]] | |[[File:And-Kensaku logo.png|100px]] | ||
|[[File:SSBU spirit Ando Kensaku.png|100x100px]] | |[[File:SSBU spirit Ando Kensaku.png|100x100px]] | ||
|- | |- | ||
|{{uvm|FlingSmash}} | |{{uvm|FlingSmash}} | ||
|[[File:FlingSmash logo.jpg|100px]] | |[[File:FlingSmash logo.jpg|100px]] | ||
|[[File:SSBU spirit Zip.png|100x100px]] | |[[File:SSBU spirit Zip.png|100x100px]] | ||
|- | |- | ||
|{{uvm|Kiki Trick}} | |{{uvm|Kiki Trick}} | ||
|[[File:Kikitricklogo.png|100px]] | |[[File:Kikitricklogo.png|100px]] | ||
|[[File:SSBU spirit Noise.png|100x100px]] | |[[File:SSBU spirit Noise.png|100x100px]] | ||
|- | |- | ||
|{{uvm|BoxBoy!}} | |{{uvm|BoxBoy!}} | ||
|[[File:BoxBoy logo.png|100px]] | |[[File:BoxBoy logo.png|100px]] | ||
|[[File:SSBU spirit Qbby.png|100x100px]] | |[[File:SSBU spirit Qbby.png|100x100px]] | ||
|- | |- | ||
|{{uvm|Code Name: | |{{uvm|Code Name: S.T.E.A.M.}} | ||
|[[File:STEAM logo.jpg|100px]] | |[[File:STEAM logo.jpg|100px]] | ||
|[[File:SSBU spirit Henry Fleming.png|100x100px]] | |[[File:SSBU spirit Henry Fleming.png|100x100px]] | ||
|- | |- | ||
|{{uvm|Ever Oasis}} | |{{uvm|Ever Oasis}} | ||
|[[File:Ever Oasis logo.png|100px]] | |[[File:Ever Oasis logo.png|100px]] | ||
|[[File:SSBU spirit Tethu.png|100x100px]][[File:SSBU spirit Esna.png|100x100px]] | |[[File:SSBU spirit Tethu.png|100x100px]][[File:SSBU spirit Esna.png|100x100px]] | ||
|- | |- | ||
|{{uvm|Sushi Striker}} | |{{uvm|Sushi Striker}} | ||
|[[File:Sushi Striker - The Way of Sushido logo.png|100px]] | |[[File:Sushi Striker - The Way of Sushido logo.png|100px]] | ||
|[[File:SSBU spirit Musashi.png|100x100px]] | |[[File:SSBU spirit Musashi.png|100x100px]] | ||
|- | |- | ||
|{{uvm|Snipperclips}} | |{{uvm|Snipperclips}} | ||
|[[File:Snipperclips logo.png|100px]] | |[[File:Snipperclips logo.png|100px]] | ||
|[[File:SSBU spirit Clip & Snip.png|100x100px]] | |[[File:SSBU spirit Clip & Snip.png|100x100px]] | ||
|- | |- | ||
|{{uvm3|Shantae}} | |{{uvm3|Shantae}} | ||
|[[File:Shantae Logo.png|100px]] | |[[File:Shantae Logo.png|100px]] | ||
|[[File:SSBU spirit Shantae.png|100x100px]][[File:SSBU spirit Risky Boots.png|100x100px]] | |[[File:SSBU spirit Shantae.png|100x100px]][[File:SSBU spirit Risky Boots.png|100x100px]] | ||
|- | |- | ||
|{{uvm|Nintendo Labo}} | |{{uvm|Nintendo Labo}} | ||
|[[File:Nintendo Labo logo.png|100px]] | |[[File:Nintendo Labo logo.png|100px]] | ||
|[[File:SSBU Toy-Con Set.png|100x100px]] | |[[File:SSBU Toy-Con Set.png|100x100px]] | ||
|- | |- | ||
|''[[Mii (universe)#Miitopia|Miitopia]]'' | |''[[Mii (universe)#Miitopia|Miitopia]]'' | ||
|[[File:Miitopia Logo.png|100px]] | |[[File:Miitopia Logo.png|100px]] | ||
|[[File:Cd.png|50px]]<br>''{{SSBUMusicLink|Other|Boss Battle}}''<br>''{{SSBUMusicLink|Other|Boss: The Darkest Lord}}'' | |[[File:Cd.png|50px]]<br>''{{SSBUMusicLink|Other|Boss Battle}}''<br>''{{SSBUMusicLink|Other|Boss: The Darkest Lord}}'' | ||
|- | |- | ||
|{{uvm|Tank Troopers}} | |{{uvm|Tank Troopers}} | ||
|[[File:Tank Troopers logo.png|100px]] | |[[File:Tank Troopers logo.png|100px]] | ||
|[[File:Cd.png|50px]]<br>''{{SSBUMusicLink|Other|Garage}}'' | |[[File:Cd.png|50px]]<br>''{{SSBUMusicLink|Other|Garage}}'' | ||
|- | |- | ||
|{{uvm3|Getsu Fuma Den}} | |{{uvm3|Getsu Fuma Den}} | ||
|[[File:Getsu Fuma Den logo.png|100px]] | |[[File:Getsu Fuma Den logo.png|100px]] | ||
|[[File:Cd.png|50px]]<br>''{{SSBUMusicLink|Castlevania|Go! Getsu Fuma}}'' | |[[File:Cd.png|50px]]<br>''{{SSBUMusicLink|Castlevania|Go! Getsu Fuma}}'' | ||
|} | |} | ||
| Line 1,545: | Line 915: | ||
!Name | !Name | ||
!Logo | !Logo | ||
!Main Representation | !Main Representation | ||
|- | |- | ||
|{{uv|Persona}} | |{{uv|Persona}} | ||
|[[File:Persona_logo.svg|100px]] | |[[File:Persona_logo.svg|100px]] | ||
|[[File:Joker SSBU.png|100x100px|link=Joker (SSBU)]] | |[[File:Joker SSBU.png|100x100px|link=Joker (SSBU)]] | ||
|- | |- | ||
|{{uv|Dragon Quest}} | |{{uv|Dragon Quest}} | ||
|[[File:Dragon Quest.png|100px]] | |[[File:Dragon Quest.png|100px]] | ||
|[[File:Hero SSBU.png|100x100px|link=Hero (SSBU)]] | |[[File:Hero SSBU.png|100x100px|link=Hero (SSBU)]] | ||
|- | |- | ||
|{{uv|Banjo-Kazooie}} | |{{uv|Banjo-Kazooie}} | ||
|[[File:Banjo Kazooie logo.png|100px]] | |[[File:Banjo Kazooie logo.png|100px]] | ||
|[[File:Banjo & Kazooie SSBU.png|100x100px|link=Banjo & Kazooie (SSBU)]] | |[[File:Banjo & Kazooie SSBU.png|100x100px|link=Banjo & Kazooie (SSBU)]] | ||
|- | |- | ||
|{{uvm3|Goemon}} | |{{uvm3|Goemon}} | ||
|[[File:Goemon Logo.png|100px]] | |[[File:Goemon Logo.png|100px]] | ||
|[[File:Goemon Costume.jpg|100x100px]] | |[[File:Goemon Costume.jpg|100x100px]] | ||
|- | |- | ||
|{{uvm3|Undertale}} | |{{uvm3|Undertale}} | ||
|[[File:Undertale logo.png|100px]] | |[[File:Undertale logo.png|100px]] | ||
|[[File:Sans Costume.jpg|100x100px]] | |[[File:Sans Costume.jpg|100x100px]] | ||
|- | |- | ||
|{{uvm3|Daemon X Machina}} | |{{uvm3|Daemon X Machina}} | ||
|[[File:Daemon X Machina logo.png|100px]] | |[[File:Daemon X Machina logo.png|100px]] | ||
|[[File:SSBU spirit Radiant Gleam.png|100x100px]][[File:SSBU spirit Kloster (Grief).png|100x100px]]<br>[[File:SSBU spirit Bullet Walker (Brigadier General).png|100x100px]][[File:SSBU spirit High Line (Guns Empress).png|100x100px]] | |[[File:SSBU spirit Radiant Gleam.png|100x100px]][[File:SSBU spirit Kloster (Grief).png|100x100px]]<br>[[File:SSBU spirit Bullet Walker (Brigadier General).png|100x100px]][[File:SSBU spirit High Line (Guns Empress).png|100x100px]] | ||
|- | |- | ||
|{{uv|Fatal Fury}} | |{{uv|Fatal Fury}} | ||
|[[File:Fatal Fury logo.png|100px]] | |[[File:Fatal Fury logo.png|100px]] | ||
|[[File:Terry SSBU.png|100x100px|link=Terry (SSBU)]] | |[[File:Terry SSBU.png|100x100px|link=Terry (SSBU)]] | ||
|- | |- | ||
|{{uvm3|Art of Fighting}} | |{{uvm3|Art of Fighting}} | ||
|[[File:ArtOfFighting.png|100px]] | |[[File:ArtOfFighting.png|100px]] | ||
|[[File:SSBU Ryo Sakazaki.jpeg|100x100px]][[File:SSBU Yuri Sakazaki.jpeg|100x100px]][[File:SSBU King.jpeg|100x100px]] | |[[File:SSBU Ryo Sakazaki.jpeg|100x100px]][[File:SSBU Yuri Sakazaki.jpeg|100x100px]][[File:SSBU King.jpeg|100x100px]] | ||
|- | |- | ||
|{{uvm3|The King of Fighters}} | |{{uvm3|The King of Fighters}} | ||
|[[File:The King of Fighters Logo.svg|100px]] | |[[File:The King of Fighters Logo.svg|100px]] | ||
|[[File:SSBU Kyo Kusanagi.jpeg|100x100px]][[File:SSBU Iori Yagami.jpeg|100x100px]][[File:SSBU Goro Daimon.jpeg|100x100px]]<br>[[File:SSBU Chang Koehan.jpeg|100x100px]][[File:SSBU Choi Bounge.jpeg|100x100px]] | |[[File:SSBU Kyo Kusanagi.jpeg|100x100px]][[File:SSBU Iori Yagami.jpeg|100x100px]][[File:SSBU Goro Daimon.jpeg|100x100px]]<br>[[File:SSBU Chang Koehan.jpeg|100x100px]][[File:SSBU Choi Bounge.jpeg|100x100px]] | ||
|- | |- | ||
|{{uvm3|Psycho Soldier}} | |{{uvm3|Psycho Soldier}} | ||
|[[File:Psycho Soldier logo.png|100px]] | |[[File:Psycho Soldier logo.png|100px]] | ||
|[[File:SSBU Athena Asamiya.jpeg|100x100px]] | |[[File:SSBU Athena Asamiya.jpeg|100x100px]] | ||
|- | |- | ||
|{{uvm3|Ikari Warriors}} | |{{uvm3|Ikari Warriors}} | ||
|[[File:Ikari Warriors Logo.jpg|100px]] | |[[File:Ikari Warriors Logo.jpg|100px]] | ||
|[[File:SSBU Ralf Jones.jpeg|100x100px]][[File:SSBU Clark Still.jpeg|100x100px]] | |[[File:SSBU Ralf Jones.jpeg|100x100px]][[File:SSBU Clark Still.jpeg|100x100px]] | ||
|- | |- | ||
|{{uvm3|Samurai Shodown}} | |{{uvm3|Samurai Shodown}} | ||
|[[File:SamuraiShodown.png|100px]] | |[[File:SamuraiShodown.png|100px]] | ||
|[[File:SSBU spirit Haohmaru.png|100x100px]][[File:SSBU spirit Nakoruru.png|100x100px]] | |[[File:SSBU spirit Haohmaru.png|100x100px]][[File:SSBU spirit Nakoruru.png|100x100px]] | ||
|- | |- | ||
|{{uvm3|Alpha Mission}} | |{{uvm3|Alpha Mission}} | ||
|[[File:Alpha Mission logo.png|100px]] | |[[File:Alpha Mission logo.png|100px]] | ||
|[[File:Cd.png|50px]]<br>''{{SSBUMusicLink|Fatal Fury|Theme of SYD - Alpha Mission}}'' | |[[File:Cd.png|50px]]<br>''{{SSBUMusicLink|Fatal Fury|Theme of SYD - Alpha Mission}}'' | ||
|- | |- | ||
|{{uvm3|Athena}} | |{{uvm3|Athena}} | ||
|[[File:Athena logo.jpg|100px]] | |[[File:Athena logo.jpg|100px]] | ||
|[[File:Cd.png|50px]]<br>''{{SSBUMusicLink|Fatal Fury|Forest World - Athena}}'' | |[[File:Cd.png|50px]]<br>''{{SSBUMusicLink|Fatal Fury|Forest World - Athena}}'' | ||
|- | |- | ||
|{{uvm3|Metal Slug}} | |{{uvm3|Metal Slug}} | ||
|[[File:Metal Slug logo.png|100px]] | |[[File:Metal Slug logo.png|100px]] | ||
|[[File:Cd.png|50px]]<br>''{{SSBUMusicLink|Fatal Fury|Main Theme from Metal Slug - METAL SLUG}}''<br>''{{SSBUMusicLink|Fatal Fury|Assault Theme - METAL SLUG 1-3}}''<br>''{{SSBUMusicLink|Fatal Fury|Final Attack - METAL SLUG 1-6}}''<br>''{{SSBUMusicLink|Fatal Fury|Judgment - METAL SLUG 2}}''<br>''{{SSBUMusicLink|Fatal Fury|Blue Water Fangs (The Island of Dr. Moreau) - METAL SLUG 3}}'' | |[[File:Cd.png|50px]]<br>''{{SSBUMusicLink|Fatal Fury|Main Theme from Metal Slug - METAL SLUG}}''<br>''{{SSBUMusicLink|Fatal Fury|Assault Theme - METAL SLUG 1-3}}''<br>''{{SSBUMusicLink|Fatal Fury|Final Attack - METAL SLUG 1-6}}''<br>''{{SSBUMusicLink|Fatal Fury|Judgment - METAL SLUG 2}}''<br>''{{SSBUMusicLink|Fatal Fury|Blue Water Fangs (The Island of Dr. Moreau) - METAL SLUG 3}}'' | ||
|- | |- | ||
|{{uvm3|Resident Evil}} | |{{uvm3|Resident Evil}} | ||
|[[File:Resident Evil.png|100px]] | |[[File:Resident Evil.png|100px]] | ||
|[[File:SSBU spirit Wesker.png|100x100px]][[File:SSBU spirit Leon.png|100x100px]]<br>[[File:SSBU spirit Chris.png|100x100px]][[File:SSBU spirit Jill.png|100x100px]] | |[[File:SSBU spirit Wesker.png|100x100px]][[File:SSBU spirit Leon.png|100x100px]]<br>[[File:SSBU spirit Chris.png|100x100px]][[File:SSBU spirit Jill.png|100x100px]] | ||
|- | |- | ||
|{{uvm|Astral Chain}} | |{{uvm|Astral Chain}} | ||
|[[File:Astral.png|100px]] | |[[File:Astral.png|100px]] | ||
|[[File:SSBU spirit ASTRAL CHAIN Hero (Female).png|100x100px]][[File:SSBU spirit ASTRAL CHAIN Hero (Male).png|100x100px]]<br>[[File:SSBU spirit Kyle.png|100x100px]][[File:SSBU spirit Lappy.png|100x100px]] | |[[File:SSBU spirit ASTRAL CHAIN Hero (Female).png|100x100px]][[File:SSBU spirit ASTRAL CHAIN Hero (Male).png|100x100px]]<br>[[File:SSBU spirit Kyle.png|100x100px]][[File:SSBU spirit Lappy.png|100x100px]] | ||
|- | |- | ||
|{{uvm3|River City}} | |{{uvm3|River City}} | ||
|[[File:Kunio-Kun Logo.png|100px]] | |[[File:Kunio-Kun Logo.png|100px]] | ||
|[[File:SSBU spirit Kunio.png|100x100px]][[File:SSBU spirit Riki (River City).png|100x100px]]<br>[[File:SSBU spirit Goda.png|100x100px]][[File:SSBU spirit Ryuichi & Ryuji.png|100x100px]] | |[[File:SSBU spirit Kunio.png|100x100px]][[File:SSBU spirit Riki (River City).png|100x100px]]<br>[[File:SSBU spirit Goda.png|100x100px]][[File:SSBU spirit Ryuichi & Ryuji.png|100x100px]] | ||
|- | |- | ||
|{{uvm3|Assassin's Creed}} | |{{uvm3|Assassin's Creed}} | ||
|[[File:Assassin's Creed Logo.svg|100px]] | |[[File:Assassin's Creed Logo.svg|100px]] | ||
|[[File:MiiCostumeAltaïrSSBU.jpg|100x100px]] | |[[File:MiiCostumeAltaïrSSBU.jpg|100x100px]] | ||
|- | |- | ||
|{{uvm3|Rabbids}} | |{{uvm3|Rabbids}} | ||
|[[File:Raving Rabbids logo.png|100px]] | |[[File:Raving Rabbids logo.png|100px]] | ||
|[[File:Rabbids Mii Costume.jpg|100x100px]] | |[[File:Rabbids Mii Costume.jpg|100x100px]] | ||
|- | |- | ||
|{{uvm3|Cuphead}} | |{{uvm3|Cuphead}} | ||
|[[File:Cuphead Logo.png|100px]] | |[[File:Cuphead Logo.png|100px]] | ||
|[[File:SSBU Cuphead Costume.jpg|100x100px]] | |[[File:SSBU Cuphead Costume.jpg|100x100px]] | ||
|- | |- | ||
|{{uvm3|Warframe}} | |{{uvm3|Warframe}} | ||
|[[File:WarframeLogo.png|100px]] | |[[File:WarframeLogo.png|100px]] | ||
|[[File:SSBU spirit Lotus.png|100x100px]][[File:SSBU spirit Natah.png|100x100px]] | |[[File:SSBU spirit Lotus.png|100x100px]][[File:SSBU spirit Natah.png|100x100px]] | ||
|- | |- | ||
|{{uvm|Ring Fit Adventure}} | |{{uvm|Ring Fit Adventure}} | ||
|[[File:Ring Fit Adventure.png|100px]] | |[[File:Ring Fit Adventure.png|100px]] | ||
|[[File:SSBU spirit Ring Fit Trainees.png|100x100px]][[File:SSBU spirit Dragaux.png|100x100px]][[File:SSBU spirit Ring.png|100x100px]] | |[[File:SSBU spirit Ring Fit Trainees.png|100x100px]][[File:SSBU spirit Dragaux.png|100x100px]][[File:SSBU spirit Ring.png|100x100px]] | ||
|- | |- | ||
|{{uvm3|Mana}} | |{{uvm3|Mana}} | ||
|[[File:Trials of Mana.png|100px]] | |[[File:Trials of Mana.png|100px]] | ||
|[[File:SSBU spirit Duran & Angela.png|100x100px]][[File:SSBU spirit Kevin & Charlotte.png|100x100px]][[File:SSBU spirit Hawkeye & Riesz.png|100x100px]] | |[[File:SSBU spirit Duran & Angela.png|100x100px]][[File:SSBU spirit Kevin & Charlotte.png|100x100px]][[File:SSBU spirit Hawkeye & Riesz.png|100x100px]] | ||
|- | |- | ||
|{{uvm3|Fallout}} | |{{uvm3|Fallout}} | ||
|[[File:Fallout logo.svg|100px]] | |[[File:Fallout logo.svg|100px]] | ||
|[[File:VaultBoyMiiGunner.jpg|100x100px]] | |[[File:VaultBoyMiiGunner.jpg|100x100px]] | ||
|- | |- | ||
|{{uvm3|Octopath Traveler}} | |{{uvm3|Octopath Traveler}} | ||
|[[File:Octopath-traveler-logo.png|100px]] | |[[File:Octopath-traveler-logo.png|100px]] | ||
|[[File:SSBU spirit Alfyn & Therion.png|100x100px]][[File:SSBU spirit Tressa & Cyrus.png|100x100px]]<br>[[File:SSBU spirit H'aanit & Ophilia.png|100x100px]][[File:SSBU spirit Olberic & Primrose.png|100x100px]] | |[[File:SSBU spirit Alfyn & Therion.png|100x100px]][[File:SSBU spirit Tressa & Cyrus.png|100x100px]]<br>[[File:SSBU spirit H'aanit & Ophilia.png|100x100px]][[File:SSBU spirit Olberic & Primrose.png|100x100px]] | ||
|- | |- | ||
|{{uv|Minecraft}} | |{{uv|Minecraft}} | ||
|[[File:Minecraft logo.svg|100px]] | |[[File:Minecraft logo.svg|100px]] | ||
|[[File:Steve SSBU.png|100x100px|link=Steve (SSBU)]] | |[[File:Steve SSBU.png|100x100px|link=Steve (SSBU)]] | ||
|- | |- | ||
|{{uvm3|No More Heroes}} | |{{uvm3|No More Heroes}} | ||
|[[File:No More Heroes logo.png|100px]] | |[[File:No More Heroes logo.png|100px]] | ||
|[[File:TravisCostume.jpg|100x100px]] | |[[File:TravisCostume.jpg|100x100px]] | ||
|- | |- | ||
|{{uvm3|Bravely Default}} | |{{uvm3|Bravely Default}} | ||
|[[File:Bravely Default logo.png|100px]] | |[[File:Bravely Default logo.png|100px]] | ||
|[[File:SSBU spirit Seth & Gloria.png|100x100px]][[File:SSBU spirit Elvis & Adelle.png|100x100px]] | |[[File:SSBU spirit Seth & Gloria.png|100x100px]][[File:SSBU spirit Elvis & Adelle.png|100x100px]] | ||
|- | |- | ||
|{{uvm3|Ghosts 'n Goblins}} | |{{uvm3|Ghosts 'n Goblins}} | ||
|[[File:Ghosts 'n Goblins.png|100px]] | |[[File:Ghosts 'n Goblins.png|100px]] | ||
|[[File:SSBU spirit Arthur.png|100x100px]] | |[[File:SSBU spirit Arthur.png|100x100px]] | ||
|- | |- | ||
|{{uvm3|The Elder Scrolls}} | |{{uvm3|The Elder Scrolls}} | ||
|[[File:The Elder Scrolls logo.svg|100px]] | |[[File:The Elder Scrolls logo.svg|100px]] | ||
|[[File:MiiCostumeDragonbornSSBU.jpg|100x100px]] | |[[File:MiiCostumeDragonbornSSBU.jpg|100x100px]] | ||
|- | |- | ||
|{{uvm3|Devil May Cry}} | |{{uvm3|Devil May Cry}} | ||
|[[File:Devil May Cry.png|100px]] | |[[File:Devil May Cry.png|100px]] | ||
|[[File:MiiCostumeDanteSSBU.jpg|100x100px]] | |[[File:MiiCostumeDanteSSBU.jpg|100x100px]] | ||
|- | |- | ||
|{{uvm3|Sakuna: Of Rice and Ruin}} | |{{uvm3|Sakuna: Of Rice and Ruin}} | ||
|[[File:Sakuna Of Rice and Ruin logo.png|100px]] | |[[File:Sakuna Of Rice and Ruin logo.png|100px]] | ||
|[[File:SSBU spirit Sakuna.png|100x100px]][[File:SSBU spirit Kokorowa.png|100x100px]][[File:SSBU spirit Tama.png|100x100px]] | |[[File:SSBU spirit Sakuna.png|100x100px]][[File:SSBU spirit Kokorowa.png|100x100px]][[File:SSBU spirit Tama.png|100x100px]] | ||
|- | |- | ||
|{{uv|Kingdom Hearts}} | |{{uv|Kingdom Hearts}} | ||
|[[File:Kingdom Hearts logo.png|100px]] | |[[File:Kingdom Hearts logo.png|100px]] | ||
|[[File:Sora SSBU.png|100x100px|link=Sora (SSBU)]] | |[[File:Sora SSBU.png|100x100px|link=Sora (SSBU)]] | ||
|- | |- | ||
|{{uvm3|Doom}} | |{{uvm3|Doom}} | ||
|[[File:Doom logo.svg|100px]] | |[[File:Doom logo.svg|100px]] | ||
|[[File:MiiCostumeDoomSlayerSSBU.jpg|100x100px]] | |[[File:MiiCostumeDoomSlayerSSBU.jpg|100x100px]] | ||
|- | |||
|{{uvm3|13 Sentinels}} | |||
|[[File:13 Sentinels logo.png|100px]] | |||
|[[File:SSBU spirit The 13 Sentinel Pilots.png|100x100px]] | |||
|- | |||
|{{uvm3|Power Pros}} | |||
|[[File:Power Pros logo.png|100px]] | |||
|[[File:SSBU spirit Power Pro-Kun, Aoi Hayakawa, & Mamoru Ikari.png|100x100px]] | |||
|- | |||
|{{uvm3|Hades}} | |||
|[[File:Hades logo.png|100px]] | |||
|[[File:SSBU spirit Zagreus.png|100x100px]] | |||
|} | |} | ||
</div> | </div> | ||
</div> | </div> | ||
==Universes by | ==Universes by "Type"== | ||
<div class="contentbox mw-collapsible mw-collapsed" data-expandtext="Show" data-collapsetext="Hide"> | |||
===Fighter-based=== | |||
<div class="contentbox mw-collapsible mw-collapsed" data-expandtext="Show" data-collapsetext="Hide"> | <div class="contentbox mw-collapsible mw-collapsed" data-expandtext="Show" data-collapsetext="Hide"> | ||
{|class="wikitable sortable" style="text-align:center" | |||
!Universe | |||
!Main Representation | |||
{|class="wikitable" style="text-align:center | !Introduction Game | ||
|[[File: | |- | ||
|[[File: | |[[File:MarioTitle.svg|150x90px]] | ||
|[[File:Mario SSB.png|100x100px|link=Mario (SSB)]][[File:Luigi SSB.png|100x100px|link=Luigi (SSB)]] | |||
|rowspan="10" |''Super Smash Bros.'' | |||
|- | |- | ||
|[[File:DonkeyKongTitle.png|150x90px]] | |[[File:DonkeyKongTitle.png|150x90px]] | ||
|[[File:Donkey Kong SSB.png|100x100px|link=Donkey Kong (SSB)]] | |||
|- | |- | ||
| | |[[File:Zelda logo ssbu.png|150x90px]] | ||
| | |[[File:Link SSB.png|100x100px|link=Link (SSB)]] | ||
| | |||
| | |||
| | |||
|- | |- | ||
|[[File: | |[[File:Metroidtitle.png|150x90px]] | ||
|[[File: | |[[File:Samus SSB.png|100x100px|link=Samus (SSB)]] | ||
| | |- | ||
|[[File: | |[[File:Yoshi logo.png|150x90px]] | ||
|[[File: | |[[File:Yoshi SSB.png|100x100px|link=Yoshi (SSB)]] | ||
|- | |- | ||
| | |[[File:KirbyTitle.png|150x90px]] | ||
| | |[[File:Kirby SSB.png|100x100px|link=Kirby (SSB)]] | ||
| | |||
| | |||
| | |||
|- | |- | ||
|[[File: | |[[File:StarFoxTitle.png|150x90px]] | ||
|[[File: | |[[File:Fox SSB.png|100x100px|link=Fox (SSB)]] | ||
|- | |- | ||
| | |[[File:Pokémontitle.png|150x90px]] | ||
| | |[[File:Pikachu SSB.png|100x100px|link=Pikachu (SSB)]][[File:Jigglypuff SSB.png|50px|link=Jigglypuff (SSB)]] | ||
| | |||
| | |||
| | |||
|- | |- | ||
|[[File: | |[[File:EarthboundTitle.svg|150x90px]] | ||
|[[File:Ness SSB.png|100x100px|link=Ness (SSB)]] | |||
|[[File: | |||
| | |||
|- | |- | ||
| | |[[File:FZeroTitle.png|150x90px]] | ||
| | |[[File:Captain Falcon SSB.png|100x100px|link=Captain Falcon (SSB)]] | ||
| | |||
| | |||
| | |||
|- | |- | ||
|[[File:IceClimberTitle.gif|150x90px]] | |[[File:IceClimberTitle.gif|150x90px]] | ||
|[[File: | |[[File:Ice Climbers SSBM.jpg|100x100px|link=Ice Climbers (SSBM)]] | ||
|[[File: | |rowspan="3" |''Super Smash Bros. Melee'' | ||
|- | |||
|[[File:Fire Emblem logo.svg|150x90px]] | |||
|[[File:Marth SSBM.jpg|100x100px|link=Marth (SSBM)]][[File:Roy SSBM.jpg|100x100px|link=Roy (SSBM)]] | |||
|- | |||
|[[File:Game & Watch logo.svg|150x90px]] | |||
|[[File:Mr. Game & Watch SSBM.jpg|100x100px|link=Mr. Game & Watch (SSBM)]] | |||
|- | |- | ||
| | |[[File:WarioSeriesTitle.png|150x90px]] | ||
| | |[[File:Wario SSBB.jpg|100x100px|link=Wario (SSBB)]] | ||
| | |rowspan="4" |''Super Smash Bros. Brawl'' | ||
| | |||
| | |||
|- | |- | ||
|[[File: | |[[File:MetalGearTitle.svg|150x90px]] | ||
|[[File: | |[[File:Snake SSBB.jpg|100x100px|link=Snake (SSBB)]] | ||
| | |||
|- | |- | ||
| | |[[File:Sonic the Hedgehog logo.svg|150x90px]] | ||
| | |[[File:Sonic SSBB.jpg|100x100px|link=Sonic (SSBB)]] | ||
| | |||
| | |||
| | |||
|- | |- | ||
|[[File:ROB series logo.png|150x90px]] | |[[File:ROB series logo.png|150x90px]] | ||
|[[File: | |[[File:R.O.B. SSBB.jpg|100x100px|link=R.O.B. (SSBB)]] | ||
| | |||
|- | |- | ||
| | |[[File:Mega Man logo.png|150x90px]] | ||
| | |[[File:Mega Man SSB4.png|100x100px|link=Mega Man (SSB4)]] | ||
| | |rowspan="4" |''Super Smash Bros. 4'' | ||
| | |||
| | |||
|- | |- | ||
|[[File: | |[[File:Wii Fit logo.svg|150x90px]] | ||
|[[File: | |[[File:Wii Fit Trainer SSB4.png|100x100px|link=Wii Fit Trainer (SSB4)]] | ||
|[[File: | |- | ||
|[[File: | |[[File:Pac-Man title.png|150x90px]] | ||
|[[File: | |[[File:Pac-Man SSB4.png|100x100px|link=Pac-Man (SSB4)]] | ||
|- | |||
|[[File:XenobladeBanner.png|150x90px]] | |||
|[[File:Shulk SSB4.png|100x100px|link=Shulk (SSB4)]] | |||
|- | |- | ||
| | |[[File:StreetFighterTitle.png|150x90px]] | ||
| | |[[File:Ryu SSB4.png|100x100px|link=Ryu (SSB4)]] | ||
| | |rowspan="3" |''Super Smash Bros. 4''<br>(DLC) | ||
| | |||
| | |||
|- | |- | ||
|[[File: | |[[File:FinalFantasyLogo.svg|150x90px]] | ||
|[[File:Cloud SSB4.png|100x100px|link=Cloud (SSB4)]] | |||
|[[File: | |||
|- | |- | ||
| | |[[File:BayonettaLogo.png|150x90px]] | ||
| | |[[File:Bayonetta SSB4.png|100x100px|link=Bayonetta (SSB4)]] | ||
| | |||
| | |||
| | |||
|- | |- | ||
|[[File:CastlevaniaLogo.png|150x90px]] | |[[File:CastlevaniaLogo.png|150x90px]] | ||
|[[File: | |[[File:Simon SSBU.png|100x100px|link=Simon (SSBU)]][[File:Richter SSBU.png|100x100px|link=Richter (SSBU)]] | ||
|''Super Smash Bros. Ultimate'' | |||
|- | |- | ||
| | |[[File:Persona logo.svg|150x90px]] | ||
| | |[[File:Joker SSBU.png|100x100px|link=Joker (SSBU)]] | ||
| | |rowspan="6" |''Super Smash Bros. Ultimate''<br>(DLC) | ||
| | |||
|- | |- | ||
|[[File: | |[[File:Dragon Quest.png|150x90px]] | ||
|[[File: | |[[File:Hero SSBU.png|100x100px|link=Hero (SSBU)]] | ||
| | |||
|- | |- | ||
| | |[[File:Banjo Kazooie logo.png|150x90px]] | ||
| | |[[File:Banjo & Kazooie SSBU.png|100x100px|link=Banjo & Kazooie (SSBU)]] | ||
| | |||
| | |||
| | |||
|- | |- | ||
|[[File: | |[[File:Fatal Fury logo.png|150x90px]] | ||
|[[File:Terry SSBU.png|100x100px|link=Terry (SSBU)]] | |||
|[[File: | |||
|- | |- | ||
| | |[[File:Minecraft logo.svg|150x90px]] | ||
| | |[[File:Steve SSBU.png|100x100px|link=Steve (SSBU)]] | ||
| | |||
| | |||
| | |||
|- | |- | ||
|[[File: | |[[File:Kingdom Hearts logo.png|150x90px]] | ||
|[[File: | |[[File:Sora SSBU.png|100x100px|link=Sora (SSBU)]] | ||
| | |||
|} | |} | ||
</div> | |||
=== | ===Assist Trophy-based=== | ||
{|class="wikitable" style="text-align:center | <div class="contentbox mw-collapsible mw-collapsed" data-expandtext="Show" data-collapsetext="Hide"> | ||
{|class="wikitable sortable" style="text-align:center" | |||
!Universe | |||
!Main Representation | |||
!Introduction Game | |||
|- | |- | ||
| | |[[File:Nintendogs logo.png|150x90px]] | ||
| | |[[File:NintendogAssist.jpg|100x100px|link=Nintendog]] | ||
| | |rowspan="8" |''Super Smash Bros. Brawl'' | ||
| | |||
| | |||
|- | |- | ||
|[[File: | |[[File:Starfy logo.png|150x90px]] | ||
|[[File: | |[[File:StarfyDojo.jpg|100x100px|link=Starfy]] | ||
| | |||
|- | |- | ||
| | |[[File:Punch-Out!! logo.png|150x90px]] | ||
| | |[[File:Mac.jpg|100x100px|link=Little Mac]] | ||
| | |||
| | |||
| | |||
|- | |- | ||
|[[File: | |[[File:Advance Wars logo.png|150x90px]] | ||
|[[File: | |[[File:Infantry and Tanks Brawl.jpg|100x100px|link=Infantry & Tanks]] | ||
| | |||
|- | |- | ||
| | |[[File:Daigasso! Band Brothers logo.png|150x90px]] | ||
| | |[[File:BarbaraAT.jpg|100x100px|link=Barbara]] | ||
| | |||
| | |||
| | |||
|- | |- | ||
|[[File: | |[[File:Golden Sun logo.png|150x90px]] | ||
|[[File:Isaac Brawl.png|100x100px|link=Isaac]] | |||
|[[File: | |||
|- | |- | ||
| | |[[File:Sin and Punishment logo.png|150x90px]] | ||
| | |[[File:SakiAmamiya.jpg|100x100px|link=Saki]] | ||
| | |||
| | |||
| | |||
|- | |- | ||
|[[File: | |[[File:Drill Dozer logo.png|150x90px]] | ||
|[[File: | |[[File:JillAssist.jpg|100x100px|link=Jill]] | ||
| | |||
|- | |- | ||
| | |[[File:Color TV Game logo.png|150x90px]] | ||
| | |[[File:ColorTVGame15TrophyWiiU.png|100x100px|link=Color TV-Game 15]] | ||
| | |rowspan="2" |''Super Smash Bros. 4'' | ||
| | |||
| | |||
|- | |- | ||
|[[File: | |[[File:Dillon's Rolling Western logo.png|150x90px]] | ||
|[[File: | |[[File:DillonTrophyWiiU.png|100x100px|link=Dillon]] | ||
| | |||
|- | |- | ||
| | |[[File:Swapnote logo.png|150x90px]] | ||
| | |[[File:Nikki Assist Trophy (SSBU).png|100x100px|link=Nikki]] | ||
| | |rowspan="5" |''Super Smash Bros. Ultimate'' | ||
| | |||
| | |||
|- | |- | ||
|[[File: | |[[File:Nintendo Badge Arcade logo.png|150x90px]] | ||
|[[File:Arcade Bunny Assist Trophy (SSBU).png|100x100px|link=Arcade Bunny]] | |||
|[[File: | |||
| | |||
|- | |- | ||
| | |[[File:ARMS logo.svg|150x90px]] | ||
| | |[[File:Spring Man Assist Trophy (SSBU).png|100x100px|link=Spring Man]] | ||
| | |||
| | |||
| | |||
|- | |- | ||
|[[File: | |[[File:Bomberman logo.png|150x90px]] | ||
|[[File:Bomberman Assist Trophy (SSBU).png|100x100px|link=Bomberman]] | |||
|[[File: | |||
| | |||
|- | |- | ||
|[[File:ShovelKnightLogo.png|150x90px]] | |||
|[[File:Shovel Knight Assist Trophy (SSBU).png|100x100px|link=Shovel Knight]] | |||
|[[File: | |||
|[[File: | |||
|} | |} | ||
</div> | |||
=== | ===Item-based=== | ||
{|class="wikitable" style="text-align:center | <div class="contentbox mw-collapsible mw-collapsed" data-expandtext="Show" data-collapsetext="Hide"> | ||
{|class="wikitable sortable" style="text-align:center" | |||
!Universe | |||
!Main Representation | |||
!Introduction Game | |||
|- | |- | ||
| | |[[File:GoldenEye logo.png|150x90px]] | ||
| | |[[File:MotionSensorBombIconSSB.png|100x100px|link=Motion-Sensor Bomb]] | ||
| | |''Super Smash Bros.'' | ||
| | |||
| | |||
|- | |- | ||
|[[File: | |[[File:Panel de Pon logo.png|150x90px]] | ||
|[[File: | |[[File:Lip's Stick Trophy Melee.png|100x100px|link=Lip's Stick]] | ||
|rowspan="3" |''Super Smash Bros. Melee'' | |||
| | |||
|- | |- | ||
| | |[[File:BalloonFightUniverseLogo.png|150x90px]] | ||
| | |[[File:Flipper Trophy Melee.png|100x100px|link=Flipper]] | ||
| | |||
| | |||
| | |||
|- | |- | ||
|[[File: | |[[File:Perfect Dark logo.png|150x90px]] | ||
|[[File:Proximity Mine Trophy Melee.png|100x100px|link=Motion-Sensor Bomb]][[File:Cloaking Device Trophy Melee.png|100x100px|link=Cloaking Device]] | |||
|[[File: | |||
|- | |- | ||
| | |[[File:Steel Diver logo.png|150x90px]] | ||
| | |[[File:SteelDiverGunTrophyWiiU.png|100x100px|link=Steel Diver]] | ||
| | |rowspan="2" |''Super Smash Bros. 4'' | ||
| | |||
| | |||
|- | |- | ||
|[[File: | |[[File:Galaxian logo.png|150x90px]] | ||
|[[File: | |[[File:BossGalagaTrophyWiiU.png|100x100px|link=Boss Galaga]] | ||
| | |} | ||
</div> | |||
===Stage-based=== | |||
<div class="contentbox mw-collapsible mw-collapsed" data-expandtext="Show" data-collapsetext="Hide"> | |||
| | {|class="wikitable sortable" style="text-align:center" | ||
!Universe | |||
!Main Representation | |||
!Introduction Game | |||
|- | |- | ||
|[[File:PictoChat Logo.png|150x90px]] | |[[File:PictoChat Logo.png|150x90px]] | ||
|[[File: | |[[File:PictoChatMan.jpg|100x100px|link=PictoChat]] | ||
|rowspan="2" |''Super Smash Bros. Brawl'' | |||
|- | |- | ||
| | |[[File:ElectroplanktonTitle.jpeg|150x90px]] | ||
| | |[[File:Hanenbow.jpg|100x100px|link=Hanenbow]] | ||
| | |||
| | |||
| | |||
|- | |- | ||
|[[File: | |[[File:Find Mii logo.jpg|150x90px]] | ||
|[[File: | |[[File:SSB4 Find Mii.JPG|100x100px|link=Find Mii]] | ||
| | |rowspan="2" |''Super Smash Bros.<br>for Nintendo 3DS'' | ||
| | |||
| | |||
|- | |- | ||
| | |[[File:Tomodachi.png|150x90px]] | ||
| | |[[File:SSB4 Tomodachi Life.jpg|100x100px|link=Tomodachi Life]] | ||
| | |||
| | |||
| | |||
|- | |- | ||
|[[File: | |[[File:Miiverse Logo.png|150x90px]] | ||
|[[File: | |[[File:SSB4 - Miiverse.jpg|100x100px|link=Miiverse]] | ||
| | |''Super Smash Bros. for Wii U''<br>(DLC) | ||
| | |} | ||
</div> | |||
===Enemy-based=== | |||
<div class="contentbox mw-collapsible mw-collapsed" data-expandtext="Show" data-collapsetext="Hide"> | |||
{|class="wikitable sortable" style="text-align:center" | |||
!Universe | |||
!Main Representation | |||
!Introduction Game | |||
|- | |- | ||
| | |[[File:Dig Dug logo.png|150x90px]] | ||
| | |[[File:PookaTrophy3DS.png|100x100px|link=Pooka]] | ||
| | |rowspan="3" |''Super Smash Bros.<br>for Nintendo 3DS'' | ||
| | |- | ||
| | |[[File:Xevious logo.png|150x90px]] | ||
|[[File:BacuraTrophy3DS.png|100x100px|link=Bacura]] | |||
|- | |- | ||
|[[File:Rhythm-heaven-logo.png|150x90px]] | |[[File:Rhythm-heaven-logo.png|150x90px]] | ||
|[[File:SneakySpiritTrophy3DS.png|100x100px|link=Sneaky Spirit]] | |||
|} | |||
</div> | |||
===Fighter Related-based=== | |||
<div class="contentbox mw-collapsible mw-collapsed" data-expandtext="Show" data-collapsetext="Hide"> | |||
{|class="wikitable sortable" style="text-align:center" | |||
!Universe | |||
!Main Representation | |||
!Introduction Game | |||
|- | |- | ||
| | |[[File:Mappy logo.png|150x90px]] | ||
| | |[[File:PacManUp1-SSB4.png|100x100px|link=Pac-Jump]] | ||
| | |''Super Smash Bros. 4'' | ||
| | |||
| | |||
|- | |- | ||
|[[File: | |[[File:King & Balloon logo.png|150x90px]] | ||
|[[File:Nr king.png]] | |||
|''Super Smash Bros.<br>for Nintendo 3DS'' | |||
|[[File: | |||
| | |||
|- | |- | ||
| | |[[File:Rally-X logo.png|150x90px]] | ||
| | |[[File:Nr mycar.png]] | ||
| | |rowspan="9" |''Super Smash Bros. 4'' | ||
| | |||
| | |||
|- | |- | ||
|[[File: | |[[File:Bosconian logo.png|150x90px]] | ||
|[[File: | |[[File:Nr bosconian.png]] | ||
|- | |- | ||
| | |[[File:Libble Rabble logo.png|150x90px]] | ||
|[[File:Nr topcup.png]] | |||
| | |||
| | |||
|- | |- | ||
|[[File: | |[[File:Tower of Druaga logo.png|150x90px]] | ||
|[[File:Nr gil.png]] | |||
|[[File: | |||
|- | |- | ||
| | |[[File:Dragon Buster logo.png|150x90px]] | ||
|[[File:Nr clovis.png]] | |||
| | |||
| | |||
|- | |- | ||
|[[File: | |[[File:Baraduke logo.png|150x90px]] | ||
|[[File: | |[[File:Nr paccet.png]] | ||
|- | |- | ||
| | |[[File:Sky Kid logo.png|150x90px]] | ||
|[[File:Nr baron.png]] | |||
| | |||
| | |||
|- | |- | ||
|[[File: | |[[File:Taiko no Tatsujin English logo.png|150x90px]] | ||
|[[File:Nr don.png]] | |||
|[[File: | |||
|- | |- | ||
|[[File:Hogan's Alley Logo.png|150x90px]] | |||
|[[File:CanTrophyWiiU.png|100x100px|link=Trick Shot]] | |||
|[[File: | |||
|[[File: | |||
| | |||
|- | |- | ||
| | |[[File:Metro-Cross logo.png|150x90px]] | ||
| | |[[File:Nr runner.png]] | ||
| | |rowspan="2" |''Super Smash Bros. for Wii U'' | ||
| | |||
| | |||
|- | |- | ||
|[[File: | |[[File:Valkyrie logo.png|150x90px]] | ||
|[[File: | |[[File:Nr valkyrie.png]] | ||
|- | |- | ||
| | |[[File:Katamari Damacy logo.png|150x90px]] | ||
| | |[[File:Nr prince.png]] | ||
| | |''Super Smash Bros. Ultimate'' | ||
| | |} | ||
| | </div> | ||
===Stage Related-based=== | |||
<div class="contentbox mw-collapsible mw-collapsed" data-expandtext="Show" data-collapsetext="Hide"> | |||
{|class="wikitable sortable" style="text-align:center" | |||
!Universe | |||
!Main Representation | |||
!Introduction Game | |||
|- | |- | ||
|[[File: | |[[File:ArtOfFighting.png|150x90px]] | ||
|[[File: | |[[File:SSBU Ryo Sakazaki.jpeg|100x100px]][[File:SSBU Yuri Sakazaki.jpeg|100x100px]][[File:SSBU King.jpeg|100x100px]] | ||
|rowspan="4" |''Super Smash Bros. Ultimate''<br>(DLC) | |||
| | |||
|- | |- | ||
| | |[[File:The King of Fighters Logo.svg|150x90px]] | ||
| | |[[File:SSBU Kyo Kusanagi.jpeg|100x100px]][[File:SSBU Iori Yagami.jpeg|100x100px]][[File:SSBU Goro Daimon.jpeg|100x100px]]<br>[[File:SSBU Chang Koehan.jpeg|100x100px]][[File:SSBU Choi Bounge.jpeg|100x100px]] | ||
| | |||
| | |||
| | |||
|- | |- | ||
|[[File: | |[[File:Psycho Soldier logo.png|150x90px]] | ||
|[[File: | |[[File:SSBU Athena Asamiya.jpeg|100x100px]] | ||
| | |||
|- | |- | ||
| | |[[File:Ikari Warriors Logo.jpg|150x90px]] | ||
| | |[[File:SSBU Ralf Jones.jpeg|100x100px]][[File:SSBU Clark Still.jpeg|100x100px]] | ||
| | |} | ||
| | </div> | ||
| | |||
===Collectible-based=== | |||
<div class="contentbox mw-collapsible mw-collapsed" data-expandtext="Show" data-collapsetext="Hide"> | |||
====Trophy-based==== | |||
<div class="contentbox mw-collapsible mw-collapsed" data-expandtext="Show" data-collapsetext="Hide"> | |||
{|class="wikitable sortable" style="text-align:center" | |||
!Universe | |||
!Main Representation | |||
!Introduction Game | |||
|- | |||
|[[File:Card Hero logo.gif|150x90px]] | |||
|[[File:Maruo Maruhige Trophy Melee.png|100x100px]] | |||
|rowspan="21" |''Super Smash Bros. Melee'' | |||
|- | |- | ||
|[[File: | |[[File:Wave Race logo.png|150x90px]] | ||
|[[File: | |[[File:Ryota Hayami Trophy Melee.png|100x100px]] | ||
|- | |- | ||
| | |[[File:1080 logo.png|150x90px]] | ||
|[[File:Kensuke Kimachi Trophy Melee.png|100x100px]] | |||
| | |||
| | |||
| | |||
|- | |- | ||
|[[File: | |[[File:Doshin the Giant logo.png|150x90px]] | ||
|[[File: | |[[File:Love Giant Trophy Melee.png|100x100px]][[File:Hate Giant Trophy Melee.png|100x100px]] | ||
|- | |- | ||
| | |[[File:Custom Robo logo.png|150x90px]] | ||
| | |[[File:Ray Mk II Trophy Melee.png|100x100px]][[File:Bayonette Trophy Melee.png|100x100px]][[File:Annie Trophy Melee.png|100x100px]] | ||
| | |||
| | |||
| | |||
|- | |- | ||
|[[File: | |[[File:AnimalCrossingTitle.png|150x90px]] | ||
|[[File: | |[[File:Tom Nook Trophy Melee.png|100x100px]][[File:Totakeke Trophy Melee.png|100x100px]][[File:Mr. Resetti Trophy Melee.png|100x100px]] | ||
|- | |- | ||
| | |[[File:Kuru Kuru Kururin logo.png|150x90px]] | ||
|[[File:Heririn Trophy Melee.png|100x100px]] | |||
| | |||
| | |||
| | |||
|- | |- | ||
|[[File: | |[[File:Cubivore logo.png|150x90px]] | ||
|[[File: | |[[File:Alpha Trophy Melee.png|100x100px]] | ||
|- | |- | ||
| | |[[File:PikminLogo.png|150x90px]] | ||
| | |[[File:Pikmin Trophy Melee.png|100x100px]][[File:Olimar Trophy Melee.png|100x100px]] | ||
| | |||
| | |||
| | |||
|- | |- | ||
|[[File: | |[[File:Excitebike logo.png|150x90px]] | ||
|[[File:Excite Bike Trophy Melee.png|100x100px]] | |||
|[[File: | |||
|- | |- | ||
| | |[[File:Devil World logo.png|150x90px]] | ||
|[[File:Tamagon Trophy Melee.png|100x100px]] | |||
| | |||
| | |||
| | |||
|- | |- | ||
|[[File: | |[[File:Duck Hunt Title.png|150x90px]] | ||
|[[File: | |[[File:Ducks Trophy Melee.png|100x100px]] | ||
|- | |- | ||
| | |[[File:Clu Clu Land logo.png|150x90px]] | ||
|[[File:Bubbles Trophy Melee.png|100x100px]] | |||
| | |||
| | |||
| | |||
|- | |- | ||
|[[File:WreckingCrewLogo.png|150x90px]] | |||
|[[File:Eggplant Man Trophy Melee.png|100x100px]] | |||
|[[File: | |||
|[[File: | |||
|- | |- | ||
| | |[[File:Mach Rider logo.png|150x90px]] | ||
| | |[[File:Mach Rider Trophy Melee.png|100x100px]] | ||
|[[File: | |||
|- | |- | ||
| | |[[File:Kid Icarus Classic Logo.png|150x90px]] | ||
| | |[[File:Pit Trophy Melee.png|100x100px]] | ||
|- | |- | ||
|[[File:Sim City logo.png|150x90px]] | |||
|[[File: | |[[File:Dr. Wright Trophy Melee.png|100x100px]] | ||
|[[File: | |||
|- | |- | ||
|[[File:Shin Onigashima logo.png|150x90px]] | |||
|[[File: | |[[File:Donbe & Hikari Trophy Melee.png|100x100px]] | ||
|[[File: | |||
|- | |- | ||
|[[File:Detective Club logo.png|150x90px]] | |||
|[[File: | |[[File:Ayumi Tachibana Trophy Melee.png|100x100px]] | ||
|[[File: | |||
|- | |- | ||
|[[File:Famicom Grand Prix logo.png|150x90px]] | |||
| | |[[File:Monster Trophy Melee.png|100x100px]] | ||
|- | |- | ||
|[[File:Sheriff arcadeflyer.png|150x90px]] | |||
|[[File: | |[[File:Sheriff Trophy Melee.png|100x100px]] | ||
| | |||
|- | |- | ||
|[[File:Magical Vacation logo.png|150x90px]] | |||
|[[File: | |[[File:Mokka - Brawl Trophy.png|100x100px]][[File:Pyrite - Brawl Trophy.png|100x100px]][[File:Putty - Brawl Trophy.png|100x100px]] | ||
|rowspan="6" |''Super Smash Bros. Brawl'' | |||
|[[File: | |||
|- | |- | ||
| | |[[File:Chosoju Mecha MG logo.jpg|150x90px]] | ||
|[[File:Warrior Mech Gauss - Brawl Trophy.png|100x100px]][[File:HM Mech Rosa - Brawl Trophy.png|100x100px]][[File:Musketeer Daltania - Brawl Trophy.png|100x100px]] | |||
| | |||
|- | |- | ||
|[[File:Chibi-Robo logo.png|150x90px]] | |||
|[[File: | |[[File:Chibi-Robo - Brawl Trophy.png|100x100px]][[File:Telly Vision - Brawl Trophy.png|100x100px]] | ||
|[[File: | |||
|- | |- | ||
|[[File:Hotel Dusk logo.png|150x90px]] | |||
|[[File: | |[[File:Kyle Hyde - Brawl Trophy.png|100x100px]] | ||
|[[File: | |||
|- | |- | ||
|[[File:Trace Memory logo.jpg|150x90px]] | |||
|[[File: | |[[File:Ashley Robbins - Brawl Trophy.png|100x100px]] | ||
|[[File: | |||
|- | |- | ||
|[[File:Ouendan Logo.png|150x90px]]<br>[[File:Ouendan logo.jpg|150x90px]] | |||
|[[File:Ouendan - Brawl Trophy.png|100x100px]][[File:Elite Beat Agents - Brawl Trophy.png|100x100px]] | |||
|[[File: | |||
|- | |- | ||
|[[File:Calciobit logo.png|150x90px]] | |||
|[[File: | |[[File:FootballPlayersTrophy3DS.png|100x100px]] | ||
|rowspan="17" |''Super Smash Bros.<br>for Nintendo 3DS'' | |||
|[[File: | |||
|- | |- | ||
|[[File:Freakyforms logo.png|150x90px]] | |||
|[[File: | |[[File:KingRoyTrophy3DS.png|100x100px]] | ||
| | |||
|- | |- | ||
|[[File:Thru logo.jpg|150x90px]] | |||
|[[File: | |[[File:KetzalsCorridorsTrophy3DS.png|100x100px]] | ||
| | |||
|- | |- | ||
| | |[[File:Sakura Samurai logo.jpg|150x90px]] | ||
|[[File:SakuraSamuraiTrophy3DS.png|100x100px]] | |||
|- | |- | ||
| | |[[File:Fatal Frame logo.png|150x90px]] | ||
|[[File: | |[[File:MayaTrophy3DS.png|100x100px]] | ||
|- | |- | ||
|[[File:Culdcept logo.png|150x90px]] | |||
|[[File: | |[[File:GoliganTrophy3DS.png|100x100px]] | ||
| | |||
|- | |- | ||
|[[File:HarmoKnight logo.png|150x90px]] | |||
|[[File: | |[[File:TempoTrophy3DS.png|100x100px]] | ||
| | |||
|- | |- | ||
|[[File:Style Savvy logo.png|150x90px]] | |||
|[[File: | |[[File:EvieTrophy3DS.png|100x100px]] | ||
| | |||
|- | |- | ||
|[[File:Pushmo logo.png|150x90px]] | |||
|[[File:MalloTrophy3DS.png|100x100px]] | |||
|[[File: | |||
|- | |- | ||
|[[File:Fluidity logo.jpg|150x90px]] | |||
|[[File: | |[[File:EddyTrophy3DS.png|100x100px]] | ||
|- | |- | ||
| | |[[File:Nintendouji logo.png|150x90px]] | ||
|[[File:NintendoujiTrophy3DS.png|100x100px]] | |||
|- | |- | ||
| | |[[File:Monster Manor logo.jpg|150x90px]] | ||
|[[File:IrisArchwellTrophy3DS.png|100x100px]][[File:ArzodiusTrophy3DS.png|100x100px]] | |||
|- | |- | ||
|[[File:Warrior's Way logo.jpg|150x90px]] | |||
|[[File:WentworthTrophy3DS.png|100x100px]][[File:FynalleTrophy3DS.png|100x100px]] | |||
| | |||
|- | |- | ||
| | |[[File:Mii Force logo.jpg|150x90px]] | ||
|[[File: | |[[File:SquadLeaderTrophy3DS.png|100x100px]][[File:GoldBoneTrophy3DS.png|100x100px]] | ||
|- | |- | ||
|[[File:Flower Town logo.jpg|150x90px]] | |||
|[[File: | |[[File:MendelBlossomTrophy3DS.png|100x100px]] | ||
|[[File: | |||
|- | |- | ||
|[[File:Rusty's Real Deal Baseball logo.jpg|150x90px]] | |||
|[[File: | |[[File:InujiDarumeshiTrophy3DS.png|100x100px]][[File:RustySluggerTrophy3DS.png|100x100px]] | ||
| | |||
|- | |- | ||
|[[File:Fossil Fighters logo.jpg|150x90px]] | |||
|[[File: | |[[File:FossilFightersTrophy3DS.png|100x100px]] | ||
|[[File: | |||
|- | |- | ||
|[[File:Captain Rainbow logo.png|150x90px]] | |||
|[[File: | |[[File:CaptainRainbowTrophyWiiU.png|100x100px]][[File:FatMacTrophyWiiU.png|100x100px]] | ||
|[[ | |rowspan="9" |''Super Smash Bros. for Wii U'' | ||
|- | |- | ||
| | |[[File:Art Academy logo.png|150x90px]] | ||
|[[File: | |[[File:VinceTrophyWiiU.png|100x100px]] | ||
| | |- | ||
| | |[[File:Zangeki no Reginleiv logo.png|150x90px]] | ||
|[[File: | |[[File:FreyTrophyWiiU.png|100x100px]][[File:FreyaTrophyWiiU.png|100x100px]] | ||
|- | |- | ||
| | |[[File:The Last Story logo.jpg|150x90px]] | ||
|[[File: | |[[File:ZaelTrophyWiiU.png|100x100px]][[File:CalistaTrophyWiiU.png|100x100px]] | ||
|- | |- | ||
|[[File:Pandora's Tower logo.png|150x90px]] | |||
|[[File: | |[[File:ElenaAeronTrophyWiiU.png|100x100px]] | ||
|[[File: | |||
|- | |- | ||
|[[File:Rayman logo.png|150x90px]] | |||
|[[File: | |[[File:RaymanTrophyWiiU.png|100x100px]][[File:GloboxTrophyWiiU.png|100x100px]][[File:BarbaraTrophyWiiU.png|100x100px]] | ||
| | |||
|- | |- | ||
|[[File:Nintendo Land logo.png|150x90px]] | |||
|[[File: | |[[File:MonitaTrophyWiiU.png|100x100px]] | ||
| | |||
|- | |- | ||
|[[File:BIT TRIP logo.png|150x90px]] | |||
|[[File: | |[[File:CommanderVideoTrophyWiiU.png|100x100px]] | ||
| | |||
|- | |- | ||
| | |[[File:The Wonderful 101 logo.png|150x90px]] | ||
|[[File: | |[[File:WonderRedTrophyWiiU.png|100x100px]][[File:WonderBlueTrophyWiiU.png|100x100px]][[File:WonderGreenTrophyWiiU.png|100x100px]][[File:WonderPinkTrophyWiiU.png|100x100px]]<br>[[File:WonderYellowTrophyWiiU.png|100x100px]][[File:WonderWhiteTrophyWiiU.png|100x100px]][[File:WonderBlackTrophyWiiU.png|100x100px]] | ||
| | |||
|[[File: | |||
|- | |- | ||
|[[File:Splatoon logo.png|150x90px]] | |||
|[[File: | |[[File:InklingTrophyWiiU.png|100x100px]] | ||
|''Super Smash Bros. 4''<br>(DLC) | |||
|[[File: | |||
|} | |} | ||
</div> | |||
=== | ====Sticker-based==== | ||
<div class="contentbox mw-collapsible mw-collapsed" data-expandtext="Show" data-collapsetext="Hide"> | |||
{|class="wikitable sortable" style="text-align:center" | {|class="wikitable sortable" style="text-align:center" | ||
!Universe | !Universe | ||
!Main Representation | |||
!Introduction Game | |||
|- | |- | ||
| | |[[File:Bit Generations logo.png|150x90px]] | ||
|[[File:Brawl Sticker Orbiter (Digiluxe).png|50px]][[File:Brawl Sticker Chromatron (Digiluxe).png|50px]][[File:Brawl Sticker Boundish (Digiluxe).png|50px]]<br>[[File:Brawl Sticker Digidrive (Digiluxe).png|50px]][[File:Brawl Sticker Rotohex (Digiluxe).png|50px]] | |||
|rowspan="15" |''Super Smash Bros. Brawl'' | |||
|[[File: | |||
| | |||
= | |||
|- | |- | ||
|[[File: | |[[File:Big Brain Academy logo.png|150x90px]] | ||
|[[File: | |[[File:Brawl Sticker Dr. Lobe (Big Brain Academy).png|50px]][[File:Brawl Sticker Dr. Lobe (Big Brain Academy WD).png|50px]] | ||
|- | |- | ||
|[[File: | |[[File:Sennen Kazoku logo.png|150x90px]] | ||
|[[File: | |[[File:Brawl Sticker Aijou Boom no Ya (Sennen Kazoku).png|50px]][[File:Brawl Sticker Cupit (Sennen Kazoku).png|50px]]<br>[[File:Brawl Sticker Akuma (Sennen Kazoku).png|50px]][[File:Brawl Sticker Kamisama (Sennen Kazoku).png|50px]] | ||
|- | |- | ||
|[[File: | |[[File:Slide Adventure MAGKID logo.png|150x90px]] | ||
|[[File: | |[[File:Brawl Sticker Midori Mushi (Slide Adventure MAGKID).png|50px]][[File:Brawl Sticker Magkid (Slide Adventure MAGKID).png|50px]] | ||
|- | |- | ||
|[[File: | |[[File:Stunt Race FX logo.png|150x90px]] | ||
|[[File: | |[[File:Brawl Sticker F-Type (Wild Trax).png|50px]][[File:Brawl Sticker Tractor Trailer (Wild Trax).png|50px]] | ||
|- | |- | ||
|[[File: | |[[File:English Training logo.png|150x90px]] | ||
|[[File: | |[[File:Brawl Sticker Dzuke-chan (English Training).png|50px]] | ||
|- | |- | ||
|[[File: | |[[File:Pilotwings logo.png|150x90px]] | ||
|[[File: | |[[File:Brawl Sticker Instructor (Pilotwings).png|50px]] | ||
|- | |- | ||
|[[File: | |[[File:Nazo no Murasamejo Logo.png|150x90px]] | ||
|[[File: | |[[File:Brawl Sticker Takamaru (Nazo no Murasamejo).png|50px]] | ||
|- | |- | ||
|[[File: | |[[File:X logo.gif|150x90px]] | ||
|[[File: | |[[File:Brawl Sticker Training Academy Coach (X).png|50px]] | ||
|- | |- | ||
|[[File: | |[[File:For the Frog the Bell Tolls logo.png|150x90px]] | ||
|[[File: | |[[File:Brawl Sticker Sabure Prince (Kaeru no Tame ni Kane wa Naru).png|50px]] | ||
|- | |- | ||
|[[File: | |[[File:Ice Hockey logo.png|150x90px]] | ||
|[[File: | |[[File:Brawl Sticker Fat Hockey Player (Ice Hockey).png|50px]] | ||
|- | |- | ||
|[[File: | |[[File:Wild Gunman Logo.png|150x90px]] | ||
|[[File: | |[[File:Brawl Sticker Wild Gunman.png|50px]] | ||
|- | |- | ||
|[[File: | |[[File:Yakuman logo.png|150x90px]] | ||
|[[File: | |[[File:Brawl Sticker Yakuman Player (Yakuman).png|50px]] | ||
|- | |- | ||
|[[File: | |[[File:Joy Mech Fight logo.png|150x90px]] | ||
|[[File: | |[[File:Brawl Sticker Sukapon (Joy Mech Fight).png|50px]] | ||
|- | |- | ||
|[[File: | |[[File:Shaberu DS Oryori Navi logo.gif|150x90px]] | ||
|[[File: | |[[File:Brawl Sticker Chef (Shaberu! DS Cooking Navi).png|50px]] | ||
| | |} | ||
</div> | |||
====Spirit-based==== | |||
<div class="contentbox mw-collapsible mw-collapsed" data-expandtext="Show" data-collapsetext="Hide"> | |||
{|class="wikitable sortable" style="text-align:center" | |||
!Universe | |||
!Main Representation | |||
!Introduction Game | |||
|- | |- | ||
|[[File: | |[[File:Wii Music Logo.jpg|150x90px]] | ||
|[[File: | |[[File:SSBU spirit Sebastian Tute.png|100x100px]] | ||
|rowspan="39" |''Super Smash Bros. Ultimate'' | |||
|- | |- | ||
|[[File: | |[[File:Ultimate Angler icon.png|150x90px]] | ||
|[[File: | |[[File:SSBU spirit Coraline.png|100x100px]] | ||
|- | |- | ||
|[[File: | |[[File:Ninja Launcher icon.png|150x90px]] | ||
|[[File: | |[[File:SSBU spirit Shinobu.png|100x100px]] | ||
|- | |- | ||
|[[File: | |[[File:Feed Mii icon.png|150x90px]] | ||
|[[File: | |[[File:SSBU spirit Crispin.png|100x100px]] | ||
|- | |- | ||
|[[File: | |[[File:SlotCarRivals.png|150x90px]] | ||
|[[File: | |[[File:SSBU spirit Nico Fire.png|100x100px]] | ||
|- | |- | ||
|[[File: | |[[File:Baseball logo.png|150x90px]] | ||
|[[File: | |[[File:SSBU spirit Pitcher & Batter.png|100x100px]] | ||
|- | |- | ||
|[[File: | |[[File:Tennis logo.png|150x90px]] | ||
|[[File: | |[[File:SSBU spirit Tennis Player.png|100x100px]] | ||
|- | |- | ||
|[[File: | |[[File:Volleyball logo.png|150x90px]] | ||
|[[File: | |[[File:SSBU spirit Volleyball Player.png|100x100px]] | ||
|- | |- | ||
|[[File: | |[[File:Yuyuki logo.png|150x90px]] | ||
|[[File: | |[[File:SSBU spirit Goku & Chao.png|100x100px]] | ||
|- | |- | ||
|[[File: | |[[File:Mole mania logo.png|150x90px]] | ||
|[[File: | |[[File:SSBU spirit Muddy Mole.png|100x100px]] | ||
|- | |- | ||
|[[File: | |[[File:Battle Clash logo.png|150x90px]] | ||
|[[File: | |[[File:SSBU spirit ST Falcon.png|100x100px]] | ||
|- | |||
|[[File:Marvelous logo.gif|150x90px]] | |||
|[[File:SSBU spirit Dion, Max, & Jack.png|100x100px]] | |||
|- | |- | ||
|[[File: | |[[File:Sutte Hakkun logo.gif|150x90px]] | ||
|[[File: | |[[File:SSBU spirit Hakkun.png|100x100px]] | ||
|- | |- | ||
|[[File: | |[[File:Hajimari no Mori logo.gif|150x90px]] | ||
|[[File: | |[[File:SSBU spirit Girl from Hajimari no Mori.png|100x100px]] | ||
|- | |- | ||
|[[File: | |[[File:Teleroboxer Logo.png|150x90px]] | ||
|[[File: | |[[File:SSBU spirit Harry.png|100x100px]] | ||
|- | |- | ||
|[[File: | |[[File:Napoleon logo.jpg|150x90px]] | ||
|[[File: | |[[File:SSBU spirit Alessandro Inzaghi.png|100x100px]] | ||
|- | |- | ||
|[[File: | |[[File:Tomato Adventure.jpg|150x90px]] | ||
|[[File: | |[[File:SSBU spirit DeMille.png|100x100px]][[File:SSBU spirit Tomatrio.png|100x100px]] | ||
|- | |- | ||
|[[File: | |[[File:Chee-Chai Alien logo.png|150x90px]] | ||
|[[File: | |[[File:SSBU spirit Li'l Blue.png|100x100px]] | ||
|- | |- | ||
|[[File: | |[[File:The Tower logo.png|150x90px]] | ||
|[[File: | |[[File:SSBU spirit Yama.png|100x100px]] | ||
|- | |- | ||
|[[File: | |[[File:Eternal Darkness logo.png|150x90px]] | ||
|[[File: | |[[File:SSBU spirit Alexandra Roivas.png|100x100px]] | ||
|- | |- | ||
|[[File: | |[[File:GiFTPiA logo.png|150x90px]] | ||
|[[File: | |[[File:SSBU spirit Mappo.png|100x100px]] | ||
|- | |- | ||
|[[File: | |[[File:Project Hacker logo.jpg|150x90px]] | ||
|[[File: | |[[File:SSBU spirit Satoru Amatsubo.png|100x100px]] | ||
|- | |- | ||
|[[File: | |[[File:Kurikin logo.png|150x90px]] | ||
|[[File: | |[[File:SSBU spirit Kurikin.png|100x100px]] | ||
|- | |- | ||
|[[File: | |[[File:Number Battle logo.jpg|150x90px]] | ||
|[[File: | |[[File:SSBU spirit Hsien.png|100x100px]] | ||
|- | |- | ||
|[[File: | |[[File:ASH logo.png|150x90px]] | ||
|[[File: | |[[File:SSBU spirit Aisya.png|100x100px]] | ||
|- | |- | ||
|[[File: | |[[File:Make 10 logo.png|150x90px]] | ||
|[[File: | |[[File:SSBU spirit Num Diddly.png|100x100px]] | ||
|- | |- | ||
|[[File: | |[[File:Looksleys Line Up logo.jpg|150x90px]] | ||
|[[File: | |[[File:SSBU spirit Looksley.png|100x100px]] | ||
|- | |- | ||
|[[File: | |[[File:Saru Band logo.png|150x90px]] | ||
|[[File: | |[[File:SSBU spirit Prince Saruno.png|100x100px]] | ||
|- | |- | ||
|[[File: | |[[File:Disaster Day of Crisis Logo.png|150x90px]] | ||
|[[File: | |[[File:SSBU spirit Raymond Bryce.png|100x100px]] | ||
|- | |- | ||
|[[File: | |[[File:Takt of Magic logo.jpg|150x90px]] | ||
|[[File: | |[[File:SSBU spirit Orville.png|100x100px]] | ||
|- | |- | ||
|[[File: | |[[File:And-Kensaku logo.png|150x90px]] | ||
|[[File: | |[[File:SSBU spirit Ando Kensaku.png|100x100px]] | ||
|- | |- | ||
|[[File: | |[[File:FlingSmash logo.jpg|150x90px]] | ||
|[[File: | |[[File:SSBU spirit Zip.png|100x100px]] | ||
|- | |- | ||
|[[File: | |[[File:Kikitricklogo.png|150x90px]] | ||
|[[File: | |[[File:SSBU spirit Noise.png|100x100px]] | ||
|- | |- | ||
|[[File: | |[[File:BoxBoy logo.png|150x90px]] | ||
|[[File: | |[[File:SSBU spirit Qbby.png|100x100px]] | ||
|- | |- | ||
|[[File: | |[[File:STEAM logo.jpg|150x90px]] | ||
|[[File: | |[[File:SSBU spirit Henry Fleming.png|100x100px]] | ||
|- | |- | ||
|[[File: | |[[File:Ever Oasis logo.png|150x90px]] | ||
|[[File: | |[[File:SSBU spirit Tethu.png|100x100px]][[File:SSBU spirit Esna.png|100x100px]] | ||
|- | |- | ||
|[[File: | |[[File:Sushi Striker - The Way of Sushido logo.png|150x90px]] | ||
|[[File: | |[[File:SSBU spirit Musashi.png|100x100px]] | ||
|- | |- | ||
|[[File: | |[[File:Snipperclips logo.png|150x90px]] | ||
|[[File: | |[[File:SSBU spirit Clip & Snip.png|100x100px]] | ||
|- | |- | ||
|[[File: | |[[File:Shantae Logo.png|150x90px]] | ||
|[[File: | |[[File:SSBU spirit Shantae.png|100x100px]][[File:SSBU spirit Risky Boots.png|100x100px]] | ||
|- | |- | ||
|[[File: | |[[File:Daemon X Machina logo.png|150x90px]] | ||
|[[File: | |[[File:SSBU spirit Radiant Gleam.png|100x100px]][[File:SSBU spirit Kloster (Grief).png|100x100px]]<br>[[File:SSBU spirit Bullet Walker (Brigadier General).png|100x100px]][[File:SSBU spirit High Line (Guns Empress).png|100x100px]] | ||
|rowspan=" | |rowspan="15" |''Super Smash Bros. Ultimate''<br>(DLC) | ||
|- | |- | ||
|[[File: | |[[File:SamuraiShodown.png|150x90px]] | ||
|[[File: | |[[File:SSBU spirit Haohmaru.png|100x100px]][[File:SSBU spirit Nakoruru.png|100x100px]] | ||
|- | |- | ||
|[[File: | |[[File:Resident Evil.png|150x90px]] | ||
|[[File: | |[[File:SSBU spirit Wesker.png|100x100px]][[File:SSBU spirit Leon.png|100x100px]]<br>[[File:SSBU spirit Chris.png|100x100px]][[File:SSBU spirit Jill.png|100x100px]] | ||
|- | |- | ||
|[[File: | |[[File:Astral.png|150x90px]] | ||
|[[File: | |[[File:SSBU spirit ASTRAL CHAIN Hero (Female).png|100x100px]][[File:SSBU spirit ASTRAL CHAIN Hero (Male).png|100x100px]]<br>[[File:SSBU spirit Kyle.png|100x100px]][[File:SSBU spirit Lappy.png|100x100px]] | ||
|- | |||
|[[File:Kunio-Kun Logo.png|150x90px]] | |||
|[[File:SSBU spirit Kunio.png|100x100px]][[File:SSBU spirit Riki (River City).png|100x100px]]<br>[[File:SSBU spirit Goda.png|100x100px]][[File:SSBU spirit Ryuichi & Ryuji.png|100x100px]] | |||
|- | |- | ||
|[[File: | |[[File:WarframeLogo.png|150x90px]] | ||
|[[File: | |[[File:SSBU spirit Lotus.png|100x100px]][[File:SSBU spirit Natah.png|100x100px]] | ||
| | |||
|- | |- | ||
|[[File: | |[[File:Ring Fit Adventure.png|150x90px]] | ||
|[[File: | |[[File:SSBU spirit Ring Fit Trainees.png|100x100px]][[File:SSBU spirit Dragaux.png|100x100px]][[File:SSBU spirit Ring.png|100x100px]] | ||
| | |||
|- | |- | ||
|[[File: | |[[File:Trials of Mana.png|150x90px]] | ||
|[[File: | |[[File:SSBU spirit Duran & Angela.png|100x100px]][[File:SSBU spirit Kevin & Charlotte.png|100x100px]][[File:SSBU spirit Hawkeye & Riesz.png|100x100px]] | ||
|- | |- | ||
|[[File: | |[[File:Octopath-traveler-logo.png|150x90px]] | ||
|[[File: | |[[File:SSBU spirit Alfyn & Therion.png|100x100px]][[File:SSBU spirit Tressa & Cyrus.png|100x100px]]<br>[[File:SSBU spirit H'aanit & Ophilia.png|100x100px]][[File:SSBU spirit Olberic & Primrose.png|100x100px]] | ||
< | |||
|- | |- | ||
|[[File: | |[[File:Bravely Default logo.png|150x90px]] | ||
|[[File: | |[[File:SSBU spirit Seth & Gloria.png|100x100px]][[File:SSBU spirit Elvis & Adelle.png|100x100px]] | ||
|- | |- | ||
|[[File: | |[[File:Ghosts 'n Goblins.png|150x90px]] | ||
|[[File: | |[[File:SSBU spirit Arthur.png|100x100px]] | ||
|- | |- | ||
| | ||[[File:Sakuna Of Rice and Ruin logo.png|150x90px]] | ||
|[[File:SSBU spirit Sakuna.png|100x100px]][[File:SSBU spirit Kokorowa.png|100x100px]][[File:SSBU spirit Tama.png|100x100px]] | |||
|[[File: | |||
|[[File:SSBU spirit | |||
|- | |- | ||
|[[File: | |[[File:13 Sentinels logo.png|100px]] | ||
|[[File:SSBU spirit | |[[File:SSBU spirit The 13 Sentinel Pilots.png|100x100px]] | ||
|- | |- | ||
|[[File: | |[[File:Power Pros logo.png|100px]] | ||
|[[File:SSBU spirit | |[[File:SSBU spirit Power Pro-Kun, Aoi Hayakawa, & Mamoru Ikari.png|100x100px]] | ||
|- | |- | ||
|[[File:Hades logo.png|100px]] | |||
|[[File:SSBU spirit | |[[File:SSBU spirit Zagreus.png|100x100px]] | ||
|} | |} | ||
</div> | </div> | ||
| Line 3,474: | Line 1,940: | ||
|} | |} | ||
</div> | </div> | ||
</div> | </div> | ||
| Line 3,823: | Line 2,147: | ||
*{{uvm|Sutte Hakkun}} (Super NES){{Flag|Japan}} | *{{uvm|Sutte Hakkun}} (Super NES){{Flag|Japan}} | ||
*{{uvm|Teleroboxer}} (Virtual Boy){{Flag|Japan}}{{Flag|North America}}{{Flag|Europe}} | *{{uvm|Teleroboxer}} (Virtual Boy){{Flag|Japan}}{{Flag|North America}}{{Flag|Europe}} | ||
* | *{{uv|Banjo-Kazooie}} series: | ||
**''{{iw|wikipedia|Banjo-Kazooie|video game}}'' (Nintendo 64){{Flag|Europe}} | **''{{iw|wikipedia|Banjo-Kazooie|video game}}'' (Nintendo 64){{Flag|Europe}} | ||
**''{{s|wikipedia|Banjo Tooie}}'' (Nintendo 64){{Flag|Europe}} | **''{{s|wikipedia|Banjo Tooie}}'' (Nintendo 64){{Flag|Europe}} | ||
Latest revision as of 15:02, March 20, 2024
This is a list of every universe in the Super Smash Bros. series.
Here is the order of the types of universes:
- Fighter-based -> Assist Trophy-based -> Item-based -> Stage-based -> Enemy-based -> Fighter Related-based -> Stage Related-based -> Collectible-based -> Mii Costume-based -> Music-based
Here is the order for specific universes of those types:
- The order of the Fighter-based universes are based on the Fighter numbers.
- Universes of most of the other types are based on in-game ordering (such as the Item Switch, stage selection, Trophy Gallery, Sticker Album, Spirit List, and My Music). Assist Trophy-based universes for Brawl and Smash 4 are based on Trophy order, while ones in Ultimate are based on the Assist Trophy selection order in Training Mode.
- Fighter and stage-related universes are ordered based on the order of their respective fighter and stage, then ordered by these factors:
- For fighter-related universes, their order will be determined by the Fighter number of their respective fighter, then by the following order: Specials -> Final Smash -> neutral attack -> tilts -> dash attack -> Smash attacks -> aerial attacks -> throws -> get-up attacks -> taunts -> victory poses -> on screen appearances. The order for multi-direction attack types will be: Neutral -> side (forward -> back for aerials and throws) -> up -> down.
- For stage-related universes, their order will be determined by the order the stage they're in comes in its debut game, then by how important their role is to the stage, and finally by their collectible order.
- Namco Roulette universes are ordered based on the release of their first installment.
- Universes introduced via downloadable content are ordered by the date in which their content was first released. DLC Mii Costume universes introduced in the same wave are based on their reveal order.
Notes:
- In terms of the collectible-based universes, only two types have appeared in the series together: Trophies and stickers. As trophies are mostly newly created models whereas stickers typically depict already existing images, trophies take priority.
- Only specific consoles, hardware, or applications will be listed if they have a playable character, stage, or Assist Trophy. So stuff like the Super Scope, Diskun, the GameCube, or any of the Wii Channels will not be recognized here unless they achieve the aforementioned statuses.
- In terms of "dependent universes" (universes that are technically represented in the series, but all content in the Smash series is categorized as a different universe), it all depends on whether or not the original universe is acknowledged. If not, then it will not be listed. If a universe of the latter kind does become its own universe, its placement will be based on the installment in which it first received that status rather than its overall debut in the series.
Universes by Super Smash Bros. Debut Game[edit]
Super Smash Bros.
 [edit]
| Name | Logo | Main Representation |
|---|---|---|
| Mario |  
| |
| Donkey Kong | 
| |
| The Legend of Zelda | 
| |
| Metroid | 
| |
| Yoshi | 
| |
| Kirby | 
| |
| Star Fox | 
| |
| Pokémon |  
| |
| EarthBound | 
| |
| F-Zero | 
| |
| GoldenEye | 
|
Super Smash Bros. Melee
 [edit]
Note: Although Wario made his Smash Bros. series debut in Melee as a trophy, he is counted as apart of the Mario universe, while the Wario series would not be recognized as a separate universe until Brawl.
Super Smash Bros. Brawl
 [edit]
Super Smash Bros. for Nintendo 3DS/Wii U
 [edit]
Introduced in Nintendo 3DS version[edit]


Introduced in Wii U version[edit]
| Name | Logo | Main Representation |
|---|---|---|
| Metro-Cross | 
| |
| Valkyrie | 
| |
| Captain Rainbow |  
| |
| Art Academy | 
| |
| Zangeki no Reginleiv |  
| |
| The Last Story |  
| |
| Pandora's Tower | 
| |
| Rayman |   
| |
| Nintendo Land | 
| |
| BIT.TRIP | 
| |
| The Wonderful 101 |       
| |
| Dragon Spirit |  Namco Arcade '80s Retro Medley 2 (Dragon Spirit portion) | |
| Wonder Momo | Namco Arcade '80s Retro Medley 2 (Wonder Momo portion) | |
| Thunder Ceptor | Namco Arcade '80s Retro Medley 2 (Thunder Ceptor portion) | |
| Yokai Dochuki | Yokai Dochuki Retro Medley | |
| Bravoman | Bravoman Retro Medley | |
| Baten Kaitos | The valedictory elegy | |
| Soma Bringer | Attack (Soma Bringer) | |
| Glory of Heracles | Glory of Heracles | |
| AR Games | Dragon Battle | |
| NES Remix | Title Theme (NES Remix 2) |
Introduced via downloadable content[edit]
| Name | Logo | Main Representation |
|---|---|---|
| Street Fighter |  (Both versions) | |
| Miiverse |  ( | |
| Splatoon | ![[1]](/File:InklingTrophyWiiU.png) (Both versions) | |
| Virtua Fighter |   (Both versions) | |
| Tekken |  (Both versions) | |
| Wii Party | Final Results (Wii Party U) ( | |
| Tales |  (Both versions) | |
| Monster Hunter |   ![[1]](/File:SSB4_Mii_Fighter_Rathalos_M.jpg) ![[1]](/File:SSB4_Mii_Fighter_Rathalos_F.jpg) (Both versions) | |
| Final Fantasy |  (Both versions) | |
| Bayonetta |  (Both versions) |
Super Smash Bros. Ultimate
 [edit]

Introduced via downloadable content[edit]
Universes by "Type"[edit]
Fighter-based[edit]
| Universe | Main Representation | Introduction Game |
|---|---|---|

|
|
Super Smash Bros. |
|
| ||
|
| ||
|
| ||
|
| ||

|
| |
|
| ||

|
| |
|
| ||

|
| |

|

|
Super Smash Bros. Melee |
| ||
| ||

|
|
Super Smash Bros. Brawl |
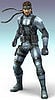
| ||
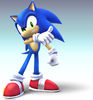
| ||
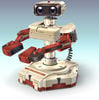
| ||
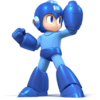
|
Super Smash Bros. 4 | |

| ||

| ||
| ||

|
|
Super Smash Bros. 4 (DLC) |
|
| ||

|
| |

|
|
Super Smash Bros. Ultimate |
|
Super Smash Bros. Ultimate (DLC) | |
| ||
| ||
| ||

| ||
|
Assist Trophy-based[edit]
| Universe | Main Representation | Introduction Game |
|---|---|---|
|
Super Smash Bros. Brawl | |

| ||

| ||
| ||
| ||
| ||
| ||
| ||
|
Super Smash Bros. 4 | |
| ||

|
Super Smash Bros. Ultimate | |
| ||
| ||

| ||

|
|
Item-based[edit]
| Universe | Main Representation | Introduction Game |
|---|---|---|
|
|
Super Smash Bros. | |

|
Super Smash Bros. Melee | |

|
| |
| ||
|
Super Smash Bros. 4 | |
|
Stage-based[edit]
| Universe | Main Representation | Introduction Game |
|---|---|---|
|
Super Smash Bros. Brawl | |
| ||

|
Super Smash Bros. for Nintendo 3DS | |

|
| |
|
|
Super Smash Bros. for Wii U (DLC) |
Enemy-based[edit]
| Universe | Main Representation | Introduction Game |
|---|---|---|

|
Super Smash Bros. for Nintendo 3DS | |
| ||

|
Fighter Related-based[edit]
| Universe | Main Representation | Introduction Game |
|---|---|---|
|
Super Smash Bros. 4 | |

|
Super Smash Bros. for Nintendo 3DS | |

|
Super Smash Bros. 4 | |

| ||

| ||

| ||

| ||

| ||

| ||
| ||
|
|
Super Smash Bros. for Wii U | |
|
| ||

|
Super Smash Bros. Ultimate |
Stage Related-based[edit]
| Universe | Main Representation | Introduction Game |
|---|---|---|

|
  
|
Super Smash Bros. Ultimate (DLC) |
    
| ||

| ||
 
|
Collectible-based[edit]
Trophy-based[edit]
| Universe | Main Representation | Introduction Game |
|---|---|---|

|
Super Smash Bros. Melee | |

| ||

| ||
 
| ||
  
| ||

|
  
| |

| ||

| ||
 
| ||

| ||

| ||

|

| |

| ||

|

| |

| ||

| ||

| ||

| ||

| ||

| ||

| ||
  
|
Super Smash Bros. Brawl | |
  
| ||
 
| ||

| ||

| ||
 
| ||

|
Super Smash Bros. for Nintendo 3DS | |

| ||

| ||

| ||

| ||

| ||

| ||

| ||

| ||

| ||

| ||
 
| ||
 
| ||
 
| ||

| ||
 
| ||

| ||
|
|
Super Smash Bros. for Wii U | |
|
| ||
|
| ||
|
| ||
|
| ||
|
| ||
|
| ||
|
| ||
|
| ||
|
|
Super Smash Bros. 4 (DLC) |
Sticker-based[edit]
| Universe | Main Representation | Introduction Game |
|---|---|---|
.png) .png)
|
Super Smash Bros. Brawl | |
.png) .png)
| ||
.png) .png)
| ||
.png) .png)
| ||
.png)
| ||
.png)
| ||
.png)
| ||
.png)
| ||
.png)
|
Spirit-based[edit]
| Universe | Main Representation | Introduction Game |
|---|---|---|

|
Super Smash Bros. Ultimate | |

| ||

| ||

| ||

|

| |

| ||

| ||

| ||

| ||

| ||

| ||

| ||

| ||

| ||

|
 
| |

| ||

| ||

| ||

| ||

| ||

| ||

| ||

| ||

| ||

| ||

| ||

|

| |

| ||

| ||
 
| ||

| ||

| ||
 | ||
 .png) .png) .png)
|
Super Smash Bros. Ultimate (DLC) | |
 
| ||

|
.png) .png) 
| |
 .png)  
| ||

|

| |

|
  
| |

|
  
| |
   
| ||
 
| ||

| ||
  
| ||

| ||

| ||

|
Mii Costume-based[edit]
| Universe | Main Representation | Introduction Game |
|---|---|---|
|
|
Super Smash Bros. 4 (DLC) | |
|
| ||
|
| ||
|
| ||

|
Super Smash Bros. Ultimate | |

|
Super Smash Bros. Ultimate (DLC) | |

| ||

| ||

| ||

| ||

| ||

| ||

| ||

|

| |

|
Music-based[edit]
Chronicle-exclusive Universes[edit]
Note: A flag denotes that the game is listed in that region's Chronicle, including those with their release dates marked as "Not released".
- Popeye series:
- Popeye (Wide Screen)* (Game & Watch)


- Popeye (Panorama Screen) (Game & Watch)
- Popeye (Table Top) (Game & Watch)
- Popeye (NES)
- Popeye no Eigo Asobi (NES)
- Popeye (Wide Screen)* (Game & Watch)
- Mickey Mouse series:
- Mickey Mouse (Game & Watch)
- Mickey & Donald (Game & Watch)
- Mickey no Racing Challenge USA* (Nintendo 64)
- Mickey to Minnie no Magical Quest* (Game Boy Advance)
- Mickey Mouse no Fushigi na Kagami* (GameCube)
- Mickey Mouse (Game & Watch)
- Snoopy series:
- Snoopy Tennis (Game & Watch)
- Snoopy (Table Top) (Game & Watch)
- Snoopy (Panorama) (Game & Watch)
- Snoopy Tennis (Game & Watch)
- Gomoku Narabe Renju (NES)
- Pinball (NES)
- Golf series:
- Golf (NES)
- Golf (Game Boy)
- Golf (NES)
- F-1 Race series:
- F1 Race (NES)
- F-1 Race (Game Boy)
- F1 Race (NES)
- Kung Fu (NES)
- 10-Yard Fight (NES)
- Gumshoe (NES)
- Pro Wrestling (Famicom Disk System*/NES*)
- Rad Racer (NES)
- Ginga no Sannin (NES)
- Slalom (NES)
- Stadium Events:
- World Class Track Meet* (NES)
- 3-in-1 Super Mario Bros./Duck Hunt/World Class Track Meet (NES)
- World Class Track Meet* (NES)
- R.C. Pro-Am series:
- R.C. Pro-Am (NES)
- Super R.C. Pro-Am (Game Boy)
- R.C. Pro-Am (NES)
- To the Earth (NES)
- Short Order/Eggsplode (NES)
- Anticipation (NES)
- U.S. Championship V'Ball:
- Super Spike V'Ball (NES)
- 2-in-1 Super Spike V'Ball/World Cup (NES)
- Super Spike V'Ball (NES)
- Play Action Football series:
- NES Play Action Football (NES)
- Play Action Football (Game Boy)
- Super Play Action Football (Super NES)
- NES Play Action Football (NES)
- StarTropics series:
- StarTropics (NES)
- Zoda's Revenge: StarTropics II (NES)
- StarTropics (NES)
- Pinbot (NES)
- Faxanadu (NES)
- Snake Rattle 'n' Roll (NES)
- Four Players' Tennis* (NES)
- Formula 1 Sensation (NES)
- Smash Ping Pong (Famicom Disk System)
- Nakayama Miho no Tokimeki High School (Famicom Disk System)
- Knight Move (Famicom Disk System)
- Backgammon (Famicom Disk System)
- Time Twist: Rekishi no Katasumi de...:
- Time Twist: Rekishi no Katasumi de... - Zenpen (Famicom Disk System)
- Time Twist: Rekishi no Katasumi de... - Kōhen (Famicom Disk System)
- Time Twist: Rekishi no Katasumi de... - Zenpen (Famicom Disk System)
- Alleyway (Game Boy)
- Solar Striker (Game Boy)
- Qix (Game Boy)
- Radar Mission (Game Boy)
- Top Rank Tennis (Game Boy)
- Killer Instinct series:
- Killer Instinct (Game Boy)
- Killer Instinct (Super NES)
- Killer Instinct (Game Boy)
- Ken Griffey Jr. series:
- Ken Griffey, Jr. Presents: Major League Baseball (Game Boy)
- Ken Griffey, Jr.'s Slugfest (Game Boy)
- Ken Griffey, Jr. Presents: Major League Baseball (Super NES)
- Ken Griffey, Jr.'s Winning Run (Super NES)
- Major League Baseball Featuring Ken Griffey, Jr. (Nintendo 64)
- Ken Griffey Jr.'s Slugfest (Nintendo 64)
- Ken Griffey, Jr. Presents: Major League Baseball (Game Boy)
- NBA Courtside series:
- NBA 3 on 3 Featuring Kobe Bryant (Game Boy)
- Kobe Bryant in NBA Courtside (Nintendo 64)
- Kobe Bryant in NBA Courtside 2 (Nintendo 64)
- NBA Courtside 2002 (GameCube)
- NBA 3 on 3 Featuring Kobe Bryant (Game Boy)
- R-Type DX (Game Boy)
- Hamtaro series:
- Tottoko Hamtaro: Tomodachi Daisakusen Dechu (Game Boy)
- Hamtaro: Ham-Hams Unite! (Game Boy)
- Hamtaro: Ham-Ham Heartbreak (Game Boy Advance)
- Tottoko Hamtaro 4: Nijīro Daikōshin Dechu* (Game Boy Advance)
- Hamtaro: Ham-Ham Games (Game Boy Advance)
- Tottoko Hamtaro: Nazonazo Q Kumonōe no? Jō (Nintendo DS)
- Tottoko Hamtaro: Tomodachi Daisakusen Dechu (Game Boy)
- Kaijin Zona (Game Boy)
- Monster Tactics (Game Boy)
- Super Tennis (Super NES)
- Super Scope 6 (Super NES)
- Super Soccer (Super NES)
- Vegas Stakes (Super NES)
- World League Basketball* (Super NES)
- Super Hockey* (Super NES)
- Illusion of Time* (Super NES)
- Itoi Shigesato no Bass Tsuri No. 1 series:
- Itoi Shigesato no Bass Tsuri No. 1 (Super NES)
- Itoi Shigesato no Bass Tsuri No. 1 Ketteiban! (Nintendo 64)
- Itoi Shigesato no Bass Tsuri No. 1 (Super NES)
- Mini Yonku: Let's & Go!! Power WGP2 (Super NES)
- Power Sokoban (Super NES)
- Galactic Pinball (Virtual Boy)
- Golf (Virtual Boy)
- Vertical Force (Virtual Boy)
- Nester's Funky Bowling (Virtual Boy)
- Cruis'n series:
- Cruis'n USA (Nintendo 64)
- Cruis'n World (Nintendo 64)
- Cruis'n USA (Nintendo 64)
- Waialae Country Club: True Golf Classics (Nintendo 64)
- F-1 World Grand Prix (Nintendo 64)
 *
* - Ogre Battle series:
- Ogre Battle 64: Person of Lordly Caliber (Nintendo 64)
- Tactics Ogre Gaiden: The Knight of Lodis* (Game Boy Advance)
- Ogre Battle 64: Person of Lordly Caliber (Nintendo 64)
- Domo-kun no Fushigi Terebi (Game Boy Advance)
- Koro Koro Puzzle Happy Panechu! (Game Boy Advance)
- Sakura Momoko no Ukiuki Carnival (Game Boy Advance)
- Polarium series:
- Tsūkin Hitofude* (Game Boy Advance)
- Polarium (Nintendo DS)
- Tsūkin Hitofude* (Game Boy Advance)
- Eyeshield 21 series:
- Eyeshield 21: Devilbats Devildays (Game Boy Advance)
- Eyeshield 21: Max Devil Power! (Nintendo DS)
- Eyeshield 21: Field Saikyō no Senshi Tachi (Wii)
- Eyeshield 21: Devilbats Devildays (Game Boy Advance)
- Geist (GameCube)
- Densetsu no Quiz Ō Ketteisen (GameCube)
- Odama (GameCube)
- DS Rakubiki Jiten series:
- DS Rakubiki Jiten (Nintendo DS)
- Kanji Sonomama: DS Rakubiki Jiten (Nintendo DS)
- DS Rakubiki Jiten (Nintendo DS)
- Meteos (Nintendo DS)
- Jump Stars series:
- Jump Super Stars (Nintendo DS)
- Jump Ultimate Stars (Nintendo DS)
- Jump Super Stars (Nintendo DS)
- Clubhouse Games series:
- Daredemo Asobi Taizen* (Nintendo DS)
- Clubhouse Games* (Nintendo DS)
- Daredemo Asobi Taizen* (Nintendo DS)
- True Swing Golf* (Nintendo DS)
- Magnetica* (Nintendo DS)
- Tabi no Yubisashi Kaiwachō DS series (Nintendo DS)
- Tabi no Yubisashi Kaiwachō DS: DS Series 1 – Thai
- Tabi no Yubisashi Kaiwachō DS: DS Series 2 – Chūgoku
- Tabi no Yubisashi Kaiwachō DS: DS Series 3 – Kankoku
- Tabi no Yubisashi Kaiwachō DS: DS Series 4 – America
- Tabi no Yubisashi Kaiwachō DS: DS Series 5 – Deutsche
- Tabi no Yubisashi Kaiwachō DS: DS Series 1 – Thai
- Mawashite Tsunageru: Touch Panic (Nintendo DS)
- Sudoku Gridmaster* (Nintendo DS)
- Nintendo DS Browser (Nintendo DS)
- Kanshū Nihon Jōshikiryoku Kentei Kyōkai: Imasara Hito ni wa Kikenai Otona no Jōshikiryoku Training DS (Nintendo DS)
- Master of Illusion* (Nintendo DS)
- Kenkō Ōen Recipe 1000: DS Kondate Zenshū (Nintendo DS)
- Touch de Tanoshimu Hyakunin-Isshu: DS Shigureden (Nintendo DS)
- Picross DS (Nintendo DS)
- Jet Impulse (Nintendo DS)
- Flash Focus: Vision Training in Minutes a Day* (Nintendo DS)
- Ganbaru Watashi no Kakei Diary (Nintendo DS)
- Facening de Hyōjō Yutaka ni Inshō Up: Otona no DS Kao Training* (Nintendo DS)
- Theta (Nintendo DS)
- DS Bungaku Zenshū* (Nintendo DS)
- Forever Blue* (Wii)
Chronicle-exclusive universes prior to their Smash debuts[edit]
Introduced in Super Smash Bros. 4:
- Hogan's Alley (NES)
- Final Fantasy Tactics Advance (Game Boy Advance)
- Calciobit (Game Boy Advance)
- Rhythm Tengoku (Game Boy Advance)
- Baten Kaitos series:
- Baten Kaitos: Eternal Wings and the Lost Ocean (GameCube)
- Baten Kaitos Origins (GameCube)
- Baten Kaitos: Eternal Wings and the Lost Ocean (GameCube)
- Wii Fit (Wii)
Introduced in Super Smash Bros. Ultimate:
- Baseball series:
- Baseball (NES)
- Baseball (Game Boy)
- Baseball (NES)
- Tennis series:
- Tennis (NES)
- Tennis (Game Boy)
- Tennis (NES)
- Volleyball (Famicom Disk System/NES)
- River City series:
- 2-in-1 Super Spike V'Ball/World Cup (NES)
- Nintendo World Cup (NES)
- Nintendo World Cup (Game Boy)
- 2-in-1 Super Spike V'Ball/World Cup (NES)
- Yūyūki:
- Famicom Mukashibanashi: Yūyūki - Zenpen (Famicom Disk System)
- Famicom Mukashibanashi: Yūyūki - Kōhen (Famicom Disk System)
- Famicom Mukashibanashi: Yūyūki - Zenpen (Famicom Disk System)
- Bomberman series:
- Wario Blast: Featuring Bomberman! (Game Boy)
- Panic Bomber (Virtual Boy)
- Bomberman Hero (Nintendo 64)
- Classic NES Series: Bomberman* (Game Boy Advance)
- Wario Blast: Featuring Bomberman! (Game Boy)
- Mole Mania (Game Boy)
- Battle Clash series:
- Battle Clash (Super NES)
- Metal Combat: Falcon's Revenge (Super NES)
- Battle Clash (Super NES)
- Marvelous: Mōhitotsu no Takarajima (Super NES)
- Sutte Hakkun (Super NES)
- Teleroboxer (Virtual Boy)
- Banjo-Kazooie series:
- Banjo-Kazooie (Nintendo 64)
- Banjo Tooie (Nintendo 64)
- Banjo-Kazooie (Nintendo 64)
- Napoleon (Game Boy Advance)
- Tomato Adventure (Game Boy Advance)
- The Tower SP (Game Boy Advance)
- Nonono Puzzle Chalien (Game Boy Advance)
- Eternal Darkness: Sanity's Requiem (GameCube)
- GiFTPiA (GameCube)
- Project Hacker: Kakusei (Nintendo DS)
- Kurikin Nano Island Story (Nintendo DS)
- Sūjin Taisen (Nintendo DS)
- Archaic Sealed Heat (Nintendo DS)
- Tashiten: Tashite 10 ni Suru Monogatari* (Nintendo DS)
Smash 64/Melee universes whose only representation in Brawl is a Chronicle listing[edit]
- Perfect Dark series:
- Perfect Dark (Game Boy)
- Perfect Dark (Nintendo 64)
- Perfect Dark (Game Boy)
- GoldenEye 007 (Nintendo 64)


 *
* - Dōbutsu Banchō* (GameCube)
- Kyojin no Doshin* (GameCube)