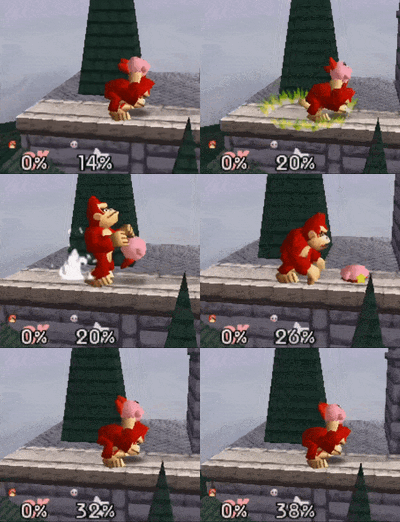
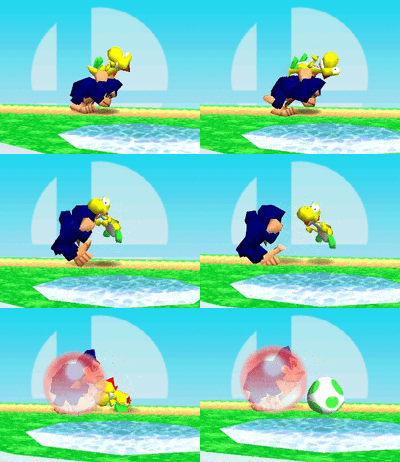
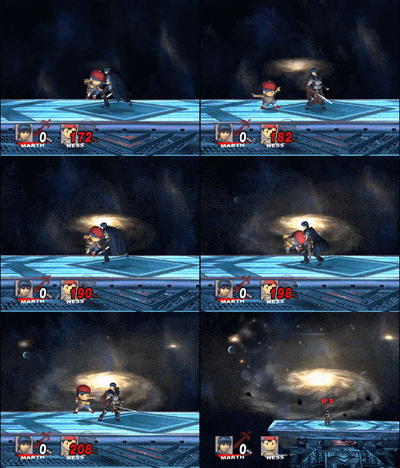
Infinite throw trap

The infinite throw trap, abbreviated as ITT, is a technique in Super Smash Bros. where Donkey Kong grabs the opponent without throwing them, allowing for easy regrabs in the right scenarios. It is also possible in Super Smash Bros. Brawl against Lucas and Ness, abusing their unusually long grab release animations.
The technique was removed in Melee through a series of nerfs to Donkey Kong's grab: It has worse startup frame data and range, so he can't grab the opponent quickly enough to start a loop. Even if it were possible, both Donkey Kong and the victim take 10% from a grab release, instead of the victim taking 6% for DK transitioning to the cargo throw stance. In return, Donkey Kong gained new up and down throws, both possessing decent utility, and the addition of pummels gives Donkey Kong some flexibility in how damage is dealt. For the purpose of chain grabs, Donkey Kong can use cargo up throw against fast fallers, or use down throw to force a tech chase. With the introduction of a regrab lockout timer in Smash 4, it's unlikely to see a repeat of the Infinite throw trap in modern Smash titles.
In Super Smash Bros.
Technical details
After grabbing an opponent, Donkey Kong can use his unique forward throw—the cargo throw—to begin carrying the opponent over his shoulder, an action which deals 8% damage. During the Cargo Throw, Donkey Kong can walk around with the opponent and can choose to perform a proper forward or back throw. The opponent can escape this through button mashing, and multiple inputs can be used at once to escape more quickly. Escaping the Cargo throw requires at least 14 inputs which increases as the opponent's percent increases (as a sidenote, the opponent required six extra inputs to break out of Cargo Throw in the Japanese version). The Cargo Throw pickup's damage never scales, so it will always deal 8% regardless of how many times it has been used.
Once the opponent struggles free, both characters are put into hitstun for a period of time. Donkey Kong is put into a consistent 19 frames of hitstun but the amount of hitstun the opponent is put into depends on their percent. At 0%, Donkey Kong is at a 1 frame disadvantage against most of the cast although Donkey Kong's frame advantage increases as the opponent's increases. How quickly the opponent's hitstun increases depends on their weight, with lighter characters gaining hitstun more quickly. This scaling hitstun for the opponent is the main thing which makes the throw trap viable. Donkey Kong has a frame 6 grab, so the throw trap becomes fully guaranteed once the opponent is at a six frame disadvantage, which occurs somewhere above 100% for a majority of the cast.
The main goal of the throw trap is to grab the opponent before they get the chance to avoid the grab. How effective this is depends on the matchup as there are numerous factors which affect the throw trap. The first thing which can affect the throw trap is whether the opponent recovers grounded or aerial after the grab. If the opponent is grounded, they have access to all of their ground options. The fastest universal escape option for grounded opponents is a shield jump which is a frame 2 option (as shield jumps have intangibility). Rolls can also work but they are slower so they are less viable as escape options, especially at higher percents. The opponent can also use fast attacks to beat the Cargo throw with some characters possessing frame 1 escape options. If the opponent is in the air, their escape options are more limited. There is no universal intangible aerial escape option so an aerial opponent can either jump, throw out an aerial or use an intangible/fast special move to escape (if they have the option). The opponent might also be able to land and use one of their grounded options although this is highly situation dependent.
Whether the opponent recovers grounded or airborne depends on how floaty the character is. Floatier characters will recover in the air while faster fallers will land on the ground. For some characters, it is also percent dependent whether they recover airborne or grounded. It is important for the opponent to know how they are going to recover to ensure the best possible chance for them to escape.
Some characters will recover behind Donkey Kong after he releases them. When this happens, Donkey Kong is unable to land a grab although he can potentially hit his opponent with an up tilt or Spinning Kong in this scenario. Donkey Kong can get these opponents to recover in front of him if he moves around before the opponent breaks out of the grab, which can let him set up the throw trap.
Donkey Kong does have other options to counter the opponent's attempts to counter his throw trap. He can simply shield the opponent's attempted punish (and then punish afterwards) or he can perform a faster followup, mainly up tilt or Spinning Kong. These followups can potentially be guaranteed in scenarios where the throw trap is not guaranteed, mainly being effective when the opponent recovers behind DK.
All of these factors combined make the throw trap a rather complex trap with numerous factors both players have to consider. The trap's effectiveness is not only percent dependent but it is also matchup dependent. The trap is strong against certain characters as they may lack strong ways to escape but other characters have fast and consistent ways to avoid the move. Both players require great execution in order to make full use of the trap (due to the lack of buffer) and depending on the matchup, the trap is largely a matchup/execution check. The trap can be very powerful against a less experienced opponent although it can be harder to take advantage of against a more experienced opponent, especially at lower percents. Once the throw actually becomes fully guaranteed against characters with frame 1 escape options, the opponent is most likely in a position where back throw can KO them although if the opponent is too far away from the blastzone to be KOed, Donkey Kong can do the throw trap once to turn the opponent around and then KO them with the back throw.
Effectiveness

Given the variance in tools, hurtboxes, and timing in which they land, each character has different levels of counterplay to the Infinite throw trap. This table summarises their best options.[1]
| Name | Details |
|---|---|
| Most effective. With Jigglypuff being the lightest and floatiest character, Jigglypuff always recovers airborne and its knockback scales the most out of the entire cast. Jigglypuff's most viable escape option is to jump out although this only works at very low percents. Jigglypuff does have Rest as a frame 1 escape option although it will rarely connect and it will leave Jigglypuff in an even more vulnerable position. | |
| Kirby is very light and he will usually recover airborne. Kirby's most viable escape options in the air are to jump or throw out a neutral aerial although he has no intangible escape options in the air. Kirby is overall one of the more vulnerable characters to the trap. | |
| Pikachu always recovers grounded and he possesses a frame 1 escape option in Quick Attack although as Pikachu is light, the throw's knockback scales quickly. Becomes fully guaranteed at 89%. | |
| Ness will usually recover grounded and he largely has to rely on roll and shield jump in order to escape. Ness' jab is fast although it does not have enough range to hit DK. | |
| Mario may recover standing or airborne depending on the percent although he always has Mario Tornado as a frame 1 escape option. Super Jump Punch can also be used as a fast escape option. Becomes fully guaranteed at 104%. | |
| Luigi recovers airborne and he has Luigi Cyclone as a frame 1 escape option. Super Jump Punch can also be used as a fast escape option, which can KO Donkey Kong in the right scenarios. Becomes fully guaranteed at 104%. | |
| Fox has Reflector as a frame 1 escape option although it will usually not connect and it will leave Fox open for a punish since he always recover grounded. | |
| Link always recovers grounded and he has to rely on roll and shield jump in order to escape. If Link has a Bomb in hand, it can potentially help him escape the throw trap although Link has no fast offensive options outside of Bombs. | |
| Captain Falcon always recovers grounded and he has to largely rely on roll and shield jump in order to escape. Up smash can be an effective punish option at lower percents. | |
| Samus recovers airborne and she has Screw Attack as a frame 1 escape option. Becomes fully guaranteed when Samus is over 110%. | |
| Knockback sends Yoshi behind the player if Donkey Kong doesn't move. Yoshi always recovers grounded and he has shield as a frame 1 escape option. | |
| Knockback sends Donkey Kong behind the player if the grabbing Donkey Kong doesn't move. Donkey Kong always recovers grounded and he has Spinning Kong as a frame 1 escape option. As Donkey Kong is the heaviest character in the game, the throw's knockback scales the least against him, overall making the trap the least viable against another Donkey Kong. | |
| Metal Mario always recovers grounded with his escape options being identical to Mario's. | |
| ? |
Banning & reinstatement
The Infinite throw trap was historically banned in competitive play, usually due to stalling. As of 2023, however, the technique has been allowed, presumably thanks to counterplay being more adequate and more precise rulings on stalling in general; specifically, deriving intent from the opponent's percentage and gauging the trap's necessity. In general, it is possible to button mash out of the throw trap: The player merely needs to be quick, and if applicable, escape with a proper move. Most high-level Smashers can escape the Infinite throw trap, making it largely a "rookie killer" technique; resultantly, major events tend to ignore the tactic altogether.
Once the Infinite throw trap is started, it is very difficult to escape. Donkey Kong has the largest and widest and non-tether grab range, allowing him to even grab short hopping opponents. This means that even in the event of escape, it is very easy for Donkey Kong to regrab the opponent. Dealing 8% each time, this is a relatively easy way for Donkey Kong to slowly tack on damage before swinging for a KO. Despite appearances, the actual grab release, despite dealing knockback, doesn't actually deal damage. Keyboard players will typically struggle more against the technique due to the button layout.
Over time, counterplay to the strategy has evolved. Some players chose not to button mash, wherein they will stay latched on until Donkey Kong initiates a throw. This leads to a stalemate in which the Donkey Kong, intending to infinite, waits for the opponent to button mash, and the grabbed character, not wanting to deal with escaping the infinite, waits for the Donkey Kong to throw. Should Donkey Kong be at a damage deficit, the throw is forced, lest the player simply time out. In modern times, players will use multiple buttons to mash efficiently and use their best escape options, usually only allowing Donkey Kong to get a few reps in. Therefore, high-level Donkey Kong players will typically focus on a strong combo game involving up aerial and other attacks, rather than relying on the Infinite throw trap.
It is important to note that the technique is escapable through strong button mashing and use of one's proper escape options. Even at high enough percentages, the victim will get knocked down from the release, allowing them to tech.
In Super Smash Bros. Brawl
The Infinite throw trap returns in Brawl, but now can only infinite on Lucas and Ness due to their unusually long grab release animations. All characters will now break free after a certain amount of time, even without button mashing. The cargo throw startup no longer deals damage, but the throw break does deal damage, as in Melee
Video
Smasher Isai demonstrates the Infinite Throw Trap around the 0:14 mark.
