SSBU Icon.png

Ice Climbers (SSBU)/Up smash

< Ice Climbers (SSBU)
Revision as of 21:08, May 14, 2024 by Yo'ster (talk | contribs) (→‎Overview: Continuing to elaborate...)
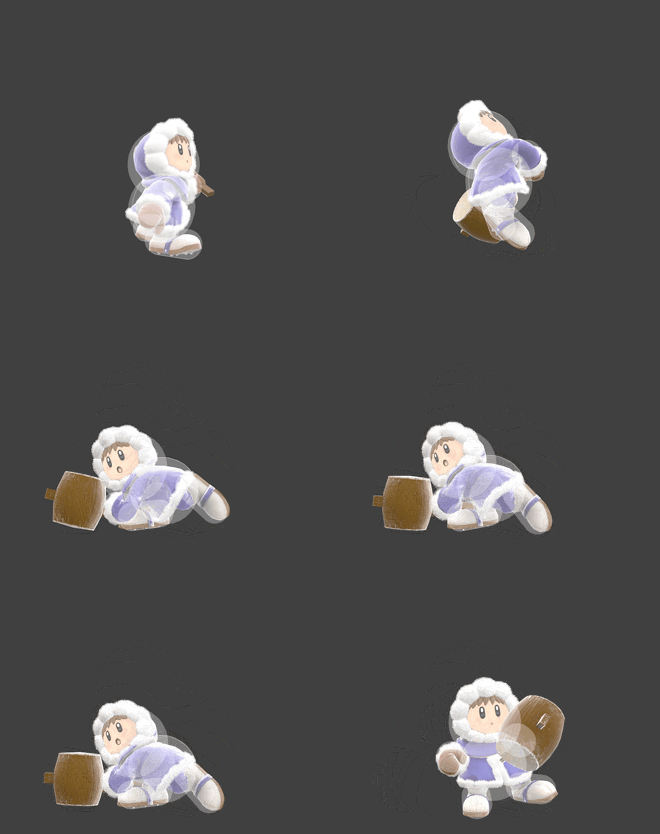
Hitbox visualization showing Popo's up smash.
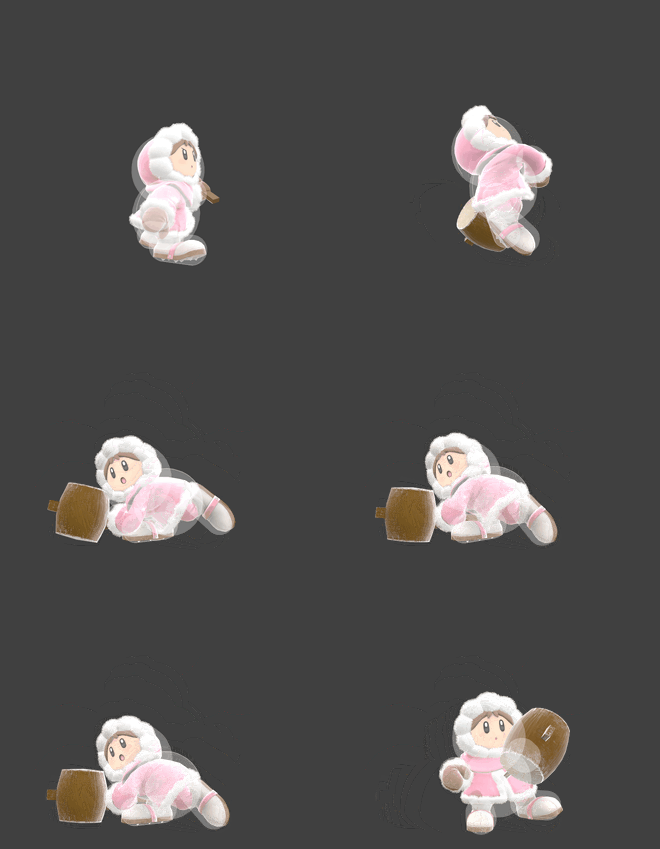
Hitbox visualization showing Nana's up smash.
Competitive.png This article or section may require competitive expertise.
You can discuss this issue on the talk page or edit this page to improve it.

Overview

Each of the duo performs an outward overhead mallet swing. While it would normally be too slow to be much good as an out of shield option, this problem is lessened for the Ice Climbers, specifically, since the additional lag that comes from hitting two different shields can keep the opponent stuck in place longer than usual, which buys the climbers some extra time to punish. What's more, it hits pretty hard, and covers them on all sides, so it can be made a very respectable out of shield option in situations where the unimpressive speed has been rendered a nonissue.

When landing a grab while desynced, the partner can be made to buffer a smash attack as the leader throws the opponent, greatly enhancing their damage and launch power. Combining an up throw with an up smash turns the otherwise very weak throw into a great kill move, with up-throw-up-smash being their 3rd strongest. A desynced up smash also hosts some combo potential at low to mid percentages if only one climber uses the move, allowing the other to jump up and hit the opponent again. It can also be desynced out of shield and lead to kill-confirms. By inputting an up smash for a split second and with tight timing, only the partner will use it. The leader can then toss their partner up to hit the enemy again with up special,

While their up smash is respectable as a pair, it becomes far worse upon isolation. Losing almost half of its damage, and no longer being able to rely on an extra shield to give it leeway on its underwhelming speed. But it does at least work as a better than nothing kill move if it catches someone by surprise.

Hitboxes

Leader

ID Part Rehit rate Damage SD Angle Angle type BK KS FKV Set weight Radius Bone Offset SDI× T% Clang Rebound Effect Type G A Sound Direct Hit bits Hit part Blockable Reflectable Absorbable Flinchless No GFX Heedless
0 0 0 11.0% 0   Standard 50 105 0   3.0 havel -0.8 0.0 0.0 1.0× 1.0× 0%               Punch   All All            
1 0 0 11.0% 0   Standard 50 105 0   3.0 havel -0.8 3.0 0.0 1.0× 1.0× 0%               Punch   All All            
2 0 0 11.0% 0   Standard 50 105 0   4.0 havel -0.8 7.0 0.0 1.0× 1.0× 0%               Punch   All All            
3 0 0 9.0% 0   Standard 50 105 0   3.0 top 0.0 9.0 0.0 1.0× 1.0× 0%               Punch   All All            

Partner

The hitboxes with a "top" bone have two possible X offsets depending on whether the partner is facing right or left (respectively), preventing issues with the Z-axis.

ID Part Rehit rate Damage SD Angle Angle type BK KS FKV Set weight Radius Bone Offset SDI× T% Clang Rebound Effect Type G A Sound Direct Hit bits Hit part Blockable Reflectable Absorbable Flinchless No GFX Heedless
Early hit
0 0 0 8.25% 0   Standard 50 126 0   3.0 top 3.0 or -3.0 12.0 4.0 1.0× 1.0× 0%               Punch   All All            
1 0 0 8.25% 0   Standard 50 126 0   3.0 top 3.0 or -3.0 10.0 5.5 1.0× 1.0× 0%               Punch   All All            
2 0 0 8.25% 0   Standard 50 126 0   4.0 top 2.0 or -2.0 7.0 8.0 1.0× 1.0× 0%               Punch   All All            
3 0 0 6.75% 0   Standard 50 126 0   3.0 top 3.0 or -3.0 9.0 0.0 1.0× 1.0× 0%               Punch   All All            
Mid hit
0 0 0 8.25% 0   Standard 50 126 0   3.0 havel 0.8 0.0 0.0 1.0× 1.0× 0%               Punch   All All            
1 0 0 8.25% 0   Standard 50 126 0   3.0 havel 0.8 3.0 0.0 1.0× 1.0× 0%               Punch   All All            
2 0 0 8.25% 0   Standard 50 126 0   4.0 havel 0.8 7.0 0.0 1.0× 1.0× 0%               Punch   All All            
3 0 0 6.75% 0   Standard 50 126 0   3.0 top 3.0 or -3.0 9.0 0.0 1.0× 1.0× 0%               Punch   All All            
Late hit
0 0 0 8.25% 0   Standard 50 126 0   3.0 havel 3.8 1.0 0.0 1.0× 1.0× 0%               Punch   All All            
1 0 0 8.25% 0   Standard 50 126 0   3.0 havel 3.8 4.0 0.0 1.0× 1.0× 0%               Punch   All All            
2 0 0 8.25% 0   Standard 50 126 0   4.0 havel 2.8 8.0 0.0 1.0× 1.0× 0%               Punch   All All            
3 0 0 6.75% 0   Standard 50 126 0   3.0 top 3.0 or -3.0 9.0 0.0 1.0× 1.0× 0%               Punch   All All            
Latest hit
0 0 0 8.25% 0   Standard 50 126 0   3.0 havel 4.8 1.0 0.0 1.0× 1.0× 0%               Punch   All All            
1 0 0 8.25% 0   Standard 50 126 0   3.0 havel 4.8 4.0 0.0 1.0× 1.0× 0%               Punch   All All            
2 0 0 8.25% 0   Standard 50 126 0   4.0 havel 3.8 8.0 0.0 1.0× 1.0× 0%               Punch   All All            
3 0 0 6.75% 0   Standard 50 126 0   3.0 top 3.0 or -3.0 9.0 0.0 1.0× 1.0× 0%               Punch   All All            

Timing

Charges between 7-8
Leader 12-17
Partner (early, mid, late, latest) 12, 13-14, 15, 16-17
Interruptible 50
Animation length 61
Leader                                                                                                                         
Partner                                                                                                                         
Legend (1 square = 1 frame)
 
Lag time
  
Charge interval
 
Hitbox
  
Hitbox change
 
Interruptible