Wolf (SSBB)/Down smash: Difference between revisions
No edit summary |
m (Changing to proper template) |
||
| Line 10: | Line 10: | ||
{{BrawlHitboxTableRow | {{BrawlHitboxTableRow | ||
|id=0 | |id=0 | ||
|damage={{ | |damage={{ChargedSmashDmgSSBB|14}} | ||
|angle=35 | |angle=35 | ||
|bk=40 | |bk=40 | ||
| Line 27: | Line 27: | ||
{{BrawlHitboxTableRow | {{BrawlHitboxTableRow | ||
|id=1 | |id=1 | ||
|damage={{ | |damage={{ChargedSmashDmgSSBB|14}} | ||
|angle=35 | |angle=35 | ||
|bk=40 | |bk=40 | ||
| Line 43: | Line 43: | ||
{{BrawlHitboxTableRow | {{BrawlHitboxTableRow | ||
|id=2 | |id=2 | ||
|damage={{ | |damage={{ChargedSmashDmgSSBB|12}} | ||
|angle=361 | |angle=361 | ||
|bk=60 | |bk=60 | ||
| Line 60: | Line 60: | ||
{{BrawlHitboxTableRow | {{BrawlHitboxTableRow | ||
|id=0 | |id=0 | ||
|damage={{ | |damage={{ChargedSmashDmgSSBB|13}} | ||
|angle=35 | |angle=35 | ||
|bk=40 | |bk=40 | ||
| Line 77: | Line 77: | ||
{{BrawlHitboxTableRow | {{BrawlHitboxTableRow | ||
|id=1 | |id=1 | ||
|damage={{ | |damage={{ChargedSmashDmgSSBB|13}} | ||
|angle=35 | |angle=35 | ||
|bk=40 | |bk=40 | ||
| Line 93: | Line 93: | ||
{{BrawlHitboxTableRow | {{BrawlHitboxTableRow | ||
|id=2 | |id=2 | ||
|damage={{ | |damage={{ChargedSmashDmgSSBB|10}} | ||
|angle=361 | |angle=361 | ||
|bk=60 | |bk=60 | ||
Revision as of 16:28, November 7, 2013
Overview
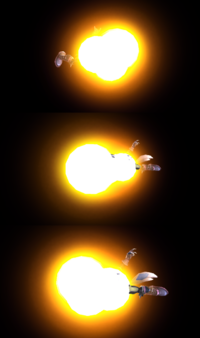
Wolf swipes his claws on both sides of his body, first in front and then behind. This attack has very low startup lag and even less ending lag, along with powerful horizontal knockback, reliably KOing at around 125%. It is often considered Wolf's best finisher due to it being significantly stronger than the rest of his attacks (except for the very difficult to land sweetspot of his up smash) and being even faster than his other KO moves. It is often considered the best down smash in the game on par with Meta Knight's due to its great speed and reach, as well as its great knockback for a down smash. When compared to Meta Knight's down smash, Wolf's has slightly less reach and slightly more startup lag, but even less ending lag and the first swipe of it is slightly stronger than the back slice of Meta Knight's. It is also interesting to note that both Wolf and Meta Knight's down smashes have the same amount of frames in their durations.
Hitboxes
Timing
| Charge interval | 2-3 |
|---|---|
| Hit 1 | 8-9 |
| Hit 2 | 14-15 |
| Animation length | 34 |
Lag time |
Charge interval |
Hitbox |
Trivia
- Wolf has the strongest down smash of the three Star Fox characters in Brawl, while Fox possesses the strongest up smash, and Falco the strongest forward smash.
