SSB4 Icon.png

Wario (SSB4)/Neutral attack/Hit 1

From SmashWiki, the Super Smash Bros. wiki
Jump to navigationJump to search
The printable version is no longer supported and may have rendering errors. Please update your browser bookmarks and please use the default browser print function instead.
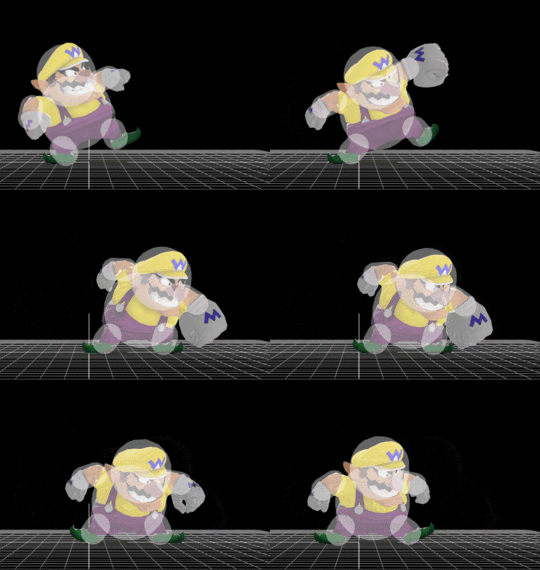
Hitbox visualization showing Wario's first jab.

Overview

Wario performs a downwards punch. It does 4%, but is tied with Palutena for the fourth slowest jab in the game. The deceptively small hitbox of the move and the knockback growth that prevents it from linking it into Jab 2 at even mid percents greatly hinders the attack. At higher percents, it can put the opponent into tumble, and lead into tech chases or combo into forward air, however this is very situational, and down tilt is capable of doing most of this as well. If the button is held, it will transition into jab 2, and if the button is tapped rapidly, it will transition into jab 2 much quicker. At early percents, it can provide niche use in having more reward than down tilt, as down tilt cannot combo into anything at early percents, whilst jab 1 leads into jab 2 correctly at lower percents.

Wario's jab is a relatively poor move overall, and his grab or down tilt make for much better options, due to their utility being far greater than jab.

Update history

Super Smash Bros. 4 1.0.8

  • Buff Jab 1 links into the second hit more reliably.

Hitboxes

ID Part Damage SD Angle BK KS FKV Radius Bone Offset SDIx T% Clang Rebound Type Effect G A Sound Direct
0 0 4% 0 AngleIcon55.png 45 50 0 4.0 0 0.0 5.0 5.0 1.0x 1.0x 0% HitboxTableIcon(Clang).png HitboxTableIcon(Rebound).png TypeIcon(Hand).png EffectIcon(Normal).png HitboxTableIcon(GroundedTrue).png HitboxTableIcon(AerialTrue).png S Punch SpecialsDirect.png
1 0 4% 0 AngleIcon72.png 38 40 0 5.0 0 0.0 5.0 10.0 1.0x 1.0x 0% HitboxTableIcon(Clang).png HitboxTableIcon(Rebound).png TypeIcon(Hand).png EffectIcon(Normal).png HitboxTableIcon(GroundedTrue).png HitboxTableIcon(AerialTrue).png S Punch SpecialsDirect.png

Timing

Hitbox 8-9
Earliest continuable frame 13
Interruptible 30
Animation length 37
FrameIcon(Lag).png FrameIcon(Lag).png FrameIcon(Lag).png FrameIcon(Lag).png FrameIcon(Lag).png FrameIcon(Lag).png FrameIcon(Lag).png FrameIcon(Hitbox).png FrameIcon(Hitbox).png FrameIcon(Lag).png FrameIcon(Lag).png FrameIcon(LagContinuableS).png FrameIcon(LagContinuableE).png FrameIcon(Lag).png FrameIcon(Lag).png FrameIcon(Lag).png FrameIcon(Lag).png FrameIcon(Lag).png FrameIcon(Lag).png FrameIcon(Lag).png FrameIcon(Lag).png FrameIcon(Lag).png FrameIcon(Lag).png FrameIcon(Lag).png FrameIcon(Lag).png FrameIcon(Lag).png FrameIcon(Lag).png FrameIcon(Lag).png FrameIcon(Interruptible).png FrameIcon(Interruptible).png FrameIcon(Interruptible).png FrameIcon(Interruptible).png FrameIcon(Interruptible).png FrameIcon(Interruptible).png FrameIcon(Interruptible).png FrameIcon(Interruptible).png
Legend (1 square = 1 frame)
FrameIcon(Lag).png
Lag time
FrameIcon(Hitbox).png
Hitbox
FrameIcon(Continuable).png
Continuable
FrameIcon(Interruptible).png
Interruptible