Toon Link (SSB4)
| Toon Link in Super Smash Bros. 4 | |
|---|---|
| |
| Universe | The Legend of Zelda |
| Other playable appearance | in Brawl |
| Availability | Starter |
| Final Smash | Triforce Slash |
| Tier | C (17) |
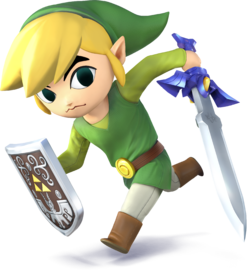
Toon Link (トゥーンリンク, Toon Link) is a playable character in Super Smash Bros. 4. His return to the series was announced on the official website on September 26th, 2013, the same day that The Legend of Zelda: The Wind Waker HD was released in Japan.[1] Sachi Matsumoto reprises her role as Toon Link's voice actor, albeit via voice clips recycled from Super Smash Bros. Brawl. Unlike in Brawl, he is now a starter character, instead of an unlockable character.
Toon Link is currently ranked 17th out of 58 on the tier list, placing him at the top of C tier and in the middle of the high-tier. This is a slight improvement compared to his placement in Brawl, where he was ranked 13th out of 38. Toon Link has multiple projectiles, which grant him a powerful zoning game and enable him to follow up into different moves; his Bomb in particular is his most notable set-up for combos and KOs. Toon Link's Hookshot has also been improved: his grabs now have much less ending lag, his back throw is now among the strongest throws in the game thanks to its significantly increased knockback, and his tether recovery has much more range.
While Toon Link's ground game is potent, his overall damage output has decreased, which has weakened his smash attacks' KO potentials. Additionally, his air game is rather unimpressive despite him being floaty, as his aerial attacks' high ending lag prevents them from partaking in long combos. Lastly, as Toon Link's combo game largely relies on his projectiles, reflection-based moves can both significantly hinder his combo game and turn his projectiles against him.
Toon Link has achieved impressive tournament results, thanks to the efforts of professionals like Zan and Hyuga, the latter of whom placed 9th at GENESIS 3 and 5th at CEO 2016. However, after Hyuga was banned from competing in tournaments following EVO 2016, Toon Link's results plummeted significantly, to the point that he has achieved respectable results only at the regional level. Although Hyuga has since returned to the competitive scene in January 2017 and won both Hail Smash VIII: The Return of the Heroe of the Wind and Smash Pendiente 68, Toon Link's tier placement has become debatable.
Attributes
As in Brawl, the majority of Toon Link's attributes noticeably differ from those of his alternate timeline counterpart. Toon Link is among the lighter middleweights and boasts above average dashing speed and air acceleration, as well as the ability to wall jump. However, his falling and fast falling speeds are both slow, while his gravity is low. While they differ on the majority of their attributes, Toon Link and Link both have above average walking speeds and slow air speeds. Overall, Toon Link's attributes render him as a fairly quick, yet fairly floaty character.
Like Link, Toon Link is a very zoning-oriented character, thanks to his Hero's Bow, Boomerang and Bomb. In addition to forcing approaches, his projectiles grant him a strong camping game, which is further supplemented by his ability to block an opponent's projectiles with his Hero's Shield. Another benefit that Toon Link's projectiles possess is their combo potential. Bomb is effectively the best combo starter out of Toon Link's projectiles, as it can grant him a number of follow-ups at low percents, such as into his neutral aerial and dash attack. Bomb can even combo into his up smash or forward aerial, both of which are among his most viable KOing options, while its combo potential is further supplemented by jump-canceling. Boomerang is also useful for his combo game, as it can combo into his up tilt, grab and various other moves depending on its positioning. While largely reliant on his projectiles, Toon Link's impressive combo game is not exclusively limited to them. His up tilt can combo into itself repeatedly, a short hopped neutral aerial, an up smash or Spin Attack at low percents, and then into aerial attacks at medium to high percents.
After previously possessing arguably the worst grab game in Brawl due to his grabs having very high ending lag and his Hookshot being the shortest ranged tether grab, these faults have been noticeably improved. His grabs are less punishable due to having significantly decreased ending lag and are now capable of grabbing airborne opponents, while Hookshot is much more effective as a tether recovery due to its range being significantly increased when used as such. Additionally, Toon Link's back throw is now one of his most viable KOing options and among the strongest throws of any kind in the game, thanks to its increased knockback values. Toon Link's throws can also supplement his projectiles, as he can use them to launch an opponent into the trajectory of a previously thrown Boomerang or Bomb, such as his up throw into a descending Bomb. Aside from this, his up throw can also combo into a short hopped up aerial or short hopped Spin Attack at low percents.
However, Toon Link has some weaknesses. His overall damage output has been decreased, with his smash attacks being the most prominent examples. While his smash attacks had their knockback values increased, they were not sufficient enough to fully compensate. Thus, Toon Link is effectively forced to use them later rather than earlier when attempting to score a KO. While Toon Link's combo game is potent, it is heavily reliant on his projectiles, up tilt and grab aerial, as the rest of his close-ranged attacks cannot reliably combo most of the time. His throws' aforementioned combo potentials with Boomerang and Bomb are also very situational, since Toon Link needs to have precise timing and positioning in order for said combos to be performed properly. To compound this, his grabs still have considerable ending lag, despite having been improved in that regard.
Toon Link's floatiness is also problematic in various ways. It makes his recovery quite predictable, especially since Spin Attack can be easily gimped due to its overall recovery distance being average, as well as susceptible to strong vertical attacks. However, unlike other floaty characters, he cannot use his floatiness to perform long aerial combos, due to most of his aerials having considerable ending lag. This is most evident with his back aerial, which is much less effective at combos due to its significantly increased ending lag.
In regard to custom moves, Toon Link has a number of notable ones at his disposal. Fire Arrow is an incredibly useful tool for spacing, as it allows him to greatly hinder an opponent's approach. It is also capable of functioning as a jab lock at any percent, or act as a set-up into a number of options and finishers from an arrow on the ground. Floating Boomerang is a very useful combo option to catch opponents off guard if used correctly, making it excellent for combos due to the large amount of hitstun it deals. Flying Spin Attack is an excellent KOing option and is even more reliable at snapping the edge. Finally, Short-Fused Bomb is useful for ranged punishment and starting combos, in addition to functioning as a powerful KOing option.
Ultimately, Toon Link's lowered overall damage output necessitates using his useful projectiles and combo game to continually rack up damage before he can attempt to score KOs with his smash attacks, back throw, clean up aerial and forward aerial. While his potency has been lowered somewhat since Brawl, Toon Link is still an effective character when his strengths are properly utilized. This is evident by Xorn, Ri-ma and 3xA achieving respectable placings at regional tournaments, while Hyuga has won a number of regional tournaments and, like Zan, has achieved above average placings at national tournaments.
Changes from Brawl
Toon Link received both buffs and nerfs in the transition from Brawl to SSB4, but was slightly nerfed overall. He gained some important buffs to his mobility, Boomerang's and Bomb's utility and, most noticeably, his Hookshot. All of his grabs have significantly less ending lag, while Hookshot covers much more distance as a tether recovery. Additionally, his back throw is now one of his most viable KOing options. Bomb also no longer damages Toon Link on contact with an opponent, making it very useful in melee combat when combined with his Boomerang, particularly when followed up with KOing options like his forward aerial.
However, Toon Link has also received some noticeable nerfs, particularly to his power and combo game. His smash attacks' damage outputs have been decreased, which forces Toon Link to deal more damage before attempting to score a KO with them. His back aerial, which was an incredibly useful combo option in Brawl, now has much more ending lag, making it very hard to combo with. While his down aerial can now meteor smash when sweetspotted, it no longer bounces on opponents, making it much harder to use for both spacing and damage racking. Lastly, Spin Attack's overall recovery distance has slightly decreased, which necessitates using his wall jump and tether recovery more often than not.
Aesthetics
 Toon Link appears more cartoonish and his color scheme is noticeably brighter overall, with particular emphasis on his primary colors. In addition, his proportions are matched more closely to his appearance in The Legend of Zelda: The Wind Waker HD.
 Toon Link is more expressive than in Brawl and he has new facial expressions, which are possibly inspired by the facial expressions he displays when taking selfies using the Picto Box in The Wind Waker HD.
 Toon Link is less expressive than in Brawl. He has a single expression that varies slightly, such as scowling during his neutral aerial and wincing when he is screen KO'd. This is presumably to avoid any unnecessary hardware strain.
 Toon Link's hat either
  disobeys gravity and usually stays in a limp position while he is falling, as opposed to the tip swaying above the rest of his body, or
  it will sway based on whether he is jumping or falling, with the tip swaying above his body while he is falling.
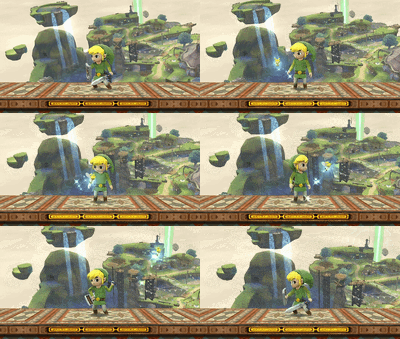
 Side taunt's animation has changed. Toon Link now watches a fairy, which has its design from The Legend of Zelda: The Wind Waker, as it flies around him.[2]
Attributes
 Toon Link is heavier (92 → 93).
 Toon Link walks faster (1.22 → 1.2265).
 Toon Link dashes faster (1.65 → 1.7325).
 Toon Link's gravity is higher (0.07 → 0.079).
 Rolls have decreased ending lag (IASA 37 → 27).
 Sidestep has increased ending lag (IASA 22 → 25).
 Air dodge has decreased ending lag (IASA 49 → 31).
 Rolls, sidestep and air dodge have decreased intangibility frames (frames 4-19 → 4-14 (rolls), frames 2-20 → 2-15 (sidestep), frames 4-29 → 2-25 (air dodge)).
 Toon Link now flinches when a projectile or an explosion hits his Hero's Shield, improving its reliability.
 Toon Link now swings more realistically when hanging off the edge with his Hookshot, to the point that he is able to swing under the stage, rather than halting all momentum right below the edge.
Ground attacks
 Neutral attack's last hit deals 1% less damage (5% → 4%).
 Neutral attack's second hit keeps the opponent in better place for its last hit, improving its reliability. Its last hit's hitbox is also larger (3.5u → 4.2u).
 Forward tilt has received a sourspot at the base of the Master Sword's blade, while its semi-spike sweetspot has been re-positioned to the center of the blade. It also has increased ending lag (FAF 31 → 34).
 Up tilt deals 4% less damage (9% → 5%), significantly hindering its KO potential.
 Up tilt has decreased ending lag (FAF 29 → 26), improving its combo potential and damage racking ability.
 Down tilt deals 2% less damage (9% → 7%).
 Down tilt's chance of tripping has increased (40% → 50%).
 Dash attack's base deals 4% less damage (10% → 6%). It also lost its ability to trip opponents, hindering its combo potential.
 Dash attack has increased knockback (35 (base)/32 (growth) → 70/70) and its angle has been altered (0° → 65°), slightly improving its spacing potential.
 Forward smash's second hit now deals consistent damage (13%/11% → 11%), though its knockback was compensated (32/25/20 (base)/106 (growth) → 32/130).
 Forward smash is faster and has increased vertical range. Its first hit also has altered knockback (0 (base)/110 (growth) → 49/54/56/60 (base)/10 (growth)) and angles (80°/76°/45°/10° → 75°/55°/45°/40°). Altogether, these changes allow its hits to connect together better.
 The window of time that the attack button can be pressed after forward smash's first hit in order to activate the second hit has been significantly tightened. This leads to less accidental activations of its second hit, but makes it so that the delay cannot be used as much in order to land its second hit.
 Up smash deals less damage (15% (clean)/11% (late) → 13%/10%), though its knockback was compensated (30 (base)/93 (growth) → 43/94). It also has increased ending lag (FAF 37 → 43).
 Down smash's second hit deals 4% less damage (11% → 7%), though its knockback was compensated (30 (base)/107 (growth) → 60/130).
 Down smash's first hit has decreased weight-based knockback (80/120/150 → 60/140). This allows it to connect together better with its second hit, but removes its KO potential against aerial opponents.
Aerial attacks
 Neutral aerial deals less damage (10% (both) → 8.5% (front)/7% (back)).
 Neutral aerial has decreased landing lag (15 frames → 12).
 Forward aerial has altered knockback (22 (base)/100 (growth) → 35/98), improving its KO potential.
 Back aerial deals 1% more damage (10% → 11%).
 Back aerial has increased start-up (frame 6 → 7) and ending lag, significantly hindering its combo potential. It also has increased landing lag (10 frames → 17).
 Late up and down aerials deal 1% less damage (12% → 11% (up), 13% → 12% (down)).
 Late down aerial has increased knockback growth (80 → 100), improving its KO potential. Its windbox is also larger, improving its safety.
 Down aerial now pierces opponents, rather than bouncing on them. This makes it easier to hit multiple opponents, but hinders its safety as an edge-guarding option.
 Grab aerial has increased landing lag (2 frames → 8).
 Grab aerial travels three times farther as a tether recovery, significantly improving its recovery potential.
 If Toon Link performs his grab aerial while holding a Bomb, he will now now drop it and use his Hookshot at the same time, rather than just drop the Bomb. This makes Bomb's advanced techniques, such as the ZAC and iZAC, significantly more difficult to perform. However, the ability to use these attacks at the same time opens up possibilities for new advanced techniques.
Throws/other attacks
 All grabs have decreased ending lag (FAF 84 (standing)/ FAF 93 (dash, pivot) → 62/72) and can now grab aerial opponents. Dash and pivot grabs also have decreased start-up lag (frame 16 (both) → 14 (dash)/15 (pivot)).
 Hookshot either
  flies and retracts in a straight line like Link's Hookshot in Super Smash Bros.[3] or
  goes limp once fully extended. However, this is merely aesthetic.
 Forward throw has altered knockback (40 (base)/120 (growth) → 60/110).
 Back throw has increased knockback (30 (base)/110 (growth) → 60/120), granting it KO potential.
 Back throw now consists of one hit instead of two. However, its damage output remains unchanged.
 Back throw is no longer a semi-spike (30° → 130°).
 Up throw has increased knockback (24 (base)/200 (growth) → 25/220), slightly improving its KO and combo potentials.
 Down throw has increased knockback growth (60 → 110), significantly hindering its combo potential.
 Down throw's first hit now always hits Jigglypuff.
 Edge attack deals less damage (8%/10% → 7%). It also has the decreased vertical range of his 100%+ edge attack from Brawl.
 Edge attack is much faster.
Special moves
 Hero's Bow charges faster. Charged Hero's Bow also travels farther, improving its zoning potential.
 Quickdrawing has been removed, significantly hindering Hero's Bow's utility.
 Boomerang travels farther, improving its zoning potential.
 Uncharged Spin Attack's last hit has altered knockback (25 (base)/160 (growth) → 70/141), slightly improving its KO potential.
 Aerial Spin Attack's hits connect together better and its last hit has increased knockback back growth (163 → 170), improving its KO potential.
 Uncharged and aerial Spin Attack have decreased start-up lag (frame 11 (both) → 9 (uncharged)/8 (aerial)).
 Aerial Spin Attack covers slightly less vertical and horizontal distance, hindering its recovery potential.
 If a Bomb hits the opponent or their shield, the explosion will not affect Toon Link. However, if the opponent grabs a Bomb and throws it back at Toon Link or another opponent, the explosion will not harm them either.
 Bomb's explosion is absorbable.
 Bomb is slightly larger. However, this is merely aesthetic.
 Triforce Slash deals 18% less damage (78% → 60%).
Update history
Toon Link has been slightly buffed via game updates. Update 1.0.6 saw his Hero's Shield become capable of blocking the lasers from Fox and Falco's Blasters, resulting in Toon Link now being capable of properly blocking any characters' projectiles so long as he stands still or walks. Update 1.1.0 saw his grab game improved even further, as his pivot and dash grabs' start-up lag were decreased.
Unlike his alternate timeline counterpart, however, Toon Link is neither helped or hindered by the changes to the shield mechanics brought about by updates 1.1.0 and 1.1.1. Lastly, update 1.1.4 improved his forward smash by enabling its first hit to connect better with its second hit.
 The period Toon Link can be at his maximum fall speed before using hard landing lag has been shortened (4 frames → 3).
 Neutral aerial has less landing lag (15 frames → 12).
 Toon Link can no longer throw a bomb with down special to cancel landing lag (outside of special moves which already could not be canceled).
 This hinders the safety of his aerials and air dodge, hinders the combo potential of his aerials and it prevents Toon Link from canceling hitstun if he lands while in non-tumble hitstun.
 Toon Link can no longer throw a bomb with down special to cancel tumble hitstun.
 This not only makes Toon Link considerably more susceptible to combos, since he can no longer throw a bomb to cancel the hitstun and act sooner but this also considerably hinders his endurance, since he can no longer throw a bomb and then utilise momentum canceling to survive longer.
 Hero's Shield now blocks Blasters, improving its reliability.
 Down smash's first hit's weight-based knockback decreased: 80/120/150 → 60/140. This makes it connect together better with its second hit, but removes its KO potential against aerial opponents.
 Neutral attack's second hit connects together better with its last hit, and its last hit's hitbox size increased: 3.5u → 4.2u.
 Dash and pivot grabs' start-up lag decreased: frame 16 (both) → 14 (dash)/15 (pivot).
 Sliding Spin Attack improved. It deals 1% more damage: 10% → 11%, it received five additional hitboxes, and its grounded version's knockback growth increased.
 Back aerial landing lag: 22 → 17.
 Forward smash connects better with the second hit with high amounts of rage, damage or how long it is charged.
 Spin Attack and Flying Spin Attack have 2 less frames of startup.
 Trip invincibility and all trip followups except floor attack have one less frame of invincibility.
Technical changelist 1.1.4
| Change | Old value | New value |
|---|---|---|
| Back aerial landing lag | 22 | 17 |
| Spin Attack/Flying Spin Attack start up (uncharged/fully charged) | 11/70 | 9/68 |
| Spin Attack duration (uncharged/fully charged) | 82/141 | 80/139 |
| Trip followup on standing/forward/back | 17/10/10 | 16/9/9 |
| Trip invincibility on hard/soft | 6/6 | 5/5 |
Moveset
- Toon Link can wall jump.
| Name | Damage | Description | ||
|---|---|---|---|---|
| Neutral attack | 3% | An inward slash, followed by an outward slash, followed by a thrust. The first two hits can be jab canceled, with allows it to be followed up with tilt attacks, a grab or Spin Attack. It appears to be loosely based on the final blow that the Link from The Legend of Zelda: Ocarina of Time dealt to Ganon. | ||
| 2% | ||||
| 4% | ||||
| Forward tilt | 9% | An overhead arcing slice. Its sweetspot is located at the center of the Master Sword's blade and deals high knockback growth. While it KOs much later than Link's due to its lower damage output and much lower base knockback, its significantly faster speed and much higher knockback growth make it better for spacing compared to his. | ||
| Up tilt | 5% | An overhead arcing slash. It can hit on either side of Toon Link and is a very reliable combo starter at a variety of percents due to its fast speed, very low base knockback and very high knockback growth. It can combo into itself, a short hopped neutral aerial, an up smash or Spin Attack at low percents, and then into aerial attacks or a short hopped Spin Attack at medium to high percents, with its combo into up aerial being a very reliable KO combo. | ||
| Down tilt | 7% | A kneeling inward slice. It can reliably trip opponents at low percents, making it an ideal set-up option. It can also be used for edge-guarding due to the Master Sword's blade being capable of reaching below edges. | ||
| Dash attack | 6% (base), 8% (tip) | An outward slash. Its tip deals slightly more damage than its base, but it has considerable ending lag. | ||
| Forward smash | 10% | A lunging downward slash. If the attack button is pressed again, he performs a lunging outward slash, making it a natural combo. Unlike Link's forward smash, the first hit of Toon Link's version lacks KO potential due to having very low knockback growth, which makes it better at following into the second hit. The second hit deals less base knockback than the first, but deals slightly more damage and drastically higher knockback growth, which allows it to KO middleweights at 105% while near the edge. | ||
| 11% | ||||
| Up smash | 13% (early, clean), 10% (late) | An overhead arcing slash. Due to having the lowest amount of ending lag out of his smash attacks Although it late hitbox deals less damage than its clean and late hitboxes, they all have the same knockback values. Its early and clean hitboxes KO middleweights at 135%, while its late hitbox KOs middleweights at 170%. | ||
| Down smash | 6% (hit 1), 7% (hit 2) | Kneels and performs an inward slash in the direction he is facing, followed by an outward slash behind himself. Its first hit combos very well into its second hit, though it is not a natural combo, while its second hit launches the opponent behind Toon Link. Its second hit deals slightly more damage and very high knockback growth, which allows it to KO middleweights at 125% while near the edge. | ||
| Neutral aerial | 8.5% (front), 7% (back) | An inward slash in front of himself, followed by an outward slash behind himself. Due to having the lowest amount of start-up and landing lag out of his aerials, as well as the ability to be auto-canceled from a short hop, it is a viable approach option and follow-up option. However, it has moderate ending lag. | ||
| Forward aerial | 13% | A spinning outward slash. Its respectable damage output and high knockback growth allow it to KO middleweights at 123% while near the edge, making it one of Toon Link's most viable KOing options. It also has combo potential, either as a follow-up from a Bomb, or as a set-up into either Spin Attack at low percents or into a grab aerial at slightly higher percents. However, it has moderate start-up and ending lag. | ||
| Back aerial | 11% | Twists around to perform an upward slice behind himself. It deals respectable damage and very high knockback growth, which allow it to KO middleweights at 127% while near the upper blast line. However, its extremely low base knockback and launching angle make it best used while near the upper blast line when attempting to score a KO. Otherwise, it KOs middleweights at 151% while near the edge. It is also a reliable surprise attack due to being Toon Link's second fastest aerial and, like neutral aerial, having the ability to auto-cancel from a short hop. However, it also has moderate ending lag. | ||
| Up aerial | Up Thrust | 14% (clean), 11% (late) | An upward thrust used by the Link from Zelda II: The Adventure of Link. Its clean hitbox's respectable damage output and high knockback growth allow it to KO at 108% while near the upper blast line. Although its late hitbox deals less damage, it has the same knockback values as its clean hit and is a lingering hitbox, which make it a great juggling option. While it has the second lowest amount of start-up out of his aerials, it has very high ending lag. | |
| Down aerial | Down Thrust | 16% (clean), 12% (late), 5% (landing) | A downward thrust used by the Links in Zelda II: The Adventure of Link, The Legend of Zelda: Four Swords, The Legend of Zelda: Four Swords Adventures and The Legend of Zelda: The Minish Cap. Unlike Link's version, Toon Link's version is a stall-then-fall and unlike in Brawl, it now pierces opponents. As such, it can be a useful edge-guarding option when performed on edges, due to its meteor smashing hitbox. However, it has very high ending and landing lag, since Toon Link has to remove the Master Sword from being plunged into the ground upon landing. In the air, Toon Link descends for a long time if there is no platform or solid ground to land on, but it does eventually conclude. As such, it is potentially possible for him to recover, especially when using a Bomb, but is extremely risky regardless. | |
| Grab aerial | Hookshot | 4% | Fires his Hookshot forward. The Hookshot, has great range, very minimal landing lag and deals knockback. All of these traits make it a good spacing option and capable of either starting combos or functioning as a tether recovery. However, while Toon Link can cancel his air dodge at any point via his tether, it will not cancel the landing lag dealt from the dodge. Additionally, it has the second highest amount of ending lag out of his aerials. | |
| Grab | Hookshot | — | Fires his Hookshot forward. The Hookshot grants each of his grabs very long ranges and allows him to grab aerial opponents. However, each of his grabs have moderate start-up and very high ending lag due to being tether grabs. | |
| Pummel | 2% | Hits the opponent with the Master Sword's hilt. A fairly fast pummel. | ||
| Forward throw | 3% (hit 1), 4% (hit 2) | A shoulder tackle. It deals high knockback growth and launches the opponent at 45°, which makes it suitable for launching the opponent off-stage for an edge-guard attempt, or into the trajectory of a returning Boomerang or a descending Bomb. It can also combo into a dash attack at low percents, but this combo is only effective if the opponent misses their tech and does not DI away. | ||
| Back throw | 7% | The tomoe nage, a Judo throw. Its very high knockback growth allows it to KO middleweights at 131% while near the edge, making it one of Toon Link's most viable KOing options. | ||
| Up throw | 5% (hit 1), 2% (hit 2) | Slightly lifts the opponent up and performs an upward slash. It has extremely low base knockback, extremely high knockback growth and launches at 92°, which allow it to combo into a short hopped up aerial and a short hopped Spin Attack at low percents. It can also combo into an up aerial at medium percents, although this combo can be avoided with DI, or be used to launch an opponent into the trajectory of a descending Bomb. Despite having the highest knockback growth out of his throws, it does not KO middleweights until 194%. | ||
| Down throw | 3% (hit 1), 4% (hit 2) | Pins the opponent to the ground and then performs an elbow drop. It deals high knockback growth and launches the opponent at 110°, which allows it to be followed with a back aerial. However, this combo is only reliable at low percents and on stages with platforms, as it requires the opponent to land on a platform in order for Toon Link to safely follow up with a back aerial. | ||
| Floor attack (front) | 7% | Slices behind himself and then in front of himself while getting up. | ||
| Floor attack (back) | 7% | Slices in front of himself and then behind himself while getting up. | ||
| Floor attack (trip) | 5% | Slices in front of himself and then behind himself while getting up. | ||
| Edge attack | 7% | Performs an outward slice while climbing up. | ||
| Neutral special | Default | Hero's Bow | 4% (uncharged), 12% (fully charged) | Equips his Hero's Bow and fires an arrow forward. If the button is held down, Toon Link charges the arrow by drawing farther back on the Hero's Bow, increasing the damage output and range. Unlike Link's Hero's Bow, Toon Link's version fires arrows that are much floatier; while this makes them very useful even while uncharged, this makes them noticeably slower. |
| Custom 1 | Fire Bow | 2% (uncharged), 6% (charged), 6% (blaze) | Fires a Fire Arrow. Deals less damage and virtually no knockback, although the Fire Arrow charges, flies and falls very quickly. Once it hits the ground, it creates a smokey blaze that lingers at the point where it landed, with the blaze dealing more damage and knockback than the Fire Arrow itself. It is comparable to Young Link's Fire Bow in Melee. | |
| Custom 2 | Piercing Bow | 1% (uncharged), 6% (charged) | Fires an arrow that flies perfectly straight and pierces opponents. However, it has less range and deals noticeably less damage. | |
| Side special | Default | Boomerang | 8% (near), 5% (middle), 3% (return) | Throws a Boomerang that flies forward and returns to him. Like Link's Gale Boomerang, if Toon Link fails to catch his Boomerang, he must wait very briefly before he can use it again. Unlike Link's Gale Boomerang, however, it damages opponents it comes into contact with upon returning, rather than pushing them toward Toon Link. It can be thrown at a variety of angles with the analog/circle pad, and three main directions with the directional pad. At close range, it can be used as a set-up into another attack. |
| Custom 1 | Floating Boomerang | 4% (all points) | The Boomerang flies much more slowly and can be angled only very narrowly. However, it can angle much more steeply than normal while returning to Toon Link, and can even loop around him. While returning, the Boomerang remains in its vertical position, meaning it has a larger hitbox when returning, making it more likely to hit an opponent. If it hits an opponent on the way back, it disappears, but can then be re-thrown immediately afterward. | |
| Custom 2 | High-Speed Boomerang | 3% (near), 2% (middle), 1% (return) | The Boomerang flies and returns quickly. However, it takes slightly longer to throw and maintains its thrown angle throughout its flight, even if Toon Link moves. The Boomerang is launched at a more horizontal position and remains this way, giving it a slightly smaller hitbox. At the point of the Boomerang turning around, it is capable of hitting multiple times. | |
| Up special | Default | Spin Attack | 1% (uncharged hits 1-9), 3% (uncharged hit 10), 1%-2% (charged hits 1-9), 4%-5% (charged hit 10), 4% (aerial hit 1), 2% (aerial hits 2-4), 4% (aerial hit 5) | A spinning series of slashes. Unlike Link's Spin Attack, Toon Link's version traps opponents and hits multiple times before launching them. Useful for damage racking and countering either rolls or get-up options. The grounded version can be charged to deal more damage, while the aerial version covers a respectable distance vertically and a minimal distance horizontally. |
| Custom 1 | Sliding Spin Attack | 10% (uncharged), 16% (charged), 2% (aerial hit 1), 1% (aerial hits 2-4), 5% (aerial hit 5) | Charges forward while spinning around, hitting opponents once with decent knockback. The grounded version takes slightly longer to start, even when minimally charged, and moves him on the ground while using it, albeit only forward. The aerial version hits multiple times and makes Toon Link cover much more horizontal distance, but at the cost of some vertical distance. Based on the Hurricane Spin, the most powerful version of the Spin Attack in The Legend of Zelda: The Wind Waker. | |
| Custom 2 | Flying Spin Attack | 1% (uncharged hits 1-6), 3% (uncharged hit 7), 4% (uncharged hit 8), 1%-2% (charged hits 1-6), 4% (charged hit 7), 6% (charged hit 8) | The Spin Attack concludes with an ascending upward slash, which has KO potential. The aerial version grants super armor while ascending and the first few hits make him ascend slowly, with the last hit quickly boosting him up. However, its overall vertical recovery is less than the default version. | |
| Down special | Default | Bomb | 4% (grounded and aerial throws/smash throws at body), 6%-7% (grounded throw/smash throw at feet), 8%-9% (aerial throw/smash throw at feet) | Pulls out a Bomb. The Bomb's fuse has a set time limit before exploding, but it will explode immediately upon contact after being thrown. Unlike Link's Bomb, Toon Link's version deals less damage itself, but its explosion is much larger and deals more damage than Link's when smash thrown at the opponent's feet. However, Bombs will bounce off of shields, making them able to be picked up by anyone. As a result, this makes the user unaffected by the Bomb's explosion. Arguably Toon Link's best combo option due to its knockback, Bombs are unaffected by rage and staleness, which further compliments their combo potential. |
| Custom 1 | Time Bomb | 1%-2% (grounded throw/smash throw at body, feet), 2%-4% (aerial throw/smash throw at body, feet) | Bombs are smaller, have shorter fuses, and cover much less distance when thrown or even smash thrown. They also cannot explode when directly thrown at opponents, as they will bounce off of them instead. While the damage output and explosion are both minuscule, it deals incredibly high knockback even at low percents, giving it KO potential. Can KO above 100%. | |
| Custom 2 | Short-Fused Bomb | 9%-10% (grounded throw/smash throw at body), 11%-12% (grounded throw/smash throw at feet), 9%-12% (aerial throw at body), 14% (aerial smash throw at feet) | Bombs are larger and have much shorter fuses. However, they and their explosions deal noticeably more damage, while their explosions are also very large and deal considerable knockback, giving it KO potential like Time Bomb. Due to its very short fuse, it has much better Bomb recovery potential than Bomb or Time Bomb. | |
| Final Smash | Triforce Slash | 1% (hit 1), 3% (hits 2-15), 2% (hit 16), 15% (hit 17) | Emits a beam of light from the Triforce of Courage symbol on the back of his hand to stun an opponent in front of him. If the beam comes in contact with an opponent, Toon Link dashes forward and slashes them repeatedly while they are trapped in a Triforce-shaped energy field, with the last hit being a powerful slash that launches the trapped opponent and KOs middleweights at 77% while near the edge. It can hit multiple opponents, but all non-trapped opponents are launched out the energy field after the penultimate hit. Unlike Link's Triforce Slash, Toon Link's version has much shorter range. However, Toon Link performs a slight jump after activating it, which grants him some vertical distance and can help him recover should he be too far off-stage. | |
On-screen appearance
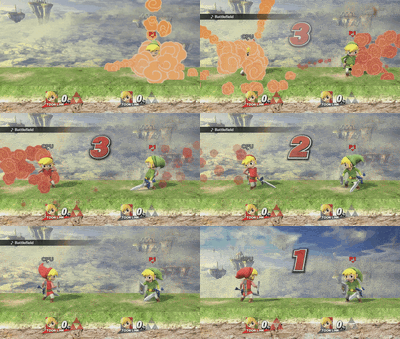
- An explosion appears on-screen and as the smoke fades, Toon Link appears and unsheathes the Master Sword and equips his Hero's Shield.
|
|---|
Taunts
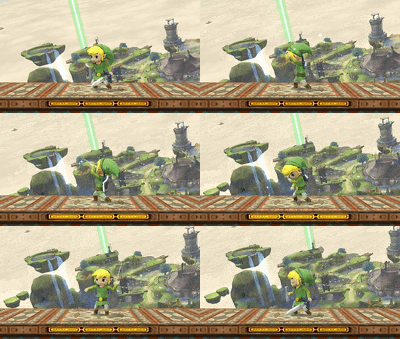
- Up taunt: Sheathes the Master Sword and places the Hero's Shield on his back as he conducts with the Wind Waker, then strikes a pose and smiles while facing towards/away from the screen.
- Side taunt: Sheathes the Master Sword and places the Hero's Shield on his back as he watches a fairy fly around him. Like Toon Link, the fairy's design is from The Legend of Zelda: The Wind Waker.
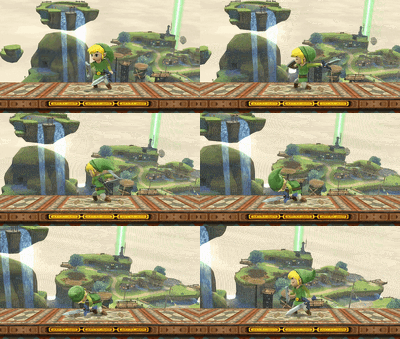
- Down taunt: Wildly swings the Master Sword in front of himself while yelling in a panicked tone, then runs out of breath while sporting a comically tired expression and while facing towards/away from the screen.
| Up taunt | Side taunt | Down taunt |
|---|---|---|
|
|
|
Idle poses
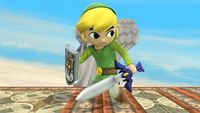
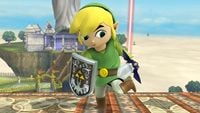
- Taps the edge of his boot on the ground.
- Looks around himself.
 |
|
|---|
Crowd cheer
| English | Japanese | |
|---|---|---|
| Cheer | ||
| Description | Link! Link! Link! | Rin-ku! |
| Pitch | Group chant | Group chant |
Victory poses
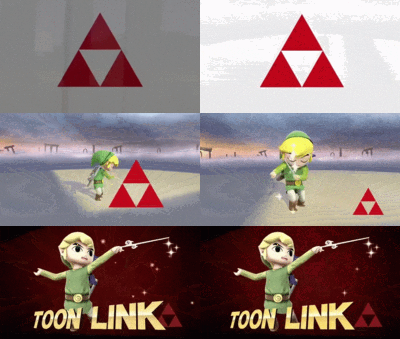
- Conducts with the Wind Waker, striking a pose while smiling at the end.
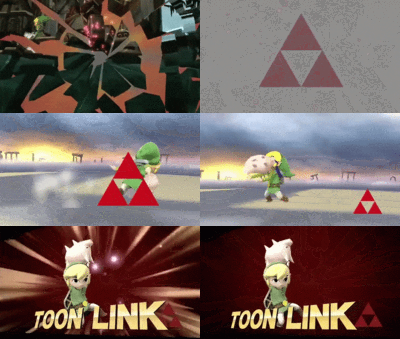
- Chases a pig, catches it and raises it in the air triumphantly.
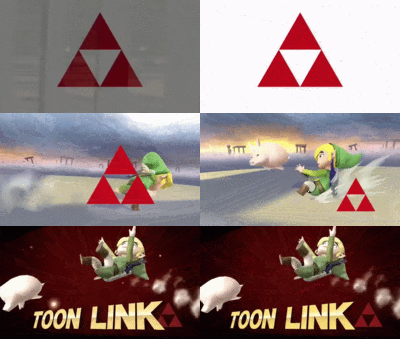
- Chases a pig, but fails to catch it, which results in him comically tripping and landing on his bottom, then rubbing it in discomfort.
 |
 |
|
|---|
In competitive play
Official Custom Moveset Project
| Character | Custom sets available | ||||
|---|---|---|---|---|---|
| 2111 | 2121 | 2131 | 2113 | 2133 | |
| 2112 | 2211 | 2213 | 3131 | 1113 | |
Notable players
Active
3xA - Ranked 6th in the NorCal Smash 4 Power Rankings. Placed 7th at 2GGT: FOW Saga and 33rd at EVO 2016.
Anaky - Ranked 3rd on the United Kingdom Smash 4 Power Rankings. Placed 13th at B.E.A.S.T 5 and 25th at B.E.A.S.T 6.
Biddy - Placed 17th at Apex 2016 and Midwest Mayhem 6: SoCal Invasion.
BlueLink - Ranked 1st on the Italian Smash 4 Power Rankings. He has a win over MVD at Jupiter League IX.
Dicks - Placed 9th at Dismantle 2 and 25th at The Big House 5.
Hayato. - Formerly ranked 10th on the Umebura Smash 4 Power Rankings and 20th on the eSports Runner Japanese Smash 4 Power Rankings. Placed 2nd at Umebura 21 and 5th at Sumabato for THE BIG HOUSE.
Hyuga - The best Toon Link player in the world. Ranked 2nd on the Mexican Smash 4 Power Rankings. Placed 3rd at Smash Factor 4 and Low Tier City 4, 4th at 2GGT: Mexico Saga, 5th at CEO 2016, 9th at GENESIS 3 and Pound 2016, and 25th at EVO 2016.
Manzoku - Placed 4th at Umebura 11.
MJG - Placed 4th at PG Key to GENESIS 4 and 9th at Midwest Mayhem 6: SoCal Invasion.
Ri-ma - Placed 7th at Sumabato 12 and 13th at The Big House 6. He has a win over Larry Lurr.
S@nt
Sigma - Ranked 15th on the JAPAN Power Rankings. Placed 2nd at Sumabato 7 and Sumabato 10 and 9th at Umebura S.A.T.
Xorn - Ranked 10th on the Massachusetts Smash 4 Power Rankings. Placed 9th at Shine 2016.
yeti - Ranked 6th on the Minnesota Power Rankings. Placed 7th at Midwest Mayhem 5 and 5th at Kings of the North V.
Zan - The best Toon Link player in the United States. Placed 4th at Key to The PG House, 5th at SoCal Regionals 2016, 7th at 2GGT: KTAR Saga, 9th at 2GGT: FOW Saga and 2GG: Pay It Forward, and 33rd at GENESIS 3.
Tier placement and history
Upon SSB4's release, players had high expectations of Toon Link, due to his success in Brawl. While players realized he his power has been toned down since Brawl, the adoption of a new playstyle that is more reliant on his Bomb allowed him to attain roughly the same potency that he did in Brawl. Despite not achieving many tournament results, professionals like Hyuga, Zan, Anaky, and Sigma have achieved very favorable tournament results in their respective regions, with Hyuga in particular placing 3rd at the national tournament Smash Factor 4. Opinions of Toon Link became even more positive when Hyuga announced his participation in GENESIS 3, where he placed 9th. As a result of his early success, Toon Link was ranked 22nd on the first tier list, placing him in the D tier.
Expectations of Toon Link remained high thanks to Hyuga placing 9th at Pound 2016, 4th at 2GGT: Mexico Saga and 5th at CEO 2016, while Zan also achieved respectable placings at 2GGaming tournaments. As such, Toon Link is currently ranked 17th, placing him at the top of the C tier and in the middle of the high-tier. After Hyuga became inactive after EVO 2016, Toon Link's representation and success at the national level noticeably decreased. Although 3xA, Ri-ma and Xorn managed to achieve respectable placings at the regional level throughout 2016, with Ri-ma also managing to place 13th at the national tournament The Big House 6, Toon Link's tier placement is considered to be somewhat too high. While Hyuga made his return to the competitive scene in January 2017 by winning Hail Smash VIII: The Return of the Heroe of the Wind and then Smash Pendiente 68 a few days later, Toon Link's tier placement is still debatable.
Trophies
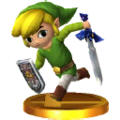
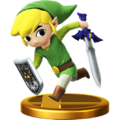
- Toon Link
This cartoonish version of young Link is how he appears in The Legend of Zelda: The Wind Waker and a few other titles. While he shares some moves with his older counterpart, he's a very different fighter. Take advantage of his size and speed to whirl past enemies and bombard them with long-range attacks.
- Toon Link (Alt.)
Toon Link's bombs don't do much damage, but their large blast radius makes it easy to hit foes with them. You can also throw them in any directions, making them a great diversionary tactic. His Spin Attack gives him more air-time than Link. His side smash may seem weak, but press the button again for a second hit that'll really send 'em flying!
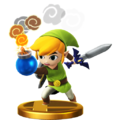
- Triforce Slash (Toon Link)
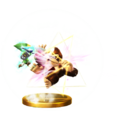
For Toon Link's Final Smash, a ray of light emanates from his hand, and whomever the light touches gets trapped in the Triforce. While they're defenseless, Toon Link strikes at foes repeatedly and then launches them a great distance. Just be sure to time the Final Smash well-if the ray of light doesn't touch anyone, nothing happens. At all.
For Toon Link's Final Smash, a ray of light emanates from his hand, and whoever the light touches gets trapped in the Triforce. While they're defenceless, Toon Link strikes them repeatedly, then launches them a great distance. Just be sure to time the Final Smash well - if the ray of light doesn't touch anyone, nothing happens. At all.
In Event Matches
Solo Events
- All-Star Battle: Secret: Toon Link is one of the opponents fought in this event. All of the opponents have been unlockable characters in previous Super Smash Bros. games.
- Four Swords Adventures: Toon Link must defeat three other Toon Links in a Stamina Battle.
- It's Past Your Bedtime!: As Jigglypuff, the player must use Sing to put Toon Link, Bowser Jr. and Ness to sleep at the same time.
- The Ultimate Swordsman: As Ike, the player must defeat Toon Link, Link, Marth, Meta Knight, male Robin, female Robin and Shulk. All of the opponents wield swords.
Co-op Events
- The Ultimate Battle: Two players select a character and must defeat the entire roster.
- Scheming Sorcerer: Toon Link and Yoshi must defeat a male Robin, a female Robin, a metal male Robin and a giant metal female Robin.
Alternate costumes

| |||||||

|

|

|

|

|

|

|

|
Gallery
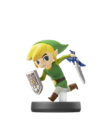
Toon Link's amiibo.
Using Spin Attack on Luigi and Kirby.
Using his forward tilt on Pit.
Toon Link alongside Peach.
Toon Link laying prone on Wily Castle.
Using Hero's Bow.
His appearance in Super Smash Bros. for Nintendo 3DS, posing with Link.
Toon Link reeling.
Donkey Kong holding Toon Link's Bomb.
A pre-release picture of the Link from The Legend of Zelda: Spirit Tracks appearing as a background character on Spirit Train.
Using his down aerial alongside Yoshi's Yoshi Bomb and Bowser's Bowser Bomb.
Fighting Mario, Kirby and Samus.
Toon Link being damaged by Zelda's Din's Fire.
Using the Gust Bellows on Samus.
Trivia
- There are technically two Toon Links in SSB4. Aside from the playable one that originated from The Legend of Zelda: The Wind Waker and reappeared in The Legend of Zelda: Phantom Hourglass, there is a non-playable one that originated from The Legend of Zelda: Spirit Tracks who conducts the Spirit Train on the stage of the same name.
- Despite having no apparent relationship with the Link from The Wind Waker and Phantom Hourglass, and existing in a different timeline than the Link from The Legend of Zelda: Twilight Princess, the Link from Spirit Tracks will not appear as a conductor if either of the playable Links fight on Spirit Train. Instead, he will be replaced by his mentor, Alfonzo.
- However, prior to the final release, the Link from Spirit Tracks would appear as a conductor if either of the playable Links fought on Spirit Train.
- Despite having no apparent relationship with the Link from The Wind Waker and Phantom Hourglass, and existing in a different timeline than the Link from The Legend of Zelda: Twilight Princess, the Link from Spirit Tracks will not appear as a conductor if either of the playable Links fight on Spirit Train. Instead, he will be replaced by his mentor, Alfonzo.
- Despite being able to crawl in their respective games, Toon Link, Mario, and Pit are unable to crawl in SSB4.
- As in Brawl, Toon Link's idle animations match Young Link's in Melee.
- Toon Link also retains a certain animation quirk from Brawl. If he eats Superspicy Curry and does not move or attack after the effect wears off, he will not wield the Master Sword and Hero's Shield until he finally moves or attacks.
- Toon Link, Young Link and Roy are the only swordsmen in the Super Smash Bros. series whose swords consistently produce a punch/kick sound effect instead of a slashing sound effect for the majority of their attacks.
- Toon Link's hair is not affected by gravity or wind.
- Toon Link's default fighter trophy in the NTSC version of SSB4 has a slight error. Its first sentence reads "This cartoonish version of Link is how he appeared in The Legend of Zelda: Wind Waker and a few other titles.", which is incorrect, as the game's full title is The Legend of Zelda: The Wind Waker. This is fixed in the PAL region's version.
References
| Fighters in Super Smash Bros. 4 | |
|---|---|
| Veterans | Bowser · Captain Falcon · Charizard · Diddy Kong · Donkey Kong · Dr. Mario · Falco · Fox · Ganondorf · Ike · Jigglypuff · King Dedede · Kirby · Link · Lucario · Lucas · Luigi · Mario · Marth · Meta Knight · Mewtwo · Mr. Game & Watch · Ness · Olimar · Peach · Pikachu · Pit · R.O.B. · Roy · Samus · Sheik · Sonic · Toon Link · Wario · Yoshi · Zelda · Zero Suit Samus |
| Newcomers | Bayonetta · Bowser Jr. · Cloud · Corrin · Dark Pit · Duck Hunt · Greninja · Little Mac · Lucina · Mega Man · Mii Fighter (Mii Brawler · Mii Gunner · Mii Swordfighter) · Pac-Man · Palutena · Robin · Rosalina & Luma · Ryu · Shulk · Villager · Wii Fit Trainer |
