SSB4 Icon.png

Samus (SSB4)/Forward smash

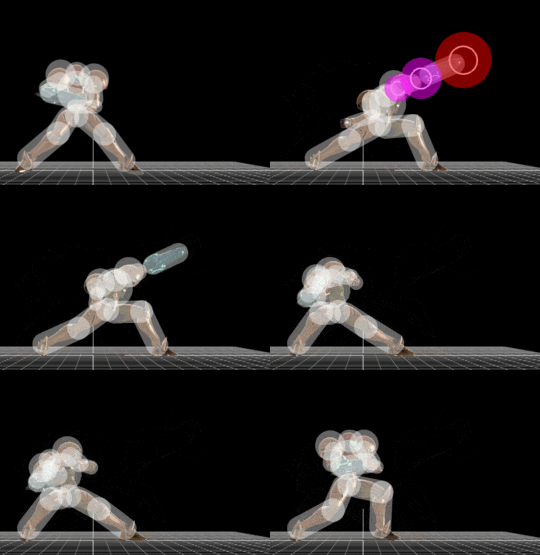
Samus forward smash hitbox visualization
SamusFSmashUp.gif
SamusFSmash.gif
SamusFSmashDown.gif
Competitive.png This article or section may require competitive expertise.
You can discuss this issue on the talk page or edit this page to improve it.
Data.png This article or section may require additional technical data.
You can discuss this issue on the talk page or edit this page to improve it.

HitboxesEdit

Angled upEdit

ID Part Damage SD Angle BK KS FKV Radius Bone Offset SDIx T% Clang Rebound Type Effect G A Sound Direct
0 0 13% 0   16 112 0 3.3 22 0.0 0.0 0.0 1.0x 1.0x 0%               Punch  
1 0 13% 0   16 112 0 2.2 22 -4.0 0.0 0.0 1.0x 1.0x 0%               Punch  
2 0 15% 0   40 100 0 4.5 22 7.5 0.0 0.0 1.0x 1.0x 0%               Burn  

Angled forwardEdit

ID Part Damage SD Angle BK KS FKV Radius Bone Offset SDIx T% Clang Rebound Type Effect G A Sound Direct
0 0 12% 0   16 112 0 3.3 22 0.0 0.0 0.0 1.0x 1.0x 0%               Punch  
1 0 12% 0   16 112 0 2.2 22 -4.0 0.0 0.0 1.0x 1.0x 0%               Punch  
2 0 14% 0   40 100 0 4.5 22 7.5 0.0 0.0 1.0x 1.0x 0%               Burn  

Angled downEdit

ID Part Damage SD Angle BK KS FKV Radius Bone Offset SDIx T% Clang Rebound Type Effect G A Sound Direct
0 0 11% 0   16 112 0 3.3 22 0.0 0.0 0.0 1.0x 1.0x 0%               Punch  
1 0 11% 0   16 112 0 2.2 22 -4.0 0.0 0.0 1.0x 1.0x 0%               Punch  
2 0 13.5% 0   40 100 0 4.5 22 7.5 0.0 0.0 1.0x 1.0x 0%               Burn  

TimingEdit

Charges between 3-4
Hitboxes 10-11
Interruptible 49
Animation length 54
                                                                                                                               
Legend (1 square = 1 frame)
 
Lag time
  
Charge interval
 
Hitbox
 
Interruptible