Ryu (SSBU)
| Ryu in Super Smash Bros. Ultimate | |
|---|---|
 
| |
| Universe | Street Fighter |
| Other playable appearance | in SSB4 |
| Availability | Unlockable |
| Final Smash | Shin Shoryuken / Shinku Hadoken |
| “ | Ryu is a special character—you can use directional command inputs to trigger his special moves. Executing moves like his Hadoken and Shoryuken using the command inputs from the original game will raise their power. You can even use a Shakunetsu Hadoken by inputting ←↙↓↘→ then tapping the attack button while facing right! | ” |
| —Super Smash Blog, Super Smash Bros. Ultimate Official Site | ||
Ryu (リュウ, Ryū) is a playable character in Super Smash Bros. Ultimate. He was officially confirmed on June 12th, 2018. Ryu is classified as fighter #60.
Ryu is once again voiced by Kyle Hebert in English and Hiroki Takahashi in Japanese, with their portrayals from Super Smash Bros. 4 being repurposed for the English and Japanese releases of Ultimate.
How to unlock
Complete one of the following:
- Play VS. matches, with Ryu being the 13th character to be unlocked.
- Clear Classic Mode with Yoshi or anyone in his unlock tree, being the 3rd character unlocked after Marth.
- Have Ryu join the player's party in World of Light.
With the exception of the third method, Ryu must then be defeated on Battlefield.
Attributes
As the "all-rounder" of his home series, Ryu's overall attributes are mostly average. As a medium-heavyweight of average size and mobility, Ryu has decent frame data and damage output, as well as a dependable ground game due to his decent traction and average dashing speed. However, other attributes are polarized in an attempt to replicate the physics of Street Fighter; Ryu's walking speed is extremely slow, and while his air speed is average, this is counteracted by his moderately high falling speed and short jumps. Additionally, he has very low air acceleration, and his air friction is uniquely locked at 0 while jumping, causing his jumps to follow a fixed "arc" unless the player steers them manually. Finally, Ryu's fast fall increases his falling speed by 40% instead of the usual 60%. Overall, this grants Ryu effective burst movement through dashing and jumping, but forces him to commit when approaching through the air and makes it difficult to land or move short distances.
Despite his average attributes, Ryu is one of the most unique fighters in Ultimate, as he has access to many variations of both his standard and special attacks (a trait only shared with his Echo Fighter, Ken). His jab and tilts can either be held or tapped; tapped attacks are faster and usually combo well into themselves, while held attacks have greater KO potential and can serve as combo finishers. This also applies to his special moves (other than Focus Attack), which gain different effects like increased power or altered hitboxes when the button is held; they also see an increase in power when used with the original Street Fighter inputs. This effectively gives Ryu two movesets, one for starting combos and racking up damage, and the other for scoring KO's. This versatility gives him access to potent true combos and mix-ups, leading to a strong punish game overall.
Ryu's standard attacks are also unique in that most of them (even his tapped tilts) have a freeze frame multiplier of at least 1.8x, making them surprisingly safe on shield given their poor range and average damage output. This grants Ryu an effective means of applying shield pressure and make some of his combo starters difficult to escape. His Collarbone Breaker (held forward tilt) deals immense shield damage, further complementing his ability to pressure and deplete shields.
Ryu's grounded moveset boasts considerable utility. His tapped jab and down tilt both hit on frame 3, making the former useful for relieving pressure, and the latter excellent for extending combos due to its launch trajectory being useful for followups, such as grabs. Tapped up tilt's low knockback, high speed and active frames make it effective for combos, either into itself, Shoryuken, or even down aerial at high percents near the ledge. Held down tilt can be canceled on hit into a special move, making it effective for shield pressure and damage-racking even at high percents. Down smash is quite powerful for its speed, and up smash lowers Ryu's hurtbox while charging. Both tapped forward tilt and held jab are altered at close range, both becoming very potent at starting combos into his special moves. Additionally, Ryu will automatically face his opponent in 1-on-1 matches while standing on the ground, making it considerably easier to land his effective ground attacks.
Ryu's aerial moveset is effective as well. Neutral aerial is a sex kick with low knockback and has only five frames of landing lag, making it useful for combos and kill confirms even at high percents. Forward aerial is quick, highly damaging and has good range; it can be chained into itself through repeated jumps, and its sourspot deals high shield damage. Up aerial has fast startup and decently high reach, making it useful for juggling, and both it and down aerial can auto-cancel from a full hop.
Complementing Ryu's moveset and combo potential is his wide array of powerful finishers; some of his held tilts, smash attacks and aerials are very capable KO moves due to their high speed. Held up tilt grants upper body intangibility on frames 4-10 while hitting on frame 7, making it deceptively safe for KOs when combined with its speed and tapped up tilt setups. Up smash makes an effective substitute for held up tilt as a finisher, and its wide hitbox can catch aerial approaches. While slow, Ryu's forward smash has long range and is his strongest standard ground attack, making it useful for hard punishes. Back aerial is Ryu's strongest aerial, and is fast and has good range despite its small hitbox. Forward and up aerial also serve as decent KO moves, enhancing their already impressive utility. Finally, down aerial is a powerful meteor smash with fast start-up and long duration, making it a deadly edgeguarding tool. Combined with his excellent combo ability, Ryu's punish game is incredibly effective and versatile, being able to rack up damage or KO very easily after connecting with almost any attack.
Ryu's signature special moves are also effective in their own ways. Hadoken is a large ki projectile, with three travel speed and three distinct variations based on input method; the standard version is capable of locking, while the input and Shakunetsu versions deal more damage (with the latter being a multi-hit flame projectile). Tatsumaki Senpukyaku propels Ryu forward and deals more damage after an initial travel distance. While Ryu's signature Shoryuken serves as his main vertical recovery move, it is most well-known for its offensive utility, due to its sweetspot's high knockback and brief intangibility (frame 5). The input version of Shoryuken has increased KO power, even longer intangibility (frames 4-6, with arm intangibility frames 1-14), and lower landing lag, and can easily be chained into from Ryu's other moves. Finally, Focus Attack grants Ryu heavy armor against a single hit, and incapacitates opponents when at least half charged, allowing for followups. It can also be canceled on hit, after tanking a blow, or even while charging, allowing Ryu to fake out with a shuffle that also provides horizontal recovery distance. His close held neutral attack, first two hits of tapped neutral attack, close tapped forward tilt, held down tilt, and all aerials can be canceled into special moves, allowing Ryu to combo into Shoryuken or Tatsumaki for KOs, Hadoken for safety and damage racking, and Focus Attack for mixups and safety.
Lastly, Ryu has a long-distanced recovery and is surprisingly difficult to combo, traits not shared with most heavyweights. Tatsumaki Senpukyaku has large hitboxes and doesn't cause helplessness; this combined with canceled Focus Attack's armor and momentum boost grants surprisingly effective horizontal distance and protection. Shoryuken travels a good vertical distance, reaches above edges, and can stage spike reckless edgeguarders. Focus Attack also serves as an effective combo breaker, and neutral aerial and input Shoryuken both grant high speed and intangibility, and can even lead into combo or KO opportunities respectively. These traits allow Ryu to survive to very high percents when used effectively, which also allows him to take full advantage of rage.
Despite his abundant strengths, Ryu has his weaknesses as well. Like any all-arounder, while he is well-rounded, his attributes are not particularly exceptional; some examples are Mario having a more versatile combo ability, Olimar having a more effective camping game, Villager has a safer recovery, and Roy does better in close combat. Though his recovery travels a long distance, it becomes very short if extendable elements, such a Tatsumaki Senpukyaku, cannot be utilized. Focus Attack requires a brief charge before it can be canceled. Tatsumaki's long duration makes it vulnerable to being interrupted by long-ranged attacks, and he can only use it once without landing or suffering hitstun. Ryu's falling speed, low jumps and poor air acceleration make it difficult to recover from below the stage, as Shoryuken's recovery is almost strictly vertical and has high endlag, making Ryu's vertical recovery easy to predict and interrupt. While Ryu excels at shield pressure, his grab game is sorely lacking; his throws have high damage, but none of them have effective follow-up or KO potential. Down throw is his only combo throw at very low percents, and the extra utility of his throws (down throw instantly breaking shields, and up throw's kick KOing bystanders) does not apply in a 1-on-1 setting, making them situational.
Ryu also suffers from his unorthodox neutral game. Despite his good frame data (especially for his tapped tilts and neutral aerial), his slow walking speed and short range hinders the otherwise great utility of his tilt attacks, which gives him trouble against characters who possess disjointed hitboxes, especially when combined with his tall stature. Ryu's only projectile, Hadoken, is punishable if used carelessly due to its long endlag and low priority. Aside from the advantages granted his neutral aerial and Focus Attack, Ryu's fixed arc jumps make his aerial approach highly committal and thus very predictable. These issues force Ryu to play patiently and take advantage of any opening, as he has trouble against opposing camping. Focus Attack's utility is also match-up dependent, as it becomes much less effective against fast or multi-hitting moves (such as Roy's forward aerial or Cloud's Cross Slash, respectively). Because Focus Attack is also Ryu's main method of escaping combos, this makes him susceptible to certain combos and juggles due to his high weight and quick falling speed, and his slower fast-fall occasionally makes it difficult to land safely.
Finally, Ryu struggles to "force" early KOs, as his KO potential relies heavily on executing combos. While Ryu does possess some powerful moves, like back aerial and sweetspotted forward smash, these usually require hard reads to land, and most of his other moves have low knockback scaling due to being tailored for combos. Ryu's superb combo ability does largely compensate for this, but without accounting for opposing SDI, or without full knowledge of Ryu's moveset, setups and combos, he can have a difficult time taking stocks. Finally, the emphasis on Ryu's unique inputs means that his non-input special moves have lower power, and a mere slip of the hand can be more detrimental than usual, at worst even causing a self-destruct while recovering.
Overall, Ryu is a combo-oriented fighter with a fearsome offensive ability, as his unique mechanics deliberately give him access to powerful true combos essential to the competitive success of most characters; his ability to trap opponents in hitstun or shield pressure, multiple options for escaping or negating combos, and dependable recovery all make Ryu very rewarding and unpredictable. Unlike his echo however, Ryu is also capable of playing as a more zoner-based character with the usage of Shakanetsu Hadoken which is true to his playstyle in his home series. However, his polarized movement, mediocre vertical recovery, and lacking approach make him difficult to play optimally. His high learning curve in particular is perhaps his biggest issue; much practice is generally required for his input specials to use them reliably and consistently, rather than accidentally inputting the wrong move.
Due to his weaknesses and high learning curve, Ryu's results and representation have been below-average overall so far. Much of his player base has either dropped him, or rather use Ken for a character of his archetype. Even though he has received noticeable buffs via game updates, it's unknown if it will make him more prominent in competitive play.
Changes from Super Smash Bros. 4
During the advent of the game, Ryu was significantly nerfed overall in the transition from Smash 4 to Ultimate, but also received significant buffs from game updates.
Ryu has received some useful buffs; he greatly benefits from the dash-cancel mechanic as he can now dash cancel into his tilts which somewhat helps his overall poor and committal approach. Ryu can also attack cancel his standard attacks and aerial attacks into his specials which further enhances his varied combo game. He also benefits from his unique trait that makes him always face his opponent in a 1v1, as he can now create ledge-traps and lessen the chance of misinputting his special attacks. Hadoken has been strengthened to be notably stronger, having variable speeds and overall higher damage, which helps its utility as both a zoning option and an approaching tool. His new proximity normals allow for much more varied combo options, and with the ability to special cancel his attacks, makes his ground game much more varied and overall easier to confirm into.
However, Ryu has received many nerfs to counter the buffs. He is one of the only characters whose walking, dashing and air speeds were all unchanged, which makes him slower overall compared to the rest of the cast and exacerbates his already poor approach. The new 1v1 mechanic also hinders his air game, as he is unable to perform a back aerial freely; he has to perform the move in a reverse aerial rush in order to do so. Because of his back aerial being his strongest aerial and having the longest reach among his aerials, this hurts him more than good. His most notorious KO move from Smash 4, Shoryuken, was nerfed in terms of damage output, KO potential, and invincibility, making it not as reliable of a KO option as it was in the previous game (although it still remains as an effective KO move). Ryu's original setups into Shoryuken have also been nerfed (such as up tilt having a smaller hitbox and more horizontal), making the move much less of a threat. Focus Attack also has less range and doesn't hit behind Ryu, making it less safe of a move to use.
Overall, while Ryu's overall mobility and KO potential have been worsened, his combo game and unique options have improved greatly, rewarding proficient players with incredible damage and mixups. While he has had very little results in Ultimate's early metagame, the buffs he received in 3.1.0 have caught the attention of many players, with some even saying they have been moved to a much higher tier. Despite this, however, Ryu’s results have continued to remain subpar. On the other hand, his Echo Fighter Ken has received better representation and higher placings. Ryu’s viability, however, still remains up for debate.
Aesthetics
 Ryu's design has been changed. His muscles and other physical features are more pronounced, and his hair is spikier. These changes make him appear virtually identical to his appearance in Street Fighter V.
- Ryu's Hadoken has also been changed. It now more closely resembles its appearance in the Street Fighter series.
- Ryu's eighth alternate costume has been replaced to based on his tenth color in Street Fighter V.
- Ryu's up taunt no longer has him turn around when tightening his headband, now more closely resembling the taunt it is based on from Street Fighter IV.
- Ryu now has a unique Palutena's Guidance conversation.
- The victory pose where Ryu throws a hook is slightly modified. He now closes his eyes and crosses his arms before winding the hook, with the camera coming in from the left, making the victory pose more resemble his Street Fighter IV pose.
- Ryu's Boxing Ring alias has been changed to "Eternal Wanderer".
Attributes
 Like all characters, Ryu's jumpsquat animation now takes three frames to complete (down from 5).
- Being able to dash cancel his tilts greatly improves his approach, letting him threaten the opponent with his tapped tilts for combos, or space his smash attacks more safely.
- Double jump is slightly higher.
- In 1-on-1 matches, Ryu will always face his opponent, similar to how he behaves in the Street Fighter series.
- This makes it harder to be hit from behind by Back Slash or Nosferatu.
 This makes it difficult to attack things behind Ryu, such as Luma, and makes him easier to be hit by Disable.
- This changes the application of his dash dance, as his initial dash does not turn him in the opposite direction. Instead, he performs a back dash similar to his home series, allowing him to perform an evasive "shimmy" to keep within an effective range while still facing the opponent. This potentially improves his punishes.
- This makes his command inputs easier to perform. For instance, it is now impossible to accidentally perform a Hadoken backwards when attempting to perform a Tatsumaki Senpukyaku, or accidentally perform a Tatsumaki Senpukyaku when trying to perform a Hadoken.
- This makes it practically impossible for Ryu to be reversed by Cape/Super Sheet on the ground, as Ryu will immediately turn right back around.
Ground attacks
- Ryu now has proximity normals that change depending on his distance from the opponent. Tapped forward tilt changes from his standing medium kick to a new attack based off his Street Fighter II close medium punch, a right hook inwards. Held neutral attack changes from his Street Fighter II standing heavy kick to his close heavy punch, which has the same damage and animation to held up tilt, but doesn't launch the opponent away. Both attacks can be special cancelled on hit.
- Proximity forward tilt is capable of locking while proximity held neutral attack deals 14% and cancels into Shoryuken's sweetspot reliably, which gives Ryu a stronger followup than most of his other options for a Focus Attack crumple punish. Two forward tilts locks into a held neutral attack deals 26%, turning missed techs into potential KOs.
- Neutral attack:
- Tapped neutral attack can now jab reset.
- Neutral attack launches opponents, making them easier to be hit.
- Ryu can now special cancel the first and second hit of his neutral attack.
- Held neutral attack's hitbox has been moved inward (Z offset: 6.4-13.9 → 5.4-11.9), reducing its range.
- First and second hit of neutral attack deal less damage (2% (first)/3% (second) → 1.5% (both).
- First and second hit of neutral attack have reduced hitlag.
- Forward tilt:
- Tapped forward tilt has less ending lag (FAF 28 → 24).
- Held forward tilt has more startup (frame 14 → 16) and ending lag (FAF 35 → 39).
- Up tilt:
- Down tilt:
- Tapped down tilt has an extra frame of hitstun.
- Held down tilt has less startup lag (7 frames → 6).
- Held down tilt deals less knockback (70 (base)/23 (scaling) → 73/16), allowing it to combo at a wider percent range.
- Light down tilt's outermost hitbox is smaller (3.5u → 2.5u), and all 3 of the hitboxes have lost their extensions, reducing the move's range.
- Held down tilt's outer hitbox does not extend as far (Z offset: 7-17.2 → 7-15.7), noticeably reducing its range.
- Forward smash:
- Forward smash deals more knockback (25 (base)/94 (scaling) → 26/98).
- Up smash:
- Up smash deals more knockback (scaling 76 (clean)/81 (late) → 82/86).
- Up smash transitions to its late hit one frame earlier, reducing the clean hit's duration (frames 9-10 → 9).
- Down smash:
- Down smash's sweetspot launches at a lower angle (45˚ → 35˚), with knockback scaling not fully compensated (50 → 47), improving its KO potential and turning it into a semi-spike.
- Down smash's outermost hitbox has been removed entirely, with no changes to the other hitboxes to compensate. As such, the move has considerably reduced range.
Aerial attacks
- Ryu can cancel all of his aerial attacks into special attacks in the same way he can cancel some of his ground attacks.
- All aerials have reduced landing lag (6 frames → 5 (neutral), 14 frames → 11 (forward), 12 frames → 10 (back), 14 frames → 11 (up), 18 frames → 15 (down)).
- Neutral aerial:
- Neutral aerial's weak hitbox stays out much longer (frame 7-22 → 7-32).
- Neutral aerial has more endlag (FAF 28 → 36), making it much more difficult to start combos with it while airborne.
- The late hit has smaller hitboxes (3.3u/3.3u → 3u/3u), further weakening its already very poor range.
- Forward aerial:
- Its sweetspot deals significantly increased knockback (80 base/49 scaling → 82/56), boosting its KO potential.
- This reduces its combo potential.
- It has more startup (frame 6 → 8) and fewer active frames (6-14 → 8-14).
- It deals less damage on the sweetspots (15% (clean)/13% (late) → 14%/12%).
- Back aerial:
- Back aerial deals more base knockback (12 → 21).
- Back aerial's outer hitbox does not extend as far (Z offset: 7.5-16 → 7.5-15), reducing its infamously large horizontal reach somewhat.
- Up aerial:
- Up aerial's hitboxes stay out longer (1 frame (both) → 2 frames (hit 1), 3 frames (hit 2)).
- Up aerial has smaller hitboxes (6u (hit 1)/7u (hit 2) → 5.0u/6.0u), and they do not extend as far upwards (Y offset: 15-17 (hit 1)/17-19 (hit 2) → 15-16.5/17-18.5), significantly reducing its previously infamously large range above Ryu.
- Down aerial:
- Down aerial's grounded hitbox has reversed knockback values (14 (base)/60 (growth) → 60/14).
Throws/other attacks
- Grabs:
- Dash and pivot grab have slightly more startup (frame 8 → 9 (dash), 9 → 10 (pivot).
- All grabs have more ending lag (FAF 30 → 35 (standing), 37 → 43 (dash), 35 → 38 (pivot).
- Standing grab extends slightly further (Z offset: 4-8.7 → 4-9.1), slightly improving its range
- Dash grab does not extend as far (Z offset: 4-10.6 → 4-10), somewhat reducing its range.
- Pivot grab extends a shorter distance (Z offset: 4-14.7 → 4-14.1), somewhat reducing its range. Combined with the new mechanic of Ryu facing his opponent, it has lost much of its utility.
- Down throw:
- Down throw deals less damage (5% (hit 1)/4% (throw) → 3% (both)), with its knockback compensated (growth 137 → 157). In addition, Ultimate's front-loaded knockback results in this move having very little true followups.
Special Moves
- Hadoken:
- All variants of Hadoken have slightly less startup lag (frame 13 → 12).
- All variants of Hadoken deal more damage (Hadoken: 6% (light)/6.5% (medium)/7% (heavy) → 7%/7.5%/8%, True Hadoken: 7.5%/8.1%/8.7% → 8.7%/9.3%/10%, Shakunetsu Hadoken: 5% → 7.3%).
- All variants of Hadoken had their travel speeds adjusted, increasing their versatility (Light: 0.9 → 0.8, Medium: 1.2 → 1.3, Heavy: 1.5 → 1.8).
- Tatsumaki Senpukyaku:
- The first hit of Tatsumaki Senpukyaku has a larger hitbox when used on the ground (3.5u → 4.5u).
- Tatsumaki Senpukyaku's weak hitbox deals more damage and knockback.
- The changes to jostling makes Tatsumaki Senpukyaku even more unsafe on shield, as Ryu can no longer cross up with the move.
- Shoryuken:
- Shoryuken has more landing lag (18 frames → 22).
- Shoryuken has less invulnerability frames, most notably on the input version of Shoryuken, which no longer grants intangibility on the first few frames when the move is inputted.
- Shoryuken has a shorter window of time in which Ryu can snap to the edge when recovering with it.
- Focus Attack:
- Focus Attack's first stage of charge is harder to combo off of.
- Focus Attack's hitbox does not extend as far backwards (Z offset: -3—11.5 → 2—11.5), no longer being able to hit opponents directly behind Ryu.
- The maximum amount of damage Focus Attack's armor can sustain is lowered (22%-39% → 16.8%-33.6%).
- Final Smash:
- During Shin Shoryuken, the opposing fighter has been given new animations while getting hit, somewhat inspired by animations from Street Fighter IV for the Metsu Shoryuken.
- Ryu can cancel several standard attacks and any special move excluding Focus Attack into Shin Shoryuken or Shinku Hadoken.
- Shin Shoryuken's final hit has significantly less knockback scaling (105 → 90), weakening its KO potential.
Update history
Ryu has been significantly buffed overall through game updates, albeit not to the exact same extent as Ken. Patch 2.0.0 improved his neutral attack and allowed his forward air to autocancel from a full hop, but at the cost of down tilt no longer allowing Ryu to jump as fast after using it. Patch 3.1.0 gave the most changes, altering many of his core moves: jab 1, jab 2 and light (close) forward tilt have a wider window to followup with a special move, while heavy (close) neutral attack has been completely changed into a low-knockback combo tool, significantly improving its utility as it was previously a heavy up tilt with no followups. Light (far) forward tilt has more range, up aerial and early Tatsumaki Senpukyaku has a larger hitbox, light down tilt has more hitstun, and heavy down tilt has decreased knockback, allowing the latter two to combo more effectively. Finally, all versions of Hadoken travel slower if tapped and faster if held, allowing the player to control the projectile's use. Patch 4.0.0 now allows Ryu to turn to opponents after parrying an attack.
Overall, Ryu's renowned combo strings have been improved through game updates, making him fare better than at release. However, he is still considered to be inferior overall to Ken.
- Neutral attack launches opponents, making them easier to be hit.
- Forward aerial auto-cancels earlier (frame 41 → 38), matching the move's interruptibility and allowing to autocancel from a rising full hop.
- Can no longer jump immediately after using down tilt.
- Edge attack deals less hitlag.
- Slightly updated Shoryuken's animation.
 Focus Attack sliding has been removed.
- Neutral attack's first and second hits can be cancelled with a special move for a longer amount of time.
- Neutral attack (heavy, close) deals drastically less knockback (70 (base)/70 (scaling) → 25/15) and sends at a slightly more horizontal angle (85° → 80°), making it a much better combo starter even at high percents.
- Forward tilt (light, close) can be cancelled with a special move for a longer amount of time.
- Up tilt (light) sends at more vertical angle when hitting airborne opponents, making it a better combo starter (66° → 75°).
- Down tilt (light) has an extra frame of hitstun.
- Down tilt (heavy) deals less knockback (70 base/23 scaling → 73/16), allowing it to combo at a wider percent range.
- Up aerial has a longer hitbox duration and a larger hitbox (4.5u (hit 1)/5.5u (hit 2) → 5.0u/6.0u).
- Hadoken:
- All variants of Hadoken have slightly less startup lag (frame 13 → 12).
- All variants of Hadoken deal more damage (Hadoken: 6% (light)/6.5% (medium)/7% (heavy) → 7%/7.5%/8%, True Hadoken: 7.5%/8.1%/8.7% → 8.7%/9.3%/10%, Shakunetsu Hadoken: 5% → 7.3%).
- All variants of Hadoken had their travel speeds adjusted, increasing their versatility (Light: 0.9 → 0.8, Medium: 1.2 → 1.3, Heavy: 1.5 → 1.8).
- The first hit of Tatsumaki Senpukyaku has a larger hitbox when used on the ground (3.5u → 4.5u).
- Ryu now turns to face opponents after parrying.
Moveset
- Ryu will always face his opponent during a one-on-one match.
- A small flash will appear whenever Ryu does the input command version of one of his Special Moves instead of the standard B input.
- Sound effects from the Street Fighter series are used when Ryu hits opponents instead of the typical knockback sounds. The intensity of the sound depends on the power of the move. Ryu shares this trait with Ken.

| “ | Some of Ryu's attacks can be executed by inputting the commands with the control stick and attack button. This may raise the power of the attack, and some can only be done this way.
|
” |
| —Move List Description, Super Smash Bros. Ultimate | ||

| “ | The strength of the attacks depends on how long you hold the button.
|
” |
| —Move List Description, Super Smash Bros. Ultimate | ||
For a gallery of Ryu's hitboxes, see here.
Note: All numbers are listed as base damage, without the 1v1 multiplier.
| Name | Damage | Description | ||
|---|---|---|---|---|
| Neutral attack | 1.5% | Tapped: A jab, followed by a short straight-punch, followed by a hook. The first two hits can lock. It is based on his standing light punch from Street Fighter II (albeit with its animation from Street Fighter III), close standing medium punch from Street Fighter III, and standing hard punch from Street Fighter III, respectively. The first and second hits can be special-cancelled. Held (Far): A spinning hook kick. It is based on his standing heavy kick in Street Fighter II. Unlike many of his other moves, it cannot be special-cancelled. | ||
| 1.5% | ||||
| 5% | ||||
| 10% (held- far), 12% (held- close) | ||||
| Forward tilt | Collarbone Breaker (Held) | 6.8% (tapped- far), 6% (tapped- close), 3% (hit 1, held), 6% (hit 2, held) | Tapped (Far): The tsumasaki geri , a kick used in Karate. It launches the opponent diagonally upward, and grants intangibility on Ryu's leg from frames 7-12. Good for following with a dash attack or forward aerial at low percents. It is based on his standing medium kick in Street Fighter III. Cannot be special-cancelled. Tapped (Close): An inward hook. based off his Street Fighter II close medium punch. This move causes the opponent to slightly shift towards Ryu, allowing it to combo into any of his special moves. Even at 999%, this move is incapable of KO'ing. This move can also lock. | |
| Up tilt | 2% (tapped), 12% (held) | Tapped: The sok ngat, an uppercut-style elbow strike used in Muay Thai. It can be used repeatedly as fast as the player can press the attack button, which allows it to chain into itself and lead into many of Ryu's moves for a quick finisher. Despite its appearance, it has decent range. It is based on his close standing light punch in Street Fighter II. Held: An uppercut. Strong for its speed and grants his upper body intangibility from frames 4-10, making it a surprisingly effective anti-air attack and KO move. If it connects, it can instantly be canceled into any version of Shoryuken. A reliable finisher for his tapped up tilt. KOs at 152%. It is based on his close standing heavy punch in Street Fighter III. | ||
| Down tilt | Light Ankle Kick (Tapped) Heavy Ankle Kick (Held) |
1.6% (tapped); 7% (leg, held), 5.5% (foot, held) | Tapped: A crouching, Hapkido-style shin kick. It can be repeated as fast as the player can press, similar to his other tapped tilts. If used on a prone opponent, they will be lightly launched back onto their feet, allowing Ryu to continue combos on them for extended periods of time. It is based on his crouching light kick in Street Fighter II. Held: A lunging, Hapkido-style shin kick. Despite having low power, it can be immediately canceled into a special move only if Ryu hits the opponent or their shield, allowing Ryu to pressure his opponent. Shoryuken combos well from this attack. It is based on his crouching medium kick in Street Fighter II. | |
| Dash attack | 12% (clean), 8% (late) | A flying kick. Possesses high base knockback for a dash attack and it can reliably combo into many of his tapped attacks as a finisher. KOs at 150%. Based on his original jumping medium and heavy kicks in the Street Fighter Alpha/Zero games. | ||
| Forward smash | Joudan Sokutogeri | 16% (leg), 17.5% (foot) | The side kick of the same name from Street Fighter III. Moves him slightly forward and has the highest range of all his standard attacks, as it is able to hit opponents two character lengths away from him. However, it has noticeable ending lag. Deals slightly more damage and knockback when hit with Ryu's heel, and is Ryu's strongest standard attack if his heel connects. KOs at 110% with his heel and 120% anywhere else. Can cancel into his Final Smash upon hit. | |
| Up smash | 17% (clean), 13.5% (late) | Squats and then rises up to throw an uppercut. Makes his hurtbox smaller while attacking, making this a good anti-air attack. Slight ending lag and does not have much horizontal range. His arm becomes intangible on frames 3-6. A good finisher for his tap combos. KOs at 130%. Can cancel into his Final Smash upon hit. It is based on his crouching heavy punch in Street Fighter, albeit with its animation from Street Fighter III. | ||
| Down smash | 16% | A legsweep. Launches opponents at a diagonal angle and unlike most down smashes, it only hits in one direction. Has the fastest start-up of all of his smash attacks, with more range than his up smash but less than his forward smash, making it also his safest smash attack at a distance. However, it has below average knockback for a smash attack, which makes it unreliable as a KOing option. Instead, it functions better as a spacing and anti-pressure option. Like his other smash attacks, it works well as a good finisher for his tapped combos. Can cancel into his Final Smash upon hit. It is based on his crouching heavy kick in Street Fighter II. | ||
| Neutral aerial | 8% (clean), 4.5% (late) | A downward angled knee strike. Its limited range is compensated by its sex kick properties and low ending lag. Can cancel into any of his special moves upon hit. The late hit is capable of locking. It is based on his diagonal jumping light kick in Street Fighter II. | ||
| Forward aerial | Tobigeri | 15% (clean sweetspot), 13% (late sweetspot), 9% (clean sourspot), 8% (late sourspot) | A flying kick. Ryu's foot has high launching power, while his upper leg has a sourspot and deals less damage. Despite this, the sourspot deals high shield damage. A good combo move and very damaging for its speed, but lacks KO power due to its knockback growth, making it more suitable for damage racking unless near the side blast lines. Can cancel into any of his special moves upon hit. It is based on his diagonal jumping medium and heavy kick animation in Street Fighter II. | |
| Back aerial | 16% (leg), 13% (foot) | An outside crescent kick. Though it has a small hitbox, its strength and fast start-up make it Ryu's most powerful aerial and a viable KOing option. KOs at 115%. Due to Ryu always facing his opponent in one-on-one matches, it is difficult to use for edgeguarding: one must perform a reverse aerial rush, which takes longer to perform as Ryu, as he will only pivot around as part of his turnaround, and not in a dash dance (without performing a reverse aerial rush, it is impossible to jump offstage while facing towards it if the opponent is offstage). It is based on his vertical jumping heavy kick from Street Fighter II, which in some sources also doubled as his Senpuukyaku (旋風脚, "Whirlwind Leg") command normal/unique art from other games. | ||
| Up aerial | Sukui Tsuki | 5% (hit 1), 6% (hit 2) | An uppercut. Despite its appearance, it hits twice, has good vertical range, and is reliable at catching opponents above Ryu. His arm becomes intangible on frames 6-10. KOs at 155%. It is based on his diagonal jumping medium punch in Super Street Fighter II Turbo. | |
| Down aerial | Straight Punch | 12% (grounded opponent), 15% (aerial opponent sweetspot), 11% (aerial opponent sourspot) | A downward angled cross. Hitting an airborne opponent with the attack's sweetspot (his fist as it comes down) results in a meteor smash that powerfully sends opponents diagonally downward, while hitting an airborne opponent with the sourspot launches the opponent diagonally upward with high knockback. Hitting a grounded opponent, however, results in extremely low knockback that will not KO even at 300%, but nonetheless possesses the ability to start combos. Can cancel into any of his special moves upon hit. It is based on his jumping medium and heavy punch in Street Fighter II, albeit at an emphasized downward angle. | |
| Grab | — | Reaches out. Ryu's overall grab range is short. It is based on his grab animation in Street Fighter III. | ||
| Pummel | 1.3% | A knee strike while holding the opponent in the collar-and-elbow position. It is based on Ken's Tsukami Hizageri (つかみ膝蹴り, "Grasping Knee Kick") throw in the Street Fighter Alpha/Zero games. | ||
| Forward throw | 9% | The seoi nage (a Judo throw). If the opponent does not react, this throw can lead into a down aerial meteor smash at medium percentages. It is based on his punch throw in Street Fighter II, where it had the same name in most in-depth sources. | ||
| Back throw | Somersault Throw | 12% | The tomoe nage (a Judo throw). Heavy opponents can be knocked back onto their feet with a tapped down tilt, then thrown again. It is based on his kick throw in Street Fighter II, where it had the same name in most in-depth sources. | |
| Up throw | Heel Drop | 8% (throw), 15% (kick) | A stretch kick transitioned into an axe kick. It can combo into an aerial attack at low percents. While the axe kick cannot hit the thrown opponent, it can nevertheless hit another opponent that is too close to Ryu. Unlike the stretch kick, the axe kick deals much more damage and has high knockback (KO's Mario starting at 77% from the edge of Final Destination). Ryu's leg becomes intangible during the axe kick (frames 25-30). It is based on his close heavy kick in Street Fighter II. | |
| Down throw | 5% (hit), 4% (throw) | Pins the opponent to the ground and performs a knifehand strike. Its angle allows it to combo well into aerial attacks and Shoryuken until 30%, where thrown opponents are launched too high to get hit. Deals immense shield damage, enough to instantly break the shield of opponents that are right next to Ryu. Based on the brick breaking bonus game in Street Fighter, though it also resembles Akuma's Shurettō (朱裂刀, "Vermilion Rending Blade") throw in Street Fighter IV. | ||
| Floor attack (front) | 7% | Kicks behind himself and then in front of himself before getting up. The front hit is based on his crouching heavy kick in Street Fighter III. | ||
| Floor attack (back) | 7% | Kicks around himself before getting up. | ||
| Floor attack (trip) | 5% | Kicks behind himself and then in front of himself before getting up. | ||
| Edge attack | 7% | Performs a crouching shin kick while climbing up. | ||
| Neutral special | Hadoken | 7%, 7.5%, 8% (Standard); 8.7%, 9.3%, 10% (Input); 1.1% (Shakunetsu Hadoken, hits 1-4), 7.3% (Shakunetsu Hadoken, hit 5), 11.7% (Shakunetsu Hadoken, total) |
Quickly cups his hands to his side and then thrusts them forward to launch a blue ki blast from his cupped hands that deals decent damage and low knockback, is capable of locking, and may cause tripping at low percents. Only one Hadoken can be active, as attempting to shoot another results in a puff of smoke emitting from his hands. Holding down the special button greatly increases the blast's speed and slightly increases damage output. Three versions of the move can be performed, two of which have directional inputs: a small blue Hadoken (special button only), a minutely stronger and larger inputted Hadoken (↓ ↘ → + attack/special), and the red flaming Shakunetsu Hadoken that hits multiple times (← ↙ ↓ ↘ → + attack/special). Combos well out of his tapped tilt attacks and aerials, and is mainly used to rack up damage and control space due to its low knockback. The light version travels extremely slowly and can be used to control space and even start combos while approaching, while the heavy version is extremely fast and is useful for zoning. Shakunetsu Hadoken deals some shield damage, though not to the extent of his Collarbone Breaker. However, the Hadoken and its variants should be used wisely due to its low priority. All variants can cancel into his Final Smash. | |
| Side special | Tatsumaki Senpukyaku | 9%, 10%, 11% (Standard); 10.4%, 11.5%, 12.4% (Input) |
A jumping, spinning crescent kick. Ryu moves in the given direction he is facing. Has sex kick properties, grants intangibility on Ryu's leg for the whole duration the hitbox is active, and deals more damage and knockback after the first few frames. Holding down the special button increases damage dealt, distance traveled, and the move's duration, also giving the attack additional knockback. Using an inputted Tatsumaki Senpukyaku (↓ ↙ ← + attack/special) sees Ryu announce the move by name and results in it dealing even more damage, covering more distance, and granting it better KOing potential. The move can be used as a good horizontal recovery while not causing helplessness, but it can only be used once in the air without touching the ground. Essentially, it is a high risk, high reward option for approaching and recovering. Can cancel into his Final Smash. | |
| Up special | Shoryuken | 13%, 14%, 15% (Standard, grounded); 12%, 13%, 14% (Standard, early air); 7% (Standard, late air); 15.6%, 16.8%, 18% (Input, grounded); 14.4%, 15.6%, 16.8% (Input, early air); 8.4% (Input, late air) |
A leaping uppercut. Upon usage, Ryu announces the move's name while propelling his fist into the air at high speed. Holding the special button increases damage and height traveled. However, it has heavy aerial lag once the hitbox ceases. An inputted Shoryuken (→ ↓ ↘ + attack/special) deals even more knockback and damage and grants Ryu both slightly more intangibility (frames 1-14 versus frame 5) and lower landing lag (16 frames versus 23 frames). Aside from being his main vertical recovery move, Shoryuken is also a viable KOing option due to its fast start-up, especially when used in conjunction with Focus Attack. In comparison, an inputted Shoryuken is Ryu's most powerful vertical KOing option overall and has the highest growth in his entire standard moveset. Ryu becomes helpless as he descends with the move's high aerial lag. Can cancel into his Final Smash. | |
| Down special | Focus Attack | 12% (Level 1), 10% (Level 2), 17% (Level 3) | Assumes a focused stance while emitting a black ink-like aura, and then throws a short straight-punch. Crumples opponents where they stand with a lengthy stun animation if charged for more than half a second, which can allow for follow-ups. Ryu gains super armor that can withstand a single hit while it is charging. When fully charged, the attack becomes unblockable and will pierce through counterattacks. Ryu can also perform a technique called the Focus Attack Dash Cancel. This is performed by tapping left or right twice, which cancels Focus Attack and instead propels Ryu a set distance depending on where the control stick was tapped. However if the punch misses, Ryu will be unable to cancel the move. If the move hits an airborne opponent, they will instead by launched with heavy hitlag. The move's charge is indicated by Ryu flashing during its start-up. Level 1 is performed immediately and slightly launches an opponent. Level 2 is performed after half a second and crumples an opponent, but deals the least amount of damage. Level 3 is performed after a whole second, can block any normal single hit attack, crumples the opponent for a much longer time and deals the most amount of damage. Although Focus Attack cannot block grabs and is countered by multiple hit attacks, it is a useful tool for baiting opponents and punishing, while its Dash Cancel can function as a horizontal recovery option while offstage. | |
| Final Smash | Shin Shoryuken / Shinku Hadoken | 1% - 1.5% (multi-hits), 10% (explosion), 1% (initial hit), 10% (hits 1 and 2), 20% (last hit) | A Final Smash that varies depending on range. At point-blank range, Ryu traps the opponent with the Shin Shoryuken, a three-hit combo that launches the opponent with an even stronger Shoryuken. Begins KOing at specific percentages for every character, much like KO Uppercut and Finishing Touch. At any other range, Ryu performs the Shinku Hadoken, a much larger Hadoken that vacuums nearby opponents into it before dragging them a distance across the screen and exploding. Shin Shoryuken has much higher KO potential against a single opponent, whereas Shinku Hadoken has more range, reliably affects multiple opponents, and is capable of bypassing walls. Shin Shoryuken can be cancelled into from Ryu's neutral attacks (both tapped and held variants), tilts, smash attacks, aerials, and special moves (for the variants of Hadoken, it must be at point blank range). | |
Canceling
Ryu can perform a special move out of certain normal attacks, a mechanic known in his home series as special-cancelling. By pressing the special button or doing the command input after connecting with a normal attack on hit or on shield, Ryu will cancel the endlag of the normal attack and perform the move. The normal attacks that can be canceled include the first two hits of neutral attack, tapped and held down-tilt, tapped up-tilt, and proximity forward-tilt and held neutral attack (in Ultimate). He is also capable of doing so with his aerials. Special-cancelling allows Ryu to perform blockstrings and hit confirms into Shoryuken for a kill, Tatsumaki for a combo, or Hadoken for safety and pressure. He can also bait the opponent out with a special cancel into a Focus Attack, further increasing mixup potential.
On-screen appearance
- Walks onto the stage from some mist in the background, then gets into a fighting stance.
Taunts
- Up Taunt: Pulls his headband's ends taunt, while stating "Come on!" Unlike in Smash 4, Ryu does not turn around during the taunt.
- Side Taunt: Ryu holds his fist forwards, and declares "Talk is cheap!".
- Down Taunt: Stomps on the ground and grunts, causing the screen to briefly shake. This is his taunt from most of the Vs. Capcom series games.
Ryu's up taunt.
Ryu's side taunt.
Ryu's down taunt.


Idle poses
- Adjusts his gloves.
- Wriggles the fingers on both hands, then crosses his arms and pumps them.
Ryu's first idle pose
Ryu's second idle pose


Victory poses
- Left: Crosses his arms, then winds back and does a pose with his right fist facing the camera; his victory pose from Street Fighter IV, saying "Give it your all!" ("必殺のタイミングを計れ!", Gauge the timing of your special moves!), one of his victory quotes from Street Fighter III: 3rd Strike.
- Up: Slings his bag over his shoulder while saying "The journey has just begun." ("旅はまだ…始まったばかりだ", Yet the journey... has just begun.). This is one of his victory quotes from Street Fighter Alpha 3.
- Right: Punches once before doing a victorious uppercut, referencing one of his more recurring win poses, while saying "Your range is one fist short." ("その間合いじゃ、拳半分届かない!", That range doesn't reach half a fist!). This is another one of his victory quotes from Street Fighter III: 3rd Strike.


In competitive play
Ryu's tournament representation has been almost entirely nonexistent ever since the beginning of Ultimate. Many people unarguably believed that Ryu's nerfs made him more of a "high risk, low reward" which marginally decreased his prominence from Smash 4. Even after his noticeable improvements in future game updates, many people haven't taken him into much consideration or think his Echo Fighter, Ken, has better speed and more consistent KO options. While players such as Sandstorm has suggested that Ryu can still be a potent fighter (evidenced with his win at DreamHack Rotterdam 2019), his nerfs and less consistent attributes in comparison to Ken has made his standing debatable.
Notable players
Active
 Maeda - Placed 33rd at Syndicate 2019. Has a win over Greward.
 Munekin - The best Ryu player in Japan. Placed 9th at Umebura SP 6, 17th at Sumabato SP 6, and 33rd at Umebura Japan Major 2019.
 Sandstorm - The best Ryu player in the world. Placed 1st at DreamHack Rotterdam 2019, 9th at Low Tier City 7, 13th at Final Round 2019, and 25th at DreamHack Dallas 2019. Has wins over ESAM, Antireflex, and Azrael.
 Venom - Uses Ryu as a secondary to his Ken and Joker. Placed 17th at Defend the North 2019 and 33rd at Shine 2019 as one of his characters.
Classic Mode: Seeking a Challenge

Ryu's opponents are all references to characters that appear in Street Fighter II and are stamina battles with all of the stages being in Ω form. The Bonus Stage also comes earlier, similar to the car mini-game from said title. The final boss fight also includes Ken as a teammate.
| Round | Opponent | Stage | Music | Notes |
|---|---|---|---|---|
| 1 | Ken |
Suzaku Castle (Ω form) | Ken Stage Type A | |
| 2 | Zero Suit Samus |
Onett (Ω form) | Chun-Li Stage Type A | Represents Chun-Li. |
| 3 | Incineroar |
Boxing Ring (Ω form) | Zangief Stage Type A | Represents Zangief. |
| 4 | Donkey Kong |
Kongo Falls (Ω form) | Blanka Stage Type A | Represents Blanka. |
| Bonus Stage | ||||
| 5 | Giant Little Mac |
Boxing Ring (Ω form) | Balrog Stage Type A | Represents Balrog. |
| 6 | Meta Knight |
Arena Ferox (Ω form) | Vega Stage Type A | Represents Vega. |
| Final | Master Hand and Crazy Hand | Final Destination | M. Bison Stage Type A | References M. Bison in the artwork of Street Fighter II': Champion Edition, while Ken |
Note: All of the matches play music from Street Fighter II regardless of the stage.
Credits roll after completing Classic Mode. Completing it as Ryu has Ryu Stage accompany the credits.
Role in World of Light

Although Ryu does not appear in the World of Light opening cutscene, he was vaporized and later imprisoned alongside the rest of the fighters (sans Kirby) when Galeem unleashed his beams of light.
Ryu only appears after the player clears the World Tour sub-area reminiscent of Street Fighter II by beating every spirit.
Fighter Battle
| No. | Image | Name | Type | Power | Stage | Music |
|---|---|---|---|---|---|---|
| 60 | |
Ryu | Attack | 9,000 | Suzaku Castle (Ω form) | Ryu Stage |
Spirits
Ryu's Fighter Spirit can be obtained by completing Classic Mode. It is also available periodically for purchase in the shop for 500 coins. Unlocking Ryu in World of Light allows the player to preview the spirit below in the Spirit List under the name "???". As a Fighter Spirit, it cannot be used in Spirit Battles and is purely aesthetic. Each Fighter Spirit has an alternate version that replaces them with their artwork in Ultimate.
977. Ryu
In Spirit battles
As the main opponent
| Spirit | Battle parameters | |||||||||
|---|---|---|---|---|---|---|---|---|---|---|
| No. | Image | Name | Series | Enemy Fighter(s) | Type | Power | Stage | Rules | Conditions | Music |
| 170 | Karate Kong | Donkey Kong: Jungle Beat | •Ryu |
9,500 | Kongo Falls (Ω form) | •Hard to Launch •Hazard: High Gravity |
•The enemy's physical attacks have increased power •Timed Stamina battle •All fighters have reduced jump ability |
Battle for Storm Hill | ||
| 379 | Knuckle Joe | Kirby series | •Ryu |
9,100 | Find Mii (Ω form) | •Assist Trophy Enemies (Knuckle Joe) | •The enemy's punches and elbow strikes have increased power •The enemy's kicks and knee strikes have increased power •The enemy's physical attacks have increased power |
Butter Building (Brawl) | ||
| 574 | Poo | Earthbound series | •Ryu |
9,400 | Skyworld (Battlefield form) | N/A | •The enemy's punches and elbow strikes have increased power •The enemy's kicks and knee strikes have increased power •The enemy has increased move speed |
Smiles and Tears | ||
| 954 | Reyn | Xenoblade Chronicles series | •Ryu |
4,300 | Gaur Plain (Battlefield form) | N/A | •The enemy has super armor but moves slower •Timed Stamina battle •The enemy loves to taunt |
Time to Fight! - Xenoblade Chronicles | ||
| 988 | Sagat | Street Fighter series | •Ryu |
9,300 | Coliseum (Ω form) | •Jump Power ↓ | •The enemy has super armor and is hard to launch or make flinch •The enemy's physical attacks have increased power •Stamina battle |
Sagat Stage Type A | ||
| 994 | Akuma | Street Fighter series | •Ryu |
13,700 | Suzaku Castle (Ω form) | •Defense ↓ •Jump Power ↓ |
•The enemy's special moves have increased power •Stamina battle •All fighters have reduced jump power |
M. Bison Stage Type B | ||
| 997 | Sakura (Street Fighter) | Street Fighter series | •Ryu |
9,300 | Suzaku Castle (Ω form) | •Jump Power ↓ | •The enemy's neutral special has increased power •Stamina battle •The enemy favors neutral specials |
Ryu Stage | ||
| 1,192 | Karate Joe | Rhythm Heaven series | •Ryu |
9,200 | Suzaku Castle (Ω form) | •Item Tidal Wave | •The enemy's punches and elbow strikes have increased power •The enemy's kicks and knee strikes have increased power •The enemy favors smash attacks |
Rhythm Boxing | ||
| 1,217 |  |
Ouendan | Osu! Tatakae! Ouendan series | •Ryu |
3,700 | Tomodachi Life | •Attack Power ↑ | •The enemy has increased attack power after a little while •The enemy favors down specials |
Filled with Hope | |
| 1,294 | Akira | Virtua Fighter series | •Ryu |
13,800 | Coliseum (Ω form) | •Assist Trophy Enemies (Akira) •Hazard: High Gravity |
•The enemy's smash attacks have increased power •The enemy's physical attacks have increased power •Stamina battle |
Cruel Smash | ||
Alternate costumes

| |||||||

|

|

|

|

|

|

|

|
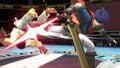
Gallery
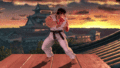
- Ryu SSBU Banner.png
Ryu's appearance on the panoramic artwork

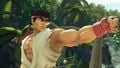
Ryu's fighter card.
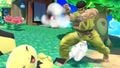
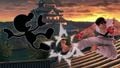
Taunting on Kongo Falls.
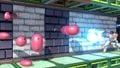
Charging his Focus Attack on Wily Castle.
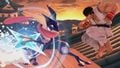
Ryu using his forward aerial on a bike-riding Wario on Suzaku Castle.
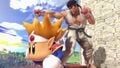
With Knuckle Joe on Princess Peach's Castle.
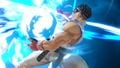
Ryu charging his Shinku Hadoken.
Failing to perform a Hadoken on Tortimer Island, with Pichu taunting.
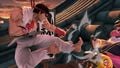
Fighting Greninja on Suzaku Castle.
Ryu getting attacked by Ike on Boxing Ring.
Ryu using his forward aerial on Mr. Game & Watch on Suzaku Castle.
Performing a Hadoken near Sukapon on Wrecking Crew.
- RyuDaisySuzakuCastleUltimateFightStart.jpg
Ryu fighting Daisy on Suzaku Castle.


Character Showcase Video
Trivia
- Ryu and Wii Fit Trainer are the only two characters (so far) whose full renders are not on the official Super Smash Bros. Ultimate website. In this case, the picture stops around his ankles.
- Ryu's artwork pose resembles a pose from his official artwork for Street Fighter II: The World Warrior, as well as the promotional poster for the original arcade release of Street Fighter IV.
- Ryu is the only fighter who was introduced in Super Smash Bros. 4 to have an Echo Fighter, that being Ken.
- Ryu is one of the five veterans from Smash 4 to have their Boxing Ring alias changed in Ultimate, the others being Link, Kirby, King Dedede, and Mega Man.
- Ryu's classic mode has numerous references to Street Fighter II:
- Each stage represents an opponent from the franchise: Ken (Ken), Zero Suit Samus (Chun-Li), Incineroar (Zangief), Donkey Kong (Blanka), Giant Little Mac (Boxer/Balrog), Meta Knight (Vega/Claw). Each character's theme plays during these fights on stages that resemble their Street Fighter 2 home stages.
- These fights are identical to their Spirit Battles with only Blanka and Balrog being fought on different stages.
- Ryu's bonus stage is in the middle, referencing Street Fighter's tendency to have bonus stages as midway points.
- The final two bosses before the final boss is a reference to the "Four Heavenly Kings" who must be fought as the last fighters before Bison, in this case Balrog and Vega (minus Sagat) with Bison being the fourth king.
- Ryu's final stage in Classic Mode is a reference to the artwork used for Street Fighter II': Champion Edition, which features a giant M. Bison towering over Ryu (represented in the game as both Master Hand and Crazy Hand) and the finale of Street Fighter II: The Animated Movie, where Ryu and Ken double team against M. Bison. Additionally, M. Bison's theme plays in the background during the final battle.
- As a reference to the health bars of not just Street Fighter II but the whole Street Fighter series, Ryu uses stamina battles in his Classic Mode route.
- Each stage represents an opponent from the franchise: Ken (Ken), Zero Suit Samus (Chun-Li), Incineroar (Zangief), Donkey Kong (Blanka), Giant Little Mac (Boxer/Balrog), Meta Knight (Vega/Claw). Each character's theme plays during these fights on stages that resemble their Street Fighter 2 home stages.
- Ryu, Hero and Terry are the only characters who have stamina battles for their Classic Mode routes.
- He is also the only one who is not DLC (in this game) to utilize this.
- Ryu being unlocked by clearing Classic Mode with Yoshi is likely a reference to how one of Yoshi's victory poses have him posing like Akuma.
- Coincidentally, Lucario takes inspiration from Ryu as it is also unlocked by clearing Classic Mode with Yoshi.
- Ryu, Ivysaur, Greninja, Little Mac, Olimar, Cloud, and Ken are the only characters to never appear as minions in any Spirit battles.
- Ryu is the only Capcom fighter to not appear in any CGI trailers whatsoever.
- If Ryu is set as a CPU-opponent in Training Mode, all three CPUs will always face the player, much like on 1-on-1 matches. He shares this distinction with Ken and Terry.
- This also happens if Ryu faces a single opponent in a team consisting of two or more characters in Team Battles, and in All-Star Mode when he appears.
.jpg)
Notes
- 1.^ translates to "Toe Kick"
- 2.^ translates to "Uppercut Elbow"
- 3.^ translates to "High-Level Foot Edge Kick"
- 4.^ translates to "Front Kick"
- 5.^ translates to "Scooping Punch"
- 6.^ translates to "Shoulder Throw"
- 7.^ translates to "Circle Throw"
|
| |
|---|---|
| Fighters | Ryu (SSB4 · SSBU) · Ken (SSBU) |
| Assist Trophy | Guile |
| Stage | Suzaku Castle |
| Trophies and Spirits | Trophies · Spirits |
| Music | SSB4 · Ultimate |
| Other | World Tour |