Roy (SSBU)
| Roy in Super Smash Bros. Ultimate | |
|---|---|
 
| |
| Universe | Fire Emblem |
| Other playable appearances | in Melee in SSB4 |
| Availability | Unlockable |
| Final Smash | Critical Hit |
| “ | Get up close and personal for major damage! Unlike Marth, Roy's attacks are more powerful the closer you get to the base of his blade. For his Final Smash, his sword bursts into flame and sends anyone caught in the blast flying. | ” |
| —Super Smash Blog, Super Smash Bros. Ultimate Official Site | ||
Roy (ロイ, Roy) is a playable character in Super Smash Bros. Ultimate, officially confirmed on June 12th, 2018. Roy is classified as fighter #25.
Jun Fukuyama's portrayal of Roy from Smash 4 was recycled for the Japanese release of Ultimate. In international versions, Roy is now voiced by Ray Chase, who reprises his role from Fire Emblem Heroes.
How to unlock
Complete one of the following:
- Play VS. matches, with Roy being the 29th character to be unlocked.
- Clear Classic Mode with Mario or any character in his unlock tree, being the sixth character unlocked after Luigi.
- Have Roy join the player's party in World of Light.
With the exception of the third method, Roy must then be defeated on Castle Siege.
Attributes
Roy is a middleweight swordfighter, although his main attributes deviate heavily from other fellow middleweights; he boasts excellent mobility with very fast dashing, air, and falling speeds. Roy has an attribute unique to him that other swordfighters do not have which is his inverse tipper; contrary to Marth specifically, his Binding Blade does the most damage if attacking near the sword's hilt, although it does weak damage and knockback when otherwise tippered.
Roy's greatest strength is his KO potential, which is very high when compared to other middleweights, and even on par with some of the harder-hitting heavyweight fighters in the roster. In conjunction with his overall very quick frame data, he can inflict large amounts of damage in a short amount time. Attacks like his forward tilt, up tilt, and forward smash are all very fast startup-wise, with each being among the strongest attacks of their kind; notably, forward smash can KO under 50% with rage near the edge, even if uncharged. However, they each have noticeable ending lag. His up smash is an effective anti-air attack due to its quick startup, along with his sword arm gaining intangibility throughout its rather long duration.
Roy's KO potential also extends to his air game, with quick, powerful and damaging aerials; his neutral aerial is a useful combo starter, especially when using the first hit by itself on landing, which allows him to add extra damage to his combos and even KO setups at high percentages. His forward aerial autocancels in a short hop and is overall very quick, allowing him to even perform a wall of pain. At high percentages, it also boasts KO potential. Back aerial has the rare effect of turning Roy around, as well as being rather quick despite its power, KOing at around 130% from center-stage. Up aerial is a reliable juggling move due to its large arc and average knockback, and can even KO by itself at high percentages. Lastly, down aerial is a strong meteor smash when sweetspotted and boasts decent KO potential when sweetspotted on-stage.
Roy's special moveset is unique; Flare Blade is known for being one of the strongest attacks in the game. Combined with its ability to be reversed and its extremely high knockback, makes it a very potent edgeguarding tool and has very low ending lag despite this. Double-Edge Dance is a quick and efficient damage-racking series of slashes, along with being a reliable finisher at higher percentages. Blazer is an excellent out of shield option, due to gaining super armor on startup and having decent KO potential when grounded. Lastly, Counter may have a short window of active frames compared to other similar attacks, but it makes up for being the strongest counter in the game with a large 1.35x damage multiplier.
Despite Roy's numerous strengths, he has noticeable weaknesses. His biggest flaw is his own inverse tipper attribute, giving him below-average effective reach compared to other swordfighters; due to his tipper dealing weak knockback and damage, Roy cannot safely space himself from his opponent as effectively as other swordfighters and has to fight in close-quarters combat in order to do effective damage, which collectively results in Roy's moves overall being very unsafe. This is further worsened by many of his attacks having high ending lag, which makes Roy very punishable if his attacks are whiffed, shielded, or dodged.
Another flaw Roy possesses is a poor recovery; despite having among the fastest air speeds in the game, his double jump covers among the lowest distances in the game, and Blazer is a slightly mediocre recovery move at best; despite its ability to be angled horizontally (which travels decent distance) and gaining both intangibility and super armor on startup, its vertical distance is rather poor and cannot sweetspot ledges until the latter half of the duration. Roy also has a very fast falling speed and high gravity, which further worsens his recovery.
Overall, Roy is a unique swordfighter who falls under the rushdown archetype; the objective of his playstyle is to overwhelm his enemy by closing the distance between him and them quickly with fast movement, then deal large amounts of damage with fast attacks without leaving Roy himself open to punishment.
Changes from Super Smash Bros. 4
Possibly as a result of his lower-mid tier placement in Smash 4, Roy has been significantly buffed in his transition to Ultimate. His most significant improvements are from the general universal changes to Ultimate, such as the ability to dash cancel into any grounded move and decreased landing lag on his aerials, which greatly improve his approach, air game, and rushdown ability. His buffed speed and the generally faster pace of Ultimate also benefit Roy's core strategy of closing the distance on his opponents and landing hits with the Binding Blade's powerful sweetspots. This helps to further counterbalance his main weakness of needing to approach at dangerously close ranges to opponents in order to deal optimal damage and knockback; a flaw not present in other sword-fighters that had plagued him in previous games. On top of that, the sweet spots themselves have been made bigger, slightly increasing Roy's effective range and allowing him to be even more consistent with attacks. Some of Roy's moves, like up aerial and Double-Edge Dance, have been buffed to have improved KO potential, increasing his options at higher percentages. Furthermore, KO confirms with his jab and the first hit of neutral aerial have become much more consistent and reliable.
However, Roy also received nerfs during the transition. Double jump now covers less distance, and his forward and down throws have less followups and combo potential due to their increased knockback. Blazer also needs to travel half its maximum distance before it can sweetspot ledges and also deals less knockback, reducing its use as a KO option. Finally, Roy still has some of his flaws from past games, such as mediocre offstage survivability, no projectiles, and an ineffective spacing game.
Overall, Roy is considered to be more viable and much less polarizing than he was in any of his previous playable appearances, due to him now having enough raw power, range, and speed to play aggressively up close. Because to these changes, he commands a large playerbase with overall great tournament results.
Aesthetics
 As with all veterans returning from SSB4, Roy's model features a more subdued color scheme.
- Roy has a new crouching animation, although he shifts to the previous animation when holding a small item.
- Roy's sweetspotted sword attacks now adopt the sound effects from Ike's sword, Ragnell.
- Roy's side taunt has been dubbed in English and now has him saying "I won't lose!"
- All of Roy's victory animations have been slightly altered with new camera angles. In addition, all of his victory lines have been dubbed in English, "That was a fierce battle!", "Failure is not an option!", and "Now the true battle begins!" respectively.
- The Binding Blade and its sheath are no longer present in Roy's Defeated/No Contest animations.
- Roy's sword was previously called the "Sword of Seals" in the trophy descriptions of Melee and Smash 4, but Palutena's Guidance now refers to the weapon as the Binding Blade.
Attributes
 Like all characters, Roy’s jumpsquat animation now takes three frames to complete (down from 5).
- Roy walks faster (1.15 → 1.208).
- Roy runs faster (1.95 → 2.145).
- Roy's initial dash is significantly faster (1.4 → 2.2).
- Roy's air acceleration is faster (0.03 → 0.05).
- Roy's falling speed remains unchanged from Smash 4. Compared to the rest of the cast, however, his falling speed is now slower.
 Roy's fast falling speed is very slightly slower (2.9 → 2.88).
- Roy's hilt sweetspots have been enlarged. This significantly improves his ranged approach, and makes him more consistent overall.
- Roy's air speed has been increased (1.24 → 1.302).
- Roy's double jump covers less distance.
Ground attacks
- Jab's sweetspot has altered knockback (40 (base)/60 (scaling) → 55/40) and has a higher angle (62° → 69°) greatly improving its combo potential.
- Forward tilt's sweetspot has more knockback growth (100 → 105).
- Forward tilt has slightly more ending lag (FAF 32 → 34).
- Dash attack has less ending lag (FAF 50 → 46).
- Forward smash has increased vertical range and slightly reduced startup (frame 14 → 13).
Aerial attacks
- All aerials have less landing lag (Neutral: frame 11 → 9, Forward: 13 → 8, Back: 16 → 10, Up: 14 → 8, Down: 23 → 14).
- Neutral aerial has increased base knockback on the first hit (30 → 32), and increased knockback growth on the second hit (100 → 105/105/100).
- Forward aerial's autocancel window has been restored, allowing it to autocancel within a short hop.
- Back aerial has more base knockback (30/30/10 → 35/35/10) and knockback growth (100 → 107/107/100).
- Up aerial has increased knockback growth (80/80/80/70 → 105/105/105/70), making it more potent for juggles and now being able to KO at very high percentages.
- Down aerial now has a flame effect.
Throws/other attacks
- Roy's forward throw is now an elbow strike to the chest, just like Marth's.
- Forward throw has increased base knockback and ending lag, removing many of its follow ups.
- However, the increased base knockback makes it more effective at setting up edgeguards.
- Roy's down throw has increased knockback growth (60 → 90), worsening its combo potential.
Special Moves
- Flare Blade:
- Flare Blade has slightly less startup (frame 23 → 21), and like with most non-storeable charge moves, Roy can now reverse the move while charging, giving him a better edge-guarding tool and the ability to catch opponents that move behind him while charging.
- A fully charged Flare Blade's recoil receives the 1.2× damage multiplier in 1v1 matches. This causes Roy to take 12% damage when using it during said matches, up from 10%.
- Flare Blade charging sound no longer alters the pitch while being in the form of a Super Mushroom or Poison Mushroom.
- Double-Edge Dance:
- As with Marth and Lucina's Dancing Blade, Double-Edge Dance transitions significantly faster into each hit. It can also now be buffered and is much harder to escape from.
- Double-Edge Dance's last hit has significantly increased knockback, which when combined with the move's other changes, now make it a viable KO option.
- Double-Edge Dance's first hit has increased startup (frame 6 → 9).
- Roy uses a single voice clip when performing down-inputted fourth swing rather than three. The voice clip itself is the same one used whenever he performs his down aerial
- Blazer :
- Blazer travels more distance.
- Blazer requires a longer travel distance before being able to sweetspot a ledge, no longer doing so until around half its travel distance.
- Blazer deals less knockback (40 base/130 scaling → 75/93), weakening its viability as a KO option.
- Counter:
- Counter has more active frames (frames 8-27 → 8-29).
- Along with an attack grunt, two of Roy's lines during a successful counterattack are dubbed, with him saying either "Now!" or "Gotcha!".
- Critical Hit:
- Critical Hit now causes a flaming background to appear once the main hit is unleashed.
- Roy now removes the Binding Blade from its sheath once he has finished sheathing it in Critical Hit.
- Critical Hit has significantly lower ending lag due to this animation change.
Update History
![]() 2.0.0
2.0.0
- Down aerial auto-cancels earlier (frame 55 → 52), matching the move's interruptibility.
Moveset
- For simplicity, damage differences between Roy's blade and hilt hitboxes will be written as 7%/12% (blade/hilt).
Note: All numbers are listed as base damage, without the 1v1 multiplier.
| Name | Damage | Description | ||
|---|---|---|---|---|
| Neutral attack | Slash | 4.8%/7.5% | A reversed gripped upward slash. A great combo starter, due to launching at a rather high angle and having low knockback and ending lag. It can easily start combos into a grab, tilts, aerials, Double-Edge Dance or Blazer. | |
| Forward tilt | Sharp Edge | 12.5% (sweetspot), 9% (near), 8% (far) | A reversed gripped downward slash. Very powerful for a tilt considering its speed, being capable of KOing at under 150% from center-stage when sweetspotted. | |
| Up tilt | 7%/12% | A reversed gripped overhead arcing slash. Like forward tilt, it has remarkably good speed and power when sweetspotted, with the capability of KOing at around 120%. | ||
| Down tilt | Low Stab | 6.5%/11% | A kneeling thrust, identical to Marth and Lucina's down tilts, but with lower range. Can set up a tech-chase due to launching at a semi-spike angle. | |
| Dash attack | 9%/13% | An inward horizontal slash across the ground. Very strong for a dash attack, KOing at around 130% near the ledge. However, it has noticeable startup and ending lag, which makes it very unsafe on shield. | ||
| Forward smash | 20% (close), 17% (mid), 12% (far) | Rotates his body to perform a lunging, two-handed downward slash. Despite coming out rather quickly (frame 13), it has extremely high damage and knockback and is one of the strongest forward smashes in the game when sweetspotted, capable of KOing as low as 40% with max rage. However, it has high ending lag and a short duration. | ||
| Up smash | Flame Sword | 1% (hit 1), 2% (hits 2-4), 10% (hit 5) | An upward thrust, which ignites the Binding Blade's tip and concludes with a small explosion. A good anti-air attack as Roy's sword arm is granted intangibility throughout the attack, though mediocre for ground combat due to it having small horizontal hitboxes. Has enough power to KO at around 100% uncharged. | |
| Down smash | 10%/15% (front hit), 11%/17% (back hit) | A kneeling outward slash in front of himself and then behind himself. Roy's fastest smash attack when it comes to startup, but has the highest ending lag of the three. The back hit is stronger than the front hit. The front and back hits KO at around 120% and 100% near the ledge, respectively. | ||
| Neutral aerial | Double Slash | 4%/6% (hit 1), 5%/8.5% (hit 2), | An inward slash followed by a spinning, outward slash. Deals decent damage and is a useful combo extender, and is Roy's main aerial approach tool due to its high amount of active frames. The first hit can start guaranteed combos, though it can be difficult to setup due to how fast it ends. | |
| Forward aerial | 7%/11% | A downward slash. Very quick, auto-cancels from a short hop, and has KO potential at high percentages. It can also be used in quick succession due to its low ending lag, making it possible to perform a wall of pain. | ||
| Back aerial | 9%/12% | Rotates his body to perform an upward slash. Interestingly, it turns Roy around completely, similarly to Marth's and Jigglypuff's back aerials. Has great KO potential at high percentages. | ||
| Up aerial | 6%/9% | A backflipping, upward arcing slash. Useful for juggling, and can even KO at very high percentages. The sourspot can lead into other aerials while falling. | ||
| Down aerial | Half Moon | 10%/15% | A two-handed, downward slash between his legs, similar to Ike's down aerial. Has the capability to meteor smash when sweetspotted, though it can be very difficult to aim due to its slim hitbox. This move has a flame effect. | |
| Grab | — | Reaches out with his free hand. | ||
| Pummel | 2% | A knee strike. A fairly fast pummel. | ||
| Forward throw | 5% | An elbow strike with his sword arm. Has very high base knockback, making it mainly used for sending opponents offstage. | ||
| Back throw | 5% | Tosses the opponent behind himself. | ||
| Up throw | 6% | Heaves the opponent upward with his free hand. Roy's only throw with KO potential, starting around 170%. | ||
| Down throw | Slam | 5% | A one-armed body slam. Roy's only combo throw and is very reliable due to the amount of followups it can potentially set up into. However, it has very low hitstun. | |
| Floor attack (front) | 7% | Gets up while slashing to the left and then to the right. | ||
| Floor attack (back) | 7% | Gets into a kneeling position and then slices around himself as he gets up. | ||
| Floor attack (trip) | 5% | Hops briskly to his feet to perform a thrust to the left and a slash to the right. | ||
| Edge attack | 8% | Performs an outward slash while climbing up. | ||
| Neutral special | Flare Blade | 6%-35%, 36%/50% (fully charged), 10% recoil (fully charged) | Rears back and ignites the Binding Blade before performing a lunging, two-handed downward slash that generates an explosion. Roy can turn while charging the move. Functions similarly to Eruption, as it can be charged before unleashing the explosion, with the explosion's size growing as it charges. It has very high knockback growth even while uncharged, and the ability to quickly increase its damage output via charging. When fully charged, it will OHKO every character in the game, with the exceptions of Bowser from center-stage and Shulk in the Shield Monado Art. | |
| Side special | Double-Edge Dance | Varies | A sequence of sword slashes with several variations based on directional input. Four slashes total, with each capable of being altered in direction, allowing for eighteen total possible combinations. Standard strikes are trailed red, high strikes are trailed blue, and low strikes are trailed green. While identical to Marth and Lucina's Dancing Blade, its overall knockback is slightly stronger than Dancing Blade, and the last hit of each variation deals flame damage unlike Dancing Blade because of the Binding Blade igniting. The final forward-held hit has good KO potential. | |
| Up special | Blazer | 4%/5.5% (grounded hit 1), 4.5% (aerial hit 1), 1.1% (grounded hits 2-4), 1% (aerial hits 2-4), 7%/8% (grounded hit 5), 6% (aerial hit 5) | A jumping reverse gripped slash, which ignites the Binding Blade. Hits multiple times and can be angled diagonally, though this causes the slash to cover less vertical distance. The grounded version deals more knockback, and has brief super armor before Roy leaves the ground. Roy cannot sweetspot ledges with the move unless he has traveled half of Blazer's maximum distance. | |
| Down special | Counter | 1.35× (minimum 9%) | Parries and then counterattacks against any incoming attacks with an outward slash that ignites the Binding Blade. It has a 1.35× damage multiplier, the second highest of any counterattack in the game by default, with only Counter Throw and Gut Check having a higher damage multiplier (1.5×), and Vision surpassing it while the Buster Monado Art is active. | |
| Final Smash | Critical Hit | 1% (hits 1-10), 35% (hit 11) | Swings the Binding Blade in a circular motion, which ignites its blade, before performing a two-handed, downward slash that generates a powerful explosion. Unlike Marth and Lucina's Critical Hit, Roy's is not a one-hit KO unless performed at the ledge. The circular swing can hit up to four times from the front, though it can hit up to ten times if performed on an opponent behind Roy. It is based on the Binding Blade's ranged attack in The Binding Blade. | |
| Hit | Damage | Description |
|---|---|---|
| First Hit (Neutral) | 2%/3% | Does an outward slash. Deals very little knockback to combo into its other hits. Can jab lock. The tipper lifts opponents off the ground slightly, making it combo into the second hit more consistently. |
| Second Hit (Up) | 2%/3% | An upwards lifting slash. Has greater vertical reach than the first hit or the second neutral hit. Lifts opponents slightly off the ground, with the tipper hit pulling them in slightly. |
| Second Hit (Neutral) | 2%/3% | Does an inward slash. Has a shorter hitbox than the first hit, which can lead to it sometimes missing if the first hit is landed from too far away. Deals very little knockback in order to connect more consistently. Can jab lock. |
| Third Hit (Up) | 3%/4% | Does an upwards slash while turning clockwise. Launches opponents slightly up and away, leading into the upward finisher. |
| Third Hit (Neutral) | 3%/4% | Takes a step forward and does a leaning outward slash. May push opponents too far away for the fourth hit to connect at high percents. |
| Third Hit (Down) | 3%/4% | Leans in and does a horizontal slash low to the ground. Deals less knockback than the other third hits, which can make it useful for connecting with the neutral finisher at higher percents, when the third neutral hit may send too far away. |
| Fourth Hit (Up) | 5%/7% | Twirls counterclockwise and does an flaming upward slash. Launches opponents up, making it useful for starting juggling strings. Has the least ending lag of the three finishers. Fairly low knockback. Has greater vertical reach than any other hit of the move. |
| Fourth Hit (Neutral) | 4%/6% | Turns counterclockwise, steps forward, and does powerful flaming vertical slash downward. This is the strongest finisher in regards to knockback. The hilt by itself will KO middleweights near the edge as low as 80%, but the hit is much weaker when tippered, only beginning to KO around 161%. |
| Fourth Hit (Down) | 2% (hit 1-4), 3/5% (hit 5) | Does a flurry of five lower stabs. Deals the most damage of the three finishers, wearing down shields well, and can shield poke low shields. Has the highest ending lag and the lowest knockback of the three finishers. |
Victory poses
- Swipes his sword once over his shoulder, then swipes it down and behind him while facing left, saying "Now... the true battle begins." (真の戦いは、これからだ, The true fight is after this.) before the camera dramatically zooms in on Roy's face, showing his eyes.
- Spins the Binding Blade one and a half times and then sheaths it, saying "That was a fierce battle!" (苦しい戦いだった, It was a difficult fight.).
- Flourishes his sword and poses with it by his side, saying "Failure is not an option!" before the camera dramatically zooms in on Roy's face(守るべきもののために、負けられない!, For those whom I must protect, I will not lose!).


In competitive play
Notable players
 Hyper Kirby - Placed 1st at Dare to Dair.
- SparK - Placed 9th at Ultimatum and 13th at No Fun Allowed 3.
 TheFlow - The best Roy player in France.
- VoiD - Plays Roy as a secondary and placed 5th at Heart of Battle.
Classic Mode: A Journey of Swords
Roy's opponents consist of entirely sword-fighters, with the exception of the final round.
| Round | Opponent | Stage | Music | Notes |
|---|---|---|---|---|
| 1 | Lucina, Chrom, and Ike | Castle Siege | Beyond Distant Skies - Roy's Departure | |
| 2 | Meta Knight | Halberd | Meta Knight's Revenge | |
| 3 | Link (Tunic of the Wild) | Skyloft | Ballad of the Goddess | |
| 4 | Shulk | Gaur Plain | You Will Know Our Names | |
| 5 | Cloud | Midgar | Fight On! | |
| 6 | Marth, male and female Corrin | Coliseum | Winning Road - Roy's Hope | |
| Bonus Stage | ||||
| Final | Master Hand | Final Destination | Master Hand | On intensity 7.0 and higher, Crazy Hand fights alongside Master Hand, and the track Master Hand / Crazy Hand plays during the battle. |
Role in World of Light
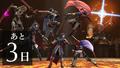
Although Roy does not appear in the World of Light opening cutscene, he was vaporized and later imprisoned alongside the rest of the fighters (sans Kirby) when Galeem unleashed his beams of light.
Presumably, Roy fell temporarily under Dharkon's control after Galeem was first defeated, the narration of Dharkon's introduction being vague on how many fighters he stole from Galeem.
Roy appears in The Final Battle as one of the last fighters imprisoned by Galeem. He is one of the few obligatory unlocks, defeating him leads to a fight with Master Hand and the subseqent reveal of Bayonetta's location.
Spirits
Roy's Fighter Spirit can be obtained by completing Classic Mode. It is also available periodically for purchase in the shop for 500 coins. Unlocking Roy in World of Light allows the player to preview the spirit below in the Spirit List under the name "???". As a Fighter Spirit, it cannot be used in Spirit Battles and is purely aesthetic. Each Fighter Spirit has an alternate version that replaces them with their artwork in Ultimate.
- Binding Blade Roy.png
612. Roy (Fire Emblem)
Alternate costumes

| |||||||

|

|

|

|

|

|

|

|
Gallery
Artwork of all playable Fire Emblem characters and Assist Trophies, as posted on the official Japanese Fire Emblem Heroes Twitter account.
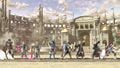
Screenshot of all playable Fire Emblem characters on Arena Ferox, as posted on the official Japanese Fire Emblem Twitter account.
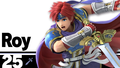
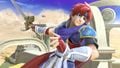
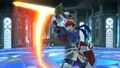
Roy's fighter card.
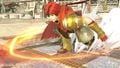
Roy countering on 3D Land.
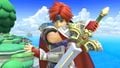
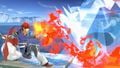
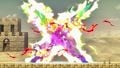
Using Double-Edge Dance on Skyworld.
Attacking Diddy Kong with Counter on The Great Cave Offensive.
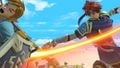
Attacking Link with his neutral aerial on Skyloft.
Taunting with a frozen Wii Fit Trainer on Summit.
Performing his down smash on Coliseum.
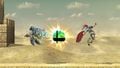
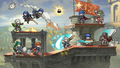
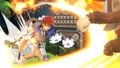
Roy and Meta Knight facing a Fake Smash Ball on Mushroomy Kingdom.
Roy and Meta Knight caught in the Fake Smash Ball's blast.

Roy being bitten by a Klaptrap on Pokémon Stadium.
Performing his jab on Kalos Pokémon League.
With all playable Fire Emblem veterans on Coliseum.


Character Showcase Video
Trivia
- Roy's pose in his official artwork resembles his forward tilt.
- Roy is the first fighter to be introduced as a clone and later have an echo of their own in a later installment.
- Roy is the only character with an Echo Fighter to not be in the same Classic Mode unlock tree as his echo; he is in Mario's character tree, while his echo, Chrom, is in Yoshi's unlock tree.
- Like in Smash 4, Roy will revert to Marth's idle animation while holding a small throwable item.
- In Roy's character showcase video, he is seen with a new dashing animation, but in the final build of the game, he reuses his old dashing animation from Smash 4.
- Whenever Roy fires a small shooting item such as a Ray Gun from the ground, his sheath will appear and then disappears after the firing animation finishes.
- Roy is the only male character unlocked in the Final Battle realm in World of Light.
- Additionally, since Roy is found in the Final Battle, he is the only character with an Echo Fighter who cannot be found before entering the Dark Realm, as Samus, Peach, Marth, Pit, Ryu, and Simon can all be found in the Light Realm, while all Echo Fighters can be found in the Dark Realm.
- This also means that Roy is the only character with an Echo Fighter that can be unlocked in World of Light first, with Chrom being found in the Sacred Land sub-world of the Dark Realm.
- Additionally, since Roy is found in the Final Battle, he is the only character with an Echo Fighter who cannot be found before entering the Dark Realm, as Samus, Peach, Marth, Pit, Ryu, and Simon can all be found in the Light Realm, while all Echo Fighters can be found in the Dark Realm.
|
| |
|---|---|
| Fighters | Marth (SSBM · SSBB · SSB4 · SSBU) · Roy (SSBM · SSB4 · SSBU) · Ike (SSBB · SSB4 · SSBU) · Lucina (SSB4 · SSBU) · Robin (SSB4 · SSBU) · Corrin (SSB4 · SSBU) · Chrom (SSBU) · Byleth (SSBU) |
| Assist Trophies | Lyn · Black Knight · Tiki |
| Stages | Castle Siege · Arena Ferox · Coliseum · Garreg Mach Monastery |
| Item | Killing Edge |
| Other | Sothis |
| Trophies, Stickers and Spirits | Trophies (SSBM · SSBB · SSB4) · Stickers · Spirits |
| Music | Brawl · SSB4 · Ultimate |
| Masterpieces | Fire Emblem: Shadow Dragon and the Blade of Light · Fire Emblem: Mystery of the Emblem |