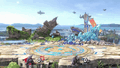
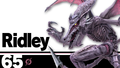
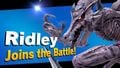
Ridley (SSBU)
| Ridley in Super Smash Bros. Ultimate | |
|---|---|
{{{content1}}}
{{{content2}}} 
| |
| Universe | Metroid |
| Availability | Unlockable |
| Final Smash | Plasma Scream |
| “ | Ridley Hits the Big Time! | ” |
| —Introduction tagline | ||
Ridley (リドリー, Ridley) is a playable character in Super Smash Bros. Ultimate. He was revealed as a newcomer alongside Inkling and Daisy from Nintendo's 2018 E3 press conference, on June 12th, 2018, with an animated trailer. Ridley is classified as Fighter #65.
Similar to Bowser, Donkey Kong, Diddy Kong, and King K. Rool, Ridley has no voice actor and instead uses computer-generated, more realistic roars and screeches, akin to his sounds in Super Smash Bros. Brawl, Super Smash Bros. for Wii U, and all of his appearances in the Metroid series.
How to unlock
Complete one of the following:
- Play VS. matches, with Ridley being the 25th character unlocked.
- Clear Classic Mode with Yoshi or anyone in his unlock tree, being the 6th character unlocked after Lucina.
- Have Ridley join the player's party in World of Light.
With the exception of the third method, Ridley must then be defeated on Norfair.
Attributes
Ridley, unsurprisingly for being a large character with powerful attacks, is a heavyweight character, although his attributes compared to other archetypal heavyweights are noticeably different. He is the tallest character in the game, tied for the 12th heaviest character, and possesses the third lowest traction. Ridley also has overall good mobility, especially compared to most of his fellow heavyweights: with two midair jumps, slightly above average walk speed, tied with Charizard for the 10th fastest dashing speed, average air speed, air acceleration and gravity, and the 17th fastest falling speed. Ridley also boasts a faster frame data than most heavyweights, further setting him apart from them.
Ridley's most defining trait is his potent and varied punish game and aerial pressure. With overall remarkable range, power and decent speed throughout his moveset, as well as a projectile, Ridley poses as a serious threat once he gets the advantage; those unaware of Ridley's danger factor can find themselves being quickly overwhelmed and/or find it difficult to get in. His key strength about his moveset is his strong air game. Boasting overall quick, powerful, and long-ranged aerials, having two midair jumps, and decent air mobility give Ridley overall excellent air pressure potential. Thanks to his additional jump and relatively high fast fall speed, he has superb vertical flexibility, and can use additional jumps or surprise fastfalls to fake out and punish his opponents with his far-reaching aerials. His neutral aerial is unarguably his most effective aerial, due to having low all-around lag, good range, and average knockback. It is a good comboing, spacing, and edge-guarding tool, while also being fast enough to break out opposing pressure if positioned correctly; these traits make it among the best of its kind and one of Ridley's most commonly used moves. Forward aerial, while having merely average power, has the highest damage output of Ridley's aerials when all hits are sweetspotted, and is infamous for being able to perform a wall of pain at low percentages, especially due to Ridley's aforementioned two midair jumps. Back aerial is decently quick, long-ranged and has consistently high damage and knockback, which makes it a deadly KO move, especially if used off-stage for edge-guarding. Up aerial is a good, disjointed juggling move with decent startup and good KO potential when sweetspotted, but requires opponents to be very close to or above Ridley to land. Lastly, down aerial is a stall-and-fall that powerfully meteor smashes opponents when sweetspotted, and can potentially be recovered from if initiated slightly above the ground. Even when sourspotted, it has high KO potential, similar to Bowser's own down aerial.
Ridley also has an abundance of powerful moves like his fellow heavyweights, with his tail-based moves having higher power if sweetspotted with the bladed end of his tail. His power also leads into one of his other primary strengths: his edge-guarding ability. His powerful air game gives him the innate ability to edge-guard offstage effectively, as many of his attacks have great KO or gimping potential, while his long-distanced recovery makes coming back to the stage a non-issue. His neutral aerial has decent range and is powerful when sweetspotted at the tip. Forward aerial boasts great wall of pain potential with enough reach and a long enough duration to effectively gimp most recovering opponents. Finally, as mentioned before, his back aerial has the strongest and most consistent knockback of his aerials. Ridley also has easy ways to set up edge-guards; his down tilt and down throw are both reliable combo starters that launch at favorable angles, and he has plenty of other attacks that deal high horizontal knockback, such as forward tilt and dash attack.
Ridley's grounded game is also noteworthy in terms of utility. His neutral attack is his fastest attack, and has both great damage potential thanks to its infinite, and surprising power due to the regular third hit. His forward tilt has good range and low lag overall, while dealing high knockback if the tip connects, with the low aim version being a reliable two-framing option. Meanwhile, his up and down tilts offer varied potential, with up tilt being a great anti-air that chains into itself, most aerials, and even up smash, whereas down tilt allows Ridley to combo off from a safe distance and position the opponent into very vulnerable spots ripe for punishing or juggling. His dash attack is one of the few to have no sourspots throughout, and has respectable power. Forward smash has below-average startup (around the same as Mr. Game & Watch and Palutena) and is short ranged, but is one of the strongest of its kind in both damage and knockback, and is just fast enough to two frame and punish whiffs, landings, or be a more situational follow up, like off a late hit of a landing neutral aerial, or a frame tight execution after a gentleman jab. Down smash has slow start up and less raw power, but has very large, mostly disjointed range as it makes use of the invulnerable parts of Ridley's wings, along with totally lacking a sourspot. It also has the added trait of Ridley hopping high during the start-up; this can allow Ridley to completely dodge attacks, even sometimes those with center aim, making it especially effective in fields like punishing a get up attack or punishing grab whiffs. It is also a notoriously effective punishment option after a successful Skewer sweetspot, as the short hop itself can cover most get-up options. This more commonly is used to cover ledge get-up options from the opponent, as with proper timing, Down Smash can cover almost the entire cast's options to return to stage, only being checked by moves that can hit from below stage (like Ridley's own uair). Finally, up smash is Ridley's fastest and most reliable smash attack; while not having the sheer power of the other two, it is still powerful in its own right, and is also a very effective anti-air as it makes Ridley's foot invulnerable. Overall, each of Ridley's grounded moves have different attributes that make them useful, while still giving him the typical great power of a heavyweight.
Additionally, his special moveset offers interesting options. Plasma Breath is Ridley's projectile; it fires a small, bouncing ball of fire, and can be charged to fire from two to five; when fully charged, it can deal substantial damage if it hits with every projectile. These traits make it a useful damage-racking, combo-starting, and on-stage edgeguarding and gimping tool. However, the move also possesses a hurtbox on Ridley's mouth that damages and stuns him if he is hit there, and while sometimes the recoil can serve as a niche defensive option due to Ridley not suffering any knockback from it, especially when offstage, this is still very risky. Skewer is a "high risk, high reward" punishment move that, when sweetspotted, deals extremely high damage and crumples enemies; while situational due to the high difficulty on sweetspotting the move, it puts the opponent in a dangerous position where Ridley can read their reaction. Space Pirate Rush is a command grab with some unique perks; it can be cancelled into a throw at any time that puts both Ridley and the opponent into the air. On land, Ridley drags the opponent on the ground, dealing high damage when performed from one ledge to another, and launching opponents offstage when Ridley reaches the edge of a floor, with the launch being capable of KOing at high percentages. In the air, it makes Ridley drop down to the floor until he lands, which can allow for easy gimps offstage as Ridley can drag opponents closer to a blast zone, potentially leaving them too far to recover. Lastly, Wing Blitz is Ridley's primary recovery move. It can be aimed in four directions, with the forward input traveling at a slight downwards angle, the backward variant traveling at a slight upward one, and the down variant traveling at a slight diagonal angle in front of Ridley. All Wing Blitz variants have a large ledge sweetspot and have high knockback, with the down input meteor smashing opponents; the down input is also unique in that it can be used at the edge of the stage and grab the ledge as long as the down direction is not inputted for longer, which can let Ridley potentially ledge trump an unsuspecting opponent or send them straight down, depending on their position.
Another notable aspect of Ridley's kit is his impressive, long-distanced recovery. As a multi-jumper with decent air speed, air acceleration and gravity, Ridley can naturally reposition himself to adapt to the situation. Space Pirate Rush can offer Ridley some horizontal gain, as well as threaten the opponent with a moving command grab that can put them in a very uncomfortable position, and has the benefit of not leaving Ridley helpless. Wing Blitz, however, provides a lot of unique properties. The intangible tips can prevent many attacks with the right aim, including but not limited to Villager's forward smash, Ness's down smash charge, and Mega Man's down aerial. Due to the "bounce" that occurs when Wing Blitz hits the side of a stage, Ridley can even recover while avoiding counter moves, a trait that very few recoveries have. The attack itself is also quite strong, giving it impressive guard-breaking potential, and covers a long distance relatively quickly, with the startup time being mitigated by how far Ridley can recover from. This can discourage the opponent from trying to edge-guard Ridley at all, especially if he has his extra jump in reserve, and can make Ridley surprisingly difficult to edge guard if he's in position. Lastly, his aerial moves can mitigate some of the vulnerability in his recovery due to their low lag. All in all, despite being rigid and potentially exploitable, Ridley's recovery has attributes and options that are both unique and valuable for any character, especially a heavyweight.
Ridley's large frame also gives him remarkable range. Many of Ridley's moves have large, disjointed hitboxes, some even eclipsing sword users like Marth and Ike. Ridley's disjoints can even challenge and beat out incoming projectiles when timed right, and can even sometimes break him out of disadvantage. This is all on top of the aforementioned projectile he has. Finally, and thanks to his range, Ridley possesses a surprisingly dangerous combo game. His down throw, up tilt, down tilt, neutral aerial, and Plasma Breath can lead into various strings and combos that can rack up huge damage with only a few hits, with some even leading to kill confirms (such as Plasma Breath to dash attack, late hit neutral aerial to forward smash, and up tilt into back or up aerial). Combined with the aforementioned power and utility on his moves, this allows Ridley to pile up damage as quickly as his fellow heavyweights, and also makes it risky for opponents to regain the advantage, as Ridley's ability to start combos and break a defense even while in a disadvantage forces the opponent to be cautious of Ridley's options. All of Ridley's traits make him a strangely varied fighter for his weight and size, allowing him to play differently depending on the situation.
While it's an understated attribute, Ridley functioning like a Swiss army knife archetype allows Ridley to have a valuable tool or playstyle in almost all match ups, which plays very well to highlight Ridley's strength in bait-and-punishing and frame trapping. Ridley's disjointed range allows him to check characters that struggle with range or rely on grabs, and his command grab can check characters that are highly defensive or have difficulty recovering, and his projectile checks characters that lack one in return. Ridley's surprising defensive capabilities often crop up in matches that would seemingly favor the aggressor, such as his rather impressively low ledge hang (which can even evade moves like Marth and Lucina's forward smash), the surprisingly low profile of his crouch, and the previously mentioned intangible tips of his Wing Blitz recovery. In the end, while many characters can give Ridley trouble, few characters are equipped to avoid being checked by his tools, and even fewer are able to negate all of them.
While Ridley has amazing strengths, he also has some critical and easy-to-exploit weaknesses. The most notable of them is his size; Ridley has among the largest, most awkward hurtboxes out of the cast, which combined with his heavy weight and fast falling speed makes him very easy to combo, juggle, and hit in general. On top of that, his lower weight compared to characters of a similar size also negatively affects his survivability, as he is often at a considerably higher risk of dying much earlier from being in disadvantage than other heavy characters due his mixture of very large size and only moderately heavy weight. While Ridley's frame data is rather poor, although good for a heavyweight, he has below average startup and above average ending lag overall on his toolkit, so he lacks a tool fast enough to break combos effectively; this makes him one of the most affected characters by average combo strings, and he is rather easy to finish off. Quite literally any character can defeat Ridley with basic edgeguarding tools and Ridley being out of his comfortable recovery position. Ridley’s options against projectile users and zoning are virtually nonexistent despite having a projectile himself; Plasma Breath is laggy, its projectiles travel slowly, and are useless against more powerful projectiles, and the move's recoil property on Ridley's mouth can easily open up opportunities for more attacks against him that would end a stock, even if said recoil would prevent knockback especially on emergency situations like being at KO percent. Ridley's disjointed moves are seldom capable of beating out projectiles, and he has few moves that boast enough range to challenge zoners, and these options usually require a great deal of effort to execute right compared to what they're challenging, which can quickly lead to Ridley being cornered into a worse situation. All of this is further worsened with how tricky it can be to land with Ridley, despite being a fast-faller.
Adding to the above is Ridley's recovery, which is still exploitable despite its long distance. Both of his recovery specials, Space Pirate Rush and Wing Blitz, have high startup and the latter, despite its appearance and its impressive distance, has only four angled travel routes, which means that Ridley has to properly get into a good position to recover, giving the opponent more than enough time to react. While Wing Blitz has some minor defenses while active, that being invulnerability on the spiked tips of his wings along with dealing heavy knockback on contact, it does not have a charging hitbox while his body remains vulnerable throughout the move, so it can be quite easy to aim for with prediction. This is worse when a character has a counterattack or heavily disjointed attacks, as they can safely challenge the move at any stage of its animation, though certain stages can allow Ridley to evade being countered by aiming Wing Blitz toward the stage and bouncing up to the ledge from impact. Without his midair jumps, Ridley can also have a lot of trouble recovering from below, and any low-sending attack like a semi-spike can put Ridley into an unrecoverable position. Because of this, offstage Ridley usually is forced to use his extra jumps as emergency jumps when he's in a disadvantage, which while valuable, is noticeably less useful than other multi-jumpers. As a result, Ridley's overall endurance is poor for a large heavyweight, and while his survivability isn't as poor as other lighter characters, it is unimpressive for a heavyweight and for his size.
Another critical flaw to Ridley is how drastically his moves vary in quality, which can lead to Ridley becoming quite predictable. While he has plenty of moves offering varying amounts of utility, some of them still have significant flaws; these can range from slow startup (Plasma Breath and down smash), absurd blindspots (up tilt and sometimes up smash), overly situational and/or strict (Skewer), to being downright unreliable (down aerial). On the other side of the spectrum, some of Ridley's moves like neutral aerial, up smash, down tilt, and depending on the match-up, the aforementioned Plasma Breath is so favorable that it becomes easy to over-centralize on their use. Ridley is a character that finds the most success in being unpredictable, which can be difficult when a player subconsciously checks off using so many moves. This, combined with his aforementioned trouble at dealing with fast and/or zoning characters, and with recovering under pressure, makes Ridley one of the most susceptible characters to pressure, as Ridley's disadvantage state makes him easy to overwhelm, and failure to overwhelm or control aggression could force him to take heavy damage or even be KOed outright.
A notable downside of Ridley's kit is his mediocre grab game. His grab range is somewhat short for his size, to begin with, alongside very mediocre to poor frame data for all variants of the grab input, and a character like him can greatly suffer from whiffing it, its only saving grace being Ridley's fast dash speed. While down throw functions as a strong and reliable combo tool from low to mid percentages, and at very high percentages (around 150%) are capable of KOing middleweights, none of Ridley's other throws provide much usage beyond repositioning the opponent. Forward and back throws don't KO at reasonable percentages, even with ideal positioning, and up throw, while being his most damaging throw and a passable kill throw with low ceiling stages, is best as a mediocre set up for juggling the opponent. Though it has a visually brutal depiction, the fact that it is Ridley's most "powerful" throw, truly demonstrates his lack of viable kill options or combo throws. Even Ridley's down throw doesn't combo into entirely unique strings, and his down tilt can sometimes service some of the same use while being much safer to execute, despite down throw into forward tilt being a noteworthy frame trap set up. Though it does combo into forward air from low to high percentages and has surprising power, KOing Mii Brawler around 180%. Unlike other normally reliable down throws, however, Ridley's is noticeably easy to simply DI away from to severely limit Ridley's follow-ups. While the existence of Space Pirate Rush somewhat mitigates his lack of a strong throw due to its ability to KO at the ledge at high percentages, overall, Ridley's grab game is almost entirely centralized by his down throw's utility, with his other throws being situational at best and a complete waste of risks at worst.
Lastly, while Ridley's advantage state is unarguably very oppressive, one key attribute holding this back is his middling airspeed. For his additional mid-air jump and impressive aerials, their full potential is greatly held back by Ridley's surprising difficulty in staying airborne. He generally needs to gain some distance while grounded to approach with his aerials, and while his dash speed is very impressive, it's restrictive regardless, and Ridley lacks the number of jumps that characters like King Dedede and Pit have to help circumvent their airspeed issues. Various combos usually are unable to extend in the air for long thanks to this, as his aerials may deal too much knockback to follow up after one or two attacks. This is further shown in his recovery, as Wing Blitz and Space Pirate Rush are usually options he must use to recover, even if Ridley isn't that far from the stage. While Ridley's airspeed is definitely better than most other fellow characters with multiple jumps, it's still merely average compared to the whole cast, which tones down his overall effectiveness in the air, and this is further exacerbated by him being a fast-faller.
Overall, Ridley is a character of extremes, with a relatively high learning curve and an even higher cerebral curve. Similarly to what Mewtwo is among its fellow lightweight characters, Ridley fills in the position of being a glass cannon among his fellow heavyweights. He has excellent damage, pressure, and edge-guarding potential with a broad arsenal of powerful moves and tools to gain and sustain advantage, gradually poke and pressure from a fair distance away, and punish whiffs or what would normally be an inconsequential slip-up. This allows Ridley to easily make comebacks or greatly widen his lead with minimal set up should an opponent make a single error in considering Ridley's approach. However, his moveset is so heavily lopsided towards accumulating damage, netting kills, and sustaining advantage that he lacks any tools to break combos and is limited in combating opposing pressure, meaning that one mistake from Ridley himself can devastate him worse than most other characters. Due to his varied amount of tools, Ridley has many playstyles applicable, but players should be able to switch said playstyles in a whim; if played recklessly or predictably, Ridley can be easily punished with a slew of combos, walls of projectiles, and general pressure he isn't built to handle, so players should be constantly aware of when and how to use Ridley's tools to take full advantage of them, while playing unpredictably to prevent the opponent from capitalizing on Ridley’s own susceptibility. This is especially true against dominating characters like Palutena or Snake, who are either well equipped to handle all of Ridley's strengths, or their own skills are so powerful that even Ridley's combined toolkit can't make up the difference on its own. However, this also means the reverse can be true, as some characters who already struggle with one of Ridley's tools may find Ridley outright insurmountable if more than one of his playstyles favors the battle.
Ridley's competitive potential is subject for debate, typically hovering in the nebulous gateway between low and mid tier while sometimes being much lower or much higher. Some professional players consider him a low-tier due to his poor disadvantage state and difficulty surviving for heavyweight standards, while others like MkLeo and ESAM argue that he is a higher mid-tier thanks to his strong advantage state and wide array of options for multiple playstyles. This can be further expressed by his tournament presence; Ridley is an unpopular pick, yet displays respectable to impressive placings relative to his usage, with smashers like Nair^, Vreyvus, and Locus demonstrating his potential. Because of this, Ridley is considered a viable character, though the difficulty in learning his strengths for high level play and how punishable Ridley can be from human error make Ridley one of the more rarely seen viable characters. In casual fields, Ridley is notorious for how exploitable his weaknesses can be and the many pitfalls that beginners can fall into, especially with poor routing of Wing Blitz leading to awkward and anti-climactic finishes, proving his high learning curve for his size class.
Update history
Ridley has received a mix of buffs and nerfs via game updates, but has been buffed overall. He initially only received glitch fixes and very minor buffs, as well reduced shield damage on Plasma Breath in update 3.0.0 as part of the general nerfs to projectiles in said update. However, update 4.0.0 helped address his KO inconsistency and recovery issues. Up smash's knockback scaling and duration were both marginally increased, which slightly improve its KO potential and utility as both an anti-air and out of shield option, respectively. Back aerial's damage output was increased and Space Pirate Rush's throw at the edge received more knockback scaling. Up aerial's sweetspot became much easier to land, thanks to it being enlarged and given more priority over its sourspot. Lastly and most notably, Wing Blitz is faster and covers more distance, now allowing Ridley to recover from the magnifying glass range of the bottom blast line when it is angled up.
Update 7.0.0 provided small, but beneficial buffs. Prior to the update, it was common for Ridley to get shield poked, even with a full shield, due to a part of his wing not being fully protected. 7.0.0 fixed this issue by both adjusting his psture and making part of his wings and tail invincible after activating and deactivating shield. In update 8.0.0, Skewer received both a buff and a nerf, although the latter is more significant overall. Its sweetspot deals slightly more damage, making it far more rewarding if successfully landed. However, if it hits an opponent with grab immunity, it causes minimal knockback instead of crumpling them. In addition to removing a setup into the move from Ridley's down throw (instead causing Skewer to be unsafe on hit in this case), it removes the move's infamous infinite combo in doubles matches when paired with a character that has a burying throw.
 Space Pirate Rush has three additional animations.
 Ridley has more horizontal speed after jumping out of Space Pirate Rush (3 → 4) and decelerates slower (0.145 → 0.135).
- He also sustains more gravity (0.14 → 0.15).
- Ridley can land sooner after jumping out of Space Pirate Rush (19 frames → 17).
- Ridley and his opponent are KO'd sooner when passing the bottom blastline during Space Pirate Rush.
- Ridley loses more speed after whiffing a Space Pirate Rush (Horizontal speed multiplier: 0.65× → 0.6×).
- Wing Blitz
- Ridley travels faster at the start of the move when charging forward or backwards (3.6 → 4.6/4.2 (forward/backwards)).
- Ridley loses more speed after bumping into a wall (Horizontal speed multiplier: 0.3× → 0.25×).
- Ridley loses less speed during landing (Horizontal speed multiplier: 0.45× → 0.55×).
- Ridley starts decelerating sooner (frame 6 → frame 2/4 (forward/backwards)).
- Ridley decelerates more during the forward charge (0.125 → 0.138).
- Ridley flies at a slightly higher angle during the forward charge (-7° → -5°).
- Ridley can grab the ledge earlier after using his neutral (65 frames → 64), forward (67 frames → 66), and down aerials (80 frames → 69).
- The Final Smash Meter version of Plasma Scream has a higher knockback multiplier (x0.62 → x0.71).
 The instant KOing glitch involving Sonic has been fixed.
 Plasma Breath deals less shield damage (-2 → -3).
- A successful Plasma Scream has less ending lag, allowing Ridley to act before opponents can.
- Up smash has a longer hitbox duration (frames 12-16 → 12-17), increasing its range in front of Ridley.
- Up smash has more knockback scaling (76 → 78).
- Back aerial deals more damage (15% → 16%) with no compensation on knockback.
- Up aerial's sweetspot is bigger (4.5u → 5.5u) and takes priority over the sourspot.
- Down aerial no longer has its downward movement disabled when used out of hitstun.
- Space Pirate Rush has less ending lag when jumping after grabbing an opponent (FAF 42 → 39).
- Space Pirate Rush has more knockback scaling when throwing the opponent at an edge (83 → 90).
- Fixed an issue that resulted in Space Pirate Rush launching floaty characters much higher when used in a Sacrificial KO.
- Wing Blitz has less startup lag (frame 37 → 34 (up), 39 → 36 (forward/back), 40 → 37 (down)), travels faster and covers more distance.
- Ridley's posture was altered while shielding, reducing the possibility of him getting shield stabbed.
- A portion of Ridley's wings are intangible when activating and deactivating his shield. A portion of his tail is also briefly intangible when deactivating the shield.
- Skewer:
- The sweetspot hitbox deals more damage (40% → 45%).
- The sweetspot no longer triggers a Special Zoom nor crumples opponents with grab immunity, effectively making the move a hit grab. This significantly worsens a hard read into the move from Ridley's down throw at low percents, which is now unsafe on hit, and removes the infamous Skewer bury infinite in doubles matches.
- Rapid jab and its finisher have transcendent priority, preventing them from being canceled out by weak attacks.
- Wing Blitz's landing hitbox when angled down no longer affects aerial opponents. Although this removes occasional situations where the landing hitbox could hit aerial opponents if the main attack missed, it is overall a buff, as it prevents more common situations where the landing hitbox would override the main attack's knockback (thus ruining meteor smash attempts) if used too close to the edge.
Moveset
- Ridley can perform two midair jumps.
For a gallery of Ridley's hitboxes, see here.
Note: All numbers are listed as base damage, without the 1v1 multiplier.
| Name | Damage | Description | ||
|---|---|---|---|---|
| Neutral attack | 2% | A double claw swipe followed by a bite. Alternatively, if the attack button is pressed quickly for each hit, the second hit transitions into a rapid-fire tail stab that ends with a swing. The first and second hits are particularly low-hitting jab locks, while the third hit is relatively strong for a neutral attack, KOing middleweights under 200% from the center of Final Destination. Conversely, the neutral infinite's finisher has high base knockback, but very low knockback scaling, being unable to KO under 500% from center stage. | ||
| 1.5% | ||||
| 5% | ||||
| 0.7% (loop), 2% (end) | ||||
| Forward tilt | 10% (tail), 13% (tip) | Grabs his tail and thrusts it forward. Can be angled, and the tip of Ridley's tail acts as a sweetspot. The up-angled version can act as a low altitude anti-air with respectable horizontal reach, while the downward-angled version can act as a ledge pressuring tool, with the sweetspot reaching low enough to catch any opponent in a 2 frame punish, a ledge regrab, or a missed ledge sweetspot. Has long range and moderately low ending lag, making it a powerful spacing tool. The sweetspot KOs at around 155% from center stage. | ||
| Up tilt | 7% (wing), 9% (tip) | Swipes one wing in an arc above himself, starting from behind. Has its sweetspot along the upper edge and renders Ridley's wing intangible while the hitboxes are active, which along with its coverage allows it to function as an effective anti-air. Its moderate speed also allows it to combo into itself at low to mid percents, and into any aerial attack at mid to high percents. Has blind spots beside Ridley. | ||
| Down tilt | 6% (tail), 9% (tip) | A low tail swipe. Has its sweetspot on the tip of the tail with slightly longer range than his forward tilt, and launches opponents upward, allowing it to combo into aerial attacks at a wide range of percents, as well as an up-angled forward tilt, dash attack, or up tilt (against larger characters) at low percents. | ||
| Dash attack | 12% | A leaning bite. A powerful dash attack especially near edges, KOing at around 100% at the edge of Final Destination, and at around 160% from the center. Resembles Meta Ridley's lunging attack in Metroid Prime. | ||
| Forward smash | 20% | Rears back and then expels a fiery explosion from his mouth in front of himself. Has slow startup and short range (covering less horizontal distance than his forward tilt), but deals very high damage and knockback, KOing under 80% from center stage. | ||
| Up smash | 17% | A frontflip kick, covering Ridley's entire overhead. Has moderate startup and ending lag, but has a large overall hitbox and grants intangibility on Ridley's leg while the hitboxes are active, making it a powerful anti-air similarly to his up tilt. Has blind spots directly in front and behind Ridley, though it may hit taller characters directly on either side. Can KO at around 105% from ground level. | ||
| Down smash | 16% | Leaps and slams his open wings onto the ground. Hits Ridley's both sides simultaneously with large coverage, allowing it to punish tech rolls in certain instances. The leap during startup can allow him to dodge some ground attacks if timed right (especially floor attacks that may be used after hitting with Skewer, or ledge attacks), while the edges of the attack utilize the intangible half of Ridley's wings. However, it has the slowest startup out of Ridley's smash attacks, and deals the least damage, while being only slightly stronger than his up smash. Launches opponents upward, KOing at around 100%. | ||
| Neutral aerial | 9% (clean, tail), 12% (clean, tip), 5% (late) | Backflips and swings his tail around himself, similar to Charizard's neutral aerial except backwards instead of forwards. Has the lowest startup, ending lag and landing lag out of Ridley's aerials, as well as a long duration and a large hitbox, making it widely considered one of his most viable approach options. Upon landing, it can also combo into a jab, forward tilt, down tilt or grab at low percents, and another neutral aerial or a forward aerial at mid percents, especially if the sourspot is landed. | ||
| Forward aerial | 3% (hits 1-2, tail), 5% (hits 1-2, tip; hit 3, tail), 7% (hit 3, tip) | Stabs with his tail forward three times in quick succession. Deals the most damage out of Ridley's aerials if all hits are sweetspotted (17% total); however, it is also his weakest aerial knockback-wise, while its hitboxes are small compared to his other moves. Has moderate landing lag, albeit the first hit can set up into a neutral attack. | ||
| Back aerial | 16% | A hook kick. Ridley's strongest aerial, KOing at around 130% from center stage. Its horizontal range and high damage also make it a relatively safe approach option, despite its moderate landing lag. | ||
| Up aerial | 12% (wings), 14% (tip) | Thrusts his closed wings upward. Has a sweetspot at the tip of the wings, which can KO at around 120% in the air. Its moderate startup and landing lag alongside Ridley's speed make it effective for juggling. On landing, it can also combo into an up tilt or up smash at low percents, as well as any aerial (except down aerial) up to high percents, including a sweetspotted up aerial as a potential KO setup. | ||
| Down aerial | 14% (clean, feet), 12% (clean, legs; late) | A double foot stomp. A stall-then-fall with a sweetspot on its clean hit that meteor smashes opponents. Unlike most other moves of its kind, Ridley can also recover from it offstage if initiated at least at some height above the stage. However, it has very high landing lag, leaving it unsafe as a landing option and preventing any followups out of its meteor smash onstage. It resembles a move Meta Ridley uses in Metroid Prime. | ||
| Grab | — | Reaches out with his right hand. | ||
| Pummel | 1.6% | Stabs his opponent with his tail. | ||
| Forward throw | 9% | Tosses the opponent forward with one arm. Has slight KO potential, being able to KO at around 181% near the ledge. | ||
| Back throw | 11% | Turns around and performs an underhanded toss with one arm. Can KO at around 150% near the ledge. | ||
| Up throw | 8% (hit 1), 4% (throw) | Sets the opponent overhead and stabs them with his tail. Ridley's most damaging throw. Has slight KO potential, being able to KO at around 190% on Final Destination. | ||
| Down throw | 7% | Slams the opponent onto the ground. Has low ending lag, allowing it to combo into an upward angled forward tilt or down tilt at low percents, and a neutral, forward, back aerial or run-canceled up tilt at low to mid percents. Surprisingly, this is also Ridley's strongest throw, being able to KO at around 179% at the edge of Battlefield. | ||
| Floor attack (front) | 7% | Performs a claw swipe around himself while getting up, starting from the front. | ||
| Floor attack (back) | 7% | Swings his tail forward, then backward while getting up. | ||
| Floor attack (trip) | 5% | Swipes an arm backward, then kicks forward. | ||
| Edge attack | 10% | Climbs up and performs a claw swipe. | ||
| Neutral special | Plasma Breath | 4.5%-5.66% (clean), 3.5%-4.4% (late) | Expels a fireball from his mouth forward, which bounces along the ground. It can be charged to have Ridley launch a maximum of five fireballs, which also increase in size and damage, dealing up to 28.3% if all of them connect. When charged, it is fairly effective for camping and edgeguarding due to its low ending lag and sheer amount of projectiles, and can rack up damage quickly if uninterrupted. However, it has rather high startup, and hitting Ridley's mouth while he is charging the move causes recoil damage to him depending on how much it had been charged. The recoil animation lasts 56 frames. | |
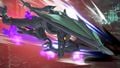
| Side special | Space Pirate Rush | 4% (slam), 2% (drag loop), 7% (throw) | Rushes forward to grab an opponent, functioning as a command grab. If successful, Ridley slams them onto the ground and drags them forward along it, dealing continuous damage, then throws them either upon reaching an edge or if the special move button is held. The move deals more damage the more distance the opponent is dragged along the ground, dealing 17% minimum when throwing manually, and can rack up a lot of damage in a short span of time. However, they can mash out of the move before Ridley throws them, with how fast they can escape depending on the difference between their percent and Ridley's. In midair, it doesn't incur helplessness, allowing it to extend Ridley's recovery, and grabbing an opponent causes him to fall down with them until landing or throwing them manually, allowing it to be used for a sacrificial KO. However, it has some startup lag, and the aerial version causes Ridley to drop downwards after its horizontal momentum ends, making it possible to mistime a recovery. | |
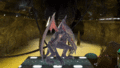
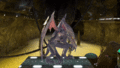
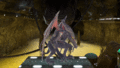
| Up special | Wing Blitz | 18% (up), 16% (forward/back), 15% (down), 5% (down, landing) | Charges up, then propels himself in any of four possible directions: straight up by default; forward and slightly down; backward and slightly up; and down and slightly forward. The move travels a long distance, does not lose power while traveling, has a wide ledge grabbing range throughout, and lets Ridley drift significantly when done. It is also noticeably powerful: the forward and upward tackles KO under 130% from center stage, whereas the diving stomp meteor smashes aerial targets while also allowing Ridley to save himself by grabbing an edge, making it potentially deadly for edgeguarding. However, the move has very slow startup, and its few angles limit the positions from which Ridley can safely recover with it. Hitting a wall or ceiling with any angle will cause Ridley to bump away foregoing helplessness. | |
| Down special | Skewer | 5% (tail), 45% (tip, hit 1), 10% (tip, hit 2) | Brings his tail back as it sparks briefly, then stabs forward with it. If hit near the tip of the tail, it causes Special Zoom and deals extremely high damage (55% total) and causes opponents to crumple if landed on the ground, akin to a fully charged Focus Attack; both the sweetspot and the sourspot deal minimal shield damage, however. It has a very slow startup of half a second (30 frames), and conversely deals low damage and knockback if any other part of Ridley's tail hits, making it significantly hard to land especially in one-on-one battles. Additionally, the sweetspotted attack only allows Ridley to move after the opponent gets up again, making followup attacks based on reading the opponent's getup option. If Skewer lands on an airborne opponent, they will instead be sent away with weak diagonal knockback. | |
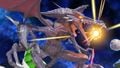
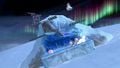
| Final Smash | Plasma Scream | 15% (dash), 40% (cutscene), 15% (ending) | Lets out a roar and dashes forward. Upon hitting an opponent, a cinematic sequence begins with Ridley headbutting them onto Samus's gunship; as the gunship flies off, he expels an energy beam from his mouth that engulfs both the ship and the target in an explosion. After the cutscene ends, the opponent is meteor smashed and the gunship can be seen crashing in the background of the stage. This Final Smash is an instant KO on opponents at 100% or higher before the cutscene ends. | |
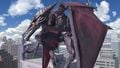
On-screen appearance
- Swoops down at an angle, before landing and letting out a roar.
Ridley's on-screen appearance

Taunts
- Up taunt: Roars and strikes a menacing pose, flapping his wings rapidly.
- Side taunt: Spins in a circle, finishing in a celebrating pose similar to his official artwork.
- Down taunt: Stands up straight while slightly smiling. His body emits a noticeable crackle as he stands upright.
Ridley's up taunt.
Ridley's side taunt.
Ridley's down taunt.


Idle poses
- Spreads his wings out and quivers slightly.
- Caresses his chin with his claw and licks the edge of his mouth while audibly snarling.
Ridley's first idle pose
Ridley's second idle pose


Victory poses
- Left: Flies into the scene, lands, and drifts to a stop.
- Up: Somersaults and screeches, then lands with a slash.
- Right: Claws at the ground repeatedly and bites once afterwards. He then turns toward the camera and grins. The way the camera is angled makes it appear as if Ridley is supposedly ravaging a downed opponent, but in Team Battles, it clearly shows that he is scratching at the bare ground.


In competitive play
Being a widely requested character, there was a lot of hype when Ridley was first announced to be playable. However, initial expressions on Ridley’s viability in the E3 Demo Build were very negative. Due to him having the largest hurtbox in the game while also not as being as heavy as other super heavyweights, along with his attacks suffering from high startup and endlag, many people claimed that Ridley’s disadvantage state was too risky for him to make a significant impact towards the meta. As such, he was initially considered to be a low or even bottom tier character.
However, when the game was released, Ridley achieved notable successes despite having low representation, thanks to impressive results from players such as Nair^, OverLade, adom, and Vreyvus, Nair^ in particular placed 2nd at Mexican Gaming Championship with a notable win over Dark Wizzy, as well as 5th at Smash Fest to the Sky. This has led to most professionals to re-evaluate their opinions on Ridley, stating that he’s a “high risk, high reward”, which is indicated by Ridley’s excellent advantage state, where he can utilise his range, speed and power to provide him a strong and versatile neutral game, though mistakes can lead him to his poor disadvantage state, which shows his relatively high learning curve. Overall, Ridley's reception is significantly better than initially thought, as he is no longer considered to be a low tier, proving that he can be very potent once mastered.
Notable players
Any number following the Smasher name indicates placement on the Fall 2019 PGRU, which recognizes the official top 50 players in the world in Super Smash Bros. Ultimate from July 13th, 2019 to December 15th, 2019.
Active
 adom - The best Ridley player in the Middle East. Placed 25th at Ultimate Fighting Arena 2019 and 33rd at both Albion 4 and 2GG: Nightmare on Smashville.
 Banku- - Placed 13th at Sumabato SP 6 in conjunction with Pac-Man and 49th at Umebura SP 6 with solo Ridley.
 Charger - Placed 17th at Heart of Battle and 25th at SoCal Chronicles. Has wins over Jtails and Rich Brown.
- Gemini - Placed 13th at Full Bloom 5 and 17th at Midwest Mayhem Ultimate.
- HIKARU (#41) - Uses Ridley as a secondary. Placed 17th at both EGS Cup 3 and EVO Japan 2020 as one of his characters.
- Iota - The best Ridley player in the MD/VA region. Placed 2nd at Just Roll With It! 10, 5th at Just Roll With It! 12, and 17th at Just Roll With It! 11. Has taken a set off of Mekos.
 Lapogne36 - One of the best Ridley players in France. Placed 17th at European SEL Clash, 33rd at Stunfest 2019, and 49th at Ultimate Fighting Arena 2019. Has wins over PeW, Ogey, and Yiazmat Goth.
 Nair^ - The best Ridley player in Mexico and one of the best in the world. Placed 2nd at Mexican Gaming Championship and 5th at Smash Fest to the Sky. Has wins over Dark Wizzy, Maister, Javi, Chag, and Hyuga.
- Nagare - Placed 3rd at Maesuma TOP 3 and 13th at Maesuma TOP 2, Maesuma TOP 4, Shulla-bra SP 6, and Shulla-bra SP 8. Has wins over Kie, Renya, and Tatsutsuyo.
- OverLade - One of the two best Ridley players in the United States. Placed 25th at both 2GG: Nightmare on Smashville and DreamHack Atlanta 2019 and 49th at 2GG: Prime Saga. Has a win over Blacktwins.
- Plup - One of the two best Ridley players in the United States. Placed 49th at Super Smash Con 2019 with solo Ridley and 49th at GENESIS 7 with Ridley and Mega Man. Has wins over Comet, Sonix, and Duwang with the character.
- Ridley - Placed 17th at Sumabato SP 10 with both Ridley and Samus, and 33rd at Sumabato SP 7 and 49th at Sumabato SP 9 with solo Ridley.
 Vreyvus - Co-mains Bowser and Ridley and is considered one of the best Ridley player in Europe. Placed 2nd at Valhalla II and 4th at Phoenix Blue 2.
- WhiteFang - The best Ridley player in Nebraska. Placed 17th at Spotlight and 25th at Smash Out 2019 and Overextend. Has a win over Panda Bair and is currently ranked 7th on the Nebraska Ultimate Power Rankings.
Inactive
 Locus - Considered to be the best Ridley player in Canada, albeit as a secondary. Placed 9th at both The Pinnacle 2018 and Battle of BC 3, and 13th at Don't Park on the Grass 2018. Has taken sets off of Captain L, SpamCop, and Snickeldorf with Ridley. Now uses Terry, and rarely uses Ridley or any of his secondaries in bracket.
- Trela - One of the best Ridley players in the world before switching to Hero. Placed 1st at Ultimate Shockwave 2, Ultimate Shockwave 14, and TGC Returns, and 65th at 2GG: Prime Saga. Defeated Meme, Daybreak, and Megafox with Ridley and was ranked 3rd on the Texas Ultimate Power Rankings when solo maining the character.
- Venom - One of the best Ridley players in Canada. Placed 2nd at LAN ETS 2019 while defeating SuperGirlKels, Darkwolf and Fwed, also placed 2nd at Polybash 2019 and 25th at Get On My Level 2019 using Ridley as one of his characters. While he hasn’t officially dropped the character, he now primarily plays Ryu and Ken in bracket.
- Tweek (#3) - One of the best Ridley players in the world. Placed 5th at Collision 2019 using mostly Ridley. Has defeated Sinji, Raptor, and Fwed.
- Zackray (#7) - Placed 2nd at Umebura SP 5 using Ridley as one of his characters.
Classic Mode: It Can't Be! Space Pirates!

Ridley fights characters who pilot their own spaceships.
| Round | Opponent | Stage | Music | Notes |
|---|---|---|---|---|
| 1 | Norfair | Title Theme - Metroid | ||
| 2 | Venom | Break: Through the Ice | ||
| 3 | Distant Planet | Fragment of Hope | ||
| 4 | Mario Galaxy | Fated Battle | ||
| 5 | Halberd | Dangerous Dinner | ||
| 6 | Frigate Orpheon | Vs. Ridley | ||
| Bonus Stage | ||||
| Final | Master Hand | Final Destination | Master Hand (Less than 7.0 intensity) Master Hand / Crazy Hand (Intensity 7.0 or higher) |
On intensity 7.0 and higher, Crazy Hand fights alongside Master Hand. |
Credits roll after completing Classic Mode. Completing it as Ridley has Nemesis Ridley accompany the credits.
Role in World of Light

Although Ridley does not appear in the World of Light opening cutscene, he was vaporized and later imprisoned alongside the rest of the fighters (sans Kirby) when Galeem unleashed his beams of light.
Ridley was one of the many fighters that fell under Dharkon's control upon Galeem's first defeat. He is in the Dracula's Castle sub-area, appearing on the map in the subterranean section, once the player defeats The Creature & Flea Man spirit.
Fighter Battle
| No. | Image | Name | Type | Power | Stage | Music |
|---|---|---|---|---|---|---|
| 65 |  |
Ridley | 10,600 | Brinstar Depths (Ω form) | Vs. Ridley (Brawl) |
Spirits
Ridley's fighter spirit can be obtained by completing Classic Mode. It is also available periodically for purchase in the shop for 500 coins. Unlocking Ridley in World of Light allows the player to preview the first spirit below in the Spirit List under the name "???". As a fighter spirit, it cannot be used in Spirit Battles and is purely aesthetic. His Meta Ridley outfit has a fighter spirit of its own, available through the shop, or by completing a challenge (Smash: Use Ridley's down special, Skewer, for a critical hit on an opponent 4 times within a single battle). Each fighter spirit has an alternate version that replaces them with their artwork in Ultimate.
Additionally, other forms of Ridley make an appearance in a few primary and support spirits.
267. Ridley
268. Meta Ridley
289. Little Birdie
291. Omega Ridley


In Spirit battles
As the main opponent
| Spirit | Battle parameters | Inspiration | |||||||||
|---|---|---|---|---|---|---|---|---|---|---|---|
| No. | Image | Name | Series | Enemy Fighter(s) | Type | Power | Stage | Rules | Conditions | Music | Character |
| 255 |  |
Vaati | The Legend of Zelda Series | •Ridley |
10,000 | Hyrule Castle | •Hazard: Heavy Wind | •Dangerously high winds are in effect after a little while •The enemy starts the battle with an Ore Club |
Dark World (Brawl) | ||
| 277 |  |
Metroid | Metroid Series | •Ridley |
9,700 | Brinstar (Battlefield form) | •Assist Trophy Enemies (Metroid) •Hazard: Sticky Floor |
•The floor is sticky •Hostile assist trophies will appear •The enemy's melee blows will heal them when they hit |
Title Theme - Metroid | ||
| 287 |  |
Mecha Ridley | Metroid Series | •Giant Ridley |
4,100 | Norfair (Ω form) | •Move Speed ↓ | •The enemy's smash attacks have increased power •Stamina battle •The enemy is giant |
Vs. Meta Ridley | ||
| 289 | Little Birdie | Metroid Series | •Tiny Ridley |
3,700 | Distant Planet | •Defense ↑ •Attack Power ↑ •Giant |
•The enemy is giant after a little while •The enemy has increased attack power after a little while •The enemy has increased defense after a little while |
Vs. Ridley | |||
| 291 |  |
Omega Ridley | Metroid Prime Series | •Metal Ridley |
13,900 | Norfair | •Curry-Filled | •Stamina battle •The enemy breathes fire •The enemy is metal |
Vs. Meta Ridley | ||
| 292 | Parasite Queen | Metroid Prime Series | •Giant Ridley |
4,000 | Frigate Orpheon | •Attack Power ↑ | •The enemy has increased attack power •The enemy shields often •The enemy is giant |
Vs. Parasite Queen | |||
| 371 | Bugzzy | Kirby Series | •Ridley |
3,700 | Green Greens | •Item: Beetle | •The enemy's side special has increased power •The enemy has increased attack power |
Forest/Nature Area | |||
| 403 |  |
Aparoid | Star Fox Series | •Metal Ridley |
4,100 | Venom | •Hazard: High Gravity | •Your jumping power decreases •The enemy is metal •The enemy has increased jump power |
Space Battleground | ||
| 426 |  |
Arbok | Pokémon Series | •Ridley |
2,200 | Yoshi's Island (Melee) | •Attack Power ↓ •Hazard: Poison Floor |
•The floor is poisonous •You have reduced attack power |
Main Theme - Pokémon Red & Pokémon Blue (Brawl) | ||
| 454 | Pinsir | Pokémon Series | •Ridley |
3,700 | Garden of Hope | •Item: Beetle | •The enemy's side special has increased power •The enemy favors side specials |
Road to Viridian City - Pokémon Red / Pokémon Blue | |||
| 456 |  |
Gyarados | Pokémon Series | •Giant Ridley |
4,100 | Kongo Falls (Battlefield form) | •Attack Power ↓ | •You have reduced attack power •The enemy is giant |
Main Theme - Pokémon Red & Pokémon Blue (Brawl) | ||
| 471 |  |
Sudowoodo | Pokémon Series | •Ridley |
1,400 | Green Greens (hazards off) | N/A | •Defeat the main fighter to win •The enemy is weak to water attacks •The enemy favors smash attacks •The enemy has super armor when charging smash attacks |
Pokémon Gold / Pokémon Silver Medley | ||
| 475 |  |
Steelix | Pokémon Series | •Metal Ridley |
4,300 | Kalos Pokémon League (Ironworks Chamber only) | N/A | •Stamina battle •The enemy is metal |
Pokémon Gold / Pokémon Silver Medley | ||
| 490 | Flygon | Pokémon Series | •Ridley |
3,800 | Gerudo Valley (Battlefield form) | •Earthquake | •Periodic earthquakes will shake the stage | Victory Road - Pokémon Ruby / Pokémon Sapphire | |||
| 500 | Rayquaza | Pokémon Series | •Ridley |
10,000 | Kalos Pokémon League (Dragonmark Chamber (Legendary) only) | •Hazard: Heavy Wind | •Dangerously high winds are in effect after a while | Battle! (Lorekeeper Zinnia) | |||
| 558 |  |
Lunala | Pokémon Series | •Gold Ridley |
9,400 | Luigi's Mansion (Battlefield form) | N/A | •Stamina battle •Only certain Pokémon will emerge from Poké Balls (Lunala) |
Battle! (Elite Four) / Battle! (Solgaleo/Lunala) | ||
| 607 | Condor | Ice Climber Series | •Ridley •Ice Climbers |
4,500 | Summit (Battlefield form) | •Hazard: Ice Floor | •Defeat the main fighter to win •The floor is frozen •Timed stamina battle (1:00) |
Ice Climber (Brawl) | |||
| 635 | Medeus | Fire Emblem Series | •Ridley |
3,600 | Castle Siege (Underground Cavern) | •Giant | •The enemy is giant after a little while •Stamina battle |
Lords-Showdown | |||
| 713 | Hewdraw | Kid Icarus Series | •Ridley |
3,500 | Skyworld | N/A | •The enemy favors neutral specials | Boss Fight 1 - Kid Icarus: Uprising | |||
| 820 | Peckish Aristocrab | Pikmin Series | •Giant Ridley |
3,800 | Garden of Hope | N/A | •Stamina battle •The enemy favors side specials •The enemy is giant |
Garden of Hope (Remix) | |||
| 1,081 |  |
Dark Emperor | StreetPass Mii Plaza Series | •Giant Ridley |
13,600 | Find Mii | N/A | •The enemy has super armor and is hard to launch or make flinch •The enemy is giant |
Dark Lord | ||
| 1,102 |  |
Master Beast | Super Smash Bros. Series | •Giant Ridley |
9,600 | Final Destination | •Assist Trophy Enemies (Chain Chomp) | •Stamina battle •Hostile assist trophies will appear after a little while •The enemy deals damage when falling |
Master Core | ||
| 1,118 |  |
Tamagon | Devil World | •Tiny Ridley •Clear Richter |
1,500 | Mario Bros. | •Item: Throwing Types | •Defeat the main fighter to win •The enemy favors neutral specials •The enemy is invisible |
Clu Clu Land | ||
| 1,119 |  |
Devil | Devil World | •Ridley •Kirby |
3,900 | 75m (Battlefield form) | •Assist Trophy Enemies (Devil) | •Hostile assist trophies will appear | 25m Theme | Tamagon | |
| 1,345 | Buzzbomb | Banjo-Kazooie Series | •Ridley |
2,000 | Garden of Hope (hazards off) | N/A | •Stamina battle •The enemy favors up specials in the air •The enemy falls slowly |
Spiral Mountain | |||
| 1,370 |  |
Corviknight | Pokémon Series | •Ridley •Giant Ridley |
3,800 | Gaur Plain (Battlefield form) | N/A | •The enemy favors air attacks •Reinforcements will appear after an enemy is KO'd •The enemy has increased jump power |
Battle! (Wild Pokémon) - Pokémon Diamond / Pokémon Pearl | ||
| 1,438 | ![In-game rip [1]](/File:SSBU_spirit_Ender_Dragon.png) |
Ender Dragon | Minecraft Series | •Ridley •Enderman |
12,700 | Find Mii (hazards off) | •Health Recovery | •Defeat the main fighter to win •Stamina battle •The enemy is healed significantly when the enemy's at high damage |
The Arch-Illager | ||
| 1,449 | Bahamut ZERO | FINAL FANTASY Series | •Giant Ridley |
13,500 | Midgar (hazards off) | •Sudden Final Smash | •The enemy will suddenly have a Final Smash when the enemy's at high damage •The enemy is giant |
Those Who Fight Further (AC Version) | |||
As a minion
| Spirit | Battle parameters | Inspiration | |||||||||
|---|---|---|---|---|---|---|---|---|---|---|---|
| No. | Image | Name | Series | Enemy Fighter(s) | Type | Power | Stage | Rules | Conditions | Music | Character |
| 656 |  |
Lyon | Fire Emblem Series | •Robin •Giant Ridley |
3,700 | Unova Pokémon League (hazards off) | N/A | •Reinforcements will appear after an enemy is KO'd •The enemy is giant |
Preparing to Advance | Fomortiis | |
| 739 |  |
Ashley | WarioWare Series | •Mii Swordfighter •Tiny Ridley |
13,700 | WarioWare, Inc. | •Assist Trophy Enemies (Ashley) •Hazard: Left Is Right, Right Is Left |
•Left and right controls will suddenly reverse •Hostile assist trophies will appear •Magic attacks aren't as effective against the enemy |
Ashley's Song | Red | |
| 1,063 | .png) |
Hector (Castlevania) | Castlevania Series | •Robin •Ridley |
3,700 | The Great Cave Offensive (Battlefield form) | •Item: Battering Types | •Reinforcements will appear during the battle | Lament of Innocence | The End | |
| 1,148 | Satoru | Trade & Battle: Card Hero Series | •Shulk •Mewtwo •Ridley •Bowser |
1,700 | Pokémon Stadium 2 | •Move Speed ↓ | •Defeat the main fighter to win •The enemy's melee weapons have increased power •Reinforcements will appear during the battle |
Worthy Rival Battle | |||
| 1,232 |  |
Nibbles | Fossil Fighters Series | •Yoshi •Charizard •Ridley •Bowser |
1,800 | Arena Ferox | •Item: Pitfall | •Defeat the main fighter to win •Reinforcements will appear during the battle |
Battle Start - Fossil Fighters: Frontier | Chompsaurus | |
| 1,271 | Allen | Culdcept Series | •Shulk •King K. Rool •Ridley |
3,500 | Arena Ferox | •Item: Assist Trophy | •Defeat the main fighter to win •Reinforcements will appear during the battle |
Worthy Rival Battle | Dragon | ||
| 1,307 | Igor | Persona Series | •Robin •Ridley |
10,600 | Kalos Pokémon League (hazards off) | •Health Recovery •Item: Assist Trophy |
•Defeat the main fighter to win •Start with 300% damage •You are healed significantly after a little while |
Aria of the Soul | Inhabitants of the Velvet Room | ||
| 1,350 | .png) |
High Line (Guns Empress) | DAEMON X MACHINA | •Tiny Zero Suit Samus •Ridley |
4,200 | Halberd | •Move Speed ↑ •Assist Trophy Enemies (Jeff) •Item: Shooting Types |
•Hostile assist trophies will appear •The enemy has increased move speed after a little while •Reinforcements will appear after an enemy is KO'd |
Metalopod | High Line | |
| 1,359 | Kim Kaphwan | Fatal Fury Series | •Ken •Giant King Dedede •Tiny Ridley |
1,800 | King of Fighters Stadium | •Jump Power ↓ | •The enemy's kicks and knee strikes have increased power •Reinforcements will appear after an enemy is KO'd •All fighters have reduced jump power |
Let's Go to Seoul! - FATAL FURY 2 | Choi Bounge | ||
Alternate costumes

| |||||||

|

|

|

|

|

|

|

|
Ridley had two palettes in demo versions of Ultimate that are not available in the final game: a dark, charcoal colored one with orange wings, and a light gray one with green wings, claws, teeth and protrusions. Each corresponds with the colors of Meta Ridley and Mecha Ridley, respectively.

Reveal trailer
Gallery

Ridley's splash art.
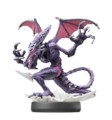
Ridley’s amiibo.
Ridley's fighter card.
Ridley's unlock notice.
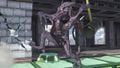
Using Plasma Breath on Mario Galaxy.
Jumping on Wrecking Crew.
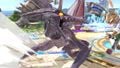
Using Wing Blitz on Midgar.
Using a Hammer on Wrecking Crew.
Using Skewer against Fox on Battlefield.
In his Meta Ridley costume with Samus on Castle Siege.

Performing his On-screen appearance in his Meta Ridley costume on Coliseum.
Ridley about to be hit by Zero's Genmu Zero on Midgar.
Ridley, Jigglypuff, Ice Climbers, and Zelda on Summit.
Taunting on Wily Castle.
With Peach, Captain Falcon and Terry on New Donk City Hall.


Character Showcase Video
Trivia
- With his debut in August 1986, Ridley is the oldest newcomer in the base game for Ultimate, beating out Simon by only one month.
- Ridley’s model appears to be based on his Super Metroid sprite with additional details and embellishments, some of which loosely resemble his design in Metroid: Other M. His size is significantly reduced to that of his appearance in the original Metroid for the NES, where his hunched posture is only slightly taller than Samus.
- Sakurai was reported to have heavily based Ridley on his depiction in the original Metroid, specifically how the sprite appeared hunched over even while flying.[1]
- His fighter tagline, "Ridley Hits the Big Time!", likely references Ridley's exclusion in previous games due to being too big according to Sakurai.
- According to Sakurai from a Nintendo Dream Magazine interview, Ridley was added in due to the Smash Bros. Fighter Ballot.[2]
- Since this is his playable Smash Bros. debut, this also marks Ridley’s debut as a playable character in any game.
- Ridley's pose in his official artwork resembles the pose Bowser makes in his official art for SSB4, only mirrored.
- His animated reveal trailer is the first time since Ridley's role in the Metroid manga where Ridley has displayed a dark sense of humor, playfully twirling the hat of a defeated Mario when revealing himself to Samus while flashing an inhuman grin.
- The way Ridley twirls Mario's hat is a throwback to Mario in the beginning of the reveal trailer of Super Mario Odyssey.
- The part where a Metroid attacks Ridley before a stunned Pikachu resembles a pivotal point in his boss fight in Metroid: Samus Returns, where the Baby Metroid saves Samus from Ridley by leeching some of his energy.
- The moment Ridley appears in his introductory trailer resembles his appearance in Metroid: Zero Mission, just before his fight. This includes the way Samus looks at the screen, Ridley's reflection in her visor, his entrance animation, and music timing.
- Ridley (and by extension, Meta Ridley) is the second Smash Bros. boss character to become playable in the series after Giga Bowser and the only boss character to be playable at all times, as Giga Bowser is limited to Bowser's Final Smash. He is also one of the only two stage hazards to become playable in the series, the other being Piranha Plant.
- There was an error on Ridley's page on the Latin American and Canadian French version of the Smash Bros. website. The reveal trailer videos were unavailable, with the Latin American version mistakenly linking to a Japanese Mario Tennis Aces video. This has since been corrected.
- Ridley is the only playable character from the Metroid universe whose animations are mirrored.
- Masahiro Sakurai has stated in an interview that Ridley's down taunt (where he stands upright) is among his favorite taunts in the game.[3]
- Ridley is the only character in Ultimate to not receive a significant eye color change after obtaining a Smash Ball or during a perfect shield animation due to his eyes already being yellow.
- Meta Knight's default eye color is also yellow, though his eyes do change into a crimson color in these circumstances.
- When zooming in behind Meta Ridley's wings, his right wing does not fully connect to his back.[4]
- Ridley's damage meter portrait protrudes downward the most out of every fighter.
- Strangely, Ridley has code for gliding, despite the mechanic not returning from Brawl, and Ridley himself not being playable or cloned from a playable character in Brawl.
- Upon further inspection, the code is identical to Charizard's, which has been carried over since Brawl, suggesting that Charizard was used as a template for some aspects of Ridley's creation.
- Ridley is the one of few characters who has only two knockback voice clips (with the others being the Ice Climbers and Duck Hunt) and one blast KO voice clip (with the others being Jigglypuff in the international versions, Mewtwo, Roy, the Mii Fighters, Bayonetta, and Sephiroth.
- Sometimes, when Ridley takes damage, he may display a similar pose to Neo-Ridley's when he flies. [5]
- Ridley and Corrin appear in the most Legend-rank spirit battles as the main opponent, at a total of four.
- Specifically, Ridley appears in the Omega Ridley, Dark Emperor, Ender Dragon, and Bahamut ZERO spirit battles.
References
- ^ https://www.eventhubs.com/news/2018/jul/23/masahiro-sakurai-designed-ridley-super-smash-bros-ultimate-based-his-appearance-original-metroid-nes/
- ^ http://www.japanesenintendo.com/post/182181277319
- ^ https://nintendoeverything.com/sakurai-on-smash-bros-ultimate-tempo-items-changes-and-additions-choosing-taunts-much-more/2/
- ^ [1]
- ^ [2]
|
| |
|---|---|
| Fighters | Samus (SSB · SSBM · SSBB · SSB4 · SSBU) · Zero Suit Samus (SSBB · SSB4 · SSBU) · Ridley (SSBU) · Dark Samus (SSBU) |
| Assist Trophies | Metroid · Dark Samus · Mother Brain |
| Bosses | Ridley · Meta Ridley |
| Stages | Planet Zebes · Brinstar · Brinstar Depths · Frigate Orpheon · Norfair · Pyrosphere Brinstar Escape Shaft (Adventure Mode) |
| Item | Screw Attack · Power Suit Piece |
| Enemies | Geemer · Kihunter · Metroid · Reo · FG II-Graham · Joulion · Zero |
| Other | Gunship · Kraid |
| Trophies, Stickers and Spirits | Trophies (SSBM · SSBB · SSB4) · Stickers · Spirits |
| Music | Brawl · SSB4 · Ultimate |
| Masterpieces | Metroid · Super Metroid |