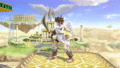
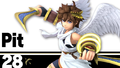
Pit (SSBU)
| Pit in Super Smash Bros. Ultimate | |
|---|---|
 
| |
| Universe | Kid Icarus |
| Other playable appearances | in Brawl in SSB4 |
| Availability | Unlockable |
| Final Smash | Lightning Chariot |
| “ | Pit is a well-balanced, well-rounded character with a defensive special that nullifies long distance attacks and excellent recovery. He's a great choice for new players! | ” |
| —Super Smash Blog, Super Smash Bros. Ultimate Official Site | ||
Pit (ピット, Pit) is a playable character in Super Smash Bros. Ultimate. He was confirmed as a playable character on June 12th, 2018. Pit is classified as fighter #28.
Antony Del Rio and Minami Takayama reprise their roles as Pit in the English and Japanese versions of the game, through recycled voice clips from Smash 4 along with some new ones. As in SSB4, the former remains uncredited with his role, most likely because of him still being a union-based voice actor.
How to unlock
Complete one of the following:
- Play VS. matches, with Pit being the 4th character to be unlocked.
- Clear Classic Mode with Samus or any character in her unlock tree, being the 3rd character unlocked after Wii Fit Trainer.
- Have Pit join the player's party in World of Light.
With the exception of the third method, Pit must then be defeated on Skyworld.
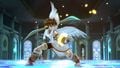
Attributes
Pit is a middleweight who has above-average walking and dashing speeds, a fast initial dash, very high traction (being tied with his Echo Fighter for the second-highest), average air acceleration and falling speed, and below-average air speed and gravity. Pit's jump and double jump are both low, although this flaw is largely offset by his three double jumps. These attributes collectively render Pit's overall mobility as average, yet make him adept at adapting to most situations. Unlike most of his fellow middleweights, Pit also has above-average height.
As a beginner-friendly character, Pit has a low learning curve, yet is quite rewarding when played wisely. His ease of use is probably best exemplified by his fast frame data; aside from six moves (forward tilt, forward smash, and forward, back, up and down aerials), the rest of Pit's standard moveset has less than 10 frames of startup lag.
Much like his attributes, Pit's moveset is balanced, so much so that it seemingly has no glaring strengths of weaknesses. When coupled with his great neutral game, Pit's edgeguarding potential, punishment ability, and conversions are all balanced compared to the rest of the cast. Pit's ground game overall possesses a decent level of utility. Neutral attack, down tilt and down smash are decent spacing options, thanks to their quick start-up and moderate ending lag in proportion to their range, with down tilt also serving as a situational combo starter unlike in SSB4 in addition to making Pit pseudo-crawl.
Neutral attack's first two hits can jab lock, while dash attack can punish landings and whiffed attacks very effectively, and down smash's back hit is a moderately strong semi-spike. Up tilt and especially up smash are useful anti-air moves, with the former being a viable combo starter leading into aerials even at higher percents, while the latter also boasts enough power to score KOs. Lastly, forward smash is Pit's strongest KOing option, and also has among the fastest startup of any forward smash in the game.
Pit possesses a respectable grab game. Forward throw can combo into dash attack at low percents or KO at high percents while near the edge, while down throw can be used to combo into up smash or his aerials. Back throw can be used to setup edgeguards at higher percents, but otherwise has limited utility. Finally, up throw is Pit's least useful throw, but can occasionally setup juggle situations or pressure.
Pit's air game is also useful, thanks to his aerial attacks' ability to all autocancel in a short hop and their particular strengths. Neutral aerial has the lowest amount of startup lag out of his entire moveset, a long duration, and an excellent autocancel window. Altogether, these traits make it a decent out of shield option, decent for edgeguarding and approaching, and similarly to Palutena's neutral aerial, it is also useful for pressure and combos. Forward and up aerials are reliable followups from down throw, the latter more so at mid to high percents; in addition, the former is useful for approaching and edgeguarding, whereas the latter is excellent for juggling. Back aerial is Pit's strongest aerial attack when sweetspotted, making it ideal for spacing as well as for outright KOing. Lastly, down aerial is has the lowest ending lag of Pit's aerials, and is useful for edgeguarding thanks to it being a meteor smash during its first frame, and its fairly large range also makes it decent for approaching; the inability to tech grounded meteor smashes in Ultimate also enables down aerial to serve as a combo starter at higher percents that can combo into an up smash for a reliable KO combo. It's also fast for a meteor smash, coming out on frame 10. Pit's aerial attacks also have low landing lag.
Pit's special moves are fairly versatile as well, reinforcing his ease of use. He has a great projectile in Palutena Bow which can be charged and easily maneuvered makes it very useful for camping, edgeguarding, and even mindgames. Upperdash Arm functions very similarly to Raptor Boost: it propels Pit forward and, upon making contact with something, results in him throwing an uppercut that has a decent damage output and very high base knockback, and can KO at high percents. Upperdash Arm also has utility outside of offense; it grants super armor, can reflect projectiles, and can function as a horizontal recovery option. However, it is very punishable because of its dash's noticeable startup lag and extreme amount of ending lag, especially when it misses. Upperdash Arm's deflection property is also fairly inconsequential, since it reflects projectiles at an upward diagonal angle instead of directly back at the opponent. Power of Flight covers an impressive amount of distance, and be angled to propel Pit either vertically, diagonally, or almost horizontally; it also grants Pit brief intangibility on startup as well. Lastly, Guardian Orbitars protect Pit on his left and right sides with energy shields that reflect projectiles. They are also capable of pushing opponents back, which makes them capable of edgeguarding. However, the Orbitars are not indestructible: should they end up being destroyed, they cannot be used again for 10 seconds. In addition, their high amount of ending lag makes them highly risky when used on the ground or when landing.
Despite his strengths, Pit does have some weaknesses. Like any all-around character, most characters are able to outperform him in various areas: as examples, Mario himself has a significantly more versatile combo game, Fox has better mobility, Young Link and Samus are better at camping, Lucina has greater range, and Ganondorf is overall much stronger. Pit's KO potential, however, is his most noticeable weakness, despite being buffed in the transition to Ultimate. Despite possessing a serviceable amount of KOing options, only his forward smash and up smash are consistently effective, and even these are highly unsafe on shield. In comparison, his other KOing options are only effective when sweetspotted (forward tilt and back aerial), or above 130% (dash attack, down aerial, down smash, forward throw and Upperdash Arm). This, in turn, is further compounded by his lack of guaranteed KO setups outside of down aerial to up smash.
Although rage somewhat alleviates Pit's KO potential, his average endurance means that he cannot utilize it as consistently or effectively as heavier characters can. As a result, Pit will typically spend a comparatively longer time racking up damage before attempting to score a KO, and will often give the opponent high amounts of rage in the process.
Although all of Pit's aerials autocancel in a short hop, only his forward and back aerials autocancel during a short hop buffered fast fall. This means that Pit players will often need to manually delay their fast fall perfectly in order to use his aerials effectively.
Pit's slow air speed, average falling speed and low gravity make him somewhat floaty and he noticeably struggles to both land and contest other aerial opponents due to neutral air and forward air's small looping hitboxes. In the end, Pit's aerials are helpful in his advantage state and supplement his grounded neutral game, but are much less useful when he is disadvantaged.
Although long-distanced, Pit's recovery is linear and predictable, and Power of Flight also does not provide Pit with protective hitboxes around him either while its intangibility period is very brief, which can leave him vulnerable to sufficiently strong meteor smashes. Additionally, while Upperdash Arm can aid Pit's horizontal recovery, it has an extreme amount of ending lag when performed in the air, making it extremely risky when improperly used as a recovery option.
All in all, Pit's strengths are on par with his weaknesses. His moveset consists of many moves with long range (his grounded moves and back aerial), long durations (neutral/forward/up aerials and forward tilt), low ending lag (autocanceled neutral/forward aerials, down smash and Palutena Bow) or quick movement (dash attack, dash grab and Upperdash Arm). This combination of traits, along with his good grounded mobility, allows Pit to reliably keep opponents in a disadvantage state, either stuck trying to land or getting off the edge.
In the end, this is arguably Pit's saving grace: he can cover enough options and retain advantage long enough to rack up more damage than a character of his limited combo potential should. However, he suffers from unimpressive KO potential similarly to lightweights, yet lacks the extended combo options and safe pressuring options that they typically possess for damage-racking. Conversely, Pit also has a poor disadvantage state like many heavyweights, yet his overall damage output is considerably lower than most of theirs. As a result, Pit's pros are on par with his cons.
Despite being a very balanced character, players often tend to overlook Pit in favor of other characters that possess much more outstanding strengths than he does. This has also been reflected in his tournament representation, which is minimal outside of Japan, much like in SSB4. However, Pit has nevertheless managed to achieve an adequate level of success in the competitive scene, although not as much as his SSB4 counterpart: Kuro in particular has done well with Pit, with him getting 3rd place in Umebura SP. Pit has also received results from others like KiraFlax.
Changes from Super Smash Bros. 4
Having been often regarded as a mid-tier character in SSB4 (32nd/33rd out of 55th), Pit has been greatly buffed overall in the transition to Ultimate.
Pit's aerial game is significantly improved as a result of the universally decreased landing lag, putting his overall landing lag more in line with the rest of the cast, which makes his aerial attacks safer to use against shields (complemented further by out of shield options being weakened) and strengthens his neutral game as a result. Adding to this, his aerials themselves have been buffed to varying degrees; his neutral, forward and up aerials deal more damage, with the former also connecting more reliably, and his down aerial being easier to meteor smash with, due to its larger meteor hitbox. Pit has also received buffs to his ground game, as his up tilt and down tilt have received less ending lag and more favorable angles that turn them into more reliable combo starters; and his neutral attack's infinite, previously unreliable due to its poor linking, is much more effective for racking up damage due to the several tweaks it has received. Moreover, his special move kit has increased utility, with both Palutena Bow and Guardian Orbitars being sped up, bolstering Pit's abilities to camp and reflect opposing projectiles.
One of Pit's most importantly buffed areas, however, is his KO ability, previously mediocre due to his lack of safe KO options (especially in comparison to the rest of the cast). In Ultimate, his dash attack, front hit of down smash, back aerial, down aerial, and Upperdash Arm have all had their knockback increased to the point of KOing reliably at high percentages, while his neutral and forward aerials are better for edgeguarding due to their slightly higher knockback and the latter has its KO potential restored, although still weaker than it was in Brawl. This is complemented by Pit's already existing KO options, as well as his generally more effective damage racking ability due to his higher damage outputs and larger amount of combo starters, ultimately granting him a much stronger offensive game.
However, Pit has received a few, though minor, nerfs. Like all other returning veterans in SSB4, all of Pit's grabs now have increased endlag in addition to to having his dash grab and pivot grab's start-up lag standardized. While Pit continues to possess an above-average grab, the changes above, compounded with the universal nerfing of shields, makes Pit's grab less effective than it was in SSB4. Some of Pit's attacks have received minor nerfs as well - his up tilt has less range, Guardian Orbitars have less HP, and Power of Flight now halts immediately at the end of the move's duration, slightly worsening Pit's recovery.
Overall, while Pit fares considerably better than he did in SSB4, he carries most of the same weaknesses—a lack of noteworthy attributes—that his previous incarnation suffered from. Though he was initially regarded as a solid upper mid tier character with a moderate level of tournament success during Ultimate's early metagame, his representation as a whole has become notably scarce. Nairo has decidedly picked up other characters in favor of him, Kuro has relegated him to a secondary character, and Earth has become inactive altogether. This has lead to a significant downfall in tournament results despite the efforts of some players including KiraFlax and Chompy. His almost nonexistent tournament results, compounded with his status as an overly "honest" character, has garnered him the same increasingly lukewarm reception he had received during SSB4: players including Mew2King, VoiD, ESAM, ZeRo, and Dabuz view him as a lower mid-tier character, or even a low-tier character.
However, patch 4.0.0 brought Pit some significant buffs to his frame data, as well as a slight buff to his edgeguarding potential, and the effect of this on his viability remains to be seen.
Aesthetics
 As with all veterans returning from SSB4, Pit's model features a more subdued color scheme. His clothing and wings now feature simple detailing, while his eyes and hair appear more detailed.
- Like many other characters, Pit is more expressive.
- The look of Pit's Upperdash Arm has been altered. The blue orb in the center has more detail, making it more closely resemble its appearance in Uprising.
- Pit's idle animation has been slightly altered.
- Pit's side taunt has been shortened. He now swings his bow three times instead of four.
- The wing particle effects from Pit's down taunt are more pronounced.
- Pit has a new Star KO scream in the English version. He now shouts "I never learned how to read!", which is a line from Uprising.
- Pit's "victory sign" animation has changed. He now does a celebratory jump before showing the hand sign.
Attributes
 Like all characters, Pit's jumpsquat animation now takes 3 frames to complete (down from 5).
- Pit walks faster (1.199 → 1.259).
- Pit runs much faster (1.66215 → 1.828).
- Pit's initial dash is significantly faster (1.5 → 2.09).
- Pit's air speed is higher (0.89 → 0.935).
- Pit's air acceleration is higher (0.065 → 0.075).
- Pit's traction is significantly higher (0.0505 → 0.135), being tied with his Echo Fighter's for the second highest in the game.
 Forward roll has more ending lag (FAF 28 → 30).
- Back roll has more startup (frame 4 → 5) and ending lag (FAF 28 → 35).
- Spot dodge has more startup (frame 2 → 3).
- Air dodge has more startup (frame 2 → 3) and significantly more ending lag (FAF 32 → 53).
- Air dodge grants more intangibility (frames 2-26 → 3-29).
Ground attacks
- Neutral attack:
- The first hit has less startup lag (frame 5 → 4), with its total duration reduced as well (FAF 27 → 26).
- Neutral infinite has a shorter gap between hits (3 frames → 2), alongside a different angle (25°/120° → 361°) and knockback values (18/4 set/100 scaling → 8 base/10 scaling). This allows it to connect much more reliably, with opponents no longer being able to jump out of it before the finisher comes out.
- The neutral infinite deals drastically less hitlag, making it harder to SDI out of.
- The infinite's finisher has less startup with a longer hitbox duration (frame 5 → frames 4-5).
- The finisher deals more knockback (45 base/170 scaling → 40/185).
- The third hit and infinite deal less damage (5% → 4% (hit 3), 0.8% → 0.5% (infinite)).
- The third hit has a shorter hitbox duration (frames 3-4 → 3).
- The infinite's finisher has more ending lag (FAF 40 → 48).
- The first and second hits of neutral attack have altered angles and knockback to keep opponents close to Pit, akin to other neutral attacks. This allows them to connect better and jab lock, but worsens their jab cancel setups.
- Neutral infinite's animation has changed. Instead of slashing horizontally with his bow fully formed like a buzzsaw, Pit quickly slashes with the bow split in two.
- Up tilt:
- Up tilt's animation has been altered into two lunging upward kicks. The move deals two hits instead from three, with its hitbox timings altered (frames 6, 8-10, 15-16 → 6-8, 15-16).
- It has noticeably less ending lag (FAF 43 → 33), which combined with Pit's faster jumpsquat and jump speed turns it into a reliable combo starter.
- The first hit uses the autolink angle, allowing to connect better in to the the second hit.
- It has smaller hitboxes (4.5u → 4u (hit 1), 7.5u → 6u (hit 2)).
- The second hit has increased base knockback (50 → 70), but significantly reduced knockback scaling (120 → 30). This removes its KO potential at high percents, but allows it to combo at a much wider percent range combined with its other changes.
- Down tilt:
- Down tilt has less ending lag (FAF 32 → 26) and launches at a more vertical angle (55° → 75°). Combined with Pit's faster jumpsquat, this significantly improves its combo potential.
- It moves Pit forward slightly with each use, allowing for a pseudo-crawl.
- Dash attack:
- Dash attack's animation has been altered to a downward swipe of Pit's blade. This gives it more vertical range.
- It has drastically increased knockback scaling (50 → 74), greatly improving its KO ability.
- Forward smash:
- Forward smash has less ending lag (FAF 59 → 55).
- The first hit has altered angles (70°/35/70°/0° → 100°/70°/35°/192°), and its outermost hitboxes' set knockback is lower against grounded opponents (43 → 20), but higher against aerial opponents (5 → 20). This allows it to connect better into the second hit, with aerial opponents no longer being to air dodge the second hit when struck by the outermost hitboxes.
- The second hit has a longer hitbox duration (frame 21 → frames 21-22).
- The first hit has more range, but the second has less range. This makes it easier to land the first hit of the move and harder to land the second.
- Up smash:
- Up smash's first hit has altered angles (365°/365°/105° → 365°/120°/120°/367°/105° (clean), 110° → 110°/123° (late, grounded/aerial opponents)), allowing it to connect more reliably.
- Down smash:
- Down smash's clean front hit has increased knockback (35 base/93 scaling → 40/98), improving its KO potential.
Aerial attacks
- All aerials have significantly reduced landing lag (24 frames → 14 (neutral, up), 20 → 12 (forward), 20 → 8 (back), 24 → 12 (down)).
- Neutral aerial:
- Neutral aerial's looping hits' two smallest hitboxes have been increased (2u/2.5u → 2.5u/3u), and its smallest hitbox uses altered angle (25° → 220°/140°) and set knockback values (20 → 30/30) for aerial and grounded opponents, with the rest of the multhit hitboxes having their angle (65°/125°/160° → 48°/335°/130°) and set knockback values (70/70/20/20 → 50/30/65) changed as well. This allows them to connect more reliably and reduces the blindspots around Pit.
- The looping hits have reduced hitlag (1× → 0.5×) and SDI multipliers (1× → 0.8×), making them harder to escape from.
- The looping hits have longer hitbox durations (1 frame → 2 frames).
- The last hit deals more damage (4% → 4.5%).
- The final hit is larger (9.2u → 9.5u), and has been repositioned (Y offset: 8 → 9.5, Z offset: 2 → 3), improving its horizontal and vertical range.
- Forward aerial:
- Forward aerial deals noticeably more damage (1.5% → 2.5% (hits 1-2), 4% → 6% (hit 3); 7% → 11% (total)), with knockback scaling not fully compensated on the last hit (180 → 148), partially restoring its KO potential from Brawl.
- The looping hits have reduced hitlag multipliers (1× → 0.8×), making them harder to SDI out of.
- The looping hits have larger hitboxes (1.5u → 2.3u), and extend further (Z offset: 11-18 → 10-19), improving its range.
- Back aerial:
- Back aerial's sweetspot launches at a lower angle (46° → 43°) and has increased knockback scaling (96 → 105), improving its KO potential.
- Due to its significantly reduced landing lag, the sourspot is a much more reliable combo starter.
- It has slightly larger hitboxes (3.4u (sweetspot)/3.2u (sourspot) → 3.7u/3.5u).
- Up aerial:
- Up aerial's linking hits deal less damage (2% → 1.5%), but the last hit deals substantially more damage (2% → 5%), increasing its total output (10% → 11%).
- The last hit has more base knockback but drastically less knockback scaling to compensate(5 base/270 scaling → 50/130), improving its juggling ability and making it safer on hit at low percents.
- The looping hits have reduced hitlag multipliers (1× → 0.8×), making them harder to SDI out of.
- Down aerial:
- Down aerial's meteor smash sweetspot is larger (3u → 4u), and extends further downwards (Y offset: -4 → -4—-6) making it easier to edgeguard with it.
- The clean hit's sourspot has more knockback scaling (80 → 100), while its sweetspot has more base knockback against aerial opponents (0 → 10), improving its KO potential.
- The removal of teching for grounded meteor smashes improves down aerial's combo potential onstage at high percents, compounded further by its reduced landing lag.
Throws and other attacks
- All grabs have increased ending lag (FAF 30 → 35 (standing), 37 → 43 (dash), 35 → 38 (pivot)).
- Dash and pivot grab have slightly more startup lag (frame 8 → 9 (dash), 9 → 10 (pivot)).
- Dash grab has slightly less range (Z2 offset: 11.8u → 11.5u).
- Pummel:
- Pummel deals less damage (2% → 1.3%).
- It deals more hitlag (4 frames → 14), but has less startup (frame 2 → 1) and much less ending lag (FAF 16 → 7).
- Back throw:
- Back throw releases the opponent slower (frame 24 → 29), making it easier to DI.
- However, its total duration remains unchanged, decreasing its ending lag as a result. This improves its combo ability.
- Back throw's speed is no longer weight-dependent. This gives it far more combo ability on heavyweights, while still being increased on lightweights due to its lower ending lag.
- Up throw:
- Up throw has more ending lag (FAF 33 → 38).
- Down throw:
- Down throw has increased combo potential due to Pit's faster jumpsquat and jump speed.
- Edge attack:
- Edge attack deals more damage (7% → 9%).
Special moves
- Palutena Bow:
- Palutena Bow has less startup (frame 20 (grounded)/22 (aerial) → 16), and drastically less ending lag on the ground (FAF 59 → 47), improving its camping ability.
- It has received negative shield damage (0 → -1.6).
- Firing a fully charged arrow causes the screen to shake.
- Upperdash Arm:
- Grounded and aerial Upperdash Arm have less ending lag if missed (FAF 83 (grounded)/121 (aerial) → 80/105). The aerial version also has less ending lag upon activation (FAF 58 → 52).
- Upperdash Arm has increased knockback scaling (60 → 72), improving its KO ability.
- The aerial version has a shorter hitbox duration upon activation (frames 2-5 → 2-3).
- The charging voice clip has swapped places with one of the attacking voice clips from SSB4. Additionally, Pit no longer consistently vocalizes when summoning the Upperdash Arm and only vocalizes during the attack if he's silent when summoning it.
- Power of Flight:
- Power of Flight can sweetspot edges from behind.
- Power of Flight now flies in a slight arc, moving outwards slightly before pulling back inwards again. The overall finishing location appears unchanged, however.
- It takes longer for Pit to move after he begins to fall, leaving him more vulnerable to attacks.
- Guardian Orbitars:
- Guardian Orbitars has less startup (frame 9 → 7), and much less ending lag if not extended (FAF 64 → 50), making it more reliable for reflecting projectiles.
- The Guardian Orbitars can be held for a longer amount of time (80 frames → 100).
- However, they gradually shrink the longer they are held out.
- They have less HP against physical attacks (18 → 15).
- Unlike in Smash 4, Pit's left foot noticeably sticks out from the bottom, leaving it more easily exposed to attacks from the side that wouldn't have normally hit him in Smash 4.
- Final Smash:
- Instead of the Three Sacred Treasures, Pit's Final Smash is the Lightning Chariot. It involves him going offscreen, aiming at opponents, and charging towards them atop the Lightning Chariot, akin to the Dragoon.
- Lightning Chariot provides Pit with a single, powerful blow that deals very high knockback, KOing opponents at around 15% from center stage, and can hit opponents much more effectively due to being fully controllable.
- Lightning Chariot affects a smaller area, and its damage potential is significantly lower.
Update history
Aside from a single nerf and two glitches being fixed, Pit has received buffs from game updates. Update 2.0.0 ensured that Lightning Chariot would launch crouching opponents akin to a standing opponent, a buff that was shared with Giga Bowser Punch. Although update 3.0.0 decreased Palutena Bow's shield damage output, update 3.1.0 buffed up smash by making it connect better. Most recently, update 4.0.0 improved his frame data in a few noticeable ways. Up tilt's lowered ending lag improved its combo potential, and down smash's front hit KOs more reliably thanks to its stronger sweetspot. Back aerial's lowered landing lag made its sweetspot and sourspot safer and a better combo starter when SHFF'd, respectively. Lastly, down aerial's higher base knockback made it a better edge-guarding option.
- Lightning Chariot will launch crouching opponents in the same manner as standing opponents.
- Palutena Bow deals less shield damage (0 → -1.6).
![]() 3.0.1
3.0.1
 Fixed a glitch where aiming Lightning Chariot beyond the blast lines on certain stages would close the game.
- Up smash's late first hit has an altered angle (110° → 123°). This makes its hits connect together better.
- Neutral attack's first hit has less start-up lag (frame 5 → 4) and ending lag (FAF 27 → 26).
- Up tilt has less ending lag (FAF 35 → 33).
- Down smash's sweetspotted first hit has more knockback (35 (base)/93 (scaling) → 40/98).
- Back aerial has less landing lag (11 frames → 8).
- Down aerial's meteor smash has more base knockback (0 → 10) against airborne opponents.
- Fixed a glitch where Mega Special Smash caused Power of Flight to be used indefinitely when used in tight spaces.
Moveset
- Pit can perform three midair jumps.
For a gallery of Pit's hitboxes, see here.
Note: All numbers are listed as base damage, without the 1v1 multiplier.
| Name | Damage | Description | ||
|---|---|---|---|---|
| Neutral attack | 2% | A reverse gripped downward slash, followed by a reverse gripped inward slash, then by an upward slash. If button mashed, Pit will instead follow up the second slash with a flurry of slashes using both blades, which concludes with a lunging outward slash. | ||
| 2% | ||||
| 4% | ||||
| 0.5% (loop), 2% (last) | ||||
| Forward tilt | 7% (base), 10% (tip) | Arcs his body forward to perform a scissoring slash. It is decent for spacing and possesses above average power for a tilt attack, with its sweetspot KOing middleweights at around 150% from the center of Final Destination. Due to it hitting on frame 10, however, it is Pit's slowest tilt attack, and its base hitboxes KO significantly later due to their lower damage output. Overall, it is one of Pit's most situational attacks. | ||
| Up tilt | Anti-air Attack | 4% (hit 1), 5% (hit 2) | Two alternate lunging kicks upward. Compared to Smash 4, where it was nearly useless due to its short range, high ending lag and lack of combo or KO potential, its much more favorable ending lag and knockback in Ultimate allow it to combo reliably into a neutral aerial or up aerial, even up to high percents. | |
| Down tilt | 6% | A kneeling outward slash. Its minimal startup and low ending lag make it Pit's best grounded spacing option, and it launches at a vertical angle, allowing it to combo into a dashing up smash at low percents, and a neutral, forward or up aerial from low to mid percents. | ||
| Dash attack | 11% | A spinning inward slash. Its fast startup, long range and respectable damage output make it excellent for punishing landings, while it also possesses enough knockback to KO at high percents, starting at around 160%. However, like other dash attacks, its moderate ending lag makes it punishable on shield. | ||
| Forward smash | 5% (hit 1), 10% (hit 2) | Performs a reverse gripped inward slash with a blade, then quickly reassembles the Palutena Bow in order to perform an outward slash with the Palutena Bow. Its first hit has low set knockback to connect reliably into its second hit. Due to hitting on frame 10, it is also one of the fastest forward smashes in the game. The second hit can KO middleweights at around 120% from the center of Final Destination. | ||
| Up smash | 3% (hit 1), 2% (hit 2), 8% (hit 3) | Jumps to perform three upward slashes. It hits on frame 6, making it one of the fastest smash attacks overall. It is also a useful anti-air attack due to its long vertical range and disjointed hitboxes. However, it conversely possesses short horizontal range, resulting in it hitting grounded opponents only if they are at point-blank range in front of Pit. | ||
| Down smash | 12% (base), 10% (tip) | Performs a kneeling outward slash with a blade, followed by a squatting reverse gripped thrust behind himself with the other blade. Its sweetspot is located at the base of each blade. Like Pit's other smash attacks, it is among the fastest of its kind, hitting on frame 5. While the first hit has higher base knockback and both hits have equal knockback scaling, the back hit's sweetspot KOs earlier thanks to its semi-spike angle. | ||
| Neutral aerial | 0.7% (hits 1-7), 4.5% (hit 8) | A buzzsaw-like series of slashes in front of himself. It hits multiple times, with its last hit having high knockback scaling. It has the fastest startup out of Pit's aerials (hitting on frame 4), long lasting hitboxes, and autocancels in a short hop quickly after the hitboxes cease, making it useful for approaching, edgeguarding, and canceling out weak projectiles. | ||
| Forward aerial | 2.5% (hits 1-2), 6% (hit 3) | Lunges forward to perform a buzzsaw-like series of slashes that hit up to three times. The last hit has high knockback scaling, KOing middleweights at around 175% from the center of Final Destination, and at around 130% at the edge, making it useful for edgeguarding at high percents. Like neutral aerial, it also autocancels quickly in a short hop, but has comparatively longer horizontal range, so it is a safe approach option. However, it has moderate startup lag and minimal vertical range. | ||
| Back aerial | 12% (tip), 8% (base) | A double reverse gripped thrust. It has a sourspot at the base of Pit's blades that launches vertically with weak knockback, allowing it to combo into several grounded moves and aerials (including another back aerial) from low to mid percents on landing. Conversely, the tip of the blades possess a sweetspot that launches horizontally with the highest knockback out of Pit's aerials, KOing at around 135% from center stage, and making it one of Pit's most reliable KO options. However, the sweetspot can be difficult to land due to having lower priority than the sourspot, as well as the move's moderate startup lag. | ||
| Up aerial | 1.5% (hits 1-4), 5% (hit 5) | An overhead, buzzsaw-like series of slashes. It hits multiple times, with its last hit launching vertically. Combined with the long duration of its hitboxes, this allows it to function as a reliable juggling tool. With proper timing and spacing, it can also hit characters on the ground upon landing and start combos, much like his back aerial's sweetspot. However, its moderate startup and long total duration make it punishable if used high up from the ground and missed. | ||
| Down aerial | Under-Arc Slash | 10% | A downward arcing reverse gripped slash. It has a sweetspot on the first hit frame that is a meteor smash, while its fairly long range and ability to autocancel in a short hop allows it to function as an approach option. It also has the fastest total duration out of Pit's aerials, and its non-meteor hitboxes launch opponents vertically, allowing it to combo into other aerials from low to mid percents. While its meteor smash is relatively weak, it is among the fastest, coming out on frame 10. | |
| Grab | — | Reaches out with his free hand. | ||
| Pummel | 1.3% | A knee strike. A fairly fast pummel. | ||
| Forward throw | 6% (hit 1), 4% (throw) | Slashes the opponent away. Pit's strongest throw, KOing middleweights at around 130% near edges. Although it is best suited for KOing, it is decent at setting up edgeguards, and even has minimal combo potential, leading into a dash attack at low percents. | ||
| Back throw | 8% | Grabs the opponent by their head, spins around with them in tow, and them slams them onto the ground headfirst. Besides setting up edgeguards, it can combo into a dash attack at low percents, or act as a setup into Palutena Bow at mid to high percents. | ||
| Up throw | 4% (hit 1), 7% (throw) | A handstand kick, similar to Sheik's up throw. It is Pit's most damaging throw, but its throw hitbox's average base knockback and knockback scaling make it unsuited for KOing or combos. As a result, its only utility is dealing damage and initiating aerial pressure alongside Palutena Bow. | ||
| Down throw | 2% (hit 1), 4% (throw) | Pins the opponent to the ground and then slashes their back. It is Pit's best combo starter, as it can combo into a dashing up smash at low percents, and into any of Pit's aerials except down aerial until high percents. | ||
| Floor attack (front) | 7% | Slashes on either side of himself while getting up. | ||
| Floor attack (back) | 7% | Slashes in front of himself, then thrusts behind himself while getting up. | ||
| Floor attack (trip) | 5% | Spins the Palutena Bow behind himself and then in front of himself before getting up. | ||
| Edge attack | 9% | Performs a hook kick while climbing up. | ||
| Neutral special | Palutena Bow | 3.27% (uncharged), 8.6% (fully charged) | Shoots a whitish sky blue, ethereal arrow from his Palutena Bow. The arrow can be aimed left, right, or directly upward while charging, and the arrow itself can be curved in any direction while flying, which make it very useful for edgeguarding and gimping. | |
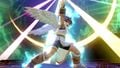
| Side special | Upperdash Arm | 11% (grounded), 9% (aerial), 1× (reflected projectiles) | Wields the Upperdash Arm to perform a dashing uppercut. The grounded version's decent damage output and high knockback enable it to KOs middleweights at around 110%, turning it into one of Pit's strongest KO moves. The aerial version deals less damage and knockback, but is still strong enough to KO middleweights at around 150% from ground level. Upperdash Arm also grants super armor during the dash, and reflects projectiles at roughly 45°. However, it is an overall laggy attack, especially if missed; the aerial version in particular has a total duration of 104 frames (roughly 1.73 seconds), leaving Pit prone to self-destructs if used below ground level. Nevertheless, the aerial version can aid Pit's recovery, as it is capable of sweetspotting edges and can still allow him to get back to the stage if he has enough jumps left. | |
| Up special | Power of Flight | — | Soars through the air by using the Power of Flight. It covers a significant amount of distance, and the flight's direction can be angled in any way except downward, making it capable of being a purely vertical and nearly horizontal recovery option. It also grants intangibility on frames 9-19 when used on the ground, and on frames 15-19 when used in the air. Due to its high ending lag and lack of hitboxes, however, it leaves Pit more vulnerable than other recoveries, especially if he does not grab an edge. | |
| Down special | Guardian Orbitars | 1.5× (reflected projectiles) | Wields the Guardian Orbitars to create twin energy shields that protect his left and right sides. They reflect projectiles with 50% more power and 70% more speed than they originally had, and can block physical attacks. However, they have 15 HP for physical attacks, with 0.07 HP regenerated every frame (4.2 HP per second), and break if it is fully depleted, after which they require 10 seconds to regenerate. Guardian Orbitars also push away opponents who are near Pit when he wields them, which makes them capable of edgeguarding. In the air, Pit can drift while using them, even if they are broken. Guardian Orbitars have a minimum duration of 20 frames (0.33 seconds) and a maximum duration of 100 frames (1.66 seconds). However, they leave Pit open to attacks from above and below him, and they gradually shrink in size as they are held out. | |
| Final Smash | Lightning Chariot | 40% | Calls the Lightning Chariot, then jumps aboard it and flies offscreen. Afterwards, Pit says "Phos! Lux! Let's go!", and a player-controlled crosshair appears onscreen, much like that of the Dragoon item; if the attack button is pressed, Pit will then swoop in atop the chariot to strike opponents, dealing very high damage and knockback. | |
On-screen appearance
- Slowly descends onto the stage while surrounded by rays of sparkling light that shine down from the sky.
Taunts
- Up taunt: Separates the Palutena Bow and crouches down, then twirls its blades before standing up, crossing them over his head and saying "Come on!" (勝負だ!, Let's battle!).
- Side taunt: Separates the Palutena Bow and then flourishes its blades before striking a pose while saying "That all you got?" (まだまだ!, Not just yet!) It is similar to Pit's animation during the end of Skyworld's first cutscene in The Subspace Emissary.
- Down taunt: Spreads out his arms and wings, during which a few feathers are loosed from his wings. This is the only taunt that does not split his Bow into blades if it was in bow form beforehand.
- Smash Taunt: Activates Palutena's Guidance. Kneels down before contacting Palutena, Viridi, Dark Pit (when fighting against him, Wolf or the Ice Climbers) and even Alucard (when fighting against Richter). Pit then receives information on one of his opponents; this applies to every character in the game, including himself, with altered conversations for the Koopalings and the male Wii Fit Trainer. There is a specific conversation reserved solely for the downloadable characters that are available as part of the Fighters Pass (currently Joker, Hero and Banjo & Kazooie). Palutena's Guidance can only be used on Palutena's Temple, and is performed by rapidly pressing the button which activates Pit's down taunt. Pit will hold a pose for a few seconds prior to the conversation starting. Paluena's Guidance can only be done once per match, and if Pit gets hit while holding his pose before the conversation starts, it will be canceled. If Pit is KOed, the conversation will end. Lastly, if there is more than one opponent on-screen when the conversation begins, one of the opponents will be randomly chosen to be discussed.
Pit's up taunt.
Pit's side taunt.
Pit's down taunt.


Idle poses
- Briefly fiddles with his Palutena Bow. Pit will split it into its blades if it is in its bow form.
- Taps the tips of his buskins on the ground and then impatiently hops in place.
Pit's first idle pose

Pit's second idle pose


Victory poses
- Left: After landing, he does two alternating inward slashes with his detached blades and says "It's game over for you!" ("撃破ー!", Struck down-!). The finishing pose he does is similar to his Ultimate official artwork, albeit with the blade in his left hand held in a proper grip.
- Up: Pit jumps up with his fist raised. After landing, he briefly faces away from the screen, and turns back around. He then strikes the V sign and says "Victory!" ("ピース!", Peace!). Based on the ending of Kid Icarus: Uprising.
- Right: Spins his bow in his right hand, then stops with the bow held out in front of him (similar to his Brawl pose) and says "That was easy!" or "What's up now?!" ("楽勝楽勝", Easy peasy! or "任務完了!", Mission complete!).


In competitive play
Notable players
Active
 Chompy - Placed 25th at Midwest Mayhem Ultimate and 33rd The Kid, the Goat, and the Mang0.
- KiraFlax - Placed 25th at SoCal Chronicles and Ultimate Nimbus. Has a win over SweetT.
 Lucky - One of the best Pit players in Europe. Placed 7th at DoKomi 2019 and Calyptus Cup X: Purple Age, 17th at Ultimate Fighting Arena 2019, and 25th at ICARUS V and Albion 4.
Inactive
 Kuro - Placed 3rd at Umebura SP and 13th at Umebura SP 2. Has wins over Nietono, Eim, and RAIN. Though he hasn't officially dropped Pit, he now only uses Zero Suit Samus in brackets.
Classic Mode: Fighting for the Goddess!

Pit's opponents are similar to the enemies he faces in Kid Icarus Uprising.
| Round | Opponent | Stage | Music | Notes |
|---|---|---|---|---|
| 1 | Dark Samus |
Brinstar | Underworld | References Dark Lord Gaol |
| 2 | Bowser |
Find Mii (Ω form) | Boss Fight 1 - Kid Icarus: Uprising | References the Reaper and Reapette |
| 3 | Ganondorf |
Gerudo Valley | Magnus's Theme | References Magnus |
| 4 | Dark Pit |
Reset Bomb Forest | Dark Pit's Theme | References Pit's battles with Dark Pit |
| 5 | Bayonetta |
Umbra Clock Tower | Hades's Infernal Theme | References Medusa |
| 6 | Palutena |
Palutena's Temple (Battlefield form) | Destroyed Skyworld | Dark Pit |
| Bonus Stage | ||||
| Final | Master Hand and Crazy Hand | Final Destination | Master Hand / Crazy Hand | Dark Pit |
Note: All stages play a track from the Kid Icarus universe, no matter what universe the stage originated from.
Credits roll after completing Classic Mode. Completing it as Pit has Underworld accompany the credits.
Role in World of Light

Pit was among the fighters that were summoned to fight the army of Master Hands.
Pit tried to rally the other fighters to fight the army of Master Hands; he felt confident that the fighters would win the exchange against the Master Hands. Pit was present when Galeem unleashed his beams of light. He was flying alongside Dark Pit to escape the beams, but after Palutena was vaporized, they lost their Power of Flight and fell victim to the beams as well. They were both placed under Galeem's imprisonment along with the rest of the fighters, excluding Kirby.
He appears in the Temple of Light sub-area at the very end. Defeating him allows access to a bridge that was previously blocked by being engulfed in light.
He is later seen alongside several other fighters, as they make their final stand against Galeem and Dharkon.
Fighter Battle
| No. | Image | Name | Type | Power | Stage | Music |
|---|---|---|---|---|---|---|
| 28 | |
Pit | Shield | 3,300 | Skyworld (Ω form) | Underworld |
Spirits
Pit's Fighter Spirit can be obtained by completing Classic Mode. It is also available periodically for purchase in the shop for 500 coins. Unlocking Pit in World of Light allows the player to preview the first spirit below in the Spirit List under the name "???". As a Fighter Spirit, it cannot be used in Spirit Battles and is purely aesthetic. Each Fighter Spirit has an alternate version that replaces them with their artwork in Ultimate.
Additionally, Pit makes an appearance in a few Primary Spirits.
703. Pit
706. Pit (Original)
708. Three Sacred Treasures

.png)
In Spirit battles
As the main opponent
| Spirit | Battle parameters | Inspiration | |||||||||
|---|---|---|---|---|---|---|---|---|---|---|---|
| No. | Image | Name | Series | Enemy Fighter(s) | Type | Power | Stage | Rules | Conditions | Music | Character |
| 363 | Bronto Burt | Kirby series | •Pit Team |
1,800 | Dream Land | N/A | •The enemy favors side specials in the air | Kirby Retro Medley | |||
| 425 |  |
Pidgey | Pokémon series | •Tiny Pit |
2,100 | Saffron City (Battlefield form) | •Hazard: Heavy Wind | •Dangerously high winds are in effect •The enemy loves to jump |
Road to Viridian City - Pokémon Red / Pokémon Blue | ||
| 680 |  |
Takumi | Fire Emblem series | •Pit |
9,100 | Mushroomy Kingdom (Battlefield form) | •Hazard: Heavy Wind | •Dangerously high winds are in effect •The enemy's neutral special has increased power •The enemy favors neutral specials |
Lost in Thoughts All Alone (Remix) | ||
| 707 | Centurion | Kid Icarus series | •Tiny Pit Team |
1,700 | Skyworld | N/A | •The enemy favors neutral specials in the air •Defeat an army of fighters |
Underworld | |||
| 708 |  |
Three Sacred Treasures | Kid Icarus series | •Reflect Pit |
9,600 | Palutena's Temple (Battlefield form) | N/A | •The enemy reflects projectiles •The enemy's special moves have increased power |
In the Space-Pirate Ship | ||
| 817 |  |
Swooping Snitchbug | Pikmin series | •Pit Team |
1,900 | Distant Planet | •Item: Boss Galaga | •The enemy is easily distracted by items | Main Theme - Pikmin (Original) | ||
| 840 |  |
Phyllis & Pelly | Animal Crossing series | •Pit •Dark Pit |
3,600 | Town and City | •Item: Tidal Wave •Uncontrollable Speed |
•All fighters move faster and can't stop quickly after a little while •Certain items will appear in large numbers after a little while •The enemy is easily distracted by items |
Town Hall and Tom Nook's Store - Animal Crossing: Wild World | Phyllis | |
| 1,021 | Affinity | Bayonetta series | •Pit Team |
2,000 | Umbra Clock Tower (Battlefield form) | N/A | •Stamina battle •The enemy has increased move speed |
One Of A Kind | |||
| 1,187 | Cupid | Sennen Kazoku | •Pit Team |
2,000 | Skyworld | N/A | •The enemy favors neutral specials | Afternoon on the Island | |||
As a minion
| Spirit | Battle parameters | Inspiration | |||||||||
|---|---|---|---|---|---|---|---|---|---|---|---|
| No. | Image | Name | Series | Enemy Fighter(s) | Type | Power | Stage | Rules | Conditions | Music | Character |
| 1,127 | Diskun | Disk System | •Young Link •Pit •Simon •Samus |
9,100 | Temple (Battlefield form) | N/A | •Take your strongest team into this no-frills battle | Famicom Medley | Pit (Hikari Shinwa: Palutena no Kagami for the Famicom Disk System) | ||
| 1,246 | Orville | Takt of Magic | •Robin •Pit •Zelda |
3,400 | PictoChat 2 | N/A | •Defeat the main fighter to win | Struggle Against Chaos | Samuel | ||
| 1,316 | Goro Akechi | Persona series | •Marth •Pit |
3,800 | Fourside (Battlefield form) | •Hazard: Left Is Right, Right Is Left | •Defeat the main fighter to win •Left and right controls will suddenly reverse |
Rivers in the Desert | Robin Hood | ||
Alternate costumes

| |||||||

|

|

|

|

|

|

|

|
Gallery
- Pit SSBU Banner.png
Pit's appearance on the panoramic artwork
Image of Pit as posted on the official Japanese Kid Icarus: Uprising Twitter account.
Pit's fighter card.
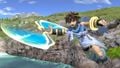
Pit on Kalos Pokémon League.
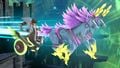
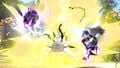
Pit using the Guardian Orbitars between Aura Sphere and Shadow Ball on Battlefield.
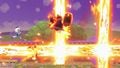
Pit initiating his Final Smash on the Bridge of Eldin.
Pit on Find Mii with the Dark Emperor.
Pit using his forward aerial on Great Bay.
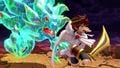
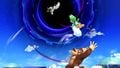
Pit riding the Lightning Chariot through Temple.
Pit readying his Palutena Bow against Dark Pit on Temple.

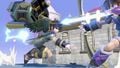
With Toon Link & Marth against a giant Jigglypuff on The Great Cave Offensive.
Getting tossed into the Black Hole with Yoshi by Donkey Kong on Big Blue.
Pit and King Dedede caught in the blast of Bomberman's bombs on Green Greens.
Pit and the Ice Climbers getting attacked by Togedemaru on Garden of Hope.
Pit on New Donk City Hall with Daisy and Mega Man in Stamina Mode.


Character Showcase Video
Trivia
- Pit's pose in his official artwork resembles his side taunt.
- When Pit is Star KO'd, he shouts, "I never learned how to read!" This is a reference to a line of dialogue he uses in Kid Icarus: Uprising. This makes Pit the first character in the Super Smash Bros. series to speak a full sentence during a Star KO. However, this is exclusive to the English version of the game, as in the Japanese version, he just uses his Star KO scream in SSB4, which has him just screaming.
- Pit is one of four characters to have appeared since Brawl to have a different Final Smash across every installment; the other three are Zero Suit Samus, King Dedede, and R.O.B..
- Pit is the only fighter who was introduced in Brawl to have an Echo Fighter, that being Dark Pit.
- Pit can be unlocked by clearing Classic Mode as Samus, which may be a reference to the original Metroid and Kid Icarus NES games running on the same engine, and both being produced by Nintendo designer Gunpei Yokoi.
- On the flipside, both characters each have dark doppelgangers for echo fighters.
- Not counting Samus, who is a starter, Pit is the only unlockable character with an Echo Fighter who is always unlocked or encountered before his Echo Fighter, no matter which combination of unlock methods are used.
- In World of Light, out of all characters with Echo Fighters, Pit is 1 of 2 non-starter characters that must be encountered before the Final Battle (the other being Simon). So it's possible to encounter Daisy, Lucina, Chrom and Ken first. In Richter's case, one can unlock Young Link through VS. Matches, then complete his Classic Mode to encounter Richter before Simon. This cannot be done with Pit and Dark Pit, as all of the characters in Samus' unlock tree that are between Pit and Dark Pit are all encountered after Pit in World of Light.
|
| |
|---|---|
| Fighters | Pit (SSBB · SSB4 · SSBU) · Palutena (SSB4 · SSBU) · Dark Pit (SSB4 · SSBU) |
| Assist Trophies | Magnus · Phosphora |
| Stages | Skyworld · Reset Bomb Forest · Palutena's Temple |
| Items | Back Shield · Daybreak · Killer Eye · Ore Club · X Bomb · Staff |
| Enemies | Boom Stomper · Bumpety Bomb · Clubberskull · Daphne · Flage · Lethinium · Lurchthorn · Mahva · Megonta · Mimicutie · Monoeye · Nutski · Orne · Reaper & Reapette · Skuttler · Souflee · Zuree |
| Other | Centurion · Viridi |
| Trophies, Stickers and Spirits | Trophies (SSBB · SSB4) · Stickers · Spirits |
| Music | Brawl · SSB4 · Ultimate |
| Masterpiece | Kid Icarus |