Little Mac (SSBU)
| Little Mac in Super Smash Bros. Ultimate | |
|---|---|
{{{content1}}}
{{{content2}}} 
| |
| Universe | Punch-Out!! |
| Other playable appearance | in SSB4 |
| Availability | Unlockable |
| Final Smash | Giga Mac Rush |
| “ | As a boxer, Little Mac fights with his fists alone—no kicks! When his Power Meter fills up, he can use a special KO Uppercut, which can really turn a battle around. For his Final Smash, he turns into Giga Mac and pummels the opponent with a furious rush of punches! | ” |
| —Super Smash Blog, Super Smash Bros. Ultimate Official Site | ||
Little Mac (リトル・マック, Little Mac) is a playable character in Super Smash Bros. Ultimate, officially confirmed on June 12th, 2018. Little Mac is classified as fighter #49.
Kōsuke Toriumi reprises his role as Little Mac in the game, albeit via reused voice clips from Smash 4.
How to unlock
Complete one of the following:
- Play VS. matches, with Little Mac being the 20th character to be unlocked.
- Clear Classic Mode with Mario or any character in his unlock tree, being the 3rd character unlocked after Bayonetta.
- Have Little Mac join the player's party in World of Light.
With the exception of the third method, Little Mac must then be defeated on Boxing Ring.
Attributes
Little Mac offers a simple yet polarized fighting style, performing well on the ground, but poorly in the air. His name is somewhat of a misnomer in regard to his size: while Mac is rather small in relation to the majority of realistically proportioned characters, he is of average size among the entire cast. This can make him somewhat difficult to hit, but also means that most of his moves have short range, which makes spacing crucial for avoiding punishment.
Little Mac is a lightweight with the 8th fastest walking speed, the 3rd fastest dashing speed, and above-average traction, granting him effective out of shield options. He also has the 2nd fastest initial dash, which has a long duration of 15 frames, giving him a long pivot and an excellent dash dance that is surpassed only by Zero Suit Samus'. His sidestep and rolls are tied with Fox, Sheik and Zero Suit Samus' for the fastest in the game, with the latter also being long-distanced, making it easy for Little Mac to punish grounded attacks and giving him excellent defensive options. He also has below-average gravity and fast falling speed (tied with King Dedede for the 2nd fastest), which collectively give him good vertical endurance in spite of his light weight. Aside from his great air speed (tied with Mario, Donkey Kong, Sonic and Inkling's for the 12th fastest) and his wall jump, which is the 4th highest, the rest of Little Mac's aerial attributes are notoriously poor: his jump is tied with Ryu and Ken's for the 5th lowest, his double jump is the 3rd lowest, his air acceleration is tied with Ganondorf for the 6th lowest, and his directional air dodge travels the least amount of distance. These attributes effectively force Mac to stay on the ground as often as possible, but in terms of mobility, he is among the fastest characters in the game.
Little Mac's greatest strength is his potent ground game. None of his grounded moves have more than 15 frames of start-up, whereas only his up smash has more than 30 frames of ending lag. Only five non-special moves (forward smash, back air, up smash, down smash and forward air) become active after frame 9, and only the former two after frame 10. His neutral attack, in particular, is tied with Zero Suit Samus' for the fastest in the game, activating on frame 1 and its minimal ending lag and angles allow it to not only jab lock, but also make it the only attack in Ultimate that is capable of jab canceling reliably. Despite his somewhat light weight, Little Mac boasts superb KO potential: his forward tilt, dash attack and smash attacks boast high damage outputs and knockback scaling, yet are also fairly fast. Forward smash can be angled, with the downward variant dealing immense shield damage and the upward variant being one of Mac's most effective vertical KO options on the ground. Up smash's coverage allows it to serve as an effective anti-air, and its sweet spot also deals a lot of shield damage. Finally, down smash is a semi-spike with a fairly long range, allowing it to tech chase as well as edge-guard easily against careless or vulnerable recoveries. Besides their speed and strength, Little Mac's grounded moves are also difficult to interrupt, which combined with his high dashing speed gives him an excellent punish game, similarly to Zelda. His tilt attacks boast anti-rebounding priority; this prevents them from clanking with opposing ground attacks provided they're within priority range, allowing Mac to punish opponents very quickly due to his own attacks' high speed. While his smash attacks have normal priority, they instead boast super armor during their use. This offers Mac a unique way of punishing attacks by tanking the hit while immediately retaliating- meaning devastating attacks such at Mr. Game and Watch`s Judge 9, Falcon Punch, Warlock Punch, can all be punished. These traits make him arguably the most difficult opponent to directly challenge on the ground for every other character in the roster, including himself.
Little Mac's special moves also have fairly respectable utility. Straight Lunge gains distance and power as it charges, deals heavy damage, and boasts light damage-based armor while charging, allowing him to withstand weak attacks before retaliating immediately afterward. As such, it is an effective tool against most rapid jabs and multihit moves even while uncharged. The move can also be canceled by shielding, giving it utility for escaping certain combo moves such as Witch Twist, and it can be turned around when released, offering decent mix-up potential and a way to get out of combos. However, Straight Lunge's considerable ending lag limits its offensive utility as it can be easily intercepted or punished, while it's defensive utility depends on the character and the attack. This makes it great defensively against characters with low damage output or with reliance on multihits, such as Sheik or Meta Knight, but it won't help against opponents with high damage output or on single-hit aerials. Jolt Haymaker propels Mac forward with a leaping punch that travels a fair distance, can be unleashed on command, grants brief intangibility during start-up, and does not lose power when used in mid-air. This makes it useful for tech-chasing, repositioning, and escaping or punishing laggy moves or projectiles, and making it Mac's only useful KO option while in the air and off-stage. It also does not leave him helpless, making it a much less dangerous recovery move when compared to Little Mac's Smash 4 iteration. Rising Uppercut grants brief intangibility on start-up and travels fairly high when used on the ground. This makes the move an effective combo breaker; combined with the last hit's high knockback scaling, it has a very fast startup and the fact that it doesn't lose power in the air, is also quite potent out of shield and for scoring aerial KOs. Slip Counter is an extremely fast counterattack, making it useful for escaping pressure, especially aerial combos. It's also one of the few counters that slide forward before attacking, allowing Little Mac to get close to his opponent or even recover horizontally in response to an edgeguard attempt.
Lastly, Little Mac has a unique mechanic in the Power Meter. Shown over the damage meter, the Power Meter charges by dealing 333% or receiving 100%. When fully charged, Straight Lunge is replaced by the KO Uppercut, which can KO any character before 40%. KO Uppercut is also unblockable (barring Witch Time), boasts fast startup, and leaps slightly into the air (allowing it to catch opponents on low platforms such as Battlefield's); combined with its immense power, this can quickly turn the tide of a match or further secure a lead if used successfully. However, Mac loses the KO Uppercut if tumbled after a 4 second grace period (not including footstool jumping), forcing him to use the move quickly. KO Uppercut also has considerable end lag regardless of whether it hits or not, and its short leap can cause Mac to fall off the stage if used while next to an edge. As a result, it is unarguably one of the riskiest, yet most rewarding attacks in the entire series.
Despite his incredible strengths, Little Mac is held back by a slew of exploitable weaknesses, with the most notorious being his deliberately ineffective air game. His air attacks have some perks; neutral aerial is the fastest aerial attack in the game, making it a decent combo breaker, and it can combo into itself; forward and back aerials are semi-spikes, with the former being effective for combos or edgeguarding; up aerial is a fast anti-air, and down aerial is an extremely fast meteor smash. However, his aerials all have short-range and minimal damage output, and while his neutral and down aerials can auto-cancel from a short hop, his forward, back, and up aerials cannot. This leaves Mac incredibly vulnerable in the air, as he has no means of properly defending himself beyond point-blank range without exhausting any of his special moves. The low power of his aerials also makes them ineffective for flinching opponents, and Mac's only aerial KO options are indeed his special moves, which are highly likely to result in sacrificial KOs if misused off-stage. This also means that Mac is more severely affected by stale-move negation than most other characters, as he is effectively limited to using little more than half of his moveset in most situations, although his variety of powerful finishers compensates for it to a degree. Mac's weak air mobility and high falling speed make him incredibly susceptible to gimps from meteor smashes, semi-spikes, and even footstool jumps, especially if he doesn't have his double jump. Compounding this, his directional air dodge has the least distance, and his air dodge's ending lag is only average relative to the cast due to the universal changes to air dodges since now the ending lag depends on the character's falling speed and gravity. Thus, it is not only a situational option while in a disadvantaged state, but also poor as a normal recovery move. Mac can grab the ledge by using a directional air dodge if he is close enough, however, allowing him to cover the remaining distance to the ledge, making it very useful if combined with his double jump and special moves.
His special moves are also considerably less effective while in the air. Straight Lunge loses much of its power when used in midair, and its long charge time makes it impractical for recovery. Aerial KO Uppercut is also significantly weaker and blockable, although it still has KO potential. While Jolt Haymaker and Rising Uppercut are Little Mac's most effective aerial KO options, they are very poor for recovery, offering poor travel distance, small edge sweet spots, and minimal intangibility. Jolt Haymaker does not cause helplessness, allowing Mac to follow up with a wall jump, directional air dodge or Rising Uppercut; however, it travels a mediocre distance and can only be used once before landing or grabbing the edge, leaving Mac one of the most vulnerable characters to edgeguarding as he is unable to use it again if he gets hit. Rising Uppercut loses roughly half its travel distance when used in midair, and while aerial Slip Counter can be a good response to an edgeguard attempt, it loses its intangibility, can be predicted, and its end lag if unsuccessful is likely to result in Mac self-destructing if used at a low enough altitude. These traits result in Little Mac having more difficulty with recovering than most other characters, resulting in his recovery being commonly cited as one of, if not the worst overall. While his below-average gravity and high falling speed grant solid vertical endurance for a lightweight, they also make him very vulnerable to combos and juggling. Additionally, the super armor granted by Mac's smash attacks still causes him to take full damage and must be timed carefully to avoid being punished. These traits make Mac extremely prone to momentum shifts; his lacking air game and overall frailty allows opponents to easily combo or even zero-to-death him after one mistake, even if Mac was otherwise dominating the match.
Because of these issues, his neutral game, while decent, is very predictable, and while he has a good approach due to his excellent mobility, Mac relies more heavily than most other characters on his shield and dodges for avoiding damage and general positioning, both of which can predictable and easily punished if overused. His short-range can be problematic against characters with long or disjointed attacks. He also has trouble dealing with camping; while his super armor and special moves provide options for dealing with projectiles, he is still forced to approach as he lacks projectiles of his own. His short jumps and weak aerial attacks also leave Mac especially vulnerable to platform camping, arguably more so than any other character in the game. While Little Mac's strong ground game helps to compensate, it has some flaws of its own. Besides his downward angled forward smash and sweet spotted up smash, none of Mac's other moves deal extra shield damage and also lack shield stun, making his jab, up tilt, and dash attack especially unsafe against opponents who shield frequently, due to their short freeze frames despite not having a lot of end lag. Compounding this is Little Mac's mediocre grab game; Mac's pummel is among the fastest, but his grabs, while having average range, have moderate startup lag and noticeable ending lag, and the ending lag and collateral hitboxes for his throws limit their ability to KO or start combos. However, they still have some uses: his down throw can combo into Rising Uppercut, but has some ending lag and it's susceptible to DI; his back throw has decent power and can KO at around 130%, but its collateral hitbox weakens it; up throw can combo into Jolt Haymaker at low to mid percents, and forward throw can tech chase at the same percentages. While Mac is very effective at tech chasing due to his high ground speed, forward throw and wide, semi-spiking down smash, his combo potential is otherwise underwhelming, which combined with his linear neutral can sometimes make it difficult to safely rack up damage despite his attacks' high damage output. As a whole, Little Mac's poor combo game and lack of true KO confirms require him to win neutral exchanges more often in order to succeed, especially when trying to close out a stock since his most reliable KO options cannot be comboed into effectively at higher percentages outside of Jolt Haymaker or Rising Uppercut. His player also must be careful and know when to attack and play defensively, or else Little Mac could lose the neutral game.
Overall, Little Mac's playstyle is like that of a real boxer, with a defensive bait and punish style: keeping constant control of the middle of the stage, capitalizing on the opponent's mistakes, staying on the ground as much as possible, and utilizing his excellent ground mobility to his advantage, similarly to his fighting style in Punch-Out!!. He can be difficult to utilize effectively despite his straightforward fighting style, as his weaknesses outweigh his strengths when used by the average player, so it is recommended to perfect the character and always stay focused. Because of his extremely exploitable weaknesses, players must reach a higher skill level than normal to use Little Mac effectively on the ground.
Changes from Super Smash Bros. 4
Despite being a lower mid-tier character in Smash 4, Little Mac has received a mix of buffs and nerfs in the transition to Ultimate. While he has received good improvements both directly and from game engine changes, he also received heavy nerfs to his damage and combo potential. As a result, he is considered to be nerfed overall, and he also is mostly harmed by the universal engine changes, compared to most of the cast who benefit from said changes.
Little Mac's biggest buff involves his notoriously poor recovery: it has been extended and has greater mixup potential due to readdition of directional air dodges, Jolt Haymaker no longer causing helplessness while traveling more distance, and KO Uppercut granting recovery distance in midair. His attributes have also been modified, as he now has a considerably faster air speed which helps him recover easier, higher jumps which no longer make him as vulnerable to platform camping (while also improving his recovery), and the second highest falling speed which makes it easier for him to return to the ground. His higher weight not only improves his endurance, but also allows him to benefit from rage more effectively despite its weakening, making him harder to KO when combined with his longer recovery.
Among other buffs, some of Little Mac's ground moves have been improved: his neutral attack is even faster, can jab cancel with more ease, and can now jab lock. His forward tilt connects better on opponents in the air, and down tilt has more range to the point it outranges some swordfighter's down tilts, such as Meta Knight or Ike. All versions of forward smash have lost their blindspots, and up smash has more active super armor frames. Straight Lunge now gains damage while charging, can now be shield-canceled, can be turned around if needed, and deals a consistent 30% when fully charged. Aside from its helpless state being removed, Jolt Haymaker also has significantly improved safety on hit. The aerial version of KO Uppercut also has more knockback, allowing it to KO reliably. His grabs have also received much more range and have lost their previous blindspots, making them much more reliable. Some of his attacks also no longer have a sourspot on Little Mac's arm, causing them to deal consistent damage and knockback.
Little Mac also benefits heavily from some of the universal changes: since the alterations to grounded movement have returned some of the aspects of dash dancing, this grants Little Mac one of the game's best dash dances. The ability to dash cancel into any grounded attack and the introduction of spot dodge canceling arguably benefit him more than any other fighter, as not only he now has access to all his grounded options at any time, he is able to avoid most laggy punishment options and retaliate immediatly with his strong grounded game; both of these changes improve his hard punish game. The changes to shieldstun make it easier for him to punish aerial approaches out of shield and make his grounded attacks safer, benefitting his ground-based playstyle, while this is complemented by the universal nerfs to grabs and shield grabs, which now make him more difficult to punish out of shield without a sufficiently ranged move. The nerfs to defensive options (shielding, air dodges, rolls, and spot dodges) further improve his pressure ability and punish game, while he still possesses some of the best defensive options of the cast. Finally, the changes to jostle mechanics now make his attacks much harder to whiff up close, such as Straight Lunge's infamous whiffs at point-blank range in Smash 4, although it very rarely can still happen.
However, the nerfs Little Mac has received to his strong grounded game and Jolt Haymaker are harsh enough to eclipse his useful buffs. His best moves for racking up damage are weaker as his neutral attack, the infinite and up tilt all deal less damage (with the latter being less safe at low percents), and the former no longer has anti-rebounding priority, while his down tilt has more ending lag, reducing its combo potential, especially beyond low percents; the latter nerf is especially notable since it weakens or outright removes most of his damage racking abilities and kill confirms. His weaker up tilt also makes it less likely to out-prioritize attacks (since it offers anti-rebounding priority). Down throw has altered and increased knockback, making it better for combos at low percentages, but worse at high percents. As a result of these changes, Little Mac's grounded game has actually become worse despite his much easier access to his options, as he now has to deal more hits and his moves have less followup potential, while he still lacks useful moves to edgeguard or attack offstage opponents with, apart from the newly buffed Jolt Haymaker and down smash. His recovery has also ironically become less consistent than before, as Jolt Haymaker can now only be used once before landing, making misuse or interception of it usually fatal for him.
In addition, despite some of the universal changes improving Little Mac, other indirect changes have harmed him as much. The increased damage on edge attacks (since they now deal more than 8% throughout the cast) means Straight Lunge's armor can no longer withstand them, removing a mindgame option. Since defensive options have been nerfed to become stale if overused, while Little Mac can punish opponents more easily, his defense is more exploitable since his awful aerial game makes him reliant on dodges and shielding. The limitation to a single air dodge until a character gets hit or lands on the ground, as well as the higher ending lag on one, is especially notable, as this makes him even more susceptible to juggling if his air dodge is misused, and much more susceptible gimping despite his improved recovery, as combined with the ability to use Jolt Haymker once before landing makes it difficult to fully extend his recovery. The changes to jostle mechanics, while making his moveset more consistent, make it easier to corner Little Mac and read his fairly linear approach. However, the removal of perfect pivoting, the universal reduction of jumpsquats and landing lag are the changes that hinder him more than any other character; the former changes eliminates his extremely strong microspacing tactics, while the changes to dash-canceling do not fully compensate for this. Meanwhile, the latter two changes benefit his terrible aerial game far less while strengthening most of the cast's aerial games far more, making him more vulnerable to combos and aerial rushdowns, which limits him more to shielding a move or directly contesting them by making use of his smash attacks super armor to muscle through them, which can be risky.
Overall, despite some changes to Little Mac's notoriously awful recovery and the ability to dash cancel moves, Little Mac has indirectly lost many of the tools that made him effective in the previous game. This makes him perform worse than his Smash 4 iteration, and he is one of the most nerfed characters in the transition, alongside Bayonetta, Cloud, Corrin, Diddy Kong, Donkey Kong, the Ice Climbers, Rosalina & Luma and Sheik. His perception within the competitive community has been extremely negative since the game's release, which has extended to the point where he is arguably considered by some players to be the worst character in the game. This has been reflected in his tournament representation, as it is almost non-existent at national level tournaments; however, he still has several dedicated mains to his credit, including Kala, Sol and Tarakotori, who continue to attain respectable results with him at the regional levels and some noteworthy placements in nationals. In addition, update 3.1.0 heavily improved his grounded kit, especially to his neutral attack (though the buff specifically decreasing the move's lag on the third hit would later be removed in update 4.0.0), making his representation and results gradually improve even in national tournaments. While some professionals maintain that Little Mac remains a bottom tier (and arguably the worst character in the game), many professionals have reevaluated their opinions on Little Mac, considering him to be a low tier, thanks to his more versatile and more reliable combo tools and improved results, albeit not enough to go higher due to his notable weaknesses. As such, Little Mac's true viability remains a highly contentious point of debate in competitive play.
Aesthetics
 As with all veterans returning from SSB4, Little Mac's model features a more subdued color scheme. His clothing now features simple detailing and his muscles are slightly more pronounced.
- Little Mac no longer has sixteen alternate costumes, only eight. Of the cut costumes, his blue and orange outfits have been removed, while Wire-Frame Mac has notably been reduced to just two outfits: his standard and sweatshirt outfits.
- Little Mac's alternate costumes no longer change his skin tone.
- For certain attacks, the visual trail textures will match the color of Little Mac's boxing gloves.
- Side taunt has been altered to have a significantly more noticeable glove-tightening and arm-swinging animation.
- Air dodge has an altered animation.
- Once KO Uppercut is used or lost, the Power Meter now shows the meter physically draining to zero, rather than cutting immediately to the lowest level.
- Little Mac now winces and frowns while clapping during the results screen.
- Doc Louis' quotes have been shortened in Little Mac's victory poses.
- Doc Louis no longer appears in Little Mac's victory pose during Team Battles.
- Little Mac's shadowboxing victory pose features less physical contact between him and Doc Louis, likely due to the latter's absence in Team Battles.
- Little Mac is much more expressive. He now scowls in many more animations, smiles in his down taunt, appears shocked when he gets hit, and looks pained when he is laying on the ground or tumbling.
- Little Mac's on-screen appearance in his wireframe alternate costume has him wear a green hoodie initially, which then turns pink when he throws it off as part of the animation, as opposed to it staying green throughout in Smash 4. This appears to be an oversight.
Attributes
 Like all characters, Little Mac's jumpsquat animation takes three frames to complete (down from 5).
- Little Mac benefits from the re-addition of directional air dodges, which grant him a new option to mix up his landings and giving him a new recovery option.
 Air dodges have higher ending lag and can only be performed once before landing or getting hit, leaving Little Mac more susceptible to edgeguarding if he does not grab the ledge.
- Little Mac benefits significantly from the ability to dash cancel almost any grounded attack, increasing the versatility of his ground game.
- In turn, Little Mac suffers from the removal of perfect pivoting due to his previous heavy reliance on the technique in Smash 4.
- As characters no longer dash through each other, many of Little Mac's moves now connect consistently better, most notably with forward smash, Straight Lunge, and KO Uppercut.
- This change hinders his mixup options, as he can no longer run through opponents for a positional advantage.
- The strengthening of Stale Move Negation disproportionately affects Little Mac, due to his intentionally poor aerials reducing his options for using a variety of moves.
- Little Mac dashes much faster (2.24 → 2.464).
- Little Mac walks slightly faster (1.32 → 1.386).
- Little Mac's air speed is much faster (1 → 1.208), going from tied for 31st fastest in Smash 4 to tied for 12th in Ultimate. Among other things, this improves his recovery.
- Little Mac's max additional air acceleration is slightly higher (0.028 → 0.03).
- Little Mac jumps higher, now being able to reach the lower platforms of Battlefield with one full hop, and the top platform with both jumps. This improves his offstage survivability and prevents him from being camped as easily.
- Little Mac's falling speed (1.8 → 1.95) and fast falling speed (2.88 → 3.12) are much faster, now tied with King Dedede for the 2nd highest falling speed. This makes it easier for him to land safely, but makes him easier to combo.
- Little Mac's gravity is higher ( 0.08 → 0.09), now being around average instead of slightly below average. Combined with his faster falling speed, this allows him to land more safely, but slightly hinders his horizontal recovery and makes him easier to combo.
- As a result, he spends less time in the air after jumping (SH air time: 35→ 33) (FH air time: 51 → 44).
- Little Mac is heavier (82 → 87), now being slightly heavier than Sonic. This improves his survivability.
- However, this makes him easier to combo when combined with his faster falling speed and higher gravity.
- Little Mac's spot dodge has more startup with a shorter duration (2-16 → 3-14), reducing its intangibility period by three frames.
- However, it has slightly decreased ending lag (FAF 25 → 24), allowing Mac to act faster out of it.
- Back roll has more intangibility (4-12 → 4-14), but increased ending lag (FAF 27 → 33).
- Little Mac's air dodge has one more frame of intangibility (2-25 → 2-26).
- Little Mac's air dodge has much more ending lag ( FAF 31 → 50), going from the second fastest in Smash 4 to being merely average in Ultimate. It can also be used only once before landing.
Ground attacks
- The increase to shieldstun for grounded attacks benefit Little Mac more than everyone else, making his grounded attacks safer on shield.
- Neutral attack
- Like most neutral attacks in the game, the first two hits of Mac's jab can jab lock due to their altered angles (85°/80° → 361°/180°), though it can be difficult to land on smaller characters.
- Due to the universal improvements to neutral infinites, Little Mac's neutral infinite connects significantly better, as it could be escaped from relatively easily in SSB4.
- Neutral attack's first and second hits have less ending lag (FAF 22 → 17), improving their jab canceling potential.
- Neutral attack's third hit has slightly less ending lag (FAF 32 → 30).
- All hits of neutral attack except for the infinite's finisher deal less damage (2% → 1.5% (hits 1-2), 7% → 5% (hit 3), 0.7% → 0.5% (infinite)).
- Neutral attack no longer has anti-rebounding priority.
- Neutral attack can no longer be edge canceled into KO Uppercut, as the universal change to neutral infinites prevents Mac from being pushed off edges while hitting opponents.
- Holding down the standard attack button causes Little Mac to do his neutral attack, while mashing it causes him to perform his neutral infinite. Previously, the infinite would be initiated by holding down standard attack.
- Dash attack:
- The changes to jostle mechanics prevents dash attack from whiffing close opponents.
- Dash attack has a slightly altered animation where Little Mac punches slightly lower, while the animation length and hitbox duration both remain unchanged, allowing it to hit opponents at the ledge.
- Up tilt:
- The removal of perfect pivoting significantly harms up tilt's overall versatility.
- Up tilt deals less damage (9% → 6.5%).
- Up tilt's base knockback was reduced, while its knockback scaling was increased (50 (base), 80 (scaling) → 25/120). This increases its knockback overall, but makes up tilt unsafe on hit at very low percents (as opponents can air dodge or attack out of it) while still not being strong enough to be a viable KO move.
- The reduced damage output and altered knockback improves its combo potential at low and mid percentages.
- Up tilt is less effective for out-prioritizing attacks with its anti-rebounding priority, due to the move's lowered damage.
- Forward tilt:
- Forward tilt's second hit connects more consistently.
- Down tilt:
- Down tilt's has a slighly altered animation where Little Mac stretches his arm more horizontally instead of towards the ground. As a result, its outermost hitbox has been moved further outwards (X offset: 3 → 4.4), noticeably improving the move's range and giving it a disjoint.
- Down tilt has more ending lag (FAF 22 → 26), reducing its combo ability and followups with a majority of its followups only usable at low percents, while limiting its few consistent followups at higher percents (Jolt Haymaker and Rising Uppercut).
- All smash attacks cause the screen to shake.
- While using any smash attack, Little Mac voices out with his weak knockback voice clip if he takes damage during the move. This allows for a minor mindgame when Mac is hit during his super armor state, but is otherwise a small detail.
- All smash attacks trigger Special Zoom if Little Mac is hit during their startup and lands the move on an opponent.
- Forward smash:
- All angles of forward smash now use a single "wind" sound effect instead of three separate sound effects.
- The changes to jostling make the unangled and upward angled versions' sweetspots easier to land, especially against grounded opponents. The windboxes have been removed as well.
- Unangled:
- The inner hitbox is slightly longer (X offset: -1.5u → -1.5u - -2u).
- The move has a slightly altered animation where Little Mac bends his elbow faster. This very slightly improves the move's vertical range.
- It deals slightly less knockback (30 base/91 scaling → 29 base/87 scaling).
- Angled down:
- The inner hitbox extends further towards Little Mac (Y offset: 7.5u → 7.5-8.5u, Z offset: 3u → 3-0u), increasing the move's range towards him and making it less likely to whiff.
- It deals more base knockback (50 → 65). While this improves its ability to send enemies away or offstage, this significantly reduces its ability to set up tech chases.
- Up smash:
- Up smash's first frame produces a spark akin to a glancing blow, which visualizes its stronger flame sweetspot.
- The sweetspot can now hit airborne opponents in addition to grounded ones.
- Up smash has more super armor (frames 8-11 → frames 8-13), now matching the duration of the hitboxes.
- It has a shorter duration (10-14 → 10-13).
- Down smash:
- The move has less knockback scaling (96 → 94).
- The back hit's outermost hitbox has a swapped Z offset (-1u → 1u).
Aerial attacks
- All aerials have noticeably less landing lag (Neutral: 16 → 10 frames, Forward: 22 → 13, Back: 26 → 16, Up: 22 → 13, Down: 30 → 16).
- Due to Little Mac's faster falling speed and higher gravity, forward aerial and back aerial no longer auto-cancel in a short hop.
- Neutral aerial auto-cancels earlier (frame 25 → 16), allowing Little Mac to use it twice in a short hop without landing lag.
- If Little Mac uses forward aerial or a double jump after Jolt Haymaker, it will give him more momentum.
- The changes to shieldstun for aerial attacks greatly benefits Little Mac, making him less vulnerable to aerial approaches.
Throws and other attacks
- Standing grab's grabbox has been moved forward and is larger (Z offset: 4-8.1 → 7-10), significantly improving its range, no longer being the shortest grab in the game. This also removes the blindspot in Little Mac's arms and hands.
- Dash grab's grabbox has been moved forward (Z offset: 0-5.7 → 4-9.7), considerably improving its range.
- Pivot grab's grabbox extends further (Z offset: 4-12.1 → 4-13.6), improving its range.
- Dash grab and pivot grab have increased startup (Dash grab: frame 10 → 13, Pivot grab: frame 11 → 14).
- All grabs have more ending lag (Standing: FAF 33 → 39, Dash: FAF 41 → 47, Pivot: FAF 34 → 42).
- Pummel is much faster, but deals less damage (2.1% → 1%), going from an average pummel in speed and damage to being weak but among the fastest in the game.
- Little Mac's throws are no longer weight dependent. This worsens their combo potential against lightweights, but improves it against heavier characters.
- Down throw:
- Down throw deals less damage (5% → 3% (throw), 9% → 7% (total)).
- The move has less base knockback, but more knockback growth (78 (base), 40 (scaling) → 50/88). The lower base knockback allows Mac to combo into a greater range of moves at low percents, while the move's knockback doesn't become greater until above 150%, allowing it to combo for longer as well.
- The higher knockback growth combined with Ultimate's knockback and hitstun changes makes down throw combo less reliably, with any given combo being more heavily dependant on the opponent's percent.
- Little Mac has altered swing animations for battering items like the Beam Sword, no longer performing a stab forward when using a forward smash. This applies to all except his dash attack. Like in Smash 4, he shares this change with Captain Falcon.
Special moves
- Straight Lunge:
- Straight Lunge can be canceled by shielding.
- Like with most non-storable charge moves, Straight Lunge can be unleashed in the opposite direction upon releasing the move.
- Fully-charged Straight Lunge no longer has a blindspot, as characters can no longer pass through each other.
- Straight Lunge gains power and damage as it is charged; previously, it had fixed damage values for an uncharged and fully-charged attack.
- Uncharged Straight Lunge has less ending lag (FAF 49 → 44).
- Uncharged grounded Straight Lunge deals less damage (14% → 12%) and has lower knockback scaling (90 → 65) significantly hindering its KO potential. The aerial version also has lower knockback scaling (95 → 80).
- Late uncharged aerial Straight Lunge deals more damage (7% → 8%).
- Fully-charged Straight Lunge deals much more damage (25% → 30% (grounded), 15% → 20% (aerial)) without full compensation on its knockback (55 (base), 86 (scaling) → 50/77 (grounded), 25/100 → 25/95 (aerial)), and deals consistent damage throughout the move instead of having a weaker late hit.
- Because all edge attacks now do at least 9% damage, Straight Lunge can no longer tank through them as its heavy armor caps at 8%, removing a key ledge trapping option for Mac.
- When beginning to charge the move in the air, Little Mac drops down a short distance (in addition to the normal falling in the air), increasing the chances of a self-destruct.
- KO Uppercut:
- KO Uppercut has a new animation. Little Mac performs a jumping uppercut while facing the screen, making it appear more identical to the Star Punch from Punch-Out!! on the NES.
- The new animation is treated as an actual jump, meaning it is possible to use the grounded variant and end up offstage, especially if the punch is used out of a dash.
- KO Uppercut now uses Special Zoom. As a result, the move will no longer zoom in the camera outside of a 1v1.
- KO Uppercut's new animation gives the move more vertical range, allowing it to hit opponents on the lower platforms of Battlefield. It also grants recovery distance if used in midair.
- KO Uppercut is performed faster in general, making it harder to punish.
- KO Uppercut no longer has a windbox, making the hitbox connect more consistently.
- KO Uppercut has less ending lag (FAF 93 → 77).
- KO Uppercut has less horizontal reach.
- Aerial KO Uppercut deals much more knockback (40 (base), 80 (scaling) → 50/95), greatly improving its KO potential.
- Aerial KO Uppercut is no longer unblockable.
- The change to the move's animation requires a ledge-cancelled KO Uppercut (the "Gazelle Punch") to be performed differently, as the previous method from Smash 4 (ledge jump to uppercut) no longer registers as a grounded move due to Little Mac performing a hop. Little Mac now needs to drop from ledge and then double jump, before uppercutting and using its momentum to land on the stage.
- Jolt Haymaker:
- Grounded Jolt Haymaker makes Little Mac spend less time in the air. He also lands with significantly more traction.
- Jolt Haymaker has 1 less frame of startup (frame 9 → 8).
- Grounded Jolt Haymaker has reduced ending lag.
- Jolt Haymaker deals more base knockback (33 → 75), sending opponents into tumble at 0%.
- Jolt Haymaker has less knockback scaling (98 → 63), killing slightly later as its base knockback was not fully compensated.
- Jolt Haymaker no longer renders Little Mac helpless. This improves his recovery and turns what was previously a common suicidal mistake into a potent edge guarding tool.
- Aerial Jolt Haymaker travels further (initial speed: 1.4 → 1.6).
- Grounded Jolt Haymaker travels a shorter distance (initial speed: 2 → 1.7).
- Grounded Jolt Haymaker gains less height off the ground, making it harder to dodge projectiles with the initial leap.
- All versions of Jolt Haymaker can only be used once until Mac touches the ground again, even if he is hit out of it. This makes it less safe to use, especially if at the risk of being sent offstage.
- Grounded Jolt Haymaker will stop Little Mac from going over the ledge in the last few frames, preventing him from just barely overshooting the ledge and having to get back to the stage.
- Rising Uppercut:
 Little Mac no longer suffers from RCO lag if he is hit out of Rising Uppercut.
- Aerial Rising Uppercut snaps to the ledge earlier on during the move, instead of only during startup and after the final hitbox appears.
- Aerial Rising Uppercut keeps a small amount of forward momentum, slightly improving its horizontal distance.
- Rising Uppercut's first hit has a trail to highlight its hitbox.
- Slip Counter:
- Slip Counter has less ending lag (FAF 61 → 57) if missed.
- Slip Counter has a higher damage multiplier (1.3× → 1.5×).
- Slip Counter grants less momentum after an aerial counter. This lowers its recovery potential, but makes it less likely that Mac gets accidentally sent offstage by a counter.
- Slip Counter produces an aesthetic spark upon retaliating.
- When Slip Counter connects, the opponent's knockback is initially slowed before going to normal speed.
- Final Smash:
- Little Mac has a new Final Smash called Giga Mac Rush. Rather than using Giga Mac as a controllable transformation, Little Mac transforms into his Giga Mac form and rushes forward, and if he comes into contact with an opponent, he unleashes a rush of punches before launching them, similar to Donkey Kong's Jungle Rush.
- As a result, the undead glitch on the Stamina Mode, and results screen glitch on the timed team battle have been removed.
Update history
Likely because of his widespread perception as one of the worst characters in the game, Little Mac has been buffed by game updates. Although update 2.0.0 granted inconsequential buffs to his neutral and up aerials, update 3.1.0 significantly improved his ground game. Neutral attack was heavily improved in three distinct ways. Its hits connect better thanks to improved ranges and, more notably, its first and second hits had their ending lag reduced to the point that it and Mr. Game & Watch's neutral attack are currently the only ones in Ultimate that are capable of jab canceling reliably. Forward tilt connects much better against airborne opponents, which was a notorious flaw that remained unaddressed throughout SSB4's lifespan. Down tilt's range was improved, to the point that it is actually on par with Mii Swordfighter's and out-ranges Ike's, while the duration of up smash's super armor was increased.
Jolt Haymaker received a new hitbox that increased its vertical range, thus allowing its grounded version to hit opponents on Battlefield's low platforms. KO Uppercut, Slip Counter and uncharged Straight Lunge had their ending lag reduced by varying amounts. Lastly, Little Mac indirectly benefits from the update's changes to shield damage for projectiles, as they make it somewhat easier for him to handle camping.
However, update 4.0.0 removed Little Mac's most useful combo option. Update 3.1.0 introduced an unintentional mechanic that decreased the ending lag of neutral attack's third hit by 10 frames if it was inputted manually. This gave his neutral attack the ability to combo into itself (via dash-canceling), forward smash, grab, or Jolt Haymaker at low to medium percents. The sheer effectiveness of this technique even saw Sol, a pioneer of Little Mac's metagame in SSB4, christen it the "Dreamland Express" as proposed by his Twitch chat. Despite the loss of this option, it is not enough to eclipse the other buffs that update 3.1.0 granted Little Mac in the first place.
He saw another improvement to his defensive game in update 7.0.0, as Little Mac's shield was made larger, decreasing his vulnerability to shield stabbing.
Overall, Little Mac's buffs have heavily improved his kit, granted him new potential set-ups, and slightly improved his defense. Sol has notably viewed the buffs as sufficient enough to render Mac better than he was in SSB4,[1] although he made this statement before the Dreamland Express was removed. However, how these buffs will affect him the long run is yet to be known.
- Neutral aerial auto-cancels earlier (frame 25 → 16), matching the move's interruptibility.
- The amount of time Little Mac cannot grab the ledge after performing neutral aerial has been shortened (46 frames → 40).
- The amount of time Little Mac cannot grab the ledge after performing up aerial has been shortened (73 frames → 66).
- Neutral attack 1 has less ending lag (FAF 22 → 17) and connects into neutral attack 2 more reliably.
- Neutral attack 2 has less ending lag (FAF 22 → 17) and more range.
- Neutral attack 3 has more range(Y/Z offsets: 10u/3u → 8u/6u).
- Neutral attack 3 has less ending lag and a slightly different animation if inputted manually, allowing Mac to act 10 frames earlier.
- Forward tilt's hits connect more reliably against opponents in the air.
- Down tilt has more range.
- Up smash has more super armor (frames 8-11 → 8-13).
- Up smash's hitbox duration is 1 frame shorter (frame 10-14 -> 10-13), making it harder to hit opponents above and behind Little Mac. This change appears to have been unintentional. [1]
- Straight Lunge has less ending lag when it is grounded and not fully charged (FAF 50 → 45).
- KO Uppercut has significantly less ending lag when it is grounded (FAF 97 → 77).
- Jolt Haymaker has a hitbox at the start of the attack, positioned above and in front of him, which extends the range above Little Mac.
- Slip Counter has less ending lag (FAF 63 → 57).
- Neutral Attack manual inputed hits can no longer reduce its ending lag, significantly reducing its combo potential.
- Overall shield size has been increased.
Moveset
- Little Mac can wall jump.
For a gallery of Little Mac's hitboxes, see here.
Note: All numbers are listed as base damage, without the 1v1 multiplier.
| Name | Damage | Description | ||
|---|---|---|---|---|
| Neutral attack | 1.5% | A left jab, followed by a right hook, followed by a left uppercut. If the button is mashed, Little Mac will perform an extremely fast flurry of alternating punches, followed by a right uppercut. Holding the attack button will have Little Mac repeat the first hit rapidly. Like in Smash 4, it is one of the fastest attacks in the game, with the first hit coming out on frame 1. As a result, it is an excellent point-blank interrupting tool. The first two hits can lock floored characters, although this is difficult to perform on most characters due to the move's height. The first two hits have very low ending lag, allowing either to jab cancel into Rising Uppercut; this acts as a KO combo at various percents, with hit 2 working past around 145%, and hit 1 working past 200%. However, this combo can be safely shielded. | ||
| 1.5% | ||||
| 5% | ||||
| 0.5% (loop), 3% (final hit) | ||||
| Forward tilt | 4% (hit 1), 8% (hit 2) | A one-two combo. The first hit leads into the second hit, which deals excellent knockback that can KO Mario from the edge of Final Destination at 90%. Due to the first hit coming out at frame 4 and the second at frame 12, it's extremely fast while also being one of the strongest forward tilts in the game. It also has anti-rebounding priority and the longest range of his tilts due to Mac moving slightly forward during both hits, especially the first, making it useful out of a dash. As of patch 3.1.0, the second hit connects more reliably on opponents in the air, unlike in SSB4. | ||
| Up tilt | 6.5% | An overhead arcing backfist. Very fast, coming out on frame 4 and has low ending lag. It covers the entirety of Little Mac's body and a wide arc above him, which allows him to use it as a quick option to punish overhead attacks or rolls. It is Little Mac's best combo initiator in general due to its anti-rebounding priority, low knockback and speed. The back hit combos better due to Mac having less endlag after. Combos include itself at low percents, and Rising Uppercut or KO Uppercut at low/mid percents if the opponent is close to him. It can also lead into tilts or smash attacks depending on an opponent's reaction. However, it is unsafe at very low percents, as opponents can act before Little Mac can. It resembles Don Flamenco's Twirling Backhand used during Title Defense Mode in the Wii version of Punch-Out!!, albeit performed vertically instead of horizontally. | ||
| Down tilt | 8% | A crouching short straight-punch. Like his neutral attack and tilts, it has anti-rebounding priority and has extremely fast startup at frame 3. However, it has lost part of its formidable combo potential from Smash 4 due to its higher ending lag. However, it is still good for combos, since it still possesses its vertical angle, can combo into tilts at 0%, and has consistent combos at higher percents into Jolt Haymaker, forward aerial, dashing Rising Uppercut, dash attack, forward air, or KO Uppercut. Otherwise, it is mainly used to force opponents into a landing situation for Mac to capitalize on. As of patch 3.1.0, down tilt's range now exceeds those of some swordfighters, now being on par with Mii Swordfighter's and longer than Ike's due to a disjoint on the hitbox on Mac's fist, giving it impressive range. It is one of Mac's main neutral tools due to its combo potential, speed, range, and relative safeness on shield compared to the rest of his attacks. It can also 2-frame which can lead into Jolt Haymaker or KO Uppercut for a kill confirm. | ||
| Dash attack | 10% | A lunging overhand. It is fast for a dash attack (frame 7), travels a decent distance, and can be a situational KO option, having enough knockback to KO Mario at 136% from the edge of Final Destination, thus making it moderately strong for a dash attack. It can also hit opponents hanging on ledges, making it one of Little Mac's only effective options against ledge-hanging opponents aside from down smash and Jolt Haymaker. However, due of its lack of shieldstun, it is notoriously punishable on shield, and is easily punished with a grab and throw, which puts Little Mac at a severe disadvantage due to his abysmal air game, so it mustn't be overused or used recklessly. The angle is different for the 3 frames in which the hitbox is active, as it launches at a 80 degrees angle at frame 7, 70 at frame 8 and 60 at frame 9. It can combo into itself at low percents. | ||
| Forward smash | ↗ | Straight Smash | 20% (fist), 18% (arm) | Steps forward and throws one of three right-handed punch variations, depending on which angle the control stick is tilted. It's active on frame 14(15 if angled down) and has a moderate amount of ending lag (26 frames of lag), making it surprisingly fast for its power. Little Mac also rushes forward during before the hitbox becomes active, giving it deceptively good range, but the hitboxes don't reach far in front of him. It's pretty versatile for a forward smash or smash attack in general, as it's up, forward, and down angles behave almost like different moves as opposed to other forward smashes just changing their angle of attack, allowing Little Mac options for powerful knockback either horizontally or vertically, or dealing heavy damage or shield damage.
Up: An uppercut. It launches opponents vertically and has the largest hitbox out of all three punch variations, which makes it the easiest to connect while also being a decent anti-air. It deals powerful vertical knockback that KOs Mario at 102%, allowing it to finish off fighters with poor vertical endurance. It also grants super armor on frames 8-15. It resembles Little Mac's Star Punch and One-Star Punch in the NES and Wii versions of Punch-Out!!, respectively. Forward: A cross. It has the highest knockback scaling out of all three punch variations, KOing Mario from center-stage at 89%. This makes it the most reliable out of the three in regard to KOing. It also grants super armor on frames 8-15. It is based on the cross Little Mac hits King Hippo with during the cutscene in which he defeats Hippo in the Wii version of Punch-Out!! Down: A body hook. It deals the most damage out of all three punch variations, but its extremely low knockback scaling makes it unusable for KOing. Its high shieldstun makes it safer on shield than the other two punch variations, and it deals heavy shield damage, allowing it to deplete more than half a shield. It also grants super armor on frames 9-15. |
| → | 20% (fist), 18% (arm) | |||
| ↘ | 24% | |||
| Up smash | 21% (clean), 16% (late) | A wide uppercut. Its first frame is highlighted by a spark, which acts as a sweetspot that possesses a flame effect and deals significant shield damage and is among the strongest up smashes in the game. Its sourspot also makes it useful for aerial protection and for KOing, thanks to its respectable damage output, high knockback scaling, and hitbox placement. Fast despite its power, since it comes out on frame 10. However, it has the highest amount of ending lag out of his grounded moves with 34 frames, making it punishable if not used carefully. Despite its appearance, it also only hits in front of Little Mac, but it has good vertical range, reaching high enough to challenge opponents standing on the bottom platforms of Battlefield, and low enough to reach some opponents on a ledge. It also grants super armor on frames 8-13. | ||
| Down smash | 13% | Spins 180° to throw a quick, downward angled right hook in each direction. It comes out on frame 10 and acts as a powerful semi-spike which hits on both sides. Coupled with its long range, it is one of Little Mac's only edgeguarding options. Like his other smash attacks, it grants super armor (frames 7-10 and 15-17). Unlike most down smashes, both of its hits have the same damage outputs. | ||
| Neutral aerial | Weak Jab | 2% | A downward angled straight jab. Due to it hitting on frame 2 and having almost no ending lag, it is the fastest aerial of any kind in the game. It can be used as a combo breaker of sorts or spammed to combo when in the air. It also sends the opponent at the autolink angle, allowing Mac to combo on landing. It has a small hitbox on Mac's back. However, it has extremely low range, making it risky and difficult to use. The front hitbox has very weak set knockback while the hitbox behind Mac has knockback. It can autocancel extremely quickly and can be used twice in a short hop without suffering from landing lag if used at the peak of the short hop. | |
| Forward aerial | 5% (sweetspot), 4% (sourspot) | A hook. It comes out on frame 10 and has a low damage output, but hits at a semi-spike angle, allowing it to act as a gimp. It can combo out of several of Little Mac's moves, though this is offset by its meager damage. It can combo into Jolt Haymaker, being risky but very rewarding if used precisely: at mid percents leaves the opponent in an unfavorable position, and even KO early offstage. By itself, it can easily gimp poor recoveries past 100%. It can also lead into tech chase situations. Compared to Little Mac's other aerials, it is the most useful and reliable, although it autocancels in a full hop. | ||
| Back aerial | 6% (sweetspot) 4% (sourspot) | A backfist. Like his forward aerial, it has a low damage output and hits at a semi-spike angle, but comes out one frame slower and deals 1% more damage. It can edgeguard, but it has poor range and a short hitbox duration. It's also his strongest aerial, but is still too weak to KO and does not autocancel in a short hop. | ||
| Up aerial | 5% (sweetspot) 4% (sourspot) | An upward arcing hook. It is extremely fast for an up aerial (frame 5), though this is significantly offset by its short range, short hitbox duration, and noticeable ending lag. It autocancels in a full hop If used while near the ground, it can combo into up tilt, Rising Uppercut, or KO Uppercut at high percents. It is also usable as an anti-air against opponents on platforms if no other options are available. It appears to be based on the jump Little Mac performs during his victory animation in the Wii version of Punch-Out!! | ||
| Down aerial | 4% (spike/sourspot), 5% (sweetspot) | A downwards punch. The fist hitbox is a sourspot, but acts as a meteor smash. It autocancels in a short hop and is one of the quickest meteor smashes in the game due to coming out on frame 7 and having low ending lag, but is situational due to its extremely low knockback and damage, with its meteor smash being ineffective against anyone but fast-fallers unless Little Mac footstool jumps on the opponent immediately after. The meteor smash hitbox also acts like a sourspot, dealing less damage than the hitbox on his arm. However, it can lock floored opponents, allowing Mac to finish them with any of his strongest attacks. It can also gimp, being good with opponents with poor recoveries, especially vertically. It will only get a meteor smash kill at 247% at the least. | ||
| Grab | — | Clinches the opponent. In addition to having average range, Little Mac possesses moderate ending lag in his grabs. Unlike in SSB4, Mac's grab no longer has blindspots on his hand and arm. Its range can be increased by performing a roll cancel boost graband it can even be used to cross-up opponents, although this is difficult to pull off. His dash grab has long range, as he rushes forward at a rather far distance before the grabbox comes out, and his pivot grab also has decent range, but they both have noticeable startup lag as well. | ||
| Pummel | 1% | A body hook. Low damage, but it's one of the fastest in the game, making it great for racking up damage before a throw. | ||
| Forward throw | 4% (hit), 4% (throw) | Rears his arm back and throws an overhand. It's Little Mac's second most damaging throw and can be used to setup an edgeguard. At low-to mid percents, it can tech-chase, and if the opponent doesn't tech, it can be followed into a dash attack or other options out of a dash at low percents. Nearby opponents will be launched at a near-perfect vertical trajectory. | ||
| Back throw | 4% (hit), 5% (throw) | Spins the opponent around and throws an uppercut. The most damaging out of all of Little Mac's throws, as well as the highest knockback scaling. This is his only throw with any KO potential, although it is not the strongest KOing option, as it is hindered by its collateral hitbox, causing it to KO Mario starting at 140% from the very edge of Final Destination. Nearby opponents will be launched at a near-perfect vertical trajectory. | ||
| Up throw | 4% (hit), 3% (throw) | An uppercut. Nearby opponents will be launched at a near-perfect vertical trajectory. Due to Mac's weak aerial presence, this throw has little use apart from mixups involving forcing opponents to land, making it his most situational throw. However, it can combo into Jolt Haymaker at low and mid percents. | ||
| Down throw | 4% (hit), 3% (throw) | A double axe handle. Its knockback was increased from the previous installment, which makes it harder to lead into combos. Nearby opponents will be launched at a near-perfect vertical trajectory. It can combo into jab at low percents or Rising Uppercut at higher percents, but it has some ending lag and the combo will fail if the opponent DIs correctly and Mac doesn't manage to read it. | ||
| Floor attack (front) | 7% | Gets up while throwing a punch behind himself, then in front of himself. | ||
| Floor attack (back) | 7% | Gets up while throwing a punch in front of himself, then behind himself | ||
| Floor attack (trip) | 5% | Gets up while throwing a punch in front of himself, then behind himself | ||
| Edge attack | 9% | Throws a lunging punch while climbing up the ledge. | ||
| Neutral special | Straight Lunge | 12%/10%/8% (uncharged), 10%/8% (uncharged, reversed), 30% (fully charged), 28% (fully charged, reversed), 35% (KO Uppercut), 13% (midair KO Uppercut) | Rears his arm back and then throws a dashing cross. It is chargeable, grants 8% (9.6% on 1v1) heavy armor while charging, can be reversed upon release, and moves Little Mac at a good distance forward, which increases with charge. The charge can be cancelled by pressing the shield button. When fully charged, it deals consistent 30% damage throughout the move, lacking a weaker late hit and launching the opponent away with extreme knockback. Due to the heavy armor, it can be useful to prevent the opponent from starting a combo with a tilt or extending the combo with an aerial attack, giving Mac a way to escape from combos. However it depends on the move and sometimes the character, as it's not useful against hits that deal more than 8%.
If the Power Meter is fully charged, it becomes the KO Uppercut, a fast and extremely powerful leaping uppercut, with the ability to pierce shields and also has enough range to reach through the bottom platform of Battlefield. Despite the name, however, it is not a true one-hit KO, but instead KOs at low to mid percentages (KO's the lightest character starting at 12%, and the heaviest starting at 36%), while also granting super armor on frames 8-9. However, KO Uppercut possesses a considerable amount of ending lag, making it punishable regardless if it hits or not, and the Uppercut is immediately lost if Little Mac holds it for 4 seconds and is then hit by any move that causes tumbling. A midair KO Uppercut, although weaker and blockable/counterable, can also be used as a recovery option, and despite the much weaker power, it is still strong enough to KO reliably at high percents, especially at a certain height. | |
| Side special | Jolt Haymaker | 14% | An overhand version of the Superman punch. It can be used almost instantly by pressing the special button immediately after first pressing it. Grants brief intangibility on the ground during startup, and its long hitbox duration allows it to punish moves effectively. It deals high damage and good knockback, making it a great combo finisher and reliable KO move at the ledge, even in the air. It does not render him helpless if used in midair, making it a good horizontal recovery option. However, it can only be used once before landing, thus the player must use it carefully due to Little Mac's mediocre recovery. Jolt Haymaker was given more range as of patch 3.1.0, allowing the grounded version to hit opponents on the bottom platforms of Battlefield.
An advanced version of the move can be performed dubbed the "Superman Haymaker". Performing this requires a dash jump to be inputted from a standing position, then Jolt Haymaker to be used immediately before Little Mac leaves the ground (similar to the input of a short hop aerial). If done correctly, the resulting Jolt Haymaker is granted increased vertical height and horizontal distance, giving Mac the ability to soar over projectiles and better pressure opponents on platforms. | |
| Up special | Rising Uppercut | 3% (hit 1), 1% (hits 2 - 5), 3% (hit 6) | A right-handed, jumping corkscrew uppercut, followed immediately by a left-handed uppercut. The first uppercut hits multiple times, whereas the second uppercut hits once and has extremely high knockback. Thanks to Little Mac's excellent traction, it is a very potent out of shield option, and is also one of his only reliable aerial finishers aside from Jolt Haymaker. It also grants 3 frames of intangibility on start-up, while the grounded version covers a decent amount of vertical distance. Conversely, the aerial version is less effective at covering vertical distance and granting maneuverability compared to the grounded version, which make it very ineffective for recovery. It appears to be based on Little Mac's Three-Star Punch in the Wii version of Punch-Out!! | |
| Down special | Slip Counter | 1.3× (minimum 10%) | Assumes a full crouch stance and, if hit, immediately counterattacks by slipping inside to throw an uppercut. It shoots Little Mac forward during the counterattack, allowing it to hit distant opponents and act as a recovery extended offstage, albeit with high risk. Due to the counter window being active on frame 5, it has one of the fastest startups of any counter, making it an effective defensive option. However, the mechanics of the uppercut's delivery, such as the short delay and Mac's own movement, can also make it infrequently whiff. It appears to be based on Glass Joe's Delayed Right Hook used during Title Defense Mode in the Wii version of Punch-Out!! | |
| Final Smash | Giga Mac Rush | 3% (beginning), 2% (beginning, late), 59% (entire) | Little Mac transforms into his Giga Mac form and rushes forward, attacking any caught opponents with an uppercut. He then proceeds to unleash a rush of punches that concludes with an uppercut. For a Final Smash, it deals a massive amount of damage, and the initial dash can be used as a niche recovery option. | |
Power Meter and KO Uppercut

| “ | Deal damage to opponents or receive damage to charge the meter. Charge it to the max to make your neutral special a KO Uppercut. | ” |
| —Move List Description for the Power Meter. | ||
| “ | Unleash a powerful uppercut that launches opponents. You get various perks for using this on the ground. | ” |
| —Move List Description for the KO Uppercut. | ||
Little Mac has a unique mechanic known as the Power Meter, which is permanently shown above his damage meter. Dealing damage or receiving damage from opponents will charge the meter; when full, Little Mac's neutral special (Straight Lunge) is replaced by the KO Uppercut. Of note is that the meter is also charged if Little Mac hits a shield or invincibility and if he is hit while in shield or invincibility. KO Uppercut has multiple perks: it can KO almost the entire cast around 35%, has very fast startup, grants super armor right before the hitbox appears, and is unblockable. This only applies to the grounded version, as the aerial version is significantly weaker and blockable; however, it grants good recovery distance.
KO Uppercut will replace Straight Lunge until it is used, Little Mac is KO'd, or if he is sent tumbling 4 seconds after he gains a KO Uppercut.
On-screen appearance
Walks onto the stage while throwing a series of punches before tossing his hooded sweatsuit off. If either of his sweatsuit alternate costumes are being used, he will still perform the tossing animation while keeping his sweatsuit on.
Taunts
- Up taunt: Turns his back to the screen, bends down, then raises his fist triumphantly. Sometimes, Doc Louis will chime in and say "Hit 'em, baby!" (叩け,マック!, Strike, Mac!)
- Side taunt: Pulls the string of his right boxing glove tight with his teeth, then gets back to his battle stance while scoffing. Sometimes, Doc Louis will chime in and say "Let 'em have it, Mac!" (ぶちかませ,マック!, Hit them hard, Mac!)
- Down taunt: Performs a series of punches while facing the screen. Sometimes, Doc Louis will chime in and say "Show 'em what you got, Mac baby!" (お前のパンチを見せてやれ!, Show them your punch!)
Little Mac's up taunt.
Little Mac's side taunt.
Little Mac's down taunt.


Idle poses
- Shuffles his feet.
- Shifts his head back and forth in front of his fists.

Little Mac's first idle pose
Little Mac's second idle pose


Victory poses
Little Mac wears a Champion belt in all three of his victory poses.
In Team Battles, Doc Louis will not appear, and he will not say anything.
- Left: Does a fakeout punch against Doc Louis, who stumbles, before they both pose with an arm raised while facing towards the camera.
- Up: Doc Louis bumps Little Mac with his belly before holding up Mac's arm, like a referee would after a boxing match.
- Right: Runs and turns his back towards the screen, shuffles his feet, then performs a spinning uppercut while Doc Louis cheers him on.
In all of Little Mac's victory poses, Doc Louis will say one of the following quotes random depending on which pose is selected and which costume is used:
| Left | Up | Right |
|---|---|---|
| Normal Costumes | ||
| "You win, Mac!" | "World Circuit's all yours Mac!" | "Ahh, winnin' feels good, don't it?" |
| "Was that a little too easy for ya, son?" | "(in tandem with the announcer) And the winner is… Little Mac!" | "Way to go, Mac! You're the champ, baby!" |
| "Nice work, Mac. You got it all figured out." | "Ya got what it takes, Mac!" | "I think I hear a chocolate bar callin'." |
| Wireframe Costumes | ||
| "I could barely keep my eyes on ya, son." | "You making my eyes water, son." | "Just like old times, huh?" |


In competitive play
From Ultimate, hopes were high on Little Mac when the game was released, due to improvements to his notoriously awful recovery. However, the game’s mechanics proved to be detrimental some of his best tools, especially his ground game, while his weak aerial game, notoriously the worst in Smash 4, was made even worse. With this, his perception dropped significantly, with the general perception of him being not only a bottom tier, but the worst character in the game.
Patch 3.1.0 granted Mac several useful buffs: his neutral attack, down and forward tilts, and decreased lag from his special attacks revamped his ground game to be more daunting than before. As such, his representation and results slowly improved over time thanks due to dedicated mains such as Kwaz and Tarakotori, most notably in Japan. Despite this, Little Mac's most critical weaknesses remain unaltered.
Patch 4.0.0, however, reverted Little Mac's biggest buff: as a result of the fixing of an unintentional mechanic, his manual gentleman jab no longer combos into itself or any KO moves, hindering his combo ability. This change, however, has gone relatively unnoticed by many pro players due to Mac’s lack of competitive presence and therefore has little effect on his already negative perception. His cons are considered too detrimental for him to be viable in the current metagame, and his multitude of buffs, which improve him at a quality-of-life level, have not made enough impact to shift Mac from being considered the worst character overall. Because of this, he is expected to remain ranked as a bottom-tier, especially if he doesn't receive further buffs from future patches.
Notable players
Active
 Akaraien - Placed 13th at BOILINGPOINT BRAWL and 17th at VCA 2019, defeating players such as Whoophee and Klemenz.
 BlasterZ - Placed 5th at Calyptus Cup Inkstrike and 9th at Calyptus Cup X: Purple Age. He has wins over players such as DarkThunder, Jbandrew, and otek.
 DevvyStar - Uses Little Mac as a strong secondary to his main, Isabelle. Placed 49th at Glitch 7 - Minus World and 97th at Super Smash Con 2019 while defeating Frozen and Pink Fresh.
 Gaia - Placed 5th at PSG Classic 2019, with wins over players such as Dakpo, Rickles, and Etsuji.
- gain - Placed 33rd at Umebura SP. Has taken sets off players such as HIKARU, kept, Brood, Etsuji ,and Eim.
 Kala - The best Little Mac player in Mexico. Placed 17th at Mexican Gaming Championship, 25th at Smash Factor 8 and 33rd at Smash Fest to the Sky.
- Kwaz - The best Little Mac player in the United States and one of the best in the world. Placed 3rd at Sweet Spot 6, 5th at Overextend, 7th at Smash Out 2019, 9th at Paradigm Shift 2019, 13th at both Be Mine? and Frosty Faustings XII 2020 , 33rd at Low Tier City 7, 49th at The Big House 9 and 97th at Frostbite 2020. Ranked 3rd on the Nebraska Ultimate Power Rankings.
- Lazyboredom - Has a strong Little Mac secondary to his main, Falco. Placed 3rd at Just Roll With It! 10 and 9th at Just Roll With It! 11 while using both Little Mac and Falco. Ranked 2nd on the North Carolina Ultimate Power Rankings.
- Masayan - Placed 17th at Sumabato SP 9 with a win over yuzu.
- Mr.Newport - The best Little Mac player in Texas and one of the best in the United States. Placed 13th at Ascension V, 49th at Low Tier City 7, and 97th at EVO 2019.
- Sol - A pioneer of competitive Little Mac plays, and was considered one of the best Little Mac players prior to his inactivity with the game. Placed 17th at COST 2019. Primarily focused on Beat Saber and Pokémon. However, he has recently gone back into competitive Smash.
- Tarakotori - The best Little Mac player in Japan and one of the best in the world. Placed 13th at both Umebura SP 4 and Sumabato SP 8, 33rd at Umebura SP 6, and 49th Umebura SP 3. Has wins over Eim and Shogun.
- Yaminabe - Placed 25th at Umebura SP 6 and 97th at EVO Japan 2020.
Inactive
- Reverse Sol - Placed 17th at Launch and 33rd at Glitch 6.
Classic Mode: Friendly Sparring

Little Mac fights fighters that are close range martial artists. During the battles, every item except the Sandbag is disabled. As such, the Sandbag can be hit but will only spawn visual confetti.
| Round | Opponent | Stage | Music | Notes |
|---|---|---|---|---|
| 1 | Incineroar |
Boxing Ring | Battle! (Elite Four) / Battle! (Solgaleo/Lunala) | |
| 2 | Ryu |
Suzaku Castle | Ryu Stage | Could also possibly reference Piston Hondo, one of Little Mac's recurring opponents. |
| 3 | Mii Brawler |
Arena Ferox | Battlefield - Super Smash Bros. Brawl | Mii Brawler costume combinations:
|
| 4 | Captain Falcon |
Port Town Aero Dive | Dream Chaser | |
| 5 | Wireframe Mac |
Boxing Ring | Jogging / Countdown | If the player uses the Wireframe Mac costume, the default Little Mac |
| 6 | Donkey Kong |
Boxing Ring (Ω form) | Donkey Kong / Donkey Kong Jr. Medley | References the boss battle against Donkey Kong in the Wii version of Punch-Out!! |
| Bonus Stage | ||||
| Final | Master Hand | Final Destination | Master Hand (Less than 7.0 intensity) Master Hand / Crazy Hand (Intensity 7.0 or higher) |
On intensity 7.0 and higher, Crazy Hand fights alongside Master Hand. |
Credits roll after completing Classic Mode. Completing it as Little Mac has Jogging / Countdown accompany the credits.
Role in World of Light

Although Little Mac does not appear in the World of Light opening cutscene, he was vaporized and later imprisoned alongside the rest of the fighters (sans Kirby) when Galeem unleashed his beams of light.
Little Mac can be found near a city area blocked through a door. To reach him, the player must first complete the Power Plant sub-area so the door can open.
Fighter Battle
| No. | Image | Name | Type | Power | Stage | Music |
|---|---|---|---|---|---|---|
| 49 |  |
Little Mac | 3,300 | Boxing Ring (Ω form) | Jogging / Countdown |
Spirits
Little Mac's Fighter Spirit can be obtained by completing Classic Mode. It is also available periodically for purchase in the shop for 500 coins. Unlocking Little Mac in World of Light allows the player to preview the first spirit below in the Spirit List under the name "???". As a Fighter Spirit, it cannot be used in Spirit Battles and is purely aesthetic. Each Fighter Spirit has an alternate version that replaces them with their artwork in Ultimate.
Additionally, Little Mac makes an appearance as a Primary Spirit as Giga Mac.

932. Little Mac
- Giga Mac Spirit.png
933. Giga Mac

In Spirit battles
As the main opponent
| Spirit | Battle parameters | Inspiration | |||||||||
|---|---|---|---|---|---|---|---|---|---|---|---|
| No. | Image | Name | Series | Enemy Fighter(s) | Type | Power | Stage | Rules | Conditions | Music | Character |
| 217 |  |
Ricky | The Legend of Zelda series | •Little Mac |
1,800 | Bridge of Eldin (Battlefield form) | N/A | •The enemy loves to jump •The enemy has increased jump power |
Tal Tal Heights | ||
| 460 |  |
Porygon | Pokémon series | •Little Mac |
1,700 | Pokémon Stadium | •Assist Trophy Enemies (Akira) | •Hostile assist trophies will appear | Main Theme - Pokémon Red & Pokémon Blue (Melee) | ||
| 568 | Teddy | Earthbound series | •Little Mac |
3,600 | Onett | N/A | •The enemy's melee weapons have increased power •The enemy starts the battle with a Killing Edge |
Bein' Friends | |||
| 933 | Giga Mac | Punch-Out!! series | •Giant Little Mac |
13,900 | Boxing Ring | N/A | •The enemy has super armor and is hard to launch or make flinch •Stamina battle •The enemy is giant |
Title Theme - Punch-Out!! (Wii) | |||
| 934 | Doc Louis | Punch-Out!! series | •Little Mac |
3,300 | Boxing Ring | •Attack Power ↑ •Defense ↑ •Move Speed ↑ |
•Stamina battle •The enemy has increased move speed •The enemy has increased defense after a little while |
Jogging / Countdown | Little Mac | ||
| 936 | Bald Bull | Punch-Out!! series | •Giant Little Mac |
4,400 | Boxing Ring | N/A | •The enemy's dash attacks have increased power •The enemy has super armor but moves slower •Stamina battle |
Jogging / Countdown | |||
| 945 | Piston Hondo | Punch-Out!! series | •Giant Little Mac |
2,000 | Boxing Ring | N/A | •Stamina battle •The enemy favors smash attacks •The enemy is giant |
Jogging / Countdown | |||
| 986 | Balrog | Street Fighter series | • Little Mac |
9,100 | Fourside (Ω form) | •Jump Power ↓ | •Stamina battle •All fighters have reduced jump power •The enemy doesn't like to jump |
Balrog Stage Type A | |||
| 1,120 | Urban Champion Fighter | Urban Champion series | •Little Mac |
2,100 | New Donk City Hall (Ω form) | •Assist Trophy Enemies (Kapp'n) | •Timed battle •Hostile assist trophies will appear after a little while •The enemy doesn't like to jump |
Wrecking Crew Retro Medley | |||
| 1,142 | Commander | X | •Little Mac |
2,300 | Lylat Cruise | •Assist Trophy Enemies (Andross) | •Hostile assist trophies will appear | Tunnel Scene - X | |||
| 1,157 | Harry | Teleroboxer | •Little Mac •Mega Man |
1,900 | Boxing Ring | N/A | •The enemy's punches and elbow strikes have increased power | Tunnel Scene - X-Scape | Protagonist | ||
| 1395 | .png)
|
Riki (River City) | River City Series | •Little Mac |
3600 | Saffron City | •Attack Power ↑ •Item: Balls |
•The enemy has increased attack power after a little while •The enemy favors neutral attacks |
Excite Truck | ||
Alternate costumes

| |||||||

|

|

|

|

|

|

|

|
Gallery
Little Mac's fighter card.
Using Jolt Haymaker on Shadow Moses Island.

Performing his side taunt on Wrecking Crew.

A bruised Little Mac with Dr. Mario on Tomodachi Life.
Wireframe Mac using his down smash against King Dedede on Luigi's Mansion.

Attacking Bowser on Mushroomy Kingdom.
Little Mac being taunted by Captain Falcon on Arena Ferox.

Little Mac struck by Corrin's forward smash on Kalos Pokémon League.
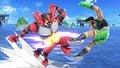
Hit by Incineroar on Big Blue.
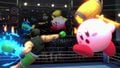
Using Jolt Haymaker on Kirby in the Boxing Ring.
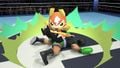
Getting slammed by Pikachu’s down throw in the Boxing Ring.
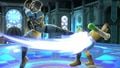
Getting kicked by Snake on Kalos Pokémon League.
Little Mac struck by Rodin's version of After-Burner Kick on the Great Plateau Tower.

Performing his up taunt on the Bridge of Eldin.


Character Showcase Video
Trivia
- Little Mac's Showcase Video has him follow Wario's motor bike while wearing his pink sweatsuit. This is a reference to the Punch-Out!! series, where Little Mac runs alongside Doc Louis on his bicycle.
- Little Mac's pose in his official art resembles the pose he performs while using Slip Counter.
- Little Mac's Classic Mode has a high spawn rate of Sandbag, as a reference to his reveal video where he has a Sandbag in his training ring, as well as usage of similar punching bags by real-life boxers.
- There's an positioning error in Little Mac's on-screen appearance when facing to the left; before removing his sweatsuit, he will be facing away from the camera. This did not occur in Smash 4.
- Additionally, when using Wire-Frame Mac's standard alternate costume, he enters the stage wearing his green sweatshirt, but it turns pink when he takes if off.
- Little Mac, Ivysaur, Greninja, Olimar, Ryu, Cloud, and Ken are the only characters to never appear as minions in any Spirit battles.
- Little Mac is unlocked on Mario's Classic tree, likely because he serves as the referee in the NES version of Punch-Out!!.
References
|
| |
|---|---|
| Fighter | Little Mac (SSB4 · SSBU) |
| Assist Trophy | Little Mac |
| Stage | Boxing Ring |
| Other | Doc Louis |
| Trophies and Spirits | Trophies · Spirits |
| Music | SSB4 · Ultimate |
| Masterpiece | Punch-Out!! Featuring Mr. Dream |