List of spirits (The Legend of Zelda series)
From SmashWiki, the Super Smash Bros. wiki
Jump to navigationJump to search
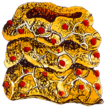
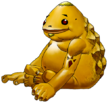
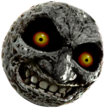
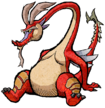
The following is the list of the Spirits from the The Legend of Zelda series in Super Smash Bros. Ultimate.
Primary Spirits
| No. | Image | Name | Type | Class | Slot | Stats | Ability | Origin Game | Acquisition |
|---|---|---|---|---|---|---|---|---|---|
| 178 | Link (The Legend of Zelda) | ★★★★ | ⬡⬡⬡ | Power: 4,182—10,459 |
Sword Attack ↑ | The Legend of Zelda | •Battle via World of Light (Mysterious Dimension) •Battle via Spirit Board (unlocked after obtaining spirit once) •Purchase from the Vault Shop for 15,000G (unlocked after obtaining spirit once) | ||
| 179 | 
|
Octorok | ★ | ⬡ | Power: 1,126—5,636 |
Fire Weakness | The Legend of Zelda (Artwork: The Legend of Zelda: Skyward Sword) |
•Battle via Spirit Board •Purchase from the Vault Shop for 500G | |
| 180 | Moblin | ★ | ⬡⬡ | Power: 859—4,296 |
No Effect | The Legend of Zelda (Artwork: The Legend of Zelda: Ocarina of Time) |
•Battle via World of Light (Temple of Light) •Battle via Spirit Board •Purchase from the Vault Shop for 500G | ||
| 181 | Tektite | ★ | ⬡ | Power: 861—4,317 |
Jump ↑ | The Legend of Zelda (Artwork: The Legend of Zelda: Twilight Princess) |
•Battle via Spirit Board •Purchase from the Vault Shop for 500G | ||
| 183 | Darknut | ★★ | ⬡ | Power: 1,877—7,536 |
Sword Attack ↑ | The Legend of Zelda (Artwork: The Legend of Zelda: Twilight Princess) |
•Battle via World of Light (The Dark Realm) •Battle via Spirit Board •Purchase from the Vault Shop for 1000G | ||
| 185 | Agahnim | ★★ | ⬡ | Power: 1,717—6,896 |
Magic Attack ↑ | The Legend of Zelda: A Link to the Past | •Battle via World of Light (Mysterious Dimension) •Battle via Spirit Board •Purchase from the Vault Shop for 1000G | ||
| 189 | Young Zelda | ★★ | ⬡⬡ | Power: 1,700—6,824 |
Can Be Enhanced at Lv. 99 | The Legend of Zelda: Ocarina of Time | •Battle via Spirit Board •Purchase from the Vault Shop for 1000G | ||
| 190 | Zelda (Ocarina of Time) | ★★★★ | ⬡⬡ | Power: 5,007—12,519 |
Assist Killer | The Legend of Zelda: Ocarina of Time | •Enhance the Young Zelda spirit | ||
| 191 | Ganon | ★★★ | ⬡⬡ | Power: 3,113—9,365 |
Weight ↑ | The Legend of Zelda (Artwork: The Legend of Zelda: Ocarina of Time) |
•Defeat the Sacred Land boss in World of Light | ||
| 193 | Impa | ★★★ | ⬡⬡⬡ | Power: 2,806—8,442 |
No Effect | The Legend of Zelda (game manual) (Artwork: The Legend of Zelda: Ocarina of Time) |
•Battle via World of Light (Sacred Land) •Battle via Spirit Board (unlocked after obtaining spirit once) •Purchase from the Vault Shop for 6000G (unlocked after obtaining spirit once) | ||
| 200 | Ruto | ★★★ | ⬡⬡⬡ | Power: 2,853—8,563 |
Water Attack ↑ | The Legend of Zelda: Ocarina of Time | •Summon with cores from Zora, Princess Shokora, and any | ||
| 202 | Koume & Kotake | ★★ | ⬡⬡⬡ | Power: 1,588—6,355 |
Can Be Enhanced at Lv. 99 | The Legend of Zelda: Ocarina of Time | •Summon with cores from Charlotte Aulin, Freezie, and Fire Flower •Battle via Spirit Board (unlocked after obtaining spirit once) •Purchase from the Vault Shop for 1000G (unlocked after obtaining spirit once) | ||
| 203 | Twinrova | ★★★ | ⬡⬡⬡ | Power: 2,872—8,617 |
Magic Attack ↑ | The Legend of Zelda: Ocarina of Time | •Enhance the Koume & Kotake spirit | ||
| 204 | ReDead | ★ | ⬡ | Power: 1,314—6,577 |
Jump ↓ | The Legend of Zelda: Ocarina of Time | •Battle via World of Light (Dracula's Castle) •Battle via Spirit Board •Purchase from the Vault Shop for 500G | ||
| 205 | Skull Kid | ★★ | ⬡⬡ | Power: 1,538—6,174 |
Can Be Enhanced at Lv. 99 | The Legend of Zelda: Ocarina of Time | •Battle via World of Light (Sacred Land) •Battle via Spirit Board •Purchase from the Vault Shop for 1000G | ||
| 206 | Skull Kid & Majora's Mask | ★★★★ | ⬡⬡ | Power: 4,588—11,471 |
Lifesteal | The Legend of Zelda: Majora's Mask | •Enhance the Skull Kid spirit | ||
| 207 | Deku Link | ★★ | ⬡ | Power: 2,083—8,335 |
Fire Weakness | The Legend of Zelda: Majora's Mask | •Battle via World of Light (The Light Realm) •Battle via Spirit Board •Purchase from the Vault Shop for 1000G | ||
| 208 | Fierce Deity Link | ★★★★ | ⬡ | Power: 4,623—11,561 |
Sword Attack ↑ | The Legend of Zelda: Majora's Mask | •Summon with cores from Deku Link, Ultra Sword, Happy Mask Salesman, and any •Battle via World of Light (The Final Battle - Dark) •Purchase from the Vault Shop for 15,000G (unlocked after obtaining spirit once) | ||
| 220 | Ganondorf (Twilight Princess) | ★★★ | ⬡⬡⬡ | Power: 2,798—8,416 |
Can Be Enhanced at Lv. 99 | The Legend of Zelda: Twilight Princess | •Battle via World of Light (Mysterious Dimension) •Battle via Spirit Board •Purchase from the Vault Shop for 6000G | ||
| 221 | Beast Ganon | ★★★★ | ⬡⬡⬡ | Power: 4,349—10,876 |
Impact Run | The Legend of Zelda: Twilight Princess | •Enhance the Ganondorf (Twilight Princess) spirit | ||
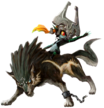
| 222 | Midna | ★★★ | ⬡⬡⬡ | Power: 2,672—8,040 |
Can Be Enhanced at Lv. 99 | The Legend of Zelda: Twilight Princess | •Battle via World of Light (The Final Battle - Dark) •Battle via Spirit Board •Purchase from the Vault Shop for 6000G •Scan the Wolf Link amiibo | ||
| 223 | Wolf Link & Midna | ★★★★ | ⬡⬡⬡ | Power: 4,458—11,147 |
Dash Attack ↑ | The Legend of Zelda: Twilight Princess | •Enhance the Midna spirit | ||
| 224 | Zant | ★★ | ⬡ | Power: 1,828—7,357 |
No Effect | The Legend of Zelda: Twilight Princess | •Battle via World of Light (Mysterious Dimension) •Battle via Spirit Board •Purchase from the Vault Shop for 1000G | ||
| 226 | King Bulblin & Lord Bullbo | ★ | ⬡ | Power: 1,109—5,549 |
No Effect | The Legend of Zelda: Twilight Princess | •Battle via World of Light (The Light Realm) •Battle via Spirit Board •Purchase from the Vault Shop for 500G | ||
| 228 | Ghirahim | ★★★ | ⬡⬡ | Power: 2,691—8,114 |
No Effect | The Legend of Zelda: Skyward Sword | •Battle via World of Light (Mysterious Dimension) •Battle via Spirit Board •Purchase from the Vault Shop for 6000G | ||
| 229 | The Imprisoned | ★★ | Power: 2,326—9,353 |
Speed ↓ | The Legend of Zelda: Skyward Sword | •Battle via World of Light (Sacred Land) •Battle via Spirit Board •Purchase from the Vault Shop for 1000G | |||
| 230 | Demise | ★★★ | ⬡ | Power: 3,309—9,929 |
No Effect | The Legend of Zelda: Skyward Sword | •Summon with cores from The Imprisoned and Ghirahim | ||
| 232 | Groose | ★★ | ⬡⬡⬡ | Power: 1,579—6,318 |
No Effect | The Legend of Zelda: Skyward Sword | •Battle via Spirit Board •Purchase from the Vault Shop for 1000G | ||
| 233 | Wall-Merged Link | ★★ | ⬡⬡⬡ | Power: 1,429—5,716 |
Can be enhanced at Lv. 99 | The Legend of Zelda: A Link Between Worlds | •Treasure Chest in World of Light (Sacred Land) •Battle via Spirit Board •Purchase from the Vault Shop for 1000G | ||
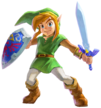
| 234 | Link (A Link Between Worlds) | ★★★ | ⬡⬡⬡ | Power: 2,925—8,776 |
Weapon Attack ↑ | The Legend of Zelda: A Link Between Worlds | •Enhance the Wall-Merged Link spirit | ||
| 236 | Hilda (The Legend of Zelda) | ★★★ | ⬡⬡⬡ | Power: 2,792—8,400 |
No Effect | The Legend of Zelda: A Link Between Worlds | •Battle via World of Light (Sacred Land) •Battle via Spirit Board •Purchase from the Vault Shop for 6000G | ||
| 237 | Yuga | ★★★ | ⬡⬡ | Power: 2,963—8,933 |
No Effect | The Legend of Zelda: A Link Between Worlds | •Summon with cores from Vince, Gharnef, and any •Battle via World of Light (The Dark Realm) •Purchase from the Vault Shop for 6000G (unlocked after obtaining spirit once) | ||
| 240 | Daruk | ★★ | ⬡ | Power: 1,814—7,283 |
Weight ↑ | The Legend of Zelda: Breath of the Wild | •Battle via World of Light (The Light Realm) •Battle via Spirit Board •Purchase from the Vault Shop for 1000G •Scan the Daruk amiibo | ||
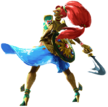
| 242 | Urbosa | ★★ | ⬡⬡ | Power: 1,756—7,029 |
Electric Attack ↑ | The Legend of Zelda: Breath of the Wild | •Battle via World of Light (Sacred Land) •Battle via Spirit Board •Purchase from the Vault Shop for 1000G •Scan the Urbosa amiibo | ||
| 243 | Calamity Ganon | ★★★★ | ⬡ | Power: 4,932—12,330 |
No Effect | The Legend of Zelda: Breath of the Wild | •Battle via World of Light (Sacred Land) •Battle via Spirit Board •Purchase from the Vault Shop for 15,000G | ||
| 244 | Bokoblin | ★ | ⬡⬡ | Power: 754—3,777 |
Battering Items Power ↑ | The Legend of Zelda: The Wind Waker (Artwork: The Legend of Zelda: Breath of the Wild) |
•Battle via World of Light (The Light Realm) •Battle via Spirit Board •Purchase from the Vault Shop for 500G •Scan the Bokoblin amiibo | ||
| 246 | Tetra | ★★★ | ⬡⬡ | Power: 2,830—8,533 |
Can Be Enhanced at Lv. 99 | The Legend of Zelda: The Wind Waker | •Battle via World of Light (The Final Battle - Light) •Battle via Spirit Board •Purchase from the Vault Shop for 6000G | ||
| 247 | Zelda (The Wind Waker) | ★★★★ | ⬡⬡ | Power: 4,975—12,440 |
Chance of Double Final Smash | The Legend of Zelda: The Wind Waker | •Enhance the Tetra spirit | ||
| 248 | King of Red Lions | ★★ | ⬡⬡⬡ | Power: 1,574—6,300 |
Can Be Enhanced at Lv. 99 | The Legend of Zelda: The Wind Waker | •Purchase at Funky Kong's Shack for 1000SP | ||
| 249 | King of Hyrule | ★★★ | ⬡⬡⬡ | Power: 3,027—9,082 |
Transformation Duration ↑ | The Legend of Zelda: The Wind Waker | •Enhance the King of Red Lions spirit | ||
| 255 | Vaati | ★★★ | ⬡⬡ | Power: 3,129—9,433 |
No Effect | The Legend of Zelda: Four Swords | •Battle via World of Light (Sacred Land) •Battle via Spirit Board •Purchase from the Vault Shop for 6000G | ||
| 258 | Phantom | ★★ | ⬡⬡ | Power: 1,713—6,878 |
Can Be Enhanced at Lv. 99 | The Legend of Zelda: Phantom Hourglass | •Battle via World of Light (The Light Realm) •Battle via Spirit Board •Purchase from the Vault Shop for 1000G | ||
| 259 | Zelda (Spirit Tracks) | ★★★ | ⬡⬡ | Power: 3,014—9,068 |
Trade-Off Ability ↑ | The Legend of Zelda: Spirit Tracks | •Enhance the Phantom spirit | ||
| 261 | Byrne | ★ | ⬡ | Power: 1,004—5,024 |
No Effect | The Legend of Zelda: Spirit Tracks | •Battle via Spirit Board •Purchase from the Vault Shop for 500G | ||
| 262 | Totem Link | ★★ | ⬡⬡⬡ | Power: 1,511—6,047 |
No Effect | The Legend of Zelda: Tri Force Heroes | •Battle via Spirit Board •Purchase from the Vault Shop for 1000G | ||
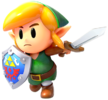
| 1,322 | Link (Link's Awakening) | ★★★ | ⬡⬡⬡ | Power: 3,068—9,253 |
Water Weakness | The Legend of Zelda: Link's Awakening (Artwork: The Legend of Zelda: Link's Awakening (Switch)) |
•Battle via Spirit Board (during the event "Return to Koholint", or after obtaining spirit once) •Purchase from the Vault Shop for 6000G |
Support Spirits
| No. | Image | Name | Class | Cost | Ability | Origin Game | Acquisition |
|---|---|---|---|---|---|---|---|
| 182 | Like Like | ★★ | ⬢⬢ | Sticky-Floor Immunity | The Legend of Zelda | •Battle via Spirit Board •Purchase from the Vault Shop for 1000G | |
| 184 | Fairy Bottle | ★★ | ⬢ | Fairy Bottle Equipped | The Legend of Zelda: A Link to the Past (Artwork: In-game render from The Legend of Zelda: Majora's Mask 3D) |
•Purchase at Beedle's Tent for 1000SP •Battle via Spirit Board | |
| 186 | Cucco | ★ | ⬢ | Floaty Jumps | The Legend of Zelda: A Link to the Past (Artwork: Super Smash Bros. Ultimate) |
•Purchase at Timmy and Tommy's for 500SP •Battle via Spirit Board | |
| 187 | Marin | ★★ | ⬢⬢ | Irreversible Controls | The Legend of Zelda: Link's Awakening (Artwork: The Legend of Zelda: Link's Awakening DX) |
•Battle via World of Light (The Light Realm) •Battle via Spirit Board •Purchase from the Vault Shop for 1000G | |
| 188 | Wind Fish | ★★★★ | ⬢ | Special-Move Power ↑ | The Legend of Zelda: Link's Awakening (Artwork: In-game sprite from The Legend of Zelda: Link's Awakening DX) |
•Purchase at Beedle's Tent for 10,000SP •Battle via Spirit Board | |
| 192 | Saria | ★★★ | ⬢ | Easier Perfect Shield | The Legend of Zelda: Ocarina of Time | •Battle via World of Light (Sacred Land) •Battle via Spirit Board (unlocked after obtaining spirit once) •Purchase from the Vault Shop for 6000G (unlocked after obtaining spirit once) | |
| 194 | Kaepora Gaebora | ★★ | ⬢⬢ | Fog Immunity | The Legend of Zelda: Ocarina of Time | •Battle via World of Light (The Light Realm) •Battle via Spirit Board •Purchase from the Vault Shop for 1000G | |
| 195 | Malon | ★★ | ⬢ | Shooting Items ↑ | The Legend of Zelda: Ocarina of Time | •Battle via World of Light (Sacred Land) •Battle via Spirit Board •Purchase from the Vault Shop for 1000G | |
| 196 | Epona | ★★★ | ⬢ | Undamaged Attack & Speed ↑ | The Legend of Zelda: Ocarina of Time | •Summon with cores from Rapidash and Malon | |
| 197 | Goron | ★ | ⬢ | Fire/Explosion Resist ↑ | The Legend of Zelda: Ocarina of Time | •Battle via Spirit Board •Purchase from the Vault Shop for 500G | |
| 199 | Zora | ★ | ⬢ | Boomerang Equipped | The Legend of Zelda (Artwork: The Legend of Zelda: Ocarina of Time) |
•Battle via World of Light (Dracula's Castle) •Battle via Spirit Board •Purchase from the Vault Shop for 500G | |
| 201 | Great Fairy | ★★★ | ⬢⬢ | Critical-Health Healing | The Legend of Zelda (Artwork: The Legend of Zelda: Majora's Mask 3D) |
•Battle via World of Light (The Light Realm) •Battle via Spirit Board •Purchase from the Vault Shop for 6000G | |
| 209 | Majora's Mask | ★★★ | ⬢ | Trade-Off Ability ↑ | The Legend of Zelda: Majora's Mask (Artwork: The Legend of Zelda: Majora's Mask 3D) |
•Purchase at Timmy and Tommy's for 4000SP | |
| 210 | Moon | ★★★ | ⬢⬢ | Giant | The Legend of Zelda: Majora's Mask (Artwork: Nintendo of Europe)[citation needed] |
•Summon with cores from Majora's Mask and any | |
| 211 | Tingle | ★★★ | ⬢ | Slumber Immunity | The Legend of Zelda: Majora's Mask | •Summon with cores from Balloon Fighter and Fairy Bottle •Battle via World of Light (The Light Realm) •Purchase from the Vault Shop for 6000G (unlocked after obtaining spirit once) | |
| 212 | Happy Mask Salesman | ★★ | ⬢ | Trade-Off Attacks ↑ | The Legend of Zelda: Ocarina of Time (Artwork: The Legend of Zelda: Majora's Mask) |
•Battle via World of Light (Dracula's Castle) •Battle via Spirit Board •Purchase from the Vault Shop for 1000G | |
| 213 | Kafei | ★★ | ⬢ | Mr. Saturn Equipped | The Legend of Zelda: Majora's Mask | •Battle via Spirit Board •Purchase from the Vault Shop for 1000G | |
| 214 | Postman | ★ | ⬢ | Bunny Hood Equipped | The Legend of Zelda: Majora's Mask | •Battle via Spirit Board •Purchase from the Vault Shop for 500G | |
| 215 | Din | ★★ | ⬢ | Lava-Floor Resist | The Legend of Zelda: Oracle of Ages / The Legend of Zelda: Oracle of Seasons | •Purchase at Anna's Emporium for 1000SP •Battle via Spirit Board | |
| 216 | Nayru | ★★ | ⬢ | Perfect-Shield Reflect | The Legend of Zelda: Oracle of Ages / The Legend of Zelda: Oracle of Seasons | •Battle via World of Light (Temple of Light) •Battle via Spirit Board •Purchase from the Vault Shop for 1000G | |
| 217 | Ricky | ★ | ⬢ | Fist Attack ↑ | The Legend of Zelda: Oracle of Ages / The Legend of Zelda: Oracle of Seasons | •Battle via World of Light (The Light Realm) •Battle via Spirit Board •Purchase from the Vault Shop for 500G | |
| 218 | Dimitri (The Legend of Zelda) | ★ | ⬢ | Swimmer | The Legend of Zelda: Oracle of Ages / The Legend of Zelda: Oracle of Seasons | •Battle via Spirit Board •Purchase from the Vault Shop for 500G | |
| 219 | Moosh | ★ | ⬢⬢ | Instadrop | The Legend of Zelda: Oracle of Ages / The Legend of Zelda: Oracle of Seasons | •Battle via World of Light (Forest Hill) •Battle via Spirit Board •Purchase from the Vault Shop for 500G | |
| 225 | Agitha | ★ | ⬢ | Lip's Stick Equipped | The Legend of Zelda: Twilight Princess | •Complete Challenge (Spirits): Collect 10 unique spirits. •Battle via Spirit Board (unlocked after obtaining spirit once) •Purchase from the Vault Shop for 500G (unlocked after obtaining spirit once) | |
| 227 | Fi | ★★★ | ⬢ | Neutral Special ↑ | The Legend of Zelda: Skyward Sword | •Summon with cores from Serena and Aegislash •Battle via World of Light (The Light Realm) •Purchase from the Vault Shop for 6000G (unlocked after obtaining spirit once) | |
| 231 | Loftwing | ★ | ⬢ | Landing Lag ↓ | The Legend of Zelda: Skyward Sword | •Battle via Spirit Board •Purchase from the Vault Shop for 500G | |
| 235 | Ravio | ★★ | ⬢ | Killing Edge equipped | The Legend of Zelda: A Link Between Worlds | •Battle via Spirit Board •Purchase from the Vault Shop for 1000G | |
| 238 | Zelda (Breath of the Wild) | ★★★ | ⬢⬢ | Poison Immunity | The Legend of Zelda: Breath of the Wild | •Battle via World of Light (Forest Hill) •Battle via Spirit Board •Purchase from the Vault Shop for 6000G | |
| 239 | Mipha | ★★ | ⬢ | Critical-Health Stats ↑ | The Legend of Zelda: Breath of the Wild | •Battle via World of Light (The Final Battle - Light) •Battle via Spirit Board •Purchase from the Vault Shop for 1000G •Scan the Mipha amiibo | |
| 241 | Revali | ★★ | ⬢ | Shooting Attack ↑ | The Legend of Zelda: Breath of the Wild | •Battle via World of Light (The Light Realm) •Battle via Spirit Board •Purchase from the Vault Shop for 1000G •Scan the Revali amiibo | |
| 245 | Guardian | ★★ | ⬢⬢ | Weapon Resist ↑ | The Legend of Zelda: Breath of the Wild | •Battle via World of Light (The Light Realm) •Battle via Spirit Board •Purchase from the Vault Shop for 1000G •Scan the Guardian amiibo | |
| 250 | Aryll | ★★★ | ⬢⬢ | Critical-Health Stats ↑↑ | The Legend of Zelda: The Wind Waker | •Complete Challenge (Smash): Beat a Lv. 5 CPU in a 2-player battle. You must have a 300% handicap, the CPU must have a 0% handicap, and spirits must be off. •Battle via Spirit Board (unlocked after obtaining spirit once) •Purchase from the Vault Shop for 6000G (unlocked after obtaining spirit once) | |
| 251 | Medli | ★★★ | ⬢⬢ | Strong-Wind Immunity | The Legend of Zelda: The Wind Waker | •Battle via World of Light (The Light Realm) •Battle via Spirit Board •Purchase from the Vault Shop for 6000G | |
| 252 | Valoo | ★★ | ⬢ | Falling Immunity | The Legend of Zelda: The Wind Waker | •Battle via World of Light (The Light Realm) •Battle via Spirit Board •Purchase from the Vault Shop for 1000G | |
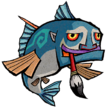
| 254 | Fishman | ★ | ⬢ | Water/Freezing Resist ↑ | The Legend of Zelda: The Wind Waker | •Battle via World of Light (The Light Realm) •Battle via Spirit Board •Purchase from the Vault Shop for 500G | |
| 256 | Ezlo | ★★ | ⬢ | Toss & Meteor | The Legend of Zelda: The Minish Cap | •Purchase at Beedle's Tent for 1000SP •Battle via Spirit Board | |
| 260 | Alfonzo & Engineer Link | ★★ | ⬢ | Dash Attack ↑ | The Legend of Zelda: Spirit Tracks | •Battle via World of Light (The Light Realm) •Battle via Spirit Board (unlocked after obtaining spirit once) •Purchase from the Vault Shop for 1000G (unlocked after obtaining spirit once) | |
| 263 | Madame Couture | ★★ | ⬢ | Physical Attack ↑ | The Legend of Zelda: Tri Force Heroes | •Battle via Spirit Board •Purchase from the Vault Shop for 1000G | |
| 1,323 | Owl | ★★ | ⬢⬢ | Screen-Flip Immunity | The Legend of Zelda: Link's Awakening (Artwork: The Legend of Zelda: Link's Awakening (Switch)) |
•Battle via Spirit Board (during the event "Return to Koholint", or after obtaining spirit once) •Purchase from the Vault Shop for 1000G |
Master Spirits
| No. | Image | Name | Facility | Origin Game | Acquisition | Music |
|---|---|---|---|---|---|---|
| 198 | Darunia | Dojo (Boulder Style) | The Legend of Zelda: Ocarina of Time | •Battle via World of Light (The Light Realm) | Ocarina of Time Medley | |
| 253 | Beedle | Shopping (Beedle's Tent) | The Legend of Zelda: The Wind Waker | •Battle via World of Light (The Light Realm) | Village of the Blue Maiden | |
| 257 | Linebeck | Explore (Jungle) | The Legend of Zelda: Phantom Hourglass | •Battle via World of Light (The Light Realm) | Main Theme - The Legend of Zelda: Tri Force Heroes |
Fighter Spirits
| No. | Image | Alternate Artwork | Name | Origin Game | Acquisition |
|---|---|---|---|---|---|
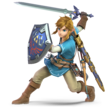
| 172 | Link | The Legend of Zelda (Artwork: The Legend of Zelda: Breath of the Wild) |
•Complete Classic Mode with Link •Purchase from the Vault Shop for 300G | ||
| 173 | Zelda | The Legend of Zelda (Artwork: The Legend of Zelda: A Link Between Worlds) |
•Complete Classic Mode with Zelda •Purchase from the Vault Shop for 300G (after unlocking Zelda) | ||
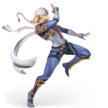
| 174 | Sheik | The Legend of Zelda: Ocarina of Time | •Complete Classic Mode with Sheik •Purchase from the Vault Shop for 300G (after unlocking Sheik) | ||
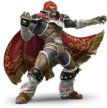
| 175 | Ganondorf | The Legend of Zelda: Ocarina of Time (Artwork: The Legend of Zelda: Ocarina of Time 3D) |
•Complete Classic Mode with Ganondorf •Purchase from the Vault Shop for 300G (after unlocking Ganondorf) | ||
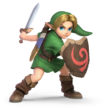
| 176 | Young Link | The Legend of Zelda: Ocarina of Time | •Complete Classic Mode with Young Link •Purchase from the Vault Shop for 300G (after unlocking Young Link) | ||
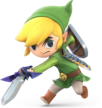
| 177 | Toon Link | The Legend of Zelda: The Wind Waker | •Complete Classic Mode with Toon Link •Purchase from the Vault Shop for 300G (after unlocking Toon Link) |
Spirit Battles
| Spirit | Battle parameters | Inspiration | ||||||||
|---|---|---|---|---|---|---|---|---|---|---|
| No. | Image | Name | Enemy Fighter(s) | Type | Power | Stage | Rules | Conditions | Music | |
| 178 | Link (The Legend of Zelda) | •Young Link |
13,500 | Find Mii (hazards off) | N/A | •The enemy's melee weapons have increased power •The enemy's FS Meter charges quickly •The enemy has increased attack power |
Overworld Theme - The Legend of Zelda |
| ||
| 179 | Octorok | •Diddy Kong Team |
1,800 | Great Bay | N/A | •The enemy's neutral special has increased power •The enemy favors neutral specials |
Termina Field |
| ||
| 180 | Moblin | •King Dedede Team |
1,900 | Skyloft (Battlefield form) | •Move Speed ↓ | •The enemy favors down specials •The enemy has reduced move speed |
Overworld Theme - The Legend of Zelda |
| ||
| 181 | Tektite | •Ivysaur |
1,600 | Hyrule Castle (Battlefield form) | N/A | •The enemy loves to jump | Overworld Theme - The Legend of Zelda |
| ||
| 182 | Like Like | •Yoshi |
4,000 | Great Bay (Battlefield form) | •Sudden Damage •Item: Food •Hazard: Sticky Floor |
•The floor is sticky •You'll occasionally take sudden damage after a little while •The enemy favors grabs and throws |
Overworld & Underworld - The Legend of Zelda (for 3DS / Wii U) |
| ||
| 183 | Darknut | •Link |
3,800 | Bridge of Eldin (Battlefield form) | •Move Speed ↑ •Defense ↓ |
•The enemy's melee weapons have increased power •The enemy has increased move speed when the enemy's at high damage •The enemy gets a major stat boost when badly damaged |
Main Theme - The Legend of Zelda: Twilight Princess |
| ||
| 184 | Fairy Bottle | •Young Link |
3,700 | Fountain of Dreams | •Sudden Damage | •All fighters take serious damage •The enemy has increased defense • The enemy starts the battle with a Fairy Bottle (*) |
Saria's Theme |
| ||
| 185 | Agahnim | •Robin |
3,600 | Temple (Ω form) | •Reflect-Damage Buffed | •The enemy's magic attacks have increased power •The enemy favors special moves •All fighters' reflected projectiles have increased power |
Dark World (Brawl) |
| ||
| 186 | Cucco | •Tiny Falco Team |
2,200 | Skyloft (hazards off) | •Item: Cucco | •The enemy favors neutral air attacks •Reinforcements will appear after an enemy is KO'd •The enemy is easily distracted by items |
Village of the Blue Maiden |
| ||
| 187 | Marin | •Zelda •Link |
4,600 | Tortimer Island (Battlefield form) | •Hazard: Slumber Floor | •The floor is sleep-inducing •Timed battle |
Tal Tal Heights |
| ||
| 188 | Wind Fish | •Giant Jigglypuff |
13,800 | Temple (Battlefield form) | •Flowery •Hazard: Slumber Floor |
•The floor is sleep-inducing •You constantly take minor damage •The enemy is giant |
Tal Tal Heights |
| ||
| 189 | Young Zelda | •Zelda •Young Link |
3,700 | Hyrule Castle | N/A | •Take your strongest team into this no-frills battle | Ocarina of Time Medley |
| ||
| 192 | Saria | •Isabelle •Young Link |
9,900 | Garden of Hope | •Hazard: Fog | •The stage is covered in fog •The enemy will charge up a powerful Final Smash |
Saria's Theme |
| ||
| 193 | Impa | •Sheik |
9,400 | Temple | •Defense ↑ •Item: Deku Nut |
•The enemy has increased defense after a little while | Gerudo Valley |
| ||
| 194 | Kaepora Gaebora | •Young Link |
3,700 | Distant Planet (Battlefield form) | •Hazard: Screen Flip | •The screen will suddenly flip after a little while | Ocarina of Time Medley |
| ||
| 195 | Malon | •Zelda |
3,600 | Smashville | •Item Tidal Wave •Item: Cucco |
•The enemy becomes more powerful after eating •Certain items will appear in large numbers |
Ocarina of Time Medley |
| ||
| 197 | Goron | •Donkey Kong |
1,700 | The Great Cave Offensive (Battlefield form) | •Item: Bob-omb | •The enemy's dash attacks have increased power •The enemy favors dash attacks |
Hidden Mountain & Forest |
| ||
| 198 | Darunia | •Donkey Kong •Jigglypuff |
1,400 | Gerudo Valley (Battlefield form) | •Hazard: Lava Floor | •Defeat the main fighter to win •The floor is lava •The enemy starts the battle with a Hammer |
Hidden Mountain & Forest |
| ||
| 199 | Zora | •Greninja |
1,800 | Great Bay | N/A | •The enemy's neutral special has increased power | Ocarina of Time Medley |
| ||
| 201 | Great Fairy | •Giant Zelda |
9,500 | Fountain of Dreams (hazards off) | •Health Recovery | •The enemy's special moves have increased power •The enemy is healed significantly when the enemy's at high damage •The enemy's FS Meter charges quickly |
Ocarina of Time Medley |
| ||
| 202 | Koume & Kotake | •Bayonetta (×2) ( |
3,700 | Gerudo Valley | N/A | •The enemy starts the battle with a Fire Flower •The enemy starts the battle with a Freezie |
Gerudo Valley |
| ||
| 204 | ReDead | •Mewtwo Team |
2,100 | Hyrule Castle (Battlefield form) | N/A | •The enemy has super armor but moves slower •Stamina battle •The enemy favors down specials |
Song of Storms |
| ||
| 205 | Skull Kid | •Mii Brawler •Meta Knight (×2) ( |
4,000 | Distant Planet (hazards off) | •Assist Trophy Enemies (Skull Kid (Invisibility Effect)) •Hazard: Fog |
•Defeat the main fighter to win •The stage is covered in fog •Hostile assist trophies will appear |
Saria's Song / Middle Boss Battle |
| ||
| 207 | Deku Link | •Diddy Kong |
3,700 | Distant Planet (Battlefield form) | •Item Tidal Wave •Item: Lip's Stick |
•The enemy favors neutral specials •Certain items will appear in large numbers after a little while •The enemy is easily distracted by items |
Saria's Theme |
| ||
| 208 | Fierce Deity Link | •Giant Link |
13,900 | Great Bay (Ω Form) | •Defense ↓ •Easy to Launch •Attack Power ↑ |
•You are easy to launch •You have reduced defense after a little while •The enemy has increased attack power |
Calamity Ganon Battle - Second Form |
| ||
| 211 | Tingle | •Villager (×3) ( •Young Link |
9,000 | Great Bay | •Uncontrollable Speed •Slippery Stage |
•Defeat the main fighter to win •All fighters move faster and can't stop quickly after a while •The enemy loves to taunt |
Termina Field (Remix) |
| ||
| 212 | Happy Mask Salesman | •Young Link |
4,300 | Umbra Clock Tower | •Attack Power ↑ •Move Speed ↑ •Jump Power ↑ |
•Timed battle •All fighters have increased jump power •All fighters have increased move speed after a little while |
Song of Storms |
| ||
| 213 | Kafei | •Bunny Young Link |
4,600 | Skyloft | N/A | •Timed battle •The enemy tends to avoid conflict |
Termina Field (Remix) |
| ||
| 214 | Postman | •Wii Fit Trainer |
2,600 | Temple | N/A | •Timed Stamina battle •The enemy tends to avoid conflict |
Termina Field |
| ||
| 215 | Din | •Zelda |
4,000 | Bridge of Eldin (Battlefield form) | •Hazard: Lava Floor | •The floor is lava •The enemy favors side specials |
Ballad of the Goddess (Remix) |
| ||
| 216 | Nayru | •Zelda |
3,500 | Bridge of Eldin | •Temporary Invincibility | •The enemy will occasionally be invincible after a little while •The enemy favors neutral specials |
Ballad of the Goddess (Original) |
| ||
| 217 | Ricky | •Little Mac |
1,800 | Bridge of Eldin (Battlefield form) | N/A | •The enemy loves to jump •The enemy has increased jump power |
Tal Tal Heights |
| ||
| 218 | Dimitri | •Yoshi •Young Link |
1,700 | Great Bay | N/A | •The enemy favors neutral specials | Tal Tal Heights |
| ||
| 219 | Moosh | •Bowser |
1,900 | Garden of Hope (Battlefield form) | N/A | •The enemy favors down specials | Tal Tal Heights |
| ||
| 220 | Ganondorf (Twilight Princess) | •Ganondorf |
9,400 | Hyrule Castle (hazards off) | •Attack Power ↑ | •Stamina battle •The enemy has increased attack power when the enemy's at high damage |
Calamity Ganon Battle - Second Form |
| ||
| 222 | Midna | •Bayonetta |
9,200 | Bridge of Eldin (hazards off) | •Assist Trophy Enemies (Midna) •Item: Transforming Types |
•Hostile assist trophies will appear | Midna's Lament |
| ||
| 224 | Zant | •Robin |
4,100 | Bridge of Eldin (Battlefield form) | •Giant | •The enemy is giant after a little while •Timed battle •Only certain Pokémon will emerge from Poké Balls (Abra) |
Main Theme - The Legend of Zelda: Twilight Princess |
| ||
| 225 | Agitha | •Peach •Bayonetta |
1,900 | Kongo Falls | •Item: Beehive | •Take your strongest team into this no-frills battle | The Hidden Village |
| ||
| 226 | King Bulblin & Lord Bullbo | •Wario |
2,000 | Bridge of Eldin | N/A | •The enemy favors dash attacks | Main Theme - The Legend of Zelda: Twilight Princess |
| ||
| 227 | Fi | •Link |
9,500 | Skyloft (Ω form) | N/A | •The enemy's melee weapons have increased power •The enemy's FS Meter charges quickly |
Ballad of the Goddess (Remix) |
| ||
| 228 | Ghirahim | •Corrin |
8,800 | Skyloft | •Assist Trophy Enemies (Ghirahim) | •The enemy's melee weapons have increased power •Hostile assist trophies will appear after a little while •The enemy has increased move speed |
Ballad of the Goddess (Remix) |
| ||
| 229 | The Imprisoned | •Giant King K. Rool |
4,600 | Gerudo Valley | •Assist Trophy Enemies (Ghirahim) | •The enemy has super armor but moves slower •Timed Stamina battle •Hostile assist trophies will appear |
Ballad of the Goddess (Remix) |
| ||
| 231 | Loftwing | •Giant Falco |
2,800 | Skyloft (Battlefield form) | •Hazard: Heavy Wind | •Dangerously high winds are in effect •The enemy is giant |
Ballad of the Goddess (Original) |
| ||
| 232 | Groose | •Wario |
3,800 | Skyloft | •Item: Exploding Types | •The enemy starts the battle with a Bomber •The enemy's throwing-type items have increased power •The enemy loves to jump |
Ballad of the Goddess (Original) |
| ||
| 233 | Wall-Merged Link | •Mr. Game & Watch •Young Link |
3,500 | Flat Zone X | N/A | •Reinforcements will appear after an enemy is KO'd | Lorule Main Theme |
| ||
| 235 | Ravio | •Bunny Young Link |
4,000 | Skyloft | N/A | •Timed battle •The enemy favors special moves •The enemy is easily distracted by items |
Hyrule Main Theme |
| ||
| 236 | Hilda | •Zelda •Bunny Young Link |
9,100 | Temple | •Assist Trophy Enemies (Nightmare) | •Hostile assist trophies will appear | Lorule Main Theme |
| ||
| 237 | Yuga | •Inkling •Giant Inkling |
9,600 | Kalos Pokémon League (hazards off) | N/A | •The enemy's side special has increased power •Reinforcements will appear after an enemy is KO'd |
Yuga Battle (Hyrule Castle) |
| ||
| 238 | Zelda (Breath of the Wild) | •Zelda •Link •Inkling •Donkey Kong •Falco •Zero Suit Samus |
9,200 | Great Plateau Tower | N/A | •Stamina battle •Reinforcements will appear after an enemy is KO'd •Defeat an army of fighters |
Main Theme - The Legend of Zelda: Breath of the Wild |
| ||
| 239 | Mipha | •Inkling |
3,900 | Great Bay (Battlefield form) | N/A | •Stamina battle •The enemy heals over time |
Main Theme - The Legend of Zelda: Breath of the Wild |
| ||
| 240 | Daruk | •Donkey Kong |
4,300 | Find Mii (Battlefield form) | •Hazard: Lava Floor | •The floor is lava •Stamina battle •The enemy's shield has extra durability |
Nintendo Switch Presentation 2017 Trailer BGM |
| ||
| 241 | Revali | •Falco |
4,400 | Skyloft (Battlefield form) | •Hazard: Heavy Wind | •Dangerously high winds are in effect •Stamina battle |
Kass's Theme |
| ||
| 242 | Urbosa | •Zero Suit Samus |
4,400 | Gerudo Valley (Battlefield form) | •Item: Lightning •Hazard: Zap Floor |
•The floor is electrified •Stamina battle •The enemy starts the battle with a Killing Edge |
Main Theme - The Legend of Zelda: Breath of the Wild |
| ||
| 243 | Calamity Ganon | •Giant Ganondorf •Ally: Zelda |
13,900 | Great Plateau Tower (Ω form) | •Sudden Damage | •You lose if your CPU ally is KO'd •You'll occasionally take sudden damage after a little while •The enemy is giant |
Calamity Ganon Battle - Second Form |
| ||
| 244 | Bokoblin | •Tiny King K. Rool Team |
1,400 | Gaur Plain (Battlefield form) | N/A | •The enemy starts the battle with an Ore Club | Kass's Theme |
| ||
| 245 | Guardian | •Giant R.O.B. |
3,800 | Great Plateau Tower (Ω form) | N/A | •The enemy has super armor and is hard to launch or make flinch •Stamina battle •The enemy favors neutral specials |
Nintendo Switch Presentation 2017 Trailer BGM |
| ||
| 246 | Tetra | •Toon Link |
9,800 | Pirate Ship | •Item: Bullet Bill •Hazard: Heavy Wind |
•Dangerously high winds are in effect •The enemy is easily distracted by items |
The Great Sea / Menu Select |
| ||
| 250 | Aryll | •Villager •Toon Link |
9,000 | Wuhu Island (Swaying Bridge) | N/A | •The enemy has increased attack power | The Great Sea / Menu Select |
| ||
| 251 | Medli | •Isabelle •Charizard |
9,300 | Pirate Ship | N/A | •The enemy has increased jump power | Dragon Roost Island |
| ||
| 252 | Valoo | •Giant Charizard |
4,000 | Wuhu Island (Maka Wuhu) | N/A | •The enemy is giant | Dragon Roost Island |
| ||
| 253 | Beedle | •Shulk •Toon Link |
2,600 | Gaur Plain (Battlefield form) | •Item: Beetle | •Items will be pulled toward the enemy | Dragon Roost Island |
| ||
| 254 | Fishman | •Squirtle |
1,600 | Pirate Ship | •Hazard: Left Is Right, Right Is Left •Buoyancy Reduced |
•You can't swim •Left and right controls will suddenly reverse after a little while |
The Great Sea / Menu Select |
| ||
| 255 | Vaati | •Ridley |
10,000 | Hyrule Castle | •Hazard: Heavy Wind | •Dangerously high winds are in effect after a little while •The enemy starts the battle with an Ore Club |
Dark World (Brawl) |
| ||
| 256 | Ezlo | •Toon Link |
3,700 | Distant Planet | •Hazard: Left Is Right, Right Is Left •Giant |
•The enemy is giant •Left and right controls will suddenly reverse after a little while |
Village of the Blue Maiden |
| ||
| 257 | Linebeck | •Luigi •Toon Link |
9,000 | Wuhu Island (The boat) | •Buoyancy Reduced | •No one knows how to swim | The Great Sea / Menu Select |
| ||
| 258 | Phantom | •Clear Zelda |
3,800 | Spirit Train (Battlefield form) | N/A | •The enemy's down special has increased power •The enemy favors down specials •The enemy is invisible |
Full Steam Ahead |
| ||
| 260 | Alfonzo & Engineer Link | •Toon Link •Captain Falcon |
3,600 | Spirit Train | •Attack Power ↑ | •The enemy's dash attacks have increased power •The enemy has increased attack power after a little while •The enemy can deal damage by dashing into you |
Full Steam Ahead |
| ||
| 261 | Byrne | •Sheik |
1,800 | Spirit Train (Battlefield form) | N/A | •The enemy's punches and elbow strikes have increased power •The enemy's throws have increased power •Stamina battle |
Full Steam Ahead |
| ||
| 262 | Totem Link | •Toon Link (×3) ( |
3,500 | Hyrule Castle | Item: The Legend of Zelda | •The enemy favors smash attacks | Main Theme - The Legend of Zelda: Tri Force Heroes |
| ||
| 263 | Madame Couture | •Rosalina & Luma •Toon Link (×3) ( |
3,300 | Skyloft | N/A | •Defeat the main fighter to win •Reinforcements will appear during the battle |
Main Theme - The Legend of Zelda: Tri Force Heroes |
| ||
| 1,322 | Link (Link's Awakening) | •Toon Link |
9,400 | Tortimer Island (Two palm trees, two regular trees) |
•Assist Trophy Enemies (Chain Chomp) | •Hostile assist trophies will appear | Tal Tal Heights |
| ||
| 1,323 | Owl | •Falco |
3,500 | Wuhu Island (Swaying Bridge) | N/A | •Only certain Pokémon will emerge from Poké Balls (Kyogre) •The enemy falls slowly |
Woodlands - The Legend of Zelda: Tri Force Heroes |
| ||
(*) Conditions in italic are not listed on the Spirit Battle preview screen.
Series Order
| Number | Name | Series |
|---|---|---|
| 172 | Link | The Legend of Zelda Series |
| 173 | Zelda | |
| 174 | Sheik | |
| 175 | Ganondorf | |
| 176 | Young Link | |
| 177 | Toon Link | |
| 178 | Link (The Legend of Zelda) | |
| 179 | Octorok | |
| 180 | Moblin | |
| 181 | Tektite | |
| 182 | Like Like | |
| 183 | Darknut | |
| 184 | Fairy Bottle | |
| 185 | Agahnim | |
| 186 | Cucco | |
| 187 | Marin | |
| 188 | Wind Fish | |
| 189 | Young Zelda | |
| 190 | Zelda (Ocarina of Time) | |
| 191 | Ganon | |
| 192 | Saria | |
| 193 | Impa | |
| 194 | Kaepora Gaebora | |
| 195 | Malon | |
| 196 | Epona | |
| 197 | Goron | |
| 198 | Darunia | |
| 199 | Zora | |
| 200 | Ruto | |
| 201 | Great Fairy | |
| 202 | Koume & Kotake | |
| 203 | Twinrova | |
| 204 | ReDead | |
| 205 | Skull Kid | |
| 206 | Skull Kid & Majora's Mask | |
| 207 | Deku Link | |
| 208 | Fierce Deity Link | |
| 209 | Majora's Mask | |
| 210 | Moon | |
| 211 | Tingle | |
| 212 | Happy Mask Salesman | |
| 213 | Kafei | |
| 214 | Postman | |
| 215 | Din | |
| 216 | Nayru | |
| 217 | Ricky | |
| 218 | Dimitri (The Legend of Zelda) | |
| 219 | Moosh | |
| 220 | Ganondorf (Twilight Princess) | |
| 221 | Beast Ganon | |
| 222 | Midna | |
| 223 | Wolf Link & Midna | |
| 224 | Zant | |
| 225 | Agitha | |
| 226 | King Bulblin & Lord Bullbo | |
| 227 | Fi | |
| 228 | Ghirahim | |
| 229 | The Imprisoned | |
| 230 | Demise | |
| 231 | Loftwing | |
| 232 | Groose | |
| 233 | Wall-Merged Link | |
| 234 | Link (A Link Between Worlds) | |
| 235 | Ravio | |
| 236 | Hilda (The Legend of Zelda) | |
| 237 | Yuga | |
| 238 | Zelda (Breath of the Wild) | |
| 239 | Mipha | |
| 240 | Daruk | |
| 241 | Revali | |
| 242 | Urbosa | |
| 243 | Calamity Ganon | |
| 244 | Bokoblin | |
| 245 | Guardian | |
| 246 | Tetra | |
| 247 | Zelda (The Wind Waker) | |
| 248 | King of Red Lions | |
| 249 | King of Hyrule | |
| 250 | Aryll | |
| 251 | Medli | |
| 252 | Valoo | |
| 253 | Beedle | |
| 254 | Fishman | |
| 255 | Vaati | |
| 256 | Ezlo | |
| 257 | Linebeck | |
| 258 | Phantom | |
| 259 | Zelda (Spirit Tracks) | |
| 260 | Alfonzo & Engineer Link | |
| 261 | Byrne Staven | |
| 262 | Totem Link | |
| 263 | Madame Couture | |
| 1,322 | Link (Link's Awakening) | |
| 1,323 | Owl |
Trivia
- The Legend of Zelda, Super Mario, EarthBound, Ice Climber and Pac-Man are the only series represented by a fighter to use in-game sprite art for their spirits.
- The order of The Legend of Zelda characters' fighter spirits does not match the order on the character select screen. Zelda and Sheik are swapped, as are Ganondorf and Young Link.
- The Zelda series is the only series that has three Master Spirits, having Beedle, Darunia and Linebeck.
- The Legend of Zelda and Pokémon are tied for having the most Enhanceable Spirits, each having 9.
- The Legend of Zelda also has the most enhanced spirits associated with a single character, with a total of 3 spirits based on Zelda.
- While the A Link Between Worlds version of Zelda and the Breath of the Wild version of Link are fighters, the A Link Between Worlds version of Link and the Breath of the Wild version of Zelda are spirits.
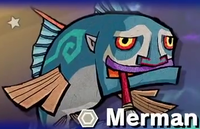
- Prior to the 1.1.0 update, Fishman was named "Merman".
- Farore is the only one of the three oracles from the Oracle games that does not appear as a spirit.
- Despite appearing in the background of the Great Plateau Tower, the Old Man has no spirit.
- While there is a spirit for the King of Hyrule, it depicts King Daphnes from The Wind Waker rather than King Rhoam, the Old Man's true identity.
| Spirits | |
|---|---|
| by categories | Primary spirit (Enhanceable spirit) · Support spirit · Master spirit · Fighter spirit · (All spirits) · Summon · DLC Spirits (DLC changes) |
| by series | Super Mario · Donkey Kong · The Legend of Zelda · Metroid · Yoshi · Kirby · Star Fox · Pokémon · EarthBound · F-Zero · Ice Climber · Fire Emblem · Game & Watch · Kid Icarus · Wario · Metal Gear · Sonic the Hedgehog · Pikmin · R.O.B. · Animal Crossing · Mega Man · Wii Fit · Punch-Out!! · Pac-Man · Xenoblade Chronicles · Duck Hunt · Street Fighter · Final Fantasy · Bayonetta · Splatoon · Castlevania · Persona · Dragon Quest · Banjo-Kazooie · Fatal Fury · ARMS · Minecraft · Tekken · Kingdom Hearts · Mii · Super Smash Bros. · Others |


