Link (SSBU)
| Link in Super Smash Bros. Ultimate | |
|---|---|
{{{content1}}}
{{{content2}}} 
| |
| Universe | The Legend of Zelda |
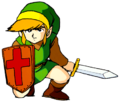
| Other playable appearances | in SSB in Melee in Brawl in SSB4 |
| Availability | Starter |
| Final Smash | Ancient Bow and Arrow |
| “ | Link has been redesigned to match his appearance in The Legend of Zelda: Breath of the Wild. He can now pick up arrows he's fired, and his bombs have been upgraded to remote bombs, so you can set them off when the timing is just right! | ” |
| —Super Smash Blog, Super Smash Bros. Ultimate Official Site | ||
Link (リンク, Link) is a playable character in Super Smash Bros. Ultimate. He was suggested to appear in the then unnamed Ultimate in its first teaser trailer at the end of the March 8th, 2018 Nintendo Direct, and officially announced in Ultimate's E3 2018 trailer on June 12th. Link is classified as fighter #03.
Link is now voiced by Kengo Takanashi, who reprises his role from The Legend of Zelda: Breath of the Wild.
Changes from Super Smash Bros. 4
Link received a mix of buffs and nerfs in the transition between Smash 4 and Ultimate, being buffed overall. He now incorporates multiple elements from Breath of the Wild into his moveset, such as the Remote Bomb, the Ancient Bow & Ancient Arrow, and the Sword Beam. Compared to his previous iterations in Smash, Link has better close combat capabilities thanks to his faster movement speed, and the return of the Boomerang improves his ability to combo. Furthermore, Link's grab game has improved due to his now possessing a more standard grab; while the Hookshot and Clawshot in previous games granted Link a long-ranged grab, they were unsafe to use due to their starting and ending lag. On the other hand, his recovery is notably less safe due to the loss of his tether, as well as the changes to his bomb recovery, despite the latter granting more distance overall. As a result, Link's optimal playstyle has changed, where he relies on his Remote Bombs and other projectiles for stage control and trapping in a similar manner to Snake. Early on in Ultimate competitive play, Link has amassed very strong results that are arguably the best of any of his iterations across the series, thanks to players such as Salem, T and Izaw.
Aesthetics
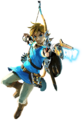
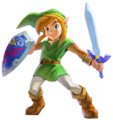
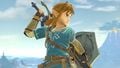
 Link's design is based on his appearance in The Legend of Zelda: Breath of the Wild. His default outfit is the blue Champion's Tunic, with the more traditional green Tunic of the Wild as an alternate costume, each having their own respective set of palette swaps. The Master Sword's design has also been updated.
- Link holds the Master Sword with his right hand and the Hylian Shield with his left. As a result, all of Link's animations have been horizontally flipped. He also has several altered animations, including a new idle pose with his legs positioned farther apart and his sword and shield held up at all times.
- Link's new on-screen appearance involves him gliding onto the stage using the Paraglider.
- Link has a new side taunt where he holds the Master Sword in front of him with both hands while it glows, similar to one of Ike's taunts.
- Link's victory animation where he swings his sword then sheathes it now shows him swinging it back before sheathing it.
- Link's Boxing Ring alias has been changed to "Champion of Hyrule".
Attributes
 Like all characters, Link's jumpsquat animation takes 3 frames to complete (down from 7).
- Link walks faster (1.188 → 1.247).
- Link runs faster (1.3944 → 1.534).
- Link's traction is much higher (0.064 → 0.113).
- Link's initial dash is significantly faster (1.3 → 1.98).
- Link jumps higher.
- Link has increased air speed (0.88 → 0.924).
 Forward roll grants less intangibility (frames 4-17 → 4-15).
- Back roll has more startup with less intangibility (frames 4-17 → 5-16), and more ending lag (FAF 31 → 36).
- Spot dodge has less ending lag (FAF 28 → 27).
- Spot dodge grants less intangibility (frames 3-18 → 3-17).
- Air dodge grants more intangibility (frames 3-28 → 3-30).
- Air dodge has significantly more ending lag (FAF 34 → 50).
Ground Attacks
![]() Link leans in further on many of his attacks. This increases his effective range, but also leaves his hurtboxes more exposed to opposing attacks.
Link leans in further on many of his attacks. This increases his effective range, but also leaves his hurtboxes more exposed to opposing attacks.
- Neutral attack:
- The first and second hits have altered angles and knockback to keep opponents close to Link, akin to other neutral attacks. This allows them to connect better and jab lock, but hinders their guaranteed jab cancel setups.
- Neutral attack's speed has been modified overall.
- The first hit has more startup (frame 7 → 8) and transitions into the second slower (frame 11 → 12).
- The second hit has less startup (frame 6 → 5) and transitions into the third faster (frame 11 → 8).
- The first and third hits have less ending lag (FAF 28 → 25 (first), 37 → 35 (third)).
- The second hit has more ending lag (FAF 21 → 26), removing its jab cancel setups.
- The third hit has a shorter hitbox duration (frames 6-10 → 6-7).
- Neutral attack's damage has been redistributed, with the first two hits dealing more damage (2.5% → 3% each) and the third hit dealing less (5% → 4%).
- The third hit deals more knockback, allowing it to set up edgeguards more effectively.
- The third hit involves Link swiping vertically instead of thrusting his sword.
- Forward tilt:
- Forward tilt has more endlag (FAF 38 → 40).
- It always sends opponents in the direction Link is facing, even if hit from behind.
- It causes the screen to shake when the sword hits the ground.
- Up tilt:
- Up tilt deals more damage (9% → 11%), with its knockback compensated.
- Up tilt has a new animation, starting from behind Link rather than from his front.
- It no longer reaches the ground in front of Link, making it more difficult (or sometimes impossible) to hit short or crouching opponents.
- Down tilt:
- Down tilt comes out one frame faster (frame 11 → 10).
- It has more ending lag (FAF 29 → 31), though its combo potential is compensated by Link's faster jumpsquat.
- It can no longer meteor smash aerial opponents.
- It deals less damage (11% → 9%). However, this allows it to combo for longer.
- Dash attack:
- Dash attack only possesses a sweetspot and sourspot, with the middlespot being removed, making the sweetspot easier to land.
- The initial lunge provides less distance, decreasing the move's horizontal range but allowing Link to more reliably hit opponents closer to him.
- Forward smash:
- Both hits of forward smash have less ending lag (FAF 52 → 51 (first), 68 → 61 (second)).
- The first hit shoots out a spinning Sword Beam as a projectile when Link is at 0% damage, in reference to multiple Zelda games where his sword shoots out beams when he is at full health. Charging forward smash increases the size, distance and damage of the projectile, dealing between 5% and 13% damage. This gives him a new long range option, while increasing the total damage of his forward smash at close range.
- The second hit is faster (frame 12 → 10), allowing it to connect better from the first hit.
- The second hit deals consistent damage throughout (13%/12% → 13%), allowing it to KO more reliably.
- The first hit has increased startup (frame 15 → 17) and transitions into the second hit slower (frame 20 → 22).
- Down smash:
- The first hit's damage has been redistributed (14%/16%/17%/16% → 16%/17%), with the sourspot being removed, and the sweetspot being located at the tip of the Master Sword rather than near the middle. This improves the first hit's KO potential and makes the sweetspot much easier to land.
- Down has more startup on both hits (frame 9 → 12 (first), 21 → 24 (second)), and more ending lag (FAF 50 → 55).
Aerial attacks
- All aerials have reduced landing lag (10 frames → 6 (neutral), 12 frames → 11 (forward), 10 frames → 6 (back), 23 frames → 14 (up), 32 frames → 19 (down)).
- Forward aerial:
- Forward aerial's animation has been sped up, with the gap between hits being shorter (12 frames → 8). This allows it to connect both hits more reliably.
- The second hit deals more knockback, now being as powerful as the first hit in Smash 4.
- Forward aerial has more startup for its first hit (frame 14 → 16), and more ending lag (FAF 50 → 52).
- Both hits deal less damage (11% → 8% (first), 13% → 10% (second)).
- The first hit has significantly weaker knockback, no longer KOing until around 800%.
- This allows it to connect into the second hit even at high percents, and coupled with its lower landing lag, improves its combo potential on landing from low to mid percents.
- However, this completely removes the first hit's previously high KO potential, requiring Link to land the slower second hit in order to KO with the move.
- Forward aerial auto-cancels later (frame 51 → 53).
- Back aerial:
- Both hits of back aerial deal more damage (3% → 5% (first), 5% → 7% (second)).
- The second hit comes out earlier (frame 18 → 15), thus reducing the frame gap between hits.
- The second hit has lower base knockback, but noticeably higher knockback scaling. This allows it to combo more reliably at low percents, while significantly improving its KO potential, KOing middleweights at around 200% from the center of Final Destination.
- The second hit has less active frames (frame 18-22 → 15-17).
- The second hit has a slightly different animation.
- Up aerial:
- Up aerial's clean hit has increased knockback, improving its KO potential.
- Up aerial auto-cancels earlier (frame 47 → 43).
- Down aerial:
- Down aerial has been reverted to possessing only a clean hit and late hit like in Brawl, with its early hit being removed. The clean hit remains unchanged against grounded opponents, but meteor smashes aerial opponents like the early hit in Smash 4.
- The clean hit lasts longer than the previous early hit (frames 14-17 → 14-19), making it easier to land and increasing the meteor smash's duration.
- Because of this change, the move can KO grounded opponents much more reliably. The meteor smash against aerial opponents is also stronger, due to its knockback not being compensated for the clean hit's higher damage compared to the previous early hit.
- Due to the removal of the early hit, down aerial can no longer combo into its bounce-off hit as effectively at higher percents, reducing its damage potential.
- Down aerial has a different animation, with a more exaggerated downward thrust.
Throws and other attacks
- Link grabs opponents with his hand instead of using his Clawshot.
- Because of this, all grabs have noticeably reduced startup (frame 12/14/15 (standing/dash/pivot) → 6/9/10) and ending lag (FAF 62/66/67 → 35/43/38), making them safer to use at close range, and allowing Link to set up into them more effectively.
- However, all grabs have much shorter range, and their hitboxes have a shorter duration (6 frames (standing), 8 frames (dash, pivot) → 2 frames (all)).
- Link no longer has a grab aerial or a tether recovery due to losing the Clawshot.
- However, this allows him to Z-drop items without triggering the grab aerial's lengthy animation.
- Pummel:
- Pummel deals less damage (2.1% → 1.3%).
- It deals more hitlag (4 frames → 14), but has much less startup (frame 4 → 1) and ending lag (FAF 16 → 7).
- Forward throw:
- Forward throw launches at a lower angle, allowing it to set up edgeguards more effectively.
- It has slightly more ending lag (FAF 36 → 38).
- It deals less damage (4% → 2.5% (release); 7% → 5.5% (total)).
- It has higher base knockback, but lower knockback scaling. This allows it to knock opponents offstage more easily at low percents, but reduces its already lacking KO potential.
- Back throw:
- Back throw deals less damage (4% → 2.5% (release); 7% → 5.5% (total)).
- Like forward throw, it has higher base knockback, but lower knockback scaling.
- Down throw:
- Down throw has one frame less ending lag (FAF 50 → 49). Combined with Link's faster jumpsquat, this increases its combo potential.
- It has drastically increased knockback scaling, KOing middleweights at around 250%. This further improves its combo potential at low to mid percents, but weakens its KO setups into up aerial at high percents.
- It is no longer weight-dependent. This improves its combo ability on heavyweights, but reduces it on lightweights.
Special moves
- Bow and Arrows:
- Link uses the Traveler's Bow from Breath of the Wild instead of the Hero's Bow.
- Arrows fired have a bright tip, making them easier to track. Arrows will also become momentarily lodged in opponents' bodies.
- Arrows have less startup (frame 18 → 16) and ending lag (FAF 47 → 45).
- Arrows that fail to hit an opponent will linger on the ground for a longer period of time, and can be picked up as throwable items. Arrows used in this way deal little damage and knockback, allowing them to set up combos. Using the Bow and Arrows while holding an arrow causes Link to fire two arrows at once for 1.5× as much damage.
- Arrows can be picked up by opponents and thrown at Link.
- Arrows can no longer be held indefinitely upon reaching full charge, now being fired automatically if held for more than three seconds.
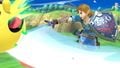
- Boomerang:
- The more traditional Boomerang has replaced the Gale Boomerang, functioning as it did in Smash 64 and Melee.
- Boomerang has regained its damaging hitbox while returning, allowing Link to interrupt opponents' attacks and perform combos more reliably than he could with Gale Boomerang's windbox.
- It deals more damage (7% → 8% (clean), 5% → 6% (late)), which increases further if used as a smash special move (7% → 9.6% (clean), 5% → 7.2% (late)). In addition, the returning hitbox deals 3% damage.
- Its throw distance has been increased.
- Boomerang now damages Link if it is reflected back at him.
- Due to the removal of the Gale Boomerang, Link can no longer perform the Gale Guarding technique.
- Boomerang travels more slowly upon returning. This increases the amount of time the hitbox is active but also increases the amount of time it takes before Link can throw it again.
- Rather than simply disappearing, the Boomerang will drop to the ground and disappear in a puff of smoke if it is intercepted by another projectile.
- The Boomerang cannot be rethrown during this animation, reducing the utility of Boomerang in trade situations.
- Spin Attack:
- Grounded Spin Attack has less startup (frame 8 → 7) and ending lag (FAF 82 → 77).
- Spin Attack has more vibrant graphics and generates a blue "slash" around Link. Link moves his arm while charging the move, and the Master Sword glints with light up to three times, referencing the three levels of charged attacks in Breath of the Wild. The grounded version is now an inward spin.
- Link has separate voice clips for grounded and aerial Spin Attacks.
- Remote Bomb:
- The spherical Remote Bomb from Breath of the Wild replaces Bomb as Link's down special. Rather than exploding on contact, the Remote Bomb bounces off opponents and objects, and can be launched around by attacks (including Link's). It is detonated by inputting down special again, similar to Snake's C4. Alternatively, it detonates automatically after about 30 seconds. This changes up Link's item play and recovery tactics substantially.
- Remote Bomb's 30 second fuse allows it to remain in play much longer than Bomb's 3.66 seconds.
- The explosion has a significantly larger blast radius.
- The explosion deals significantly higher knockback, improving its KO potential. It also launches opponents at a more horizontal angle, allowing it to edgeguard more effectively.
- Remote Bombs themselves can lock opponents if thrown lightly.
- Remote Bomb's detonation has 12 frames of startup before it can damage the opponent. It also cannot be manually detonated if it is held by an opponent; if attempted, Link will try to generate another Remote Bomb, but this will fail and give him high ending lag.
- Only one Remote Bomb can be on the field at a time, as opposed to two Bombs.
- The explosion damages Link even if opponents are caught within it.
- The Remote Bomb itself deals less damage when hitting an opponent (5%/9% → 1%), since it no longer explodes on contact and cannot be detonated while held by the opponent.
- Remote Bomb cannot be detonated while Link is helpless, preventing him from using his up special multiple times offstage. This hinders Link's vertical recovery.
- However, in a similar vein to Snake's C4, Link can Z-drop and quickly detonate a Remote Bomb on himself to supplement his recovery, especially at higher percents due to its higher knockback.
- Remote Bomb's explosion deals consistent damage (5%/9% → 7%).
- Remote Bomb lacks the flame effect.
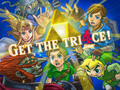
- Ancient Bow and Arrow:
- Link's new Final Smash is the Ancient Bow and Arrow, replacing Triforce Slash. It is functionally similar to Zelda's Light Arrow from previous games, although it only deals a single powerful blow to the first opponent in the arrow's path along with any bystanders.
- Ancient Bow and Arrow has more horizontal range than Triforce Slash.
- It deals significantly less damage than Triforce Slash (60% → 35%).
Update History
![]() 1.2.0
1.2.0
 Invisible Bomb glitch fixed.
![]() 2.0.0
2.0.0
- Up aerial auto-cancels earlier (frame 47 → 43).
- Arrows from Bow and Arrows travel a longer distance (40 frames → 48).
Moveset
- While standing still, walking, or crouching, incoming projectiles that hit Link's Hylian Shield will deal no damage and simply push him back. It can block any amount of projectiles regardless of power.
Note: All numbers are listed as base damage, without the 1v1 multiplier.
| Name | Damage | Description | ||
|---|---|---|---|---|
| Neutral attack | 3% | A downward slash, followed by an outward slash, then by an ascending slash. Has slow startup for a jab, but deals above-average damage, and its third hit is a semi-spike with high base knockback, making it useful for tech-chasing and forcing opponents near edges offstage. | ||
| 3% | ||||
| 4% | ||||
| Forward tilt | 13% | A lunging downward slash. It has noticeably slow startup for a tilt attack, but deals high damage and knockback for one in return, while possessing long range, the ability to hit opponents above and slightly behind Link, and only average ending lag that makes it safe on shield if spaced properly. This attack resembles the Z-Targeting slash used by the Link from The Legend of Zelda: Ocarina of Time. | ||
| Up tilt | 11% | An overhead arcing slash, starting from behind. Has good juggling potential from low to mid percents, comboing into itself depending on the victim's weight and falling speed, and decent KO potential at high percentages. | ||
| Down tilt | 9% | A kneeling inward slash. Has slow startup for a tilt, but low ending lag with vertical knockback, granting it combo potential into aerials and making it safe on shield with proper spacing. | ||
| Dash attack | Jump Slash | 14% (blade), 12% (base) | The Jump Attack. It is one of the strongest dash attacks in the game, KOing at around 110% from center stage when sweetspotted. However, it also has very slow startup (hitting on frame 20) alongside high ending lag, making it very punishable if whiffed or used recklessly. | |
| Forward smash | Sword Slice | 7% (blade), 14% (tip), 5%-13% (Sword Beam) | A two-handed, lunging downward slash. If the attack button is pressed again, Link will perform a single-handed outward slash. The first hit deals respectable damage and knockback at the blade's tip, but only deals half as much damage with much lower knockback when not tipped; however, the non-tipped hit is a natural combo into the second slash. Conversely, the second hit deals more consistent damage overall and is relatively powerful, but has heavy ending lag. Additionally, if Link is at 0% damage, the first hit shoots out a spinning Sword Beam; a projectile with relatively weak knockback that travels a long distance forward, giving it utility in both racking up extra damage at close range, and camping at long range. Charging the move increases the Sword Beam's size, distance and damage. However, it can be reflected and absorbed. The beam can be used as a jab lock set-up. | |
| 13% | ||||
| Up smash | 4% (hit 1), 3% (hit 2), 11%/10%/9% (hit 3) | A series of three overhead arcing slashes, the last one which launches opponents away. Has average startup, covers a wide range, deals high damage and can KO under 100%, but has high ending lag. The third hit deals more damage the closer opponents are to the tip of the Master Sword. | ||
| Down smash | 17%/16% (hit 1), 12%/11%/10% (hit 2) | A kneeling inward slash in front of himself, followed by a kneeling outward slash behind himself. The first hit launches opponents at a vertical trajectory, and can KO at around 100% uncharged with the strongest hitbox. The second hit is a semi-spike that has high base knockback, making it effective near edges, but deals less damage and overall knockback than the first hit. | ||
| Neutral aerial | 11% (clean, foot), 9% (clean, leg), 6% (late) | A flying kick. It is a sex kick with relatively low startup, ending and landing lag. One of Link's most useful moves overall, as it lets him escape pressure, is safe on shield with proper timing, and can even lock and combo into other moves on landing especially with the late hit, a notable followup being dash attack as a KO setup at high percents. | ||
| Forward aerial | 8% (hit 1), 10% (hit 2) | Two alternating, spinning outward slashes. The first hit has weak knockback in order to connect into the second hit, which deals high enough knockback to be one of Link's most reliable KO options. The move deals high damage if both hits connect, and due to its low landing lag and long range, it is also safe on shield move with proper spacing and timing. However, its slow startup, high ending lag and inability to autocancel before it can be interrupted leave it easy to punish if overused. | ||
| Back aerial | 5% (hit 1), 7% (hit 2) | A hook kick followed by a mid-level roundhouse kick. Link's fastest aerial, and has low ending and landing lag, allowing it to combo into itself at low percents. The first hit can also set up various attacks on landing, including an up tilt or up smash, the latter which can serve as a KO setup at high percents. | ||
| Up aerial | Jump Thrust | 15% (clean), 13% (late) | The Up Thrust. It is quite powerful when clean and has a long lasting hitbox that is difficult to dodge, making it an effective KOing and juggling option. However, it has moderate startup, can only autocancel in a full hop if done near the start, and leaves Link highly vulnerable from other positions due to its long duration. | |
| Down aerial | Downward Thrust | 18% (clean), 15% (late), 11% (bounce) | The Down Thrust. Upon hitting a target without fast falling, Link bounces off them and can then hit them a second time, albeit dealing less damage. The clean hit is a powerful meteor smash against aerial targets, while also dealing high knockback to grounded targets, KOing them at around 125%. Like up aerial, the move has very long lasting hitboxes, which along with its disjointed range make it useful for contesting attacks from below and intercepting recoveries offstage. However, due to its very long duration, high landing lag and inability to autocancel even in a full hop, it is Link's most committal aerial. | |
| Grab | — | Reaches out with one hand. A relatively fast grab, but possesses merely average range. | ||
| Pummel | 1.3% | Hits the opponent with the Master Sword's pommel. A fairly fast pummel. | ||
| Forward throw | 3% (hit 1), 2.5% (throw) | A front kick. Has little utility beyond launching opponents offstage, due to its weak power. | ||
| Back throw | 3% (hit 1), 2.5% (throw) | A back kick. Launches the victim facing away from Link and at a slightly higher angle, but it is otherwise identical to forward throw. | ||
| Up throw | 5%/4% (hit 1), 2% (throw) | Raises the opponent overhead and slashes them upward. Has relatively high knockback growth, which allows it to KO around 170% without rage. Against bystanders, it is a weak semi-spike with a sourspot at the base of the Master Sword; the thrown opponent is always hit by the sweetspot. | ||
| Down throw | 3% (hit 1), 3% (throw) | Pins the opponent to the ground and then performs an elbow drop. A reliable combo starter into his up tilt, up smash, neutral aerial and up aerial. | ||
| Floor attack (front) | 7% | Slashes in front of himself and then behind himself. | ||
| Floor attack (back) | 7% | Slashes in front of himself and then behind himself. | ||
| Floor attack (trip) | 5% | Slashes in front of himself and then behind himself. | ||
| Edge attack | 9% | The Crouch Stab from The Legend of Zelda: Ocarina of Time. Performs a thrust while climbing up. | ||
| Neutral special | Bow and Arrows | 4% (uncharged), 12% (fully charged), 6% (uncharged, two arrows), 18% (fully charged, two arrows), 2.1%-3.9% (thrown arrow) | Wields the Traveler's Bow and fires an arrow forward. Charging increases the arrow's speed, distance and damage output; at full charge, the arrow flies almost completely straight and covers a very long distance. Good for gimping recoveries and pressuring opponents from afar. Upon hitting the ground or a wall, the arrows also linger for a while before disappearing, during which they can be picked up and thrown as items. If Link uses this move with an arrow picked up, he will fire two arrows at once, greatly increasing the damage dealt to opponents. | |
| Side special | Boomerang | 8% (clean), 6% (late), 9.6% (clean, smash thrown), 7.2% (late, smash thrown), 3% (return) | Throws a Boomerang, which flies forward and then returns to Link. On the way forward, it launches enemies vertically with high base knockback, and on the way back, it launches them towards Link with weaker knockback, allowing it to set up combos. It can be angled up or down, and inputting it like a smash attack increases its damage, as well as the distance it can travel. | |
| Up special | Spin Attack | 14%/12%/9%/7% (grounded, blade), 11.2%/9.6%/7.2%/5.6% (grounded, tip), 4% (aerial hit 1), 2% (aerial hits 2-4), 4% (aerial hit 5) | A spinning, outward slash. Much like in the The Legend of Zelda series, it is a powerful attack, and can be charged on the ground for even higher damage and knockback. Conversely, an aerial Spin Attack is a series of spinning, inward slashes and is Link's primary recovery move, covering respectable vertical distance, but minimal horizontal distance. The grounded version is a fast out of shield option and decays on damage over time, KOing at around 120% uncharged with the strongest hit, while the aerial version deals up to 5 hits and can KO reliably near edges. | |
| Down special | Remote Bomb | 1% (throw), 7% (detonation) | Pulls out a Remote Bomb, which can be thrown as an item. After throwing it, using the move again has Link detonate the Remote Bomb with his Sheikah Slate, creating a large blue explosion. The Remote Bomb has a maximum duration of about 30 seconds before detonating automatically, and can be knocked back by attacks, which also causes it to damage opponents in range. The Remote Bomb's throw deals low damage and knockback, but its explosion is significantly more powerful, having enough knockback to KO at around 180% from center stage with no rage. The explosion hurts Link as well if he is in range, which has its pros and cons; while being detrimental to him if he detonates the Remote Bomb with opponents too close to him, it also gives him a useful bomb recovery, especially at high percents. | |
| Final Smash | Ancient Bow and Arrow | 35% | Wields the Ancient Bow and fires an Ancient Arrow straight forward, which explodes upon impact with the nearest opponent in its line of fire. It deals low damage compared to other Final Smashes, but has high KO potential. | |
On-screen appearance
- Glides in on his Paraglider, and unsheathes his sword.
Taunts
- Up Taunt : Swings the Master Sword twice and twirls it behind him before sheathing it. It is very similar to his victory pose in Twilight Princess, which he performs after learning a Hidden Skill or defeating a boss/particularly difficult enemies.
- Side Taunt: Holds the Master Sword in front of him with both hands as it glows blue, then puts it aside.
- Down Taunt: Assumes a Fujian White Crane-like stance while rearing the Master Sword behind his head. Loosely based on the attacking pose used by the Link from Zelda II: The Adventure of Link.
Idle poses
- Assumes a battle stance.
- Looks behind him.
Victory poses
- Swipes his sword three times and looks to the right. (His "character chosen" animation in Super Smash Bros., but ends with him facing a different direction.)
- Stabs with his sword, then holds it up, giving off a battle cry.
- Swipes his sword, then turns his back to the camera and sheaths it. Based off of Link's victory pose in Twilight Princess.


In competitive play
Notable players
 Izaw - The best Link player in Europe. Placed 9th at Valhalla II
 Lean - One of the best Link players in Japan. Placed 17th at Umebura SP 2.
 Salem - The best Link player in the world. Placed 13th at GENESIS 6.
- T - The best Link player in Japan and one of the best ones in the world.
Classic Mode: A Quest to Seal the Darkness
Link's opponents are all affiliated with darkness.
| Round | Opponent | Stage | Music | Notes |
|---|---|---|---|---|
| 1 | Dark Pit | Reset Bomb Forest | Dark Pit's Theme | |
| 2 | Giant Ridley | Norfair | Vs. Ridley | |
| 3 | Bayonetta | Umbra Clock Tower | One Of A Kind | |
| 4 | Dark Samus | Frigate Orpheon | Boss Battle 4 - Metroid: Samus Returns | |
| 5 | Ganondorf | Gerudo Valley | Gerudo Valley | Zelda is a CPU ally. |
| 6 | Dark Link | Temple | Great Temple / Temple | If using the Dark Link costume, Link appears as an enemy. |
| Bonus Stage | ||||
| Final | Ganon | Calamity Ganon Battle - Second Form | ||
Credits roll after completing Classic Mode. Completing it as Link has "Title Theme - The Legend of Zelda" accompany the credits.
Character unlock tree
Link's Classic Mode character unlock tree includes the following characters in order:
Each character can be unlocked by clearing Link's Classic Mode, or the Classic Mode of any preceding character, if all preceding characters have been unlocked. Once all the above characters are unlocked, clearing Classic Mode with any of them will default to Mario's character unlock tree, starting with Sonic.
Role in World of Light
Link was among the fighters summoned to the cliffside to fight the army of Master Hands.
Link was present on the cliffside when Galeem unleashed his beams of light. Link successfully deflected three beams of light with his Hylian Shield (staying true to the shield's unbreakable nature), but he lost his footing on the third blow, and was vaporized and placed under Galeem's imprisonment along with the rest of the fighters (excluding Kirby).
Link is unlocked near a Sheikah Tower when taking the Villager route. The player must defeat Don's spirit to access his unlock battle.
Fighter Battle
| No. | Image | Name | Type | Power | Stage | Music |
|---|---|---|---|---|---|---|
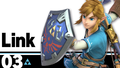
| 03 |  |
Link | Shield | 3,600 | Great Plateau Tower (Ω form) | Main Theme - The Legend of Zelda: Breath of the Wild |
Spirits
Link's Fighter Spirit can be obtained by completing Classic Mode. It is also available periodically for purchase in the shop for 500 coins. Unlocking Link in World of Light allows the player to preview the second spirit below in the Spirit List under the name "???". As a Fighter Spirit, it cannot be used in Spirit Battles and is purely aesthetic. Each Fighter Spirit has an alternate version that replaces them with their artwork in Ultimate.
Additionally, Link makes an appearance in various Primary and Support Spirits.
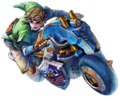
93. Master Cycle
172. Link
178. Link (The Legend of Zelda)
- Epona Spirit.png
196. Epona
217. Ricky
- Dimitri Spirit.png
218. Dimitri
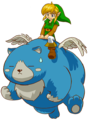
219. Moosh
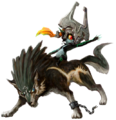
223. Wolf Link & Midna
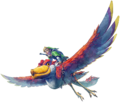
231. Loftwing
233. Wall-Merged Link
234. Link (A Link Between Worlds)


.png)


.png)
In Spirit battles
As the main opponent
| Spirit | Battle parameters | ||||||||
|---|---|---|---|---|---|---|---|---|---|
| No. | Image | Name | Enemy Fighter(s) | Type | Power | Stage | Rules | Conditions | Music |
| 183 | Darknut | •Link |
Shield | 3,800 | Bridge of Eldin (Battlefield form) | •Move Speed ↑ •Defense ↓ |
•The enemy's melee weapons have increased power •The enemy has increased move speed when the enemy's at high damage •The enemy gets a major stat boost when badly damaged |
Main Theme - The Legend of Zelda: Twilight Princess | |
| 208 | Fierce Deity Link | •Giant Link |
Attack | 13,900 | Great Bay (Ω Form) | •Defense ↓ •Easy to Launch •Attack Power ↑ |
•You are easy to launch •You have reduced defense after a little while •The enemy has increased attack power |
Calamity Ganon Battle - Second Form | |
| 227 | Fi | •Link |
Shield | 9,500 | Skyloft (Ω form) | N/A | •The enemy's melee weapons have increased power •The enemy's FS Meter charges quickly |
Ballad of the Goddess (Remix) | |
| 1,086 | Crispin | •Link •Mii Swordfighter |
Shield | 1,500 | Onett (Battlefield form) | •Item: Food | •Defeat the main fighter to win •The enemy becomes more powerful after eating •The enemy breathes fire |
Personal Trainer: Cooking | |
| 1,233 | Glory of Heracles Hero | •Link |
Shield | 3,700 | Wuhu Island (Swaying Bridge) | •Defense ↑ | •Stamina battle •The enemy has increased defense after a little while |
Revolt -Striving for Hope- | |
| 1,247 | Frey & Freya | •Link •Robin |
Attack | 3,700 | Reset Bomb Forest | •Giant | •The enemy's melee weapons have increased power •The enemy's magic attacks have increased power •You are giant |
Save the World, Heroes! | |
As a minion
| Spirit | Battle parameters | Inspiration | ||||||||
|---|---|---|---|---|---|---|---|---|---|---|
| No. | Image | Name | Enemy Fighter(s) | Type | Power | Stage | Rules | Conditions | Music | Character |
| 187 | Marin | •Zelda •Link |
Shield | 4,600 | Tortimer Island (Battlefield form) | •Hazard: Slumber Floor | •The floor is sleep-inducing •Timed battle |
Tal Tal Heights | Link (Link's Awakening) | |
| 238 | Zelda (Breath of the Wild) | •Zelda •Link •Inkling •Donkey Kong •Falco •Zero Suit Samus |
Shield | 9,200 | Great Plateau Tower | N/A | •Stamina battle •Reinforcements will appear after an enemy is KO'd •Defeat an army of fighters |
Main Theme - The Legend of Zelda: Breath of the Wild | Link (Breath of the Wild) | |
Alternate costumes
![[1] I could only find these images on Reddit, but if someone else can claim ownership, then I would be glad to credit them.](https://ssb.wiki.gallery/images/thumb/1/12/Link_Palette_%28SSBU%29.png/1000px-Link_Palette_%28SSBU%29.png)
| |||||||

|

|
|

|

|

|

|

|
Gallery
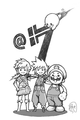
Link, Kirby, Mario, and Cloud artwork, as posted by Tetsuya Nomura's official Twitter account.
Artwork of all The Legend of Zelda characters, as posted on the official Legend of Zelda Twitter account.
Link's fighter card.
Link taunting on the Great Plateau Tower.

Link about to perform his forward smash on Temple.
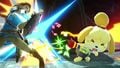
Link performing a Spin Attack on Pac-Man on Spirit Train.
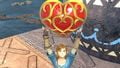
Link holding a Heart Container on Great Bay.
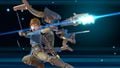
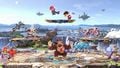
Link performing his new Final Smash, Ancient Bow and Arrow.

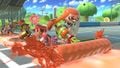
About to strike Ganondorf with his dash attack on Skyworld.
Struck by Daisy's down smash on Spirit Train.
Link struck by Dr. Mario's forward smash on New Pork City.
Link, Mario and Samus struck by the Inkling's Splat Roller on Figure-8 Circuit.
Link getting hit by Isabelle's forward smash on Luigi's Mansion.
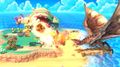
Link, Pikachu, Bowser and Inkling being attacked by Rathalos on Tortimer Island.
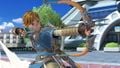
Link using Bow and Arrows on Prism Tower.
With Mario, Donkey Kong, Samus, Ice Climbers, Pit, Villager and Inkling on Battlefield.
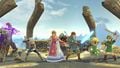
With all playable The Legend of Zelda veterans on the Great Plateau Tower.
With Zelda and Ganondorf on the Great Plateau Tower.


Character Showcase Video
Trivia
- Ultimate marks the first time in the Smash series where Link does not wear his trademark green tunic as his default outfit, as well as the first time Link no longer has his Goron and Zora tunics from Ocarina of Time as his respective red and blue alternate costumes. His new red and blue costumes are based on armor sets from Breath of the Wild - the Hylian Tunic and the Royal Guard Uniform, respectively.
- Ironically, Link's Champion's Tunic cannot be dyed in Breath of the Wild despite being the base for four of his costumes in Ultimate. His Tunic of the Wild can be dyed, but the colors used for the other four costumes based on this outfit are not possible in Breath of the Wild.
- Despite being recolored versions of the Tunic of the Wild, neither his Fierce Deity nor his Twilight Princess-inspired costumes appear to expose his knees. This is in line with how both outfits appear in their respective Zelda games.
- Despite Link's default design lacking a cap, Kirby still gains his familiar green cap when copying Link.
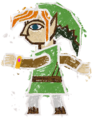
- Link's Skyloft-based alternate costume (now a white recolor of his Champion's Tunic) is the only one of his eight costumes in this game that does not appear in Breath of the Wild.
- Ultimate is the first Smash game where Link does not use a tether; however, his doppelgängers Young Link and Toon Link still use one.
- This is the first game where Link is no longer left-handed, matching Breath of the Wild; this resulted in multiple animation changes.
- In the E3 demo of the game, Link's portrait used his in-game model instead of his official artwork. This was also the case for Mario, Pikachu and Villager.
- Link is one of five fighters from Smash 4 to have their Boxing Ring alias changed in Ultimate, the others being Kirby, King Dedede, Mega Man, and Ryu.
- Link is ranked #3 on Ultimate's roster, which is coincidentally the same number of playable Links in the game as well as the same number of pieces in the Triforce.
- Ultimate marks the first time in which any incarnation of Link (including Young Link and Toon Link) has new voice clips recorded for Smash as opposed to reused ones from the Zelda series.
- While Link's Smash series amiibo is based on his SSB4 appearance and does not match his Ultimate design, he possesses an amiibo in the Breath of the Wild line that matches his incarnation in Ultimate (despite possessing different weapons) and is identical to his Fighter Spirit.