King K. Rool (SSBU)/Up special
Overview
King K. Rool dons his Propellerpack from Donkey Kong Country 3 and ascends for a moment before drifting down. This move is designed for K. Rool to recover with, and as such carries very limited offensive utility.
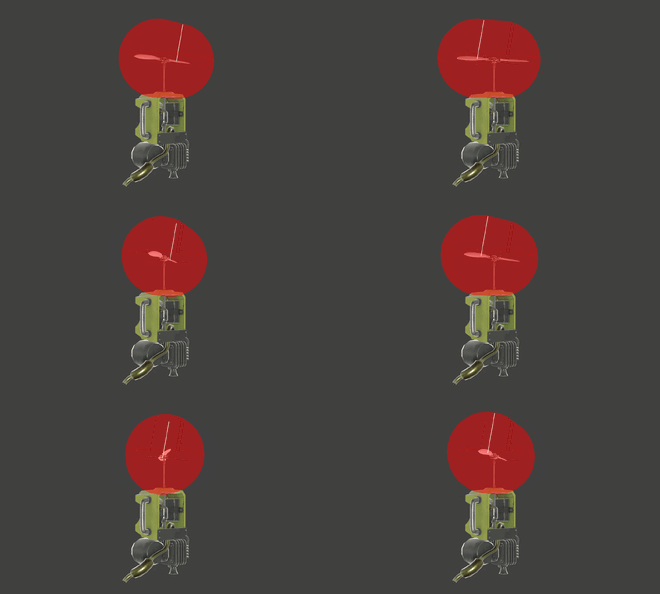
Propellerpack is a well-protected recovery, thanks to the hitbox on the propeller. However, this hitbox carries a degree of randomness due to it being assigned to the left propeller, and the spinning makes its coverage vary by frame. This means that it is inconsistent in regards to whether or not K. Rool will actually be protected, and hitting past it is very possible through disjoints and generally large hitboxes. However, the inconsistency goes both ways: this makes it very difficult for an opponent to assess whether their attacks will actually hit through the propeller, and getting hit usually means they forfeit their advantage state. It should be noted that hurtbox extensions from the opponent can also make Propellerpack hit much more easily. Moves such as Chrom's down aerial as particularly noteworthy for their inconsistency against Propellerpack due to the above factors.
Propellerpack goes an extremely long distance, allowing K. Rool to recover from virtually anywhere, especially in tandem with up aerial's stalling ability. As long as K. Rool survives a hit, he is generally able to find a way to make it back to the stage, oftentimes without even needing to burn his double jump. Due to this phenomenal distance, he is also capable of going under stages like Smashville and even Battlefield with precise inputs to have a chance of escaping overwhelming ledgetrap setups. Effectively, King K. Rool has the single best vertical recovery move in the game, in terms of distance covered. Thanks to this, K. Rool is capable of staying off-stage for incredible amounts of time to stall out edgeguard attempts or mix up timing.
K. Rool, while essentially locked into Propellerpack upon use, does have the ability to swerve and influence Propellerpack's hitbox during recovery. While this does reduce the airtime of Propellerpack due to less vertical distance, it can potentially save K. Rool from being edgeguarded or taking unnecessary damage. Swerving backwards can allow K. Rool to prevent stage spike attempts quite consistently due to the hitbox shift, which makes the recovery significantly less exploitable. LSI can assist with the stage spike issue, with K. Rool's super heavyweight status enabling him to tech until around 150%, sometimes longer. This often turns stage spike attempts into dice rolls, making them significantly less favorable for the opponent overall. This especially hurts swordfighters which - on average - have worse recoveries and laggier aerials.
Once the gas in Propellerpack has been exhausted, K. Rool will enter a flapping fall animation. This isn't actually helplessness; players can input down to initiate the helplessness animation, and fast fall to the stage (or the blast zone to save time). This animation has 1 frame less landing lag; 30 compared to the normal falling animation's 31, and the hurtbox is smaller horizontally. As a result, considering K. Rool's incredible fall speed along with these factors, it is optimal to fast fall out of Propellerpack when possible in almost any situation.
Propellerpack tends to snipe the ledge, which can disrupt ledgetraps or attempts to 2-frame K. Rool. This makes him one of the hardest characters to 2-frame by virtue of this defense, as well as his low ledgegrab animation and lack of a hand hurtbox. This ledgegrab animation makes it easier to snipe the ledge with the propellers as well. The "ledge snipe" can also confirm all of K. Rool's aerials depending on the DI (note that there is always something that it can be confirmed into), including back aerial meteor smashes if they DI in. This makes it an incredibly useful reversal tool, and can even take stocks due to the sheer power of K. Rool's aerial attacks. The ledge snipe can be made more consistent through holding down to prevent an auto-ledgesnap, which will increase hitbox activity and have it go a bit higher, though the ledgegrab range makes it a bit inconsistent and occasionally dangerous if K. Rool rises above the range. This can be made more consistent through swerving as well.
Propellerpack hits multiple times with a rehit rate of 15 frames, allowing it to drag opponents to the blast zone. Through good swerving, it is possible for this to be somewhat consistent, but at higher percentages this is somewhat easier to avoid due to the knockback growth. It should be noted that swerving makes it harder to SDI and escape the attempts. K. Rool players often set this up through up throw, though there are no true confirms into Propellerpack; in the case of up throw, every character can avoid Propellerpack kills through jumping or air dodging. However, the K. Rool player can often punish both of these, and delaying Propellerpack makes jumping a worse option, reducing the hits required to drag the opponent to the blast zone.
While Propellerpack has many benefits, it has an equal amount of drawbacks. For one, K. Rool is completely locked into Propellerpack upon usage, unlike moves such as Cypher. This means that his options are significantly limited, making Propellerpack very exploitable. Once an opponent is under K. Rool while he is recovering, he is forced to take a hit that could potentially gimp or even KO him. Propellerpack also reduces King K. Rool's vertical ledgegrab range, which makes it so that if the propellerpack runs out of gas near the ledge, it will cause K. Rool to just barely miss snapping while leaving him vulnerable to a meteor smash. In addition, while Propellerpack can snipe the ledge with very high consistency, it is also very easy to avoid by standing a decent distance away or simply shielding it. Furthermore, Propellerpack has 14 frames of startup lag which do not halt K. Rool's momentum, meaning he can be KO'd at the bottom blast zone through delaying recovery too much, or simply being launched too low.
Update History
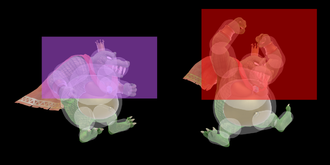
 Propellerpack's horizontal hitbox is smaller, making it difficult to KO opponents straight to the upper blast zone and making it less safe when recovering. Most notably, it doesn't snap to the ledge as often as it used to.
Hitboxes
Timing
Landing Lag (Standard)
| Interruptible) | 31 |
|---|---|
| Animation length | 29 |
| Lag |
Landing Lag (Helpless)
| Interruptible) | 30 |
|---|---|
| Animation length | 32 |
| Lag |
Lag time |
Hitbox |
Hitbox change |
Vulnerable |
Interruptible |
|

