From SmashWiki, the Super Smash Bros. wiki
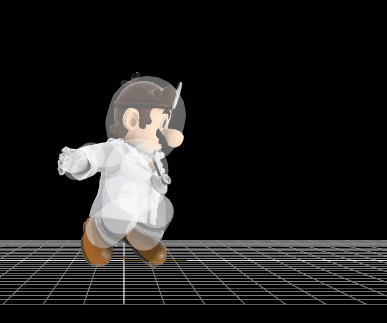
Hitbox visualization showing Dr. Mario's forward aerial.
Overview
Dr. Mario readies a fist, then brings it down. Unlike Mario's forward aerial, this one trades a meteor for a strong horizontally launching hitbox, and is one of his most potent kill moves. While slow with a fair amount of landing lag, the high power makes it quite useful. The early and late hits of the move are considerably weaker than the mid hit, however, so precision is necessary for maximum effectiveness. Some of Dr. Mario's moves, such as down tilt and most notably down throw can combo into this move as a kill confirm. The move also performs well in edgeguarding, as while it does not send the opponent downwards, it is made up for by its very strong kill power, making it almost equally as effective. However, due to his poor recovery, using forward aerial at even small depths can result in an SD, due to the high amount of endlag the move has.
Update history
 1.0.4
1.0.4
 Forward aerial has increased knockback scaling: 85 (early/late)/95 (clean) → 95/102.
Hitboxes
| ID |
Part |
Damage |
SD |
Angle |
BK |
KS |
FKV |
Radius |
Bone |
Offset |
SDIx |
H× |
T% |
Clang |
Rebound |
Type |
Effect |
G |
A |
Sound |
Direct
|
| Early hit
|
| 0 |
0 |
11.2% |
0 |
 |
30 |
95 |
0 |
3.0 |
22 |
3.2 |
0.0 |
0.0 |
1.0x |
1.0x |
0% |
 |
 |
 |
 |
 |
 |
 Kick Kick |

|
| Clean hit
|
| 0 |
0 |
16.8% |
0 |
|
30 |
102 |
0 |
4.0 |
21 |
0.0 |
0.0 |
0.0 |
1.0x |
1.0x |
0% |
|
|
|
|
|
|
 Kick Kick |
|
| 1 |
0 |
16.8% |
0 |
|
30 |
102 |
0 |
4.6 |
22 |
3.2 |
0.0 |
0.0 |
1.0x |
1.0x |
0% |
|
|
|
|
|
|
Kick |
|
| Late hit
|
| 0 |
0 |
10.08% |
0 |
|
20 |
95 |
0 |
4.0 |
21 |
0.0 |
0.0 |
0.0 |
1.0x |
1.0x |
0% |
|
|
|
|
|
|
Kick |
|
| 1 |
0 |
10.08% |
0 |
|
20 |
95 |
0 |
4.0 |
22 |
3.2 |
0.0 |
0.0 |
1.0x |
1.0x |
0% |
|
|
|
|
|
|
Kick |
|
