Diddy Kong (SSB4)/Up aerial
Overview[edit]
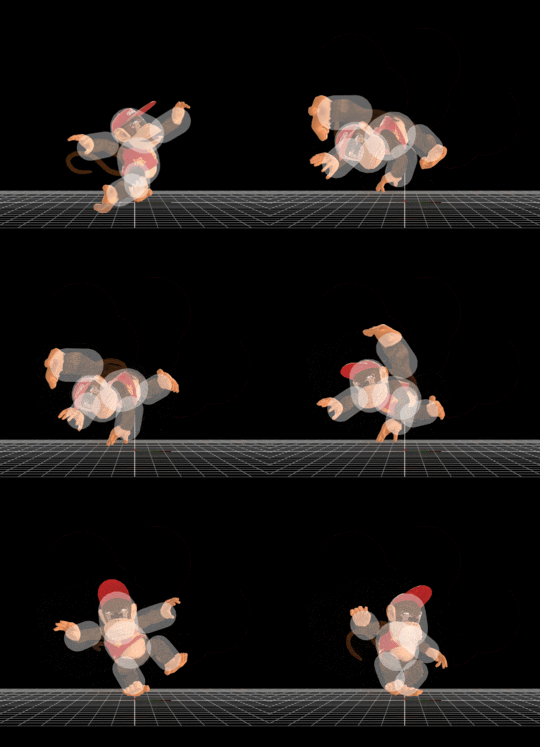
Diddy Kong performs an overhead kick. Its extremely quick startup, wide coverage above Diddy Kong and decently wide autocancel window make it a relatively low risk move in air-to-air combat. Its high base knockback and vertical launch angle also make it excellent for juggling and as a followup from Diddy Kong's up throw and down throw, even at high percentages; the move can combo into itself, though this largely depends on the opponent's character and DI. Moreover, it benefits immensely from rage thanks to its high base knockback, allowing it to KO at percentages as low as 80% when used near the upper blast line. The move does have its disadvantages, though: its below average knockback scaling makes it KO considerably later if used near the ground, usually failing to KO under 180%, and it also has high landing lag, deals low damage and consequently low shieldstun, meaning that it is ill-advised to use against grounded opponents. Even with such considerable drawbacks, however, this remains one of Diddy Kong's most used moves overall.
Update history[edit]
During the initial version of the game, Diddy Kong's up aerial was significantly more lethal in various aspects. It had faster startup (tied with Luma for the fastest up aerial in the game) with one more frame of hitbox duration, less ending lag and a much earlier autocancel window that gave it significantly better and easier combo ability, especially into itself. In addition, it dealt more damage with disproportionately high knockback for its speed, KOing opponents on the ground under 150% and in the air under 110% simply without rage, and under 115% and 80% respectively with maximum rage. Furthermore, the move's additional active frame at the start granted it more horizontal range, enabling Diddy Kong to hit opponents directly in front of him more easily, even grounded ones. Altogether, these advantages outweighed the move's drawbacks by an exorbitant margin, enabling it to combo, juggle, interrupt opposing combos and KO with incredible efficiency, all while its use carried low risk, and most infamously, it could be used in a simple yet deadly followup out of Diddy Kong's down throw known as the "Hoo-hah" to KO with even less risk involved. As a result, Diddy Kong's up aerial was the main reason of his extreme dominance at early Super Smash Bros. for Wii U tournaments, and due to the move yielding such high reward for its low risk of use, it was widely deemed broken.
Following these occurrences, patch 1.0.6 lowered the move's damage, drastically weakening its KO ability, though its combo ability and extraordinary speed remained untouched, with the former being extended instead as a result of the lower knockback. However, patch 1.0.8 heavily nerfed the move as a whole: it removed the hitboxes on frame 3, giving it one frame more startup and less duration in addition to noticeably shortening its horizontal range, further reduced its power by directly lowering the knockback values, increased its ending lag, and significantly shortened its autocancel window. These changes made it harder to combo with and less effective for breaking out of opponents' combos, while also removing its KO ability almost entirely anywhere but near the upper blast line. In conclusion, while still working as a fast aerial with decent coverage and juggling ability, Diddy Kong's up aerial is significantly worse than in the base game, and also one of the most nerfed single moves in updates.
 Damage (8% → 6%).
 Startup lag/hitbox duration: (frames 3-7 → 4-7).
 Its animation was not adjusted, making the hitboxes start at a considerably higher position.
 Ending lag (FAF 36 → 39).
 Knockback (65 (base)/99 (scaling) → 64/89).
 Initial auto-cancel window removed.
 Auto-cancel (frame 15 → 27).
Hitboxes[edit]
Timing[edit]
Attack[edit]
| Hitboxes | 4-7 |
|---|---|
| Autocancel | 27- |
| Interruptible | 39 |
| Animation length | 48 |
Landing lag[edit]
| Animation length | 21 |
|---|
Lag time |
Hitbox |
Autocancel |
Interruptible |
|
