Combo
A combo, short for combination, is a sequence of attacks that is guaranteed (or very likely) to occur if the first attack hits the enemy. The exact definition of a combo may change from player to player. Some definitions may include:
- A single attack that consists of multiple hits that can string into each other (see natural combo).
- Any sequence of attacks that keeps the opponent in hitstun, and is thus guaranteed to connect. These are commonly known as true combos.
- Any sequence of attacks that counts as a combo according to the combo counter (which allows for one consecutive frame of non-hitstun).
- Any sequence of attacks that is very hard to DI (or in certain cases, tech) out of.
- Any sequence of attacks that cannot be DI'd out of if performed perfectly.
- Any sequence of attacks that prevent the opponent from landing (possibly by tech) or ledge-grabbing.
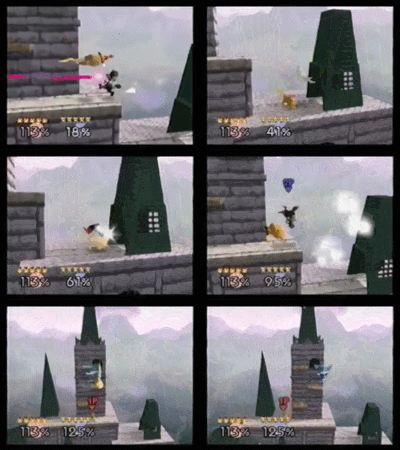
- Any attack that sends an opponent into a stage hazard that then leaves them vulnerable to other attacks, such as knocking an opponent into a tornado on Hyrule Castle in Super Smash Bros. 64, then jumping above the tornado and using a meteor smash to knock the opponent back down into the tornado after they're launched up to rack damage, or using an aerial attack to KO.
- Any sequence of attacks performed by two doubles teammates on an opponent to deal extra damage (known as a wombo combo or team combo).
Combos are used to quickly rack up damage on opponents. In Super Smash Bros., long, highly-damaging true combos are commonplace, due to the hitstun being much higher than in subsequent games. The lack of DI contributes to this, resulting in attacks sending opponents in consistent directions. This is also compounded by the lack of wall- and ceiling-teching, which allows for well-known tent combos. In fact, every character in SSB64 has a confirmed zero-death combo.
In Super Smash Bros. Melee, hitstun was reduced, and the introduction to DI makes combos more difficult to pull off consistently. However, with the increased game speed and new mobility options, such as wavedashing, along with the ability to fastfall during an aerial attack, combos are still very common, usually racking up around 50% damage. The decreased knockback on throws and the aforementioned physics changes make chain-grabs more common. In both of these games, L-cancelling also allows for faster attack speed, contributing to the ease of combos.
In Super Smash Bros. Brawl, characters can air dodge almost immediately out of hitstun, greatly reducing the frequency of combos. This is compounded by the slower falling speeds and more limited mobility, as L-cancelling and wavedashing were both removed. The airdodge's lack of landing lag also makes it hard to keep your opponents pressured in an aerial string. As such, true combos in Brawl tend to work only at very low percentages with quick moves that deal very low base knockback. The ability to negate hitstun results in gameplay having a heavy emphasis on locks, infinites, and chain-grabs.
In Super Smash Bros. 4, the ability to air dodge out of hitstun has been reduced, making true combos much more common, and the increased falling speeds also help in this regard. However, with the ability to air dodge out of a tumble, the increased base knockback on many moves, and the heavier landing lag on aerial attacks, true combos are still harder to pull off than in Melee and Smash 64, and generally revolve more around memorization and DI reads than "cookie cutter" combos compared to the aforementioned games. Characters can also no longer be locked indefinitely, and chain-grabs have been completely removed. As a result, most SSB4 characters have a simple combo that is often initiated with a throw and lasts for 2-3 hits, usually racking up 15-20% damage, with any further follow-ups requiring the player to read the opponent's defensive options. However, characters such as Greninja, Mewtwo, Sheik, and Bayonetta, as well as many others with item-based projectiles, have more diverse combo games, which often involve the use of aerial footstools and jab locks.
In Super Smash Bros. Ultimate, every character received a 3 frame jumpsquat, which when combined with the generally faster run and air speeds makes air combos easier to perform than in Brawl and Smash 4. The ability to perform any ground attack while running (including pivots) and the much lower landing lag across the cast (rivaling L-cancelling in Melee) also make combos easier to perform when on or close to the ground. Air dodges have been significantly reworked; directional air dodges make a return from Melee and no longer cause helplessness, but air dodges, in general, have much more endlag and can no longer be performed more than once without landing or getting hit. Thus, air combos tend to involve either guessing which direction the opponent will dodge, or pressuring the opponent into air dodging early. However, grabs have received a significant endlag increase and can now clang with each other, and shield grabs are slower overall, making Smash 4-esque throw combos less prevalent across much of the cast. Jab locks no longer force a standard getup and footstools can now be teched, reducing the effectiveness of both techniques in combos.
Types of combos
Below is a list of commonly used terms referring to specific types of combos, along with examples of each
- True combo: a combo that is impossible to escape from, guaranteed if performed correctly, though many require properly reacting to DI.
- Throw combo: a combo initiated from a throw, usually a down throw, followed up with one or more aerials. Sheik's down-throw to forward-air is one example in Melee.
- Kill confirm: a combo where a weaker, often faster and safer move links into a powerful kill move at a certain percent range. Fox's neutral-air to up smash is an example from SSB4.
- Zero-to-death: a combo which is initiated on a character at 0% damage and ends with a kill move, taking their stock. Many characters in Smash 64 have zero-to-deaths.
- Ladder combo: a combo consisting of multiple moves, often up-airs, which carry the opponent towards the upper blast line, ending in a potential kill move. Mario, Captain Falcon, Zero Suit Samus, Meta Knight, Bayonetta, Byleth and Steve are characters with well-known ladder combos.
- Wall of pain: similar to the ladder combo, but carries the opponent towards the side blast lines instead. Jigglypuff and Meta Knight are characters with well-known walls of pain.
- 50/50: not technically a combo, but rather a situation where the attacker has two available options and the defender has to guess which option will be taken. If the defender guesses right, they successfully defend themselves and are possibly able to punish the attacker. If the defender guesses wrong, the attacker can deal massive damage and possibly a kill. A classic example is the attacker throwing the defender and either chasing them with an aerial, or waiting until they return to the floor and performing a ground chain.
- DI dependent: a combo that will not work if the opponent uses a specific type of DI. Rosalina's back throw to up-air is an example of this.
- Custom Combo: a combo where a player repeatedly cancels normal and special moves into each other. Because the moves get canceled before completion, the knockback done is either set and/or very low, allowing the attacker to continue the combo with very few limitations. The canceled move also means the attacker finishes their attack animation before the opponent gets out of hitstun, which allows the combos to work. These combos are usually done to Juggle the opponent and rack up damage quickly, sometimes as a Zero-to-death.
Notable combos
SSB
- Captain Falcon: Multiple up aerials followed by Falcon Dive, known as the Stairway to Heaven. He can also perform a variation of the Ken Combo by chaining his up aerial into his down aerial spike.
- Kirby: Multiple up tilts, which can rack up heavy damage, lead into aerials, or be used to break shields.
- Pikachu: Tent combo, made up of a combination of up tilts and throws, along with other moves, in the tent portion of Hyrule Castle.
Melee
- Captain Falcon: The Sacred Combo, involving a Knee Smash to knock opponents offstage, and then jumping off and finishing them with a Falcon Punch.
- Falco: The Pillar combo, which involves launching opponents into the air with his Reflector and then following up with a down air spike. Other moves can be added, such as up tilts, back aerials, and up throws. When done properly, this combo is excellent for wearing down shields.
- Fox: Because of his Reflector's horizontal launch angle and low knockback scaling, Fox can chain his Reflector into itself as well as other moves, such as his up smash. Consecutive shines are known as multi-shining.
- Fox: A KO combo involving his up throw leading into an up aerial, particularly devastating against floaty characters.
- Jigglypuff: Jigglypuff's multiple jumps and excellent aerial mobility allow it to chain multiple back aerials and carry opponents offstage towards the blast line. Known as the Wall of Pain. Against the space animals, Jigglypuff's up throw leads into an up aerial, and finishes with Rest, guaranteeing a KO at ludicrously low damages. This combo is known as the Space Animal Slayer.
- Marth: Multiple forward aerials followed by a down air spike, known as the Ken Combo. Against the space animals, Marth can chain throw with his up throw.
- Sheik: While her down throw can chain-throw a number of characters, against characters immune to the chain-grab, Sheik can combo into other moves, notably her up smash, if she reads her opponents' reaction, and this is effective at both racking damage and KOing.
Brawl
- Falco: His down throw chaingrab racks on about 50%, and can lead into a dash attack, which can be canceled into an up smash, for a total of over 60% damage. Alternatively, Falco can finish with a down air meteor smash, which is effective at the ledge.
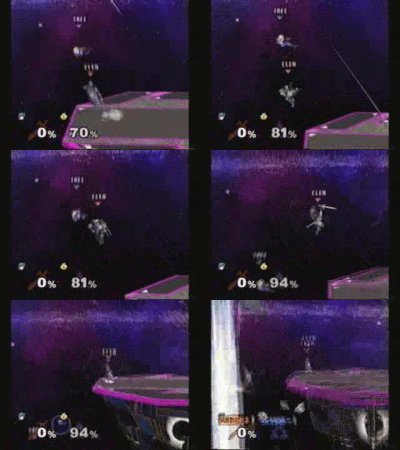
- Ice Climbers: Well-known for their variety of chain-throws, which can be used to 0-death any character in the game.
- King Dedede: His down throw, with its unique set knockback, can chain-throw many characters at any percent, and can be finished with his back throw for a KO.
- Kirby: The Gonzo combo, consisting of a forward throw, which leads into an up aerial, followed by an up tilt, and finishes with a back aerial, for 38% damage.
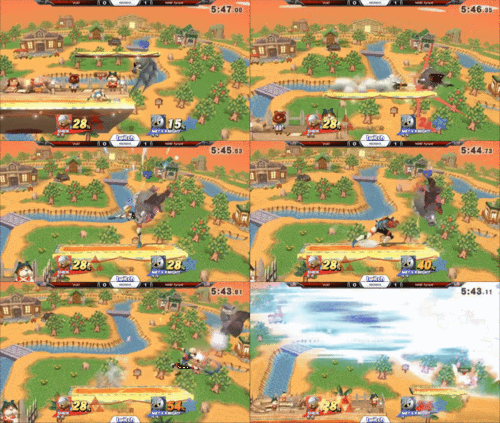
- Meta Knight: Being one of the fastest attacks in the game, his up aerial, when combined with his multiple jumps, can combo itself for 30% damage. For finishers, Mach Tornado can be used, for a total of 50% and an early KO if done near the upper blast line. Shuttle Loop can be used as well, and its semi-spike angle is useful for starting edgeguards. Lastly, neutral aerial can add on another 19%. The variation using Mach Tornado is known as the Rufio combo.
- Pikachu: Down throw can chain grab fast-fallers to KO percents, where they can be finished with a Thunderspike.
- Sheik: Her forward tilt can combo itself for as much as 50%.
SSB4
- Bayonetta: A held Heel Slide can combo into a Witch Twist, followed by two After Burner Kicks.
- Bowser: His up throw combos into up tilt at low percents, any aerial at mid percents (usually a neutral aerial), and an up aerial kill confirm at high percents. This combo is named the "Koo-pa", after Diddy Kong's "Hoo-Hah" combo.
- Captain Falcon: His down throw combos into two or three up aerials, as well as his neutral aerial. Depending on the opponent's DI, he can combo into his Knee Smash from a down throw.
- Charizard: His down throw can combo into a wide variety of moves, such as his forward aerial, neutral aerial, up aerial, Flare Blitz, and Fly.
- Diddy Kong: Known as the "Hoo-hah", prior to patch 1.0.6, Diddy could combo his down throw into an up aerial, or even two at low percents, being a quick and easy damage-racker and KO string. The aforementioned patch changed the angle and knockback of his down throw and decreased its hitstun, and also drastically decreased the damage and knockback of his up aerial.
- Donkey Kong: Dubbed the "Ding-Dong", his cargo up throw can chain into his up aerial for racking up damage and KOing.
- Fox: Up tilt combos into itself, and can finish with one of his aerials. At high percents, his down aerial combos into his up smash for a KO. In battles with custom moves enabled, a down throw at around 15% to 30% can also lead into a clean Wolf Flash.
- Kirby: Down aerial is almost guaranteed to be followed by tilts (up tilt in particular), grabs, jabs, aerials, and or smash attacks based on percentage and which way the opponent DIs. The smashes in particular, if successful, can lead to KOs. Under certain circumstances, forward aerial can also chain into itself repeatedly to carry opponents offstage. Up tilt also combos into itself and lead into his aerials, mostly at lower percents.
- Little Mac: At low percents, KO Uppercut can notoriously combo from neutral attack's first hit and down tilt, and can be used immediately after getting pushed off a ledge during Little Mac's jab infinite for a guaranteed KO.
- Lucas: Down throw chains into multiple neutral aerials. At high percents, his down throw confirms into his up aerial for a KO.
- Luigi: Previously, his down throw had very low knockback scaling, which allowed Luigi to perform combos even at KO percents, with his down throw easily leading into his Luigi Cyclone or Super Jump Punch for a KO. However, patch 1.1.1 greatly increased the knockback scaling of his down throw, which hindered his follow-ups at high percents. Still, his down throw is an effective combo starter, and by chaining into the spiking hitbox of his down air, he can perform a pseudo-chain grab by fast falling and re-grabbing.
- Mario: His down throw leads into multiple up tilts, followed by two up aerials, and finishing with a Super Jump Punch.
- Meta Knight: His down throw and dash attack combo into multiple up aerials (known as a ladder combo), ending with aerial Shuttle Loop for a KO. Alternatively, Mach Tornado can be used. An easier combo at low percents involves using his back throw, followed by a dash attack and then Shuttle Loop. Alternatively, Drill Rush can be used in place of Shuttle Loop.
- Ness: Down throw combos into multiple forward aerials.
- Pikachu: At high percents, an up or down throw followed up by Thunder will result in immense damage and knockback, due to the meteor effect which forces them into Pikachu's shockwave.
- R.O.B.: His down throw leads into a guaranteed up aerial for a deadly KO combo, known as the "Beep-Boop".
- Roy: His down throw combos into his jab, which can then lead into a re-grab and another down throw. His jab alone combos into itself at low percents. Also, his neutral aerial's first hit can chain into itself at low percents.
- Ryu: His tapped up tilt is notorious for chaining into itself, and leading into his Shoryuken at high percents for a KO.
- Sheik: Her forward and down throws can start long combos using many forward aerials. Her forward throw also leads into Bouncing Fish, being an easy and useful damage racker. Also, her forward tilt can chain into itself at low percents.
- Shulk: With the Jump Monado Art active, an up throw followed by an up aerial can lead into a KO depending on rage and the opponent's reaction. This can be enhanced by buffer-canceling the Art during the throw, causing Shulk to jump higher and giving less margin for error. This has been dubbed the "Monado Purge". The Speed Monado Art can also aid in numerous forward aerial attacks after a down throw, which, when off-stage, can optionally be followed by an Air Slash.
- Sonic: Spin Dash and Spin Charge combos into his aerials. His up throw also combos in to neutral, forward, back or up aerial and at certain percents with the help with Spring Jump, up throw to up air can lead to a KO. His neutral aerial is also an excellent combo starter due to its launching angle.
- Villager: His down smash can be followed up by his forward smash if the foe does not escape from the former fast enough, although they will only be effectively launched at high percents.
- Wii Fit Trainer: Her landing neutral air can combo into virtually any other attack, most notably two more neutral airs, which can easily rack up over 50% if Deep Breathing is active. Landing such that only the first hit of neutral air connects also combos into a slightly charged up smash, killing the majority of the cast by 50% with Deep Breathing.
- Zelda: At low percents, her down tilt can combo into up tilt and then into neutral aerial. Down throw is also a kill confirm into up aerial at high percents.
- Zero Suit Samus: Her down throw can lead into two up aerials, finishing with aerial Boost Kick, KOing very early if done properly. At medium percents, her neutral aerial combos into her Flip Jump, KOing if she lands the spiking hitbox.
Ultimate
- Bayonetta: A held Heel Slide combos into a Witch Twist, followed by two After Burner Kicks, and ending with a back aerial.
- Byleth: Neutral aerial can be chained into dash attack, forward tilt, down tilt, or itself.
- Captain Falcon: Down throw combos into two neutral aerials, then an up aerial, then into either a Knee Smash or down aerial if the opponent doesn't DI.
- Donkey Kong: Aerial Hand Slap can combo into every one of his tilts and jab at low percents.
- Falco: Up tilt and up throw combo into every one of his aerials besides down aerial at low to mid percents. Down throw also combos into dash attack or forward aerial at low percents.
- Fox: At low percents, dash attack can combo into up tilt, and at mid-high percents, falling neutral aerial can combo into all tilts and jab.
- Ganondorf: Down throw into either jab, forward tilt, dash attack, neutral aerial, or if they don't roll in time, down air to up/neutral aerial. Flame Choke can also lead to mixups and combos such as down tilt on shorter characters, jab or forward tilt on taller characters, and if they tech-roll towards Ganondorf, Forward or Up Smash could hit them.
- Jigglypuff: Down aerial can combo into Rest, if auto-cancelled.
- Joker: Up throw can combo into up aerial or up tilt. Down tilt can also combo into up tilt.
- Ken: Tapped jab hits 1 and 2 can combo into a Shoryuken variation.
- King K. Rool: Down throw combos into up tilt at lower percents. At higher percents, down throw can combo into a downward angled forward smash or other tilt attacks.
- Kirby: Forward throw can combo into forward aerial at low-mid percents, as well as a back aerial into reversed forward tilt at low percents.
- Link: Falling neutral aerial can combo into up and down tilts, down smash, grounded Spin Attack, and although rare, up smash, all at low percents.
- Little Mac: Down tilt can combo into itself, KO Punch, and his other tilts at low percents, or at high percents, will combo into dash attack, Jolt Haymaker, or Rising Uppercut.
- Luigi: Down throw combos into a variety of moves such as up tilt and his aerials at low percents. His most well-known followup from down throw is down aerial, neutral aerial, to another down aerial, then up aerial and is finished by a sweetspot Super Jump Punch.
- Mario: Up throw is his primary combo starter, with it comboing into up and down aerial at low to mid percents. Down throw is also effective as it combos into up tilt, up smash, and up aerial at low percents. He also has a wall of pain with back aerial. At low-mid percents, back aerial can combo into reversed forward tilt.
- Meta Knight: Starting with a tipper dash attack or downthrow, Meta Knight can from there choose options or directly convert into a string of up-airs, fast-falling after each one. While hard to pull off with 5 mid-air jumps and due to the fact this combo is non-airdodgable or jumpable this combo can be a guaranteed kill given the player is skilled enough. Generally ends with either Shuttle Loop or Mach Tornado.
- Mr. Game and Watch: Down throw can combo into Judge, and, depending on the opponent's weight, can be a one-hit KO.
- Ness: Can chain PK Fire into itself, and can combo into a throw or forward smash.
- Palutena: Neutral aerial can be chained into itself, and on large characters can be chained until high percents.
- Pichu: A down throw can combo into a chain of up aerials, then Thunder if Pichu and the opponent is offstage. This combo mainly works at low percents, as well as up throw to Thunder as a KO confirm at high percents, plus a up tilt or short hop up aerial to a fastfall back aerial chain together until offstage, which Pichu can then use its down aerial spike, as a zero-to-death combo.
- Pikachu: Down throw combos into a chain of up aerials at low percents, and at high percents, up throw combos into Thunder as a KO confirm.
- Samus and Dark Samus: From farther away, they can combo Missile and its super variants into a fully charged Charge Shot at low to high percents, while at higher percents, they must use Super Missile and jump before the Charge Shot, which is also a KO confirm around these percents.
- Sheik: Can juggle opponents easily with forward tilt at low percents.
- Terry: Jab can combo into a variety of moves such as Burning Knuckle, Rising Tackle, Power Dunk, and even Buster Wolf. Up tilt can combo into Crack Shoot at low percents, and Rising Tackle at higher percents. Down tilt can combo into Rising Tackle and Power Dunk at low percents as well.
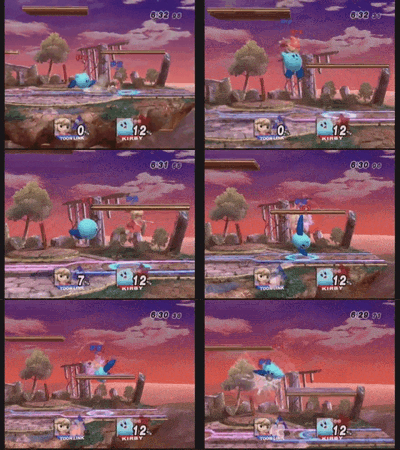
- Toon Link: Can perform a wall of pain with his back aerial.
- Wii Fit Trainer: Just like Smash 4, her landing neutral air can combo into virtually any other attack, most notably more neutral airs and even Header for massive damage. Landing such that only the first hit of neutral air connects also combos into a slightly charged up smash, killing the majority of the cast by 50% with Deep Breathing. This kill confirm was made even more potent in Update 8.0.0 when up smash was given reduced startup, giving the kill confirm more leeway and allowing up smash to be charged longer in some cases.
- Yoshi: Up tilt can combo into neutral and up aerial. At high percents, up tilt to up aerial can be a KO confirm.


