OverviewEdit
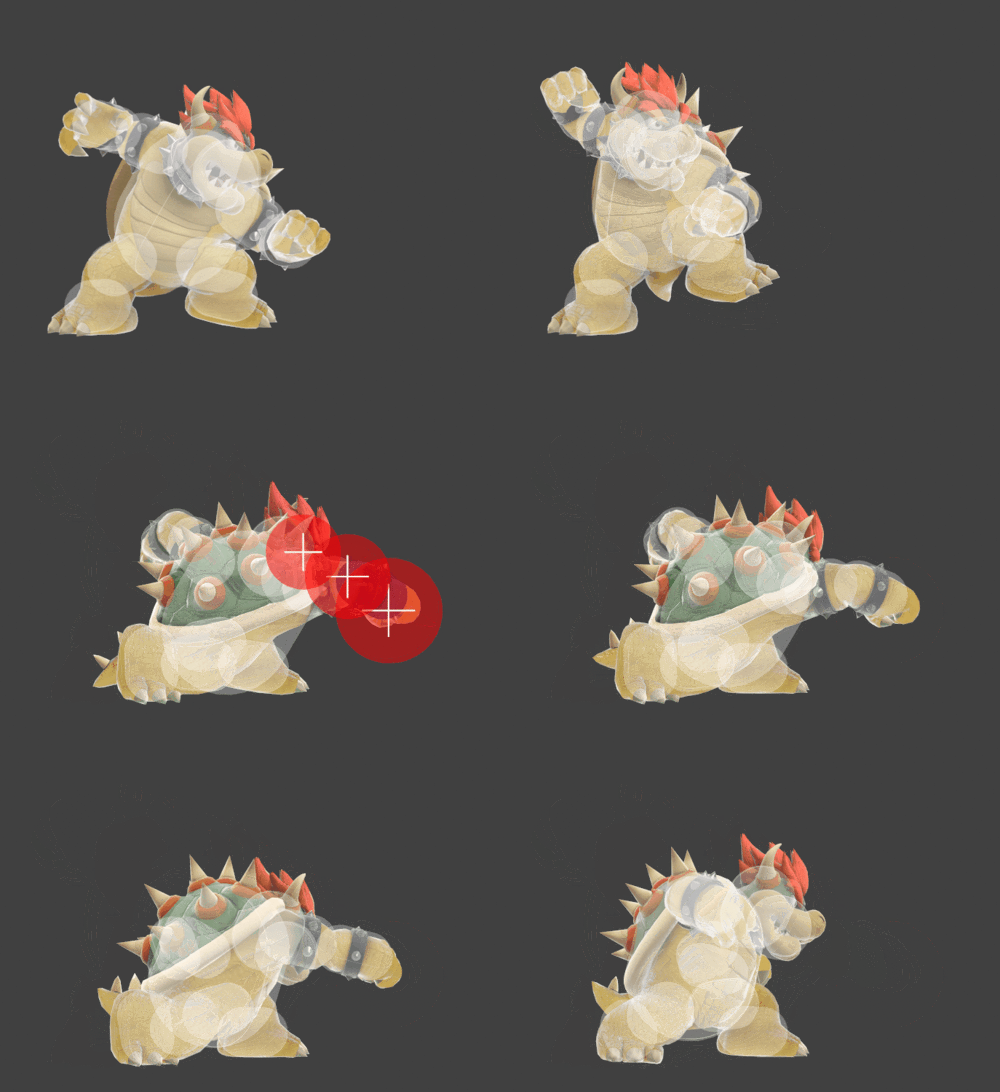
Bowser punches forward. With its low ending lag, it can be safe on shield if spaced, at -8 frame advantage. The angle at which it sends is good for tech chase setups and can kill near the ledge at higher percents. Just like his Jab 1, Bowser has intangibility on his arm while the hitboxes are out. Because it's +13 on hit with non-tumble hitstun at 0% (tested on Mario), it's possible to get a grab in afterwards and combo off. Dash attack is a fair alternative for around 29% damage and a juggle situation, though it is generally inferior to the reward Bowser can get from a grab. Jab 2 combos can be confirmed until tumble is inflicted.
Update HistoryEdit
- The second hit deals more damage (6% → 7%).
HitboxesEdit
TimingEdit
| Lower arm intangible | 9-11 |
|---|---|
| Hitboxes | 9-11 |
| Interruptible | 26 |
| Animation length | 32 |
| Hitboxes | ||||||||||||||||||||||||||||||||
|---|---|---|---|---|---|---|---|---|---|---|---|---|---|---|---|---|---|---|---|---|---|---|---|---|---|---|---|---|---|---|---|---|
| Lower arm |
| Lag time |
Hitbox |
Vulnerable |
Intangible |
Interruptible |
|
