From SmashWiki, the Super Smash Bros. wiki
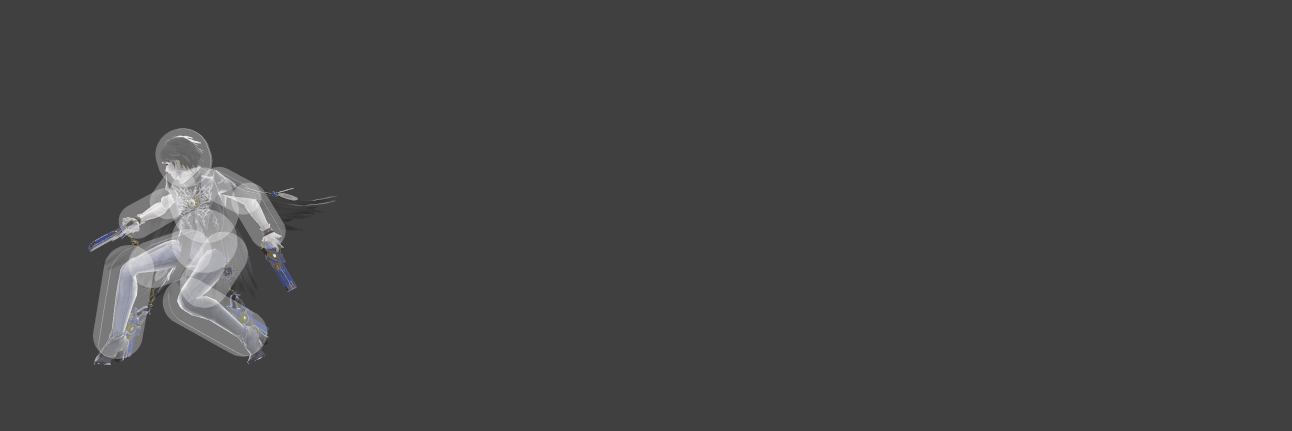
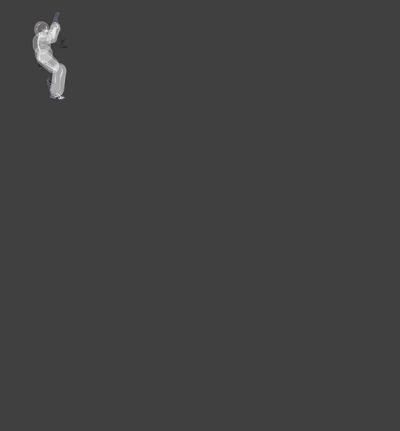
Hitbox visualization showing Bayonetta's side special, Heel Slide.

Hitbox visualization showing Bayonetta's bullet arts side special, Heel Slide.
Hitbox visualization showing Bayonetta's side special, Heel Slide.
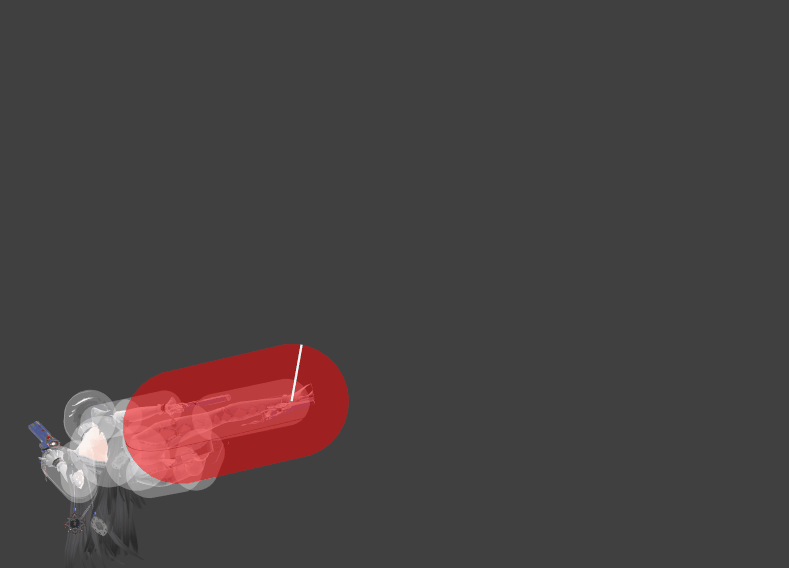
Hitbox visualization showing Bayonetta's side special, After Burner Kick.
Hitbox visualization showing Bayonetta's bullet arts side special, After Burner Kick.
Hitbox visualization showing Bayonetta's side special, After Burner Kick.
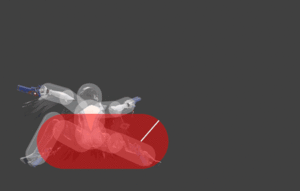
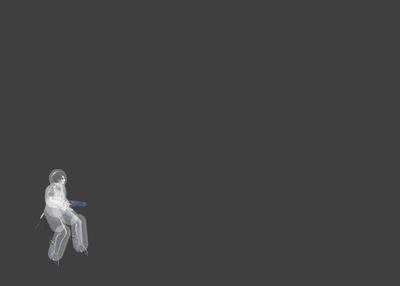
Hitbox visualization showing Bayonetta's landing side special, After Burner Kick.
Overview
A kick that functions differently when used on the ground or in midair. All versions are based on the individual techniques from the Bayonetta games, with minor differences.
Heel Slide: On the ground, she performs the Heel Slide. If the button is held, Bayonetta will then follow it up with an aú aberto. She will also fire the guns on her feet as she slides. It is her primary combo starter, due to the follow-up kick launching the opponent upward. If the first hit is shielded, however, she will not transition to the aú aberto. She will also be under considerable ending lag, leaving her open to punishing.
After Burner Kick: In the air, she alternately performs the After Burner Kick, a flying kick with a slightly diagonal trajectory which can be performed twice in a row as long as the first kick connects. If shielded, it can't transition into another After Burner Kick. It can be angled diagonally downward by two different methods: holding the control stick down before inputting the move (moving the stick in a quarter-circle), or by flicking the control stick down as soon as the move is inputted but before the move comes out. The second method takes strict timing: if not performed correctly, she will end up doing the standard After Burner Kick. If the button is held for the standard version, Bayonetta will fire the guns on her feet (one slightly upward, and one slightly downward).
Like Witch Twist, both versions of After Burner Kick are her primary aerial combo initiators and followups, with each angled version having different launch angles and allowing for creative combos.
Update History
 3.1.0
3.1.0
 After Burner Kick has less landing lag (one kick: 20 frames → 18, two kicks: 30 → 26).
 This does not affect Downwards After Burner Kick and most combos that start with or land on the ground with the move, but most combos that finish with the move and land normally have reduced landing lag.
8.0.0
- Heel Slide has less ending lag (FAF 72 → 67 (non-extended), 73 → 68 (extended)), improving its combo potential.
Hitboxes
Heel Slide
| ID |
Part |
Rehit rate |
Damage |
SD |
Angle |
Angle type |
BK |
KS |
FKV |
Set weight |
Radius |
Bone |
Offset |
H× |
SDI× |
T% |
Clang |
Rebound |
Effect |
Type |
G |
A |
Sound |
Direct |
Hit bits |
Hit part |
Blockable |
Reflectable |
Absorbable |
Flinchless |
No GFX |
Heedless
|
| Early hit
|
| 0 |
0 |
0 |
8.0% |
0 |
 |
Standard |
100 |
8 |
0 |
 |
4.0 |
footr |
0.0 to -8.0 |
0.0 |
0.0 |
0.9× |
1.3× |
0% |
 |
 |
 |
 |
 |
 |
 Kick Kick |
 |
All |
All |
 |
 |
 |
|
|
|
| Mid hit
|
| 0 |
0 |
0 |
8.0% |
0 |
 |
Standard |
95 |
8 |
0 |
|
4.0 |
footr |
0.0 to -8.0 |
0.0 |
0.0 |
0.9× |
1.3× |
0% |
|
|
|
|
|
|
Kick |
|
All |
All |
|
|
|
|
|
|
| Late hit
|
| 0 |
0 |
0 |
7.5% |
0 |
 |
Standard |
83 |
8 |
0 |
|
4.0 |
footr |
0.0 to -8.0 |
0.0 |
0.0 |
0.9× |
1.3× |
0% |
|
|
|
|
|
|
Kick |
|
All |
All |
|
|
|
|
|
|
| Latest hit
|
| 0 |
0 |
0 |
7.0% |
0 |
 |
Standard |
68 |
8 |
0 |
|
4.0 |
footr |
0.0 to -8.0 |
0.0 |
0.0 |
0.9× |
1.3× |
0% |
|
|
|
|
|
|
 Kick Kick |
|
All |
All |
|
|
|
|
|
|
| All hitboxes use weight-independent knockback.
|
Heel Slide Finisher
| ID |
Part |
Rehit rate |
Damage |
SD |
Angle |
Angle type |
BK |
KS |
FKV |
Set weight |
Radius |
Bone |
Offset |
H× |
SDI× |
T% |
Clang |
Rebound |
Effect |
Type |
G |
A |
Sound |
Direct |
Hit bits |
Hit part |
Blockable |
Reflectable |
Absorbable |
Flinchless |
No GFX |
Heedless
|
| Early
|
| 0 |
0 |
0 |
8.0% |
0 |
 |
Standard |
60 |
8 |
0 |
|
4.0 |
footr |
0.0 to -8.0 |
0.0 |
0.0 |
1.0× |
1.3× |
0% |
|
|
|
|
|
|
 Kick Kick |
|
All |
All |
|
|
|
|
|
|
| Final hit
|
| 0 |
0 |
0 |
5.0% |
0 |
 |
Standard |
64 |
65 |
0 |
|
5.3 |
kneer |
7.5 |
0.0 |
0.0 |
1.0× |
1.3× |
0% |
 |
 |
|
|
|
|
Kick |
|
All |
All |
|
|
|
|
|
|
| 1 |
0 |
0 |
5.0% |
0 |
|
Standard |
64 |
65 |
0 |
|
4.0 |
kneer |
1.0 |
0.0 |
0.0 |
1.0× |
1.3× |
0% |
|
|
|
|
|
|
Kick |
|
All |
All |
|
|
|
|
|
|
| 2 |
0 |
0 |
5.0% |
0 |
 |
Standard |
64 |
65 |
0 |
|
4.5 |
waist |
0.0 |
-0.8 |
-1.0 |
1.0× |
1.3× |
0% |
|
|
|
|
|
|
Kick |
|
All |
All |
|
|
|
|
|
|
After Burner Kick (Up)
| ID |
Part |
Rehit rate |
Damage |
SD |
Angle |
Angle type |
BK |
KS |
FKV |
Set weight |
Radius |
Bone |
Offset |
H× |
SDI× |
T% |
Clang |
Rebound |
Effect |
Type |
G |
A |
Sound |
Direct |
Hit bits |
Hit part |
Blockable |
Reflectable |
Absorbable |
Flinchless |
No GFX |
Heedless
|
| Early hit
|
| 0 |
0 |
0 |
6.0% |
0 |
 |
Standard |
60 |
50 |
0 |
|
5.0 |
kneer |
6.0 to 2.0 |
0.0 |
3.0 |
1.4× |
2.0× |
0% |
|
|
|
|
|
|
Kick |
|
All |
All |
|
|
|
|
|
|
| 1 |
0 |
0 |
6.0% |
0 |
 |
Standard |
60 |
50 |
0 |
|
5.0 |
kneer |
6.0 to 2.0 |
0.0 |
-3.0 |
1.4× |
2.0× |
0% |
|
|
|
|
|
|
Kick |
|
All |
All |
|
|
|
|
|
|
| Mid hit
|
| 0 |
0 |
0 |
7.0% |
0 |
 |
Standard |
60 |
35 |
0 |
|
5.0 |
kneer |
6.0 to 2.0 |
0.0 |
3.0 |
1.4× |
2.0× |
0% |
|
|
|
|
|
|
Kick |
|
All |
All |
|
|
|
|
|
|
| 1 |
0 |
0 |
7.0% |
0 |
 |
Standard |
60 |
35 |
0 |
|
5.0 |
kneer |
6.0 to 2.0 |
0.0 |
-3.0 |
1.4× |
2.0× |
0% |
|
|
|
|
|
|
Kick |
|
All |
All |
|
|
|
|
|
|
| Late hit
|
| 0 |
0 |
0 |
7.0% |
0 |
 |
Standard |
55 |
33 |
0 |
|
5.0 |
kneer |
6.0 to 2.0 |
0.0 |
3.0 |
1.4× |
2.0× |
0% |
|
|
|
|
|
|
Kick |
|
All |
All |
|
|
|
|
|
|
| 1 |
0 |
0 |
7.0% |
0 |
 |
Standard |
55 |
33 |
0 |
|
5.0 |
kneer |
6.0 to 2.0 |
0.0 |
-3.0 |
1.4× |
2.0× |
0% |
|
|
|
|
|
|
Kick |
|
All |
All |
|
|
|
|
|
|
| Latest hit
|
| 0 |
0 |
0 |
6.0% |
0 |
 |
Standard |
0 |
112 |
60 |
|
5.0 |
kneer |
6.0 to 2.0 |
0.0 |
3.0 |
1.4× |
2.0× |
0% |
|
|
|
|
|
|
Kick |
|
All |
All |
|
|
|
|
|
|
| 1 |
0 |
0 |
6.0% |
0 |
 |
Standard |
0 |
112 |
50 |
|
5.0 |
kneer |
6.0 to 2.0 |
0.0 |
-3.0 |
1.4× |
2.0× |
0% |
|
|
|
|
|
|
Kick |
|
All |
All |
|
|
|
|
|
|
| All hitboxes use weight-independent knockback.
|
After Burner Kick (Down)
| ID |
Part |
Rehit rate |
Damage |
SD |
Angle |
Angle type |
BK |
KS |
FKV |
Set weight |
Radius |
Bone |
Offset |
H× |
SDI× |
T% |
Clang |
Rebound |
Effect |
Type |
G |
A |
Sound |
Direct |
Hit bits |
Hit part |
Blockable |
Reflectable |
Absorbable |
Flinchless |
No GFX |
Heedless
|
| ABK
|
| 0 |
0 |
0 |
6.5% |
0 |
|
Standard |
85 |
38 |
0 |
|
4.5 |
top |
0.0 |
2.0 to 4.0 |
4.5 to 3.2 |
1.2× |
2.5× |
0% |
|
|
|
|
 |
|
Kick |
|
All |
All |
|
|
|
|
|
|
| 0 |
0 |
0 |
6.5% |
0 |
|
Standard |
90 |
38 |
0 |
|
4.5 |
top |
0.0 |
2.0 to 4.0 |
4.5 to 3.2 |
1.2× |
2.5× |
0% |
|
|
|
|
|
 |
Kick |
|
All |
All |
|
|
|
|
|
|
| Landing
|
| 0 |
0 |
0 |
5.0% |
0 |
 |
Standard |
80 |
50 |
0 |
|
4.0 |
top |
0.0 |
4.0 |
7.0 to -4.0 |
1.2× |
1.0× |
0% |
|
|
|
|
|
|
Kick |
|
All |
All |
|
|
|
|
|
|
| The ABK uses weight-independent knockback.
|
Timing
Heel Slide
| Hitboxes (early, mid, late, latest)
|
15-16, 17-18, 19-24, 25-39
|
| Interruptible
|
72
|
| Animation length
|
71
|
Heel Slide Finisher
| Early
|
1-11
|
| Final hit
|
20-24
|
| Interruptible
|
42
|
| Animation length
|
54
|
After Burner Kick (Up)
| Hitboxes (early, mid, late, latest)
|
7-9, 10-12, 13-14, 15-19
|
| Interruptible
|
32
|
| Animation length
|
51
|
After Burner Kick (Down)
| Hitboxes
|
8-24
|
| Interruptible
|
44
|
| Animation length
|
43
|
After Burner Kick (Landing)
| Hitboxes
|
1
|
| Interruptible
|
41
|
| Animation length
|
40?
|
|
 |

|
Bayonetta's moveset
|
|


