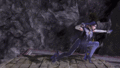
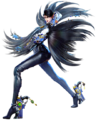
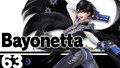
Bayonetta (SSBU)
| Bayonetta in Super Smash Bros. Ultimate | |
|---|---|
{{{content1}}}
{{{content2}}} 
| |
| Universe | Bayonetta |
| Other playable appearance | in SSB4 |
| Availability | Unlockable |
| Final Smash | Infernal Climax |
| “ | An Umbra Witch who equips guns on her arms and legs, Bayonetta has mastered the beautiful but brutal Bullet Arts fighting style. She can even slow down her opponents with Witch Time! | ” |
| —Super Smash Blog, Super Smash Bros. Ultimate Official Site | ||
Bayonetta (ベヨネッタ, Bayonetta) is a playable character in Super Smash Bros. Ultimate, making her return from the previous game. She was confirmed as a playable character on June 12th, 2018. Bayonetta is classified as fighter #63.
Once again, Bayonetta is voiced by Hellena Taylor in English and Atsuko Tanaka in Japanese, using recycled voice clips from Super Smash Bros. 4.
How to unlock
Complete one of the following:
- Play VS. matches, with Bayonetta being the 43rd character to be unlocked.
- Clear Classic Mode with Mario or anyone in his unlock tree, being the 2nd character unlocked after Sonic.
- Have Bayonetta join the player's party in World of Light.
With the exception of the third method, Bayonetta must then be defeated on the Umbra Clock Tower.
Attributes
Bayonetta is a tall lightweight. She has a below average walking and air speed, average traction and dashing speed with a decently fast initial dash, very fast air acceleration and fall speed, high gravity and very high jumps. This gives her a poor endurance, especially vertically, and an overall average mobility.
Bayonetta's biggest strength is her strong combo game, with her tilt attacks, forward aerial and special moves being capable of starting or extending combos. Her damage output is somewhat low, though her extensive combo game makes up for this, as her combos can quickly and easily rack up damage. She has a number of unique attributes - with her Bullet Arts, she can shoot from the guns on her hands and heels by keeping the button pressed. They are a solid pressure tool and as they are big disjointed hitboxes, they do not classified as projectiles. She can also wall cling and wall jump.
Bayonetta’s ground game is reliant on her tilt attacks to help perform intricate combos. Her jab is slow, but by repeatedly button-pressing it forms a combo into itself, which can KO at very high percents. Her dash attack is also slow as it has a lot of startup lag, but can also be a situational KO move. While both her up tilt and her down tilt have small hitboxes in front of her, they are very good combo tools - up tilt is useful for getting her opponents into the air and also combos from her Heel Slide into itself or Witch Twist, while her down tilt is a good out of shield option and also has combo potential. Her forward tilt is her least useful tilt as it lacks follow-up options, though it too has combo potential, as it forms a three hit combo is repeatedly pressed.
She has very useful special moves: Bullet Climax allows to fire projectiles and is useful for KOing higher percentage opponents at left and right blast lines. Heel Slide is a reliable combo starter and shoot from her gun if the button is pressed, while After Burner Kick is a good combo extender and horizontal recovery option. Witch Twist is a great tool for extending combos and dragging the opponent to the upper blast line. Though it has little vertical distance, it can be performed twice with Bayonetta’s double jump, and she can also jump cancel her second jump to grant extra vertical distance, giving her good horizontal recovery. Her Witch Time has a short duration and high ending lag, but it can slow down time for a brief period of time. If Bayonetta gets hit in a specific time when dodging or in the later frames of Witch Time, she will activate her Bat Within. This turns her into bats and moves her to a (usually) more favourable stage position, and she will take half of the attack's damage output and no knockback.
Bayonetta’s air game is similarly potent for combos, with her flexible recovery meaning she can use aerial combos far offstage. Her neutral air has great range (especially with the Bullet Arts, which covers a huge area around her) and can be a KO option at very high percents. Back aerial is one of her strongest KO options and is a good combo finisher. Her forward aerial can edgeguard and, like her forward tilt, combos into itself if button pressed repeatedly. Her up aerial is fast and a useful juggling tool, though it lacks knockback. Her down aerial is a stall-then-fall aerial which is a risky landing option due to its high lag, though it has a strong landing hit which can be a useful KO option.
Her grab and throw game has some utility, though to a lesser extent than the rest of her moveset. Her down throw and up throw are her best combo throws into her aerials, with down throw also acting as a KO option at very high percents. Her forward throw can KO at very high percents and her back throw - while not as useful - can be used for getting her opponent offstage.
Bayonetta's smash attacks allow her to summon Madama Butterfly's limbs. They each have good knockback and range, but they also have low priority and noticeable lag. Her forward smash is her earliest KO option and one of her earliest attacks that can reliably kill before 100%. Her up smash covers the area directly in front of Bayonetta and can KO from the top blast line. Her down smash covers the same range as her up smash and is useful for meteor smashing her opponents from the ledge, though it can also kill from the top blast line at higher percents.
Bayonetta has very noticeable flaws, however. Most notably, while she can quickly rack up damage with her combo game, she has very few reliable KO options until around 150%, with her only real kill options before this being her aforementioned punishable smash attacks, difficult to perform back air or risky down air. Even at percents higher than 150%, her KO options outside of back aerial are unreliable or only KO at very high percentages, for example her forward throw and dash attack. Furthermore, she has a poor frame data on the ground, with her jab coming out on frame 9; this combined with the fact that Bayonetta is tall, has a high gravity and a light weight, means she has a very poor disadvantage state, being highly susceptible to being comboed and KO’d earlier than most characters without many options to escape. Finally, while Bayonetta has a recovery that grants good distance and her special moves don't leave her helpless, her recovery is very slow and prone to being exploited because of the somewhat limited distance of Witch Twist.
Overall, Bayonetta is seen as a character with a high skill cap because of her extensive, difficult to use combo game. She is a flexible combo-heavy character good at quickly racking up damage and applying pressure to opponents, though her lack of reliable KO options means she can struggle in securing the stock while also being prone to combos and kill setups herself. Due to her significantly steeper learning curve - for what most players consider - a relatively low reward, her playerbase is weaker than it was in Smash 4, though players like CaptainZack have achieved some noteworthy results with her.
Changes from Super Smash Bros. 4
Bayonetta in Smash 4 was considered by many players as the best character in the game, even after having received nerfs in updates, due to many of her extreme advantages remaining intact, including most infamously her ability to KO opponents at virtually any percentage with successful ladder combos. These traits often caused players to label her as "broken", and many matches involving her became controversial. This includes the Smash Ultimate tournament Super Smash Bros. Invitational 2018, where the top professional Bayonetta player MkLeo pulled off a ladder KO in front of Masahiro Sakurai. Possibly as a result of these events, Bayonetta has been drastically nerfed in the transition to Ultimate, and is by far the most nerfed character in the game, in a similar vein to Meta Knight in Smash 4.
Bayonetta's already poor frame data, her major weakness in Smash 4, has been more so nerfed from the previous game. Her most reliable combo starters have been weakened, with her up tilt, down tilt and forward aerial all having more ending lag; the latter in particular has been affected the most significantly, no longer allowing for any followups other than the next hits of the move. Witch Twist also has more startup and grants less distance, reducing its effectiveness as a combo starter, out of shield option and followup from other moves. Adding to this, all of Bayonetta's special moves have received nerfs that make them more punishable: Bullet Climax's charge takes longer to cancel, Heel Slide and After Burner Kick's followup hits can no longer be used if they hit a shield, Witch Twist takes much longer to grab ledges, and Witch Time slows down opponents for much shorter except at very high percentages, alongside having noticeably more startup and ending lag, going from the uncontested best counter in Smash 4 to the hardest to land, as well as arguably one of the worst counters.
Bayonetta's KO ability has been weakened as well. Her neutral, up and down aerials deal lower knockback (most significantly the former two, which no longer KO under 200% onstage), her back aerial has a smaller hitbox (most notably the sweetspot) in addition to less range, and her smash attacks only get half as much of an increase in power when charged. This is exacerbated by Witch Time's decreased slowdown duration, hindering its ability to lead into safe KOs, and due to the severe nerfs to her up aerial, she can no longer KO with ladder combos unless they are initiated very close to the top blast line, and even then very high percents are often needed to reliably earn a KO. As a result, Bayonetta now has a significantly more defined main weakness, which is her lack of KO ability at higher percentages due to a lack of reliable options for KOing outside of back air. Although some of her moves have received more knockback in return, such as her neutral attack's finisher and dash attack, they are still below average in strength, and fail to compensate for her much more severely hindered finishers. Conversely, her own endurance has been worsened, as her already low weight has been decreased further, and her recovery is less effective due to Witch Twist's shorter distance, slower ledge grab, and smaller hitboxes.
On the other hand, Bayonetta has received a few noteworthy buffs. Her dodges have been sped up relative to the rest of the cast, no longer being among the slowest in the game, while still having the ability to trigger Bat Within during their startup. Downwards After Burner Kick is a reliable combo starter due to launching grounded opponents at a higher, more suitable angle for followups, and Witch Twist is harder to SDI out of. Lastly, Witch Time can slow down opponents from much farther distances upon a successful counterattack, and has a longer counter window. However, these buffs fail to compensate for the comparatively much larger impact her abundance of nerfs has brought up.
Overall, Bayonetta performs significantly worse than her Smash 4 iteration, and has a considerably higher learning curve, to the point she is widely viewed as a high-effort, low-reward character. Her biggest strengths from Smash 4 that were deemed "overpowered" by some, namely her forward air strings, Witch Twist, Witch Time, and ladder combos, have all been heavily nerfed or even removed altogether, her recovery is worse (albeit still outstanding compared to the rest of the cast), her KO potential is much lower, her combos are harder to pull off, and the rest of the cast has received comparately massive buffs in the face of Bayonetta's nerfs. Though she had a moderate amount of success during the beginning of Ultimate's metagame, her current representation has quickly dwindled as many Smash 4 Bayonetta players, including Salem, tamim, and Lima, have either dropped her, use her as a secondary, or have quit competitive play altogether. This has earned her very negative opinions from many players, who generally claim that she is a low-mid or low tier character. Despite this, CaptainZack still uses her at multiple tournaments and has been able to obtain decent results within the first six months of the game including 9th at GENESIS 6 and 13th at Smash 'N' Splash 5. This, along with buffs Bayonetta has received in update 3.1.0, makes her position in the eyes of many players debatable.
Aesthetics
 As with all veterans returning from SSB4, Bayonetta's model features a more subdued color scheme.
- Love is Blue and Scarborough Fair have louder sound effects to distinguish the two.
- Bayonetta's taunts are sped up.
- The excess hair tendrils hanging from both her Bayonetta and Bayonetta 2 outfits now have individual physics.
- When the victory screen shows her name, Bayonetta's glasses glint at the edge. While this was present in her victory poses in Smash 4, it only showed for a brief moment.
- While veterans' facial expressions were typically upgraded, Bayonetta seems to lack expressions she possessed in the previous installment, notably in her Screen KO, a wink in one of her victory animations, and during certain moves such as up tilt.
Attributes
 Like all characters, Bayonetta's jumpsquat animation now takes 3 frames to complete (down from 4).
- Bayonetta's initial dash speed (1.6 → 1.936) and run speed (1.6 → 1.76) are much faster.
- Bayonetta walks slightly faster (0.9 → 0.945).
- Bayonetta's air speed is faster (0.97 → 1.019).
- Bayonetta is slightly lighter (84 → 81). This worsens her survivability, but also makes her harder to combo at higher percents.
- Bayonetta's traction is much higher (0.055 → 0.11).
- Forward roll has less ending lag (FAF 38 → 32). Bat Within also activates faster and has a longer duration (frames 3-5 → 2-5).
 Forward roll grants less intangibility (frames 6-19 → 6-15).
- Back roll has less ending lag (FAF 38 → 37). Bat Within also has a longer duration (frames 3-5 → 3-6).
- Back roll has more startup and grants less intangibility (frames 6-19 → 7-16).
- Spot dodge has less ending lag (FAF 30 → 26).
- Spot dodge has more startup and grants less intangibility (frames 5-19 → 6-17). Bat Within also activates slower (frame 1 → 2).
- Air dodge grants more intangibility (frames 5-27 → 5-31).
- Air dodge has more ending lag (FAF 37 → 46).
- With the reintroduction of directional air dodges, Bayonetta can take advantage of her special moves not causing helplessness by getting additional distance with a directional air dodge after using them. This slightly improves her recovery.
- Bat Within cannot have its direction altered, instead always going straight down. If Bayonetta is hit offstage and attempts to recover with a directional air dodge, and Bat Within activates, this could cause her to self-destruct.
- Much like other characters, Bayonetta's wall jump covers significantly less distance, making her more frail while offstage.
- Bullet Arts range has been significantly reduced on all of her moves.
- Bullet Arts are no longer susceptible to Stun Jacket.
Ground attacks
- Neutral attack:
- The first three hits have altered angles (hit 1: 55°/55°/85° → 361°/180°; hit 2: 48°/68°/82°/70° → 361°; hit 3: 68°/85°/68°/90° → 361°) and knockback (hit 1: 45/30/42 base, 25 scaling → 36/32, 8; hit 2: 45/40/38/40, 25 → 42/38, 8; hit 3: 47/47/28/28, 20 → 40, 8) to keep opponents close to Bayonetta, akin to other neutral attacks, and inflict additional frames of hitstun (0 → 8 (hits 1-2), 10 (hit 3)). This allows them to connect better and jab lock.
- The second and third hits have less startup (frame 9 → 7 (hit 2), 11 → 7 (hit 3)).
- The rapid jab has a lower hitlag multiplier (1× → 0.6×) and SDI multiplier (0.6× → 0.4×), and inflicts 2 additional frames of hitstun per hit, making it harder to escape.
- The rapid jab's finisher deals more knockback (70 base/90 scaling → 67/117).
- All hits deal less damage (1.5% → 1.4% (hits 1-2), 2.7% → 2.2% (hit 3), 0.3% → 0.2% (rapid jab), 1% → 0.5% (finisher, hit 1), 6% → 5% (finisher, hit 2)).
- The first three hits have more ending lag (FAF 26 → 32 (hit 1), 31 → 32 (hit 2), 34 → 40 (hit 3)).
- Forward tilt:
- The first and second hit have altered angles (hit 1: 60°/45°/75°/80°/45° → 58°/45°/70°/70°/50°, hit 2: 43°/75° → 48°/62°) and knockback (hit 1: 62/50/45/60/56 base, 25/15/25/15/25 scaling → 55/45/50/35/60, 15; hit 2: 60/58 base → 42/46), allowing them to connect more reliably.
- The first and third hits deal less damage (3.5% → 3% (hit 1), 8.5% → 7% (hit 3)), though with the latter's knockback scaling mostly compensated (60 → 68).
- Up tilt:
- The first hit's grounded hitbox launches opponents into the second hit rather than away from Bayonetta (68° → 123°), and has altered knockback (80 base/40 scaling → 100/10) allowing it to connect more consistently.
- Up tilt has more startup (frame 7 → 9 (hit 1), 11 → 15 (hit 2)), with the second hit also having a shorter hitbox duration (frames 11-12 → frame 15).
- It has more ending lag (FAF 27 → 32), hindering its combo potential despite the second hit having decreased base knockback (60 → 55).
- The first hit deals less damage when clean (5% → 1.5%), being less than the late hit's damage.
- The first hit's aerial hitbox connects worse into the second hit due to its lower angle (110° → 123°), despite having altered knockback (80 base/40 scaling → 90/10).
- Down tilt:
- Down tilt has more ending lag (FAF 27 → 29), hindering its combo potential.
- It deals less damage (6%/7% → 5%/6%). While its knockback scaling has not been fully compensated (50 → 55), its combo potential remains worse due to its increased ending lag.
- Dash attack:
- Dash attack has less ending lag (FAF 47 → 43).
- It deals more knockback (85 base/55 scaling → 78/71 (clean), 80/65 (late)).
- It has a larger hitbox (4.2u → 5u (clean), 4.5u (late)).
- Smash attacks:
- They have a lower maximum damage multiplier (1.4× → 1.2×).
- They have 8 additional frames of ending lag if they hit a shield.
- Forward smash:
- Forward smash has less startup (frame 19 → 17).
- However, its total duration has not been fully compensated (FAF 68 → 67), giving it one frame more ending lag.
- Forward smash can now be angled. Despite this, all angles still have a blindspot directly in front of her.
- Down smash:
- Down smash's second hit has a longer hitbox duration (frames 25-27 → 25-28).
- The second hit's meteor smash hitbox has less knockback scaling (90 → 80).
Aerial attacks
- Forward, back and up aerial have less landing lag (14 frames → 12 (forward), 12 → 10 (back), 12 → 8 (up)).
- All aerials except down aerial have more landing lag if their Bullet Arts extensions are used (10 frames → 18 (neutral), 12 → 18 (forward), 12 → 16 (back, up)). This worsens Bayonetta's pressure ability with her neutral and up aerials.
- Neutral aerial:
- Neutral aerial deals drastically less knockback (40 base/100 scaling → 65/60 (clean), 40/90 → 65/50 (late)), no longer KOing under 300% from the center of most stages. While this allows it to combo for longer, it most significantly hinders Bayonetta's KO ability at high percents.
- The Bullet Arts extension deals less damage (4.5% → 3%) and knockback (50 base/100 scaling → 60/85).
- Forward aerial:
- All hits deal more damage (3% → 4% (hit 1), 2.2% → 3.3% (hit 2), 6% → 7% (hit 3)).
- All hits have more ending lag (FAF 27 → 38 (hit 1), 32 → 40 (hit 2), 40 → 47 (hit 3)). This prevents the first hit from comboing into After Burner Kick or Witch Twist, or being used repeatedly to drag opponents offstage, significantly weakening its utility.
- The first hit has noticeably smaller hitboxes (4u/8u → 2.8u/5.8u) and less vertical range (Y offset: 8u/16u/12u → 9.2u/14.8u/12u).
- The first hit auto-cancels later (frame 28 → 30).
- The third hit's angle has been altered (44° → 54°). This worsens its KO ability near the horizontal blast lines, but combined with its knockback not being compensated for its increased damage, this allows it to KO more reliably at the end of a ladder combo.
- Back aerial:
- Back aerial has more ending lag (FAF 30 → 35).
- Its hitboxes are smaller (6.2u/4.8u → 4.6u/4.2u).
- Up aerial:
- Up aerial deals less damage (9% → 7.5%) and its knockback scaling has been reduced (90 → 80). This significantly hinders its KO ability.
- It launches at a more horizontal angle (75° → 55°). While this allows it to combo into back aerial and After Burner Kick, it hinders its combo potential into most other moves at higher percents, and renders it vulnerable to LSI. Combined with the aforementioned nerfs, up aerial can no longer KO vertically from a ladder combo until much higher percents, unless it is initiated very close to the top blast line.
- The Bullet Arts extension deals less damage (4% → 3%).
- The hitbox starts slightly higher/later into the arc, and the trail may appear to go through grounded opponents but will whiff.
- Down aerial:
- Down aerial deals set knockback to grounded opponents (30/80 base/120/50 scaling → 50/90 set/100 scaling) to lead more effectively into the landing hit, allowing it to deal more damage and KO them more effectively.
- It deals less knockback to aerial opponents (80 base/50 scaling → 50/65 (clean), 30/50 (late)), no longer being able to KO off a meteor smash at very low percents, and the landing hit has less knockback scaling (135 → 127), KOing later onstage.
- It has more ending lag (FAF 48 → 53), making it harder to use offstage without self-destructing.
- It has more landing lag (28 frames → 30).
- It adds ten frames of landing lag to combinations that give Bayonetta 28 (32 in Smash 4) frames of landing lag (32 → 38).
- As aerial footstools are now techable, down aerial can no longer be confirmed into from a footstool, further worsening its KO ability.
- It no longer deals weight-independent knockback, making it weaker against heavier opponents, but stronger against lighter ones.
Throws and other attacks
- Grabs:
- All grabs have increased range (Z2 offset: 8.7u → 9.2u (standing), 10.6u → 10.9u (dash), -14.7u → -15.5u (pivot)).
- All grabs have more ending lag (FAF 31 → 38 (standing), 38 → 46 (dash), 36 → 41 (pivot)).
- Dash and pivot grab have more startup (frame 9 → 10 (dash), 10 → 11 (pivot)).
- Bayonetta's hand grabs characters using a form of Umbran magic, as seen via a slightly updated animation where she swings her hand around, which is sparkling with a noticeable Umbran purple.
- Pummel:
- Pummel deals more hitlag per hit (4 frames → 10), but has significantly less startup (frame 7, 14 → 1, 4) and ending lag (FAF 22 → 7), shortening its duration.
- It deals much less damage (1.6% (hits 1-2) → 0.6% (hit 1), 0.7% (hit 2); 3.2% → 1.3% total).
- Edge attack:
- Edge attack deals more damage (7% → 9%).
Special moves
- Bullet Climax:
- Bullet Climax's bullets have more range.
- Full charge deals more knockback (20 base/150 scaling → 15/190).
- It has more ending lag (FAF 71 → 76).
- It needs to be fully charged before it can be charge-canceled.
- It can only be held for up to one second upon reaching full charge.
- The bullets have received negative shield damage (0 → -0.3 (uncharged), -0.6 (charged)).
- Heel Slide and After Burner Kick have lower hitlag multipliers (Heel Slide: 1.2× → 0.9× (hit 1), 1× (hit 2); After Burner Kick: 2× → 1.4× (up), 1.5× → 1.2× (down)), although this is offset by the universal increase to hitlag, except in battles with more than two players.
- Heel Slide:
- The second hit comes out faster (frame 54 → 51).
- It has less ending lag (FAF 78 → 73).
- All hits deal less damage (9%/8.5%/8% → 8%/7.5%/7% (hit 1, clean/mid/late), 6% → 5% (hit 2)).
- It has an increased SDI multiplier (1× → 1.3×).
- The second hit cannot be performed if the first hit is shielded. Combined with the changes to jostle mechanics preventing the move from crossing up shields, this makes it much easier to punish.
- The second hit has a shorter hitbox duration (frames 54-59 → 51-55).
- After Burner Kick:
- After Burner Kick travels on a more horizontal angle and gains less vertical height, worsening her recovery.
- It bounces farther away when hitting a wall, sometimes not snapping the ledge afterwards, requiring the use of a directional air dodge to grab the ledge.
- Upon hitting an opponent with After Burner Kick, the second one can only be used within a one-second window afterwards, hindering its mixup potential.
- Additionally, it cannot be used altogether if the first one is shielded.
- Downwards After Burner Kick can be inputted by pressing down during the first five frames of After Burner Kick.
- Downwards After Burner Kick launches grounded opponents at a higher angle (60° → 80°), much like in Smash 4 before update 1.1.6, allowing it to be a reliable combo starter once again.
- Downwards After Burner Kick can no longer be auto-canceled.
- Downwards After Burner Kick has a higher SDI multiplier (2× → 2.5×).
- Witch Twist:
- Witch Twist's looping hits have a lower hitlag multiplier (1.3× → 0.8×), and the first hit can no longer be SDIed, making it harder to escape.
- One of the first hit's hitboxes is slightly larger if used in the air (5u → 5.3u).
- It has increased startup (frame 4 → 6) and ending lag (FAF 29 → 32), weakening it as an out of shield option and followup.
- It gains less vertical height, making it even harder to drag opponents to the top blast line, as well as worsening her recovery.
- It takes much longer to sweetspot edges from the front (frame 11 → 27), and can no longer sweetspot them from behind.
- The first hit's body hitbox is much smaller (4u (grounded)/5u (aerial) → 2.5u/3u), no longer extending behind Bayonetta, preventing it from hitting opponents behind her into the multi-hits. The subsequent hits' hitboxes are also smaller (7u → 5u/4.5u/2u (looping hits), 8.5u → 6.5u (last hit)) and placed higher, meaning they cannot hit some crouching or shorter opponents such as Pichu.
- However, since 3.1.0, it received a new smaller hitbox on Bayonetta's body to help it connect into the rest of the multi-hits more consistently.
- Witch Time:
- Witch Time's slowdown hitbox is twice as large (30u → 60u), allowing it to affect opponents from much farther distances.[2]
- It grants more intangibility (frames 5-16 → 8-23).
- It has increased startup (frame 5 → 8).
- However, its counter window is longer (frames 5-21 → 8-27), no longer being the shortest, with Bat Within's window taking place later (frames 18-29 → 24-35).
- It has significantly more ending lag (FAF 50 → 67), making it easier to punish if missed.
- It also takes significantly longer for Bayonetta to act out of the move after its activation (frame 15 → 40 (normal), 50 (Bat Within)).
- Its base duration has been significantly lowered (180 frames → 90), no longer being effective at any percent range, even against uncharged smash attacks.[3]
- The minimum duration has been lowered (30 → 22).
- Bat Within's minimum duration has been lowered to 12 frames.
- Its duration scaling is higher (10 → 30), meaning its duration increases by 30 frames for every 100% the opponent takes, rather than by 10 frames. This allows it to reach its maximum duration faster (600% → 500% fresh), but fails to compensate for the move's lower base duration at higher percents, as a 300% Witch Time is equivalent to a 0% Witch Time in Smash 4.
- It has less penalty frames per use (75 → 60).
- Its regeneration per frame is slower (0.06 → 0.04).
- The screen turns dark whenever someone is affected by Witch Time.
- The Bat Within portion always takes away 30 frames from the duration, as opposed to reducing the length to 2/3 in Smash 4. This makes the Bat Within portion longer if Witch Time would be above 30 frames, but less if at or below 30.
- Infernal Climax:
- When Witch Time is activated, opponents move a little faster. This makes it easier to dodge her attacks but effectively reduces intangibility for every consecutive dodges during the Final Smash.
- Infernal Climax deals less damage before releasing opponents (30% → 28% (Gomorrah), 15% → 13% (full Climax Gauge)).
- When the Final Smash ends, opponents take an additional 10% damage.
Recovery frames
- The maximum landing lag Bayonetta can receive has been increased (43 → 50).
- Witch Twist has less landing lag (19 → 18).
- After Burner Kick has less landing lag (20 → 18).
- Witch Twist to After Burner Kick has less landing lag (25 → 22).
- Downwards After Burner Kick has much more landing lag if it connects (20 → 30).
- After Burner Kick to Downwards After Burner kick, and DABK to DABK has much more landing lag (30 → 40). ABK to DABK still has 30 frames of landing lag.
- Whiffed Downwards After Burner Kick can no longer autocancel, and it has 20 frames of landing lag.
- Bayonetta gains recovery frames for air dodging after Witch Twist (18 → 22) and combinations that would give her 28 frames of landing lag (28 → 38).
- Several combinations of moves give her less landing lag (30 → 28, 43 → 38).
- Bayonetta's Down Air Recovery Frame cancel has been removed.
- Downwards After Burner Kick's landing hitbox has 50 recovery frames after any combo minus Witch Twist to DABK and DABK alone.
Update history
Bayonetta received a mix of nerfs and buffs in game updates, but has been buffed overall. Before 3.1.0, she received few and relatively minor changes to her moveset, weakening Witch Time's duration scaling, and making Bullet Climax less effective on shield much like most other projectiles, but allowing Bayonetta to grab ledges easier after neutral aerial, while leaving her Bullet Arts unaffected by Stun Jacket. However, update 3.1.0 gave Bayonetta a much larger amount of buffs, particularly Witch Time having more counter frames and intangibility frames alongside swifter regeneration, which makes it more reliable even through multiple uses. This greatly increased Witch Time's usability as a counter, with its incarnation in the base game having arguably the worst frame data for a counter and no guarantee for a reward when landing it. Witch Twist and After Burner Kick both have less landing lag, making Bayonetta less punishable after performing combos and opening new opportunities for applying pressure. Her dash attack's clean hit deals more knockback, making it a semi-reliable kill option on lighter characters. Neutral attack gained a slightly longer-lasting hitbox on the first hit, which down smash also received for its meteor smash, and also greater knockback for its final blow after the rapid jab. 3.1.0's buffs allow Bayonetta to KO with a couple more moves at higher percents, along with giving her a more reliable counter. The update also improved her up tilt by allowing it to connect reliably even at very high percents, all of which helps turn Bayonetta into a more fluid and functional character compared to the base game. Her most significant changes are Witch Time being able to trigger more reliably and Bat Within retaining the same duration but occurring later in the move, which helps alleviate the move's high ending lag.
- Witch Time's duration scaling is lower (40 → 30).
- Witch Time's regeneration per frame is slower (0.04 → 0.03).
- A glitch with Witch Time has been created, with its slowdown duration now being capable of underflowing and becoming extremely long under certain circumstances.
 The Witch Time glitch from 1.1.0 has been fixed.
- Bayonetta can grab ledges faster after using neutral aerial (59 frames → 57).
- Bullet Climax deals less shield damage (0 → -0.3 (uncharged), -0.6 (charged)).
- Bullet Arts are no longer susceptible to Stun Jacket.
- Neutral attack's first hit has a longer hitbox duration (frames 9-11 → 9-12).
- Neutral infinite's finisher deals more knockback at high percents (70 base/100 scaling → 67/117).
- Dash attack's clean hit deals more knockback at high percents (80 base/65 scaling → 78/71).
- Up tilt's hits connect more reliably due to the angle change of the grounded hitbox (113° → 123°) and decreased knockback scaling (20 → 10).
- Down smash's second hit has a longer hitbox duration (frames 25-27 → 25-28).
- After Burner Kick has less landing lag (one kick: 20 frames → 18, two kicks: 30 → 26). [4]
- This does not affect Downwards After Burner Kick and most combos that start with or land on the ground with the move, but most combos that finish with the move and land normally have reduced landing lag.
- Witch Twist has less landing lag when used twice (32 frames → 28).
- Witch Twist has an additional hitbox, making its hits connect more reliably.
- Witch Time has a longer counter window (frames 8-21 → 8-27), no longer being the shortest in the game, and grants more intangibility (frames 8-17 → 8-23). The Bat Within window takes place later (frames 18-29 → 24-35) without changing the move's total duration, reducing its ending lag.
- Witch Time regenerates faster (0.03 → 0.04).
- Bayonetta's up and side taunts no longer cause her voice clips to delay or cut off after finishing her taunting animation.
- Down air descends immediately when using the move after being launched.
Moveset
- Bayonetta can wall jump and wall cling.
Note: All numbers are listed as base damage, without the 1v1 multiplier.
| Name | Damage | Description | ||
|---|---|---|---|---|
| Neutral attack | 1.4% | Bayonetta performs 3 pistol whips (a lunge with her left gun, a back-handed strike with her right, and an uppercut with the left), then performs a barrage of pistol whips, concluded by a thrusting pistol whip. Bayonetta will only enter the rapid strike if the button is mashed. The Bullet Arts version of all hits of the combo has her shoot her guns forward, with the exception of the third hit, which shoots forward and upward in a diagonal direction behind herself. Based on Bayonetta's Punch + Punch + Punch • Punch (PPP • P) combo from Bayonetta 2. | ||
| 1.4% | ||||
| 2.2% | ||||
| 0.2% (loop), 0.5% (penultimate hit), 5% (last) | ||||
| Forward tilt | Consecutive Kicks | 3% (hits 1 and 2), 7% (hit 3) | Bayonetta performs 3 consecutive kicks (a front kick, a spin kick, and an upward roundhouse kick), the last hit knocking the opponent diagonally upward. Functions like a neutral attack, requiring further inputs to continue the combo. The Bullet Arts version of each strike has her fire her guns at different angles: the first is straight forward, the second is slightly upward, and the third is diagonally upward. If up close, the subsequent hits may fail to connect. Based on Bayonetta's Kick + Kick + Kick combo while wielding Love is Blue. | |
| Up tilt | 1.5% (hit 1, clean), 2% (hit 1, late), 6% (hit 2) | An upwards pistol whip. Hits twice. At low percents, can combo into up air. The first hit has a hitbox slightly above and in front Bayonetta's head that does slightly more damage than on the ground, but it can only hit midair opponents. The Bullet Arts version of this move fires her gun above her. Useful as an anti air or combo tool, although the second hit sometimes won't connect due to positioning and very high percents. It is based on the delayed punch launcher. | ||
| Down tilt | Kick Attack | 6% (foot), 5% (leg) | A sweep kick. The Bullet Arts version of this move fires two guns in front of herself and one behind herself. Based on the final hit of Bayonetta's PPK combo while wielding Love is Blue. | |
| Dash attack | Stiletto | 10% (early), 8% (late) | The Stiletto: a forward rushing pistol whip. It has noticeable start-up, but travels far and can kill at higher percents. The Bullet Arts version of this move fires her gun in front of herself. | |
| Forward smash | 14% (wrist), 16% (fist) | Uses Wicked Weaves to summon Madama Butterfly's arm, which is used to throw a punch. It has great horizontal range and Madama Butterfly's hitbox cannot be reversed. However, it has high ending lag and low priority, making it fairly easy to cancel out. It can be angled slightly upward and downward. The Bullet Arts version of this move fires her gun depending on how the smash was angled: forward if unangled, slightly upward if angled up, and slightly downward if angled down. Based on the final hit of Bayonetta's PPP • P combo in Bayonetta 2. | ||
| Up smash | 17% (clean), 16% (mid), 15% (late) | Uses Wicked Weaves to summon Madama Butterfly's arm, which is used to throw an uppercut. It hits directly in front of Bayonetta, and thus leaves her vulnerable from behind and directly above. It has rather noticeable start-up, high ending lag and low priority, but it is her strongest attack when clean, as it is capable of KOing middleweights around 100%. Madama Butterfly's hitbox cannot be reversed. The Bullet Arts version of this move fires one gun forward and one upward. It is based on the delayed punch Wicked Weave launcher. | ||
| Down smash | Heel Stomp | 5% (Bayonetta), 16% (Madama Butterfly, clean), 15% (Madama Butterfly, late) | The Heel Stomp; Bayonetta stamps her foot on the ground while simultaneously using Wicked Weaves to summon Madama Butterfly's foot, which stomps shortly after her. There is a hitbox on Bayonetta's leg that leads into the main hitbox. It can meteor smash opponents that are either on the edge or in midair, making it a potent edge-guarding option. Like up smash, it only hits in front of her, has high ending lag and low priority, but has considerable vertical range. Madama Butterfly's hitbox cannot be reversed. Oddly, the Bullet Arts version of this move fires the guns on her feet downward into the ground, making it useless except for opponents directly touching her front or back. | |
| Neutral aerial | 8% (clean), 6% (late), 3% (Bullet Arts extension) | A spinning roundhouse kick. It hits around Bayonetta and continuing the input for the Bullet Arts version has her continue to spin for a few seconds. It has very good coverage, as it can hit opponents adjacent and/or below her. The Bullet Arts version of this move fires her guns to her sides both horizontally and diagonally below her, and is useful for edgeguarding as it can last quite long. It is based on the aerial Bullet Climax in Bayonetta. | ||
| Forward aerial | 4% (hit 1), 3.3% (hit 2), 7% (hit 3) | Bayonetta performs 2 pistol whips (a straight with her left, and a backhanded strike with her right), and a downward-arc spin kick. Functions like a neutral attack, requiring further inputs to continue the combo. The Bullet Arts version of this move fires in front of her for the first two hits, while the third hit fires three guns downward (two of them being slightly diagonal) and one upward. Is best used as a combo finisher, or edgeguard tool due to the multiple hits. Based on Bayonetta's aerial PPK combo while wielding Love is Blue. | ||
| Back aerial | 10% (leg), 13% (foot) | A high-angle back kick. The Bullet Arts version of this move fires one gun behind her at an upward angle, and is useful for killing. Based on the second hit of Bayonetta's aerial PK combo while wielding Love is Blue. | ||
| Up aerial | 7.5% (kick), 3% (Bullet Arts extension) | A bicycle kick. Very fast. Can combo from Witch Twist at low percents. The Bullet Arts version of this move has her fire her guns, whilst she performs a modified version of the aú aberto, one of many cartwheeling kicks in capoeira. While this version deals less damage, it provides excellent coverage that covers wide areas around her, making it useful for edge-guarding and dealing additional damage. It is based on the kick launcher in Bayonetta. | ||
| Down aerial | 7% (body), 8% (leg), 9% (heel), 5% (landing) | A split-legged axe kick. A stall-then-fall with low duration and ending lag, which allows her to safely recover afterward if used off-stage. It is a meteor smash when hitting with her heel, while its landing hit has extremely high knockback, both of which make it a viable, but punishable KOing option overall. Can be used after her special move combos to catch opponents who attempt to punish her increased landing lag. The Bullet Arts version fires one gun from her heel forward, but only upon landing. It is based on Bayonetta's standard aerial kick in Bayonetta. | ||
| Grab | — | Reaches out, with her hand emanating purple Umbran Magic. | ||
| Pummel | Slap Punish Attack | 0.6% (hit 1), 0.7% (hit 2) | The Slap Punish Attack. It has average speed, but is unique in that it consists of two hits per input. As a result, it is possible for the opponent to break free in the middle of the pummel, and thus miss the second hit entirely. | |
| Forward throw | Tetsuzanko | 7% (hit), 3% (throw) | The Tetsuzanko, a technique based on the tie shan kao used in Bajiquan. It is her strongest throw in knockback and damage. She occasionally says "十年早いんだよ! (Ten years too early!)", even in the English version of the game. The quote is a reference to Akira Yuki's famous quote in the Virtua Fighter series, and is said occasionally by Bayonetta herself in Bayonetta. | |
| Back throw | 3% (kick), 6% (throw) | A jumping roundhouse kick. Particularly weak for a back throw. Possibly based on the final hit of her PPPK combo while wielding Love is Blue. | ||
| Up throw | 3% (kick), 4.5% (throw) | An outside crescent kick. A good combo starter that can lead into Witch Twist or up aerial until medium to high percents. The pose Bayonetta assumes afterward is based on the final hit of her PPK combo while wielding Scarborough Fair. | ||
| Down throw | 3% (stomp), 5% (throw) | Stomps the opponent into the ground. Can be used as a combo starter, although unreliable. Also has unusually high knockback growth, enabling it to kill off the top when not in position for forward throw to do so. Based on the final hit of Bayonetta's PPPKKK combo while wielding Love is Blue. | ||
| Floor attack (front) | 7% | A low-angle kick performed from a windmill, an acrobatic technique used in breakdancing. | ||
| Floor attack (back) | 7% | A low-angle kick performed from a windmill. | ||
| Floor attack (trip) | 5% | A low-angle kick performed from a windmill. | ||
| Edge attack | 9% | Performs a hook kick while climbing up. | ||
| Neutral special | Bullet Climax | 1.35% (uncharged), 2.7% (charged) | Fires bullets at a slight angle. When held, Bayonetta instead fires Charge Bullets, which are stronger but only active during the first four shots. The move can be cancelled by shielding or rolling, but only when fully charged. Due to its angle, it is useful for edge-guarding and hindering aerial approaches. Bayonetta alternates between two animations while charging and firing for each time she uses Bullet Climax: either she stands in a semi-crouching position and fires the guns in her hands, or she does a handstand and fires the guns on her feet. Both function identically, although Kirby's Copy Ability fires from noticeably different heights. This move takes inspiration from the Bullet Climax and Charge Bullet techniques from Bayonetta and Bayonetta 2, respectively. | |
| Side special | Heel Slide/After Burner Kick | 8% (Heel Slide, hit 1, clean), 7.5% (Heel Slide, hit 1, mid), 7% (Heel Slide, hit 1, late), 5% (Heel Slide, hit 2), 6% (After Burner Kick, standard, early/late), 7% (After Burner Kick, standard, clean), 6.5% (After Burner Kick, downward, kick), 5% (After Burner Kick, downward, landing) | A kick that functions differently when used on the ground or in midair. Heel Slide: On the ground, she performs the Heel Slide. If the button is held, Bayonetta will then follow it up with an aú aberto. She will also fire the guns on her feet as she slides. It is her primary combo starter, due to the follow-up kick launching the opponent upward. If the first hit is shielded, however, she will not transition to the aú aberto. She will also be under considerable endlag, leaving her open to punishing. | |
| Up special | Witch Twist | 3% (ground, hits 1 and 7), 0.2% (hits 2 - 5), 2% (air, hit 1) | An ascending, corkscrew pistol-whip. It hits multiple times but covers minimal vertical distance and extremely minimal horizontal distance, similarly to Rising Uppercut. Despite this, Witch Twist is still a very useful recovery option, as using it after a jump allows Bayonetta to use her double jump, and then use another Witch Twist. Holding the button has Bayonetta fire her guns from her hands and feet; hitting anyone directly above or below, to her sides, and slightly diagonally under her. Based on the technique of the same name from Bayonetta, as well as a variation from Bayonetta 2 known as Witch Strike; the ability to hold guns is taken from the former, but lacks the dodging spinning kick at the start. Otherwise performs identically to the latter, including the ability to use a second one after a double jump. With precise timing (a 3 frame window to be exact), a Double Jump can be cancelled into Witch Twist, thereby saving her jump in a similar way to Smash 4. This drastically improves her combo game and enables some particularly powerful ladder combos, as well as some much needed recovery mix-ups. This can be executed with both the first and second Witch Twists (as long as the double jump is unused) only to use the double jump right after, essentially giving her a maximum of three midair jumps, though only one would reach the top of its arch. | |
| Down special | Witch Time | — | Uses her magic to slow down time around an opponent who attacks her. Its duration is dependent on several factors: the opponent's damage (more damage = longer duration), whether the attack was direct or indirect (indirect attacks such as projectiles result in a shorter duration), and frequency (using Witch Time too often will decrease the duration). However, if Witch Time is activated too late, then Bat Within is activated instead. Bat Within teleports Bayonetta in any direction, but unlike in the Bayonetta series, it halves the damage received, rather than negating it. Based on the same ability from the Bayonetta games, albeit only slowing down the attacking opponent as opposed to all opponents. | |
| Final Smash | Infernal Climax | 28% (Gomorrah), 13% (bonus spell), 10% (end) | Activates Witch Time to affect the whole stage. While this effect is active, Bayonetta has a limited time to deal damage to her opponents in order to fill up the Climax Gauge. The Climax Gauge will also fill itself up slowly. Once it is filled, she has to deal knockback to any opponent before a cutscene occurs. The cutscene consists of her using her hair as a conduit to summon Gomorrah, who then damages any opponents suffering hitstun from Bayonetta's attacks by chomping them four times before they are launched with set knockback. The attack button can be mashed during the attack to fill a second Climax Gauge that deals an additional 15% after the cutscene. Once the cutscene ends, anyone with 100% or more will be instantly KO'd. Anyone below 100% will take an additional 10% as the Final Smash ends. | |
Bullet Arts
Bat Within
Recovery Frames
After using Witch Twist, Afterburner Kick, or Downwards Afterburner Kick, upon landing Bayonetta will be unable to move for a set amount of frames depending on the combination of moves used. Recovery Frames are in tiers, with each tier having more recovery frames than the previous. The tiers are: 18 frames, 20 frames, 22 frames, 26 frames, 28 frames, 30 frames, 38 frames, 40 frames, and 50 frames. In addition, air dodges and aerial end lag may add to her recovery frames.
On-screen appearance
- Emerges from her Bat Within form while surrounded by the Umbra Witches' symbol, then proceeds to wield her guns.
Taunts
- Up taunt: Twirls around, moves both arms around her in a graceful manner, then strikes a pose with both arms over her head, saying, "If you need to learn how to talk to a lady, ask your mum." (レディの扱い方、ママに教えて貰いなさい, If you can't handle a lady, ask your mum.) This taunt has been significantly shortened from the last game, although it can still be cancelled. It is based on her long taunt from Bayonetta 2.
- Side taunt: Gracefully spins around, then points both guns directly in front of herself, saying, "New 'do, dead you." (動くと死ぬわよ, You move, you die.) The quote comes from her short taunt while wielding Salamandra in Bayonetta 2.
- Down taunt: Strikes a pose while flourishing her guns before looking away and then looking forward, while her glasses briefly emit a light purple glint upon concluding. Significantly shortened from the last game, although it can still be cancelled. Based on the dances she performs prior to fighting the first Joy she encounters in Bayonetta.
Bayonetta's up taunt.
Bayonetta's side taunt.
Bayonetta's down taunt.


Idle poses
- Waves one of her guns in an inviting motion, while resting the other on her hip.
- Holds her left gun in front of herself, and her right gun upward beside her head. This idle pose only occurs once she ends any ground attack, and reverts to her standard idle animation after a few seconds.
Bayonetta's first idle pose
Bayonetta's second idle pose, assumed only after a ground attack


Victory poses
All of Bayonetta's victory quotes are based on taunts from Bayonetta 2 while wielding various weapons; the associated weapon for each is listed in parentheses.
- Left: Dances and says "Miss me, baby?" (Chernobog; "私はここよ", I'm right here.). The dance is similar to her down taunt, with a slightly different ending pose.
- In the Japanese version, Bayonetta does not turn her head.
- Up: Performs the Break Dance move then strikes a pose, saying "Dreadful." (gun-type weapons or Rodin; "退屈だわ", Boring.) or "Don't make me beg." (Takemikazuchi; "遠慮しないで", Don't be shy.). The ending pose is similar to her crouch.
- Right: Bayonetta steps back and sticks up her guns, pirouettes like a ballerina, then aims her guns to the right with a pose, saying "That all you got?" (Alruna; "全力を見せてよ", Show me your full power.) or "You're making it easy." (Rakshasa; "楽勝ね", Too easy.).


In competitive play
Ever since the beginning of Ultimate's metagame, Bayonetta has had hardly any success in tournaments. This is largely due to many of her playerbase and top players dropping her in favor of other characters as a result of her nerfs. Bayonetta has widely been considered to be a "high effort low-reward" character as she has to work significantly harder to win neutral, wrack up damage, and close out stocks than a vast majority of the cast. The changes to her have caused top players to have very negative opinions on her with many players regarding her as an unviable character that isn't worth the effort.
In subsequent patches, Bayonetta received many buffs that made her strongest options more consistent. On top of this, players like CaptainZack, Lima, and Geist continue to use her to moderate success. Both of these have allowed her perception to be better than before, however she is still considered to be a shell of her former self and continues to have low representation in the current metagame.
Notable players
Any number following the Smasher name indicates placement on the Spring 2019 PGRU, which recognizes the official top 50 players in the world in Super Smash Bros. Ultimate from February 1st, 2019 to July 7th, 2019.
 Geist - Placed 33rd at both Frostbite 2019 and Pound 2019.
- Lima - Co-mains Bayonetta with Peach and is considered one of the best Bayonetta players in the world prior to his initial retirement. Placed 9th at Ultimate Gamer Miami and 33rd GENESIS 6.
- Salem - Has a strong Bayonetta secondary. Placed 13th at Glitch 7 - Minus World with a win over 8BitMan.
 tamim - One of the best Bayonetta players in the world prior to his initial retirement. Placed 5th at Glitch 6, 7th at LAN ETS 2019, 13th at Ultimate Gamer Miami, and 17th at Let's Make Moves.
Inactive
- CaptainZack (#32) - The best Bayonetta player in the world before his hiatus. Widely known for his Daisy and Peach secondaries as well. Placed 3rd at Battle of BC 3, 9th at GENESIS 6, 13th at MomoCon 2019, and 17th at Let's Make Moves. Has wins over Nairo, Salem, and Wishes.
Classic Mode: The Requiem of Fallen Wings

All of Bayonetta's opponents have wings, in reference to her battles against angels and specific fights from Bayonetta.
| Round | Opponent | Stage | Music | Notes |
|---|---|---|---|---|
| 1 | Dark Pit |
Umbra Clock Tower | One Of A Kind | A reference to the Loptr boss fight from Bayonetta 2. Takes place in same location. |
| 2 | Falco |
Castle Siege | Tomorrow Is Mine (Bayonetta 2 Theme) (Instrumental) | A reference to the Flaming Affinity from Bayonetta. |
| 3 | Ridley |
Reset Bomb Forest | Riders Of The Light | A reference to the Inspired Angels from Bayonetta & Bayonetta 2. |
| 4 | Giant Charizard |
Skyloft | Time For The Climax! | A reference to Fortitudo from Bayonetta & Bayonetta 2. |
| 5 | Meta Knight |
Skyworld | Theme Of Bayonetta - Mysterious Destiny (Instrumental) | A reference to the Masked Lumen from Bayonetta 2. |
| Bonus Stage | ||||
| 6 | Pit (x6) |
Skyworld | Let's Hit The Climax! | Horde Battle. A reference to the Affinity Angels, which usually attack in groups. |
| Final | Giant Palutena |
Palutena's Temple (Ω form) | The Legend of Aesir | A reference to Jubileus, The Creator from Bayonetta. |
Note: When fighting Charizard, its Pokémon Trainer is absent. Additionally, every stage plays a track from the Bayonetta universe, no matter what universe the stage originates from.
Credits roll after completing Classic Mode. Completing it as Bayonetta has Let's Dance, Boys! accompany the credits.
Role in World of Light

Bayonetta was among the fighters summoned to the cliffside to fight against the army of Master Hands.
During the opening cutscene, Bayonetta was present when Galeem unleashed his beams of light. Bayonetta dodged a beam of light, activating her Bat Within, but she was then vaporized immediately after she reformed her body, and later placed under Galeem's imprisonment alongside the rest of the fighters, excluding Kirby.
Bayonetta was one of the many fighters that fell under Dharkon's control upon Galeem's first defeat, and the last fighter to be found to be imprisoned by him. In The Final Battle, she is called by Dharkon as part of his reinforcements after Roy is awakened and Master Hand is beaten. She is a necessary unlock to achieve the true ending, as awakening her leads to a battle with Crazy Hand that frees him from Dharkon's control (both of whom's defeats greatly shifts the balance of power in Galeem's favor).
Fighter Battle
| No. | Image | Name | Type | Power | Stage | Music |
|---|---|---|---|---|---|---|
| 63 |  |
Bayonetta | Shield | 12,500 | Umbra Clock Tower (Ω form) | Tomorrow Is Mine (Bayonetta 2 Theme) (Instrumental) |
Spirits
Bayonetta's Fighter Spirits can be obtained by completing Classic Mode. They are also available periodically for purchase in the shop for 500 coins. Unlocking Bayonetta in World of Light allows the player to preview the first spirit below in the Spirit List under the name "???". As Fighter Spirits, they cannot be used in Spirit Battles and are purely aesthetic. Each Fighter Spirit has an alternate version that replaces them with their artwork in Ultimate.
Additionally, her younger form, Cereza, appears as a Support Spirit.
1,006. Bayonetta (Bayonetta 2)
1,007. Bayonetta (Bayonetta)
1,015. Cereza
.png)
.png)
In Spirit battles
As the main opponent
| Spirit | Battle parameters | |||||||||
|---|---|---|---|---|---|---|---|---|---|---|
| No. | Image | Name | Series | Enemy Fighter(s) | Type | Power | Stage | Rules | Conditions | Music |
| 97 | Kammy Koopa | Paper Mario series | •Bayonetta |
2,000 | Paper Mario | •Invisibility | •All fighters are invisible after a little while •The enemy starts the battle with a Star Rod |
Airship Theme - Super Mario Bros. 3 | ||
| 142 | Candy Kong | Donkey Kong series | •Bayonetta |
3,800 | Kongo Falls | •Item: Bananas | •The enemy starts the battle with a Banana Gun •The enemy has increased move speed |
Mangrove Cove | ||
| 202 |  |
Koume & Kotake | The Legend of Zelda series | •Bayonetta (×2) ( |
3,700 | Gerudo Valley | N/A | •The enemy starts the battle with a Fire Flower •The enemy starts the battle with a Freezie |
Gerudo Valley | |
| 222 | Midna | The Legend of Zelda series | •Bayonetta |
9,200 | Bridge of Eldin (hazards off) | •Assist Trophy Enemies (Midna) •Item: Transforming Types |
•Hostile assist trophies will appear | Midna's Lament | ||
| 745 | Captain Syrup | Wario Land series | •Bayonetta •Giant King Dedede |
3,500 | Pirate Ship | N/A | •Items will be pulled toward the enemy •The enemy is giant •The enemy is easily distracted by items |
The Great Sea / Menu Select | ||
| 768 | Strangelove | Metal Gear Solid series | •Bayonetta •Metal R.O.B. |
1,600 | Midgar (Battlefield form) | N/A | •Defeat the main fighter to win •Reinforcements will appear during the battle •The enemy is metal |
Main Theme - METAL GEAR SOLID PEACE WALKER | ||
| 961 | Elma | Xenoblade Chronicles series | •Bayonetta |
9,400 | Gaur Plain | •Temporary Invincibility | •Sometimes the opponent will be invincible after a while •Weapons (swords, etc.) deal more damage •The opponent will be equipped with a Killing Edge |
Xenoblade Chronicles Medley | ||
| 1,003 |  |
Juri | Street Fighter series | •Bayonetta |
3,800 | New Pork City (Ω form) | •Attack Power ↑ •Jump Power ↓ |
•Stamina battle •The enemy has increased attack power when the enemy's at high damage •The enemy favors side specials |
Vega Stage | |
| 1,008 | Gomorrah | Bayonetta series | •Bayonetta |
3,200 | Umbra Clock Tower | •Sudden Final Smash •Sudden Damage |
•You take serious damage after a little while •The enemy will suddenly have a Final Smash after a little while |
Let's Hit The Climax! | ||
| 1,009 | Madama Butterfly | Bayonetta series | •Bayonetta |
13,900 | Umbra Clock Tower | •Hazard: Poison Cloud | •The stage is covered in a poisonous cloud •Stamina battle •The enemy favors smash attacks |
Let's Hit The Climax! | ||
| 1,010 |  |
Jeanne | Bayonetta series | •Bayonetta |
9,400 | Umbra Clock Tower | N/A | •The enemy's ranged weapons have increased power •Stamina battle |
Red & Black | |
| 1,020 | Prophet | Bayonetta series | •Bayonetta |
3,800 | Umbra Clock Tower | •Item: Timer | •The enemy's punches and elbow strikes have increased power •Stamina battle |
The Legend Of Aesir | ||
| 1,024 | Alraune | Bayonetta series | •Bayonetta |
1,900 | Garden of Hope (Ω form) | N/A | •Stamina battle •The enemy's battering items have increased power •The enemy starts the battle with a Lip's Stick |
Tomorrow Is Mine (Bayonetta 2 Theme) (Instrumental) | ||
| 1,066 | Shanoa | Castlevania series | •Bayonetta |
9,900 | Brinstar Depths (Ω form) | •Sudden Final Smash •Hazard: Heavy Wind |
•The enemy will suddenly have a Final Smash after a little while •Dangerously high winds are in effect •The enemy's special moves have increased power |
Twilight Stigmata | ||
| 1,100 | Tabuu | Super Smash Bros. Series | •Metal Bayonetta |
13,900 | Final Destination | •Sudden Damage | •Stamina battle •You'll occasionally take sudden damage after a little while •The enemy is metal |
Boss Battle Song 2 | ||
| 1,290 |  |
Twintelle | ARMS | •Bayonetta |
3,700 | New Donk City Hall | N/A | •The enemy's smash attacks have increased power •The enemy favors smash attacks •The enemy starts the battle with a Drill |
New Donk City | |
As a minion
| Spirit | Battle parameters | Inspiration | |||||||||
|---|---|---|---|---|---|---|---|---|---|---|---|
| No. | Image | Name | Series | Enemy Fighter(s) | Type | Power | Stage | Rules | Conditions | Music | Character |
| 225 | Agitha | The Legend of Zelda series | •Peach •Bayonetta |
1,900 | Kongo Falls | •Item: Beehive | •Take your strongest team into this no-frills battle | The Hidden Village | Golden Bug | ||
| 672 | Gangrel | Fire Emblem series | •Wolf •Bayonetta |
3,700 | Find Mii (Ω form) | N/A | •Defeat the main fighter to win •The enemy has increased attack power |
Id (Purpose) (Remix) | Aversa | ||
| 973 | Zeke | Xenoblade Chronicles series | •Cloud •Bayonetta |
2,500 | Kongo Falls (Battlefield form) | •Sudden Final Smash •Hazard: Zap Floor |
•Survive until the timer runs out •The floor is electrified •The enemy will suddenly have a Final Smash after a little while |
Those Who Stand Against Our Path - Xenoblade Chronicles 2 | Pandoria | ||
| 1,015 | Cereza | Bayonetta series | •Tiny Isabelle •Bayonetta |
1,900 | Luigi's Mansion | N/A | •Defeat the main fighter to win | Let's Dance, Boys! | Bayonetta | ||
| 1,319 | Professor Riggs & Plaise & Lerna | Nintendo Labo series | •Dr. Mario •Bayonetta •Young Link |
2,500 | Paper Mario | •Attack Power ↑ •Defense ↑ |
•The enemy has increased defense after a little while •The enemy has increased attack power after a little while |
Title Theme - Super Mario Maker | Lerna Lotte | ||
Alternate costumes

| |||||||

|

|

|

|

|

|

|

|
Gallery
Artwork of Bayonetta, Rodin, and Madama Butterfly as posted on the official Japanese PlatinumGames Twitter account.
Bayonetta's fighter card.
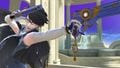
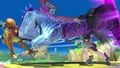
Performing Bullet Climax on Skyworld.

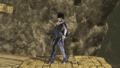
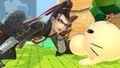
Attacking Ganondorf on Mario Galaxy.
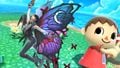
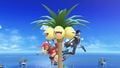
Jumping next to Villager on Tortimer Island.
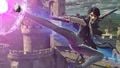
Attacking Samus with her forward smash on Spirit Train.
Crouching near Mr. Saturn on Yoshi's Story.
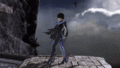
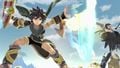
Performing After-Burner Kick on Castle Siege.
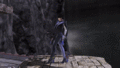
Taunting near Dark Pit on Great Plateau Tower.
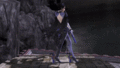
Wall clinging with Diddy Kong on Alolan Exeggutor.
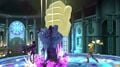
Bayonetta using a Wicked Weave against Isaac's Pound Psynergy on Kalos Pokémon League.


Character Showcase Video
Trivia
.jpg)
.jpg)
to Ganondorf during normal gameplay (left) vs. the
"No Contest" screen (right).
- On the "No Contest" screen, Bayonetta's model is significantly taller than it is during normal gameplay. No other character model seems to shrink on this screen.
- Bayonetta's official artwork strongly resembles her official artwork for Bayonetta 2, albeit with her arms pointed outwards rather than inwards.
- Likewise, Bayonetta's official artwork based on the first game resembles her official artwork for Bayonetta, only mirrored.
- Bayonetta can be unlocked by clearing Classic Mode as either Sonic or Mario. This could be a reference to Sega publishing the first Bayonetta game and Nintendo publishing the sequels.
- The Umbra Clock Tower being the stage in the first round of Bayonetta's classic mode may be a reference to it being the setting of "The Witch Hunts", the opening scene of the first Bayonetta game.
- Similarly, the fight with Mecha Ridley in the Reset Bomb Forest may be a reference to the fight against Fortitudo in the Colisseum Ruins.
- An interview with Masahiro Sakurai revealed that Bayonetta and Palutena were under consideration to survive Galeem's attack in the World of Light opening. They were turned down in favor of Kirby, due to both women being very complex characters to use for beginners and that other characters of their series were also turned into spirits, stating that Bayonetta couldn't escape to Purgatorio as Galeem's attack reached there and her enemies were turned into spirits.
- Both Palutena and Bayonetta are in the Final Battle map, appearing as the last of all fighters. This implies that Galeem (and eventually Dharkon) knew how big of a threat Palutena and Bayonetta were (Palutena being a Goddess, and Bayonetta's slaughter of two gods) to his plans, so he kept them as a last resort.
- While Palutena is designed to always be one of the final characters unlocked, outside of World of Light, Bayonetta can be unlocked very early, potentially as the second character to be unlocked (by clearing Classic Mode with Mario, Sonic and/or any DLC character twice).
- Bayonetta is the only third-party character and the only sole franchise representative unlocked in the Final Battle realm in World of Light.
- In all versions of the game, Bayonetta has two separate menus for her Sound Test voice clips, one for her Bayonetta 2 design and one for her Bayonetta design, despite both versions of Bayonetta using the same voice clips in western versions. This is because the Japanese version has separate voice clips for her in Japanese and English.
- The Cereza spirit battle is a direct reference to Chapter VI in Bayonetta, in which Bayonetta has to protect Cereza and loses if she dies.
- Bayonetta's Classic Mode is one of three that feature the bonus stage before Round 6, the other two being Mega Man and Ryu.
- Bayonetta's Classic Mode is one of only few whose boss round does not feature a designated boss, instead fighting characters who are otherwise playable (in this case, Palutena). The other fighters with the same attribute are Jigglypuff, who instead faces a giant Donkey Kong and Hero, who faces Robin and a giant Charizard.
- Bayonetta is one of the four female fighters not to face Master Hand and Crazy Hand (if the difficulty is 7.0 or higher) as the final boss in Classic Mode, the other three being Zelda, Rosalina & Luma and Inkling.
- Along with Diddy Kong, Bayonetta is the only fighter to fight an alternate costume of Ridley in Classic Mode.
- Bayonetta is the only character to fight all three Kid Icarus characters in her route, and travels to all of their home stages.
- Bayonetta's Fighter Spirit for her default costume reuses her artwork from Bayonetta 2, where it depicts the back of her legs uncovered rather then the wearing silver leggings. This is probably an oversight, as the Spirits for Camilla from Fire Emblem: Fates and Mythra from Xenoblade Chronicles 2 had modified artwork to be less provocative.
- Strangely, Marx does not appear as Bayonetta's final boss despite having wings.
- Since Bayonetta's Bullet Arts behave as disjointed hitboxes rather than projectiles, Spirits that effect physical attack power can affect her Bullet Arts Extensions.
- Bayonetta and Mii Fighters are the only characters in Ultimate who portraits don't extend out of the frame of meter. However, in Bayonetta's case, this only applies to when using her costume based on original game.
Notes
- 1.^ translates to "Open Cartwheel"
- 2.^ translates to "Iron Mountain Lean"
- 3.^ translates to "By Iron Mountain"
References
|
| |
|---|---|
| Fighter | Bayonetta (SSB4 · SSBU) |
| Assist Trophy | Rodin |
| Stage | Umbra Clock Tower |
| Other | Madama Butterfly |
| Trophies and Spirits | Trophies · Spirits |
| Music | SSB4 · Ultimate |