Adventure Mode: World of Light
| World of Light | |
|---|---|
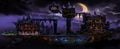
The World of Light logo, prior to defeating Galeem. |
Adventure Mode: World of Light (灯火の星, The Star of Light) is a single-player mode in Super Smash Bros. Ultimate. The mode is accessed from the Spirits main menu item and revolves around the fighters teaming up with Spirits to defeat an "ultimate enemy" named Galeem.
Gameplay

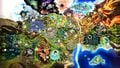
Similar to The Subspace Emissary, World of Light features a navigable world map. Map navigation is unlike The Subspace Emissary but somewhat resembles Smash 3DS's Classic Mode: the player character has a fully rendered model on the map, and the character themselves navigate on predetermined paths between map locations.
Both spirits and imprisoned fighters appear on the map as rendered icons, with one type of icon for spirits and one type for fighters. Moving up to and interacting with an icon will reveal which character it is. Opponent fighters (including puppet fighters) appear with distinctive red eyes both on the map and in battle. Spirit fights consist of fighter characters with battle conditions that largely mimic the spirit in their home series, for example Smoky Progg features Mario in his black alternate costume with the ability to occasionally turn metal. Defeating an opponent puppet fighter obtains that spirit, along with G, SP, snacks, and Skill Spheres.
Kirby is the only available fighter at the start, as he is the only one to have escaped his own fate from Galeem. Defeating an imprisoned fighter unlocks that fighter both in the mode and in the main game, which can be swapped through the mode's menu. Mario is the first fighter to be unlocked, followed by a choice of Sheik, Marth, or Villager.
Defeating "master" spirits does not yield a collectible that joins the player, but instead unlocks "activities" to aid the player and their collected spirits. Gyms trains spirits until they reach their maximum level; explorations sends spirits to find SP, snacks, and Spirit Board items; dojos train spirits that provide a stat modification when equipped to the correct fighter; and shops sell snacks, Spirit Board items, and other collectible spirits in exchange for SP.

The world map also features several many items and obstacles, such as treasure chests (resembling those found in Crazy Orders) which yield various rewards (including Spirits, music tracks, SP, and Skill Spheres), waterfalls that can be swum through, Warp Pipes and similar teleporters, and ! Switch that transforms a row of Dotted Line Blocks on the map into a bridge of red ! Blocks over lava. Certain spirits are required to pass through obstacles, such as needing Bomberman to remove large rocks, or Lapras to traverse an ocean. Some areas also have minigames and puzzles, such as a gourmet race that reveals spirits after collecting a certain score, or the Power Plant's Zapfish on various power generators that open up pathways so that they may reach the main reactor.
Bosses are present in subareas. While Master Hand, Crazy Hand, Rathalos, Galeem, and Dharkon have rendered models, the other bosses simply appear as an icon of swirling darkness with glowing eyes and their portraits shadowed before fought. Master Hand also often plays a role in creating obstacles, such as forcefields or smashing bridges, before disappearing.
The player may zoom out to view the full map by pressing the L button; the right analog stick can also be used to scan over the map on a smaller scale. Areas not yet accessible are obscured with clouds. When fully zoomed out, the player character's model is replaced with their stock icon, opponent fighter icons similarly become flat, and various other icons representing activities, warp pipes, inaccessible obstacles, and swirling subareas appear on the map. Spirit icons do not appear on the zoomed-out map. In addition, the predetermined paths between map areas become explicitly drawn, with dotted lines showing paths that can't be traversed without the aid of a spirit.
Skill Tree

The Skill Tree is a menu item in World of Light. In it, the player can spend Skill Spheres (スキルのかけら Skill Fragments) in order to learn Adventure Skills. These are effectively power-ups akin to the skills granted by Support Spirits (and can stack with their equivalent Spirit skills), and appear as icons resembling the stat boost icons found in Smash 4's Smash Tour and Smash Run. Obtaining a power-up also makes power-ups further down the tree available. The player can spend SP to forget a power-up and gain back all of the Skill Spheres spent on it.
Plot
World of Light

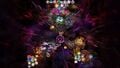
The story begins with a close-up of a Blaster aimed at the horizon, revealing its wielder to be Fox, who gives the command of "Don't let a single one get away!". The camera then zooms out and pans to the left, revealing that Fox is addressing the entirety of Super Smash Bros. Ultimate's playable cast, excluding DLC characters - all of whom have been summoned to the edge of a cliff. The camera then pans upward to reveal Galeem, who is currently accompanied by a looming army of Master Hands that is slowly approaching the mount. After Marth, Zelda, and Pit each comment on their reassurance over the upcoming battle, every Master Hand surrounding Galeem slowly disintegrates into a glowing, blue streak of light that ends up being absorbed by Galeem. As the fighters prepare for the god-like being's next move, Shulk suddenly envisions the downfall of his comrades and immediately looks at them all in shock and despair, but perhaps foreseeing Kirby's escape. The singularity between Galeem and his now-absorbed Master Hand army creates a black hole, which soon collapses, creating an array of beams of intense light.
| “ | With an army of Master Hands under its control, Galeem sought to create a new world. The fighters and their countless stories... came to an end as the light consumed them. | ” |

The beams of intense light quickly extrude from the black hole, rapidly approaching the cliff where the fighters are situated. As they aim downwards to consume the fighters, Link successfully reflects three beams with his Hylian Shield before succumbing to another. Samus attempts to fire at the beams, but it's to no avail before she is engulfed by one. Both Zelda and Mewtwo simultaneously attempt to reflect the beams with Nayru's Love and Confusion respectively, before being immediately decimated. Sonic and Pikachu attempt to outrun the beams, with the former attempting to assist the latter in escaping, but both are ultimately disintegrated. Bayonetta successfully dodges three beams at once using Bat Within, but she is disintegrated by yet another beam of light as soon as she retains her original form. Both the Pokémon Trainer and Bowser attempt to fight off Galeem's beams of light, with the former ordering his Pokémon to use Triple Finish, and the latter using his Fire Breath respectively, only to fail and be consumed by the light. Captain Falcon is briefly shown attempting to get into his Blue Falcon in order to escape the onslaught, but both he and his vehicle are destroyed just as quickly. Lucario is shown successfully teleporting away from one of the beams with Double Team, finding himself behind Greninja, who jumps upward to successfully escape from a beam. Unfortunately, this was all for naught as the beam Greninja hops over ends up engulfing Lucario instead, and yet another beam of light reaches Greninja in midair. The female and male Inklings use their Splattershots to shoot ink onto the ground and then try to hide in it, only to have yet another of Galeem's beams of light ram into the ground, decimating them. Falco is shown in his Arwing attempting to make his escape, but his exceptional flying skills are just not enough to evade the persistent tendrils of light, and he ends up getting taken down by multiple beams all at once. Both Pit and Dark Pit are seen flying away with the Power of Flight, bestowed upon them by Palutena, who attempts to buy the two angels more of a chance to escape by summoning a Reflect Barrier in the hopes of suppressing Galeem's attack. With little effort however, the goddess of light is simply vaporized by a beam, which ends up resulting in the unfortunate chain reaction of causing the (normally flightless) angelic duo to lose their ability to fly, resulting in each angel getting wiped out by a beam of light in midair. A lone cardboard box is shown on the cliff's edge, hiding away Snake, only to have a beam prove the espionage expert's attempt futile. Both Rosalina & Luma and Diddy Kong attempt to fly away from the onslaught using a Launch Star and his Rocketbarrel Pack respectively, but all three are eventually swallowed by the beams. Finally, a group consisting of the Wii Fit Trainer (who simply strikes a yoga tree pose), Duck Hunt (consisting of the dog cowering in fear of Galeem's attack as the duck attempts to fly itself and its canine companion away to safety with Duck Jump), and the Villager (who simply runs around in circles in a blind panic over his and the group's impending doom) eventually end up getting engulfed by the light.

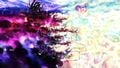
Amidst the massacre, Kirby is shown flying away from a legion of Galeem's beams of light via his Warp Star. After deviating from many of them, the frequency of the Warp Star's blipping noise increase in rapid succession and intensity as Kirby attempts to push its power to its absolute limit, resulting in it moving at warp speed, temporarily warping Kirby to another plane of existence just before the aforementioned series of beams could swallow it and Kirby along with it. From this point onward, the beams are then shown atomizing multiple non-playable characters into oblivion. The scene then transitions from the planet in its entirety being engulfed by Galeem's light, with said light slowly expanding throughout the galaxy, engulfing and vaporizing multiple planets. Eventually, the deadly light produced by the deity-like being soon erases the entire universe, leaving nothing in its wake. The planet on which the ordeal started is now left as nothing more than a barren wasteland, with its remains currently inhabited by the now-hostile souls of non-playable characters. A glimmer of light is seen on the horizon, later revealed to be none other than Kirby, who has ended up becoming the sole survivor of Galeem's onslaught upon the universe, and ends up making a rough emergency landing into a nearby canyon. As Kirby recovers from his crash-landing, he looks towards a vast landscape consisting of various areas, some of which are recognizable as coming from the fighters' old worlds. The landscape, constructed by Galeem, is none other than the World of Light.
| “ | Thus, the universe was crushed in the hands of Galeem. Those who fought the light were devoured. The others lost their bodies and became spirits. Only one survived... A star of hope twinkles faintly as the dust settles on the new world. | ” |
Army of Puppets

Following Kirby's arrival in the World of Light, the scene cuts to a dark room, in which the only source of light found in it reveals that of a now-unconscious Mario being held captive by a series of fibers made out of pure energy. A golden liquid resembling that of molten metal is poured upon Mario's body, which is then absorbed by the fibers holding him. The liquid then passes through the stand on which he is situated to create a monochrome clone of him, which forms on the stand's opposite end. The resulting puppet fighter then disconnects from the stand and falls to the ground, motionless. The spirit of a Smoky Progg then weaves around the dark room and, coming across the lifeless Mario clone, is forced by Galeem to possess it, thus giving life to the previously inanimate statue, which now dons distinctive red, glowing eyes. The camera slowly zooms outward, revealing that Galeem has already made puppet fighters out of every single playable character (except for Kirby), with the intention of unleashing this army upon the planet to stop Kirby from freeing his comrades. The scene then cuts back to Kirby, now about to take his first steps into the World of Light.
| “ | Galeem copied the fallen fighters, creating empty puppets in their likenesses... Then, Galeem forced the captive spirits to pull the puppets' strings. This army of puppet fighters spread themselves across the last remaining world. Can anyone free the spirits from Galeem's control? Is there any hope for the fallen fighters? The journey to defeat Galeem begins... | ” |
From Light to Dark

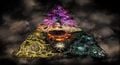
Kirby rescues many fighters and spirits and defeats Giga Bowser, Galleom, and Rathalos powering Galeem's shield. A Master Hand puppet appears to intercept, but is destroyed. The fighters defeat Galeem, but this victory is short-lived as a crack appears in the sky. The crack shatters and Dharkon and his army of Crazy Hands emerges, taking advantage of the situation and forcing Galeem to retreat. The World of Light is then swallowed by darkness, with Dharkon taking control of Galeem's remaining spirits and fighters.
| “ | With Galeem, the lord of light, defeated, darkness takes hold. In the blink of an eye, the land is swallowed by shadow. Galeem's spirits and puppet fighters fall under its control. The embodiment of chaos and darkness... Dharkon. | ” |
The Final Battle

The fighters continue to free the puppets and spirits under Dharkon's control, and defeat Ganon, The Demon King, Marx, and Dracula to force Dharkon to appear. After the fighters confront Dharkon, Dharkon retreats, but Galeem soon came back and launches an assault with a new army of spirits and puppet fighters. Both gods were trying to defeat the other, but Mario, Simon, Pit, Zelda, Kirby, Fox, Greninja, Bowser, Samus, Sonic, and the rest of the fighters soon catch up in the middle with both Dharkon and Galeem noticing. The final battle is about to begin.
Gameplay-wise, The Final Battle takes place on a map that uniquely has no sub-areas and no obscuring clouds, with the player at the center bottom, Dharkon at the top left, and Galeem at the top right. Initially, there is no path to reach either Galeem or Dharkon, and the background is split in half with Dharkon controlling the dark side and Galeem controlling the light side. As the player defeats more dark spirits, the background moves so that more of it is covered with light, and vice versa.
Endings
Consumed by Light
This bad ending is achieved if the fighters defeat enough dark spirits, and few enough light spirits, allowing Galeem's light to dominate enough of the background that it covers Dharkon, creating a path to fight him.
With Dharkon and his army of darkness defeated, Galeem blasts Dharkon with beams of light, before vaporizing Dharkon. Galeem then consumes the universe in his light once more, vaporizing Mario, Samus, Fox, Zelda, Greninja, Bowser, and the other fighters in the process.
Swallowed by Darkness
This bad ending is achieved if the fighters defeat enough light spirits, and few enough dark spirits, allowing Dharkon's darkness to dominate enough of the background that it covers Galeem, creating a path to fight him.
With Galeem and his army of light crushed, Dharkon then engulfs the world in darkness, destroying the Master Hand army in the process, and piercing Galeem with chains. Mario is then shown dropping on the ground (presumably dead) as the screen turns to static, then black. The world then rots into a necrotic desert, and Dharkon's eye is then shown in the destroyed world (watching the player), now completely dark forever.
Restoration


The fighters rescue Roy and Dark Samus and defeat a Master Hand and a Crazy Hand. Galeem calls on Palutena and the original Master Hand as reinforcements, while Dharkon calls on Bayonetta and the original Crazy Hand. The fighters also free all four from Galeem and Dharkon's control.
At this point, gameplay-wise, the Hands appear at the top center of the map, but there is no path to reach them unless the number of dark and light spirits on each side is exactly equal. Once this condition is met, interacting with the Hands causes them to come to the fighters' aid, creating a fracture in the background where Master Hand dives in. He becomes a temporarily playable character as he defeats an onslaught of 50 light and dark puppet fighters, destroying the former light and dark background and replacing it with a golden backdrop. This opens up the paths to fight Galeem or Dharkon solo (as seeing both bad endings is necessary to obtain 100% clear), but also creates a new true ending path in the middle where Galeem and Dharkon come together from their previous positions, face to face, for the final confrontation.

The fighters climb the long stairwell while being attacked by Galeem and Dharkon and defeating more puppets. Afterwards, they fight all six bosses once again. The two deity-like beings continue to battle each other before turning their attention to the fighters in a three-way climactic clash. Even in the midst of a shared enemy, the two deities still wage war against another. When both Galeem and Dharkon are destroyed, their armies vanish as they fall into the ocean and explode, cleansing the universe of their influence. Now free, the spirits return to their original worlds. The imagery of this last scene strongly mirrors the lyrics of the main theme.
Fighters
Overworld
All who opposed Galeem (aside from Kirby) are scattered among three realms, each being ruled over by Galeem and/or Dharkon, and must be defeated before joining the fight. 42 characters (with Pokémon Trainer counting as one) can be found in The Light Realm. 27 more characters can be found in The Dark Realm after defeating Galeem. The final 4 characters are found in The Final Battle following Dharkon's defeat. Several characters require more than just reaching their location on the map, such as King Dedede requiring collecting 11 foods in a minigame. DLC characters will only join after awakening at least 10 fighters.
The maps below show the location where the player can find the characters within the Adventure Mode. (Note: Luigi and Greninja are missing from the Dark Realm map)
Light Realm map.
Dark Realm map.
The Final Battle map.


Sub-worlds
Sub-worlds are additional maps that are separate from the main maps. They tend to have a puzzle in order to advance the area, and each have at least one character trapped within. Six of them also contain bosses. They are themed after certain games, many of which are related to the captured fighters hidden within.
Characters that are trapped within the Light Realm's sub-worlds are Peach and Bowser in the Molten Fortress; Pichu in the Power Plant; Pit and Simon in the Temple of Light; Diddy Kong in DK Island; King Dedede in Gourmet Race; Snake in the Base; Toon Link in the Forest Hill; and Ryu in the World Tour. All other characters in the Light Realm are encountered outside of sub-worlds.
With the exceptions of Lucina, Rosalina & Luma, and Incineroar, all fighters trapped inside of the Dark Realm are located inside sub-worlds.
- Trapped inside of the Mysterious Dimension are Luigi, Mewtwo, Meta Knight, Ike, R.O.B., Wolf, Greninja, Corrin, and King K. Rool.
- Trapped inside of Dracula's Castle are Daisy, Dark Pit, Wario, Robin, Ken, Ridley, and Richter.
- Trapped within the Sacred Land are Zelda, Young Link, Ganondorf, Chrom, Sonic, Mii Brawler, Bowser Jr., and Cloud.
There are no sub-worlds in the Final Battle map, although Bayonetta and Palutena need to have Master Hand and Crazy Hand defeated to appear respectively.
These maps show where the player can find the characters in the sub-worlds of the Dark Realm.
Sacred Land map.
Dracula's Castle map.
Mysterious Dimension map.


Fighter Battles
In World of Light, each fighter must be unlocked through a fighter battle, with very few exceptions:
 Kirby is available from the beginning.
 Bowser is obtained after defeating Giga Bowser.


 Downloadable fighters are directly available once finished downloading them, after awaking a total of 10 fighters. If a file is loaded where those conditions have been already met previously to download them, they will be made instantly available.
The fighter battles all feature the same single condition: Win the battle to awaken the fighter
Unlockables
Characters may be unlocked through this mode. Playing this mode is required to unlock the ability to train spirits in the dojo or have them explore for treasure. Defeating bosses in this mode is the only way to get their spirits. Completing the mode with the true ending requirements grants the player spirits of Galeem and Dharkon which makes attacks more powerful against puppet fighters controlled by Dharkon and Galeem respectively if used, and unlocks the ability to change the menu's theme in My Music.
Completing the mode also unlocks New Game+ which allows the player to begin a new save file while carrying over any fighters and Activities they unlocked.
Spirits required to overcome obstacles
- Cyrus & Reese, Guts Man, Bord & Cord & Barst or Dion, Max & Jack – Bridge Repair
- Mouser, Link (The Legend of Zelda), Bomb Man, Bomberman or Poppy Bros. Jr. – Boulder Destruction
- Ho-oh – Rainbow Creation (used to connect the Magicant area with the Sky area in the Light Realm, activated from the Sky area)
- Lapras – Beachside Town Transportation
- Kapp’n – Southern Great Plateau Boat Transportation
- Kapp’n (Wild World) – Northwestern Town Bus Transportation
- Pico – Raceway Entrance
- Susie, MegaMan.EXE, ProtoMan.EXE or Hal Emmerich – Base Entrance
- Great Zapfish – Power Plant Activation
- Slippy Toad or ROB 64 – Great Fox Activation
- Alfonzo & Engineer Link – Train Transportation
- Lip, Kammy Koopa, Kamek or Viridi – Rain Conjuring (used to grow the mushrooms leading to Olimar’s fighter battle and to grow a giant beanstalk leading to the Sky area in the Light Realm)
Bosses
Light Realm


Dark Realm


Trailer
Trivia
- If World of Light's Japanese name has its characters reversed, it can be read as 星の火灯, which is pronounced very similarly to 星のカービィ (Kirby of the Stars), the Japanese name of the Kirby series. Sakurai has stated, however, that this was coincidental.[1]
- When Galeem is defeated for the first time, the title screen will now feature Dharkon alongside him.
- The cliff appearing at the start of World of Light's opening cutscene is a reference to the opening cutscene from Brawl and the cliff overlooking the Isle of the Ancients, and it is even used borderline identically—showing all of the fighters before changing perspective to look over a sunrise/sunset and an ocean.
- The location where Kirby's Warp Star crash-lands strongly resembles the cliffs used in the reveal trailers for Mega Man, Greninja, and Bowser Jr. prior to the release of Super Smash Bros. 4. This cliff area is further shown to overlook the area in the background of Battlefield.
- The premise of World of Light is identical to an idea that Masahiro Sakurai considered for The Subspace Emissary in Brawl. He had initially envisioned a story in which a single character survives the annihilation of their squadron and must fight back while rounding up his allies.[2] In World of Light, Kirby is this sole survivor.
- Incidentally, Kirby is one of the few characters to revive himself after Tabuu's attack.
- As with The Subspace Emissary, Kirby and Mario are the first characters to be playable in World of Light; additionally, in both modes, Mario is attacked or captured near the beginning, leaving Kirby more prominent during the early portions of the story.
- According to Sakurai, the reason Kirby, a character he created, was chosen as the sole starting character in World of Light was because he was one of the few characters who could plausibly escape Galeem's attack (the others being Bayonetta and Palutena, although it would contradict the fact spirits of similar powers did not survive), but was also the most suitable as an introductory character among them.[1]
- Incidentally, Bayonetta and Palutena can't be freed until the very end, implying that their respective captors realized their threat potential should they be freed (and are being used to guard the next-biggest threats to Dharkon and Galeem, respectively).
- Kirby is the only one of the 3 to be a starting character.
- While the mode effectively encourages players to use almost every character in the game, it is possible to complete World of Light saving as few as twenty-one characters, or barely one-fourth of the base roster, with only Kirby, Mario, Fox, Bowser, Simon, Pit, Samus, Sonic, Zelda, Young Link, Cloud, Ganondorf, Greninja, Ike, Meta Knight, Roy, Dark Samus, Bayonetta, Palutena, and one of the following pairs of fighters (Marth and Pac-Man, Sheik and Yoshi, or Villager and Lucario) being mandatory under any circumstances.
- As few as 198 spaces cleared out of 615 are needed to complete World of Light, which is 32.19% completion.[3]
- Some spirits possess puppet fighters of Kirby, even though he was never captured by Galeem and could not have puppet fighters made from him. This is most likely an oversight on the story as World of Light does feature spirit battles shared with that of the Spirit Board.
- Masahiro Sakurai adressed this in an interview, stating that Galeem managed to analyze Kirby halfway through the story, making it possible to create puppets of him.[4]
- Some of the buildings in the city on the World of Light are of past Nintendo consoles, such as the Famicom, Nintendo 64, GameCube, and Wii; other Nintendo paraphernalia such as the Nintendo 64 logo and a Super NES Mouse are also present. Additionally, a building resembles Nintendo's headquarters in Kyoto, Japan.
- In World of Light, all Echo Fighters are found affiliated with Dharkon, whereas their original fighters are all affiliated with Galeem.
- Additionally, all characters who have Echo Fighters and Echo Fighters themselves (except Roy and Dark Samus) can be found in the respective realm of their masters (Galeem or Dharkon) are the final boss of (Light Realm for the original fighters and Dark Realm for the Echo Fighters).
- Hero's trailer is the only reveal trailer thus far to reference the events of World of Light, with Dharkon appearing at the beginning, and several puppet fighters appearing under his control.
See also
References
- ^ a b Source Gaming - Sakurai Discusses the World of Light and Smash Ultimate
- ^ "Iwata Asks - Super Smash Bros. Brawl" "I had envisioned a more serious tone for the story. Something with some misfortune like a single character escaping total annihilation of his squadron and then fighting back while rounding up his allies."
- ^ https://youtu.be/zMF2t6SpPpE?t=8938
- ^ https://twitter.com/PushDustIn/status/1098252915532165120?s=20