User:Yo'ster/Cheerless Smash: Difference between revisions
(→Overview: Continuing to elaborate...) |
(Bold) |
||
| Line 1: | Line 1: | ||
{{incomplete| | {{incomplete|Anyone have a clip of this tech being used in high-level play}} | ||
'''Smash Throw''' refers to a desynced kill confirm combining a throw with a buffered smash attack from the partner, keeping the opponent in place to turn their otherwise weak throws into some of the strongest in the game. The damage and launch power of Smash Throws vary depending on the player's timing, as landing the smash attack will usually interrupt the actual throw, preventing some of the throw's damage from being dealt, while delaying the smash can not only let the throw connect and damage the opponent in its entirety, but also further strengthen the combo due to charging the smash a little in the meantime. | '''Smash Throw''' refers to a desynced kill confirm combining a throw with a buffered smash attack from the partner, keeping the opponent in place to turn their otherwise weak throws into some of the strongest in the game. The damage and launch power of Smash Throws vary depending on the player's timing, as landing the smash attack will usually interrupt the actual throw, preventing some of the throw's damage from being dealt, while delaying the smash can not only let the throw connect and damage the opponent in its entirety, but also further strengthen the combo due to charging the smash a little in the meantime. | ||
| Line 17: | Line 17: | ||
*'''Back''' | *'''Back''' | ||
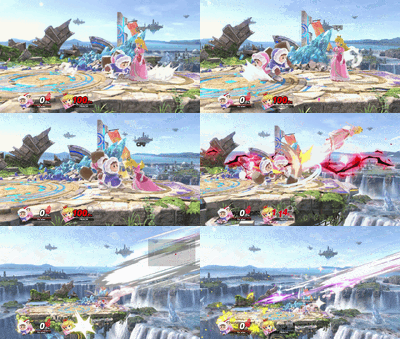
''' | The '''Back-Throw-Forward-Smash''' confirm, also known as '''Beyeff''', KOs at about 72%, and cannot be optimized due to the point from which the opponent is thrown and the lack of hitlag. The smash must be buffered, and attempting to charge it for even a single frame will cause them to swing several frames too late. | ||
[[File:BFSmashThrow.gif|thumb|Performing a Backward-Throw-Forward-Smash confirm in SSBU]] | [[File:BFSmashThrow.gif|thumb|Performing a Backward-Throw-Forward-Smash confirm in SSBU]] | ||
*'''Up''' | *'''Up''' | ||
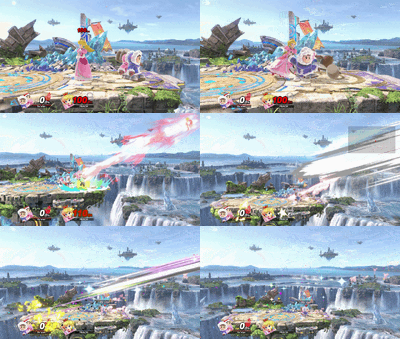
''' | The '''Up-Throw-Up-Smash''' confirm, also known as '''Yooyoo''', KOs at about 115% at its weakest, and 100% when performed optimally. Strangely, the [[Ice Climbers (SSBU)/Up smash|up smash's]] knockback will be outprioritized by that of the [[Ice Climbers (SSBU)/Up throw|up throw]] if the smash attack is buffered. Making the throw deal much more damage than it's supposed to, but without the knockback needed to KO at realistic percents. The 2nd Climber must charge their [[Ice Climbers (SSBU)/Up smash|up smash]] for at least 3 frames to avoid being deprioritized. (It doesn't need to enter the charge interval, the player just has to be holding the R stick during the 1st 3 frames of the smash's startup) | ||
[[File:UUSmashThrow.gif|thumb|Performing a Up-Throw-Up-Smash confirm in SSBU]] | [[File:UUSmashThrow.gif|thumb|Performing a Up-Throw-Up-Smash confirm in SSBU]] | ||
*'''Down''' | *'''Down''' | ||
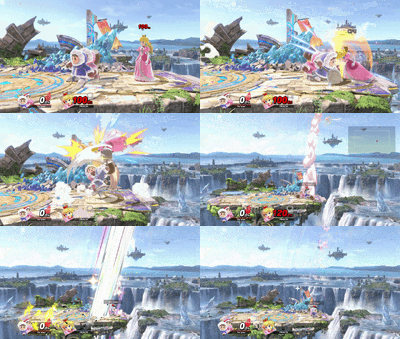
''' | The '''Down-Throw-Down-Smash confirm''', also known as '''Deedee''', KOs at about 100% at its weakest, and 89% when performed optimally. The [[Ice Climbers (SSBU)/Down smash|down smash]] will miss completely if it is buffered, so the 2nd Climber must charge their [[Ice Climbers (SSBU)/Down smash|down smash]] for at least 10 frames to avoid swinging too early. (It doesn't need to enter the charge interval for 10 frames, the player just has to be holding the R stick during the 1st 10 frames of the smash's startup) | ||
[[File:DDSmashThrow.gif|thumb|Performing a Down-Throw-Down-Smash confirm SSBU]] | [[File:DDSmashThrow.gif|thumb|Performing a Down-Throw-Down-Smash confirm in SSBU]] | ||
===Niche Variants=== | ===Niche Variants=== | ||
| Line 49: | Line 49: | ||
The '''Down-Throw-Forward-Smash''' confirm, also known as '''Deyeff''', KOs at about 73% at its weakest, and 59% when performed optimally. The [[Ice Climbers (SSBU)/Forward smash|forward smash]] will miss completely if it is buffered, so the 2nd Climber must charge their [[Ice Climbers (SSBU)/Forward smash|forward smash]] for at least 6 frames to avoid swinging too early. (It doesn't need to enter the charge interval for 6 frames, the player just has to be holding the R stick during the 1st 6 frames of the smash's startup) Compared to Effeff, it can take stocks slightly sooner, but is slightly weaker when both are done perfectly. | The '''Down-Throw-Forward-Smash''' confirm, also known as '''Deyeff''', KOs at about 73% at its weakest, and 59% when performed optimally. The [[Ice Climbers (SSBU)/Forward smash|forward smash]] will miss completely if it is buffered, so the 2nd Climber must charge their [[Ice Climbers (SSBU)/Forward smash|forward smash]] for at least 6 frames to avoid swinging too early. (It doesn't need to enter the charge interval for 6 frames, the player just has to be holding the R stick during the 1st 6 frames of the smash's startup) Compared to Effeff, it can take stocks slightly sooner, but is slightly weaker when both are done perfectly. | ||
The '''Down-Throw-Up-Smash''' confirm, also known as '''Deeyoo''', KOs at about 119% at its weakest, and 106% when performed optimally. The [[Ice Climbers (SSBU)/Up smash|up smash]] will miss completely if it is buffered, so the 2nd Climber must charge their [[Ice Climbers (SSBU)/Up smash|up smash]] for at least 3 frames to avoid swinging too early. (It doesn't need to enter the charge interval for 3 frames, the player just has to be holding the R stick during the 1st 3 frames of the smash's startup) Unlike every other Smash Throw, charging the smash for a moment can actually weaken Deeyoo, as the small boost in knockback from the extra charge time is not always worth giving up the higher position from which the opponent is launched. The weakest timing is 10 frames of charge, while the minimum charge of 3 frames KOs at 115%. | The '''Down-Throw-Up-Smash''' confirm, also known as '''Deeyoo''', KOs at about 119% at its weakest, and 106% when performed optimally. The [[Ice Climbers (SSBU)/Up smash|up smash]] will miss completely if it is buffered, so the 2nd Climber must charge their [[Ice Climbers (SSBU)/Up smash|up smash]] for at least 3 frames to avoid swinging too early. (It doesn't need to enter the charge interval for 3 frames, the player just has to be holding the R stick during the 1st 3 frames of the smash's startup) Unlike every other Smash Throw, charging the smash for a moment can actually weaken Deeyoo, as the small boost in knockback from the extra charge time is not always worth giving up the higher position from which the opponent is launched. The weakest timing is 10 frames of charge, while the minimum charge of 3 frames KOs at 115%. | ||
Revision as of 12:18, May 14, 2024
Smash Throw refers to a desynced kill confirm combining a throw with a buffered smash attack from the partner, keeping the opponent in place to turn their otherwise weak throws into some of the strongest in the game. The damage and launch power of Smash Throws vary depending on the player's timing, as landing the smash attack will usually interrupt the actual throw, preventing some of the throw's damage from being dealt, while delaying the smash can not only let the throw connect and damage the opponent in its entirety, but also further strengthen the combo due to charging the smash a little in the meantime.
In SSBM and SSBB
Due to either of the duo being able to act while the other is holding an opponent in these games, attempting a Smash Throw is an unnecessary and suboptimal conversion compared to the infamous setups available. Which are noticeably easier, safer, and more rewarding. As such, Smash Throws seldom see use in SSBM or SSBB, if at all.
In SSBU
Primary Variants
- Forward
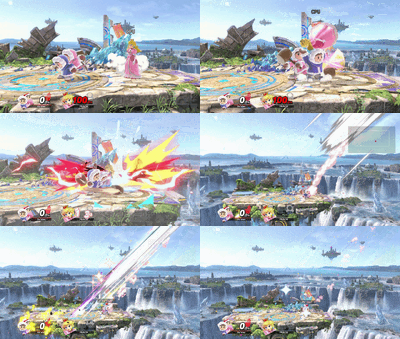
The Forward-Throw-Forward-Smash confirm, also known as "Effeff", KOs at about 75% at its weakest, and 57% when performed optimally.
- Back
The Back-Throw-Forward-Smash confirm, also known as Beyeff, KOs at about 72%, and cannot be optimized due to the point from which the opponent is thrown and the lack of hitlag. The smash must be buffered, and attempting to charge it for even a single frame will cause them to swing several frames too late.
- Up
The Up-Throw-Up-Smash confirm, also known as Yooyoo, KOs at about 115% at its weakest, and 100% when performed optimally. Strangely, the up smash's knockback will be outprioritized by that of the up throw if the smash attack is buffered. Making the throw deal much more damage than it's supposed to, but without the knockback needed to KO at realistic percents. The 2nd Climber must charge their up smash for at least 3 frames to avoid being deprioritized. (It doesn't need to enter the charge interval, the player just has to be holding the R stick during the 1st 3 frames of the smash's startup)
- Down
The Down-Throw-Down-Smash confirm, also known as Deedee, KOs at about 100% at its weakest, and 89% when performed optimally. The down smash will miss completely if it is buffered, so the 2nd Climber must charge their down smash for at least 10 frames to avoid swinging too early. (It doesn't need to enter the charge interval for 10 frames, the player just has to be holding the R stick during the 1st 10 frames of the smash's startup)
Niche Variants
- Forward
The Forward-Throw-Up-Smash confirm, also known as Effyoo, is usually a misinputted attempt at a Yooyoo. It KOs at about 124% at its weakest, and 122% when performed optimally. Strangely, the up smash's knockback will be outprioritized by that of the forward throw if the smash attack is buffered. Making the throw deal much more damage than it's supposed to, but without the knockback needed to KO at realistic percents. Similarly to Yooyoo, the 2nd Climber must charge their up smash for at least 3 frames to avoid being deprioritized. (It doesn't need to enter the charge interval, the player just has to be holding the R stick during the 1st 3 frames of the smash's startup) As a niche and often unintentional variant, it's significantly inferior to Yooyoo, but it occasionally works as a "disrespectful" DI mixup due to the lead climber's animation making opponents anticipate an Effeff, and the tech's name resembling "FU", a form of trash talk.
The Forward-Throw-Down-Smash confirm, also known as Efty, KOs at about 105% at its weakest, and 93% when performed optimally. Due to being weaker and much more difficult to perform, Efty should never be used over Deedee.
- Back
No Smash Throws involving Back Throw have any workable followup besides Forward Smash.
- Up
No Smash Throws involving Up Throw have any workable followup besides Up Smash.
- Down
The Down-Throw-Forward-Smash confirm, also known as Deyeff, KOs at about 73% at its weakest, and 59% when performed optimally. The forward smash will miss completely if it is buffered, so the 2nd Climber must charge their forward smash for at least 6 frames to avoid swinging too early. (It doesn't need to enter the charge interval for 6 frames, the player just has to be holding the R stick during the 1st 6 frames of the smash's startup) Compared to Effeff, it can take stocks slightly sooner, but is slightly weaker when both are done perfectly.
The Down-Throw-Up-Smash confirm, also known as Deeyoo, KOs at about 119% at its weakest, and 106% when performed optimally. The up smash will miss completely if it is buffered, so the 2nd Climber must charge their up smash for at least 3 frames to avoid swinging too early. (It doesn't need to enter the charge interval for 3 frames, the player just has to be holding the R stick during the 1st 3 frames of the smash's startup) Unlike every other Smash Throw, charging the smash for a moment can actually weaken Deeyoo, as the small boost in knockback from the extra charge time is not always worth giving up the higher position from which the opponent is launched. The weakest timing is 10 frames of charge, while the minimum charge of 3 frames KOs at 115%.
Unusable Variants
Forward
Forward Throw can be combined with any smash attack, so no unusable variants involving Forward Throw exist.
Back
The Back-Throw-Up-Smash confirm, also known as Beeoo, doesn't actually work and is more difficult to perform than other Smash Throws, anyway.
The Back-Throw-Down-Smash confirm, also known as Beedee, doesn't actually work and is more difficult to perform than other Smash Throws, anyway.
Up
The Up-Throw-Forward-Smash confirm, also known as Yueff, is usually a misinput of Yooyoo, and doesn't actually work. It's more difficult to perform than other Smash Throws, anyway.
The Up-Throw-Down-Smash confirm, also known as Yoodee, doesn't actually work and is more difficult to perform than other Smash Throws, anyway.
Down
Down Throw can be combined with any smash attack, so no unusable variants involving Down Throw exist.
Trivia
- When performing a Smash Throw, the smash's knockback will sometimes be outprioritized by the throw's knockback if the player has a Spirit Equipped.


