SSB4 Icon.png

Zero Suit Samus (SSB4)/Up special/Default: Difference between revisions

From SmashWiki, the Super Smash Bros. wiki
Jump to navigationJump to search
(added missing category)
mNo edit summary
Line 1: Line 1:
{{ArticleIcons|ssb4=y}}
{{disambig2|the hitbox visualization in ''[[Super Smash Bros. 4]]''|the move itself|Boost Kick}}
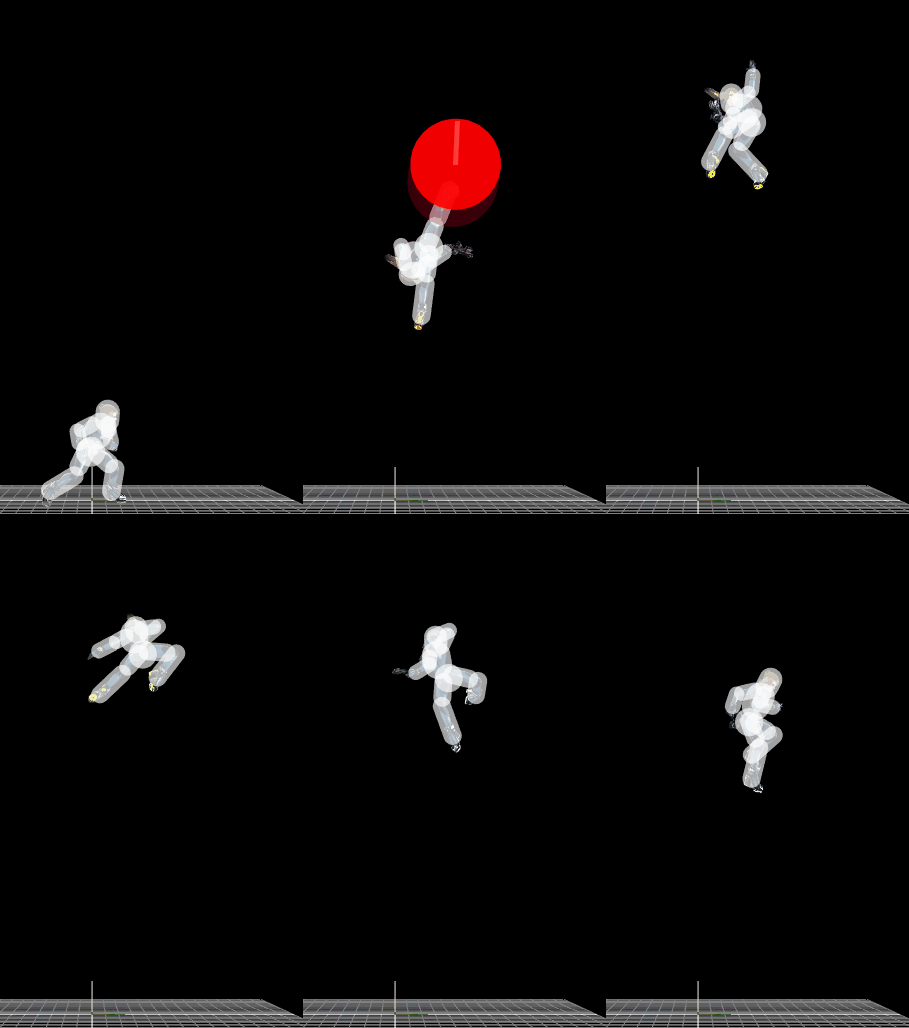
[[File:ZSSBoostKick.gif|thumb|270px|Hitbox visualization showing Zero Suit Samus's Boost Kick.]]
[[File:ZSSBoostKick.gif|thumb|270px|Hitbox visualization showing Zero Suit Samus's Boost Kick.]]
{{competitive expertise}}
Line 177: Line 178:
{{MvSubNavZeroSuitSamus|g=SSB4}}
[[Category:Zero Suit Samus (SSB4)]]
[[Category:Zero Suit Samus (SSB4)]]
[[Category:Special attacks (SSB4)]]
[[Category:Special moves (SSB4)]]
[[Category:Up special moves (SSB4)]]
[[Category:Up special moves (SSB4)]]

Revision as of 16:30, May 17, 2020

This article is about the hitbox visualization in Super Smash Bros. 4. For the move itself, see Boost Kick.
Hitbox visualization showing Zero Suit Samus's Boost Kick.
Competitive.png This article or section may require competitive expertise.
You can discuss this issue on the talk page or edit this page to improve it.
Data.png This article or section may require additional technical data.
You can discuss this issue on the talk page or edit this page to improve it.

Hitboxes

Looping hit rehits every 4 frames.

ID Part Damage SD Angle BK KS FKV Radius Bone Offset SDIx T% Clang Rebound Type Effect G A Sound Direct
Hit 1
0 0 5% 0 AngleIcon90.png 0 100 150 4.0 0 0.0 8.0 11.0 1.0x 1.0x 0% HitboxTableIcon(Clang).png HitboxTableIcon(Rebound).png TypeIcon(Foot).png EffectIcon(Normal).png HitboxTableIcon(GroundedTrue).png HitboxTableIcon(AerialTrue).png L Kick SpecialsDirect.png
1 0 5% 0 AngleIcon84.png 0 100 150 4.0 0 0.0 8.0 5.0 1.0x 1.0x 0% HitboxTableIcon(Clang).png HitboxTableIcon(Rebound).png TypeIcon(Foot).png EffectIcon(Normal).png HitboxTableIcon(GroundedTrue).png HitboxTableIcon(AerialTrue).png L Kick SpecialsDirect.png
Hit 2 (loop)
0 0 1.3% 0 AngleIcon87.png 0 100 110 7.0 0 0.0 19.0 5.5 0.0x 1.0x 0% HitboxTableIcon(Clang).png HitboxTableIcon(Rebound).png TypeIcon(Foot).png EffectIcon(Normal).png HitboxTableIcon(GroundedFalse).png HitboxTableIcon(AerialTrue).png M Kick SpecialsDirect.png
1 0 1.3% 0 AngleIcon87.png 0 100 110 7.0 0 0.0 19.0 5.5 0.0x 1.0x 0% HitboxTableIcon(Clang).png HitboxTableIcon(Rebound).png TypeIcon(Foot).png EffectIcon(Normal).png HitboxTableIcon(GroundedTrue).png HitboxTableIcon(AerialFalse).png M Kick SpecialsDirect.png
Hit 3
0 1 1.3% 0 Autolink angle (366) 0 100 40 7.0 0 0.0 19.0 5.5 0.0x 1.0x 0% HitboxTableIcon(Clang).png HitboxTableIcon(Rebound).png TypeIcon(Foot).png EffectIcon(Normal).png HitboxTableIcon(GroundedTrue).png HitboxTableIcon(AerialTrue).png M Kick SpecialsIndirect.png
Hit 4
0 1 1.3% 0 AngleIcon290.png 0 100 16 4.0 0 0.0 20.0 5.5 0.0x 1.0x 0% HitboxTableIcon(Clang).png HitboxTableIcon(Rebound).png TypeIcon(Foot).png EffectIcon(Normal).png HitboxTableIcon(GroundedTrue).png HitboxTableIcon(AerialTrue).png M Kick SpecialsIndirect.png
1 1 1.3% 0 AngleIcon90.png 0 100 12 7.0 0 0.0 12.0 10.0 0.0x 1.0x 0% HitboxTableIcon(Clang).png HitboxTableIcon(Rebound).png TypeIcon(Foot).png EffectIcon(Normal).png HitboxTableIcon(GroundedTrue).png HitboxTableIcon(AerialTrue).png M Kick SpecialsIndirect.png
Hit 5
0 0 4% 0 AngleIcon48.png 50 209 0 8.0 0 0.0 12.5 11.0 0.0x 2.5x 0% HitboxTableIcon(Clang).png HitboxTableIcon(Rebound).png TypeIcon(Foot).png EffectIcon(Normal).png HitboxTableIcon(GroundedTrue).png HitboxTableIcon(AerialTrue).png L Kick SpecialsDirect.png