Diddy Kong (SSB4)
| Diddy Kong in Super Smash Bros. 4 | |
|---|---|
 
| |
| Universe | Donkey Kong |
| Other playable appearance | in Brawl |
| Availability | Starter |
| Final Smash | Rocketbarrel Barrage |
| Tier | S (1) |
Diddy Kong (ディディーコング, Diddy Kong) is a playable character in Super Smash Bros. 4. He was confirmed on February 21st, 2014, coinciding with the international release date of Donkey Kong Country: Tropical Freeze. Diddy Kong retains his realistic chimpanzee screeches from Super Smash Bros. Brawl.[1]
Diddy Kong currently rests at 1st out of 58 characters in the tier list, on the S tier, a slight rise from being 4th out of 38 in Brawl. Diddy Kong's strengths lie in his profound comboing ability, with attacks flowing very well together as a result of their surprisingly long reach for a character of his size, quick frame data, and low knockback. He also has a fair share of strong finishers, such as his smash attacks, which he can combo into. He is highly mobile and has a strong neutral game thanks to his Banana Peel and Peanut Popgun.
However, Diddy Kong is quite susceptible to being gimped, as Monkey Flip is linear and short-distanced while Rocketbarrel Boost is very unsafe to use from virtually any distance. He also suffers from a poor damage output, exacerbated by his poor aerial mobility when not using special moves, which hinders his aerial combo game. Finally, his Banana Peel, which heavily contributed to his top tier status in Brawl, has reduced stage control potential and is no longer capable of locking or zero-deathing opponents as the active Banana Peel maximum was reduced to one. Still, his strengths generally outshine his flaws, and he has seen some of the best tournament representation and results of any character in spite of being severely nerfed by updates.
Despite this, Diddy's tier placement is somewhat debated, as other characters such as Mario have recently been more dominant in competitive play; in particular, Diddy's best player ZeRo no longer shows the same level of dominance as he once did, even in the early days of version 1.1.6.
Attributes
Diddy Kong, true to his appearance in the Donkey Kong games, is an overall agile character. He is a middleweight with fast walking speed, fast dashing speed, fast falling speed, strong jumps, as well as the ability to wall cling and crawl. However, he has low air speed, below average air acceleration and high gravity, hindering his aerial mobility.
Diddy Kong's greatest strength is the resilience of his moveset. His jab is not only quick, but decently strong as well, having some KO potential at high percentages. Forward tilt has very good range, can be angled and deals good knockback, making it great for fending off opponents. Up tilt has follow-up potential at low percentages and good KO potential at high percentages. Down tilt has low knockback, giving it the ability to combo into itself, as well as KO set-ups into up smash and forward aerial. His smash attacks have high speed and high power, making them great for finishing off opponents. Down smash is also a semi-spike, making it great for edgeguarding and covering rolls. Forward aerial is fast, strong and has long duration, making it a great choice in any case. Back aerial is very fast, and its varied power makes it useful for comboing. Up aerial, while significantly nerfed over time, remains extremely fast, hitting on frame 4, making it excellent at keeping opponents above Diddy Kong at bay. Lastly, down aerial has large autocancel windows and high power, making it a very dependable meteor smash. Along with the speed of his moves, Diddy Kong's limbs have the unique ability of stretching, giving his attacks surprising range.
Diddy Kong's already great neutral game is further supplemented by his versatile special moves. Peanut Popgun allows Diddy Kong to shoot a peanut, a weak projectile that can be used for edgeguarding or disrupting approaches. While slow and difficult to land, the explosion from the overcharged popgun can also be used as an attack. It is also tremendously powerful, dealing 23% damage and heavy knockback, KOing earlier than even King Dedede's forward smash. Monkey Flip is a command grab that lets Diddy Kong latch onto and pummel an opponent. From there, it can be followed up by either a double punch or a jump attack, with the latter being a meteor smash and granting Diddy Kong a second use. Alternatively, it can be cancelled immediately into a strong flying kick. The jump also grants a lot of momentum, making it a great move for recovery. Rocketbarrel Boost is Diddy Kong's primary means of recovery, covering large amounts of distance, especially if fully charged. Diddy Kong can also ram and launch opponents, and if attacked during it, the rocketbarrels become unblockable projectiles. Finally, Banana Peel is a defining part of Diddy Kong's ground game. It can be used as a regular banana peel or out of shield, both of which can be used for predicting the opponent's floor recovery or leaving them open to a smash attack.
However, Diddy Kong has some serious flaws. His damage output has been nerfed over time, and has now ended up being below average. This makes it crucial for him to extend his combos in any way possible. In addition, as a fastfaller, Diddy Kong is vulnerable to combos, making it easy for other characters with reliable combos to rack up damage on him, worsening his already mediocre survivability. While his high jumps, wall cling and special attacks grant very long distance overall and allow for many mix-ups, none of them are effective on their own, making his recovery easy to gimp. As mentioned before, Rocketbarrel Boost has to be charged to cover long distances, and the rocketbarrels will detach from Diddy Kong if he's hit. This means that any hit during the move can be detrimental to Diddy Kong, with meteor smashes often KOing him outright.
Diddy Kong doesn't benefit much from his custom moves, having only two that are overall better than their defaults: Rocketbarrel Attack and Shocking Banana Peel. Rocketbarrel Attack has much less maneuverability and is slower, but is extremely powerful even when uncharged, granting Diddy Kong a lethal surprise KO option. Shocking Banana Peel has a different throw trajectory and is less effective when thrown directly at the opponent, but is able to paralyze the opponent, leaving them wide open to any attack. The rest of his custom moves have disadvantages that noticeably outweigh their advantages, with Exploding Popgun being particularly notorious.
Overall, despite his constant nerfs, Diddy Kong remains a very potent character. The combination of high combo versatility and strong stage control have granted him great results in tournaments, and is ranked first on the official tier list, being even higher than in Brawl.
Changes from Brawl
Initially, Diddy Kong was heavily buffed in his transition from Brawl to SSB4 despite already being a top tier character, but as of patch 1.0.8, he is considered to be slightly nerfed overall. He has received a major nerf to his Banana Peel move, which was previously the key to his past success, and many attacks deal less damage, weakening his damage racking abilities. To make up these nerfs however, he has attained many new easily usable combos, which are further benefitted by the changes to hitstun canceling, and some of his moves were buffed to KO better. Overall, he is still seen as one of the most successful characters in competitive play, albeit not nearly as much as in early versions of the game.
Aesthetics
 Like Donkey Kong and Fox, Diddy has more stylized fur than he did in Brawl. His proportions have been tweaked to match his more recent appearances in Donkey Kong Country Returns and Donkey Kong Country: Tropical Freeze. For example, Diddy's head is smaller in proportion to his body, and his cap matches the one with the differently-colored Nintendo logo as shown in Donkey Kong Country: Tropical Freeze. However, his arsenal of weaponry (namely his Peanut Popgun and Rocketbarrels) are not from these recent installments and remain aesthetically unchanged. Like other veterans, Diddy Kong's pigments are more prominent than they were in Brawl, with the visual sharpness of his red attire and brown fur increased. This coincidentally makes Diddy Kong similar to his appearance in Donkey Kong 64. Diddy's general expressiveness has also been exaggerated, like Donkey Kong. Many of his animations are now accompanied with look of distraught surprise.
- Diddy's teeth are no longer visible while performing his side taunt.
- Diddy now claps at the results and No Contest screens.
Attributes
 Diddy Kong's more elastic limbs stretch out farther in his attacks, which gives a significant increase in the reach of his attacks.
- Diddy dashes slightly faster (1.721 → 1.824).
- Diddy's air speed is slightly faster (0.82 → 0.88).
- Diddy's falling speed is faster (1.43 → 1.75) this improves Diddy Kong's vertical endurance, it worsens Diddy Kong's recovery, and makes Diddy Kong more vulnerable to combos.
Ground attacks
- Third hit of neutral attack now transitions into a finisher, making it much safer overall.
 First and second hit of jab and the neutral infinite deal less damage (first hit: 3% → 1.2%, second hit: 2% → 1.2%, neutral infinite: 2/1% → 1%).
- Dash attack, forward tilt, up tilt, and down tilt deal less damage (dash attack: 9% → 7%, forward tilt: 11%/9%/8% → 10%/7%, up tilt: 7% → 6%, down tilt: 7% → 5.5%) with only the final hit of dash attack having its knockback compensated.
- Dash attack has more endlag, making the move slightly less reliable for quick setups.
- Up tilt has more knockback growth (130 → 150) and hits at a slightly higher angle (80 → 92), slightly improving its KO potential.
- Up tilt has more ending lag (frame 25 → frame 33) and its hitbox duration is a frame shorter.
- Down tilt's lower knockback makes it have more reliable followups.
- Down tilt's hitbox duration is a frame shorter.
- The second hit of forward smash deals less damage (13% → 11%/9%), although its knockback was compensated (90 → 116). It also has more ending lag (40 → 51).
- Up smash's hits connect better and the last hit has much stronger knockback (70 base/70 growth → 50 base/129 growth), no longer being the weakest.
- Up smash has more 4 more frames of ending lag.
- Down smash hits are reversed, with the front hit being weaker and the back hit being stronger.
- With the aforementioned change, down smash's front hit is much weaker, dealing less damage (16% → 12%).
- Down smash's back hit is does more damage (12% → 15%) and has slightly more knockback (35 base/72 growth → 35 base/76 growth) making the hit much stronger.
- Down smash has 1 more frame of ending lag.
Aerial attacks
- Forward and down aerials have slightly less landing lag (30 → 26 and 30 → 28, respectively) and ending lag.
- Neutral and up aerial have worse autocancel frames (neutral aerial: frame 27 → frame 59, up aerial: frame 1-3, frame 15 → frame 27. Neutral aerial can no longer autocancel in a short hop.
- Forward and up aerial deal less damage (14%/11% → 10%/8% and 11% → 6%, respectively) and their knockback wasn't compensated enough (forward aerial: 80 growth → 86 growth, up aerial: 30 base/90 growth → 64 base/89 growth).
- Diddy Kong has a new up aerial; instead of performing a flip kick, he now swings his leg up and halfway across his head. It sends opponents at a better angle for combos (76° angle).
- Back aerial has more knockback scaling (100 → 102).
- Down aerial's sweetspot deals slightly more damage (12% → 13%).
- Down aerial's hitbox duration only last for 1 frame. Additionally, it now has a sourspot, which deals less damage 10%.
Throws/other attacks
- Dash grab comes out faster (frame 10 → 8).
- Pivot grab comes out slower (frame 8 → 9).
- Forward and back throw's animations are much slower, making them easier to DI.
- Forward throw deals 2% less damage.
- Back throw deals 2% more damage.
- Up throw's slightly lower knockback and the changes to hitstun make it much more reliable for comboing up until high percentages.
- Up throw deals less damage (4%, 5% (9% total) → 1%, 4% (5% total)).
- Down throw now sends opponents overhead instead of behind which makes it much more reliable for comboing, now being able to set up any aerial until mid percents (depending on the opponent's character).
- Down throw deals less damage (9% → 7%).
Special moves
- Peanut Popgun's explosion from overcharging now has a very powerful hitbox.
- Peanut Popgun deals 5% less damage when fully charged, and has more endlag per shot, essentially slowing its rate of fire down.
- Monkey Flip now allows Diddy to automatically pummel the opponent once he grabs onto them. The launch is also more powerful and can now KO at around 200%. It also travels slightly further.
- Monkey Flip's jump release deals less damage (10% → 8%).
- Rocketbarrel Boost is now able to move at horizontal trajectories, opening up more recovery options and making Diddy's recovery less linear in general.
- Rocketbarrel Boost needs to be charged longer to cover more distance than it did in Brawl.
- Diddy can now only have one Banana Peel out at a time, significantly reducing Diddy's ability to control the stage, and completely removing the double banana lock and the move's ability to zero-death opponents in Brawl. In addition, Banana Peels can now be destroyed by opponents and will disappear after touching the ground twice.
- Rocketbarrel Barrage no longer puts Diddy into helpless upon completion.
- Rocketbarrel Barrage deals less damage.
- The peanuts fired from the Peanut Popgun and Rocketbarrel Barrage no longer break into pieces, making the peanuts no longer consumable. This also hinders Diddy's potential of recovering damage this way, but also keeps the opponents from healing.
Update history
Likely as a result of his dominance in early competitive play, taking top spots in several tournaments, Diddy Kong was infamously nerfed by patches. Previously, Diddy Kong possessed powerful aerials that could easily be comboed into, most notably down throw to one or more up aerials, which was both a powerful KOing and damage racking tool which was simple to execute. However, patches 1.0.6 and 1.0.8 greatly weakened the hitstun, damage, and knockback of several of Diddy's most frequently used moves, particularly the aforementioned down throw to up aerial combo, bringing Diddy's competitive usage more in line with other frequently used SSB4 characters. The changes on shield mechanics slightly hinder him, too, as banana throw out of shield, one of his fastest punish options, comes out slower.
Nevertheless, while Diddy Kong initially seemed to be much less effective after the nerfs, his neutral game has not been nerfed significantly in these updates, and he has obtained slight buffs in other areas, so he is still seen as a popular and successful character in competitive play.
In patch 1.1.1, Diddy Kong had a glitch that had rendered him invulnerable to grabs of any kind until he performed any kind of dodging maneuver. This was later fixed in patch 1.1.2, nine days after 1.1.1's worldwide release.
- Neutral infinite's loop hits deals less damage per hit (1% → 0.6%).
- Neutral infinite's loop hits launch opponents at a higher angle (60° → 70°/90°), they have lower set knockback (8 → 6) and they have a lower hitlag multiplier (2x → 1.3x). All of these changes overall make neutral infinite connect more reliably.
- Neutral infinite's loop hits have bigger hitboxes (2.8u → 3u).
- Neutral infinite's final hit has a larger hitbox (4u → 5u) which is positioned higher (y offsets: 5 → 5.5), improving its range.
 Diddy Kong can no longer use Peanut Popgun to cancel non-tumble hitstun.
- This naturally hinders the move's utility at lower percents especially, as Diddy can no longer use Peanut Popgun to potentially escape combos.
- Exploding Popgun can no longer hit damageable floors.
- Monkey Flip's grab has more startup lag with a shorter duration (frames 19-36 → 20-36).
- Monkey Flip and Flying Monkey Flip's grabs have smaller hitboxes (4u/5u → 3u/4u) which have been positioned closer to Diddy (z offset: 5/4 → 3/2), reducing their range.
- Diddy's barrel jets from Rocketbarrel Boost (and its custom variants) have received additional visual wind effects.
- Forward smash has more ending lag (FAF 48 → 51).
- Forward smash's sweetspot launches opponents at a higher angle (40° → 46°).
- Up aerial deals less damage (8% → 6%) without compensation on its knockback, significantly hindering its KO potential.
- However, this also improves its combo potential at higher percents.
- Forward aerial deals less damage (12% (clean)/10% (late) → 10%/8%).
- Up throw deals less damage (6% (throw)/10% (total) → 4%/8%) without compensation on its knockback. This hinders its KO potential but improves its followup potential at higher percents.
- Down throw deals less damage (7% → 6%) and it has increased kncokback scaling (40 → 50). This gives the throw more knockback overall, hindering its combo potential at higher percents.
- Monkey Flip's kick now has an extra hitbox that deals 10% damage near the end of the kick.
- Monkey Flip's grab deals less damage (12% → 10%).
- Monkey Flip's jump deals less damage (10% → 8%).
- Jab improved. It transitions through to the second hit 2 frames faster, to the third hit 1 frame faster, and to the infinite portion 7 frames faster. The rapid hits additionally have reduced SDI capacity, and the final hit of the jab has increased reach, increased base knockback, and 4 less frames of ending lag.
- The complete jab deals marginally less damage.
- Down tilt's damage was reduced by 0.5%, decreasing it's knockback. This, however, allows him to combo into moves like forward smash later.
- Up aerial's hitboxes on frame 3 are removed, causing it to cover less range and have more starting lag, it autocancels 12 frames later, and has less interruptibility (frame 36 → frame 39), lessening its usefulness for spacing attacks and making it harder to combo with. Its knockback growth was also decreased weakening its KO capabilities.
- All of Diddy's grabs have 3 more frames of ending lag.
- Up throw's damage was reduced (8% → 5%) and its knockback was increased, reducing its follow-up capabilities & making reliable KO followups slightly more difficult.
- Down throw damage increased: 6% → 7%.
- Down throw has increased knockback growth and a very slightly more diagonal knockback trajectory, reducing its follow-up capabilities and removing all guaranteed follow ups around 135%. Despite its higher knockback growth, it still cannot KO at realistic percentages.
- Up smash's final hit knockback growth: 126 → 129.
Technical changelist
| Change | Old value | New value |
|---|---|---|
| Jab 1 damage | 1.5% | 1.2% |
| Transition from Jab 1 to Jab 2 | frame 10 | frame 8 |
| Jab 2 damage | 1.5% | 1.2% |
| Transition from Jab 2 to Jab 3 | frame 9 | frame 8 |
| Jab 3 weight-based knockback | 30 | 25 |
| Jab 3 hitbox sizes | 4/3.5/3 | 4.2/3.7/3.2 |
| Transition between third hit and looping hits of jab | frame 22 | frame 15 |
| Looping hits of jab now use a large, single hitbox as opposed to many small ones | ||
| Looping hits of jab damage | 0.6% | 0.5% |
| Looping hits of jab angle | 70/90 | 60 |
| Looping hits of jab weight-based knockback | 6 | 4 |
| SDI capacity of jab rapid hits | 1.3 | 0.7 |
| Unknown parameters of rapid jab hits changed | Default | 6.8/6.0 |
| Final hit of jab animation length | frame 8 | frame 4 |
| Final hit of jab knockback growth | 180 | 177 |
| Final hit of jab base knockback | 30 | 45 |
| Final hit of jab hitbox size | 5 | 7.2 |
| Final hit of jab Y-offset | 5.5 | 6.8 |
| Unknown parameters of final hit of jab changed | 5.5 | 6.8/6.0 |
| Down tilt given an additional hitbox identical to its other two hitboxes | ||
| Down tilt damage | 6% | 5.5% |
| Up air startup | 3 frames | 4 frames |
| Up air autocancel window | Frames 0-2/15 | Frame 27 |
| Up air base knockback | 65 | 64 |
| Up air knockback growth | 99 | 89 |
| Grab total duration | 28 frames | 31 frames |
| Dash grab total duration | 35 frames | 38 frames |
| Pivot grab total duration | 33 frames | 36 frames |
| Up throw (hit 2) damage | 4% | 1% |
| Up throw (hit 2) base knockback | 30 | 50 |
| Up throw (hit 2) knockback growth | 100 | 120 |
| Down throw damage | 6% | 7% |
| Down throw angle | 105° | 106° |
| Down throw knockback growth | 50 | 59 |
| Upsmash knockback growth | 126 | 129 |
- Up smash links better.
- Down smash has increased knockback growth on both hits: 69/74 → 72/76.
- Created glitch where Diddy Kong cannot be grabbed if he shield jumps or shield grabs a multihit attack.
![]() 1.1.2
1.1.2
- Fixed glitch induced by the previous update where Diddy Kong cannot be grabbed if he shield jumps or shield grabs a multi-hit attack.
- Trip invincibility and all trip followups except floor attack have one less frame of invincibility.
Moveset
- Diddy Kong can wall jump, wall cling, and crawl.
| Name | Damage | Description | ||
|---|---|---|---|---|
| Neutral attack | 1.5% | Diddy Kong slaps forward twice, turns around to quickly kick the foe, and proceeds to repeatedly whip them with his tail. The attack finishes with an upward tail flick.Very strong for a jab, having KO potential near the edge at high percents. | ||
| 1.5% | ||||
| 2% | ||||
| 0.6% (infinite), 3% (last hit) | ||||
| Forward tilt | 10% (clean), 7% (late) | Diddy Kong leans to the side and thrusts both of his arms forward in a double punch. This attack can be tilted upwards or downwards. | ||
| Up tilt | 6% | Diddy Kong swats in the air above him with a slap and looks similar to an uppercut. Can KO at high percentages. | ||
| Down tilt | 5.5% | Diddy Kong claps forward while crouching. Comes out fast and can combo into many moved such as itself, a running up smash, or forward aerial, depending on the opponent's percentage. Considered to be one of the best moves in the game and a great KOing option. | ||
| Dash attack | 2% (hits 1-2) 3% (hit 3) | Diddy Kong performs his signature Cartwheel attack from Donkey Kong Country. The final hit has largely vertical knockback. Its adjusted animation from Brawl now has it end with a ground-slap with both hands. | ||
| Forward smash | 5% (hit 1), 11% (sweetspot hit 2), 9% (sourspot hit 2) | Diddy Kong spins and slaps forward, then swings his fist immediately after. The first hit has no knockback. | ||
| Up smash | 2.5% (hits 1-2), 6% (hit 3) | Diddy Kong hops briefly and performs a stationary cartwheel. The attack's vertical reach is greater and his hand now forms a fist in the final hit. | ||
| Down smash | 12% (front), 15% (back) | Diddy Kong performs a sweeping kick around himself. It has less knockback than his forward smash. | ||
| Neutral aerial | 6% | Diddy Kong does an aerial cartwheel similar to his dash attack. Has vertical knockback. | ||
| Forward aerial | 10% (clean), 8% (late) | Diddy Kong kicks both feet forward while spinning, similar to Mario and Luigi's old forward aerial in Super Smash Bros.. It hits at the Sakurai angle, and has good power for how fast and ranged it is, making it a useful move for edgeguarding. | ||
| Back aerial | 9% | Diddy Kong thrusts his leg backward and spins it behind him. Has fairly strong knockback. | ||
| Up aerial | 6% | Diddy Kong performs an overhead kick. Since the 1.0.6 and 1.0.8 updates, it has had low knockback and little range, though it can still combo into itself and Diddy Kong's other aerials at lower damages. | ||
| Down aerial | 13% (clean), 10% (late) | Diddy Kong swings both arms downward in a double axe-handle punch. A strong meteor smash and Diddy Kong's strongest aerial, though it is also his slowest. | ||
| Grab | — | Diddy Kong grabs his opponent in a bear hugging style. | ||
| Pummel | 2% | Diddy Kong jumps up to headbutt his target, angled from the side of his body. | ||
| Forward throw | 9% | Diddy Kong tosses his opponent forwards. The throw is based on Diddy Kong's barrel toss animation from Donkey Kong Country. Can combo into Fair and Uair at very low percentages. Can KO around 150%. | ||
| Back throw | 12% | Diddy Kong tosses his opponent backwards. Diddy's strongest and most damaging throw, KOing middleweights around 130%. | ||
| Up throw | 1% (hit 1), 4% (throw) | Diddy Kong throws his opponent up and handstand kicks them. Good combo tool before 110%. | ||
| Down throw | 7% | Diddy Kong throws the opponent onto the ground and hops over them. Can combo into aerials, such as the infamous link into up air. | ||
| Floor attack (front) | 7% | Diddy Kong gets up and kicks on both sides. | ||
| Floor attack (back) | 7% | Diddy Kong gets up and kicks on both sides. | ||
| Floor attack (trip) | 5% | Diddy Kong gets up and kicks on both sides. | ||
| Edge attack | 7% | A spinning tail slap. | ||
| Neutral special | Default | Peanut Popgun | 3-12% (Peanuts), 23% (explosion) | Diddy Kong shoots a peanut from his Popgun. The longer Diddy charges the attack, the farther and quicker the peanut will fly. If Diddy overcharges the attack, however, it will cause a very powerful explosion that leaves him vulnerable. |
| Custom 1 | Exploding Popgun | 1% (Shot), 25% (explosion) | Diddy Kong charges his Popgun, solely for exploding, and it charges faster. If released early, Diddy Kong will then do a shot without a Peanut firing and it will hurt when up close at the cost of damage. | |
| Custom 2 | Jumbo Peanuts | 7-11% (Peanuts), 18% (explosion) | Diddy Kong shoots a giant peanut from his Popgun. The peanuts don't fly as far, but are more powerful than normal. Requires slightly less time to fully charge. | |
| Side special | Default | Monkey Flip | 14% (clean midair kick), 12% (mid midair kick), 10% (late midair kick), 1% (pummel), 3% (grab attack hit 1), 7% (grab attack hit 2), 3% (jump attack hit 1), 5% (jump attack hit 2) | Diddy Kong performs a sideways hop that has the potential to launch Diddy onto an opponent's face if timed correctly. Once Diddy has clung onto his foe's face, he can double chop them and leap away with the attack button, or can perform a footstool jump with the jump button. Finally, tapping the special button while he is flipping will cause Diddy to attack with a flying kick instead. |
| Custom 1 | Back Flip | 17% (clean), 12% (mid), 8% (late) | Diddy Kong hops backwards, and can perform a flying kick forwards with another button press. Can't grab however. | |
| Custom 2 | Flying Monkey Flip | 10% (clean midair kick), 8% (late midair kick), 1% (pummel), 3% (grab attack hit 1), 5% (grab attack hit 2), 7.5% (jump attack hits 1-2) | Diddy Kong jumps higher, but his flying kick and regular grab attack is weaker. The jump attack, however, is a much stronger meteor smash. | |
| Up special | Default | Rocketbarrel Boost | 10% (launch explosion), 6-8% (collision with opponent) | Diddy Kong charges his rocketbarrels from Donkey Kong 64 in a powerful attack. Can potentially fly very far and very fast, but hitting a surface (or being hit) will make Diddy Kong lose his rocketbarrels and will fall helplessly. Diddy Kong will gain 5% damage for hitting a surface. |
| Custom 1 | Rocketbarrel Attack | 18% (launch explosion) | A more powerful attack than Rocketbarrel Boost, but has less maneuverability. Requires slightly more time to fully charge. | |
| Custom 2 | Rocketbarrel Kaboom | 7% (launch explosion), 6-8% (collision with opponent) | Charges faster and controls better than Rocketbarrel Boost, but will explode if Diddy Kong hits any terrain during the move. | |
| Down special | Default | Banana Peel | N/A | Diddy Kong tosses a banana peel over his shoulder and into the air to have it fall onto the ground. Opponents who touch the peel will slip and trip. Unlike in Brawl, only one banana peel can exist at one time, and it disappears when hit by an opponent. |
| Custom 1 | Shocking Banana Peel | N/A | Diddy Kong tosses a banana peel into the air to have it fall onto the ground. Opponents who come in contact with the peel will be stunned momentarily. The stun time is longer if the opponent steps on the peel as opposed to getting hit by it. | |
| Custom 2 | Battering Banana Peel | N/A | Diddy Kong tosses a banana peel straight up. Opponents who come in contact with the peel will be launched upwards as well. | |
| Final Smash | Rocketbarrel Barrage | 5-10% (Peanuts), 12% (collision) | Diddy Kong flies around on his rocketbarrels, shooting explosive peanuts everywhere. The peanuts fly great distances and have great power, but crashing into enemies does more damage. Has greater movement speed than it does in Brawl, but is even harder to control. It no longer puts Diddy Kong into a helpless state when ended in the air. | |
On-screen appearance
- Diddy Kong bursts out of a DK Barrel and briefly strikes a pose.

|
|---|
Taunts
- Up taunt: Tosses his cap in the air and has it land on his head. This is a reference to his victory pose in Donkey Kong Country, after he defeats a boss or wins in a Bonus Area.
- Side taunt: Does a playful fighter's stance and cackles.
- Down taunt: Claps his hands above his head four times, switching feet in the process.
| Up taunt | Side taunt | Down taunt |
|---|---|---|

|

|

|
Idle poses
- Scratches his rump, gets down on all fours, and shakes his fur.
- Jumps in place twice.
 |

|
|---|
Crowd cheer
| English | Japanese | |
|---|---|---|
| Cheer | ||
| Description | Did-dy Kong! | Diddy Kong! |
| Pitch | Group chant | Group chant |
Victory poses
- Shoots at the "camera lens" with his Peanut Popguns.
- Spins around with his Rocketbarrel and does a jig.
- Does a little dance and claps his feet while standing on one hand.
 |
 |

|
|---|
In competitive play
Official Custom Moveset Project
| Character | Custom sets available | ||||
|---|---|---|---|---|---|
| 1121 | 1123 | 1113 | 1131 | 1133 | |
| 1211 | 3111 | 1213 | 1112 | 3121 | |
Notable players
Active
 ADHD - 5th at KTAR XII, 9th at KTAR XV and Collision XIV, 13th at SKTAR 4.
- Angel Cortes - The second best Diddy Kong player in the Tristate region and one of the original Diddy Kong players, 5th at Super Smash Con 2015 and Do or DI, 9th at SKTAR 4 and Olympus, 17th at Pound 2016, 33rd at Apex 2015 and GENESIS 3, ranked 38th on the Panda Global SSB4 Rankings.
 Chrim Foish - Arguably the best Diddy Kong player in Canada, 4th at Enthusiast Gaming Live, 5th at Get On My Level 2015 and Summit 2015, 7th at Canada Cup 2016, ranked 4th on the Southern Ontario Smash 4 Power Rankings.
 cyve - The best Diddy Kong player in Europe, 2nd at B.E.A.S.T 5, 3rd at Key to The PG House's European qualifier, 9th at B.E.A.S.T 6, 33rd at Apex 2015, ranked 1st on the German Smash 4 Power Rankings.
- DJ Fliphop - 7th at Clutch City Clash, 17th at Apex 2015, ranked 2nd on the Houston Smash 4 Power Rankings, regularly attends TGC tournaments.
- dyr - 9th at Shine 2016, 17th at CEO 2015 and EVO 2016, ranked 1st on the Central Florida Smash 4 Power Rankings.
 Firehao - The Best Diddy Kong player in Chile, and one of the original Diddy Kong players. Ranked 1st on the Chilean Smash 4 Power Rankings, he took a game from ZeRo at Showdown VI.
- James - 2nd at Midwest Mayhem 6: SoCal Invasion, 17th at The Big House 6, 7th at Apex 2016 and 25th at Pound 2016 are some of his notable placings. Ranked 6th on the New Jersey Power Rankings for July 1st to December 31st.
 Jezmo - The best Diddy Kong player in Australia, ranked 5th on the Australian Smash 4 Power Rankings.
- JJROCKETS - One of the original Diddy Kong players, constantly traveled the USA during 2015 for tournaments. 4th at Combo Breaker 2015, 13th at Shine 2016, 17th at Dismantle 2, 33rd at CEO 2015, The Big House 5 and The Big House 6, ranked 2nd on the Chicago Smash 4 Power Rankings.
- JPeds - 7th at Canada Cup 2015.
- Jtails - One of the original Diddy Kong players. 1st at KTAR XI, 4th at Spring Fighter 2015, 7th at KTAR XVII, 9th at KTAR XII, SKTAR 4 and KTAR XVI, 13th at Apex 2015.
- K9sbruce - Ranked 9th on the SoCal Smash 4 Power Rankings, often uses it as a secondary or counterpick.
- Legit - 3rd in NorCal, has wins over Zex, Trevonte, Cacogen, Dath, Elegant, Xzax, Ryo, Shaky, Ito, and Tearbear.
- MVD - 3rd at Paragon Los Angeles 2015, 4th at PAX Prime 2015, 5th at Sandstorm and CEO 2015, 9th at Super Smash Con 2015, 17th at EVO 2015, 25th at Pound 2016, ranked 4th on the South Florida Smash 4 Power Rankings
 Nietono - Regularly places high at Umebura tournaments, 3rd at Apex 2016, 7th at Umebura 25, 9th at Umebura F.A.T. and Umebura S.A.T., 13th at CEO 2016, 25th at GENESIS 3, ranked 3rd at the eSports Runner Japanese Smash 4 Power Rankings and 6th at the Umebura Smash 4 Power Rankings.
 Phogos - Ranked 3rd on the French Smash 4 Power Rankings.
- Ryuji - 5th at Umebura Genesis Cup.
- ZeRo - The best Diddy Kong player worldwide and one of the original Diddy Kong players, won 56 tournaments consecutively with Diddy Kong as part of his main characters. Was ranked on the top spot for several SoCal Smash 4 Power Rankings, currently ranked 1st on the Panda Global SSB4 Rankings.
- Zinoto - The second best Diddy Kong player worldwide and one of the original Diddy Kong players, started gaining notability after 17th at The Big House 5, ranked 2nd on the Michigan Smash 4 Power Rankings.
Inactive
- AeroLink - 9th at Apex 2015.
- C3PO - 13th at KTAR XVI and KTAR XVII, 17th at CEO 2016, 25th at Pound 2015, ranked 2nd on the Pennsylvania Smash 4 Power Rankings.
- Mew2King - One of the original Diddy Kong players, 1st at Paragon Orlando 2015, 2nd at KTAR XI and Chokaigi 2015, 3rd at Sandstorm, 5th at Apex 2015.
- RAIN - Regularly placed high at Umebura tournaments when he used him, winning Umebura 11 to Umebura 15 with him.
Tier placement and history
Since the game's release, Diddy Kong was noticed to have gained heavy buffs despite being one of the best characters in Brawl and his Banana Peel getting nerfed, and soon became extremely dominant in early competitive play due to his very powerful combos; his throw combos combined with his strong aerial game flowed well into the other, with his Banana Peel offering strong stage control in spite of the nerfs. His unavoidable KO confirm from up/down throw to up aerial combo also quickly became infamous for easily securing KOs at relatively low percentages (known as the "Hoo-Hah") and his up aerial had the speed and range necessary to KO easily without the need of the "Hoo-Hah", as well as many of his moves being both speedy and hard-hitting and with good range (like forward smash). These traits resulted in him being deemed the best character in the game. As a result, Diddy Kong players came to tournaments by the dozens, resulting in multiple Diddy dittos and multiple who made use of little but the "Hoo-Hah", resulting in him being utterly loathed by casuals and experts alike. Likely as a result of this, Diddy was heavily nerfed by updates 1.0.6 and 1.0.8, and his representation dropped significantly, becoming largely abandoned while Sheik was considered the best character instead. Despite this, due to his key advantages not being deceptively nerfed as other people thought, he remains a potent character due to the adoption of a newer, more creative playstyle, with many high-level players such as Angel Cortes, Jtails, MVD, Nietono, and most notably, ZeRo and Zinoto.
As a result of these factors, Diddy was ranked 9th on the first 4BR tier list, near the bottom of the A tier, but thanks to continued strong results from multiple top players, along with the nerfs to Sheik, Zero Suit Samus and Bayonetta, some matchups that previously caused him trouble in updates 1.1.5 and 1.1.6, he has now taken the 1st spot on the second tier list, despite not being as dominant as he was originally.
Trophies
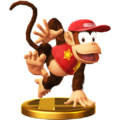
- Diddy Kong
 Donkey Kong's trusty partner. He sports his signature look: red hat, red shirt, Rocketbarrel Pack. In Smash Bros., he's incredibly agile. Charge the Rocketbarrel Pack by holding down the button before launch, and you can steer with left and right. Don't forget to drop banana peels—enemies love it!
 Red cap? Red T-shirt? Rocketbarrel Pack? Yep, it's Diddy Kong. His agility lets him get attacks in quickly in this game. Fire up his Rocketbarrel Pack and keep the button held down to fly further. You can even steer him in the air! Tip: If you don't mind fighting dirty, make you opponent slip on a Banana Peel, then hit 'em while they're down.
 : Donkey Kong Country (11/1994)
- : Donkey Kong Country 2: Diddy's Kong Quest (11/1995)
- Diddy Kong (Alt.)
- The Banana Peel Diddy throws when you use his down special can be picked up and used against you, so be careful. His Monkey Flip side special is a rolling leap followed by a grab (or a kick if you press the button again midjump). If you grab someone, press the button again to attack or jump off them to go high into the air.
- : Donkey Kong Country (11/1994)
- : Donkey Kong Country 2: Diddy's Kong Quest (11/1995)
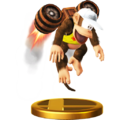
- Rocketbarrel Barrage
- Diddy Kong's Final Smash is an attack on all fronts! Diddy takes to the air with his Barrel Jet, tackling opponents as he fires explosive shots from his Peanut Popguns. His Final Smash is nearing its end when he begins flashing, so get as close to your foes as you can-the Barrel Jet will explode at the end of this Final Smash!
- With a Peanut Popgun in each hand, Diddy showers his foes with a hail of explosive destruction. This Final Smash lets him fly freely through the air, dealing damage to anyone in his way. When his body starts to flash, that means the Final Smash is about to end, so try to catch your foes in the Rocketbarrel Pack's explosion!
- Diddy Kong Trophy.png
Classic (3DS)
- Diddy Kong All-Star Trophy.png
Alt. (3DS)
Classic (Wii U)
Alt. (Wii U)


In Event Matches
Solo Events
- All-Star Battle: Brawl: Diddy Kong is one of the opponents fought in this event. All opponents debut in Brawl, and reappear in Smash 4.
- Guardian of the Jungle: Donkey Kong, aided by 2 Diddy Kongs, must defeat 3 Duck Hunts.
- The Jungle in Chaos: Diddy Kong must defeat 20 Donkey Kongs wearing Bunny Hoods.
Co-op Events
- 1988: Donkey Kong and Diddy Kong must defeat 3 Marios, each one larger than the last.
- The Ultimate Battle: Two players select a character and must defeat the entire roster.
Alternate costumes
.png)
| |||||||

|

|

|

|

|

|

|

|
Gallery
Diddy Kong in the Nintendo Direct from April 8th, 2014.
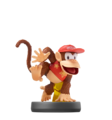
Diddy Kong's amiibo.
The pic of the day shown during Diddy Kong's reveal.
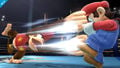
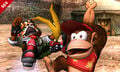
Forward tilt on Mario.
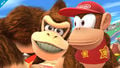
With Donkey Kong.
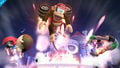
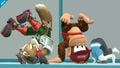
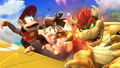
Diddy hitting Villager and Little Mac with Rocketbarrel Boost.
Up smash with Little Mac.
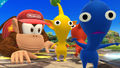
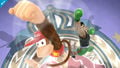
Looking at Pikmin.
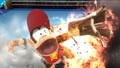
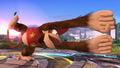
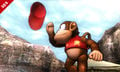
Peanut Popgun overloading.
Teching or rolling with Fox and Wii Fit Trainer.
Up taunt in Super Smash Bros. for Nintendo 3DS.
Down taunt with Fox and a Banana Peel.
Damaging Bowser with an overcharged Peanut Popgun.


Trivia
- Diddy Kong's confirmation was the first time a character was revealed for an international release of a game as opposed to just the Japanese release.
- The elastic quality of Diddy Kong's limbs is similar to another Donkey Kong character, Lanky Kong.
- Diddy Kong's Banana Peels can only be thrown twice before disappearing once landing on the ground, while the actual item when spawned elsewhere can be thrown three times before disappearing.
- Prior to update 1.0.6, Diddy Kong's down-throw to up-air combo had quickly gained notoriety as a quick KO string. It gained the name "Hoo-Hah" after StaticManny interrupted a set between Hungrybox and Player-1.
| Fighters in Super Smash Bros. 4 | |
|---|---|
| Veterans | Bowser · Captain Falcon · Charizard · Diddy Kong · Donkey Kong · Dr. Mario · Falco · Fox · Ganondorf · Ike · Jigglypuff · King Dedede · Kirby · Link · Lucario · Lucas · Luigi · Mario · Marth · Meta Knight · Mewtwo · Mr. Game & Watch · Ness · Olimar · Peach · Pikachu · Pit · R.O.B. · Roy · Samus · Sheik · Sonic · Toon Link · Wario · Yoshi · Zelda · Zero Suit Samus |
| Newcomers | Bayonetta · Bowser Jr. · Cloud · Corrin · Dark Pit · Duck Hunt · Greninja · Little Mac · Lucina · Mega Man · Mii Fighter (Mii Brawler · Mii Gunner · Mii Swordfighter) · Pac-Man · Palutena · Robin · Rosalina & Luma · Ryu · Shulk · Villager · Wii Fit Trainer |
|
| |
|---|---|
| Fighters | Donkey Kong (SSB · SSBM · SSBB · SSB4 · SSBU) · Diddy Kong (SSBB · SSB4 · SSBU) · King K. Rool (SSBU) |
| Assist Trophy | Klaptrap |
| Boss | Giant Donkey Kong |
| Stages | Kongo Jungle · Kongo Falls · Jungle Japes · Rumble Falls · 75m · Jungle Hijinxs |
| Items | Hammer · Barrel Cannon · Peanut · Spring |
| Enemies | Kritter · Tiki Buzz |
| Other | Dixie Kong · DK Barrel · DK Island · Pauline · Zinger |
| Trophies, Stickers and Spirits | Trophies (SSBM · SSBB · SSB4) · Stickers · Spirits |
| Music | Brawl · SSB4 · Ultimate |
| Masterpiece | Donkey Kong |
| Related universe | Mario |