SSB4 Icon.png

King Dedede (SSB4)/Down aerial: Difference between revisions

From SmashWiki, the Super Smash Bros. wiki
Jump to navigationJump to search
No edit summary
(I'm pretty sure this is how the move is from experience)
Line 24: Line 24:
|ff=1.5
|ff=1.5
|trip=0
|trip=0
|g=f
|sfx=Thwomp
|sfx=Thwomp
|slvl=L
|slvl=L
Line 43: Line 44:
|sdi=1.0
|sdi=1.0
|trip=0
|trip=0
|a=f
|sfx=Thwomp
|sfx=Thwomp
|slvl=L
|slvl=L

Revision as of 02:19, May 5, 2018

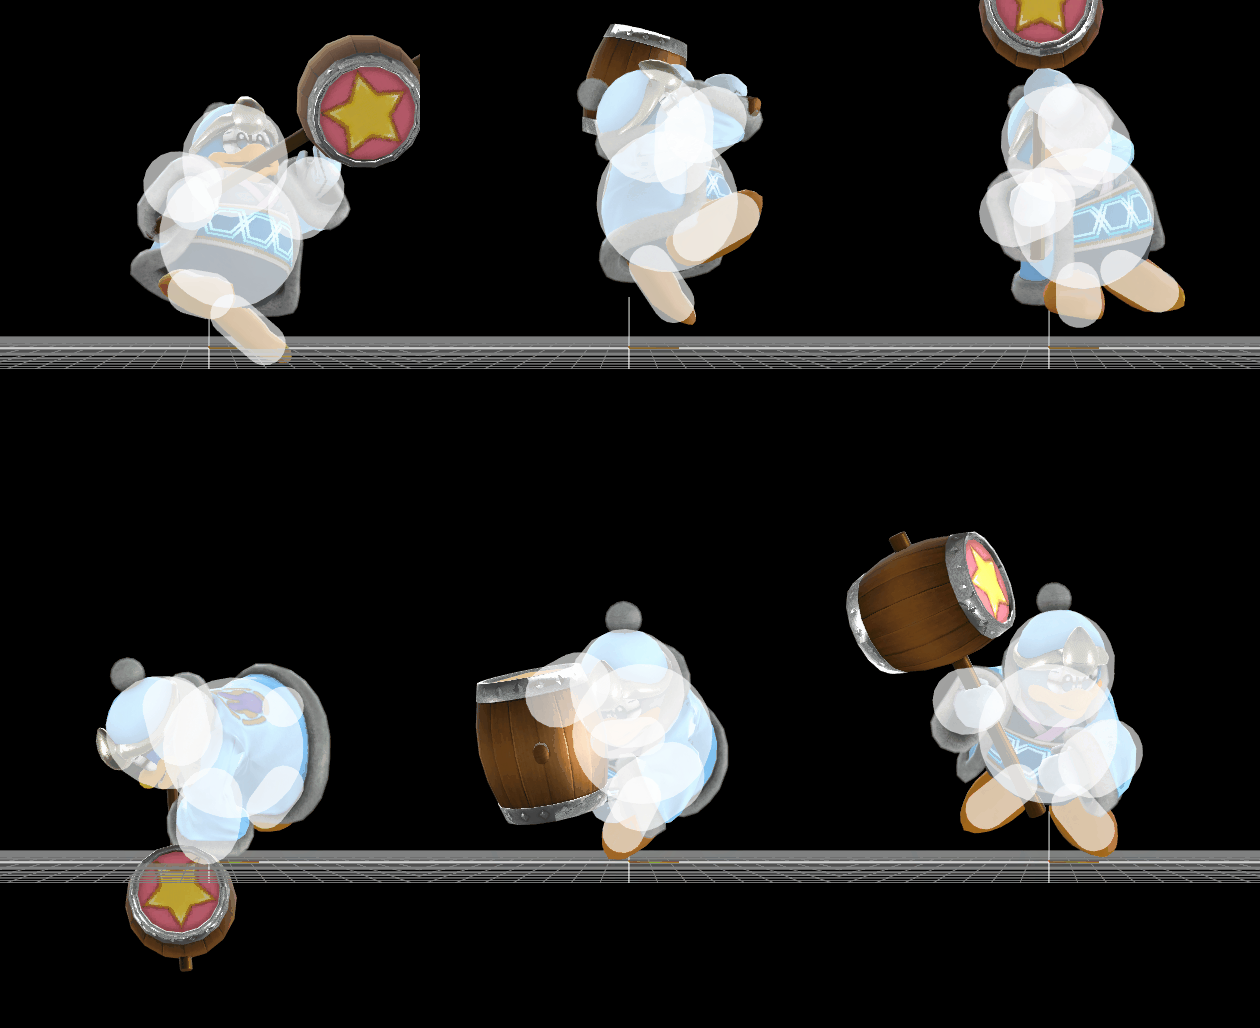
Hitbox visualization showing King Dedede's down aerial.
Competitive.png This article or section may require competitive expertise.
You can discuss this issue on the talk page or edit this page to improve it.
Data.png This article or section may require additional technical data.
You can discuss this issue on the talk page or edit this page to improve it.

Hitboxes

ID Part Damage SD Angle BK KS FKV Radius Bone Offset SDIx T% Clang Rebound Type Effect G A Sound Direct
0 0 15% 0 AngleIcon270.png 20 90 0 5.5 0 0.0 -6.0 -1.0 1.0x 1.5x 0% HitboxTableIcon(Clang).png HitboxTableIcon(Rebound).png TypeIcon(Hammer).png EffectIcon(Normal).png HitboxTableIcon(GroundedFalse).png HitboxTableIcon(AerialTrue).png L Thwomp SpecialsDirect.png
1 0 15% 0 Sakurai angle 20 100 0 6.0 0 0.0 -6.0 -1.0 1.0x 1.0x 0% HitboxTableIcon(Clang).png HitboxTableIcon(Rebound).png TypeIcon(Hammer).png EffectIcon(Normal).png HitboxTableIcon(GroundedTrue).png HitboxTableIcon(AerialFalse).png L Thwomp SpecialsDirect.png
2 0 8% 0 Sakurai angle 20 100 0 8.5 0 0.0 -5.0 -1.0 1.0x 1.0x 0% HitboxTableIcon(Clang).png HitboxTableIcon(Rebound).png TypeIcon(Hammer).png EffectIcon(Normal).png HitboxTableIcon(GroundedTrue).png HitboxTableIcon(AerialTrue).png L Thwomp SpecialsDirect.png