SmashWiki:12TP/Items: Difference between revisions
From SmashWiki, the Super Smash Bros. wiki
Jump to navigationJump to search
FirstaLasto (talk | contribs) m (whoops, didn't see that.) |
m (Text replacement - "\[\[(:)?Image:" to "[[$1File:") |
||
| (One intermediate revision by one other user not shown) | |||
| Line 2: | Line 2: | ||
{{anchor|Home}} | {{anchor|Home}} | ||
{|style="font-size:2.0em;margin:1em auto 1em auto;text-align:center" | {|style="font-size:2.0em;margin:1em auto 1em auto;text-align:center" | ||
|[[ | |[[File:SmashBrosSymbol.svg|50px]] | ||
|<span style="border-bottom:2px solid rgba(193,201,62,1.0)">{{rollover|Item Room|アイテムの部屋}}</span> | |<span style="border-bottom:2px solid rgba(193,201,62,1.0)">{{rollover|Item Room|アイテムの部屋}}</span> | ||
|} | |} | ||
| Line 15: | Line 15: | ||
<div style="text-align:center">'''<span style="font-size:1.5em">{{rollover|Item Types and Effects|アイテムの種類と効果}}</span>'''</div> | <div style="text-align:center">'''<span style="font-size:1.5em">{{rollover|Item Types and Effects|アイテムの種類と効果}}</span>'''</div> | ||
'''<span style="font-size:1.125em">[[ | '''<span style="font-size:1.125em">[[File:SSB64DOJO Crate.gif|60x58px]] {{rollover|Crate|木箱}}</span>''' | ||
*{{TranslationQuality|A large carrier.|大きなもの扱いのキャリアー。|0.55}} | *{{TranslationQuality|A large carrier.|大きなもの扱いのキャリアー。|0.55}} | ||
| Line 30: | Line 30: | ||
---- | ---- | ||
{{anchor|Barrel}} | {{anchor|Barrel}} | ||
'''<span style="font-size:1.125em">[[ | '''<span style="font-size:1.125em">[[File:SSB64DOJO Barrel.gif|51x60px]] {{rollover|Barrel|たる}}</span>''' | ||
*{{TranslationQuality|A large carrier.|大きなもの扱いのキャリアー。|0.55}} | *{{TranslationQuality|A large carrier.|大きなもの扱いのキャリアー。|0.55}} | ||
| Line 39: | Line 39: | ||
---- | ---- | ||
{{anchor|Capsule}} | {{anchor|Capsule}} | ||
'''<span style="font-size:1.125em">[[ | '''<span style="font-size:1.125em">[[File:SSB64DOJO Capsule.gif|22x39px]] {{rollover|Capsule|カプセル}}</span>''' | ||
*{{rollover|Small carrier.|小型キャリアー。}} | *{{rollover|Small carrier.|小型キャリアー。}} | ||
| Line 57: | Line 57: | ||
---- | ---- | ||
{{anchor|Egg}} | {{anchor|Egg}} | ||
'''<span style="font-size:1.125em">[[ | '''<span style="font-size:1.125em">[[File:SSB64DOJO Egg.gif|32x36px]] {{rollover|Chansey Egg|ラッキーのたまご}}</span>''' | ||
*'''{{rollover|Basically the same as a Capsule.|基本的にカプセルと性質はかわらない。}}''' | *'''{{rollover|Basically the same as a Capsule.|基本的にカプセルと性質はかわらない。}}''' | ||
| Line 67: | Line 67: | ||
{{anchor|Tomato}} | {{anchor|Tomato}} | ||
'''<span style="font-size:1.125em">[[ | '''<span style="font-size:1.125em">[[File:SSB64DOJO Maxim Tomato.gif|32x24px]] {{rollover|Maxim Tomato|マキシムトマト}}</span>''' | ||
*'''{{rollover|This item quickly recovers 100 damage.|その場で蓄積ダメージを100回復する速効アイテム。}}''' | *'''{{rollover|This item quickly recovers 100 damage.|その場で蓄積ダメージを100回復する速効アイテム。}}''' | ||
| Line 77: | Line 77: | ||
---- | ---- | ||
{{anchor|Container}} | {{anchor|Container}} | ||
'''<span style="font-size:1.125em">[[ | '''<span style="font-size:1.125em">[[File:SSB64DOJO Heart Container.gif|35x27px]] {{rollover|Heart Container|ハートのうつわ}}</span>''' | ||
*'''{{rollover|Recovers your damage to zero.|蓄積ダメージをゼロまで回復する。}}''' | *'''{{rollover|Recovers your damage to zero.|蓄積ダメージをゼロまで回復する。}}''' | ||
| Line 86: | Line 86: | ||
---- | ---- | ||
{{anchor|Star}} | {{anchor|Star}} | ||
'''<span style="font-size:1.125em">[[ | '''<span style="font-size:1.125em">[[File:SSB64DOJO Star.gif|32x31px]] {{rollover|Star|スター}}</span>''' | ||
*'''{{rollover|Upon touching a player, immediately makes them invincible for a limited time.|一定時間、本体が当たりあり無敵になる速効アイテム。}}''' | *'''{{rollover|Upon touching a player, immediately makes them invincible for a limited time.|一定時間、本体が当たりあり無敵になる速効アイテム。}}''' | ||
| Line 97: | Line 97: | ||
---- | ---- | ||
{{anchor|Sword}} | {{anchor|Sword}} | ||
'''<span style="font-size:1.125em">[[ | '''<span style="font-size:1.125em">[[File:SSB64DOJO Beam Sword.gif|25x75px]] {{rollover|Beam Sword|ビームソード}}</span>''' | ||
*{{rollover|Striking item.|打撃アイテム。}} | *{{rollover|Striking item.|打撃アイテム。}} | ||
| Line 104: | Line 104: | ||
<div style="text-align:center"> | <div style="text-align:center"> | ||
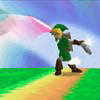
[[ | [[File:SSB64DOJO Beam Sword Link.gif|100x100px|class=ssb64-site-img-2px]] | ||
▲<span style="font-size:0.825em">{{rollover|Link will dual wield.|リンクは二刀流になるぞ。}}</span></div> | ▲<span style="font-size:0.825em">{{rollover|Link will dual wield.|リンクは二刀流になるぞ。}}</span></div> | ||
| Line 110: | Line 110: | ||
---- | ---- | ||
{{anchor|Bat}} | {{anchor|Bat}} | ||
'''<span style="font-size:1.125em">[[ | '''<span style="font-size:1.125em">[[File:SSB64DOJO Home-Run Bat.gif|12x46px]] {{rollover|Home-Run Bat|ホームランバット}}</span>''' | ||
*{{rollover|One of the striking items.|打撃アイテムのひとつ。}} | *{{rollover|One of the striking items.|打撃アイテムのひとつ。}} | ||
| Line 119: | Line 119: | ||
<div style="text-align:center"> | <div style="text-align:center"> | ||
[[ | [[File:SSB64DOJO Home-Run Windup.gif|100x100px|class=ssb64-site-img-2px]] | ||
<span style="font-size:0.825em">▲{{rollover|Using this is a one-hit KO.|はじいて使って一発KO。}}<br/>{{rollover|Aim for opponents fighting each other!|混戦時をねらえ!}}</span></div> | <span style="font-size:0.825em">▲{{rollover|Using this is a one-hit KO.|はじいて使って一発KO。}}<br/>{{rollover|Aim for opponents fighting each other!|混戦時をねらえ!}}</span></div> | ||
| Line 125: | Line 125: | ||
---- | ---- | ||
{{anchor|Fan}} | {{anchor|Fan}} | ||
'''<span style="font-size:1.125em">[[ | '''<span style="font-size:1.125em">[[File:SSB64DOJO Fan.gif|30x66px]] {{rollover|Fan|はりせん}}</span>''' | ||
*{{rollover|One of the striking items.|打撃アイテムのひとつ。}} | *{{rollover|One of the striking items.|打撃アイテムのひとつ。}} | ||
| Line 136: | Line 136: | ||
<div style="text-align:center"> | <div style="text-align:center"> | ||
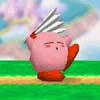
[[ | [[File:SSB64DOJO Kirby Fan.gif|100x100px|class=ssb64-site-img-2px]] | ||
<span style="font-size:0.825em">▲{{TranslationQuality|Kirby closes his eyes for some reason.|なぜかはりせん攻撃時には目をつぶるカービィ。|0.0}}</span></div> | <span style="font-size:0.825em">▲{{TranslationQuality|Kirby closes his eyes for some reason.|なぜかはりせん攻撃時には目をつぶるカービィ。|0.0}}</span></div> | ||
| Line 142: | Line 142: | ||
---- | ---- | ||
{{anchor|Rod}} | {{anchor|Rod}} | ||
'''<span style="font-size:1.125em">[[ | '''<span style="font-size:1.125em">[[File:SSB64DOJO Star Rod.gif|20x46px]] {{rollover|Star Rod|スターロッド}}</span>''' | ||
*{{rollover|One of the striking items.|打撃アイテムのひとつ。}} | *{{rollover|One of the striking items.|打撃アイテムのひとつ。}} | ||
| Line 151: | Line 151: | ||
<div style="text-align:center"> | <div style="text-align:center"> | ||
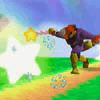
[[ | [[File:SSB64DOJO Falcon Star Rod.gif|100x100px|class=ssb64-site-img-2px]] | ||
<span style="font-size:0.825em">▲{{TranslationQuality|This mismatch is also available.|こんなミスマッチもあり。|0.85}}</span></div> | <span style="font-size:0.825em">▲{{TranslationQuality|This mismatch is also available.|こんなミスマッチもあり。|0.85}}</span></div> | ||
| Line 157: | Line 157: | ||
---- | ---- | ||
{{anchor|Raygun}} | {{anchor|Raygun}} | ||
'''<span style="font-size:1.125em">[[ | '''<span style="font-size:1.125em">[[File:SSB64DOJO Ray Gun.gif|42x29px]] {{rollover|Ray Gun|レイガン}}</span>''' | ||
*{{rollover|Shooting item.|射撃アイテム。}}<br/><span style="color:#af0000">{{rollover|With shooting items, your neutral, strong side, side smash, and neutral aerial attacks become item shots.|射撃アイテムは、弱、強横、スマッシュ横、空中ニュートラル、空中前のそれぞれの攻撃が、射撃になる。}}</span><br/>{{rollover|Power is not affected by the input used.|それぞれの射撃方法での威力の違いなどはない。}} | *{{rollover|Shooting item.|射撃アイテム。}}<br/><span style="color:#af0000">{{rollover|With shooting items, your neutral, strong side, side smash, and neutral aerial attacks become item shots.|射撃アイテムは、弱、強横、スマッシュ横、空中ニュートラル、空中前のそれぞれの攻撃が、射撃になる。}}</span><br/>{{rollover|Power is not affected by the input used.|それぞれの射撃方法での威力の違いなどはない。}} | ||
| Line 167: | Line 167: | ||
<div style="text-align:center"> | <div style="text-align:center"> | ||
[[ | [[File:SSB64DOJO Ray Gun shoot.gif|100x100px|class=ssb64-site-img-2px]] | ||
<span style="font-size:0.825em">▲{{TranslationQuality|Try to remember how much ammo you have remaining.|おおよそ何発残っているのかは少し頭に入れておこう。|0.0}}</span></div> | <span style="font-size:0.825em">▲{{TranslationQuality|Try to remember how much ammo you have remaining.|おおよそ何発残っているのかは少し頭に入れておこう。|0.0}}</span></div> | ||
| Line 173: | Line 173: | ||
---- | ---- | ||
{{anchor|Fireflower}} | {{anchor|Fireflower}} | ||
'''<span style="font-size:1.125em">[[ | '''<span style="font-size:1.125em">[[File:SSB64DOJO Fire Flower.gif|32x28px]] {{rollover|Fire Flower|ファイアフラワー}}</span>''' | ||
*{{rollover|Shooting item.|射撃アイテム。}} | *{{rollover|Shooting item.|射撃アイテム。}} | ||
| Line 182: | Line 182: | ||
<div style="text-align:center"> | <div style="text-align:center"> | ||
[[ | [[File:SSB64DOJO Fire Flower shoot.gif|100x100px|class=ssb64-site-img-2px]] | ||
<span style="font-size:0.825em">▲{{rollover|Just keep hitting the button.|基本的にはボタンは押しっぱなしで。}}</span></div> | <span style="font-size:0.825em">▲{{rollover|Just keep hitting the button.|基本的にはボタンは押しっぱなしで。}}</span></div> | ||
| Line 188: | Line 188: | ||
---- | ---- | ||
{{anchor|Hammer}} | {{anchor|Hammer}} | ||
'''<span style="font-size:1.125em">[[ | '''<span style="font-size:1.125em">[[File:SSB64DOJO Hammer.gif|42x64px]] {{rollover|Hammer|ハンマー}}</span>''' | ||
*{{rollover|Special striking item.|特殊な打撃アイテム。}} | *{{rollover|Special striking item.|特殊な打撃アイテム。}} | ||
| Line 209: | Line 209: | ||
<div style="text-align:center"> | <div style="text-align:center"> | ||
[[ | [[File:SSB64DOJO Hammer swing.gif|100x100px|class=ssb64-site-img-2px]] | ||
<span style="font-size:0.825em">▲{{TranslationQuality|This is your chance! But it's more like you're in a pinch?|チャンス!でも実はピンチ?|0.8}}</span></div> | <span style="font-size:0.825em">▲{{TranslationQuality|This is your chance! But it's more like you're in a pinch?|チャンス!でも実はピンチ?|0.8}}</span></div> | ||
| Line 215: | Line 215: | ||
---- | ---- | ||
{{anchor|MSB}} | {{anchor|MSB}} | ||
'''<span style="font-size:1.125em">[[ | '''<span style="font-size:1.125em">[[File:SSB64DOJO Motion-Sensor Bomb.gif|32x31px]] {{rollover|Motion-Sensor Bomb|モーションセンサー爆弾}}</span>''' | ||
*{{rollover|Throwing item.|投てきアイテム。}} | *{{rollover|Throwing item.|投てきアイテム。}} | ||
| Line 243: | Line 243: | ||
---- | ---- | ||
{{anchor|Bobomb}} | {{anchor|Bobomb}} | ||
'''<span style="font-size:1.125em">[[ | '''<span style="font-size:1.125em">[[File:SSB64DOJO Bob-omb.gif|32x29px]] {{rollover|Bob-omb|ボム兵}}</span>''' | ||
*{{rollover|Throwing item.|投てきアイテム。}} | *{{rollover|Throwing item.|投てきアイテム。}} | ||
| Line 255: | Line 255: | ||
---- | ---- | ||
{{anchor|Bumper}} | {{anchor|Bumper}} | ||
'''<span style="font-size:1.125em">[[ | '''<span style="font-size:1.125em">[[File:SSB64DOJO Bumper.gif|32x31px]] {{rollover|Bumper|バンパー}}</span>''' | ||
*{{rollover|Throwing item.|投てきアイテム。}} | *{{rollover|Throwing item.|投てきアイテム。}} | ||
| Line 266: | Line 266: | ||
---- | ---- | ||
{{anchor|Green}} | {{anchor|Green}} | ||
'''<span style="font-size:1.125em">[[ | '''<span style="font-size:1.125em">[[File:SSB64DOJO Green Shell.gif|32x30px]] {{rollover|Green Shell|ミドリのこうら}}</span>''' | ||
*{{rollover|Throwing item.|投てきアイテム。}} | *{{rollover|Throwing item.|投てきアイテム。}} | ||
| Line 279: | Line 279: | ||
---- | ---- | ||
{{anchor|Red}} | {{anchor|Red}} | ||
'''<span style="font-size:1.125em">[[ | '''<span style="font-size:1.125em">[[File:SSB64DOJO Red Shell.gif|32x30px]] {{rollover|Red Shell|アカのこうら}}</span>''' | ||
*{{rollover|Throwing item.|投てきアイテム。}} | *{{rollover|Throwing item.|投てきアイテム。}} | ||
| Line 289: | Line 289: | ||
---- | ---- | ||
{{anchor|Ball}} | {{anchor|Ball}} | ||
'''<span style="font-size:1.125em">[[ | '''<span style="font-size:1.125em">[[File:SSB64DOJO Poke Ball.gif|32x31px]] {{rollover|Poké Ball|モンスターボール}}</span>''' | ||
*{{rollover|Throwing item.|投てきアイテム。}} | *{{rollover|Throwing item.|投てきアイテム。}} | ||
Latest revision as of 12:11, February 10, 2021

|
Item Room |
These items can be used by anyone.
As such, choose the right one if you want to get ahead.
As such, choose the right one if you want to get ahead.
[Crate] [Barrel] [Capsule] [Chansey Egg]
[Maxim Tomato] [Heart Container] [Star]
[Beam Sword] [Home-Run Bat] [Fan] [Star Rod]
[Ray Gun] [Fire Flower] [Hammer]
[Motion-Sensor Bomb] [Bob-omb] [Bumper]
[Green Shell] [Red Shell]
[Poké Ball]
[Maxim Tomato] [Heart Container] [Star]
[Beam Sword] [Home-Run Bat] [Fan] [Star Rod]
[Ray Gun] [Fire Flower] [Hammer]
[Motion-Sensor Bomb] [Bob-omb] [Bumper]
[Green Shell] [Red Shell]
[Poké Ball]
Item Types and Effects
- A large carrier.
- It breaks when it hits a character, hits the ground, or takes 15 damage.
- 1-3 items can appear from it with probability:
- 1 item: 2/5
2 items: 1/5
3 items: 2/5
- 1 item: 2/5
- In addition, there is a separate 1/32 chance that all items that come out will be the same.
- All carriers have a 1/10 chance to explode when broken and damage all characters.
- Incidentally, carriers never appear from carriers.
- A large carrier.
- Basically the same as a Crate, but starts rolling when thrown if the impact is weak.
- Rolling Barrels will damage characters.
Rolling speed is affected by slopes.
- Small carrier.
- One item comes out when you break it. It may also explode.
- In games with small carriers,
the strategy for getting its contents can be interesting.
For example, hitting the opponent with the thrown Capsule deals damage but leaves the item next to them, while attacking it directly has a risk of explosion.
Other tactics can be:
- Break it with a projectile while it's falling to get the contents safely.
- Throw it downwards to ensure you get the contents.
- Jump and throw down to avoid any explosion.
- Throw it up and wait for it to come down.
- Smash throw it at the enemy and take the contents after they get knocked away.
- When the opponent is on a platform directly overhead, throw it up at them and then harvest the contents.
- Basically the same as a Capsule.
- Only produced by the Pokémon Chansey;
cannot normally appear on the stage. - Originally appeared in the "Pokémon" series.
- This item quickly recovers 100 damage.
- If you are attacked while healing,
knockback is based on damage at that time.
It can be a painful experience to let someone else get the tomato. - It takes 2 frames to pick up an item.
You could get attacked before this time. - Originally appeared in the "Kirby" series.
- Recovers your damage to zero.
- Aside from the healing power and falling speed, basically the same as the Maxim Tomato.
- Originally appeared in the "Legend of Zelda" series.
- Upon touching a player, immediately makes them invincible for a limited time.
- This is the only item that can be collected just by touching a character.
- The player is invincible for 10 seconds.
- Unlike in "Super Mario Bros.",
you cannot damage by ramming just because you're invincible. - Originally appeared in the "Super Mario" series.
- Striking item.
- Striking items each have a neutral, strong side, side smash, and dash attack.
- One of the Sword's features is that it has long reach.
It has high attack power and is easy to use.
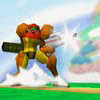
- One of the striking items.
- When used normally, lacks reach and destructive power.
However, a smash attack will apply very strong knockback to the opponent. - It swings much slower than the others.
- A smash attack is almost a one-hit KO.
(not guaranteed if handicap is on) - Original but could be considered from the "EarthBound" series, but no item with the name of "home run bat" appeared there.
- One of the striking items.
- Swings fast compared to other items.
- Not much damage. Actually weakens your normal attacks.
- Shield damage is high; smash attack can break a shield instantly.
- When thrown, enemies are knocked straight up,
which can be used strategically. - Attacks cause opponents to face the wrong way.
By using this you can keep flipping the opponent left and right for a continuous hit.
If this is used against you, breakfall. - No true original appearance, but a similar item appears in a sub-game of "Kirby Super Star".
- One of the striking items.
- Using a strong or smash attack will shoot a star.
- Star shots have their range, speed, and power increased when smashed.
- When thrown, hits enemies perfectly horizontally.
A smash throw on a reasonably-damaged opponent
can be very dangerous. - Originally from the "Kirby" series.
The Star Rod can be used in "Kirby's Adventure".
- Shooting item.
With shooting items, your neutral, strong side, side smash, and neutral aerial attacks become item shots.
Power is not affected by the input used. - Excellent power and speed, and the shot itself has near unlimited range.
- Holds 16 shots. Then it runs out of ammo and cannot shoot.
- It's a good idea to throw shooting items that run out of ammo.
That said, throwing with ammo remaining can be a surprise. - If out of ammo,
a shooting item can be thrown with a side smash. - Depending on damage, it's possible to hit one opponent with one shot after another.
If this happens to you, use your double jump to disrupt the timing.
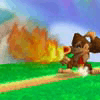
- Shooting item.
- Has 60 shots. One A button press fires 5 shots.
- If you hold down the button or press repeatedly,
the flame will be continuous. - The flames last a certain period, during which the multiple hits can be hard to escape
then smash throw it at opponents to catch them off guard. - Originally appeared in the "Super Mario" series.
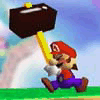
- Special striking item.
- The moment you pick it up, you swing the Hammer like mad.
- Time-limited.
- Actions are limited while you hold the Hammer:
you cannot attack (except getups), double jump, shield,
dodge, or grab edges. - The Hammer is powerful, but since double jumping is disabled, you can attack while invincible after being KO'd.
Counterattack examples:- Get-up attack
- Use invincibility after being KO'd
- Stone
- Hookshot
- Grappling Beam
- Hand Slap
- PK Fire
- Shooting items
- Throwing items
- Invincibility star
- Pokémon (protect yourself by standing intside its range)
- Originally appeared in "Donkey Kong (NES)".
- Throwing item.
- Sticks to terrain (wall, ceiling, or floor).
- After 100 frames, explodes when a character passes within a short distance.
- Bombs stuck on terrain also xplode when attacked.
- If placed by an enemy, there are ways to remove it.
Examples of removing Motion-Sensor Bombs on floors:- Link's side smash attack (just the tip)
- Bomb
- Bomb (easy to do from the air)
- Fireball
- Egg Throw (low trajectory)
- Final Cutter projtectile
- Stone
- Thunder Jolt
- PK Thunder (you can even use the body hit, even directly)
- Thrown item
- Beam Sword (just the tip)
- Fire Flower
- Star
- Shell
- Dodge (using the invincibility)
- Originally appeared in "GoldenEye 007".
- Throwing item.
- Starts walking 3 seconds after it appears,
and explodes 8 seconds after starting to walk. - While walking, explodes on contant with any character.
- Also explodes if you attack it. So don't attack it.
- Doesn't explode over time if picked up,
but will if attacked. - Originally appeared in the "Super Mario" series.
- Throwing item.
- Base damage when thrown is only 1,
not counting damage added by throw speed. - Deals a certain amount of knockback regardless of the opponent's damage.
- Attaches itself to the floor once thrown.
Knocks away opponents when touched in this state. - Once placed on floor, disappears after 6 seconds.
- Throwing item.
- When thrown or attacked, slides across the floor.
- Like normal items,
disappears if thrown and stationary,
so attack it to make it last longer. - If you reflect an attack, its speed (and therefore power) go up.
- You can also attack an active shell to change its speed.
However, it can never be hit vertically. - Even to the character that used it, it will attack without mercy.
- Originally from the "Super Mario" series, while the behaviour differences between green and red shells is from "Mario Kart".
- Throwing item.
- Like the Green Shell, slides when attacked.
- Aims towards the horizontal position of nearby characters.
You can be on a different floor,
and it will follow you anyway. - Belongs to whoever last attacked it. (Green Shell is the same.)
For example, if Link throws a Red Shell,
and Mario hits it with a Fireball,
if the Red Shell then KOs someone,
Mario gets a point.
- Throwing item.
- A random Pokémon comes out. Can be one of 13.
- The player who opened the Poké Ball (the master) cannot be hit by the Pokémon's attack.
- Likewise, the Pokémon's attack belongs to the master, so if the Pokémon KOs someone, the master gets the point.
- It is possible to hit enemies by throwing the Poké Ball itself.
But it might be preferable to throw it down so it cannot fall off the screen. - The master should co-operate with the Pokémon.
I like to drive the enemy towards the Pokémon's location. - Each Pokémon uses a move in accordance with the "Pokémon" series.
Pikachu and Jigglypuff's attack names are written in Hiragana to conform to how the originals are.
[Topic] About the attack power of items
★ Throwing item damage
- The damage of an item that hits an enemy is defined as follows:
- Total damage = base attack power + (speed × 0.1)
- In other words, faster items do more damage.
This is why smash throwing is super-important,
and why damage can change due to gravity.
- In addition, damage is halved if an item is simply dropped.
★ Striking item damage
- Though any character can use striking items,
the damage is the same for each one.
(the same move of the same item does the same damage whether it's Link or Pikachu) - However, due to the difference of range and motion,
they may still have different uses. - The striking items of Beam Sword, Home-Run Bat, Fan, and Star Rod each have four attacks of neutral, strong side, side smash, and dash.


