Ness (SSB)/Down aerial
Overview[edit]
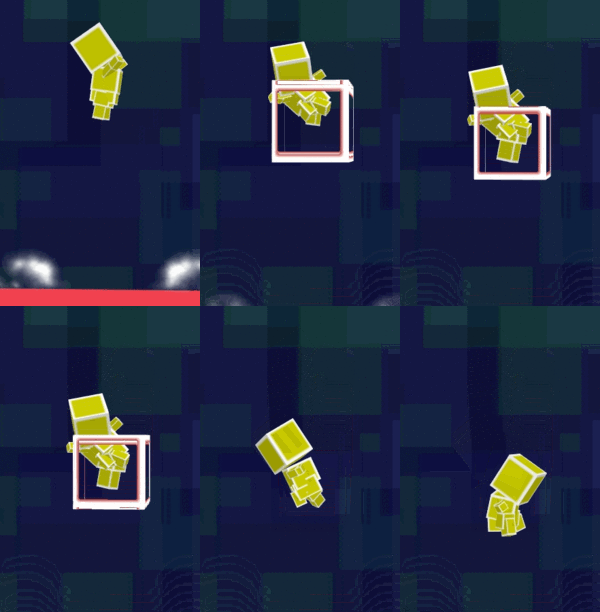
Ness stomps below himself, dealing 15% and very powerful knockback, while being a meteor smash. The move comes out on frame 4; making it one of the fastest down aerials in the game. In addition to this, it is one of the strongest meteor smashes in the game, the hitboxes are active until frame 21, the move has very low ending lag (with the move having an FAF of 30; the lowest out of any aerial in the game) and it always auto-cancels; giving it minimal landing lag regardless of whether the player Z-cancels it or not.
The move consists of a clean hit for its first 4 active frames and a late hit for the rest of its duration. The only differences between the clean hit and the late hit are that the late hit is slightly smaller and weaker. One thing to note is that Ness starts moving his foot back in while the move's hitboxes are still active. Seeing this combined with looking into the move's data, it seems that the move was only supposed to be active until frame 13 but due to a timing error (with the wrong timer being used), it remains active until frame 21.
These traits make it a potent edgeguarding tool, being a very fast and powerful meteor smash with a long lasting hitbox; even when hit late. These traits also make it a rather excellent combo tool; with the move easily leading to an up tilt or an up aerial depending on the opponent's percent. The move is especially effective with double jump cancelling and plays an important part in Ness' metagame – with his down aerial, up aerial, and some other moves such as up tilt, Ness can potentially rack up extreme damage on opponents, and it is even possible to perform zero-to-death combos on them.
The move also has excellent shield pressuring potential. The move has 28 frames of shieldstun (30 in the Japanese version); with the move being +24 on shield if Ness perfectly lands with it. When combined with its low startup and double jump cancelling, Ness can repeatedly chain down aerials against a shielding opponent which can lead into a shield break combo, although this is difficult to perform; especially if the down aerial is stale. Even if Ness does not land with down aerial, the move is still gives him frame advantage against shielding opponents at +3 frames. This gives Ness enough time to perform another down aerial and if the opponent tries to drop shield, the down aerial will hit their shield (which he can setup with a short hop). If the opponent tries to roll or jump, they will get hit by the down aerial. The only characters who can reliably avoid this setup are Pikachu and Samus, who can use their frame 1 invincible up specials out of shield to avoid it. Ness can then land and either perform the setup again or use double jump cancelling to break the opponent's shield. This setup however is even more difficult than using double jump cancelling as the second down aerial needs to be performed frame perfectly.
The only downside the move has is that it has subpar range. This allows characters to space around the down aerial more easily than many other down aerials and it generally makes it harder for Ness to combo or edgeguard with his down aerial; especially when combined with his poor mobility.
Overall, it is one of the best down aerials in the game and it works rather excellently with Ness' double jump cancelling (although it is limited by Ness' poor mobility and recovery).
Hitboxes[edit]
| ID | Part | Damage | SD | Angle | BK | KS | FKV | Radius | Bone | Offset | Clang | Effect | G | A | Sound | ||
|---|---|---|---|---|---|---|---|---|---|---|---|---|---|---|---|---|---|
| Clean | |||||||||||||||||
| 0 | 0 | 15% | 0 | 10 | 120 | 0 | 160 | 0 | 0 | -30 | 30 | ||||||
| Late | |||||||||||||||||
| 0 | 0 | 15% | 0 | 0 | 120 | 0 | 150 | 0 | 0 | -30 | 30 | ||||||
Timing[edit]
Attack[edit]
| Auto-cancel | 1-29 |
|---|---|
| Clean hit | 4-7 |
| Late hit | 8-20 |
| Animation length | 29 |
Landing lag[edit]
| Animation length | 4 |
|---|---|
| L-cancelled animation length | 4 |
| Normal | ||||
| L-cancelled |
Lag time |
Hitbox |
Hitbox change |
Autocancel |
Gallery[edit]
The move chained for a shield break combo.
|


